Table of Contents for
Nim in Action
 Nim in Action
Published by
Manning Publications, 2017
Nim in Action
Published by
Manning Publications, 2017
- Cover
- Nim in Action
- Copyright
- Brief Table of Contents
- Table of Contents
- Preface
- Acknowledgments
- About this Book
- About the Author
- About the Cover Illustration
- Part 1. The basics of Nim
- Chapter 1. Why Nim?
- Chapter 2. Getting started
- Part 2. Nim in practice
- Chapter 3. Writing a chat application
- Chapter 4. A tour through the standard library
- Chapter 5. Package management
- Chapter 6. Parallelism
- Chapter 7. Building a Twitter clone
- Part 3. Advanced concepts
- Chapter 8. Interfacing with other languages
- Chapter 9. Metaprogramming
- Appendix A. Getting help
- Appendix B. Installing Nim
- Nim Reference
- Index
- List of Figures
- List of Tables
- List of Listings
Appendix B. Installing Nim
Before you begin writing Nim code, you need to install and set up the Nim compiler. The Nim compiler is the tool that will transform your Nim source code into a binary format that your computer can then execute. It’s only used during development, so users of your application won’t need it.
You have the option of installing Aporia, the Nim IDE, as well. Aporia is a useful tool for beginning Nim programmers: it allows you to compile and run Nim code easily, and it can also be used as a Nim-centric alternative to popular source-code editors such as gedit, Sublime Text, or Atom. Visual Studio Code is another editor that offers functionality similar to Aporia (through a plugin) and can be installed relatively easily.
In this appendix, you’ll learn how to install both the Nim compiler and an appropriate text editor. You’ll then test this Nim development environment by compiling and executing a Hello World example.
Let’s get started. Grab any computer—even a Raspberry Pi will work—and follow along![1]
Seriously, though, please don’t use a Raspberry Pi for development.
B.1. Installing the Nim compiler
It’s difficult to write installation instructions that will remain accurate for years to come.[2] This is especially true for a compiler that’s still evolving. In this appendix, I can’t provide a step-by-step installation guide for Nim, but I can discuss some potential troubleshooting steps and let you know where to look for installation instructions.
During the development of this book, the installation instructions changed at least once.
B.1.1. Getting up-to-date installation info
It’s best to consult the Nim website for up-to-date installation information. In particular, see the install page: https://nim-lang.org/install.html.
That page should be your first stop when installing Nim because it also contains the downloads for Nim. There will be different downloads for each OS and each will have different installation instructions. You may need to build the compiler yourself or simply execute an installer.
Depending on your OS, the installation might be easy or difficult. As Nim evolves, installation should become easier for all OSs, but as of the time of writing that’s not yet the case. Follow whatever instructions the Nim website offers, and if they fail, you can get in touch with me or somebody else in the Nim community (as discussed in appendix A).
For completeness, I’ll describe the installation process offered by Nim since its inception—building from source. This installation method should work more or less the same way for the foreseeable future, but remember that there are likely simpler ways to install Nim.
Possible problems
There’s nothing more annoying than not being able to install something. Please remember that the Nim community is happy to help out. Consult appendix A for ways to get in touch with us so that we can help you solve your issue.
B.1.2. Building from source
This installation method will work on all platforms. It relies on a compressed archive that contains the C source code, which has been generated for a specific version of the Nim compiler. What you’ll be doing here is compiling the Nim compiler yourself.
To compile the C source code, you need to have a C compiler installed on your system. If you don’t already have one, you’ll need to install one first.
The installation of a C compiler is fairly straightforward. The recommended C compiler and the process for installing it differs depending on your OS.
Windows
You can install GCC by installing the MinGW package available here: www.mingw.org/.
Mac OS
The recommended C compiler on Mac OS is Clang. Clang can be installed in two ways.
If you have Homebrew, simply execute brew install clang to install Clang.
Otherwise, follow these steps:
- Open a terminal window.
- Execute clang or gcc.
A dialog box asking whether you’d like to install the Command Line Developer Tools should appear. Alternatively, you can execute xcode-select --install.
Click the Install button. Wait for the installation to finish, and then verify that the installation was successful by executing clang --version.
Linux
In all likelihood, you already have a C compiler installed. Before attempting to install, you can verify this by running gcc --version or clang --version.
The recommended C compiler for Linux is GCC. The installation instructions depend on your distribution’s package manager.
On Yum-based distributions, you should be able to execute sudo yum install gcc to install GCC.
On Debian-based distributions, you can execute apt-get like so: sudo apt-get
Download the Nim compiler archive
Once you have a working C compiler installed, it’s time to download the C sources for the latest version of the Nim compiler.
Navigate to the Nim download page and find the download links for the generated C sources for Windows, Mac OS, or Linux.
You may see two download links, one of them a zip archive and another a tar.xz archive. If you’re unsure which one to pick, download the zip archive.
Extract the archive and move it to a safe location
Once the download completes, extract the archive. You should be able to simply double-click the zip archive in your OS’s file manager to extract it.
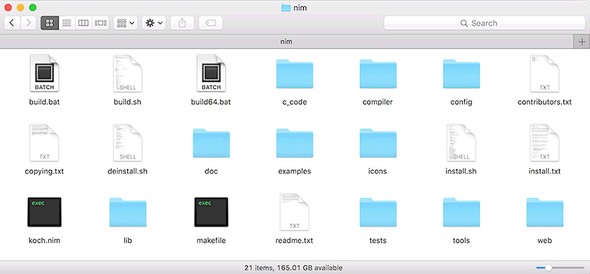
You should now see a folder containing files belonging to the Nim compiler (see figure B.1). The folder’s name will likely be nim-<ver>, where <ver> is the version of the Nim compiler that you downloaded (for example, nim-0.12.0).
Figure B.1. The nim directory after it’s been extracted from the archive
Move the Nim folder to a safe place where you’d like to install it, such as ~/programs/nim.
Compile the Nim compiler
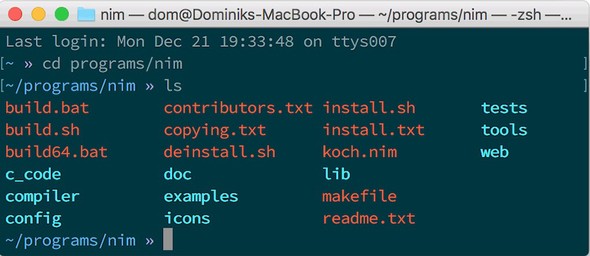
Now open a terminal. Navigate into the nim directory using the cd command; for example, cd ~/programs/nim. Your terminal should look similar to figure B.2.
Figure B.2. Terminal after navigating to /home/dom/programs/nim
You can now build the Nim compiler by executing one of the build scripts. The build.bat and build64.bat scripts are for Windows, and the build.sh script is for all other OSs. To execute the build.sh script, type sh build.sh into the terminal.
Depending on the CPU power of your computer, this may take some time. But unless you’re compiling Nim on a 1995 IBM NetVista, it shouldn’t take more than a minute.
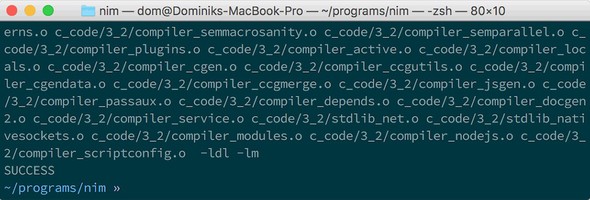
When the compilation is successful, you should see “SUCCESS” at the bottom of your terminal, as in figure B.3.
Figure B.3. The compilation succeeded
Getting help
Did the compilation fail? Are you having other issues? There are many ways to get help, and one of the easiest is to ask on the Nim forum or on IRC. For more information, see appendix A.
The bin directory should now contain a nim binary, but the installation is not finished yet.
Add Nim to your PATH
In order for the nim binary to be visible to other applications, such as the terminal, you need to add the bin directory to your PATH. In the previous example, the path you’d need to add would be /Users/dom/programs/nim/bin because the username in that example was dom and the ~ was expanded.
Expanding the tilde
Keep in mind that the ~ expands to /home/<your_username> on Linux. The preceding examples are for Mac OS. In certain cases, adding a file path that includes the ~ to PATH may not work, so it’s usually best to just add an absolute path.
Windows
To add Nim to your PATH, you need to access the advanced system settings, which you can do by opening Control Panel > System and Security > System. You should then see Advanced System Settings in the left sidebar. Click on it and a dialog box should appear. It will include an Environment Variables button that will display another dialog box allowing you to edit the environment variables. Edit the Path variable either under System Variables or User Variables. Make sure the path you add is separated from the other paths by a semicolon (;).
Mac OS
There are multiple ways to edit your PATH on Mac OS. You can open the /etc/paths file (as root using sudo nano /etc/paths or via your favorite editor) and append the Nim bin path to the bottom. Alternatively, you can edit the ~/.profile file and add export PATH=$PATH:/home/user/path/to/Nim/bin to the bottom.
Linux
If you want the change to be system-wide, you can edit the /etc/profile file. To make Nim available only for your user, you can edit the ~/.profile file. In both cases you should add export PATH=$PATH:/home/user/path/to/Nim/bin to the bottom of those files.
Verify that the installation was successful
Ensure that you’ve completed these steps successfully by opening a new terminal window and executing nim -v. The output should look similar to the following:
Nim Compiler Version 0.14.2 (2016-08-09) [MacOSX: amd64]
Copyright (c) 2006-2016 by Andreas Rumpf

git hash: e56da28bcf66f2ce68446b4422f887799d7b6c61
active boot switches: -d:release
Assuming you were successful in installing Nim, you’re now ready to begin developing Nim software! Before testing your new development environment, you have the option of installing the Aporia IDE, discussed in the next section. You can skip this if you’d like to use another IDE or text editor for writing Nim code. Section B.3 will show you how to compile your first Nim application.
B.2. Installing the Aporia IDE
The installation of Aporia is entirely optional. Aporia integrates with the Nim compiler, so it makes experimenting with Nim easier. With Aporia, you’ll be able to compile and run Nim source code by pressing the F5 key on your keyboard. Later in this section, you’ll also learn how to compile Nim source code using the command line, so you won’t miss out by using a different source code editor.
Releases of Aporia can be downloaded from GitHub, and you’ll find detailed instructions on how to install it on your OS here: https://github.com/nim-lang/Aporia#readme.
There are also other editors that can be used instead of Aporia. For example, Visual Studio code with the Nim plugin is another good choice, especially for Mac OS users. For a full list, see the following Nim FAQ answer: https://nim-lang.org/faq.html#what-about-editor-support.
B.3. Testing your new development environment
You should now have a basic Nim development environment set up. This setup should include the Nim compiler and may also include Aporia or a different source code editor that supports Nim syntax highlighting.
You can test your new environment with a simple Nim Hello World program.
Open your source code editor and type in the following short piece of code.
Listing B.1. Hello World
echo "Hello World!"
Save the file as hello.nim. Then, open a new terminal in the directory that contains the file you just saved, and execute nim c -r hello.nim. This command will compile the hello.nim file you’ve written, generating as output a brand-new binary file (the c subcommand stands for compile). Once the compilation finishes, the binary will be executed, as specified by the -r option (which stands for run).
The Nim command syntax takes the form of nim command [options] projectFile.nim, where the options are optional. The following table shows some common Nim commands.
|
Command |
Description |
|---|---|
| c, compile | Compiles the projectFile.nim file and all its dependencies into an executable using the default backend (C). |
| cpp | Compiles the projectFile.nim file and all its dependencies using the C++ back-end. The result is an executable. |
| js | Compiles the projectFile.nim file and all its dependencies using the JavaScript backend. The result is a JavaScript file. |
| check | Parses the projectFile.nim file and checks it for errors, displaying all the errors found. |
For a full list of commands, execute nim --help and nim --advanced. When you’re compiling with the C/C++ backends, passing in the -r flag will run the resulting executable after compilation. Arguments to this executable can be passed after the projectFile.nim param: nim c -r projectFile.nim arg1 arg2.
Aporia
In Aporia, you can simply press F5 to compile and run your program. You don’t even have to save it manually!
At this point, if you’ve followed along and performed these steps yourself (I strongly encourage you to do this!), you may be wondering what to make of all the messages being output to your screen. These messages come from the Nim compiler. By default, the Nim compiler displays information about which modules it’s currently processing to notify you of its progress. Other information includes warnings, errors, and other messages triggered by your source code. The following listing shows a sample of output from the Nim compiler.
Listing B.2. Compiler output
config/nim.cfg(54, 3) Hint: added path: '~/.nimble/pkgs/' [Path] 1 Hint: used config file '~/nim/config/nim.cfg' [Conf] 2 Hint: system [Processing] 3 Hint: hello [Processing] CC: hello 4 CC: stdlib_system [Linking] Hint: operation successful (9407 lines compiled; 1.434 sec total;14.143MB; Debug Build) [SuccessX] /Users/dominikp/nim-in-action/examples/hello 5 Hello World! 6
- 1 Added Nimble packages to its module search path
- 2 Used a config file located in ~/nim/config/nim.cfg
- 3 Parsing and compiling the system module to C
- 4 Using a C compiler to compile the hello module to a binary format
- 5 Executing the resulting binary located at that file path
- 6 Output from the resulting binary’s execution
You’re probably surprised at just how short the Hello World example is. In comparison to other programming languages like C, Nim doesn’t require a main function, which drastically reduces the amount of code needed for this example. In Nim, top-level statements are executed from the top of the file to the bottom, one by one.
Warning: Performance
Top-level statements are generally harder to optimize for the compiler. To get maximum performance, use a main procedure and compile with the -d:release flag.
Congratulations! You’ve successfully written your first Nim application. More importantly, you have successfully set up a Nim development environment and are now ready to begin learning the basics of the Nim programming language.
B.4. Troubleshooting
This section identifies some problems that you may run into during the installation of Nim, and provides solutions. This is certainly not a complete list, and I invite you to consult the following website, which I’ll be keeping up to date, with solutions to other problems that various users run into: https://github.com/dom96/nim-in-action-code/wiki/Installation-troubleshooting.
Please get in touch if you run into a problem that isn’t described in this section or on the website. Instructions for getting in touch are available in appendix A.
B.4.1. Nim command not found
If you attempt to execute nim -v (or similar), and you see a message such as this,
command not found: nim
the likely problem is that you haven’t successfully added Nim to your PATH. Ensure that the directory you added to your PATH contains the nim binary. You may need to restart your terminal for the PATH changes to take effect.
Another diagnosis tool you can use is displaying the contents of the PATH environment variable using echo $PATH on Unix or echo %PATH% on Windows.
B.4.2. Nim and C compiler disagree on target architecture
This problem manifests in an error that looks something like this:
error: 'Nim_and_C_compiler_disagree_on_target_architecture'
Usually the problem is that your Nim compiler’s architecture isn’t the same as your C compiler’s. For example, this can mean that the C compiler targets 32-bit CPUs, whereas Nim targets 64-bit CPUs, or vice versa.
To solve this issue, you can either ensure that a C compiler that targets the correct architecture is in your PATH, or you can build a Nim compiler that targets the other architecture. This is usually a problem on Windows, and you just need to use build32.bat instead of build64.bat, or vice versa.
B.4.3. Could not load DLL
This issue usually presents itself when you’re executing a Nim application, either your own or one of the Nim tools like the Nimble package manager.
You might see a variation of the following error when executing the application:
could not load: (ssleay64|libssl64).dll
This error means that the application can’t find a DLL that it depends on to execute. In the preceding case, the missing DLL is used for secure socket connections via the TLS or SSL protocols, such as HTTPS.
This is usually an issue only on Windows. Mac OS and Linux typically already have these dependencies installed.
The solution is to download or install the missing DLLs. Unfortunately, on Windows it’s not easy to find them online, and the Nim distribution might not include them. That said, the Nim website does usually have a link to download them. Look for them here: https://nim-lang.org/install.html. After downloading them, place them somewhere in your PATH or beside your executable file.
For Linux and Mac OS, you should be able to use a package manager to install them if they’re missing.