Table of Contents for
JavaScript Security
 JavaScript Security
Published by
Packt Publishing, 2014
JavaScript Security
Published by
Packt Publishing, 2014
- Cover
- Table of Contents
- JavaScript Security
- JavaScript Security
- Credits
- About the Author
- About the Reviewers
- www.PacktPub.com
- Preface
- What you need for this book
- Who this book is for
- Conventions
- Reader feedback
- Customer support
- 1. JavaScript and the Web
- JavaScript beyond the client
- JavaScript security issues
- Summary
- 2. Secure Ajax RESTful APIs
- Basic defense against similar attacks
- Summary
- 3. Cross-site Scripting
- Examples of cross-site scripting
- Defending against cross-site scripting
- Summary
- 4. Cross-site Request Forgery
- Other examples of CSRF
- Other forms of protection
- Summary
- 5. Misplaced Trust in the Client
- Summary
- 6. JavaScript Phishing
- Examples of JavaScript phishing
- Defending against JavaScript phishing
- Summary
- Index
In the previous chapter, we built a Node.js/Express.js-based backend and attempted successfully to inject a simple JavaScript function, alert(), into the app. So, you may be thinking, does such a security flaw occur in a backend based on JavaScript?
The answer is no. The error can occur in systems based on different programming/scripting languages. In this section, we'll start with a RESTful backend based on Python and demonstrate how we can perform different types of cross-site scripting.
The app here is similar to what we built in Chapter 2, Secure Ajax RESTful APIs; we are going to build a simple RESTful to-do app, but now the difference is that the backend is based on Python/Tornado.
Your code will look like the following by the end of this section:
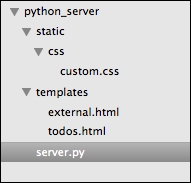
Code organization by the end of this chapter
Therefore, you might want to start by creating the required folders and files before moving to the next subsection. The folders that you need to create include python_server, and within python_server, you need to create static/ and templates/. Within static/, you need to create css/.
Assuming you have created the required files and folders, we will start with server.py.
In this section, we will write some code that duplicates what our Express.js/Node.js backend did in the previous chapter. In this chapter, we are going to use Python (https://www.python.org/) and the Tornado web framework (http://www.tornadoweb.org/en/stable/). You will need to make sure that you have Python and the Tornado web framework installed.
To install Python (we are using Version 2.7.5 for the code examples, by the way), you can visit https://www.python.org/ and check out the installation instructions. Once that is done, you will need to install the common Python development tools, such as Python setuptools (https://pypi.python.org/pypi/setuptools).
Next, you will need to install the Tornado web framework, PyMongo, and Tornado CORS. Issue the following commands:
sudo pip install tornado==3.1
sudo pip install pymongo
sudo pip install tornado-cors
Now, we can start to code. As a reminder, the code in this chapter is found in this chapter's code sample folder under the python_server folder.
We will first kick off proceedings by importing and defining the important stuff, as follows:
import tornado.httpserver
import tornado.ioloop
import tornado.options
import tornado.web
import pymongo
from bson.objectid import ObjectId
from tornado_cors import CorsMixin
from tornado.options import define, options
import json
import os
define("port", default=8080, help="run on the given port", type=int)
Note
You will need to install Python for this section. While Python is now at Version 3.4.x, I'll use Python 2.7.x for this section. You can download Python from https://www.python.org/download. You will also need to install PyMongo (http://api.mongodb.org/python/current/) and
tornado_cors (https://github.com/globocom/tornado-cors).
In the preceding code, we imported the libraries we will need and defined 8080 for the port at which this server will run.
Next, we need to define the URLs and other common settings. This is done via the Application class, which is discussed as follows:
class Application(tornado.web.Application):
    def __init__(self):
        handlers = [
            (r"/api/todos", Todos),
            (r"/todo", TodoApp)

        ]
        conn = pymongo.Connection("localhost")
        self.db = conn["todos"]
        settings = dict(
            xsrf_cookies=False,
            debug=True,
            template_path=os.path.join(os.path.dirname(__file__), "templates"),
            static_path=os.path.join(os.path.dirname(__file__), "static")
        )
        tornado.web.Application.__init__(self, handlers, **settings)
What we did here is we defined two URLs, /api/todos and /todo, which do exactly the same thing as per what we did in Chapter 2, Secure Ajax RESTful APIs. Next, we need to code the required classes that provide the meat of the functionalities.
We will code the TodoApp class and the Todos class as follows:
class TodoApp(tornado.web.RequestHandler):
    def get(self):
        self.render("todos.html")

class Todos(tornado.web.RequestHandler):
    def get(self):


        Todos = self.application.db.todos
        todo_id = self.get_argument("id", None)

        if todo_id:
            todo = Todos.find_one({"_id": ObjectId(todo_id)})
            todo["_id"] = str(todo['_id'])
            self.write(todo)
        else:
            todos = Todos.find()
            result = []
            data = {}
            for todo in todos:
                todo["_id"] = str(todo['_id'])
                result.append(todo)
            data['todos'] = result
            self.write(data)


    def post(self):


        Todos = self.application.db.todos
        todo_id = self.get_argument("id", None)

        if todo_id:
            # perform a delete for example purposes
            todo = {}
            print "deleting"
            Todos.remove({"_id": ObjectId(todo_id)})
            # cos _id is not JSON serializable.
            todo["_id"] = todo_id
            self.write(todo)
        else:
            todo = {
                'text': self.get_argument('text'),
                'details': self.get_argument('details')
            }
            a = Todos.insert(todo)
            todo['_id'] = str(a)
            self.write(todo)
Todoapp simply renders the todos.html file, which contains the frontend of the to-do list app. Next, the Todos class contains two HTTP methods: GET and POST. The GET method simply allows our app to retrieve one to-do item or the entire list of to-do items, while POST allows the app to either add a new to-do item or delete a to-do item.
Finally, we will initialize the app with the following piece of code:
def main():
    tornado.options.parse_command_line()
    http_server = tornado.httpserver.HTTPServer(Application())
    http_server.listen(options.port)
    tornado.ioloop.IOLoop.instance().start()

if __name__ == "__main__":
    main()
Now, we need to code the todos.html file; the good news is that we already coded this in the previous chapter. You can copy-and-paste the code or refer to the source code for this chapter. Similarly, the custom.css and external.html files are the same as Chapter 2, Secure Ajax RESTful APIs.
You can now start the app by issuing the following command on your terminal:
python server.py
Once the app has started, navigate to your browser on http://localhost:8080/todo, and you should see the following:
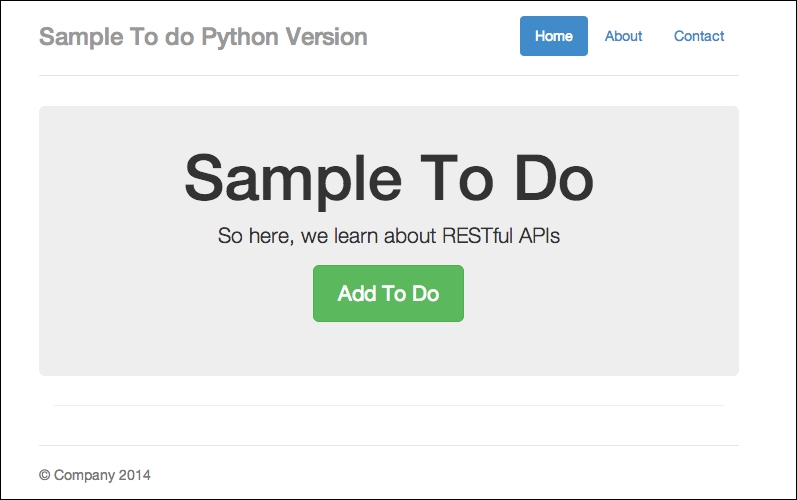
Our to-do app in Python/Tornado
The app looks approximately the same as what we had in Chapter 2, Secure Ajax RESTful APIs. Now you can try out the app by clicking on the Add To Do button and type in some details, as shown in the following screenshot:
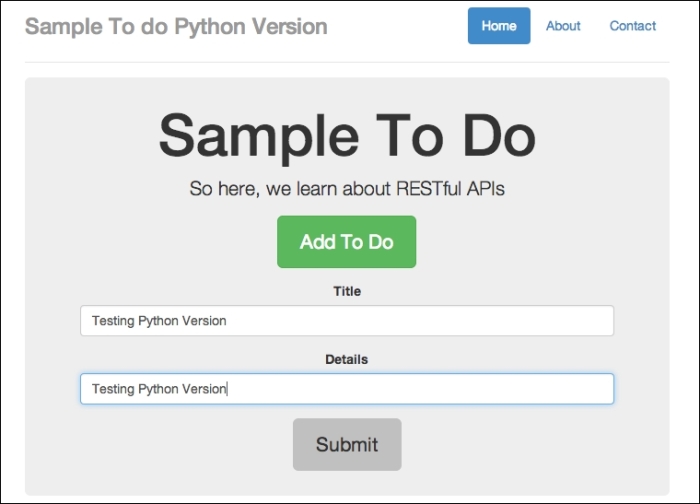
Adding in a new to-do item
When you click on the Submit button, you will see something similar to the following screenshot:
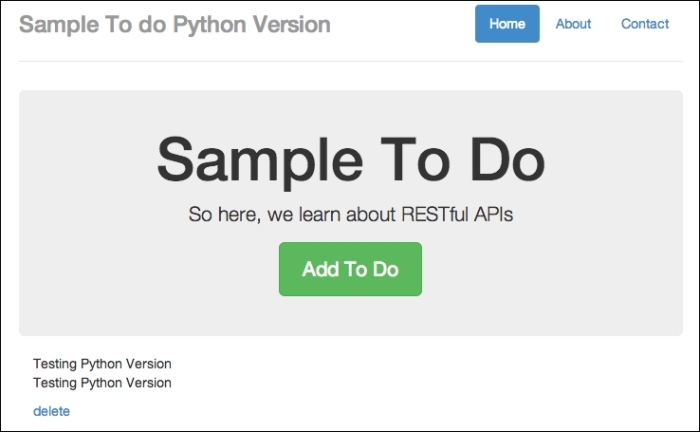
A to-do item successfully added
You should see the new to-do item showing on the screen after clicking on Submit. Now that we have confirmed that the app is working, let's attempt to perform cross-site scripting.
Now, let's try to perform a basic cross-site scripting example:
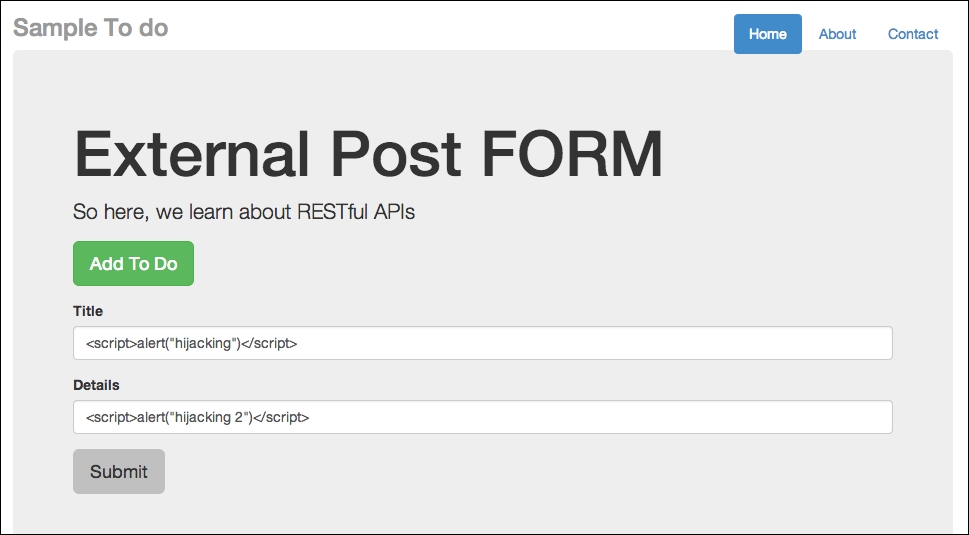
- Open
external_node.htmlfrom the previous chapter (Chapter 2, Secure Ajax RESTful APIs) in a new web server under a different port (such as port8888), and type in some basic text, as shown in the following screenshot: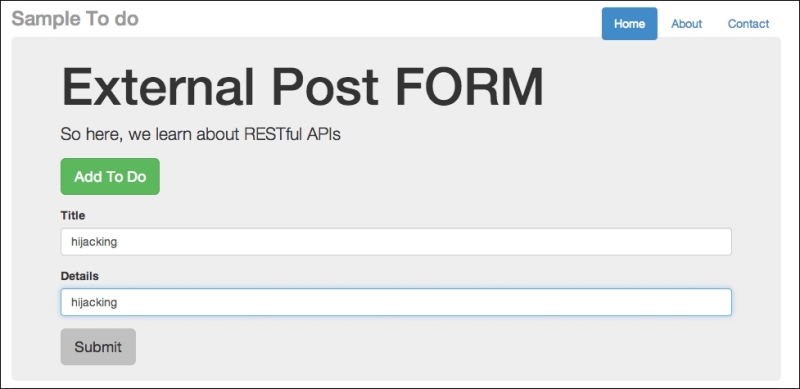
An external post form to post externally
- Click on Submit. Now, go back to your app written in this chapter at
http://localhost:8080/todoand refresh the browser. You should see the text being injected in to the web page, as follows: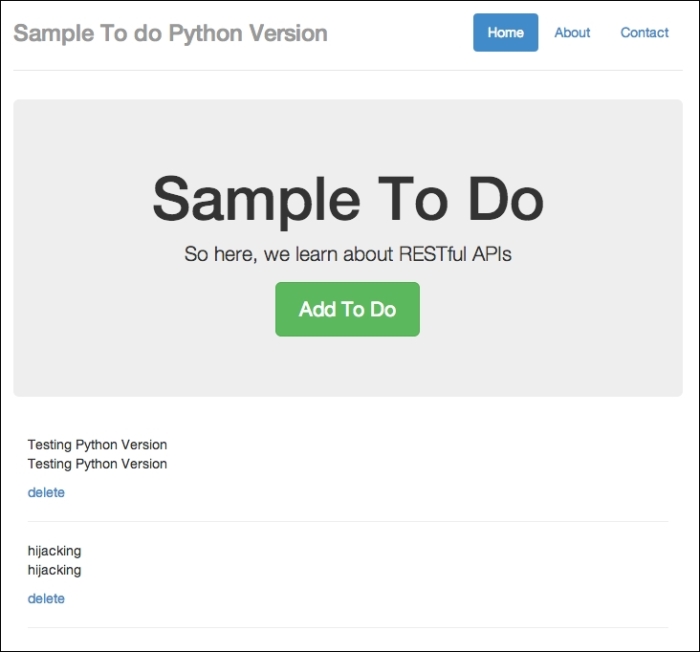
A to-do item added from somewhere else
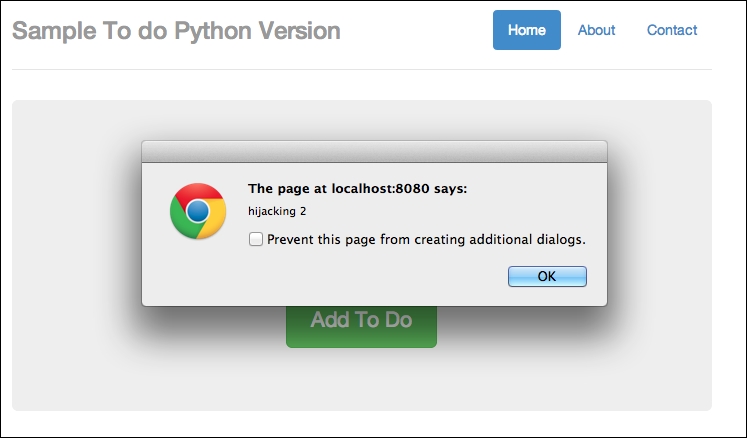
- Now, let's create a to-do item that contains a JavaScript function, as follows:
Posting JavaScript functions
As usual, click on Submit and refresh the app at
http://localhost:8080/todo. You will see two alert boxes. Here's how the first box looks: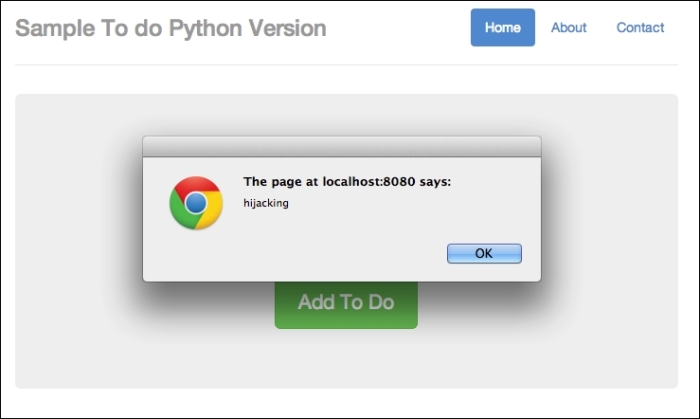
Hijacked part 1
The second hijacked part looks like this:
Hijacked part 2
So once again, we are hijacked!
Now we can try to trick end users into clicking through a malicious link. Take an instance where we enter the following line on http://localhost:8080/todo:
<a href=# onclick="document.location='http://a-malicious-link.com/xss.php'">Malicious Link 1</a>
You can also enter <a href=# onclick="document.location='http://a-malicious-link-2.com/xss.php'">Malicious Link 2</a> for the details:
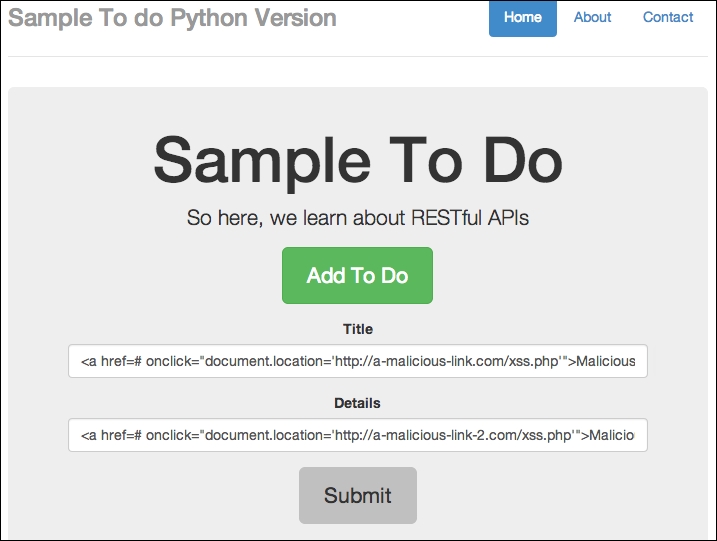
Adding malicious code in the app itself
Now click on Submit, and you should see the new item as follows:
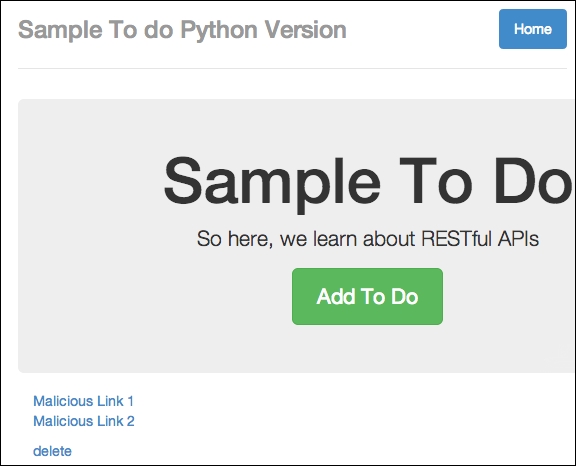
Malicious code added successfully
Now, imagine that these links are malicious and are public to other users. Now, you can try to click on the link; you will find that you are being directed to the malicious link. This is because the to-do item that we entered contains malicious JavaScript that redirects a user to a website. You can perform Inspect Element, as follows:
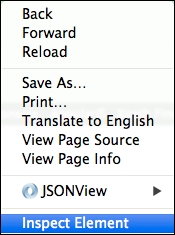
You can perform this action by right-clicking on your browser window
The resulting HTML page that our input produces is as follows:

The code generates a malicious link
You will notice that onclick will lead to a new URL other than our app; imagine this link is really malicious and leads to phishing sites, and so on.
At this point in time, you should notice that our app contains various security issues that allow for persistent cross-site scripting attacks. So, how do we prevent this from happening? We'll cover this and more after we talk briefly about our nonpersistent cross-site scripting example.
We will cover a basic nonpersistent scripting example in this section. Earlier on in this book, we discussed that nonpersistent cross-site scripting occurs where an unsuspecting user clicks on maliciously crafted URLs.
To briefly understand what this means, open your favorite browser and try to type the following into the URL address bar: javascript:alert("hi you!").
In my case, I'm using the Google Chrome browser, and I typed in the aforementioned code in the following screenshot:
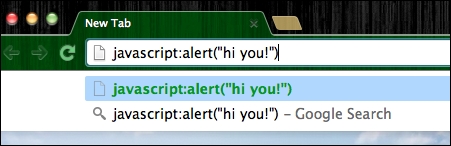
Executing JavaScript in the URL address bar
Now hit Enter, and you should get something like the following screenshot :
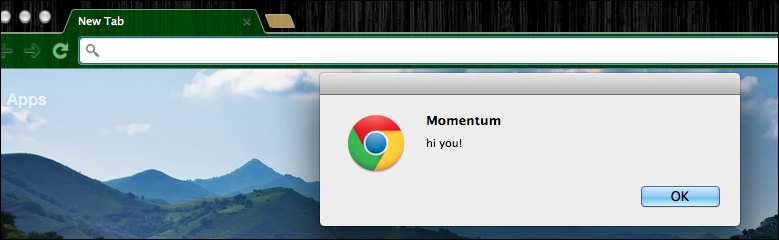
JavaScript executed successfully
That's right; the browser URL address bar is capable of executing JavaScript functions.
So now, we can imagine that the original URLs in our apps may be appended with malicious JavaScript functions; consider the following code for instance:
<a href="http://localhost:8080/todo?javascript:window.onload=function(){var link=document.getElementsByTagName('a');link[0].href='http://malicious-website.com/';}">This is an alert</a>This code snippet assumes that our to-do app is hosted on http://localhost:8080/todo. Most importantly, notice that we are changing the URL of the links found on the to-do app, pointing to malicious-website.com.
If an unsuspecting user were to visit our to-do list app via the preceding link, the user will notice that he or she is redirected to malicious-website.com instead of just deleting the to-do items or visiting other parts of the website.