Table of Contents for
Getting Started with Varnish Cache
 Getting Started with Varnish Cache
Published by
O'Reilly Media, Inc., 2017
Getting Started with Varnish Cache
Published by
O'Reilly Media, Inc., 2017
- nav
- Cover
- Varnish
- Getting Started with Varnish Cache
- Getting Started with Varnish Cache
- Dedication
- Preface
- 1. What Is Varnish Cache?
- 2. Go, Go, Go and Get Started!
- 3. Varnish Speaks HTTP
- 4. The Varnish Configuration Language
- 5. Invalidating the Cache
- 6. Dealing with Backends
- 7. Improving Your Hit Rate
- 8. Logging, Measuring, and Debugging
- 9. What Does This Mean for Your Business?
- 10. Taking It to the Next Level
- Index
- About the Author
- Colophon
Chapter 7. Improving Your Hit Rate
Up to this point, you’ve learned about best practices for implementing Varnish under ideal circumstances. But the real world is often less than ideal, and you need to know what to do when things don’t go according to plan.
This chapter will strike a balance between optimizing your application and just writing VCL to cope with the limitations of your application.
Common Mistakes
I remember when I started out with Varnish, I thought I had it all figured out. I read the manual, copy-and-pasted some VCL, and added a layer of Varnish to a client’s website. All of this was an attempt to protect my client’s website from the impact of a huge marketing campaign.
But it didn’t go as planned. I was caching too aggressively and even cached the cookies. This resulted in a cached version of the shopping cart and login page. Safe to say that the client wasn’t happy.
There were other instances where the hit rate was spectacularly low and that was because I was unaware of the built-in VCL. I was just writing VCL in vcl_recv without exiting the subroutine with return statements like hash or pass. Varnish just went about its business and continued using default behavior that discarded my changes.
I see clients who write their own VCL make similar mistakes. Long story short: there are a bunch of common mistakes that people make, and here’s how to avoid the most common pitfalls.
Not Knowing What Hit-for-Pass Is
Many people forget that Varnish creates a hit-for-pass object when fetched objects cannot be cached. Varnish will cache the decision not to cache for 120 seconds. Objects in the hit-for-pass cache will not be queued like regular misses and will directly make a backend connection. This mechanism has an impact and can lead to strange conclusions if you don’t prepare some contingencies.
Imagine a situation where you set s-maxage temporarily to zero for quick debugging purposes. When you reset the value to a cacheable value within 120 seconds of the previous request, it still won’t be cached. This confuses people.
My advice
Purge or ban the URL that is stuck in hit-for-pass and the updated Cache-control header will kick in.
Returning Too Soon
Another very common mistake is forgetting about the consequences of return statements. Most people know that Varnish doesn’t cache POST requests and they assume that the Varnish engine will deal with that.
So they write a VCL snippet like this to cache everything besides the admin pages:
sub vcl_recv {
    if(req.url ~ "^/admin") {
        return(pass);
    } else {
        return(hash);
    }
}
But in this example, there is no way Varnish can fall back on the built-in VCL—there were no measures in place to handle POST requests. So in this case, all request methods can be cached.
Caution
Be aware that if you’re trying to cache POST calls or calls with other non-idempotent request methods, the initial request to the backend will be transformed into a GET and the request body will be discarded.
My advice
Either include code from the built-in VCL that you need, or just remove the explicit return(hash); to fall back on built-in VCL.
Purging Without Purge Logic
When people hear that you can purge URLs from Varnish by using the PURGE method, they tend to get excited and forget that purge support needs to be implemented in your VCL file.
I’ve seen setups where people use PURGE without it being implemented and without people even noticing it. Even the default VCL will not complain when you issue a PURGE: you’ll hit the if statement that checks the request methods, and your request will be piped to the backend and you’ll probably get an HTTP 200 back.
Another variation on this problem is implementing PURGE support after the request method check. Even though you implemented it, your request will still be piped.
My advice
Check for the proper use of PURGE and BAN. To avoid shenanigans like this, you could also issue ban statements using the command-line interface, as explained in “Banning from the Command Line”.
No-Purge ACL
Cache invalidation using the PURGE method and the return(purge) logic is very simple to implement. However, if you don’t protect access to your purge logic via an ACL, you can end up in major trouble. Any other script kiddie could scan your site map and execute PURGE calls on every URL on your site. All caching would then go out of the window and the load on your backend servers would dramatically increase.
My advice
Add an ACL, obviously! Have a look at “Purging” for an example. If you want to tighten the security of your PURGE/BAN logic, just use the command-line interface and firewall access to the interface. Again, read “Banning from the Command Line” for more information.
404 Responses Get Cached
Remember that time you deleted a file, and then quickly re-uploaded it so that no one would notice? Well, they sure did notice it, because while you were uploading, someone accessed that page and now the 404 response is cached.
Varnish caches responses that have the following status codes:
-
200: OK
-
203: Non-Authoritative Information
-
300: Multiple Choices
-
301: Moved Permanently
-
302: Moved Temporarily
-
307: Temporary Redirect
-
410: Gone
-
404: Not Found
All other status codes aren’t cached.
Want to make sure 404s aren’t cached? Use the following VCL snippet:
sub vcl_backend_response {
    if (beresp.status == 404) {
        set beresp.ttl = 0s;
        return(deliver);
    }
}
Setting an Age Header
In “Expiration”, I mentioned how expiration works in HTTP. I also added a word of warning, saying that Varnish uses the Age header to determine how long it still has to cache an object.
If you start setting your own Age headers, it will mess with the cache duration and that might become a problem.
My advice
Don’t set an Age header yourself; let Varnish do that for you.
Max-age Versus s-maxage
Most people in the web industry have heard about max-age. A lot fewer people know what s-maxage does. Having both mechanisms in your Cache-control header could lead to confusion, especially if the values differ.
My advice
Always set s-maxage and if you want the browser to do some extra caching, you can use max-age. Use the instruments that HTTP provides and use them in the right way. When in doubt, read Chapter 3.
Adding Basic Authentication for Acceptance Environments
Imagine this situation—I assume it will sound familiar: you’re working on a new project for a client. It’s almost done and you want the client to test the latest features. The production environment is ready to go, but to avoid spoiling details to the outside world too early, you added server-side basic authentication.
During those tests, you notice that the hit rate drops dramatically. And yes, that makes sense, because built-in VCL doesn’t not cache requests that include an Authorization header.
My advice
Use firewall rules or VPN access instead. If you really want basic authentication, you could handle the authentication on a node in front of Varnish. If you terminate SSL/TLS, that server could act as the authentication server.
You could also use vmod_basicauth and handle the authentication at the Varnish level instead of the backend level.
Here’s a code example:
vcl 4.0;

import basicauth;

sub vcl_recv {
    if (!basicauth.match("/var/www/.htpasswd",req.http.Authorization)) {
        return(synth(401,"Authentication required"));
    }
    unset req.http.Authorization;
}
Session Cookies Everywhere
One of my pet peeves is the use of session cookies “just in case.” Those are the kind of cookies that are generated in the very first step of your application flow—because you never know, right?
My advice
Minimize the use of cookies. Use session cookies in places where it matters. Other meta information, such as the language of the user, can be stored in separate cookies.
Dedicated cookies make more sense and are easier to control by Varnish. If these cookies get in the way of your hit rate, you can use URL blacklists or whitelists to decide where cookies should be used and where they should be removed.
No Cache Variations
A typical case where a lack of cache variations poses a problem is a multilingual site that uses the Accept-Language header to determine the language and render output in the appropriate language.
If there is no cache variation on that header, the language of the first request will be the cached language. As a developer, you should be aware of this and add a Vary: Accept-Language header to your responses.
The same problem occurs when you don’t perform a cache variation on the Accept-Encoding header: compressed content that offers no support for compression could be served to the client.
Do You Really Want to Cache Static Assets?
In many cases, you have way more files to cache than available storage space in Varnish. When Varnish runs out of available storage, it uses a Least Recently Used (LRU) strategy to free up space by removing items with the least amount of hits.
Unfortunately, you don’t have any control over what that actually is. But let’s be honest: most of your object storage will be consumed by static assets like images, videos, PDF documents, and other similar files. We call them static assets because they don’t change and because their output isn’t rendered by a runtime. They are just files that are transmitted by the web server.
In most cases, it’s not the images, JavaScript files, or even the CSS files that cause load on the backend—it’s the dynamic scripts. Scripts written in languages like PHP, Ruby, Python, ASP.NET, and many more. Scripts that depend on external resources like databases, feeds, or web services. Scripts that are rendered by a runtime and that consume a bunch of RAM and CPU.
These are the situations where caching matters and where Varnish can make a difference. These scripts are tiny and consume little space in the object storage of Varnish. The number of dynamic scripts on a machine isn’t that big and is controlled by the deployment.
Images and documents, however, are often controlled by the users: they can upload images and documents using a CMS. It’s tough to control the number of (somewhat) large files uploaded by end users.
So instead of taking our chances an trusting that the LRU strategy will do a good job, we can also decide not to cache static assets in Varnish. The only reason we would cache static assets in Varnish is to avoid consuming too many backend connections.
A web server like Nginx is built to handle these things like a champ! High concurrency? No problem.
If you believe that images and other large files are filling up your cache like crazy, then use the following piece of VCL:
vcl 4.0;

sub vcl_recv {
    if (req.url ~ "^[^?]*\.(7z|avi|bmp|bz2|css|csv|doc|docx|eot|flac|flv|gif|gz
    |ico|jpeg|jpg|js|less|mka|mkv|mov|mp3|mp4|mpeg|mpg|odt|otf|ogg|ogm|opus|pdf
    |png|ppt|pptx|rar|rtf|svg|svgz|swf|tar|tbz|tgz|ttf|txt|txz|wav|webm|webp
    |woff|woff2|xls|xlsx|xml|xz|zip)(\?.*)?$") {
        return (pass);
    }
}
You could also provide a separate hostname for these static files and bypass Varnish completely—for example, http://static.example.com/image.jpg.
URL Blacklists and Whitelists
Controlling what does and doesn’t get cached is often done with URL blacklists and whitelists. This means you match URLs or URL patterns and decide whether or not to cache them.
Here’s an example of a blacklist. It’s part of a VCL template for Drupal 7:
sub vcl_recv {
    if (req.url ~ "^/status\.php$" ||
        req.url ~ "^/update\.php$" ||
        req.url ~ "^/ooyala/ping$" ||
        req.url ~ "^/admin"        ||
        req.url ~ "^/admin/.*$"    ||
        req.url ~ "^/user"         ||
        req.url ~ "^/user/.*$"     ||
        req.url ~ "^/users/.*$"    ||
        req.url ~ "^/info/.*$"     ||
        req.url ~ "^/flag/.*$"     ||
        req.url ~ "^.*/ajax/.*$"   ||
        req.url ~ "^.*/ahah/.*$")
    {
        return (pass);
    }
}
The blacklist in this example typically passes requests to the backend where the URL represents parts of Drupal that contain user-specific data. That’s also a place where session cookies are used to identify the user.
You could also switch it up and go for a whitelist instead:
sub vcl_recv {
    if (req.url ~ "^/products(/.*)?$")
    {
        return (hash);
    }
}
In this example, we’re caching the /products page, but also all subordinate pages like /products/cellphones.
Decide What Gets Cached with Cache-Control Headers
In the previous section, blacklists and whitelists were used to decide whether or not to cache. Though effective, it’s extra VCL code and hence not that portable; I’m all about empowering the application and its developers.
A better way to do this is by letting the application send a no-store for resources that shouldn’t be cached. This gives developers more control. Cache behavior changes do not require VCL changes in that case.
Here’s a bit of code to illustrate this fact:
Cache-control: private, no-cache, no-store
By sending these headers, Varnish will not cache the response and add the request to the hit-for-pass cache.
There is one major downside, though: the decision happens at the response level, not at the request level. This makes it a lot harder to deal with cookies.
Here’s an unconventional way to still make it work, even when there are cookies:
sub vcl_recv {
    if (req.method != "GET" && req.method != "HEAD") {
        return (pass);
    }
    return(hash);
}
Basically, you’re caching everything that is a GET or a HEAD, even if there are cookies involved. There’s a risk of caching pages that require cookie values, but that’s the responsibility of the developer. All pages that require cookie interaction should have a no-store response header.
Note
Although I’m saying that no-store is the way to go, you can achieve the same result by using one of the following Cache-control instructions:
-
no-cache -
private -
s-maxage=0 -
max-age=0
There Will Always Be Cookies
I don’t like cookies. They annoy me. But we need them because they make a stateless protocol like HTTP stateful. And that’s what we sometimes need: to be able to pass extra information about the user across requests. By default, Varnish doesn’t cache when there’s a Cookie header, and in an ideal setup, we would avoid the use of cookies.
The reality is that there will always be cookies, even if you don’t use any in your code. Simple fact: as soon as you start using Google Analytics, you’ll have tracking cookies. And that’s just one example of tracking cookies.
And let me tell you: there is not a single solution to this problem. It all depends on the type of cookie and its role within the application. Instead of a long conceptual explanation, I’ll show you some use cases and code examples.
Admin Panel
Imagine a website that is powered by a CMS. The pages themselves are pretty static, but the admin panel hosted under /admin is dynamic and requires a login. Once you’re logged in, there’s a session cookie that keeps track of your session ID. Sound familiar?
This is the VCL you need to cache the website itself, but still have dynamic access to the admin panel:
sub vcl_recv {
    if (!(req.url ~ "^/admin/")) {
        unset req.http.Cookie;
    }
}
Since we only need cookies when we’re in the /admin section, we can strip them off for all other pages. Notice that we’re not “returning”; we’re relying on built-in VCL for the rest of the flow.
Remove Tracking Cookies
Tracking cookies have a bad rep: people think they’re used to “spy” on us. But marketers rely on them to retrieve user metrics.
Let’s face it: if you run a website, you’re going to install Google Analytics and you’re going to want to know how many daily visitors you have, what kind of content they are consuming, and how they found your site. Guess what: this requires tracking cookies. Even if your website is built out of plain old HTML, there will still be cookies.
But these cookies are not processed by the web server or the application runtime; the browser processes them using Javascript. And quite honestly, they’re in our way and we want to get rid of them.
The good news is that you can. By stripping off tracking cookies, Varnish will start caching your site again. The Javascript code that processes the cookies is run in the browser. By the time Varnish strips off the cookies, they will already have been processed by the browser.
The following code is a no-brainer and is an extract out of “A Real-World VCL File”:
sub vcl_recv {
  # Some generic cookie manipulation, useful for all templates that follow
  # Remove the "has_js" cookie
  set req.http.Cookie = regsuball(req.http.Cookie, "has_js=[^;]+(; )?", "");

  # Remove any Google Analytics based cookies
  set req.http.Cookie = regsuball(req.http.Cookie, "__gads.=[^;]+(; )?", "");
  set req.http.Cookie = regsuball(req.http.Cookie, "_ga=[^;]+(; )?", "");
  set req.http.Cookie = regsuball(req.http.Cookie, "_gat=[^;]+(; )?", "");
  set req.http.Cookie = regsuball(req.http.Cookie, "utmctr=[^;]+(; )?", "");
  set req.http.Cookie = regsuball(req.http.Cookie, "utmcmd.=[^;]+(; )?", "");
  set req.http.Cookie = regsuball(req.http.Cookie, "utmccn.=[^;]+(; )?", "");

  # Remove DoubleClick offensive cookies
  set req.http.Cookie = regsuball(req.http.Cookie, "__gads=[^;]+(; )?", "");

  # Remove the Quant Capital cookies (added by some plugin, all __qca)
  set req.http.Cookie = regsuball(req.http.Cookie, "__qc.=[^;]+(; )?", "");

  # Remove the AddThis cookies
  set req.http.Cookie = regsuball(req.http.Cookie, "__atuv.=[^;]+(; )?", "");

  # Remove a ";" prefix in the cookie if present
  set req.http.Cookie = regsuball(req.http.Cookie, "^;\s*", "");

  # Are there cookies left with only spaces or that are empty?
  if (req.http.cookie ~ "^\s*$") {
    unset req.http.cookie;
  }
}
This example performs regex-based find-and-replace magic. It identifies specific cookies and removes them from the cookie header. This is just a set of common tracking cookies; you can extend the list and remove even more cookies.
If after the find-and-replace actions, the cookie header is nothing more than a set of tabs or spaces, you can completely remove the cookie header.
Note
Please note that vmod_cookie is a Varnish module that offers functions to clean up, delete, and filter cookies without having to write complicated regular expressions. This VMOD is not shipped by default and is part of the Varnish modules collection. If you don’t have the possibility of installing this VMOD, the preceding example using regular expressions will do the job just fine.
Remove All But Some
You can also apply the inverse logic: instead of removing some cookies, remove them all except the ones you really need. This makes things easier because you don’t have to edit your VCL code every time a new cookie needs to be removed.
Here’s the code that only keeps the lang and the PHPSESSID cookie. All the others are removed:
sub vcl_recv {
  if (req.http.Cookie) {
    set req.http.Cookie = ";" + req.http.Cookie;
    set req.http.Cookie = regsuball(req.http.Cookie, "; +", ";");
    set req.http.Cookie = regsuball(req.http.Cookie, ";(lang|PHPSESSID)=",
    "; \1=");
    set req.http.Cookie = regsuball(req.http.Cookie, ";[^ ][^;]*", "");
    set req.http.Cookie = regsuball(req.http.Cookie, "^[; ]+|[; ]+$", "");

    if (req.http.cookie ~ "^\s*$") {
      unset req.http.cookie;
    }
}
Cookie Variations
A very common scenario is using cookies to keep track of user preferences. Language is probably the most common one. The danger of caching those pages is that the language doesn’t vary for the cached page. Not caching the page because of the language cookie might be a missed opportunity.
If you have tight control over your language cookie, you can actually do VCL-based cache variations based on that cookie.
Let’s have a look at some code:
sub vcl_hash {
    if(req.http.Cookie ~ "language=(nl|fr|en|de|es)"){
        hash_data(regsub(req.http.Cookie,
        "^.*;? ?language=(nl|fr|en|de|es)( ?|;| ;).*$","\1"));
    }
}
We already featured this code in Chapter 4, but it’s a good example and an excellent use case.
And don’t forget that the language selection happens on a splash screen. Once a language selection has been made, it just displays the site in the selected language. This splash screen is only shown if no language cookie is set. That means if no cookie is set, we cannot cache.
I know, it sounds like the exact opposite of what I’ve been preaching, but in this case it’s required. The following code is necessary to make this work:
sub vcl_recv {
    if(!req.http.Cookie ~ "language=(nl|fr|en|de|es)"){
        return(pass);
    }
}
Sanitizing
So far, the only input cleanup we’ve done was cookie-based. But the way the URL is used can also mess with our hit rate. Here are a couple of quick fixes to optimize your URLs to avoid unnecessary cache misses.
Removing the Port
The following example removes the port number from the HTTP host. The port number might be important from a TCP perspective, but once you’ve reached Varnish, you’re already in. Keeping the port number could mean a cache variation and would cause a miss.
By removing the port, the connectvity aspect is not disrupted, but the host header is sanitized and the hit rate is maintained.
sub vcl_recv {
  set req.http.Host = regsub(req.http.Host, ":[0-9]+", "");
}
Note
In most cases, the port will not be mentioned in the URL. But by adding port 80 to a regular URL, you could actually cause a cache miss.
Query String Sorting
“Never trust the end user.” That point was proven in the previous section where users messed with the hit rate by adding a port. The query string is also vulnerable.
In the following example, we’re applying the std.querysort function to alphabetically sort query-string parameters. If users put the query-string parameters in a different order, we’d have a different URL, a different hash, and a cache miss as a result.
By sorting the query-string parameters alphabetically, we’re eliminating that risk:
import std;

sub vcl_recv {
  set req.url = std.querysort(req.url);
}
Removing Google Analytics URL Parameters
Google Analytics doesn’t just add tracking cookies to your requests; it can also inject tracking URL parameters. It’s a common marketing trick to do campaign tracking.
Just like the tracking cookies, these parameters are processed by the browser, serve no purpose to the server, and can be removed.
Here’s some code to remove the tracking URL parameters:
sub vcl_recv {
  if (req.url ~ "(\?|&)(utm_source|utm_medium|utm_campaign|utm_content|gclid|cx
  |ie|cof|siteurl)=") {
    set req.url = regsuball(req.url, "&(utm_source|utm_medium|utm_campaign
    |utm_content|gclid|cx|ie|cof
    |siteurl)=([A-z0-9_\-\.%25]+)", "");
    set req.url = regsuball(req.url, "\?(utm_source|utm_medium|utm_campaign
    |utm_content|gclid|cx|ie|cof
    |siteurl)=([A-z0-9_\-\.%25]+)", "?");
    set req.url = regsub(req.url, "\?&", "?");
    set req.url = regsub(req.url, "\?$", "");
  }
}
Removing the URL Hash
You’re probably familiar with the # sign in the URL: it is used as an HTML anchor to link to a specific section of a page. This is a client-side thing, not a server-side thing. We can strip it as follows:
sub vcl_recv {
  if (req.url ~ "\#") {
    set req.url = regsub(req.url, "\#.*$", "");
  }
}
Removing the Trailing Question Mark
In a URL, the question mark is used to indicate the start of the URL parameters. If the question mark is at the end of your URL, you really don’t have any URL parameters. So why keep it?
Here’s how you can remove a trailing question mark:
sub vcl_recv {
  if (req.url ~ "\?$") {
    set req.url = regsub(req.url, "\?$", "");
  }
}
Hit/Miss Marker
A useful addition to your response headers is a custom header that lets you know if the page you’re seeing is the result of a cache hit or cache miss. This is the VCL code you need the display the very convenient hit/miss marker:
sub vcl_deliver {
  if (obj.hits > 0) {
    set resp.http.X-Cache = "HIT";
  } else {
    set resp.http.X-Cache = "MISS";
  }
}
Note
If you consider this hit/miss marker to be sensitive information, you can put an ACL on it and only return the header if the client IP matches the ACL.
You can even go one step further and display the number of hits:
sub vcl_deliver {
  set resp.http.X-Hits = obj.hits;
  if (obj.hits > 0)
    set resp.http.X-Cache = "HIT";
  } else {
    set resp.http.X-Cache = "MISS";
  }
}
Note
You always have the Age header to know how long the page has been served from cache so far.
Caching Blocks
In your code, the different sections of your content might be constructed and displayed as blocks. The image below contains one of the most traditional site layouts containing four basic blocks:
-
Header
-
Footer
-
Navigation
-
Main block
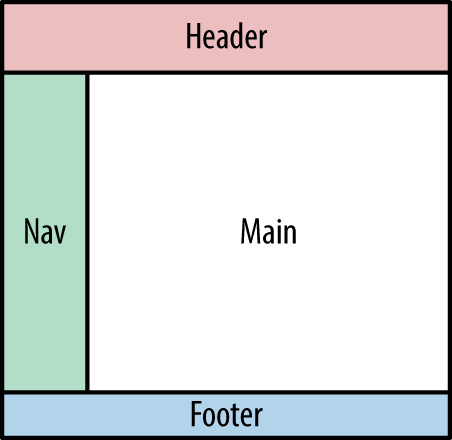
Figure 7-1. The typical block setup with a header, footer, navigation, and main block
If your header section is not cacheable, the rest of the page won’t be either. Varnish caches pages and has no understanding of the content blocks. The lowest common denominator of these blocks is a miss, so the page will not be cached.
Should you abandon all hope? Not really. There are ways to circumvent these limitations:
-
AJAX
-
Edge Side Includes (ESI)
AJAX
AJAX stands for Asynchronous JavaScript and XML and has nothing to do with Varnish. By using AJAX, you’re basically letting your browser load the different blocks as separate HTTP requests. This is done in JavaScript, so it’s a client-side matter.
The downside is that there’s an HTTP request for every content block, which causes overhead. The upside of separate HTTP requests is that you can control the time-to-live and the cacheability of each block by setting the right Cache-control headers.
You can use AJAX natively by initializing an XMLHttpRequest object, but most of us just use the AJAX implementation of our favorite JavaScript framework.
In terms of caching, it would be great for the application to have full control. Repetition, repetition, repetition: Cache-control headers are all you need to make that happen. But if you want to be on “Easy Street” and not care about Cache-control discipline, you could just write some VCL to handle it. Here’s the idea: if you’re only using AJAX to load blocks that would otherwise not be cached, you can pass all AJAX requests to the backend. This is the VCL code that does that for you:
sub vcl_recv {
    if (req.url ~ "^.*/ajax/.*$")
    {
        return (pass);
    }
}
You might think that my assumptions are simple and risky, and I agree: when the URL contains an /ajax/ part, we assume it’s AJAX and we don’t cache. But hey, it gets the job done!
Edge Side Includes
AJAX is asynchronous, is loaded by the browser, and depends entirely on JavaScript. Although it solves the block-caching problem quite well, the server loses control over the actual output and how it gets rendered. This might not be an acceptable solution to you.
If that’s the case, Edge Side Includes (or ESI, as we tend to call them) can be a viable alternative. The goal of ESI is to include HTTP fragments in your output that originate from different URLs. The composition of the output happens on the edge, rather than on the web server. Every fragment can use Cache-control headers to control its own cacheability.
In our case, the edge is Varnish and it represents the outer edge of our web stack. ESI was not invented by or for Varnish. It’s a standard that is also used by content delivery networks (CDNs), but Varnish only supports a subset of its features.
These so-called fragments are loaded by using an ESI tag, as illustrated below:
<esi:include src="http://example.com/include.php" />
This tag is nothing more than a placeholder of which the src attribute is processed by Varnish. It’s very similar to old-school Server-Side Includes (SSI) from back in the day, except that SSI tags were processed by the webserver. ESI tags are processed on the edge. It’s like a frameset processed server-side but without the ugliness.
The following HTML code is an example of a page where the main content is loaded by the web server—and the header, navigation, and footer are loaded on the edge:
<!DOCTYPE html><html><head><title>My ESI placeholder</title></head><body><header><esi:includesrc="http://example.com/header.php"/></header><nav><esi:includesrc="http://example.com/nav.php"/></nav><main><!--This is where the main content will be loaded--></main><footer><esi:includesrc="http://example.com/footer.php"/></footer></body></html>
Making Varnish Parse ESI
Varnish does not automatically parse ESI tags, as this would be a bit resource-intensive. In your VCL code, you explicitly need to enable ESI parsing on a request basis.
The beresp.do_esi variable is used to enable and disable ESI parsing.
There are several ways to implement this. Here’s an example where a URL prefix is used to enable ESI parsing:
sub vcl_backend_response {
    if(bereq.url ~ "^/esi/.*$") {
        set beresp.do_esi=true;
    }
}
In this example, every URL that starts with /esi/ is expected to have ESI tags in its content that need parsing. But as I have evangelized many, many times before, it’s better to let the application take control of the situation.
The following example features ESI parsing based on a response header sent by the application:
sub vcl_backend_response {
    if(beresp.http.x-parse-esi) {
        set beresp.do_esi=true;
    }
}
But there’s a slightly more official way do it. Here’s the code I advise you to use:
sub vcl_recv {
    set req.http.Surrogate-Capability="key=ESI/1.0";
}

sub vcl_backend_response {
    if(beresp.http.Surrogate-Control~"ESI/1.0") {
        unset beresp.http.Surrogate-Control;
        set beresp.do_esi=true;
        return(deliver);
    }
}
In this example, we’re sending a Surrogate-Capability request header to the backend, indicating that we’re able to parse ESI. The backend can go ahead and send us ESI tags, knowing we’ll be able to handle it.
Once the backend response returns to Varnish, the vcl_backend_response subroutine will check if a Surrogate-Control response header is sent containing ESI/1.0. By sending that header, the application announces that it is returning ESI tags that Varnish is supposed to parse.
For more information about these headers, please read the W3C Edge Architecture Specification.
Note
If you send Surrogate-Control headers from your application, please only do this on the placeholder page that contains your ESI tags. It’s not necessary to do this within the resources that are loaded through ESI.
ESI versus AJAX
I made a case for both ESI and AJAX. Which one should you pick?
Personally, I prefer ESI because you don’t depend on the browser—or JavaScript for that matter. But ESI has some limitations:
-
By default, Varnish requires HTTP fragments loaded by ESI to be XHTML-compliant. Any deviation will cause an error.
-
ESI tags are parsed sequentially. If you have a bunch of tags to parse and the corresponding pages are rather slow, this could cause a major slowdown.
-
The ESI implementation in Varnish does not offer graceful degradation, which means that Varnish will not recover from a potential error in an ESI subrequest.
The ESI implementation of Varnish also has some advantages:
-
You can have nested ESI tags. The depth is limited by the
max_esi_depthvariable. The default maximum depth is set to five levels. -
The
req_topobject gives you the ability to get request information from the top-level request from within an ESI subrequest. -
You can check the level of ESI nesting by using the
req.esi_levelvariable.
The XHTML compliance limitation can be circumvented by setting a feature=esi_disable_xml_check feature flag at startup time. We talked about this in “Runtime parameters”.
AJAX, on the other hand, has a couple of clear advantages:
-
For many web developers, AJAX is common practice and thus easier to implement
-
No real VCL magic required
-
AJAX calls can be executed in parallel
-
When an AJAX call fails, there is a sense of graceful degradation: the failed component can be ignored gracefully and the rest of the page can still be displayed
One of the disadvantages of AJAX is that these requests are sent from the client—and the responses are parsed by the client, too. If you’re on an unreliable connection, you’ll end up with multiple HTTP calls that can slow down your website. Mobile traffic is a case in point: if you’re on a crappy 3G or 2G connection, HTTP round trips are very expensive. If you use ESI instead, all the subrequests will be done server-side and a single round-trip will suffice.
Choose wisely!
Making Your Code Block-Cache Ready
I know I’ve said it so many times that it might sound annoying by now, but I’m a very strong advocate of empowering the application to make the right decisions in terms of caching. You can bet this also applies to block caching!
Your application might not always be positioned behind a reverse caching proxy, let alone one that supports ESI. I’d advise you to detect if the Surrogate-Capability is set before outputting ESI tags for your blocks. If it turns out that this header is not set, I wouldn’t take any risks and would just render those blocks via AJAX. There’s even a third option: render the blocks natively and don’t apply any block caching logic.
Many frameworks have view helpers that automatically create ESI tags or AJAX logic. They’re usually intelligent enough to parse the subrequest internally if the Surrogate-Capability header is not set. By using so-called view helpers for this, you’re restricting the context to the view layer and you don’t have to add extra logic to your MVC controllers. This small widget takes care of the subrequests and makes life easy for you. And in the end, your model and controller layer don’t care how the output is visualized.
The next section contains a code example of HTTP fragments loaded through ESI and AJAX. Check it out.
An All-in-One Code Example
Let’s end this chapter with an all-in-one code example that applies all these best practices. The code is written in PHP and uses the Silex framework, which is a microframework based on Symfony. The framework is very HTTP-friendly and offers most of the best practices right out of the box.
The example code—available on GitHub—uses the following HTTP best practices:
-
Use
Cache-controlheaders to decide what does and does not get cached -
Use the
s-maxagedirective to define how long Varnish can cache -
Apply a language cache variation using the
Varyheader -
Use a mixture of ESI tags and AJAX calls to have a separate time-to-live on each content block
-
Use view helpers to render the content blocks
-
Provide conditional request support for returning ETags and checking the
If-None-Matchheader
This is the VCL code you need to make this example work. As you can see, it’s pretty limited:
vcl 4.0;

sub vcl_recv {
    set req.http.Surrogate-Capability="key=ESI/1.0";
    if ((req.method != "GET" && req.method != "HEAD") || req.http.Authorization) {
        return (pass);
    }
    return(hash);
}

sub vcl_backend_response {
    if(beresp.http.Surrogate-Control~"ESI/1.0") {
        unset beresp.http.Surrogate-Control;
        set beresp.do_esi=true;
        return(deliver);
    }
}
The VCL code processes ESI and tries to cache everything that is a GET or a HEAD request. It’s up to the application to decide whether or not this is fine. If not, the object will end up in the hit-for-pass cache.
Note
Before you can use the example code, you need to load a set of dependencies. These dependencies are managed by Composer.
You must declare your dependencies in a composer.json file and run the composer install command to load them.
The PHP code
This is the PHP code that renders the output:
<?phprequire_once__DIR__.'/../vendor/autoload.php';useSymfony\Component\HttpFoundation\Response;useSymfony\Component\HttpFoundation\Request;useSilex\Provider\HttpFragmentServiceProvider;useSilex\Provider\HttpCacheServiceProvider;$app=newSilex\Application();$app['debug']=true;$app->register(newSilex\Provider\TwigServiceProvider(),['twig.path'=>__DIR__.'/../views']);$app->register(newHttpFragmentServiceProvider());$app->register(newHttpCacheServiceProvider());$app->register(newSilex\Provider\TranslationServiceProvider(),['locale_fallbacks'=>['en']]);$app['locale']='en';$app['translator.domains']=['messages'=>['en'=>['welcome'=>'Welcome to the site','rendered'=>'Rendered at %date%','example'=>'An example page'],'nl'=>['welcome'=>'Welkom op de site','rendered'=>'Samengesteld op %date%','example'=>'Een voorbeeldpagina']]];$app->before(function(Request$request)use($app){$app['translator']->setLocale($request->getPreferredLanguage());});$app->after(function(Request$request,Response$response)use($app){$response->setVary('Accept-Language')->setETag(md5($response->getContent()))->isNotModified($request);});$app->get('/',function()use($app){$response=newResponse($app['twig']->render('index.twig'),200);$response->setSharedMaxAge(5)->setPublic();return$response;})->bind('home');$app->get('/header',function()use($app){$response=newResponse($app['twig']->render('header.twig'),200);$response->setPrivate()->setSharedMaxAge(0);return$response;})->bind('header');$app->get('/footer',function()use($app){$response=newResponse($app['twig']->render('footer.twig'),200);$response->setSharedMaxAge(10)->setPublic();return$response;})->bind('footer');$app->get('/nav',function()use($app){$response=newResponse($app['twig']->render('nav.twig'),200);$response->setSharedMaxAge(20)->setPublic();return$response;})->bind('nav');$app->run();
Let’s explain what it does:
-
Initialize the autoloader.
-
Resolve the namespaces.
-
Intialize the Silex Application.
-
Register the Twig service provider to load and parse Twig templates.
-
Register the
HttpFragmentServiceProviderto support ESI and AJAX content block loading. -
Register the
HttpCacheServiceProviderto support the ESI view helper. -
Register the
TranslationServiceProviderto support translations and leverage the translations view helper. -
Set English as the default locale.
-
Initialize the translations.
-
Set a pre-dispatch hook that uses the
Accept-Languageheader value as the locale. -
Set a post-dispatch hook that sets the
Vary: Accept-Languageheader. -
Set a post-dispatch hook that sets the
ETagheader. -
Set a post-dispatch hook that checks the
If-None-Matchheader and returns anHTTP 304status code if nothing changed. -
Register a default MVC route that handles the homepage, parses the
index.twigtemplate, and caches the response for five seconds. -
Register an MVC route for
/headerthat loads the header as a separate HTTP fragment. This resource is not cached. -
Register an MVC route for
/footerthat loads the footer as a separate HTTP fragment. This resource is cached for 10 seconds. -
Register an MVC route for
/navthat loads the navigation as a separate HTTP fragment. This resource is cached for 20 seconds.
The index template
Now we need a template that contains the output for the homepage. Here goes:
<!DOCTYPE html><htmlxmlns="http://www.w3.org/1999/html"xmlns:hx="http://purl.org/NET/hinclude"><head><title>Varnish</title><metaname="viewport"content="width=device-width, initial-scale=1.0"><metahttp-equiv="Content-Type"content="text/html; charset=utf-8"/><linkrel="stylesheet"href="//maxcdn.bootstrapcdn.com/bootstrap/3.3.7/css/bootstrap.min.css"integrity="sha384-BVYiiSIFeK1dGmJRAkycuHAHRg32OmUcww7on3RYdg4Va+PmSTsz/K68vbdEjh4u"crossorigin="anonymous"><scriptsrc="//rawgit.com/mnot/hinclude/master/hinclude.js"></script></head><body><divclass="container-fluid">{{ render_hinclude(url('header')) }}<divclass="row"><divclass="col-sm-3 col-lg-2">{{ render_esi(url('nav')) }}</div><divclass="col-sm-9 col-lg-10"><divclass="page-header"><h1>{{ 'example' | trans }}<small>{{ 'rendered' | trans({'%date%':"now"|date("Y-m-d H:i:s")}) }}</small></h1></div><p>Lorem ipsum dolor sit amet, consectetur adipiscing elit. Mauris consequat orci eget libero sollicitudin, non ultrices turpis mollis. Aliquam sit amet tempus elit. Ut viverra risus enim, ut venenatis justo accumsan nec. Praesent a dolor tellus. Maecenas non mauris leo. Pellentesque lobortis turpis at dapibus laoreet. Mauris rhoncus nulla et urna mollis, et lobortis magna ornare. Etiam et sapien consequat, egestas felis sit amet, dignissim enim.</p><p>Quisque quis mollis justo, imperdiet fermentum velit. Aliquam nulla justo, consectetur et diam non, luctus commodo metus. Vestibulum fermentum efficitur nulla non luctus. Nunc lorem nunc, mollis id efficitur et, aliquet sit amet ante. Sed ipsum turpis, vehicula eu semper eu, malesuada eget leo. Vestibulum venenatis dui id pulvinar suscipit. Etiam nec massa pharetra justo pharetra dignissim quis non magna. Integer id convallis lectus. Nam non ullamcorper metus. Ut vestibulum ex ut massa posuere tincidunt. Vestibulum hendrerit neque id lorem rhoncus aliquam. Duis a facilisis metus, a faucibus nulla.</p></div></div>{{ render_esi(url('footer')) }}</div></body></html>
This Twig template is loaded on line 46 of the preceding PHP code. It contains HTML that is styled by the Twitter Bootstrap library.
I’m also using the hinclude.js JavaScript library to perform so-called hx:include calls. These are placeholder tags similar to ESI tags. These tags aren’t processed on the edge, but are instead processed by the browser. It’s an alternative form of AJAX.
The header is rendered by calling {{ render_hinclude(url(header)) }}. This view helper renders a named route called header and displays it as an <hx:include /> tag. This tag is processed by the browser and loads the /header route.
The next block that is loaded is the navigation. This is done by calling {{ render_esi(url(nav)) }}. This view helper loads a named route called nav and displays this block as an ESI tag. This tag is processed by Varnish and loads the /nav route.
The final block that is loaded is the footer, which is rendered by calling {{ render_esi(url(nav)) }} and this also loads a named route in similar fashion using ESI.
A final remark on the index template: you might have noticed {{ example | trans }} and {{ rendered | trans({%date%:"now" | date("Y-m-d H:i:s")})}}. These are translation keys that are translated by the trans filter. Depending on the language, the right message is parsed into these placeholders. We even inject the current date and time into the second placeholder.
The header template
The header was loaded as a separate HTTP fragment in the index template. This is the Twig template that is loaded when /header is called:
<divclass="jumbotron"><divclass="page-header"><h1>{{ 'welcome'|trans }}<small>{{ 'rendered' | trans({'%date%':"now"|date("Y-m-d H:i:s")}) }}</small></h1></div></div>
As you can see, it is plain HTML enriched by some Twig placeholders and filters that provide translations.
Conclusion
The extensive code example is the perfect proof that it is possible to architect an application to be highly cacheable. If, for some reason, a part of the content is not cacheable, HTTP fragments can be used to load it on the edge or in the browser.
Live, eat, and breathe headers like Cache-control, Vary, ETag, If-None-Match, Last-Modified, If-Modified-Since, Surrogate-Capability, and Surrogate-Control. If you forgot about those, go all the way back to Chapter 3 and study them again!
If you’re dealing with a legacy application where these headers are tough to implement, just write some VCL. It’s OK.