Table of Contents for
Getting Started with OpenShift
 Getting Started with OpenShift
Published by
O'Reilly Media, Inc., 2014
Getting Started with OpenShift
Published by
O'Reilly Media, Inc., 2014
- Cover
- Getting Started With OpenShift
- Getting Started With OpenShift
- Preface
- 1. Introduction
- 2. Creating Applications
- 3. Making Code Modifications
- 4. Adding Application Components
- 5. Environment and Application Management
- 6. Library Dependencies
- 7. Networking
- 8. Disk Usage
- 9. Backup
- 10. Team Collaboration
- 11. Summary
- A. Basic Linux for Non-Linux Users
- Colophon
- Copyright
Chapter 3. Making Code Modifications
In Chapter 2 we used OpenShift and a single RHC command to create a Python application running in the cloud. In a matter of seconds the application was live on the Internet; when we visited its URL we got back the OpenShift equivalent of a Hello World page, including some useful information on what to do next. Spinning up an application quickly and easily like this is pretty cool, but a static page can only entertain for so long. In this chapter we will modify the default application to do something more exciting and deploy the changes to OpenShift.
Cloning Code to Your Local Machine
When you create an OpenShift application with the RHC command-line tools, by default the new Git repository created on the OpenShift gear will be cloned to your local machine. The contents will end up in a new directory with the same name as the application, created inside the directory in which you ran the rhc app create command. If you would like the repository to be cloned to a different location, specify this by adding the --repo option to your repo_dir_pathrhc app create command; the repository contents will be cloned into the directory specified, which should either be empty or not yet exist. If you do not wish to clone the Git repository as part of the app creation process, you can add the --no-git flag.
If you choose not to clone the OpenShift application repository when you create the app, or something goes wrong and the clone fails, you can clone it later using the command rhc git-clone. This is a wrapper for the standard git clone command that provides some extra benefits: you can specify what to clone by using the application’s name, rather than its full Git URL, and it adds some RHC configuration data to the Git repository config. This means that you can run RHC commands from within the cloned directory without having to specify the application to which you wish them to apply with -a . Where RHC commands shown in this book omit the appname-a option, it is because they are being run within an app repository cloned via RHC, either with appnamerhc app create or rhc git-clone.
To view the Git URL for your OpenShift application, run the command rhc app show -a .appname
Tip
In order to clone an application repository, you must have supplied OpenShift with an SSH public key for the machine on which you are working. If you have not yet done this, run the command rhc setup. See Chapter 2 for more information.
Modifying Application Code
Once you have a local copy of the OpenShift application repository you can modify the code using whatever tool you prefer: a command-line text editor, a graphical editor, or an IDE. For our example application, we will start by making a few changes to add and utilize the Python Flask microframework. Writing raw Web Server Gateway Interface (WSGI) apps is not much fun. Flask is a lightweight alternative that will give us just enough support to fulfill our app’s main aim: insulting people. To learn more about Flask, see its website.
First up, we need to add Flask as a dependency. To do this, we navigate to the local cloned insultapp repository and open the setup.py file with our chosen editor (long live the Vim, though some of us believe Nano rules). In this file we can set the application name and other details; the most significant change to make, though, is uncommenting the install_requires line and replacing Django with Flask 0.10.1. Our resulting setup section looks like this:
setup(name='Insult App',version='1.0',description='Insults you',author='Katie and Steve',author_email='example@example.com',url='http://www.python.org/sigs/distutils-sig/',install_requires=['Flask==0.10.1'],)
The next file we need to edit is wsgi/application. It contains the HTML for the “Welcome to your Python application on OpenShift” page we saw in Chapter 2. We do not need any of the template code, so we delete everything beneath the comment lines marked as IMPORTANT. Beneath the comment, we add the line from routes import app as application, referencing the application code we are about to add next. Here is the source of the resulting application file:
#!/usr/bin/pythonimportosvirtenv=os.environ['OPENSHIFT_PYTHON_DIR']+'/virtenv/'virtualenv=os.path.join(virtenv,'bin/activate_this.py')try:execfile(virtualenv,dict(__file__=virtualenv))exceptIOError:pass## IMPORTANT: Put any additional includes below this line. If placed above this# line, it's possible required libraries won't be in your searchable path.#fromroutesimportappasapplication
Finally, we add a new file in the wsgi directory called routes.py. This contains a single route for the application’s root directory, which maps to an insult function that returns the mildly irritating string, “Hello, code monkey!” Here is the code:
importosfromflaskimportFlaskapp=Flask(__name__)# Keeps Flask from swallowing error messagesapp.config['PROPAGATE_EXCEPTIONS']=True@app.route("/")definsult():return"Hello, code monkey!"if__name__=="__main__":app.run()
In routes.py we create a Flask application type called app. From there we use annotations to define that HTTP requests to the root URL get handled by the function insult. The application file loads the Python virtual environment (a mechanism for having different Python libraries on the same machine) and imports the app from the routes module defined in routes.py.
Now that we have made some changes to the application code base, we should commit them to the local Git repository. We can do that with the following Git commands: add to add the changes to the repository index, and commit to record the new contents of the index. It is good practice to use the git status command before each one to make sure you are clear on what is happening, although for brevity this is not shown here:
[me@localhost ~/insultapp]$ git add -A
[me@localhost ~/insultapp]$ git commit -m "Added Flask microframework"
[master b1d87e3] Added Flask microframework
 3 files changed, 32 insertions(+), 315 deletions(-)
 rewrite wsgi/application (99%)
 create mode 100644 wsgi/routes.py
The code changes are now committed on our local machine, but our OpenShift app remains unaffected. In the next section, we will push our modifications to the cloud.
Building and Deploying Your Code
Once you have committed your code changes, you can deploy them to OpenShift with just one command: git push. There is no special binary or secret sauce involved; it is just pure Git and SSH. If we run the command git status, we can see that we have modifications ready and raring to go. The git push command sends them on their merry way up into the cloud:
[me@localhost ~/insultapp]$ git status
# On branch master
# Your branch is ahead of 'origin/master' by 1 commit.
#   (use "git push" to publish your local commits)
#
nothing to commit, working directory clean
[me@localhost ~/insultapp]$ git push
We have not included the full output of the push command here as it was quite lengthy, but here are some choice snippets:
remote: Stopping PYTHON cart
...
remote: Building git ref 'master', commit b1d87e3
...
remote: Installed /var/lib/openshift/6e7672676e61676976757570/app-root/runtime
/repo
remote: Processing dependencies for Insult-App==1.0
...
remote: Processing Flask-0.10.1.tar.gz
...
remote: Preparing build for deployment
...
remote: Activating deployment
...
remote: Starting PYTHON cart
remote: Result: success
remote: Activation status: success
remote: Deployment completed with status: success
Note that each time new code is deployed, the directory on the gear containing the current copy of the Git repository is blown away and then replaced with an updated copy, so anything stored there between deployments will be lost. We explain where you can store files persistently in Chapter 8.
Tip
By default, pushing code changes to the OpenShift repository will also trigger a deployment; however, this behavior can be changed. See Chapter 9 to learn how.
As we can see from the console output, when code is pushed to OpenShift it kicks off a build lifecycle, which has build and deployment phases. This lifecycle will differ slightly depending on the application cartridge in use, whether or not the app is scalable, and whether or not a builder cartridge such as Jenkins is included. In the case of our example app, the Python cartridge is stopped, the Git repository is cloned, a series of Python-specific processes occur to fetch dependencies and prepare the app, the resulting build is deployed, and the cartridge is restarted. You will learn more about most of these other pieces of application deployment in later chapters. In the next section we will talk about how you can write scripts to hook into various phases of the build.
Once this cycle is complete, we can visit our application URL in a browser and are now greeted with “Hello, code monkey!” (see Figure 3-1).

Action Hook Scripts
OpenShift cartridges are designed to take care of the major tasks required to build and deploy a web application. If there are actions you want to perform as part of the build lifecycle that go beyond the basics, you can include these in action hook scripts.
Action hook scripts are included as part of your application Git repository, in the .openshift/action_hooks directory. Different cartridges may support different hooks, depending on their build lifecycles; however, they should all include pre_build, build, deploy, and post_deploy, as well as pre and post hooks for the start, stop, restart, reload, and tidy actions.
To run code at a particular time in the lifecycle, place a script in the action_hooks directory with the same name as the phase when you want it to be executed. The script can be written in Shell, Python, PHP, Ruby, or any other scripting language installed in the OpenShift environment that you can reference. It does not matter what language you chose for your web application; all of these scripting environments are still available to run on your gear. The script should be executable; run the chmod x scriptname command to ensure this.
Warning
Windows users may find that permissions they set on their action hook scripts are lost when the scripts are pushed to OpenShift with Git. To fix this issue, run the command git update-index --chmod=+x .openshift/action_hooks/* and push the scripts again.
Action hook scripts need to be added and committed in Git just like any other repository file. When they are pushed to the cloud, you will see any effects as the build lifecycle runs. For example, if you delete files in the /tmp directory as part of an action hook, the git push output will echo the result of that command unless you tell your script to swallow output.
Hot-Deploying Code
When we pushed our code changes to the example application, we saw that the Python cartridge was stopped while the app was built and deployed, and then started back up again. If there had been a database cartridge installed in our application, it would have been stopped as well. This meant our application was unavailable for that time; if we had hit the URL at that moment, we would have received a 503 Service Unavailable message. In addition, for many of OpenShift’s programming languages, you do not need to stop the server to deploy new code on the server. Going through a start/stop cycle for the application server significantly slows down the deployment experience.
We want to properly insult people rather than scaring them away with server error status codes, so our next code change will be to add a marker file to tell the platform to hot deploy the code. This signals that OpenShift should deploy new application versions without restarting the server. The hot deployment option is available on most of the core OpenShift application cartridges; the JBoss, Tomcat, PHP, Zend, Perl, Ruby, and Python cartridges all support this. (See Using Marker Files for more information about marker files.) Enabling hot deployment is as simple as creating an empty file named hot_deploy in the .openshift/markers directory, adding it to the local repository with git add, doing a git commit, and then finally executing a git push:
[me@localhost ~/insultapp]$ touch .openshift/markers/hot_deploy
[me@localhost ~/insultapp]$ git add .openshift/markers/hot_deploy
[me@localhost ~/insultapp]$ git commit -m "Changing application to hot deploy"
Warning
There are times when you want the server to be stopped and then started again, such as when making changes to server.xml in a Java application: you need the application server to restart in order to pick up the changes. There might also be times when you believe a bug in the code you are deploying or running has crashed the application server. Please remember to remove or rename the hot_deploy file, git add, git commit, and then git push in this situation. This is a sometimes-forgotten problem that has bitten at least one of your gentle authors more than once.
Our app is looking pretty good now, but a single canned insult will get old fast. We will make things more entertaining by adding some randomization, Elizabethan style. There is a list of insulting Shakespearean words that has been floating around the Internet practically since it was a twinkle in someone’s eye (no, not Al Gore). There are two columns of adjectives and one column of nouns; the idea is to combine one word from each column. Our next step is to gather a few insulting words and add a wsgi/insulter.py file to encapsulate the serious business logic of contempt:
fromrandomimportchoicedefinsult():return"Thou "+generate_insult()+"!"defnamed_insult(name):returnname+", thou "+generate_insult()+"!"defgenerate_insult():first_adjs=["artless","bawdy","beslubbering","bootless","churlish"]second_adjs=["base-court","bat-fowling","beef-witted","beetle-headed","boil-brained"]nouns=["apple-john","baggage","barnacle","bladder","boar-pig"]returnchoice(first_adjs)+" "+choice(second_adjs)+" "+choice(nouns)
We use the choice function in the random module to select a random element in the Python lists, such as first_adjs. Next, we change the code in wsgi/routes.py to make use of our new functions:
importosfromflaskimportFlaskimportinsulterapp=Flask(__name__)# Keeps Flask from swallowing error messagesapp.config['PROPAGATE_EXCEPTIONS']=True@app.route("/")definsult():returninsulter.insult()@app.route("/<name>")definsult_name(name):returninsulter.named_insult(name)if__name__=="__main__":app.run()
Notice we import the insulter module (the file named insulter.py) and then use the two insult-constructing functions to generate our insults. You can also see that in the second @app.route we are grabbing any text after the / and making it available to the function insult_name as a parameter called name. We added this function for cases when only a personalized insult will do.
We add and commit those changes to the Git repository, and then the final step is to git push our latest two commits. The output from OpenShift shows that the server has not been stopped and restarted because hot deployment is enabled:
remote: Not stopping cartridge python because hot deploy is enabled
...
remote: Not starting cartridge python because hot deploy is enabled
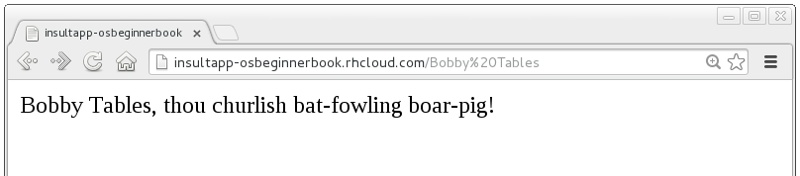
Once the new code has hit the cloud, we can refresh the app for some random Shakespearean insult fun (see Figure 3-2).
In this chapter we showed how to modify OpenShift application starter code, spicing up our Python demo app with logic to insult its users. We achieved this with Git commands including add, status, commit, push, and, with the help of RHC, clone. We also explained how we can add custom scripts to the application lifecycle with action hooks, and how to use a marker file to configure an app to hot deploy.