So far, we have learned to write functional JavaScript code and to appreciate the modularity, reusability, and simplicity it brings to your applications. We have seen concepts like composition, filters, map, reduce, and other features such as async, await, and pipes. Nonetheless, we have not combined these features together to build a reusable library. That is something we are going to learn in this chapter. In this chapter we build a complete library that will be helpful in building applications, just like React or HyperApp (https://hyperapp.js.org). This chapter is dedicated towards building applications instead of just functions. We will build two HTML applications using functional JavaScript programming concepts we have learned so far. We will learn how to build an application with central storage, render a user interface (UI) using declarative syntax, and wire up events using our custom library. We are going to build a tiny JavaScript library that will be capable of rendering HTML applications with behavior. In the next chapter we will learn to write unit tests for the library we build in this chapter.
Before we start building a library, we need to understand a very important concept in JavaScript called immutability.
Once you check out the code, please check out branch chap11:
git checkout -b chap11 origin/chap11
Open the command prompt as administrator, navigate to the folder that contains package.json, and run
npm install
to download the packages required for the code to run.
Immutability
JavaScript functions act on data, which are typically stored in variables like strings, arrays, or objects. The state of data is usually defined as the value of the variable at any given point in time. For example:
let x = 5; // the state of x is 5 here
let y = x; // the state of y is same as that of x
y = x * 2; // we are altering the state of y
console.log('x = ' + x); // prints: x=5; x is intact, pretty simple
console.log('y = ' + y); // prints: y=10
Now consider string data type:
let x = 'Hello'; // the state of x is Hello here
let y = x; // the state of y is same as x
x = x + ' World'; // altering the state of x
console.log('x = ' + x); // prints: x = Hello World
console.log('y = ' + y); // prints: y = y = Hello ; Value of y is intact
So, to conclude JavaScript numbers and strings are immutable. The state of these variable types cannot be altered after it is created. That is not the case with objects and arrays, however. Consider this example:
let x = { foo : 'Hello' };
let y = x; // the state of y should be the same as x
x.foo += ' World'; // altering the state of x
console.log('x = ' + x.foo); // prints: x = Hello World
console.log('y = ' + y.foo); // prints: y = Hello World; y is also impacted
JavaScript objects and arrays are mutable, and the state of a mutable object can be modified after creation.
Note
This also implies that equality is not a reliable operator for mutable objects because changing a value in one place will update all references.
If you would like to enforce immutability onto JavaScript objects, it is possible by using Object.freeze. Freeze makes the object read-only. For example, consider this code:
let x = { foo : 'Hello' };
let y = x;
Object.freeze(x);
// y.foo += ' World';
// uncommenting the above line will throw an error, both x and y are made read-only.
console.log('x = ' + x.foo);
console.log('y = ' + y.foo);
To summarize, Table 11-1 differentiates the mutable and immutable types in JavaScript.
Table 11-1
Data Types in JavaScript
Immutable Types
Mutable Types
Numbers, strings
Objects, arrays
Immutability is a very important concept for building modular JavaScript libraries that can be reused across projects. An application’s life cycle is driven by its state, and JavaScript applications store state mostly in mutable objects. To predict the state of an application at any given point in time is critical.
In the next section we build a library that can be used as a predictable state container. In this library we use immutability and various functional programming concepts we have learned earlier.
Building a Simple Redux Library
Redux is a library that is inspired by popular single application architectues like Flux, CQRS, and Event Sourcing. Redux helps you centralize the application state and helps you build a predictable state pattern. Before understanding what Redux is, let us try to understand how state is handled in few popular JavaScript frameworks. Let us take Angular as an example. Angular applications rely on the Document Object Model (DOM) to store state, the data is bound to UI components called views (or DOM), the views represent the model, and in turn model changes can update the views. When the application scales horizontally over time as you add new features, it becomes highly challenging to predict the cascading effect of state change. At any given point in time the state can be changed by any component in the application or another model, which makes it extremely unpredictable to determine when and what has caused the application state to change. React, on the other hand, works using virtualized DOM. Given any state, a React application creates a virtual DOM and can then render the virtual DOM.
Redux is a framework-agnostic state library. It can be used with Angular, React, or any other application. Redux is built to address the common problems with application state and how they are influenced by models and views. Redux is inspired by Flux, an application architecture introduced by Facebook. Redux uses a unidirectional flow of data. The following are the design principles of Redux.
Single source of truth: The application has a central state.
State is read-only: Special events called actions describe the state change.
Changes are made by pure functions: Actions are consumed by reducers, and reducers are pure functions that can be invoked when user action is identified. Only one change takes place at a time.
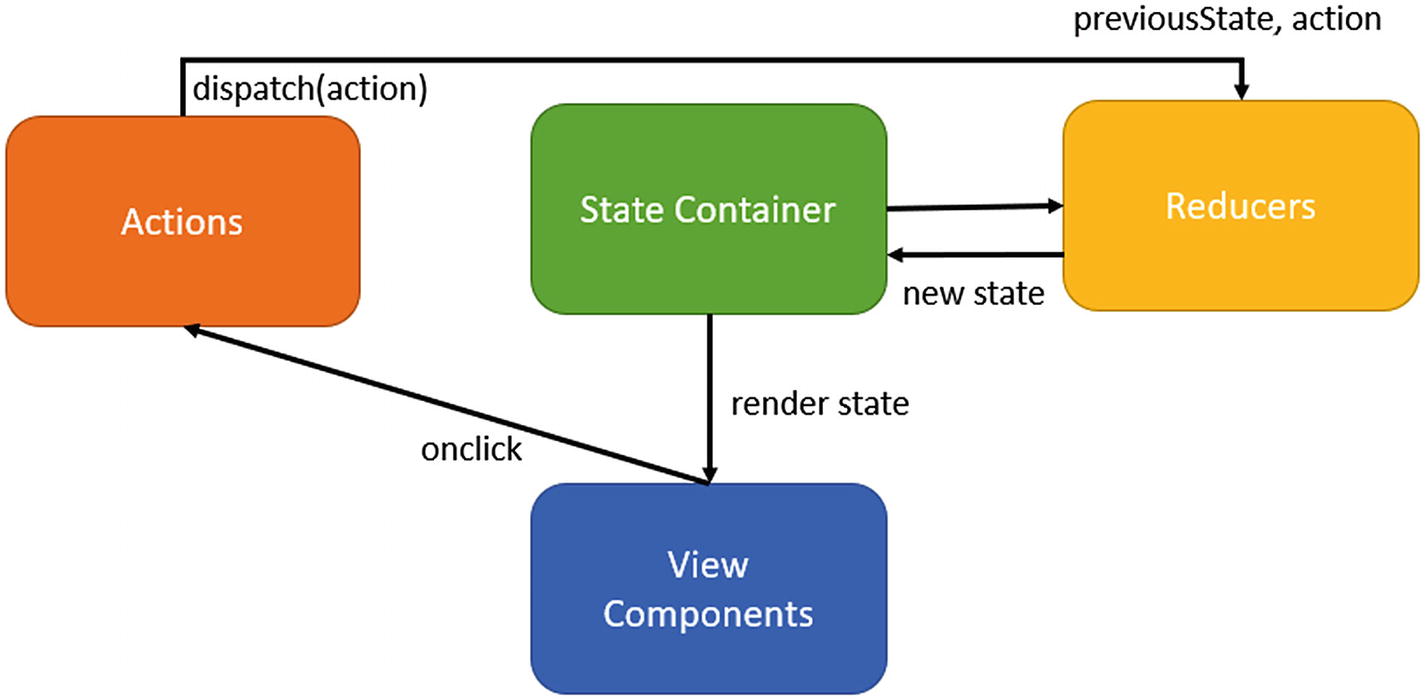
The key feature of Redux is that there is a single source of truth (state). The state is inherently read-only, so the only way to change the state is to emit an action describing what happened. The action is consumed by the reducer and a new state is created, which in turn triggers a DOM update. The actions can be stored and replayed, which allows us to do things like time travel debugging. If you’re still confused, do not worry; read on as the pattern is unveiled and becomes simpler when we start implementing it using what we have learned so far.
Figure 11-1 shows how Redux implements predictable state container.
Figure 11-1
Redux implementation of a state container
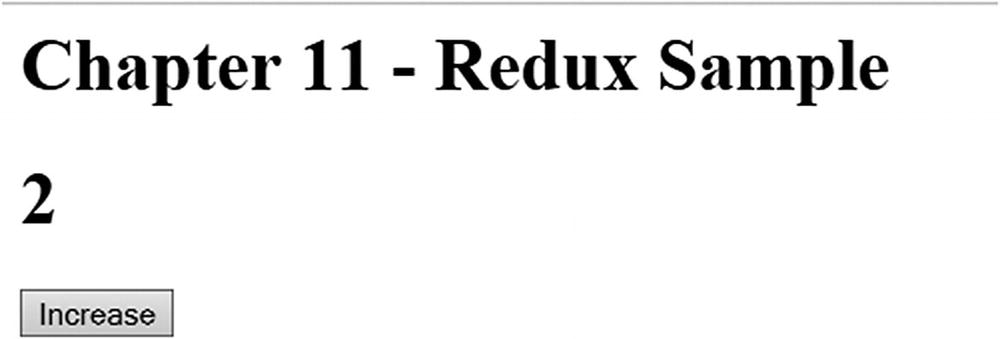
Figure 11-2
Example using our redux library
The key ingredients of Redux are reducers, actions, and state. With this context, let’s start building our own Redux library.
Note
The Redux library we build here is not production ready; rather, the Redux example is used to demonstrate the power of functional JavaScript programming.
Create a new folder for the Redux library and create a new file called redux.js that will host our library. Copy and paste the code from the following sections into this file. You can use any JavaScript editor of your choice; for example, VS Code. The first and most important part of our Redux library is state. Let’s declare a simple state with one property called counter.
let initialState = {counter: 0};
The next key ingredient is reducer, the only function that can alter the state. A reducer takes two inputs: the current state and an action that acts on the current state and creates a new state. The following function acts as reducer in our library:
function reducer(state, action) {
if (action.type === 'INCREMENT') {
state = Object.assign({}, state, {counter: state.counter + 1})
}
return state;
}
In Chapter 4 we discussed the usage of Object.assign for creating new state by merging old states. This method is very helpful when you want to get around the mutability. The reducer function is responsible for creating a new state without altering the current state. You can see how we have used object.assign to achive this: object.assign is used to create a new state by merging two states into one, without affecting the state object.
The action is dispatched by a user interaction; in our example it is a simple button click as shown here.
When the user clicks a button with Id button the incrementCounter is invoked. Here is the code for incrementCounter:
function incrementCounter() {
store.dispatch({
type: 'INCREMENT'
});
}
What is store? store is the main function that encapsulates behaviors that cause the state to change, invokes listeners for state change like UI, and registers listeners for the actions. A default listener in our case is the view renderer. The following function elaborates how a store looks.
The following code shows how the listener is subscribed using the subscribe method.
store.subscribe(function() {
render(store.getState());
});
This code is used to bootstrap the application:
let store = createStore(reducer, initialState);
function loadRedux(){
// Render the initial state
render(store.getState());
}
It is time to plug our Redux library into an application, create a new file called index.html under the same folder, and paste in the following code.
<html>
<head>
<h1>Chapter 11 - Redux Sample</h1>
</head>
<body>
<h1 id="counter">-</h1>
<button id="button">Increase</button>
<script src="./redux.js"></script>
</body>
</html>
The function loadRedux is invoked on page load. Let us understand the life cycle of our application.
1.
On load: Redux store object is created and listener is registered using store.subscribe. The onclick event is also registered to call the reducer.
2.
On click: The dispatcher is invoked, which creates a new state and invokes the listener.
3.
On render: The listener (render function) gets the updated state and renders the new view.
This cycle continues until the application is unloaded or destroyed. You can either open index.html in a new file or update package.json with the following code (to see the details of the full package.json, check out the branch mentioned at the beginning of the chapter).
To run the application you can run this command, which opens index.html in the browser:
npm run start
Notice that each action performed on the UI is stored in the Redux store, which adds tremendous value to our project. If you want to know the reason for the current state of the application, just traverse through all actions performed on the initial state and replay them; this feature is also called time traveling. This pattern also helps you undo or redo a state change at any point in time. For example, you might want the user to make some changes in the UI but only commit them based on certain validation. If the validation fails you can easily undo the state. Redux can also be used with non-UI applications; remember, it is a state container with time travel capabilities. If you want to know more about Redux, visit https://redux.js.org/.
Building a Framework Like HyperApp
Frameworks help reduce development time by allowing us to build on something that already exists and to develop applications within less time. The most common assumption with frameworks is that all the common concerns like caching, garbage collection, state management, and DOM rendering (applicable to UI frameworks only) are addressed. It would be like reinventing the wheel if you start to build an application without any of these frameworks. However, most of the frameworks available in the market to build a single-page UI application suffer from a common problem: bundle size. Table 11-2 provides the gzipped bundle size of most popular modern JavaScript frameworks.
HyperApp, on the other hand, Promises to be the thinnest JavaScript framework available to build UI applications. The gzipped version of HyperApp is 1 KB. Why are we talking about a library that is already built? The idea behind this section is not to introduce or to build applications with HyperApp. HyperApp builds on top of functional programming concepts like immutability, closures, higher order functions, and so on. That’s the primary reason we are learning to build a Hyper-App-like library.
Because HyperApp needs JSX (JavaScript Extension) syntax to be parsed, and so on, we will learn what Virtual Dom and JSX are in the upcoming sections.
Virtual DOM
DOM is a universally accepted language to represent documents like HTML. Each node in an HTML DOM represents an element in an HTML document. For example:
<div>
<h1>Hello, Alice </h1>
<h2>Logged in Date: 16th June 2018</h2>
</div>
JavaScript frameworks used to build UI applications intend to build and interact with DOM in a most efficient way. Angular, for example, uses a component-based approach. An application built using Angular contains multiple components, each storing part of the applicaion state locally at the component level. The state is mutable, and every state change rerenders the view, and any user interaction can update the state. For example, the preceding HTML DOM can be written in Angular as shown here:
<div>
<h1>Hello, {{username}} </h1> ➔ Component 1
<h2>Logged in Date: {{dateTime}}</h2> ➔ Component 2
</div>
The variables username and dateTime are stored on the component. Unfortunately, DOM manipulations are costly. Although this is a very popular model, it has various caveats, and here are a few.
1.
The state is not central: The application’s state is locally stored in components and passed across components, resulting in uncertainty of overall state and its transition at any given point in time.
2.
Direct DOM manipulation: Every state change triggers a DOM update, so in a large application with 50 or more controls on a page the impact on the performance is pretty evident.
To solve these problems we would need a JavaScript framework that can centralize storage and reduce DOM manipulations. In the previous section we learned about Redux, which can be used to build a central predictable state container. The DOM manipulations can be reduced by using Virtual DOM.
Virtual DOM is an in-memory representation of DOM using JSON. The DOM operations are done on the in-memory representation before they are applied to the actual DOM. Based on the framework, the representation of DOM varies. The HyperApp library we discussed earlier uses Virtual DOM to detect the changes during state change and only re-creates the delta DOM, which leads to an increase in the overall efficiency of the application. The following is a sample representation of DOM used by HyperApp.
{
name: "div",
props: {
id: "app"
},
children: [{
name: "h1",
props: null,
children: ["Hello, Alice"]
}]
}
Virtual DOM is heavily used in the React framework, which uses JSX to represent DOM.
JSX
JSX is a syntax extension of JavaScript that can be used to represent DOM. Here is an example of JSX:
const username = "Alice"
const h1 = <h1>Hello, {username}</h1>; //HTML DOM embedded in JS
React heavily uses JSX but it can live without it, too. You can put any valid JavaScript expression into the JSX expression like calling a function as shown next.
We will not be delving into JSX concepts; the idea behind introducing JSX and Virtual DOM is to familiarize you with the concepts. To learn more about JSX please visit https://reactjs.org/docs/introducing-jsx.html.
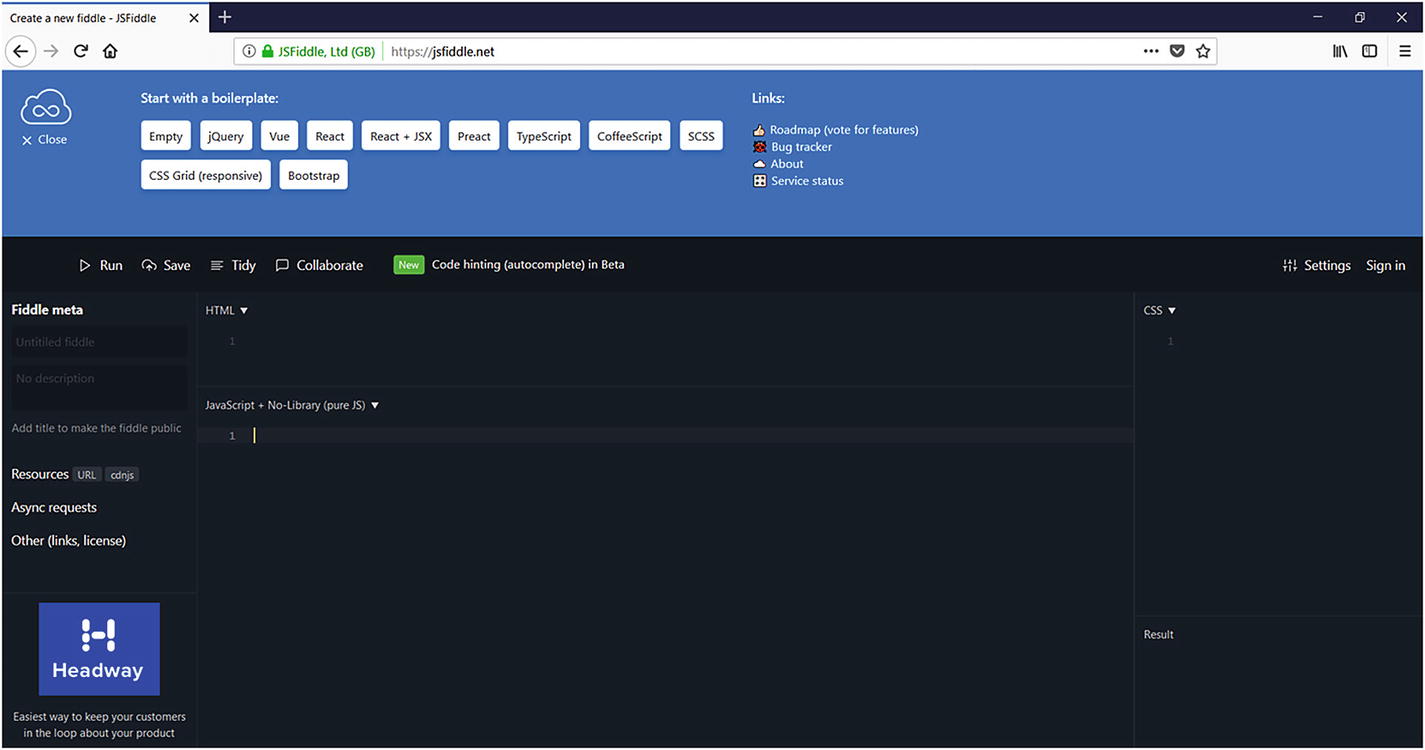
JS Fiddle
In all the previous chapters we have executed code from our development machines. In this section we introduce an online code editor and compiler called JS Fiddle (https://jsfiddle.net). JS Fiddle can be used to code, debug, and collaborate over HTML, JavaScript, and Cascading Style Sheets (CSS)-based applications. JS Fiddle contains ready-to-use templates and it supports multiple languages, frameworks, and extensions. JS Fiddle is the best tool to use if you’re planning to do quick and dirty POCs (Proof of Concepts) or learn something interesting as in this book. It allows you to save work online and work from anywhere, relieving us from the need to set up an appropriate development environment for any new combination of language, compiler, and library.
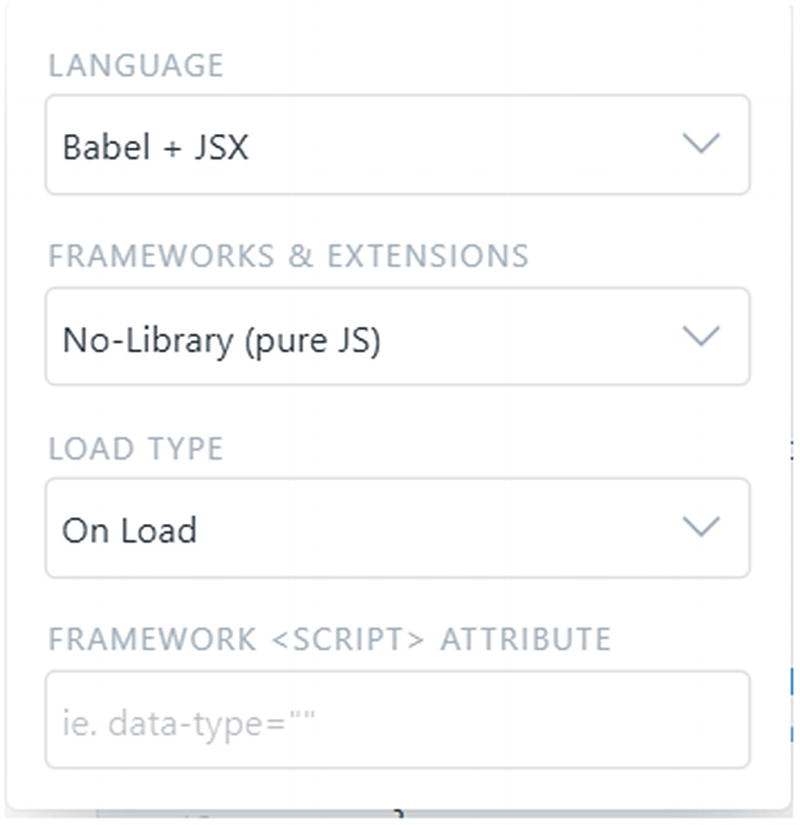
Let us start building our library by creating a new JS Fiddle. Click Save on the top ribbon anytime you wish you save the code. As shown in Figure 11-4, in the Language drop-down list box, select Babel + JSX. In the Frameworks & Extensions drop-down list box, select No-Library (Pure JS). Selecting the right combination of language and framework is very important for the library to compile.
Figure 11-4
The below image shows Framework and Exteions selection for this code sample
Our library consists of three main components: state, view, and actions (like HyperApp). The following function acts as a bootstrap for our library. Paste this code into the JavaScript + No-Library (Pure JS) code section.
changeText : state => ({changeText : "Date: " + new Date().toString()})
}
})
}
The state here is a simple object.
state : {
count : 5,
changeText : "Date: " + new Date().toString()
}
The actions do not change the state directly, but return a new state every time the action is called. The functions down, up, and changeText act on the state object passed as a parameter and return a new state object.
actions: {
down: state => ({ count: state.count - 1 }),
up: state => ({ count: state.count + 1 }),
changeText : state => ({changeText : "Date: " + new Date().toString()})
}
The view uses JSX syntax representing a Virtual DOM. The DOM elements are bound to the state object and the events are registered to the actions.
The app function shown here is the crux of our library, which accepts state, view, and actions as a single JavaScript object and renders the actual DOM. Copy the following code into the JavaScript + No-Library (Pure JS) section.
function app(props){
let appView = props.view;
let appState = props.state;
let appActions = createActions({}, props.actions)
let firstRender = false;
let node = h("p",{},"")
}
The function h is inspired from HyperApp, which creates a JavaScript object representation of DOM. This function is basically responsible for creating an in-memory representation of the DOM that is rendered when the state changes. The following function, when called during pageLoad, creates an empty <p></p> node. Copy this code into the JavaScript + No-Library (Pure JS) section.
Please note that for the JSX to call our h function, we would have left the following comment:
/** @jsx h */
This is read by the JSX parser and the h function is called.
The app function contains various child functions that are explained in the sections that follow. These functions are built using functional programming concepts we have already learned. Each function accepts an input, acts on it, and returns a new state. The transformer (i.e., h function) receives tags and properties. This function is invoked by the JSX parser, typically once they parse the JSX and send across the tag and properties as arguments. If we look closely at the h function, it uses the fundamental functional programming paradigm, recursion. It recursively builds the tree structure of DOM in JavaScript data type.
For example, calling h('buttons', props) where props is an object carrying other properties attached to the tag like onclick function, the function h would return a JSON equivalent as shown here.
{
children:["Increase"]
generatedId:1
props:{onclick: ƒ}
tag:"button"
}
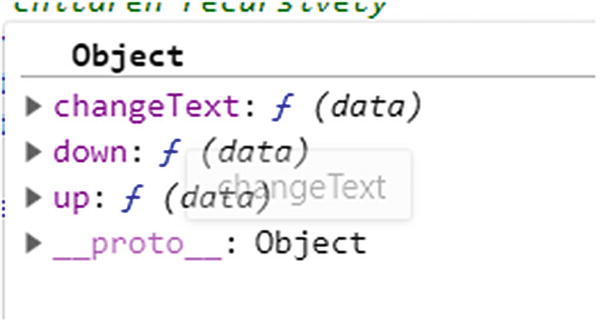
CreateActions
The createActions function creates an array of functions, one each for action. The actions object is passed in as a parameter as shown earlier. Notice the usage of Object.Keys, closures, and the map function here. Each object within the actions array is a function that can be identified by its name. Each such function has access to the parent’s variable scope (withActions), a closure. The closure when executed retains the values in the parent scope even though the function createAction has exited the execution context. The name of the function here in our example is up, down, and changeText.
The patch function is responsible for creating HTML nodes in recursion; for example, when patch receives the virtual DOM object, it creates the HTML equivalent of the node recursively.
function patch(node,newNode) {
if (typeof newNode === "string") {
let element = document.createTextNode(newNode)
} else {
let element = document.createElement(newNode.tag);
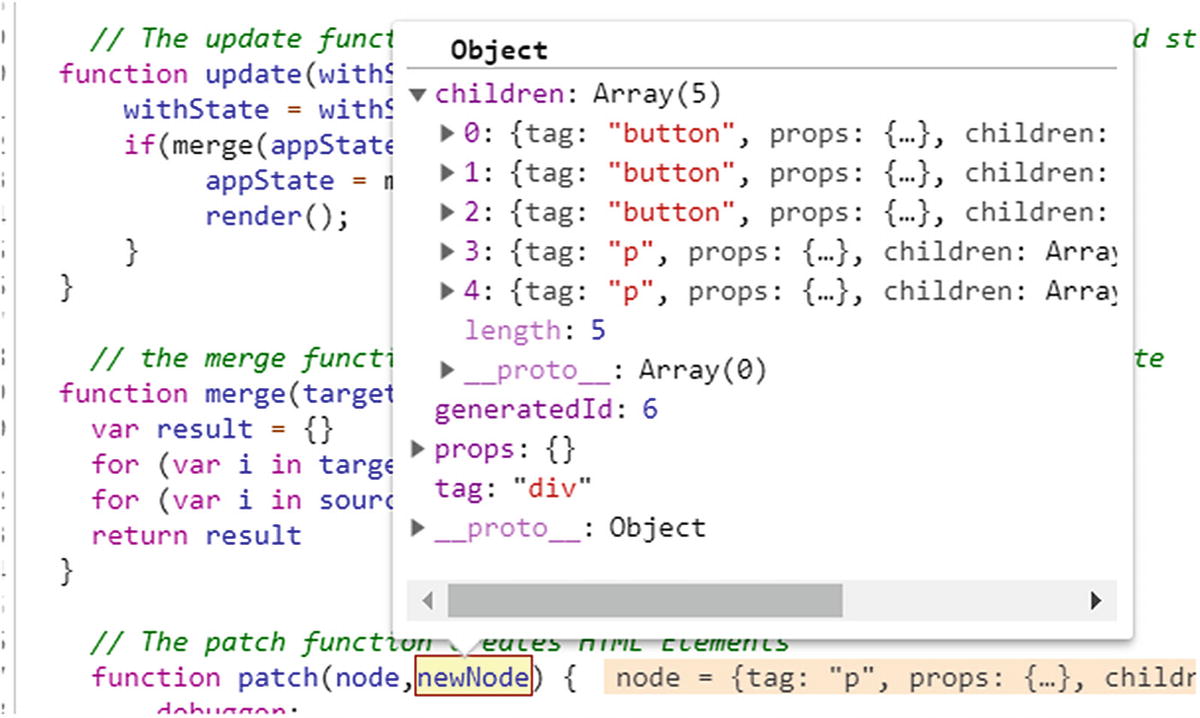
The update function is a higher order function responsible for updating the old state with a new state and rerendering the application. The update function is invoked when the user invokes an action like clicking any of the buttons shown in Figure 11-7.
Figure 11-7
The below image shows the final UI for this example
The update function receives a function as an argument; for example, up, down, or changeText, which makes it a higher order function. This gives us the benefit of adding dynamic behavior to the application. How? The update function is not aware of the argument with state until runtime, which leaves the app behavior to be decided during runtime based on what argument is passed. If up gets passed, the state is incremented; if down is passed, it is decremented. So much functionality with less code is the power of functional programming.
The current state of the application is passed on to your actions (example, up, down). Actions fundamentally follows the functional paradigm by returning a new state altogether. (Yes, HyperApp strictly follows the concepts of Redux, which in turn is fundamentally based on functional programming concepts.) This is done by the merge function. Once we get a new state, we will call the render function, as shown here.
function update(withState) {
withState = withState(appState)
if(merge(appState,withState)){
appState = merge(appState,withState)
render();
}
}
Merge
The merge function is a simple function that ensures the new state is merged with the old state.
function merge(target, source) {
let result = {}
for (let i in target) { result[i] = target[i] }
for (let i in source) { result[i] = source[i] }
return result
}
As you can see, where the state is altered, a new state that contains the old state and the state that has changed is created and altered. For example, if you invoke the Increase action, the merge ensures only the count property is updated. If you look closely, the merge function very closely resembles what Object.assign does; that is, it creates a new state from any given state by not affecting the given states. Hence we can also rewrite the merge function as shown here.
function merge(target, source) {
let result = {}
Object.assign(result, target, source)
return result
}
That’s the power of ES8 syntax.
Remove
The following functions are used to remove the children from the real DOM.
// remove element
function removeElement(parent, element, node) {
function done() {
parent.removeChild(removeChildren(element, node))
}
let cb = node.attributes && node.attributes.onremove
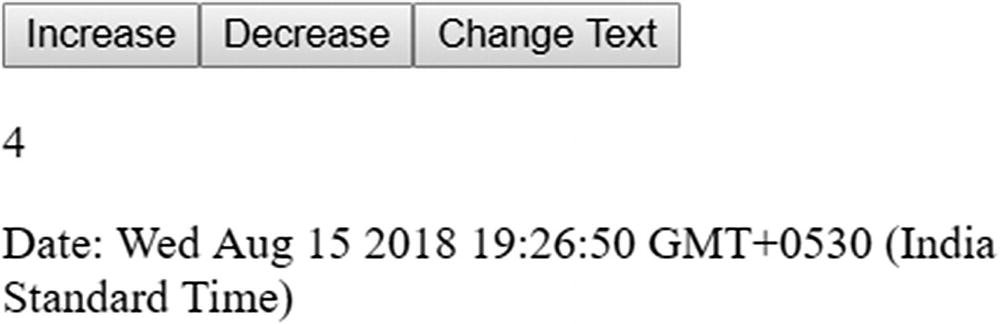
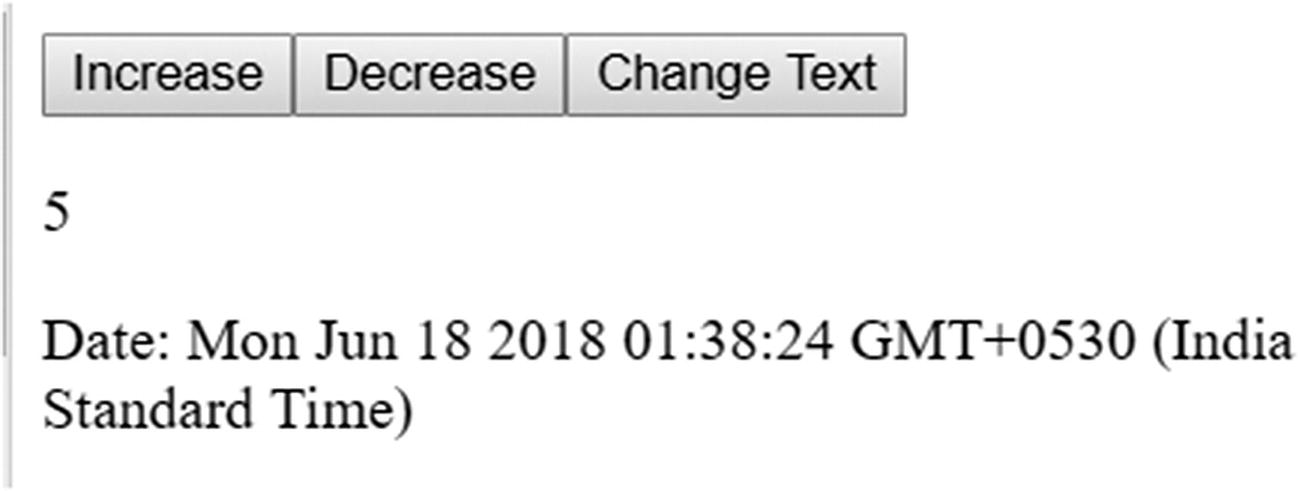
The UI of the application looks like Figure 11-8. Increase, Decrease, and ChangeText are the actions, the number is 5, and Date is the state.
Figure 11-8
The below image shows the final UI for this example
The source code of the library is available under hyperapp.js of the checkout branch. You can copy paste it into a new JS Fiddle to create the application (remember to select the correct language as explained earlier). You can also fork from my JS Fiddle at https://jsfiddle.net/vishwanathsrikanth/akhbj9r8/70/.
With this, we are finished building our second library. Clearly our library is much smaller than 1 KB, yet it is capable of building interactive web apps. Both the libraries that we built are based only on functions. All these functions work only on the input, rather than on global state. Functions use concepts like higher order functions to make the system easier to maintain. We see how each function receives input on time and works only with that input, returning a new state or function. We reused many higher order functions like map, each, assign, and so on. This shows how well-defined functions can be reused within our code base.
Also, both of these codes are taken from Redux and HyperApp (with tweaking of course), but you can see how popular libraries can be built by just following the functional concepts. It’s all about functions at the end of the day!
Try to build more libraries like these using the functional JavaScript concepts explained in this book.
Summary
In this chapter we learned to use functional JavaScript concepts to build a library. We have learned how distributed state will disrupt the application’s maintainability and predictability over time and how Redux-like frameworks can help us centralize state. Redux is a state container with a centralized read-only state; the state change is only allowed by reducers by passing actions and the old state. We also built a Redux-like library and an HTML application using functional JavaScript concepts. We learned about Virtual DOM and how it helps reduce DOM manipulations, and JSX syntax that can be used to represent DOM in JavaScript files. JSX and Virtual DOM concepts are used in building a library like HyperApp, the thinnest library available to build single-page applications.