New Features and Good Practices
Copyright © 2015 Josh Lockhart. All rights reserved.
Printed in the United States of America.
Published by O’Reilly Media, Inc., 1005 Gravenstein Highway North, Sebastopol, CA 95472.
O’Reilly books may be purchased for educational, business, or sales promotional use. Online editions are also available for most titles (http://safaribooksonline.com). For more information, contact our corporate/institutional sales department: 800-998-9938 or corporate@oreilly.com.
See http://oreilly.com/catalog/errata.csp?isbn=9781491905012 for release details.
The O’Reilly logo is a registered trademark of O’Reilly Media, Inc. Modern PHP, the cover image, and related trade dress are trademarks of O’Reilly Media, Inc.
While the publisher and the author have used good faith efforts to ensure that the information and instructions contained in this work are accurate, the publisher and the author disclaim all responsibility for errors or omissions, including without limitation responsibility for damages resulting from the use of or reliance on this work. Use of the information and instructions contained in this work is at your own risk. If any code samples or other technology this work contains or describes is subject to open source licenses or the intellectual property rights of others, it is your responsibility to ensure that your use thereof complies with such licenses and/or rights.
978-1-491-90501-2
[LSI]
For Laurel
There are a million PHP tutorials online. Most of these tutorials are outdated and demonstrate obsolete practices. Unfortunately, these tutorials are still referenced today thanks to their Google immortality. Outdated information is dangerous to unaware PHP programmers who unknowingly create slow and insecure PHP applications. I recognized this issue in 2013, and it is the primary reason I began PHP The Right Way, a community initiative to provide PHP programmers easy access to high-quality and up-to-date information from authoritative members of the PHP community.
Modern PHP is my next endeavor toward the same goal. This book is not a reference manual. Nope. This book is a friendly and fun conversation between you and me. I’ll introduce you to the modern PHP programming language. I’ll show you the latest PHP techniques that I use every day at work and on my open source projects. And I’ll help you use the latest coding standards so you can share your PHP components and libraries with the PHP community.
You’ll hear me say “community” over and over (and over). The PHP community is friendly and helpful and welcoming—although not without occasional drama. If you become curious about a specific feature mentioned in this book, reach out to your local PHP user group with questions. I guarantee you there are nearby PHP developers who would love to help you become a better PHP programmer. Your local PHP user group is an invaluable resource as you continue to improve your PHP skills long after you finish this book.
Before we get started, I want to set a few expectations. First, it is impossible for me to cover every way to use PHP. There isn’t enough time. Instead, I will show you how I use PHP. Yes, this is an opinionated approach, but I use the very same practices and standards adopted by many other PHP developers. What you take away from our brief conversation will be immediately applicable in your own projects.
Second, I assume you are familiar with variables, conditionals, loops, and so on; you don’t have to know PHP, but you should at least bring a basic understanding of these fundamental programming concepts. You can also bring coffee (I love coffee). I’ll supply everything else.
Third, I do not assume you are using a specific operating system. However, my code examples are written for Linux. Bash commands are provided for Ubuntu and CentOS and may also work on OS X. If you use Windows, I highly recommend you spin up a Linux virtual machine so you can run the example code in this book.
Part I demonstrates new PHP features like namespaces, generators, and traits. It introduces you to the modern PHP language, and it exposes you to features you may not have known about until now.
Part II explores good practices that you should implement in your PHP applications. Have you heard the term PSR, but you’re not entirely sure what it is or how to use it? Do you want to learn how to sanitize user input and use safe database queries? This chapter is for you.
Part III is more technical than the first two parts. It demonstrates how to deploy, tune, test, and profile PHP applications. We dive into deployment strategies with Capistrano. We talk about testing tools like PHPUnit and Travis CI. And we explore how to tune PHP so it performs as well as possible for your application.
Appendix A provides step-by-step instructions for installing and configuring PHP-FPM on your machine.
Appendix B explains how to build a local development environment that closely matches your production server. We explore Vagrant, Puppet, Chef, and alternative tools to help you get started quickly.
The following typographical conventions are used in this book:
Indicates new terms, URLs, email addresses, filenames, and file extensions.
Constant widthUsed for program listings, as well as within paragraphs to refer to program elements such as variable or function names, databases, data types, environment variables, statements, and keywords.
Constant width boldShows commands or other text that should be typed literally by the user.
Constant width italicShows text that should be replaced with user-supplied values or by values determined by context.
This element signifies a tip or suggestion.
This element signifies a general note.
This element indicates a warning or caution.
Supplemental material (code examples, exercises, etc.) is available for download at https://github.com/codeguy/modern-php.
This book is here to help you get your job done. In general, if example code is offered with this book, you may use it in your programs and documentation. You do not need to contact us for permission unless you’re reproducing a significant portion of the code. For example, writing a program that uses several chunks of code from this book does not require permission. Selling or distributing a CD-ROM of examples from O’Reilly books does require permission. Answering a question by citing this book and quoting example code does not require permission. Incorporating a significant amount of example code from this book into your product’s documentation does require permission.
We appreciate, but do not require, attribution. An attribution usually includes the title, author, publisher, and ISBN. For example: “Modern PHP by Josh Lockhart (O’Reilly). Copyright 2015 Josh Lockhart, 978-1-491-90501-2.”
If you feel your use of code examples falls outside fair use or the permission given above, feel free to contact us at permissions@oreilly.com.
Safari Books Online is an on-demand digital library that delivers expert content in both book and video form from the world’s leading authors in technology and business.
Technology professionals, software developers, web designers, and business and creative professionals use Safari Books Online as their primary resource for research, problem solving, learning, and certification training.
Safari Books Online offers a range of plans and pricing for enterprise, government, education, and individuals.
Members have access to thousands of books, training videos, and prepublication manuscripts in one fully searchable database from publishers like O’Reilly Media, Prentice Hall Professional, Addison-Wesley Professional, Microsoft Press, Sams, Que, Peachpit Press, Focal Press, Cisco Press, John Wiley & Sons, Syngress, Morgan Kaufmann, IBM Redbooks, Packt, Adobe Press, FT Press, Apress, Manning, New Riders, McGraw-Hill, Jones & Bartlett, Course Technology, and hundreds more. For more information about Safari Books Online, please visit us online.
Please address comments and questions concerning this book to the publisher:
We have a web page for this book, where we list errata, examples, and any additional information. You can access this page at http://bit.ly/modern_php.
To comment or ask technical questions about this book, send email to bookquestions@oreilly.com.
For more information about our books, courses, conferences, and news, see our website at http://www.oreilly.com.
Find us on Facebook: http://facebook.com/oreilly
Follow us on Twitter: http://twitter.com/oreillymedia
Watch us on YouTube: http://www.youtube.com/oreillymedia
This is my first book. When O’Reilly approached me about writing Modern PHP, I was equally excited and scared to death. The first thing I did was a Walter Huston dance; I mean, O’Reilly wanted me to write a book. How cool is that!? Then I asked myself can I really write that many pages? A book isn’t a quick or small task.
Of course, I immediately said “yes.” I knew I could write Modern PHP because I had family, friends, coworkers, editors, and reviewers supporting me the entire way. I want to acknowledge and thank my supporters for their invaluable feedback. Without them, this book would never have happened.
First, I want to thank my editor at O’Reilly Media—Allyson MacDonald (@allyatoreilly). Ally was nice, critical, supportive, and smart. She knew exactly how and when to gently nudge me in the right direction whenever I got off track. I can’t imagine working with a better editor.
I also want to thank my technical reviewers—Adam Fairholm (@adamfairholm) and Ed Finkler (@funkatron). Adam is a brilliant web developer at Newfangled, and he is perhaps best known for his work on IMVDb—the popular music video database. Ed is well-known throughout the PHP community for his incredible PHP skills, his personality on the /dev/hell podcast, and his commendable Open Sourcing Mental Illness campaign. Adam and Ed both pointed out everything dumb, illogical, and incorrect in my early drafts. This book is far better than anything I could write on my own thanks to their brutally honest feedback. I am forever indebted to them for their guidance and wisdom. If any faults or inaccuracies wriggled their way into the final manuscript, those faults are surely my own.
My coworkers at New Media Campaigns have been a constant source of encouragement. Joel, Clay, Kris, Alex, Patrick, Ashley, Lenny, Claire, Todd, Pascale, Henry, and Nathan—I tip my hat to all of you for your kind words of encouragement from beginning to end.
And most important, I want to thank my family—Laurel, Ethan, Tessa, Charlie, Lisa, Glenn, and Liz. Thank you for your encouragement, without which I would have never finished this book. To my lovely wife, Laurel, thank you for your patience. Thank you for accompanying me to Caribou Coffee for so many late-night writing sessions. Thank you for letting me abandon you on weekends. Thank you for keeping me motivated and on schedule. I love you now and forever.
The PHP language is experiencing a renaissance. PHP is transforming into a modern scripting language with helpful features like namespaces, traits, closures, and a built-in opcode cache. The modern PHP ecosystem is evolving, too. PHP developers rely less on monolithic frameworks and more on smaller specialized components. The Composer dependency manager is revolutionizing how we build PHP applications; it emancipates us from a framework’s walled garden and lets us mix and match interoperable PHP components best suited for our custom PHP applications. Component interoperability would not be possible without community standards proposed and curated by the PHP Framework Interop Group.
Modern PHP is your guide to the new PHP, and it will show you how to build and deploy amazing PHP applications using community standards, good practices, and interoperable components.
Before we explore modern PHP, it is important to understand PHP’s origin. PHP is an interpreted server-side scripting language. This means you write PHP code, upload it to a web server, and execute it with an interpreter. PHP is typically used with a web server like Apache or nginx to serve dynamic content. However, PHP can also be used to build powerful command-line applications (just like bash, Ruby, Python, and so on). Many PHP developers don’t realize this and miss out on a really exciting feature. Not you, though.
You can read the official PHP history at http://php.net/manual/history.php.php. I won’t repeat what has already been said so well by Rasmus Lerdorf (the creator of PHP). What I will tell you is that PHP has a tumultuous past. PHP began as a collection of CGI scripts written by Rasmus Lerdorf to track visits to his online resume. Lerdorf named his set of CGI scripts “Personal Home Page Tools.” This early incarnation was completely different from the PHP we know today. Lerdorf’s early PHP Tools were not a scripting language; they were tools that provided rudimentary variables and automatic form variable interpretation using an HTML embedded syntax.
Between 1994 and 1998, PHP underwent numerous revisions and even received a few ground-up rewrites. Andi Gutmans and Zeev Suraski, two developers from Tel Aviv, joined forces with Rasmus Lerdorf to transform PHP from a small collection of CGI tools into a full-fledged programming language with a more consistent syntax and basic support for object-oriented programming. They named their final product PHP 3 and released it in late 1998. The new PHP moniker was a departure from earlier names, and it is a recursive acronym for PHP: Hypertext Preprocessor. PHP 3 was the first version that most resembled the PHP we know today. It provided superior extensibility to various databases, protocols, and APIs. PHP 3’s extensibility attracted many new developers to the project. By late 1998, PHP 3 was already installed on a staggering 10% of the world’s web servers.
Today, the PHP language is quickly evolving and is supported by dozens of core team developers from around the world. Development practices have changed, too. In the past, it was common practice to write a PHP file, upload it to a production server with FTP, and hope it worked. This is a terrible development strategy, but it was necessary due to a lack of viable local development environments.
Nowadays, we eschew FTP and use version control instead. Version control software like Git helps maintain an auditable code history that can be branched, forked, and merged. Local development environments are identical to production servers thanks to virtualization tools like Vagrant and provisioning tools like Ansible, Chef, and Puppet. We leverage specialized PHP components with the Composer dependency manager. Our PHP code adheres to PSRs—community standards managed by the PHP Framework Interop Group. We thoroughly test our code with tools like PHPUnit. We deploy our applications with PHP’s FastCGI process manager behind a web server like nginx. And we increase application performance with an opcode cache.
Modern PHP encompasses many new practices that may be unfamiliar to those of you new to PHP, or to those upgrading from older PHP versions. Don’t feel overwhelmed. I’ll walk through each concept later in this book.
I’m also excited that PHP now has an official draft specification—something it lacked until 2014.
Most mature programming languages have a specification. In layman’s terms, a specification is a canonical blueprint that defines what it means to be PHP. This blueprint is used by developers who create programs that parse, interpret, and execute PHP code. It is not for developers who create applications and websites with PHP.
Sara Golemon and Facebook announced the first PHP specification draft at O’Reilly’s OSCON conference in 2014. You can read the official announcement on the PHP internals mailing list, and you can read the PHP specification on GitHub.
An official PHP language specification is becoming more important given the introduction of multiple competing PHP engines. The original PHP engine is the Zend Engine, a PHP interpreter written in C and introduced in PHP 4. The Zend Engine was created by Rasmus Lerdorf, Andi Gutmans, and Zeev Suraski. Today the Zend Engine is the Zend company’s main contribution to the PHP community. However, there is now a second major PHP engine—the HipHop Virtual Machine from Facebook. A language specification ensures that both engines maintain a baseline compatibility.
A PHP engine is a program that parses, interprets, and executes PHP code (e.g., the Zend Engine or Facebook’s HipHop Virtual Machine). This is not to be confused with PHP, which is a generic reference to the PHP language.
The Zend Engine is improving at a rapid pace with new features and improved performance. I attribute the Zend Engine’s improvements to its new competition, specifically Facebook’s HipHop Virtual Machine and Hack programming language.
Hack is a new programming language built on top of PHP. It introduces static typing, new data structures, and additional interfaces while maintaining backward compatibility with existing dynamically typed PHP code. Hack is targeted at developers who appreciate PHP’s rapid development characteristics but need the predictability and stability from static typing.
We’ll discuss dynamic versus static typing later in this book. The difference between the two is when PHP types are checked. Dynamic types are checked at runtime, whereas static types are checked at compile time. Jump ahead to Chapter 12 for more information.
The HipHop Virtual Machine (HHVM) is a PHP and Hack interpreter that uses a just in time (JIT) compiler to improve application performance and reduce memory usage.
I don’t foresee Hack and HHVM replacing the Zend Engine, but Facebook’s new contributions are creating a giant splash in the PHP community. Increasing competition has prompted the Zend Engine core team to announce PHP 7, an optimized Zend Engine said to be on par with HHVM. We’ll discuss these developments further in Chapter 12.
It’s an exciting time to be a PHP programmer. The PHP community has never been this energized, fun, and innovative. I hope this book helps you firmly embrace modern PHP practices. There are a ton of new things to learn, and many more things on the horizon. Consider this your roadmap. Now let’s get started.
The modern PHP language has many exciting new features. Many of these features will be brand new to PHP programmers upgrading from earlier versions, and they’ll be a nice surprise to programmers migrating to PHP from another language. These new features make the PHP language a powerful platform and provide a pleasant experience for building web applications and command-line tools.
Some of these features aren’t essential, but they still make our lives easier. Some features, however, are essential. Namespaces, for example, are a cornerstone of modern PHP standards and enable development practices that modern PHP developers take for granted (e.g., autoloading). I’ll introduce each new feature, explain why it is useful, and show you how to implement it in your own projects.
I encourage you to follow along on your own computer. You can find all of the text’s code examples in this book’s companion GitHub repository.
If there is one modern PHP feature I want you to know, it is namespaces. Introduced in PHP 5.3.0, namespaces are an important tool that organizes PHP code into a virtual hierarchy, comparable to your operating system’s filesystem directory structure. Each modern PHP component and framework organizes its code beneath its own globally unique vendor namespace so that it does not conflict with, or lay claim to, common class names used by other vendors.
Don’t you hate it when you walk into a coffee shop and this one obnoxious person has a mess of books, cables, and whatnot spread across several tables? Not to mention he’s sitting next to, but not using, the only available power outlet. He’s wasting valuable space that could otherwise be useful to you. Figuratively speaking, this person is not using namespaces. Don’t be this person.
Let’s see how a real-world PHP component uses namespaces. The Symfony Framework’s
own symfony/httpfoundation
is a popular PHP component that manages HTTP requests and responses. More important,
the symfony/httpfoundation component uses common PHP class names like Request,
Response, and Cookie. I guarantee you there are many other PHP components that use
these same class names. How can we use the symfony/httpfoundation PHP component if
other PHP code uses the same class names? We can safely use the symfony/httpfoundation
component precisely because its code is sandboxed beneath the unique Symfony vendor namespace.
Visit the symfony/httpfoundation component on GitHub
and navigate to the Response.php
file. It looks like Figure 2-1.
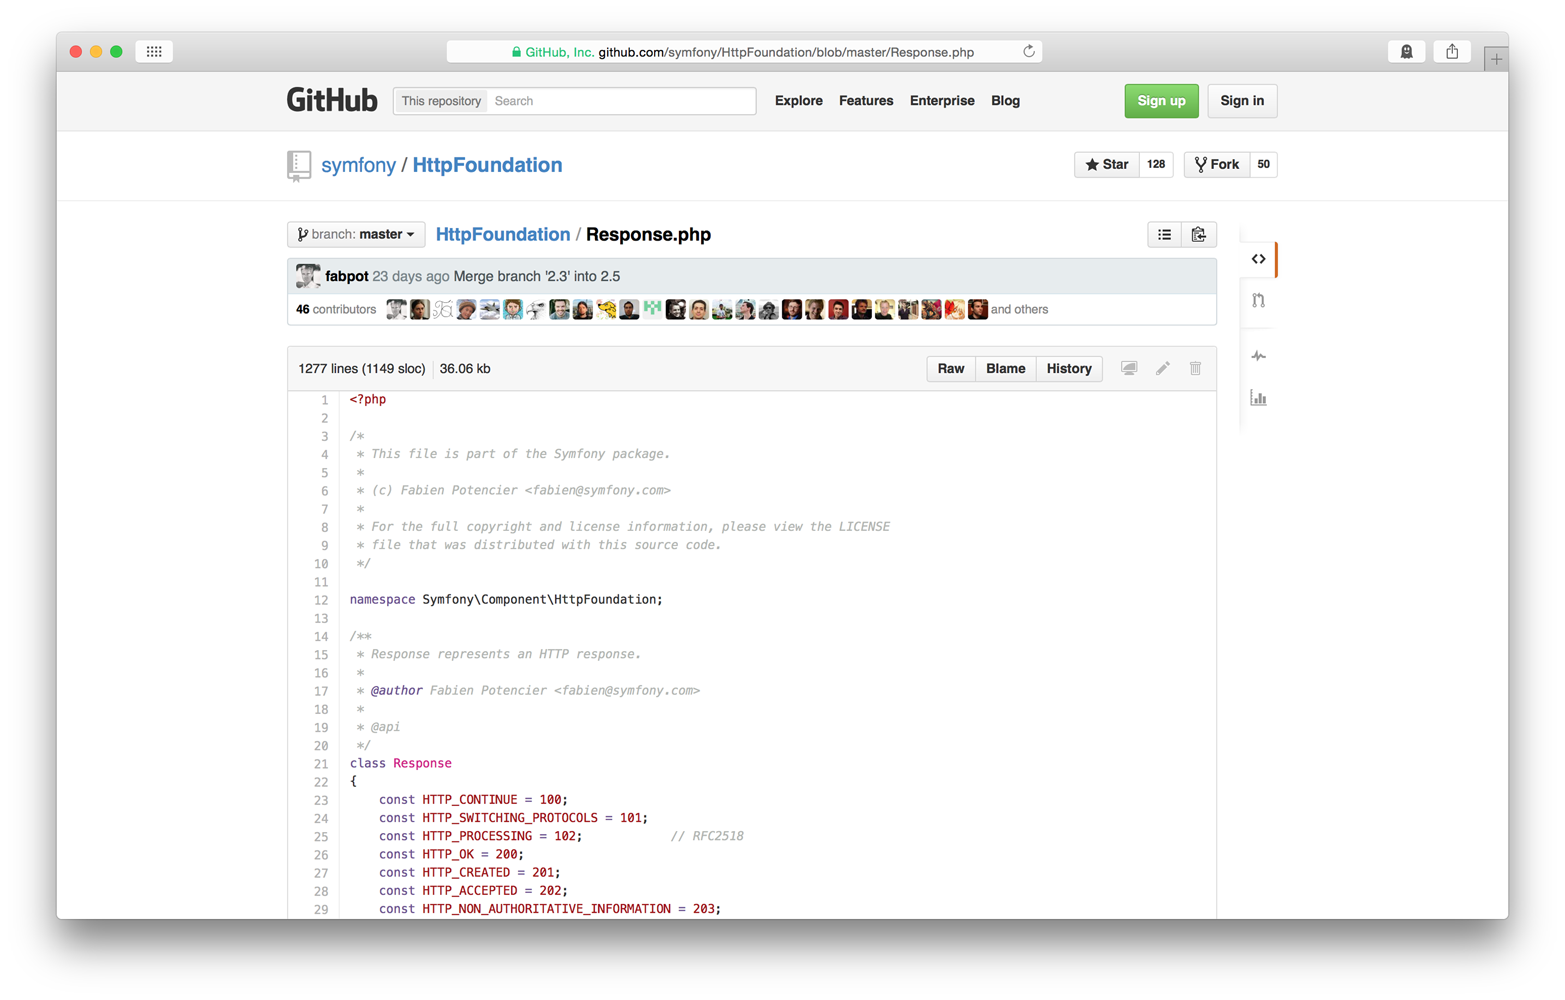
Look closely at line 12. It contains this code:
namespaceSymfony\Component\HttpFoundation;
This is a PHP namespace declaration, and it always appears on a new line immediately after the
opening <?php tag. This particular namespace declaration tells us several things.
First, we know the Response class lives beneath the Symfony vendor namespace
(the vendor namespace is the topmost namespace). We know the Response class
lives beneath the Component subnamespace. We also know the Response class
lives beneath yet another subnamespace named HttpFoundation. You can view other
files adjacent to Response.php, and you’ll see they use the
same namespace declaration. A namespace (or subnamespace) encapsulates and organizes
related PHP classes, just as a filesystem directory contains related files.
Subnamespaces are separated with a \ character.
Unlike your operating system’s physical filesystem, PHP namespaces are a virtual concept and do not necessarily map 1:1 with filesystem directories. That being said, most PHP components do, in fact, map subnamespaces to filesystem directories for compatibility with the popular PSR-4 autoloader standard (we’ll talk more about this in Chapter 3).
Technically speaking, namespaces are merely a PHP language notation referenced by the PHP interpreter to apply a common name prefix to a set of classes, interfaces, functions, and constants.
Namespaces are important because they let us create sandboxed code that works alongside other developers’ code. This is the cornerstone concept of the modern PHP component ecosystem. Component and framework authors build and distribute code for a large number of PHP developers, and they have no way of knowing or controlling what classes, interfaces, functions, and constants are used alongside their own code. This problem applies to your own in-house projects, too. If you write custom PHP components or classes for a project, that code must work alongside your project’s third-party dependencies.
As I mentioned earlier with the symfony/httpfoundation component, your
code and other developers’ code might use the same class, interface, function,
or constant names. Without namespaces, a name collision causes PHP
to fail. With namespaces, your code and other developers’ code can
use the same class, interface, function, or constant name assuming
your code lives beneath a unique vendor namespace.
If you’re building a tiny personal project with only a few dependencies, class name collisions probably won’t be an issue. But when you’re working on a team building a large project with numerous third-party dependencies, name collisions become a very real concern. You cannot control which classes, interfaces, functions, and constants are introduced into the global namespace by your project’s dependencies. This is why namespacing your code is important.
Every PHP class, interface, function, and constant lives beneath a
namespace (or subnamespace). Namespaces are declared at the top of a
PHP file on a new line immediately after the opening <?php tag.
The namespace declaration begins with namespace, then a space character,
then the namespace name, and then a closing semicolon ;
character.
Remember that namespaces are often used to establish a top-level vendor name.
This example namespace declaration establishes the Oreilly vendor name:
<?phpnamespaceOreilly;
All PHP classes, interfaces, functions, or constants declared
beneath this namespace declaration live in the Oreilly namespace and are,
in some way, related to O’Reilly Media. What if we wanted to organize code
related to this book? We use a subnamespace.
Subnamespaces are declared exactly the same as in the previous example.
The only difference is that we separate namespace and subnamespace names
with the \ character. The following example declares a subnamespace
named ModernPHP that lives beneath the topmost Oreilly vendor namespace:
<?phpnamespaceOreilly\ModernPHP;
All classes, interfaces, functions, and constants declared
beneath this namespace declaration live in the Oreilly\ModernPHP
subnamespace and are, in some way, related to this book.
All classes in the same namespace or subnamespace don’t have to be declared in the same PHP file. You can specify a namespace or subnamespace at the top of any PHP file, and that file’s code becomes a part of that namespace or subnamespace. This makes it possible to write multiple classes in separate files that belong to a common namespace.
Before we had namespaces, PHP developers solved the name collision problem with Zend-style class names. This was a class-naming scheme popularized by the Zend Framework where PHP class names used underscores in lieu of filesystem directory separators. This convention accomplished two things: it ensured class names were unique, and it enabled a naive autoloader implementation that replaced underscores in PHP class names with filesystem directory separators to determine the class file path.
For example, the PHP class Zend_Cloud_DocumentService_Adapter_WindowsAzure_Query
corresponds to the PHP file Zend/Cloud/DocumentService/Adapter/WindowsAzure/Query.php.
A side effect of the Zend-style naming convention, as you can see, is
absurdly long class names. Call me lazy, but there’s no way I’m
typing that class name more than once.
Modern PHP namespaces present a similar problem. For example, the full Response class name
in the symfony\httpfoundation component is \Symfony\Component\HttpFoundation\Response.
Fortunately, PHP lets us import and alias namespaced code.
By import, I mean that I tell PHP which namespaces, classes, interfaces, functions, and constants I will use in each PHP file. I can then use these without typing their full namespaces.
By alias, I mean that I tell PHP that I will reference an imported class, interface, function, or constant with a shorter name.
You can import and alias PHP classes, interfaces, and other namespaces as of PHP 5.3. You can import and alias PHP functions and constants as of PHP 5.6.
The code shown in Example 2-1 creates and sends a 400 Bad Request HTTP response
without importing and aliasing.
<?php$response=new\Symfony\Component\HttpFoundation\Response('Oops',400);$response->send();
This isn’t terrible, but imagine you have to instantiate a Response instance
several times in a single PHP file. Your fingers will get tired quickly.
Now look at Example 2-2. It does the same thing with importing.
<?phpuseSymfony\Component\HttpFoundation\Response;$response=newResponse('Oops',400);$response->send();
We tell PHP we intend to use the Symfony\Component\HttpFoundation\Response class
with the use keyword. We type the long, fully qualified class name once. Then we
can instantiate the Response class without using its fully namespaced class name.
How cool is that?
Some days I feel really lazy. This is a good opportunity to use an alias. Let’s
extend Example 2-2. Instead of typing Response, maybe I just want to
type Res instead. Example 2-3 shows how I can do that.
<?phpuseSymfony\Component\HttpFoundation\ResponseasRes;$r=newRes('Oops',400);$r->send();
In this example, I changed the import line to import the Response class. I also appended
as Res to the end of the import line; this tells PHP to consider Res an alias for
the Response class. If we don’t append the as Res alias to the import line, PHP
assumes a default alias that is the same as the imported class name.
You should import code with the use keyword at the top of each PHP file,
immediately after the opening <?php tag or namespace declaration.
You don’t need a leading \ character when importing code with the use
keyword because PHP assumes imported namespaces are fully qualified.
The use keyword must exist in the global scope (i.e., not inside of
a class or function) because it is used at compile time. It can, however, be
located beneath a namespace declaration to import code into another namespace.
As of PHP 5.6, it’s possible to import functions and constants. This
requires a tweak to the use keyword syntax. To import
a function, change use to use func:
<?phpusefuncNamespace\functionName;functionName();
To import a constant, change use to use constant:
<?phpuseconstantNamespace\CONST_NAME;echoCONST_NAME;
Function and constant aliases work the same as classes.
If you import multiple classes, interfaces, functions, or constants
into a single PHP file, you’ll end up with multiple use statements
at the top of your PHP file. PHP accepts a shorthand import syntax
that combines multiple use statements on a single line like this:
<?phpuseSymfony\Component\HttpFoundation\Request,Symfony\Component\HttpFoundation\Response,Symfony\Component\HttpFoundation\Cookie;
Don’t do this. It’s confusing and easy to mess up. I recommend you keep
each use statement on its own line like this:
<?phpuseSymfony\Component\HttpFoundation\Request;useSymfony\Component\HttpFoundation\Response;useSymfony\Component\HttpFoundation\Cookie;
You’ll type a few extra characters, but your code is easier to read and troubleshoot.
PHP lets you define multiple namespaces in a single PHP file like this:
<?phpnamespaceFoo{// Declare classes, interfaces, functions, and constants here}namespaceBar{// Declare classes, interfaces, functions, and constants here}
This is confusing and violates the recommended one class per file good practice. Use only one namespace per file to make your code simpler and easier to troubleshoot.
If you reference a class, interface, function, or constant without a namespace,
PHP assumes the class, interface, function, or constant lives in the current
namespace. If this assumption is wrong, PHP attempts to resolve the class, interface,
function, or constant. If you need to reference
a namespaced class, interface, function, or constant inside another namespace,
you must use the fully qualified PHP class name (namespace + class name). You
can type the fully qualified PHP class name, or you can import the code
into the current namespace with the use keyword.
Some code might not have a namespace and, therefore, lives in the global namespace.
The native Exception class is a good example. You can reference globally namespaced
code inside another namespace by prepending a \ character to the class, interface, function, or constant
name. For example, the \My\App\Foo::doSomething()
method in Example 2-4 fails because PHP searches for a \My\App\Exception
class that does not exist.
<?phpnamespaceMy\App;classFoo{publicfunctiondoSomething(){$exception=newException();}}
Instead, add a \ prefix to the Exception class name, as shown in Example 2-5. This tells PHP to look for
the Exception class in the global namespace instead of the current namespace.
<?phpnamespaceMy\App;classFoo{publicfunctiondoSomething(){thrownew\Exception();}}
Namespaces also provide the bedrock for the PSR4 autoloader standard created by the PHP Framework Interop Group (PHP-FIG). This autoloader pattern is used by most modern PHP components, and it lets us autoload project dependencies using the Composer dependency manager. We’ll talk about Composer and the PHP-FIG in Chapter 4. For now, just understand that the modern PHP ecosystem and its emerging component-based architecture would be impossible without namespaces.
Learning how to code to an interface changed my life as a PHP programmer, and it profoundly improved my ability to integrate third-party PHP components into my own applications. Interfaces are not a new feature, but they are an important feature that you should know about and use on a daily basis.
So what is a PHP interface? An interface is a contract between two PHP objects that lets one object depend not on what another object is but, instead, on what another object can do. An interface decouples our code from its dependencies, and it allows our code to depend on any third-party code that implements the expected interface. We don’t care how the third-party code implements the interface; we care only that the third-party code does implement the interface. Here’s a more down-to-earth example.
Let’s pretend I just arrived in Miami, Florida for the Sunshine PHP Developer Conference. I need a way to get around town, so I head straight for the local car rental place. They have a tiny Hyundai compact, a Subaru wagon, and (much to my surprise) a Bugatti Veyron. I know I need a way to get around town, and all three vehicles can help me do that. But each vehicle does so differently. The Hyundai Accent is OK, but I’d like something with a bit more oomph. I don’t have kids, so the wagon has more seating than I need. I’ll take the Bugatti, please.
The reality is that I can drive any of these three cars because they all share a common and expected interface. Each car has a steering wheel, a gas pedal, a brake pedal, and turn signals, and each uses gasoline for fuel. The Bugatti is probably more power than I can handle, but the driving interface is the same as the Hyundai’s. Because all three cars share the same expected interface, and I have the opportunity to choose my preferred vehicle (and if we’re being honest, I’d probably go with the Hyundai).
This is the exact same concept in object-oriented PHP. If I write code that expects an object of a specific class (and therefore a specific implementation), my code’s utility is inherently limited because it can only use objects of that one class, forever. However, if I write code that expects an interface, my code immediately knows how to use any object that implements that interface. My code does not care how the interface is implemented; my code cares only that the interface is implemented. Let’s drive this home with a demo.
I have a hypothetical PHP class named DocumentStore that collects text from different
sources: it fetches HTML from remote URLs; it reads stream resources; and it collects
terminal command output. Each document stored in a DocumentStore instance has a unique ID.
Example 2-6 shows the DocumentStore class.
classDocumentStore{protected$data=[];publicfunctionaddDocument(Documentable$document){$key=$document->getId();$value=$document->getContent();$this->data[$key]=$value;}publicfunctiongetDocuments(){return$this->data;}}
How exactly does this work if the addDocument() method only accepts instances of
the Documentable class? That’s a good observation. However, Documentable is not a
class. It’s an interface, and it looks like Example 2-7.
interfaceDocumentable{publicfunctiongetId();publicfunctiongetContent();}
This interface definition says that any object implementing the Documentable interface
must provide a public getId() method and a public getContent() method.
So how exactly is this helpful? It’s helpful because we can create separate document-fetching classes with wildly different implementations. Example 2-8 shows an implementation that can fetch HTML from a remote URL with curl.
classHtmlDocumentimplementsDocumentable{protected$url;publicfunction__construct($url){$this->url=$url;}publicfunctiongetId(){return$this->url;}publicfunctiongetContent(){$ch=curl_init();curl_setopt($ch,CURLOPT_URL,$this->url);curl_setopt($ch,CURLOPT_RETURNTRANSFER,1);curl_setopt($ch,CURLOPT_CONNECTTIMEOUT,3);curl_setopt($ch,CURLOPT_FOLLOWLOCATION,1);curl_setopt($ch,CURLOPT_MAXREDIRS,3);$html=curl_exec($ch);curl_close($ch);return$html;}}
Another implementation (Example 2-9) can read a stream resource.
classStreamDocumentimplementsDocumentable{protected$resource;protected$buffer;publicfunction__construct($resource,$buffer=4096){$this->resource=$resource;$this->buffer=$buffer;}publicfunctiongetId(){return'resource-'.(int)$this->resource;}publicfunctiongetContent(){$streamContent='';rewind($this->resource);while(feof($this->resource)===false){$streamContent.=fread($this->resource,$this->buffer);}return$streamContent;}}
And another implementation (Example 2-10) can fetch the result of a terminal command.
classCommandOutputDocumentimplementsDocumentable{protected$command;publicfunction__construct($command){$this->command=$command;}publicfunctiongetId(){return$this->command;}publicfunctiongetContent(){returnshell_exec($this->command);}}
Example 2-11 shows how we can use the DocumentStore class with our three document-collecting implementations.
<?php$documentStore=newDocumentStore();// Add HTML document$htmlDoc=newHtmlDocument('https://php.net');$documentStore->addDocument($htmlDoc);// Add stream document$streamDoc=newStreamDocument(fopen('stream.txt','rb'));$documentStore->addDocument($streamDoc);// Add terminal command document$cmdDoc=newCommandOutputDocument('cat /etc/hosts');$documentStore->addDocument($cmdDoc);print_r($documentStore->getDocuments());
This is really cool because the HtmlDocument, StreamDocument, and CommandOutputDocument classes
have nothing in common other than a common interface.
At the end of the day, coding to an interface creates more-flexible code that delegates implementation concerns to others. Many more people (e.g., your office buddies, your open source project’s users, or developers you’ve never met) can write code that works seamlessly with your code by knowing nothing more than an interface.
Many of my PHP developer friends are confused by traits, a new concept introduced in PHP 5.4.0. Traits behave like classes but look like interfaces. Which one are they? Neither and both.
A trait is a partial class implementation (i.e., constants, properties, and methods) that can be mixed into one or more existing PHP classes. Traits work double duty: they say what a class can do (like an interface), and they provide a modular implementation (like a class).
You may be familiar with traits in other languages. For example, PHP traits are similar to Ruby’s composable modules, or mixins.
The PHP language uses a classical inheritance model. This means you start with a single generalized root class that provides a base implementation. You extend the root class to create more specialized classes that inherit their immediate parent’s implementation. This is called an inheritance hierarchy, and it is a common pattern used by many programming languages.
If it helps, picture yourself back in grade school Biology. Remember how you learned about the biological classification system? There are six kingdoms. Each kingdom is extended by phyla. Each phylum is extended by biological classes. Classes are extended by orders, orders by families, families by genera, and genera by species. Each hierarchy extension represents further specialization.
The classical inheritance model works well most of the time. However,
what do we do if two unrelated PHP classes need to exhibit similar behavior?
For example, a PHP class RetailStore and another PHP class Car
are very different classes and don’t share a common parent in their
inheritance hierarchies. However, both classes should be geocodable
into latitude and longitude coordinates for display on a map.
Traits were created for exactly this purpose. They enable modular implementations that can be injected into otherwise unrelated classes. Traits also encourage code reuse.
My first (bad) reaction is to create a common parent class Geocodable
that both RetailStore and Car extend. This is a bad solution
because it forces two otherwise unrelated classes to share a common
ancestor that does not naturally belong in either inheritance hierarchy.
My second (better) reaction is to create a Geocodable interface that
defines which methods are required to implement the geocoding behavior.
The RetailStore and Car classes can both implement the Geocodable
interface. This is a good solution that allows each class to retain
its natural inheritance hierarchy, but it requires us to duplicate the
same geocoding behavior in both classes. This is not a DRY solution.
DRY is an acronym for Do not repeat yourself. It’s considered a good practice never to duplicate the same code in multiple locations. You should not need to change code in one location because you changed code in another location. Read more on Wikipedia.
My third (best) reaction is to create a Geocodable trait that defines
and implements the geocodable methods. I can then mix the Geocodable
trait into both the RetailStore and Car classes without polluting
their natural inheritance hierarchies.
Here’s how you define a PHP trait:
<?phptraitMyTrait{// Trait implementation goes here}
It is considered a good practice to define only one trait per file, just like class and interface definitions.
Let’s return to our Geocodable example to better demonstrate traits in
practice. We agree both RetailStore and Car classes need to provide
geocodable behavior, and we’ve decided inheritance and interfaces are
not the best solution. Instead, we create a Geocodable trait that
returns latitude and longitude coordinates that we can plot on a map.
Our complete Geocodable trait looks like Example 2-12.
<?phptraitGeocodable{/** @var string */protected$address;/** @var \Geocoder\Geocoder */protected$geocoder;/** @var \Geocoder\Result\Geocoded */protected$geocoderResult;publicfunctionsetGeocoder(\Geocoder\GeocoderInterface$geocoder){$this->geocoder=$geocoder;}publicfunctionsetAddress($address){$this->address=$address;}publicfunctiongetLatitude(){if(isset($this->geocoderResult)===false){$this->geocodeAddress();}return$this->geocoderResult->getLatitude();}publicfunctiongetLongitude(){if(isset($this->geocoderResult)===false){$this->geocodeAddress();}return$this->geocoderResult->getLongitude();}protectedfunctiongeocodeAddress(){$this->geocoderResult=$this->geocoder->geocode($this->address);returntrue;}}
The Geocodable trait defines only the properties and methods necessary
to implement the geocodable behavior. It does not do anything else.
Our Geocodable trait defines three class properties: an address
(string), a geocoder object (an instance of \Geocoder\Geocoder from
the excellent willdurand/geocoder component by
William Durand), and a geocoder result object (an instance of \Geocoder\Result\Geocoded).
We also define four public methods and one protected method. The setGeocoder() method is
used to inject the Geocoder object. The setAddress() method is used to
set an address. The getLatitude() and getLongitude() methods return
their respective coordinates. And the geocodeAddress() method
passes the address string into the Geocoder instance to retrieve the
geocoder result.
Using a PHP trait is easy. Add the code use MyTrait; inside a
PHP class definition. Here’s an example. Obviously, replace MyTrait
with the appropriate PHP trait name:
<?phpclassMyClass{useMyTrait;// Class implementation goes here}
Both namespaces and traits are imported with the use keyword. Where
they are imported is different. We import namespaces, classes, interfaces,
functions, and constants outside of a class definition. We import traits
inside a class definition. The difference is subtle but important.
Let’s return to our Geocodable example. We defined the Geocodable
trait in Example 2-12. Let’s update our RetailStore class so that it uses the
Geocodable trait (Example 2-13). For the sake of brevity, I do not provide the
complete RetailStore class implementation.
<?phpclassRetailStore{useGeocodable;// Class implementation goes here}
That’s all we have to do. Now each RetailStore instance can use the
properties and methods provided by the Geocodable trait, as shown in Example 2-14.
<?php$geocoderAdapter=new\Geocoder\HttpAdapter\CurlHttpAdapter();$geocoderProvider=new\Geocoder\Provider\GoogleMapsProvider($geocoderAdapter);$geocoder=new\Geocoder\Geocoder($geocoderProvider);$store=newRetailStore();$store->setAddress('420 9th Avenue, New York, NY 10001 USA');$store->setGeocoder($geocoder);$latitude=$store->getLatitude();$longitude=$store->getLongitude();echo$latitude,':',$longitude;
The PHP interpreter copies and pastes traits into class definitions at compile time, and it does not protect against incompatibilities introduced by this action. If your PHP trait assumes a class property or method exists (that is not defined in the trait itself), be sure those properties and methods exist in the appropriate classes.
PHP generators are an underutilized yet remarkably helpful feature introduced in PHP 5.5.0. I think many PHP developers are unaware of generators because their purpose is not immediately obvious. Generators are simple iterators. That’s it.
Unlike your standard PHP iterator, PHP generators don’t require you to
implement the Iterator interface in a heavyweight class. Instead,
generators compute and yield iteration values on-demand. This has
profound implications for application performance. Think about it.
A standard PHP iterator often iterates in-memory, precomputed
data sets. This is inefficient, especially with large and formulaic
data sets that can be computed instead. This is why we use generators
to compute and yield subsequent values on the fly without commandeering
valuable memory.
PHP generators are not a panacea for your iteration needs. Because generators never know the next iteration value until asked, it’s impossible to rewind or fast-forward a generator. You can iterate in only one direction—forward. Generators are also a once-and-done deal. You can’t iterate the same generator more than once. However, you are free to rebuild or clone a generator if necessary.
Generators are easy to create because they are just PHP functions that
use the yield keyword one or more times. Unlike regular PHP functions,
generators never return a value. They only yield values. Example 2-15 shows a simple generator.
<?phpfunctionmyGenerator(){yield'value1';yield'value2';yield'value3';}
Pretty simple, huh? When you invoke the generator function, PHP returns an
object that belongs to the Generator class. This object can be iterated
with the foreach() function. During each iteration, PHP asks the Generator
instance to compute and provide the next iteration value. What’s neat is
that the generator pauses its internal state whenever it yields a value.
The generator resumes internal state when it is asked for the next value. The generator
continues pausing and resuming until it reaches the end of its
function definition or an empty return; statement. We can invoke and
iterate the generator in Example 2-15 like this:
<?phpforeach(myGenerator()as$yieldedValue){echo$yieldedValue,PHP_EOL;}
This outputs:
value1value2value3
I like to demonstrate how a PHP generator saves memory by implementing
a simple range() function. First, let’s do it the wrong way (Example 2-16).
<?phpfunctionmakeRange($length){$dataset=[];for($i=0;$i<$length;$i++){$dataset[]=$i;}return$dataset;}$customRange=makeRange(1000000);foreach($customRangeas$i){echo$i,PHP_EOL;}
Example 2-16 makes poor use of memory. The makeRange() method in Example 2-16 allocates one million integers into a precomputed array.
A PHP generator can do the same thing while allocating memory for only one integer at any given time, as shown in Example 2-17.
<?phpfunctionmakeRange($length){for($i=0;$i<$length;$i++){yield$i;}}foreach(makeRange(1000000)as$i){echo$i,PHP_EOL;}
This is a contrived example. However, just imagine all of the potential data sets that you can compute. Number sequences (e.g., Fibonacci) are an obvious candidate. You can also iterate a stream resource. Imagine you need to iterate a 4 GB comma-separated value (CSV) file and your virtual private server (VPS) has only 1 GB of memory available to PHP. There’s no way you can pull the entire file into memory. Example 2-18 shows how we can use a generator instead!
<?phpfunctiongetRows($file){$handle=fopen($file,'rb');if($handle===false){thrownewException();}while(feof($handle)===false){yieldfgetcsv($handle);}fclose($handle);}foreach(getRows('data.csv')as$row){print_r($row);}
This example allocates memory for only one CSV row at a time instead of reading the entire 4 GB CSV file into memory. It also encapsulates the iteration implementation into a tidy package; this lets us quickly change how we get data (e.g., CSV, XML, JSON) without interrupting our application code that iterates the data.
Generators are a tradeoff between versatility and simplicity. Generators are forward-only iterators. This means you cannot use a generator to rewind, fast-forward, or seek a data set. You can only ask a generator to compute and yield its next value. Generators are most useful for iterating large or numerically sequenced data sets with only a tiny amount of system memory. They are also useful for accomplishing the same simple tasks as larger iterators with less code.
Generators do not add functionality to PHP. You can do what generators
do without a generator. However, generators greatly simply certain tasks
while using less memory. If you require more versatility to rewind,
fast-forward, or seek through a data set, you’re better off writing a
custom class that implements the Iterator interface,
or using one of PHP’s prebuilt Standard PHP Library (SPL) iterators.
For more generator examples, read What Generators Can Do For You by Anthony Ferrara (@ircmaxell on Twitter).
Closures and anonymous functions were introduced in PHP 5.3.0, and they’re two of my favorite and most used PHP features. They sound scary (at least I thought so when I first learned about them), but they’re actually pretty simple to understand. They’re extremely useful tools that every PHP developer should have in the toolbox.
A closure is a function that encapsulates its surrounding state at the time it is created. The encapsulated state exists inside the closure even when the closure lives after its original environment ceases to exist. This is a difficult concept to grasp, but once you do it’ll be a life-changing moment.
An anonymous function is exactly that—a function without a name. Anonymous functions can be assigned to variables and passed around just like any other PHP object. But it’s still a function, so you can invoke it and pass it arguments. Anonymous functions are especially useful as function or method callbacks.
Closures and anonymous functions are, in theory, separate things. However, PHP considers them to be one and the same. So when I say closure, I also mean anonymous function. And vice versa.
PHP closures and anonymous functions use the same syntax as a
function, but don’t let them fool you. They’re actually objects disguised as
PHP functions. If you inspect a PHP closure or anonymous function, you’ll
find they are instances of the Closure class. Closures are considered first-class
value types, just like a string or integer.
So we know PHP closures look like functions. You should not be surprised, then, that you create a PHP closure like Example 2-19.
<?php$closure=function($name){returnsprintf('Hello %s',$name);};echo$closure("Josh");// Outputs --> "Hello Josh"
That’s it. Example 2-19 creates a closure object and assigns it
to the $closure variable. It looks like a standard PHP function:
it uses the same syntax, it accepts arguments, and it returns a value.
However, it does not have a name.
We can invoke the $closure variable because the variable’s value is a closure,
and closure objects implement the \__invoke() magic method. PHP looks for and calls
the __invoke() method whenever () follows a variable name.
I typically use PHP closure objects as function and method callbacks. Many PHP functions expect callback functions, like array_map()
and preg_replace_callback(). This is a perfect opportunity to use PHP anonymous functions!
Remember, closures can be passed into other PHP functions as arguments, just like
any other value. In Example 2-20, I use a closure object as a callback argument
in the array_map() function.
<?php$numbersPlusOne=array_map(function($number){return$number+1;},[1,2,3]);print_r($numbersPlusOne);// Outputs --> [2,3,4]
OK, so that wasn’t that impressive. But remember, before closures PHP developers had no choice but to create a separate named function and refer to that function by name. This was slightly slower to execute, and it segregated a callback’s implementation from its usage. Old-school PHP developers used code like this:
<?php// Named callback implementationfunctionincrementNumber($number){return$number+1;}// Named callback usage$numbersPlusOne=array_map('incrementNumber',[1,2,3]);print_r($numbersPlusOne);
This code works, but it’s not as succinct and tidy as Example 2-20. We don’t need a separate incrementNumber()
named function if we use the function only once as a callback. Closures
used as callbacks create more concise and legible code.
So far I’ve demonstrated nameless (or anonymous) functions used as callbacks.
Let’s explore how to attach and enclose state with a PHP closure. JavaScript developers
might be confused by PHP closures because they do not automatically enclose application
state like true JavaScript closures. Instead, you must manually attach state
to a PHP closure with the closure object’s bindTo() method or the use keyword.
It’s far more common to attach closure state with the use keyword, so let’s look
at that first (Example 2-21). When you attach a variable to a closure via the use keyword, the attached variable
retains the value assigned to it at the time it is attached to the closure.
<?phpfunctionenclosePerson($name){returnfunction($doCommand)use($name){returnsprintf('%s, %s',$name,$doCommand);};}// Enclose "Clay" string in closure$clay=enclosePerson('Clay');// Invoke closure with commandecho$clay('get me sweet tea!');// Outputs --> "Clay, get me sweet tea!"
In Example 2-21, the enclosePerson() named function accepts
a $name argument, and it returns a closure object that encloses
the $name argument. The returned closure object preserves the $name
argument’s value even after the closure exits the enclosePerson()
function’s scope. The $name variable still exists in the closure!
You can pass multiple arguments into a closure with the use keyword.
Separate multiple arguments with a comma, just as you do with
any PHP function or method arguments.
Don’t forget, PHP closures are objects. Each closure instance has its
own internal state that is accessible with the $this keyword just like
any other PHP object. A closure object’s default state is pretty boring;
it has a magic __invoke() method and a bindTo() method. That’s it.
However, the bindTo() method opens the door to some interesting possibilities.
This method lets us bind a Closure object’s internal state to a
different object. The bindTo() method accepts an important second
argument that specifies the PHP class of the object to which the closure
is bound. This lets the closure access protected and private member
variables of the object to which it is bound.
You’ll find the bindTo() method is often used by
PHP frameworks that map route URLs to anonymous callback functions.
Frameworks accept an anonymous function and bind it to the application
object. This lets you reference the primary application object inside the
anonymous function with the $this keyword, as shown in Example 2-22.
01.<?php02.classApp03.{04.protected$routes=array();05.protected$responseStatus='200 OK';06protected$responseContentType='text/html';07.protected$responseBody='Hello world';08.09.publicfunctionaddRoute($routePath,$routeCallback)10.{11.$this->routes[$routePath]=$routeCallback->bindTo($this,__CLASS__);12.}13.14.publicfunctiondispatch($currentPath)15.{16.foreach($this->routesas$routePath=>$callback){17.if($routePath===$currentPath){18.$callback();19.}20.}21.22.header('HTTP/1.1 '.$this->responseStatus);23.header('Content-type: '.$this->responseContentType);24.header('Content-length: '.mb_strlen($this->responseBody));25.echo$this->responseBody;26.}27.}
Pay close attention to the addRoute() method. It accepts a route
path (e.g., /users/josh) and a route callback. The dispatch() method
accepts the current HTTP request path and invokes the matching route callback.
The magic happens on line 11 when we bind the route callback to the current
App instance. This lets us create a callback function that can manipulate
the App instance state:
<?php$app=newApp();$app->addRoute('/users/josh',function(){$this->responseContentType='application/json;charset=utf8';$this->responseBody='{"name": "Josh"}';});$app->dispatch('/users/josh');
Bytecode caches are not new to PHP. We’ve had optional standalone extensions like Alternative PHP Cache (APC), eAccelerator, ionCube, and XCache. But none of these was built into the PHP core distribution until now. As of PHP 5.5.0, PHP has its own built-in bytecode cache called Zend OPcache.
First, let me explain what a bytecode cache is and why it is important. PHP is an interpreted language. When the PHP interpreter executes a PHP script, the interpreter parses the PHP script code, compiles the PHP code into a set of existing Zend Opcodes (machine-code instructions), and executes the bytecode. This happens for each PHP file during every request. This is a lot of overhead, especially if PHP must parse, compile, and execute PHP scripts over and over again for every HTTP request. If only there were a way to cache precompiled bytecode to reduce application response times and reduce stress on our system resources. You’re in luck.
A bytecode cache stores precompiled PHP bytecode. This means the PHP interpreter does not need to read, parse, and compile PHP code on every request. Instead, the PHP interpreter can read the precompiled bytecode from memory and execute it immediately. This is a huge timesaver and can drastically improve application performance.
Zend OPcache isn’t enabled by default; you must explicitly enable Zend OPcache when you compile PHP.
If you choose a shared web host, be sure you choose a good hosting company that provides PHP 5.5.0 or newer with Zend OPcache enabled.
If you compile PHP yourself (i.e., on a VPS or dedicated server),
you must include this option in your PHP ./configure command:
--enable-opcacheAfter you compile PHP, you must also specify the path to the Zend OPcache extension in your php.ini file with this line:
zend_extension=/path/to/opcache.so
The Zend OPcache extension file path is displayed immediately after PHP compiles successfully. If you forget to look for this as I often do, you can also find the PHP extension directory with this command:
php-config --extension-dir
If you use the popular Xdebug profiler by the incomparable Derick Rethans, your php.ini file must load the Zend OPcache extension before Xdebug.
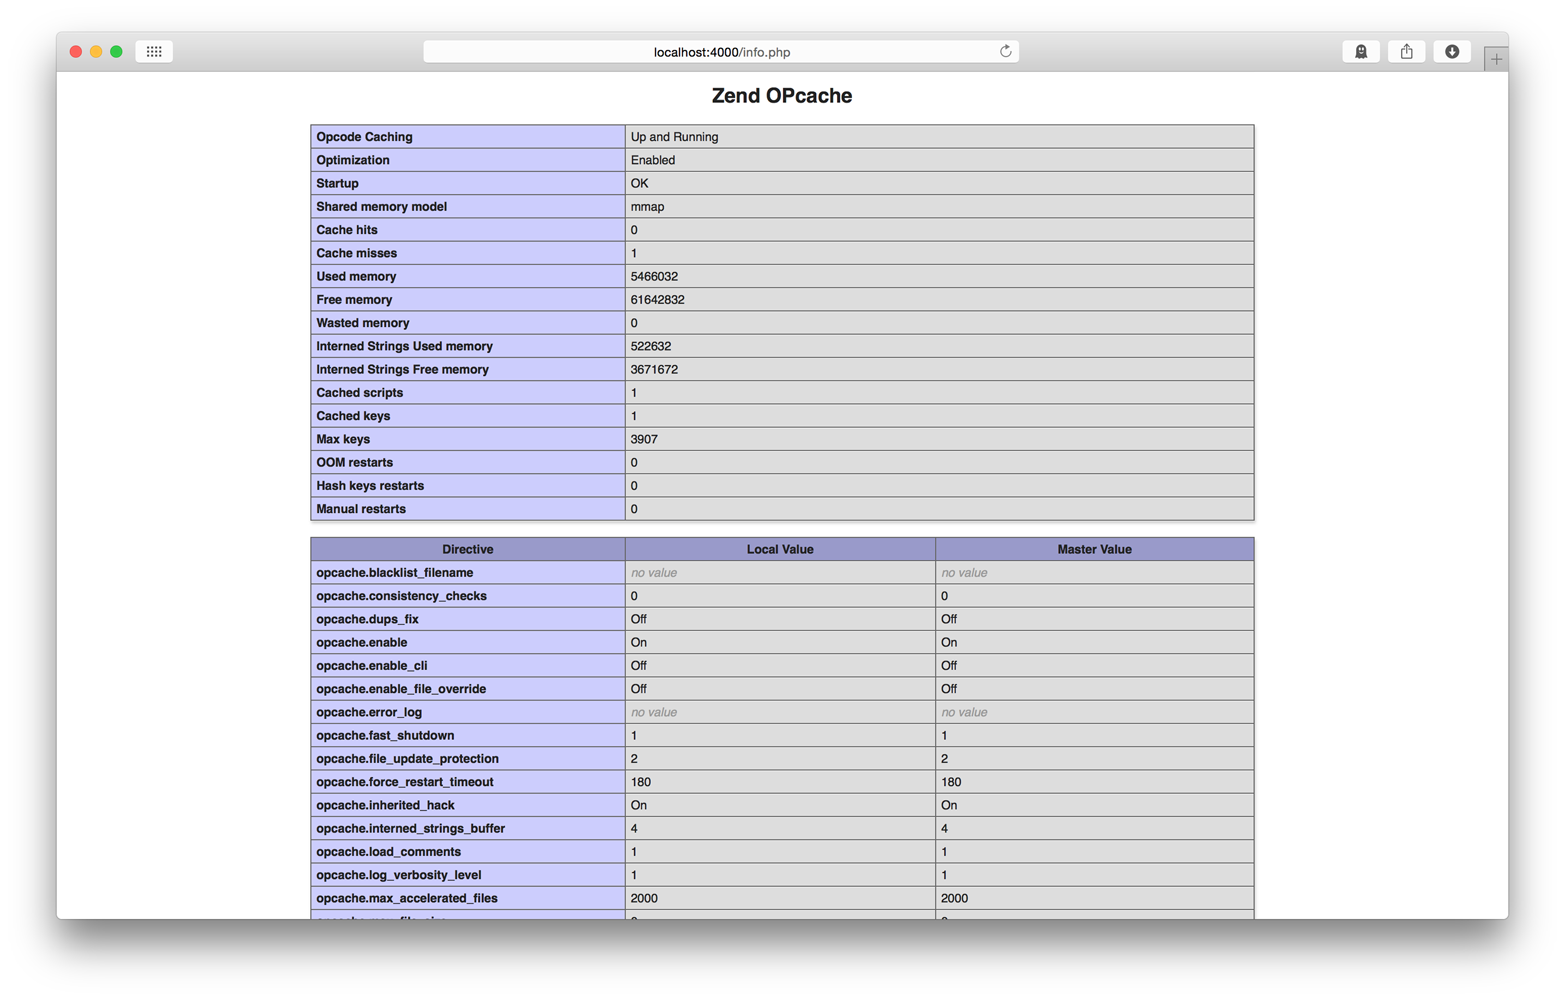
After you update the php.ini file, restart the PHP process and you’re ready to go. You can confirm Zend OPcache is working correctly by creating a PHP file with this content:
<?phpphpinfo();
View this PHP file in a web browser and scroll down until you see the Zend OPcache extension section shown in Figure 2-2. If you don’t see this section, Zend OPcache is not running.
When Zend OPcache is enabled, you should configure the Zend OPcache settings in your php.ini configuration file. Here are the OPcache settings I like to use:
opcache.validate_timestamps=1 // "0" in productionopcache.revalidate_freq=0opcache.memory_consumption=64opcache.interned_strings_buffer=16opcache.max_accelerated_files=4000opcache.fast_shutdown=1
This part’s easy because the Zend OPcache works automatically when enabled. Zend OPcache automatically caches precompiled PHP bytecode in memory and executes the bytecode if available.
Be careful if the opcache.validate_timestamps INI directive is false. When
this setting is false, the Zend OPcache does not know about changes to your
PHP scripts, and you must manually clear Zend OPcache’s bytecode cache before
it recognizes changes to your PHP files. This setting is good for production
but inconvenient for development. You can enable automatic cache revalidation
with these php.ini configuration settings:
opcache.validate_timestamps=1opcache.revalidate_freq=0
Did you know that PHP has a built-in web server as of PHP 5.4.0? This is another hidden gem unknown to PHP developers who assume they need Apache or nginx to preview PHP applications. You shouldn’t use it for production, but PHP’s built-in web server is a perfect tool for local development.
I use PHP’s built-in web server every day, whether I’m writing PHP or not. I use it to preview Laravel and Slim Framework applications. I use it while building websites with the Drupal content-management framework. I also use it to preview static HTML and CSS if I’m just building out markup.
Remember, the PHP built-in server is a web server. It speaks HTTP, and it can serve static assets in addition to PHP files. It’s a great way to write and preview HTML locally without installing MAMP, WAMP, or a heavyweight web server.
It’s easy to start the PHP web server. Open your terminal application, navigate to your project’s document root directory, and execute this command:
php -S localhost:4000
This command starts a new PHP web server accessible at localhost. It listens on port 4000. Your current working directory is the web server’s document root.
You can now open your web browser and navigate to http://localhost:4000 to
preview your application. As you browse your application in your web browser, each
HTTP request is logged to standard out in your terminal application so you can see
if you application throws 400 or 500 responses.
Sometimes it’s useful to access the PHP web server from other machines
on your local network (e.g., for previewing on your iPad or local Windows box).
To do this, tell the PHP web server to listen on all interfaces by using
0.0.0.0 instead of localhost:
php-S0.0.0.0:4000
When you are ready to stop the PHP web server, close your terminal application or press Ctrl+C.
It’s not uncommon for an application to require its own
PHP INI configuration file, especially if it has unique
requirements for memory usage, file uploads, profiling,
or bytecode caching. You can tell the PHP built-in
server to use a specific INI file with the -c option:
php -S localhost:8000 -c app/config/php.ini
It’s a good idea to keep the custom INI file beneath the application’s root directory and, optionally, version-control the INI file if it should be shared with other developers on your team.
The PHP built-in server has one glaring omission. Unlike Apache or nginx, it doesn’t support .htaccess files. This makes it difficult to use front controllers that are common in many popular PHP frameworks.
A front controller is a single PHP file to which all HTTP requests are forwarded (via .htaccess files or rewrite rules). The front-controller PHP file is responsible for routing the request and dispatching the appropriate PHP code. This is a common pattern used by Symfony and other popular frameworks.
The PHP built-in server mitigates this omission with router scripts. The router script is executed before every HTTP request. If the router script returns false, the static asset referenced by the current HTTP request URI is returned. Otherwise, the output of the router script is returned as the HTTP response body. In other words, if you use a router script you’re effectively hardcoding the same functionality as an .htaccess file.
Using a router script is easy. Just pass the PHP script file path as a an argument when you start up the PHP built-in server:
php -S localhost:8000 router.php
Sometimes it’s helpful to know if your PHP script is served by PHP’s
built-in web server versus a traditional web server like Apache or
nginx. Perhaps you need to set specific headers for nginx (e.g.,
Status:) that should not be set for the PHP web server. You can detect
the PHP web server with the php_sapi_name() function. This function
returns the string cli-server if the current script is served with
the PHP built-in server:
<?phpif(php_sapi_name()==='cli-server'){// PHP web server}else{// Other web server}
PHP’s built-in web server should not be used for production. It is for local development only. If you use the PHP built-in web server on a production machine, be prepared for a lot of disappointed users and a flood of Pingdom downtime notifications.
The built-in server performs suboptimally because it handles one request at a time, and each HTTP request is blocking. Your web application will stall if a PHP file must wait on a slow database query or remote API response.
The built-in server supports only a limited number of mimetypes.
The built-in server has limited URL rewriting with router scripts. You’ll need Apache or nginx for more advanced URL rewrite behavior.
The modern PHP language has a lot of powerful features that can improve your applications. I’ve talked about my favorite features in this chapter. You can learn more about PHP’s latest features on the PHP website.
I’m sure you’re excited to start using these fun features in your applications. However, it’s important that you use these features correctly according to PHP community standards. And that’s exactly what we talk about in the next chapter.
There is a mind-boggling number of PHP components and frameworks. There are macro frameworks like Symfony and Laravel. There are micro frameworks like Silex and Slim. And there are legacy frameworks like CodeIgniter that were built long before modern PHP components existed. The modern PHP ecosystem is a veritable melting pot of code that helps us developers build amazing applications.
Unfortunately, older PHP frameworks were developed in isolation and do not share code with other PHP frameworks. If your project uses one of these older PHP frameworks, you’re stuck with the framework and must live inside the framework’s ecosystem. This centralized environment is OK if you are happy with the framework’s tools. However, what if you use the CodeIgniter framework but want to cherry-pick a helper library from the Symfony framework? You’re probably out of luck unless you write a one-off adapter specifically for your project.
What we’ve got here is a failure to communicate.
Cool Hand Luke
Do you see the problem? Frameworks created in isolation were not designed to communicate with other frameworks. This is extremely inefficient, both for developers (creativity is limited by framework choice) and for frameworks themselves (they re-invent code that already exists elsewhere). I have good news, though. The PHP community has evolved from a centralized framework model to a distributed ecosystem of efficient, interoperable, and specialized components.
Several PHP framework developers recognized this problem and began a
conversation at php|tek (a popular PHP conference) in 2009. They
discussed how to improve intraframework communication and efficiency.
Instead of writing a new and tightly coupled logging class, for example,
what if a PHP framework could share a decoupled logging class like
monolog? Instead of writing its own HTTP request and response classes,
what if a PHP framework could instead cherry-pick the excellent HTTP request
and response classes from the Symfony Framework’s symfony/httpfoundation
component? For this to work, PHP frameworks must speak a common language that allows them to
communicate and share with other frameworks. They need standards.
The PHP framework developers who serendipitously met at php|tek eventually created the PHP Framework Interop Group (PHP-FIG). The PHP-FIG is a group of PHP framework representatives who, according to the PHP-FIG website, “talk about the commonalities between our projects and find ways we can work together.” The PHP-FIG creates recommendations that PHP frameworks can voluntarily implement to improve communication and sharing with other frameworks.
The PHP-FIG is a self-appointed group of framework representatives. Its members are not elected, and they are not special in any way other than their willingness to improve the PHP community. Anyone can request membership. And anyone can submit feedback to PHP-FIG recommendations that are in the proposal process. Final PHP-FIG recommendations are typically adopted and implemented by many of the largest and most popular PHP frameworks. I highly encourage you to get involved with the PHP-FIG, if only to send feedback and help shape the future of your favorite PHP frameworks.
The PHP-FIG’s mission is framework interoperability. And framework interoperability means working together via interfaces, autoloading, and style.
PHP frameworks work together via shared interfaces. PHP interfaces allow frameworks to assume what methods are provided by third-party dependencies without worrying about how the dependencies implement the interface.
Refer to Chapter 2 for an in-depth explanation of PHP interfaces.
For example, a framework is happy to share a third-party logger object
assuming the shared logger object implements the
emergency(), alert(), critical(), error(), warning(),
notice(), info(), and debug() methods. Exactly how these methods
are implemented is irrelevant. Each framework cares only that the third-party
dependency does implement these methods.
Interfaces enable PHP developers to build, share, and use specialized components instead of monolithic frameworks.
PHP frameworks work together via autoloading. Autoloading is the process by which a PHP class is automatically located and loaded on-demand by the PHP interpreter during runtime.
Before PHP standards, PHP components and frameworks implemented their
own unique autoloaders using the magic \__autoload() method or the more
recent spl_autoload_register() method. This required us to
learn and use a unique autoloader for each component and framework.
Nowadays, most modern PHP components and frameworks are compatible with
a common autoloader standard. This means we can mix and match multiple
PHP components with only one autoloader.
PHP frameworks work together via code style. Your code style determines spacing, capitalization, and bracket placement (among other things). If PHP frameworks agree on a standard code style, PHP developers don’t need to learn a new style every time they use a new PHP framework. Instead, PHP framework code is immediately familiar. A standard code style also lowers the barrier for new project contributors, who can spend more time squashing bugs and less time learning an unfamiliar style.
Standard code style also improves our own projects. Every developer has a unique style with more than a few idiosyncrasies, and these become a problem when multiple developers work on the same codebase. A standard code style helps all team members immediately understand the same codebase regardless of its author.
PSR is an acronym for PHP standards recommendation. If you’ve recently read a PHP-related blog, you have probably seen the terms PSR-1, PSR-2, PSR-3, and so on. These are PHP-FIG recommendations. Their names begin with PSR- and end with a number. Each PHP-FIG recommendation solves a specific problem that is frequently encountered by most PHP frameworks. Instead of PHP frameworks continually re-solving the same problems, frameworks can instead adopt the PHP-FIG’s recommendations and build upon shared solutions.
The PHP-FIG has published five recommendations as of this book’s publication:
If you counted only four recommendations, you are correct. The PHP-FIG deprecated its first PSR-0 recommendation. This first recommendation was replaced by the newer PSR-4 recommendation.
Notice how the PHP-FIG recommendations coincide nicely with the three interoperability methods I mentioned earlier: interfaces, autoloading, and code style. This is not a coincidence.
I’m really excited about the PHP-FIG recommendations. They are the bedrock beneath the modern PHP ecosystem. They define the means with which PHP components and frameworks interoperate. I admit, PHP standards are not the most scintillating of topics, but they are (in my mind) prerequisite to understanding modern PHP.
If you want to write PHP code that is compatible with community standards, start with PSR-1. It’s the easiest PHP standard to use. It’s so easy, you’re probably already using it without even trying. PSR-1 provides simple guidelines that are easy to implement with minimal effort. The point of PSR-1 is to provide a baseline code style for participating PHP frameworks. You must satisfy these requirements to be compatible with PSR-1:
You must surround your PHP code with either the <?php ?>
or <?= ?> tags. You must not use any other PHP tag syntax.
All PHP files must be encoded with the UTF-8 character set without a byte order mark (BOM). This sounds complicated, but your text editor or IDE can do this for you automatically.
A single PHP file can either define symbols (a class, trait, function, constant, etc.) or perform an action that has side effects (e.g., create output or manipulate data). A PHP file should not do both. This is a simple task and requires only a little foresight and planning on your part.
Your PHP namespaces and classes must support the PSR-4 autoloader standard. All you have to do is choose appropriate names for your PHP symbols and make sure their definition files are in the expected location. We’ll chat about PSR-4 soon.
Your PHP class names must use the common CamelCase
format. This format is also called TitleCase. Examples are
CoffeeGrinder, CoffeeBean, and PourOver.
Your PHP constants must use all uppercase characters.
They may use underscores to separate words if necessary. Examples are
WOOT, LET_OUR_POWERS_COMBINE, and GREAT_SCOTT.
Your PHP method names must use the common camelCase
format. This means the method name’s first character is lowercase, and
the first letter of each subsequent word in the method name is
uppercase. Examples are phpIsAwesome, iLoveBacon, and
tennantIsMyFavoriteDoctor.
After you implement PSR-1, the next step is to implement PSR-2. The PSR-2 standard further defines PHP code style with stricter guidelines.
The PSR-2 code style is a godsend for PHP frameworks that have many contributors from around the world, all of whom bring their own unique style and preferences. A common strict code style lets developers write code that is easily and quickly understood by other contributors.
Unlike PSR-1, the PSR-2 recommendation contains stricter guidelines. Some of PSR-2’s guidelines may not be what you prefer. However, PSR-2 is the preferred code style of many popular PHP frameworks. You don’t have to use PSR-2, but doing so will drastically improve the ability for other developers to read, use, and contribute to your PHP code.
You should use the stricter PSR-2 code style. Even though I call it strict, it’s easy enough to write. Eventually it’ll become second nature. Also, there are tools available to automatically format existing PHP code into the PSR-2 style.
The PSR-2 code style requires that you implement the PSR-1 code style.
This is a hot topic that is typically divided into two camps. The first camp prefers to indent code with a single tab character. The second (and much cooler) camp prefers to indent code with several space characters. The PSR-2 recommendation says PHP code should be indented with four space characters.
From personal experience, space characters are better suited for indentation because a space is a definitive measure that largely renders the same in different code editors. A tab, however, can vary in width and renders differently in different code editors. Use four space characters to indent code to ensure the best visual continuity for your code.
Your PHP files must use Unix linefeed (LF) endings, must end with a
single blank line, and must not include a trailing ?> PHP tag. Each line
of code should not exceed 80 characters. Ultimately, each line of code
must not exceed 120 characters. Each line must not have trailing white space.
This sounds like a lot of work, but it’s really not. Most code editors can
automatically wrap code to a specific width, strip trailing whitespace,
and use Unix line endings. All of these should happen automatically with
little to no thought on your part.
Omitting the trailing ?> PHP tag was odd to me at first.
However, it is good practice to omit the closing tag to avoid
unexpected output errors. If you do include the ?> closing tag, and also a
blank line after the closing tag, the blank line is considered output
and can cause errors (e.g., when you set HTTP headers).
I know many PHP developers who type TRUE, FALSE, and NULL in
uppercase characters. If you do this, try to unlearn this practice and
instead use only lowercase characters from now on. The PSR-2 recommendation
says that you should type all PHP keywords in lowercase.
Each namespace declaration must be followed by one blank
line. Likewise, when you import or alias namespaces with the use
keyword, you must follow the block of use declarations with one blank
line. Here’s an example:
<?phpnamespaceMy\Component;useSymfony\Components\HttpFoundation\Request;useSymfony\Components\HttpFoundation\Response;classApp{// Class definition body}
Like indentation, class definition bracket placement is another topic
that attracts heated debate. Some prefer the opening bracket to reside
on the same line as the class name. Others prefer the opening bracket to
reside on a new line after the class name. The PSR-2 recommendation
says a class definition’s opening bracket must reside on a new line
immediately after the class definition name as shown in the following example. The class definition’s closing bracket must reside on a new
line after the end of the class definition body. This is probably what
you have been doing already so it’s not as big a deal. If your class extends
another class or implements an interface, the extends and implements keywords
must appear on the same line as the class name:
<?phpnamespaceMy\App;classAdministratorextendsUser{// Class definition body}
Method definition bracket placement is the same as class definition bracket placement. The method definition’s opening bracket resides on a new line immediately after the method name. The method definition’s closing bracket resides on a new line immediately after the method definition body. Pay close attention to the method arguments. The first parenthesis does not have a trailing space, and the last parenthesis does not have a preceding space. Each method argument (except the last) is followed immediately by a comma and one space character:
<?phpnamespaceAnimals;classStrawNeckedIbis{publicfunctionflapWings($numberOfTimes=3,$speed='fast'){// Method definition body}}
You must declare a visibility for
each class property and method. A visibility is one of public,
protected, or private; visibility determines how a property or method
is accessible within and outside of its class. Old-school PHP developers
may be accustomed to prefixing class properties with the var keyword
and prefixing private methods with the underscore _ character. Do not
do this. Use one of the visibilities listed previously instead. If you declare a
class property or method as abstract or final, the abstract and final
qualifiers must appear before the visibility. If you declare a property or
method as static, the static qualifier must appear after the visibility:
<?phpnamespaceAnimals;classStrawNeckedIbis{// Static property with visibilitypublicstatic$numberOfBirds=0;// Method with visibilitypublicfunction__construct(){static::$numberOfBirds++;}}
This is probably the one guideline that trips me up the most. All control structure keywords must be followed by a single space character.
A control structure keyword is if, elseif, else, switch,
case, while, do while, for, foreach, try, or catch.
If the control structure keyword requires a set of parentheses, make sure
the first parenthesis is not followed by a space character, and make
sure the last parenthesis is not preceded by a space character. Unlike in
class and method definitions, opening brackets that appear after a control
structure keyword must remain on the same line as the control structure keyword.
The control structure keyword’s closing bracket must reside on a new line.
Here’s a brief example that demonstrates these guidelines:
<?php$gorilla=new\Animals\Gorilla;$ibis=new\Animals\StrawNeckedIbis;if($gorilla->isAwake()===true){do{$gorilla->beatChest();}while($ibis->isAsleep()===true);$ibis->flyAway();}
You can automate PSR-1 and PSR-2 code style compatibility. Many
code editors automatically format your code according to PSR-1 and PSR-2.
There are tools available to help you audit and format your code
against PHP standards, too. One such tool is the PHP Code Sniffer,
also called phpcs. This tool (used directly on the command line or via your IDE)
reports inconsistencies between your code and a given PHP code standard. You
can install phpcs with most package managers (e.g., PEAR, Homebrew, Aptitude, or Yum).
You can also use Fabien Potencier’s PHP-CS-Fixer to correct most incompatibilities automatically. This tool is not perfect, but it’ll get you most of the way toward PSR compatibility with little or no effort on your part.
The third PHP-FIG recommendation is not a set of guidelines like its predecessors. PSR-3 is an interface, and it prescribes methods that can be implemented by PHP logger components.
A logger is an object that writes messages of varying importance
to a given output. Logged messages are used to diagnose, inspect, and
troubleshoot application operation, stability, and performance. Examples
include writing debug information to a text file during development,
capturing website traffic statistics into a database, or emailing fatal
error diagnostics to a website administrator. The most popular PHP
logger component is monolog/monolog,
created by Jordi Boggiano.
Many PHP frameworks implement logging in some capacity. Before the PHP-FIG, each framework solved logging differently, often with a proprietary implementation. In the spirit of interoperability and specialization—recurring motifs in modern PHP—the PHP-FIG established the PSR-3 logger interface. Frameworks that accept PSR-3 compatible loggers accomplish two important things: logging concerns are delegated to a third party, and end users can provide their preferred logger component. It’s a win-win for everyone.
A PHP logger component compatible with the PSR-3 recommendation must include
a PHP class that implements the interface named Psr\Log\LoggerInterface.
The PSR-3 interface replicates the RFC 5424 syslog protocol
and prescribes nine methods:
<?phpnamespacePsr\Log;interfaceLoggerInterface{publicfunctionemergency($message,array$context=array());publicfunctionalert($message,array$context=array());publicfunctioncritical($message,array$context=array());publicfunctionerror($message,array$context=array());publicfunctionwarning($message,array$context=array());publicfunctionnotice($message,array$context=array());publicfunctioninfo($message,array$context=array());publicfunctiondebug($message,array$context=array());publicfunctionlog($level,$message,array$context=array());}
Each interface method maps to a corresponding RFC 5424 protocol level and accepts
two arguments. The first $message argument must be a string or an object
with a __toString() method. The second $context argument is optional and
provides an array of placeholder values that replace tokens in the first argument.
Use the $context argument to construct complicated logger messages.
You use placeholders in the message text. A placeholder looks
like {placeholder_name}; it contains a {, the placeholder name,
and a }. A placeholder does not contain spaces. The $context argument
is an associative array; its keys are placeholder names (without brackets),
and its values replace the related placeholders in the message text.
To write a PSR-3 logger, create a new PHP class that implements the
Psr\Log\LoggerInterface interface and provide a concrete
implementation for each interface method.
If you are creating your own PSR-3 logger, stop and reconsider if you are spending your time wisely. I strongly discourage you from writing your own logger. Why? Because there are some truly amazing PHP logger components already available!
If you need a PSR-3 logger, just use monolog/monolog.
Don’t waste time looking elsewhere. The Monolog PHP component
fully implements the PSR-3 interface, and it’s easily extended with custom message
formatters and handlers. Monolog’s message handlers let you send log messages to
text files, syslog, email, HipChat, Slack, networked servers, remote APIs, databases,
and pretty much anywhere else you can imagine. In the very unlikely event Monolog
does not provide a handler for your desired output destination, it’s
super-easy to write and integrate your own Monolog message handler. Example 3-1 demonstrates how easy it is to setup Monolog and log messages to a text file.
<?phpuseMonolog\Logger;useMonolog\Handler\StreamHandler;// Prepare logger$log=newLogger('myApp');$log->pushHandler(newStreamHandler('logs/development.log',Logger::DEBUG));$log->pushHandler(newStreamHandler('logs/production.log',Logger::WARNING));// Use logger$log->debug('This is a debug message');$log->warning('This is a warning message');
The fourth PHP-FIG recommendation describes a standardized autoloader strategy. An autoloader is a strategy for finding a PHP class, interface, or trait and loading it into the PHP interpreter on-demand at runtime. PHP components and frameworks that support the PSR-4 autoloader standard can be located by and loaded into the PHP interpreter with only one autoloader. This is a big deal given the modern PHP ecosystem’s affinity for many interoperable components.
How often have you seen code like this at the top of your PHP files?
<?phpinclude'path/to/file1.php';include'path/to/file2.php';include'path/to/file3.php';
All too often, right? You’re probably familiar with the require(), require_once(), include(),
and include_once() functions. These functions load an external PHP file into the
current script, and they work wonderfully if you have only a few PHP scripts.
However, what if you need to include a hundred PHP scripts? What if you need to include a thousand PHP
scripts? The require() and include() functions do not scale well, and this is why
PHP autoloaders are important. An autoloader is a strategy for finding a PHP class,
interface, or trait and loading it into the PHP interpreter on-demand at runtime, without
explicitly including files as the example does.
Before the PHP-FIG introduced its PSR-4 recommendation, PHP component and framework authors
used the __autoload() and spl_autoload_register() functions to register custom
autoloader strategies. Unfortunately, each PHP component and framework used a unique
autoloader, and every autoloader used different logic to locate and load PHP classes,
interfaces, and traits. Developers using these components and frameworks were obliged
to invoke each component’s autoloader when bootstrapping a PHP application. I use Sensio Labs’
Twig template component all the time. It’s awesome. Without PSR-4, however, I have
to read Twig’s documentation and figure out how to register its custom autoloader
in my application’s bootstrap file, like this:
<?phprequire_once'/path/to/lib/Twig/Autoloader.php';Twig_Autoloader::register();
Imagine having to research and register unique autoloaders for every PHP component in your application. The PHP-FIG recognized this problem and proposed the PSR-4 autoloader recommendation to facilitate component interoperability. Thanks to PSR-4, we can autoload all of our application’s PHP components with only one autoloader. This is amazing. Most modern PHP components and frameworks are compatible with PSR-4. If you write and distribute your own components, make sure they are compatible with PSR-4, too! Participating components include Symfony, Doctrine, Monolog, Twig, Guzzle, SwiftMailer, PHPUnit, Carbon, and many others.
Like any PHP autoloader, PSR-4 describes a strategy to locate and load PHP classes, interfaces, and traits during runtime. The PSR-4 recommendation does not require you to change your code’s implementation. Instead, PSR-4 only suggests how your code is organized into filesystem directories and PHP namespaces. The PSR-4 autoloader strategy relies on PHP namespaces and filesystem directories to locate and load PHP classes, interfaces, and traits.
The essence of PSR-4 is mapping a top-level namespace prefix to a specific
filesystem directory. For example, I can tell PHP that classes, interfaces,
or traits beneath the \Oreilly\ModernPHP namespace live beneath the src/
physical filesystem directory. PHP now knows that any classes, interfaces, or traits
that use the \Oreilly\ModernPHP namespace prefix correspond to directories and files
beneath the src/ directory. For example, the \Oreilly\ModernPHP\Chapter1 namespace
corresponds to the src/Chapter1 directory, and the \Oreilly\ModernPHP\Chapter1\Example
class corresponds to the src/Chapter1/Example.php file.
PSR-4 lets you map a namespace prefix to a filesystem directory. The namespace prefix can be one top-level namespace. The namespace prefix can also be a top-level namespace and any number of subnamespaces. It’s quite flexible.
Remember when we talked about vendor namespaces in Chapter 2? The PSR-4 autoloader strategy is most relevant to component and framework authors who distribute code to other developers. A PHP component’s code lives beneath a unique vendor namespace, and the component’s author specifies which filesystem directory corresponds to the component’s vendor namespace—exactly as I demonstrated earlier. We’ll explore this concept more in Chapter 4.
We know that PSR-4 compatible code has a namespace prefix that maps to a base filesystem directory. We also know that subnamespaces beneath the namespace prefix map to subdirectories beneath the base filesystem directory. Example 3-2 shows an autoloader implementation, borrowed from the PHP-FIG website, that finds and loads classes, interfaces, and traits based on the PSR-4 autoloader strategy.
<?php/*** An example of a project-specific implementation.** After registering this autoload function with SPL, the following line* would cause the function to attempt to load the \Foo\Bar\Baz\Qux class* from /path/to/project/src/Baz/Qux.php:** new \Foo\Bar\Baz\Qux;** @param string $class The fully qualified class name.* @return void*/spl_autoload_register(function($class){// project-specific namespace prefix$prefix='Foo\\Bar\\';// base directory for the namespace prefix$base_dir=__DIR__.'/src/';// does the class use the namespace prefix?$len=strlen($prefix);if(strncmp($prefix,$class,$len)!==0){// no, move to the next registered autoloaderreturn;}// get the relative class name$relative_class=substr($class,$len);// replace the namespace prefix with the base directory, replace namespace// separators with directory separators in the relative class name, append// with .php$file=$base_dir.str_replace('\\','/',$relative_class).'.php';// if the file exists, require itif(file_exists($file)){require$file;}});
Copy and paste this into your application, change the $prefix and $base_dir
variables, and you have yourself a working PSR-4 autoloader. However,
if you find yourself writing your own PSR-4 autoloader, stop and ask
yourself if what you are doing is really necessary. Why? Because we
can use PSR-4 autoloaders that are automagically generated by the
Composer dependency manager. Conveniently enough, that’s exactly
what we’ll talk about next in Chapter 4.
Modern PHP is less about monolithic frameworks and more about composing solutions from specialized and interoperable components. When I build a new PHP application, rarely do I reach straight for Laravel or Symfony. Instead, I think about which existing PHP components I can combine to solve my problem.
Modern PHP components are a new concept to many PHP programmers. I had no idea about PHP components until a few years ago. Before I knew better, I instinctually started PHP applications with a massive framework like Symfony or CodeIgniter without considering other options. I invested in a single framework’s closed ecosystem and used the tools it provided. If the framework did not provide what I needed, I was out of luck and I built additional functionality on my own. It was also difficult to integrate custom or third-party libraries into larger frameworks because they did not share common interfaces. I am relieved to inform you that times have changed, and we are no longer beholden to monolithic frameworks and their walled gardens.
Today, we choose from a vast and continually growing collection of specialized components
to create custom applications. Why waste time coding an HTTP request and response library
when the guzzle/http component already exists?
Why create a new router when the aura/router
and orno/route components work great? Why spend
time coding an adapter to Amazon’s S3 online storage service when the
aws/aws-sdk-php and
league/flysystem components can be used
instead? You get my drift. Other developers have spent countless development hours creating,
perfecting, and testing specialized components that do one thing really well. It’s silly not
to take advantage of these components to build better applications more quickly instead of
wasting time reinventing the wheel.
A component is a bundle of code that helps solve a specific problem in your PHP application. For example, if your PHP application sends and receives HTTP requests, there’s a component to do that. If your PHP application parses comma-delimited data, there’s a PHP component to do that. If your PHP application needs a way to log messages, there’s a component for that. Instead of rebuilding already-solved functionality, we use PHP components and spend more time solving our project’s larger objectives.
Technically speaking, a PHP component is a collection of related classes, interfaces, and traits that solve a single problem. A component’s classes, interfaces, and traits usually live beneath a common namespace.
In any marketplace, there are good products and there are bad products. The same concept applies to PHP components. Just as you inspect an apple at the grocery store, you can use a few tricks to spot a good PHP component. Here are a few characteristics of good PHP components:
A PHP component is laser-focused and exists only to solve a single problem very well. It is not a jack-of-all-trades and master of none; it is a master of one. It is obsessed with solving a single problem, and it encapsulates its genius beneath a simple user interface.
A PHP component is no larger than it needs to be. It contains the least amount of PHP code necessary to solve one problem. The amount of code varies. A PHP component can have one PHP class. It can also have several PHP classes organized into subnamespaces. There is no correct number of classes in a PHP component. It uses however many are necessary to solve its one problem.
A PHP component plays well with others. After all, this is the point of PHP components—their existence depends on their cooperation with other components to build larger solutions. A PHP component does not pollute the global namespace with its own code. Instead, a PHP component lives beneath its own namespace to avoid name collisions with other components.
A PHP component is well-tested. This is easy to accomplish thanks to its small size. If a PHP component is small and laser-focused, it is very likely easily tested. Its concerns are few, and its dependencies can be easily identified and mocked. The best PHP components provide their own tests and have sufficient test coverage.
A PHP component is well-documented. It should be easy for developers to install, understand, and use. Good documentation makes this possible. The PHP component should have a README file that says what the component does, how to install it, and how to use it. The component may also have its own website with more in-depth information. And good documentation should also extend into the PHP component’s source code. Its classes, methods, and properties should have inline docblocks that describe the code, its parameters, its return values, and its potential exceptions.
The problem with frameworks (particularly older frameworks) is that they are an expensive investment. When we choose a framework, we invest in that framework’s tools. Frameworks usually provide a smorgasbord of tools. But sometimes we need a specific something that the framework does not provide, and it becomes our burden to find and integrate a custom PHP library. Integrating third-party code into a framework is difficult because the third-party code and the PHP framework probably don’t share common interfaces.
When we choose a framework, we invest in that framework’s future. We put our faith behind the framework’s core development team. We assume the framework’s developers will continue investing their own time into developing the framework and ensuring that its code remains up-to-date with modern standards. And often this does not happen. Frameworks are very large, and they require a lot of time and effort to maintain. Project maintainers have their own lives, jobs, and interests. And lives, jobs, and interests change.
To be fair, larger PHP components are also at risk of abandonment, especially if a component only has one core developer.
Also, who’s to say that a particular framework will remain the best tool for the job? Large projects that exist for many years must perform well and be well-tuned now and into the future. The wrong PHP framework may hinder this ability. Older PHP frameworks that have fallen out of fashion may become slower and outmoded as they lose community support. Older frameworks are often written with procedural code instead of modern object-oriented code. Your newer team members may be unfamiliar with an older framework’s codebase. There is a lot to consider when deciding whether or not to use a PHP framework.
So far I’ve spoken only about the downsides of frameworks. Frameworks are not all bad. Symfony is an excellent example of a modern PHP framework. Fabien Potencier and Sensio Labs built the Symfony Framework as an amalgam of smaller and decoupled Symfony components. These components can be used together as a framework or piecemeal in custom applications.
Other, older frameworks are making a similar transition to modern PHP components. The Drupal content management framework is another example. Drupal 7 is written with procedural PHP code that lives in the global PHP namespace. It ignores modern PHP practices to support its legacy codebase. However, Drupal 8 is a ginormous and commendable leap into modern PHP. Drupal 8 leverages the comparative advantages of many different PHP components to build a modern content management platform.
Laravel is also a popular PHP framework written by Taylor Otwell. Like Symfony, Laravel is built atop its own Illuminate component library. However (at time of publishing), Laravel’s components are not easily decoupled for use in non-Laravel applications. Laravel does not use the PSR-2 community standards, and Laravel does not adhere to the Semantic Versioning scheme. Don’t let this dissuade you though. Laravel is still an amazing framework that can create very powerful applications.
Should you use components or a framework? Use the right tool for the job. Most modern PHP frameworks are only a set of conventions built atop smaller PHP components.
If you are working on a smaller project that can be solved with a precise collection of PHP components, then use components. Components make it super-easy to shop for and use existing tools so we can focus less on boilerplate and more on the larger task at hand. Components also help our code remain lightweight and nimble. We use only the code we need, and it’s super-easy to swap one component with another that may be better suited for our project.
If you are working on a large project with multiple team members and can benefit from the conventions, discipline, and structure provided by a framework, then use a framework. However, frameworks make many decisions for us and require us to adhere to its set of conventions. Frameworks are less flexible, but we do get far more out-of-the-box than we do with a collection of PHP components. If these tradeoffs are acceptable, by all means use a framework to guide and expedite your project development.
You can find modern PHP components on Packagist (Figure 4-1), the de facto PHP component directory. This website aggregates PHP components and makes them searchable by keyword. The best PHP components are listed on Packagist. I tip my hat to Jordi Boggiano and Igor Wiedler for creating such an invaluable community resource.
I’m often asked which components I believe are the best PHP components. This is a subjective question. However, I largely agree with the PHP components listed at Awesome PHP. This is a list of good PHP components curated by Jamie York.
Do not waste your time solving problems that are already solved. Do you need to send or receive HTTP
messages? Go to Packagist and search for http; Guzzle is the first result. Use it. Do you need to
parse a CSV file? Go to Packagist and search for csv; pick a CSV component and use it. Think of
Packagist as a grocery store for PHP components where you can shop for the best ingredients. Packagist
probably has a PHP component that solves your problem.
What if there are multiple PHP components on Packagist that do what you need? How do you pick the best one? Packagist keeps statistics about each PHP component. Packagist tells you how many times each PHP component has been downloaded and starred (Figure 4-2). More downloads and stars indicate a component may be a good option (this is not always true). That being said, don’t discount newer packages with fewer downloads. Many new components are added every day.
It can be difficult to find the perfect PHP component if your Packagist keyword search returns a large number of results. You can’t always rely on download statistics, because crowds are not always right. This is a problem that Packagist must address as it becomes more popular. I recommend you rely on word of mouth and peer recommendations to confirm your PHP component selection.
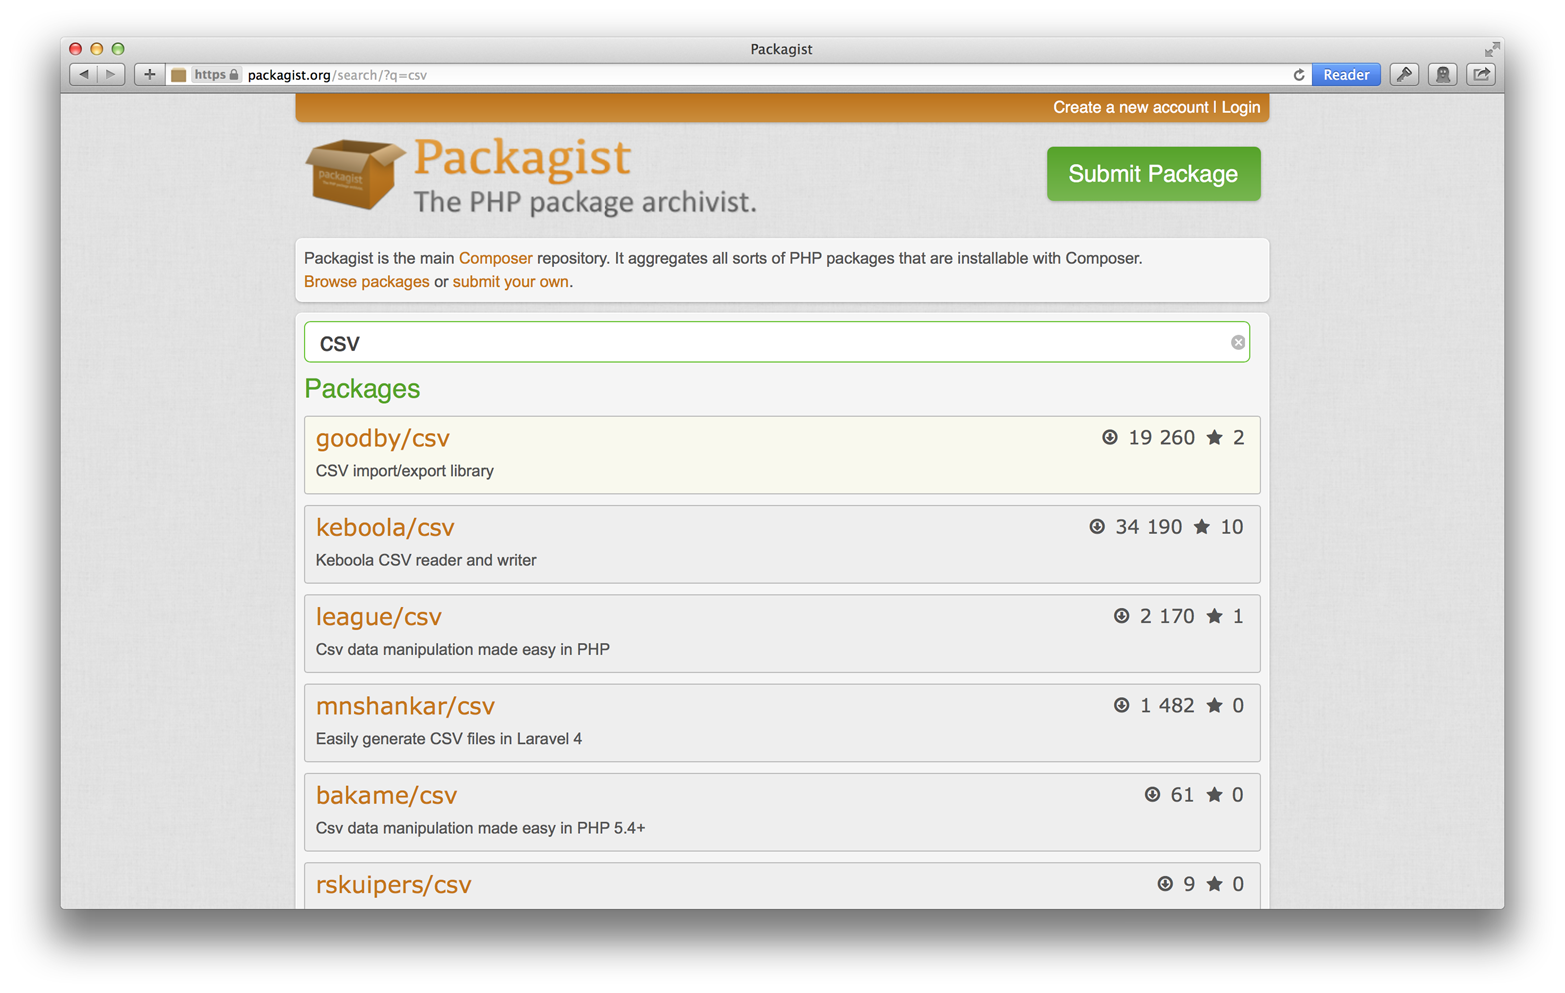
If you find a PHP component that you like, star the PHP component on Packagist and share it with your fellow PHP developers on Twitter, Facebook, IRC, Slack, and your other communication channels. This helps the best PHP components bubble up so they are discovered by other developers.
Packagist is where you find PHP components. Composer is how you install PHP components. Composer is a dependency manager for PHP components that runs on the command line. You tell Composer which PHP components you need, and Composer downloads and autoloads the components into your project. It’s as simple as that. Because Composer is a dependency manager, it also resolves and downloads your components’ dependencies (and their dependencies, ad infinitum).
Composer works hand-in-hand with Packagist, too. When you tell Composer you want to use the
guzzlehttp/guzzle component, Composer fetches the guzzlehttp/guzzle component listing on
Packagist, finds the component’s repository URL, determines the appropriate version to use,
and discovers the component’s dependencies. Composer then downloads the guzzlehttp/guzzle
component and its dependencies into your project.
Composer is important because dependency management and autoloading are hard problems to solve.
Autoloading is the process of automatically loading PHP classes on-demand without explicitly
loading them with the require(), require_once(), include(), or include_once() functions.
Older PHP versions let us write custom autoloaders with the \__autoload() function; this function
is automatically invoked by the PHP interpreter when we instantiate a class that has not already
been loaded. PHP later introduced the more flexible spl_autoload_register() function in its
SPL library. Exactly how a PHP class is autoloaded is entirely up to the developer. Unfortunately,
the lack of a common autoloader standard often necessitates a unique autoloader implementation
for every project. This makes it difficult to use code created and shared by other developers
if each developer provides a unique autoloader.
The PHP Framework Interop Group recognized this problem and created the PSR-0 standard (superseded by the PSR-4 standard). The PSR-0 and PSR-4 standards suggest how to organize code into namespaces and filesystem directories so it is compatible with one standard autoloader implementation. As I alluded to in Chapter 3, we don’t have to write a PSR-4 autoloader on our own. Instead, the Composer dependency manager automatically generates a PSR-compatible autoloader for all of our project’s PHP components. Composer effectively abstracts away dependency management and autoloading.
I believe Composer is the most important addition to the PHP community, period. It changed the way I create PHP applications. I use Composer for every PHP project because it drastically simplifies integrating and using third-party PHP components in my applications. If you haven’t used Composer yet, you should start researching Composer today.
Composer is easy to install. Open a terminal and execute this command:
curl -sS https://getcomposer.org/installer | php
This command downloads the Composer installer script with curl, executes the installer script
with php, and creates a composer.phar file in the current working directory. The composer.phar
file is the Composer binary.
Never execute code that you blindly download from a remote URL. Be sure you review the remote code first so you know exactly what it will do. Also make sure you download the remote code over HTTPS.
I prefer to move and rename the downloaded Composer binary to /usr/local/bin/composer with this command:
sudo mv composer.phar /usr/local/bin/composer
Be sure you run this command to make the composer binary executable:
sudo chmod +x /usr/local/bin/composer
Finally, add the /usr/local/bin directory to your environment PATH by appending this
line to your ~/.bash_profile file:
PATH=/usr/local/bin:$PATH
You should now be able to execute composer in your terminal application to see a list
of Composer options (Figure 4-3).
Now that Composer is installed, let’s download some PHP components. Composer is typically used to download PHP components on a per-project basis.
First, you should make a list of the components you need for your project. Specifically,
note each component’s vendor and package names. Each PHP
component has a vendor name and a package name. For example, the popular
league/flysystem component’s vendor name is
league and its package name is flysystem. The vendor and package names are separated with
a / character. Together, the vendor and package names form the full component name
league/flysystem.
The vendor name is globally unique and provides the global identity to
which its encompassed packages belong. The package name uniquely identifies a single package
beneath a given vendor name. Composer and Packagist use the vendor/package naming convention
to avoid name collisions among PHP components from different vendors. You can find a PHP
component’s vendor and package names on the component’s Packagist directory listing (Figure 4-4).
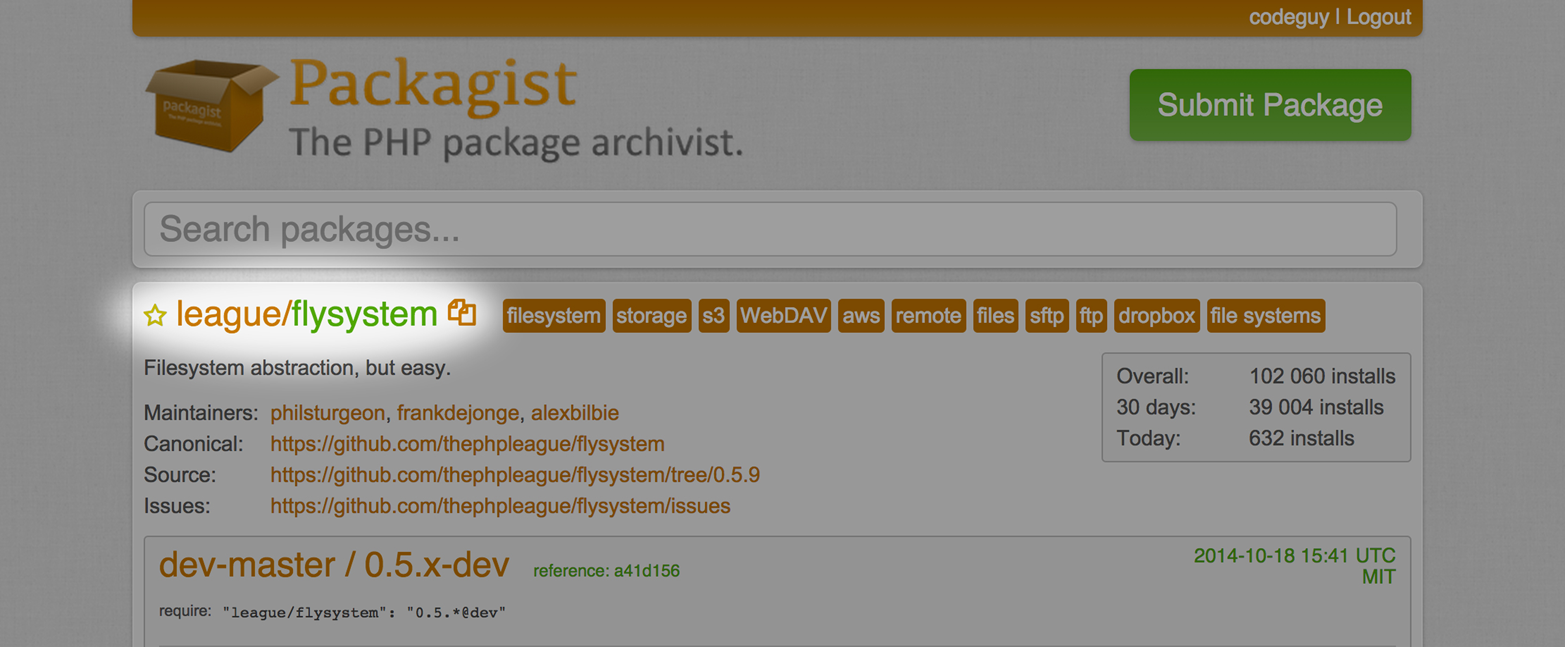
Each PHP component can have many available versions (e.g., 1.0.0, 1.5.0, or 2.15.0).
All available versions are listed on the component’s Packagist directory listing.
Modern PHP components use the Semantic Versioning scheme and contain three
numbers separated with a period (.) character (e.g., 1.13.2). The first number is the
major release number; the major release number is incremented whenever the PHP component is
updated with changes that break backward compatibility. The second number is the minor release
number; the minor release number is incremented whenever the PHP component is updated with minor
features that do not break backward compatibility. The third and final number is the
patch release number; the patch release number is incremented when the PHP component receives
backward-compatible bug fixes.
Fortunately, we don’t have to figure out each component’s most stable version number. Composer does this for us. Navigate to your project’s topmost directory in your terminal application and run this command once for each PHP component:
composer require vendor/package
Replace vendor/package with the component’s vendor and package names. To install the Flysystem component,
for example, run this command:
composer require league/flysystem
This command instructs Composer to find and install the PHP component’s most stable version. It also
instructs Composer to update the component up to, but not including, the component’s next major version.
The previous example, as of October 2014, installs Flysystem version 0.5.9, and it will update the
Flysystem component up to, but not including, version 1.*.
You can review the result of this command in the newly created or updated composer.json file in your project’s topmost directory. This command also creates a composer.lock file. Commit both of these files into your version control system.
Let’s reinforce our Composer skills by building an example PHP application that scans URLs from a CSV
file and reports all inaccessible URLs. Our project will send an HTTP request to each URL. If a
URL returns an HTTP response with a status code greater than or equal to 400, we’ll send the
inaccessible URL to standard out. Our project will be a command-line application, and the path
to the CSV file will be the first and only command-line argument. Ultimately, we’ll execute our
script, pass it the CSV file path, and see a list of inaccessible URLs on standard out:
php scan.php /path/to/urls.csv
Our project directory looks like Figure 4-5.
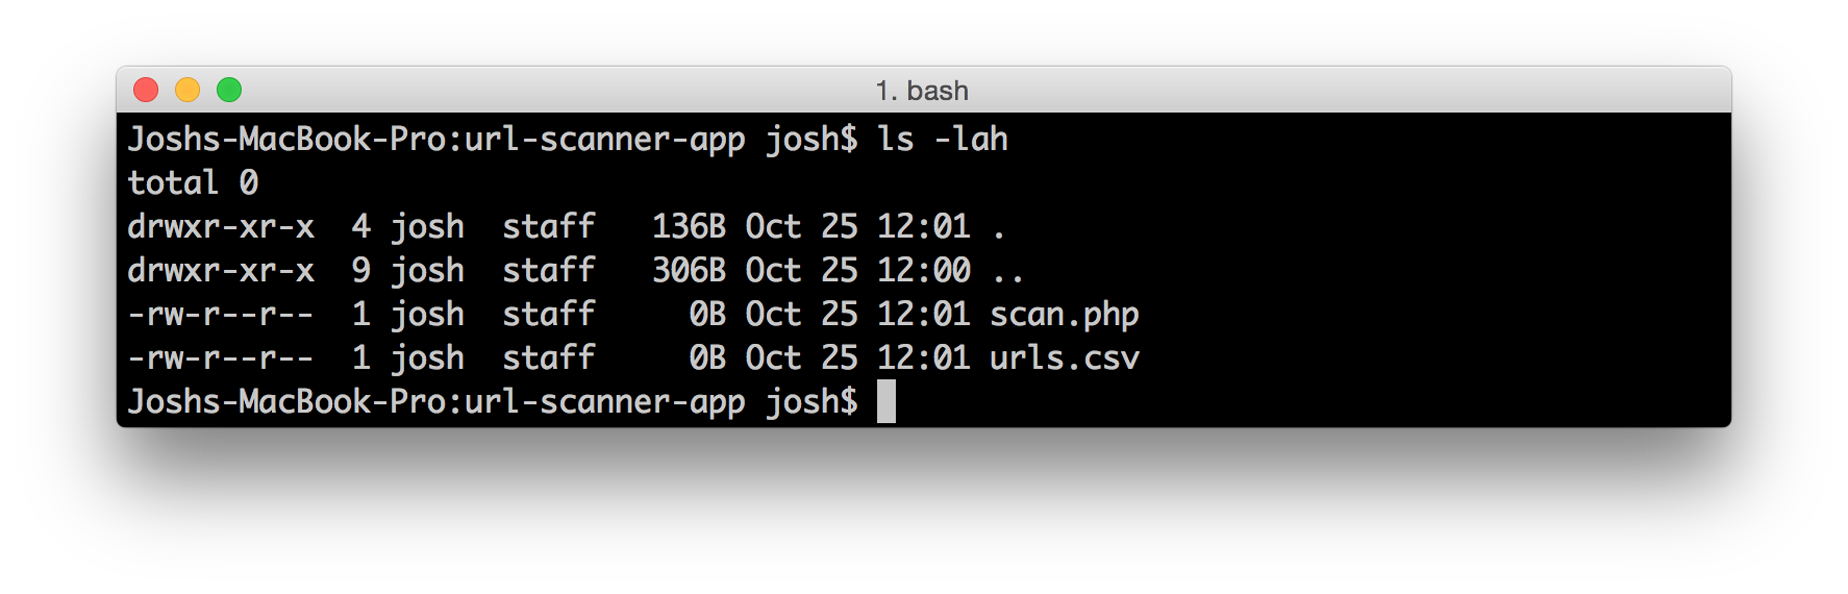
The first thing I do when starting a new PHP project is determine what tasks can be solved with existing PHP components. The scan.php script opens and iterates a CSV file, so we’ll need a PHP component that can read and iterate CSV data. The scan.php script also sends an HTTP request to each URL in the CSV file, so we’ll need a PHP component that can send HTTP requests and inspect HTTP responses. It is certainly possible to write our own code to iterate a CSV file or send HTTP requests, but why should we waste our time if these problems are already solved? Remember, our goal is to scan a list of URLs. Our job is not to build HTTP and CSV parser libraries.
After browsing Packagist, I find the guzzlehttp/guzzle and league/csv PHP components. The former
handles HTTP messages and the latter parses and iterates CSV data. Let’s install these components
with Composer using these commands in the project’s topmost directory:
composer require guzzlehttp/guzzle;composer require league/csv;
These commands instruct Composer to download these two components into a new vendor/ directory in the project’s topmost directory. It also creates a composer.json file and a composer.lock file.
After you install project dependencies with Composer, you’ll notice that Composer creates a composer.lock file. This file lists all of the PHP components used by our project and the components’ exact version numbers (including major, minor, and patch numbers). This effectively locks our project to these specific PHP component versions.
Why is this important? If a composer.lock file is present, Composer downloads the specific PHP component versions listed in the composer.lock file regardless of the component’s latest available version on Packagist. You should version control the composer.lock file and distribute it to your team members so they can use the same PHP component versions as you. If your team members, your staging server, and your production server all use the same PHP component versions, you minimize the risk of bugs caused by component version discrepancies.
The one downside with the composer.lock file is that composer install will not install versions
newer than those listed in the composer.lock file. If you do need to download newer component
versions and update your composer.lock file, use composer update. The composer update
command updates your components to their latest stable versions and also updates the composer.lock
file with new PHP component version numbers.
Now that our project’s PHP components are installed with Composer, how do we use them? Luckily for us,
when Composer downloads the PHP components it also creates a single PSR-compatible autoloader for all
of our project dependencies. All we have to do is require Composer’s autoloader at the top of
the scan.php file:
<?phprequire'vendor/autoload.php';
Composer’s autoloader is just a PHP file named autoload.php located inside the vendor/ directory. When Composer downloads each PHP component, Composer inspects each component’s own composer.json file to determine how the component prefers to be autoloaded and, with this information, creates a local PSR-compatible autoloader for it. Ultimately, we can instantiate any of our project’s PHP components and they are autoloaded on-demand! Pretty neat, huh?
Let’s finish the scan.php script using the Guzzle and CSV components. Remember, the path to
the CSV file is provided as the first command-line argument (accessible in the $argv array)
when our PHP script is executed. The scan.php script looks like Example 4-1.
<?php// 1. Use Composer autoloaderrequire'vendor/autoload.php';// 2. Instantiate Guzzle HTTP client$client=new\GuzzleHttp\Client();// 3. Open and iterate CSV$csv=new\League\Csv\Reader($argv[1]);foreach($csvas$csvRow){try{// 4. Send HTTP OPTIONS request$httpResponse=$client->options($csvRow[0]);// 5. Inspect HTTP response status codeif($httpResponse->getStatusCode()>=400){thrownew\Exception();}}catch(\Exception$e){// 6. Send bad URLs to standard outecho$csvRow[0].PHP_EOL;}}
Pay attention to how we use the \League\Csv and \GuzzleHttp namespaces when we
instantiate the guzzlehttp/guzzle and league/csv components. How do we know to
use these particular namespaces? I read the guzzlehttp/guzzle and league/csv
documentation. Remember, good PHP components have documentation.
Add a few URLs to the urls.csv file, one URL per line. Make sure at least one URL is invalid. Next, open a terminal and execute the scan.php script:
php scan.php urls.csv
We execute the php binary and pass it two arguments. The first argument is the path
to the scan.php script. The second argument is the path to the CSV file that contains
a list of URLs. If any of the URLs return an unsuccessful HTTP response, they are output
to the terminal screen.
So far I’ve assumed you are using open source PHP components that are publicly available. As much as I create and use open source software, I recognize that using only open source PHP components may not always be possible. Sometimes we have to mix open source and proprietary components in the same application. This is especially true for companies that use internally developed PHP components that cannot be open sourced due to licensing or security concerns. Composer makes this a nonissue.
Composer can manage private PHP components whose repositories require authentication.
When you run composer install or composer update, Composer prompts you if a
component’s repository requires authentication credentials. Composer also asks if
you want to save the repository authentication credentials in a local auth.json
file (created adjacent to the composer.json file). An example auth.json file looks like this:
{"http-basic":{"example.org":{"username":"your-username","password":"your-password"}}}
In most cases, you should not version control the auth.json file. Instead, let project developers create their own auth.json file with their own authentication credentials.
If you’d rather not wait for Composer to request authentication credentials, you can manually tell Composer your authentication credentials for a remote machine with this command:
composer config http-basic.example.org your-username your-password
In this example, http-basic lets Composer know we are adding authentication details
for a given domain. The example.org hostname identifies the remote machine that
contains the private component repository. The final two arguments are the username
and password credentials. By default, this command saves credentials in the current
project’s auth.json file.
You can also save authentication credentials system-wide by using the --global flag.
This flag lets Composer use your credentials for all projects on your local machine:
composer config --global http-basic.example.org your-username your-password
Global credentials are saved in the ~/.composer/auth.json file. If you are using Windows, global credentials are saved in %APPDATA%/Composer.
Learn more about Composer and private repositories in Authentication management in Composer.
By this point you should be able to find and use PHP components. Let’s switch gears and talk about creating PHP components. Specifically, we’ll convert the URL scanner application into a PHP component and submit it to the Packagist component directory.
Creating PHP components is a great way to share your work with the greater PHP community. The PHP community is built on a foundation of sharing and helping others. If you use open source components in your applications, it’s always nice to return the favor with a new and innovative open source component.
Be careful that you do not rewrite components that already exist. If you improve upon an existing component, consider sending your improvements to the original component as a pull request. Otherwise, you risk confusing and fragmenting the PHP component ecosystem with duplicate components.
Before I build a PHP component, I choose the component’s vendor and package name. Remember, each PHP component uses a globally unique vendor and package name combination to avoid name collisions with other components. I recommend you use only lowercase letters for your vendor and package names.
A vendor name is the brand or identity to which a component belongs. Many of my own
PHP components use the codeguy vendor name because this is my online identity.
Choose a vendor name that best represents you or your component’s brand.
Search Packagist before you choose a vendor name to make sure it is not already claimed by another developer.
A package name identifies a PHP component beneath a given vendor name. Many components
can live beneath a single vendor name. For this example, I’ll use modernphp as the vendor
name and scanner as the package name.
As we discussed in Chapter 2, each component lives beneath its own PHP namespace so that it does not pollute the global namespace or collide with other components that use the same PHP class names.
A common misconception is that the component’s PHP namespace must match the component’s vendor and package names. This is not true. The component’s PHP namespace is unrelated to the component’s vendor and package names. The vendor and package names are only used by Packagist and Composer to identify a component. You use the component’s namespace when using the component in your PHP code.
For this tutorial, we’ll create our component beneath the PHP namespace Oreilly\ModernPHP. This
namespace does not exist yet. I just pulled this out of thin air for this particular component.
PHP components have largely standardized on this filesystem structure:
This directory contains the component’s source code (e.g., PHP class files).
This directory contains the component’s tests. We will not use this directory in this example.
This is the Composer configuration file. This file describes the component and tells Composer’s
autoloader to map your component’s PSR-4 namespace to the src/ directory.
This Markdown file provides helpful information about this component, including its name, description, author, usage, contributor guidelines, software license, and credits.
This Markdown file describes how others can contribute to this component.
This plain-text file contains the component’s software license.
This Markdown file lists changes introduced in each new component version.
If you’re having trouble starting your own PHP component, have a look at the PHP League’s excellent PHP component boilerplate repository.
The composer.json file is required and must contain valid JSON. It includes information used by Composer to find, install, and autoload the PHP component. It also contains information for the component’s Packagist directory listing.
Example 4-2 shows a composer.json file for our URL scanner component. It includes all of the composer.json properties that I use most often for my own PHP components.
{"name":"modernphp/scanner","description":"Scan URLs from a CSV file and report inaccessible URLs","keywords":["url","scanner","csv"],"homepage":"http://example.com","license":"MIT","authors":[{"name":"Josh Lockhart","homepage":"https://github.com/codeguy","role":"Developer"}],"support":{"email":"help@example.com"},"require":{"php":">=5.4.0","guzzlehttp/guzzle":"~5.0"},"require-dev":{"phpunit/phpunit":"~4.3"},"suggest":{"league/csv":"~6.0"},"autoload":{"psr-4":{"Oreilly\\ModernPHP\\":"src/"}}}
This is admittedly a lot to digest, so let’s step through each composer.json property in detail:
nameThis is the component’s vendor and package name, separated with a / character. This value is
displayed on Packagist.
descriptionThis contains a few sentences that succinctly describe the component. This description is displayed on Packagist.
keywordsThis contains an appropriate number of keywords that describe the component. These keywords help others find this component on Packagist.
homepageThis is the URL of the component’s website.
licenseThis is the software license with which the PHP component is released. I prefer to use the MIT Public License. You can read more about software licenses at http://choosealicense.com. Remember to always release your code with a license.
authorsThis is an array of information for each project author. You should include at least a name and URL for each author.
supportThis is how the component’s users find technical support. I prefer to include an email address and support forum URL. You could also list an IRC channel, for example.
requireThis lists the PHP component’s own component dependencies. You should list each dependency’s vendor/package name and minimum version number. I also like to list the minimum PHP version required by this component. All dependencies listed beneath this property are installed for both development and production project installations.
require-devThis acts like the require property, but it lists only the dependencies required to develop
this component. For example, I often list phpunit as a dev dependency so that other component
contributors can write and run tests. These dependencies are installed only during development.
They are not installed in production projects.
suggestThis acts like the require property, but it merely suggests other components because they may
be useful when used with our component. Unlike the require property, this object’s values are
free text fields that describe each suggested component. Composer does not install suggested components.
autoloadThis tells the Composer autoloader how to autoload this component. I recommend you use
the PSR-4 autoloader, as demonstrated in Example 4-2. Beneath the psr-4 property, you map
the component’s namespace prefix to a filesystem path relative to the component’s root directory.
This makes our component compatible with a standard PSR-4 autoloader. In Example 4-2, I map
the Oreilly\ModernPHP namespace to the src/ directory. The mapping’s namespace must end with
two back slash characters (\\) to avoid conflicts with other components that use a namespace with
a similar sequence of characters. Based on the example mapping, if we instantiate a hypothetical
Oreilly\ModernPHP\Url\Scanner class, Composer will autoload the PHP class file at src/Url/Scanner.php.
Learn more about the complete composer.json schema at getcomposer.org.
README fileThe README file is often the component’s first introduction to its users. This is especially true for components hosted on GitHub and Bitbucket. Therefore, it’s important that the component’s README file provides, at a minimum, this information:
Component name and description
Install instructions
Usage instructions
Testing instructions
Contributing instructions
Support resources
Author credits
Software license
GitHub and Bitbucket can render README files in Markdown format. This means you can write well-formatted README files with headers, lists, links, and images. Use this to your advantage! All you have to do is add the .md or .markdown file extension to the README file. The same principle applies to the CONTRIBUTING and CHANGELOG files. Learn more about the Markdown format at Daring Fireball.
And now we arrive at the component’s meat and potatoes—its implementation. This is where you write the PHP classes, interfaces, and traits that form the PHP component. What classes you write, and how many, depends entirely on the PHP component’s purpose. However, all component classes, interfaces, and traits must live in the src/ directory and exist beneath the component’s namespace prefix listed in the composer.json file.
For this demonstration, I’ll create a single PHP class named Scanner that exists beneath the Url subnamespace beneath the Oreilly\ModernPHP namespace listed in the composer.json file. The Scanner class file lives at src/Url/Scanner.php. The Scanner class implements the same logic as our earlier URL scanner example application, except it encapsulates the URL
scanning behavior in a PHP class (Example 4-3).
<?phpnamespaceOreilly\ModernPHP\Url;classScanner{/*** @var array An array of URLs*/protected$urls;/*** @var \GuzzleHttp\Client*/protected$httpClient;/*** Constructor* @param array $urls An array of URLs to scan*/publicfunction__construct(array$urls){$this->urls=$urls;$this->httpClient=new\GuzzleHttp\Client();}/*** Get invalid URLs* @return array*/publicfunctiongetInvalidUrls(){$invalidUrls=[];foreach($this->urlsas$url){try{$statusCode=$this->getStatusCodeForUrl($url);}catch(\Exception$e){$statusCode=500;}if($statusCode>=400){array_push($invalidUrls,['url'=>$url,'status'=>$statusCode]);}}return$invalidUrls;}/*** Get HTTP status code for URL* @param string $url The remote URL* @return int The HTTP status code*/protectedfunctiongetStatusCodeForUrl($url){$httpResponse=$this->httpClient->options($url);return$httpResponse->getStatusCode();}}
Instead of parsing and iterating a CSV file, we inject an array of URLs into the Scanner class constructor.
We want our URL scanner class to be as generic as possible. If we demand a CSV file, we inherently limit
our component’s usefulness. If we accept an array of URLs, we let the end user decide how to fetch an array of
URLs (from a PHP array, a CSV file, an iterator, etc). That being said, we still recommend the
league/csv component because it can be helpful for developers using our component. We include the
league/csv component in the composer.json manifest’s suggest property.
The Scanner class has a hard dependency on the guzzlehttp/guzzle component. However, we isolate each
URL’s HTTP request in the getStatusCodeForUrl() method. This lets us stub (or override) this method’s
implementation in our component’s unit tests so that our tests do not rely on a working Internet connection.
We’re almost done. Before we submit our component to Packagist, we must publish it to a public code repository. I prefer to publish my open source PHP components to GitHub. However, any public Git repository is fine (I have published this component to GitHub).
It’s also a good idea to tag each component release using the Semantic Versioning scheme. This lets component
consumers request specific versions of your component (e.g., ~1.2). I’ll create a 1.0.0 tag for the URL
scanner component.
Now we’re ready to submit the component to Packagist. If you don’t use GitHub, go ahead and create a Packagist account. You can also log in to Packagist with your GitHub credentials.
Once logged in, click the big green Submit Package button at the top right of the website. Enter the full Git repository URL into the Repository URL text field and click the Check button. Packagist verifies the repository URL and prompts you to confirm your submission. Click Submit to finalize your component submission. Packagist creates and redirects you to the component listing, which looks Figure 4-6.
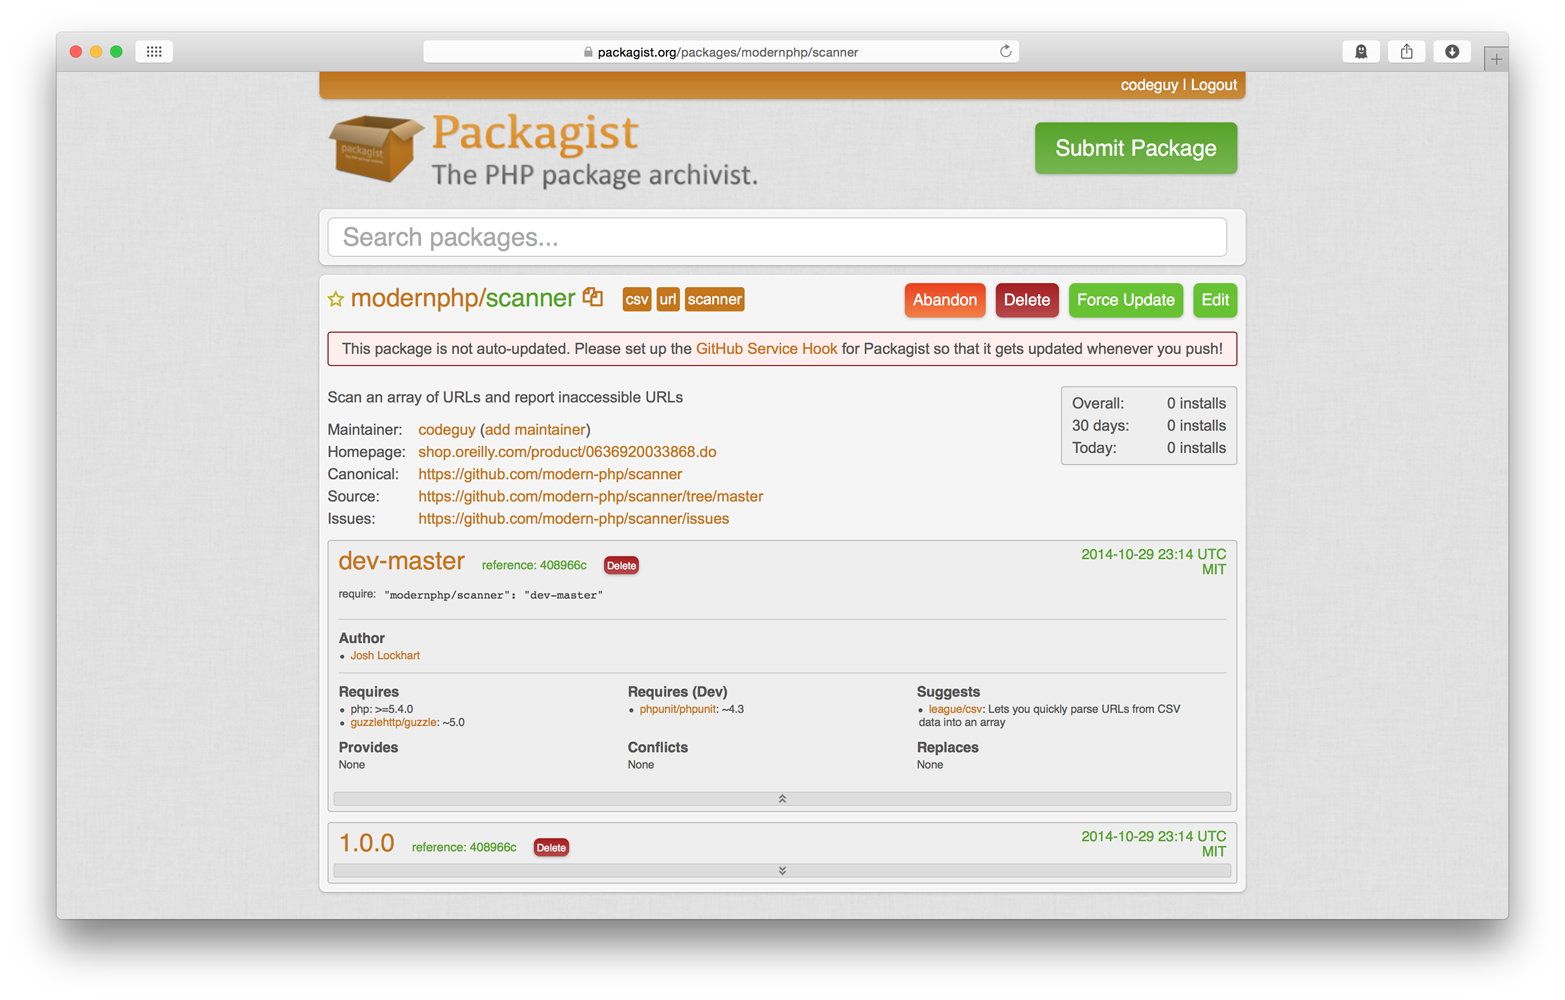
You’ll notice it pulls the component name, description, keywords, dependencies, and suggestions
from the component’s composer.json file. You’ll also notice that it shows the repository branches
and tags, too. Packagist establishes a direct correlation between repository tags and semantic version
numbers. This is why I recommend your repository tags be valid version numbers like 1.0.0, 1.1.0,
and so on. However, we still have that big red alert message that reads:
This package is not auto-updated. Please set up the GitHub Service Hook for
Packagist so that it gets updated whenever you push!
We can activate a GitHub or Bitbucket hook that notifies Packagist whenever the component repository is updated. Learn how to setup this repository hook at https://packagist.org/profile/.
We’re done! Now anyone can install the URL scanner component with Composer and use it in their PHP applications. Run this command in your terminal to install the URL scanner component with Composer:
composer require modernphp/scanner
Then you can use the URL scanner component, as shown in Example 4-4.
<?phprequire'vendor/autoload.php';$urls=['http://www.apple.com','http://php.net','http://sdfssdwerw.org'];$scanner=new\Oreilly\ModernPHP\Url\Scanner($urls);print_r($scanner->getInvalidUrls());
This chapter contains an assortment of good practices that you should apply when building PHP applications. Following good practices makes your applications faster, more secure, and more stable. The PHP language is an accumulation of tools introduced piecemeal over a long period of time, and we use these tools to apply good practices. Tools change with the passage of time as newer and better solutions are introduced in newer PHP versions. Unfortunately, the PHP language still contains outdated tools from its past, and it’s possible to build slow and insecure applications with these outmoded tools if you’re not careful. The trick is knowing which tools to use and which to ignore. That’s what this chapter is all about.
I’m not preaching “best practices” from atop an academic ivory tower. This chapter contains good and practical advice that I use every day in all of my own projects. You can immediately apply this knowledge to your own projects.
Good practices demonstrated in this chapter have always been possible with past and present PHP versions. However, how you implement these practices changes as the PHP language evolves. Newer PHP versions introduce tools that make it easier to apply good practices. This chapter demonstrates how to apply good practices with the latest tools in PHP 5.3+.
Fox Mulder is correct—trust no one. Never trust any data that originates from a source not under your direct control. A few external sources are:
$_GET
$_POST
$_REQUEST
$_COOKIE
$argv
php://stdin
php://input
file_get_contents()
Remote databases
Remote APIs
Data from your clients
All of these external data sources are potential attack vectors that can inject malicious data into your PHP scripts (intentionally or accidentally). Writing a PHP script that receives user input and renders output is easy. Doing so safely requires a bit more thought. The simplest advice I can give you is this: sanitize input, validate data, and escape output.
When you sanitize input (i.e., data from any of the sources listed previously),
you escape or remove unsafe characters. It’s important to sanitize input data
before it reaches your application’s storage layer (e.g., Redis or MySQL).
This is your first line of defense. For example, assume your website comment
form accepts HTML. By default, nothing prevents a visitor from adding a devious
<script> tag to the comment text like this:
<p>This was a helpful article!</p><script>window.location.href='http://example.com';</script>
If you don’t sanitize this comment, you’ll inject malevolent code into your database that can be rendered into your website’s markup. When your website visitors go to a page with this unsanitized comment, they’re redirected to a website that does bad things. This is one example why you must sanitize input data that you do not control. In my experience, there are several types of input data that you’ll run into most often: HTML, SQL queries, and user profile information (i.e., email addresses and phone numbers).
You sanitize HTML special characters (e.g., &, >, ″) into their
HTML entity equivalents with the htmlentities() function (Example 5-1). This function
escapes all HTML characters in a given string and renders the string safe
for your application’s storage layer.
The htmlentities() function is dumb, though. It does not validate HTML
input. It does not escape single quotes by default. And it cannot
detect the input string’s character set. Here’s how to use the
htmlentities() function correctly. The first argument is the input string.
The second argument is the ENT_QUOTES constant, which prompts the function
to encode single quotes. The third argument specifies the input string’s
character set.
<?php$input='<p><script>alert("You won the Nigerian lottery!");</script></p>';echohtmlentities($input,ENT_QUOTES,'UTF-8');
If you require more finesse when sanitizing HTML input, use the HTML Purifier library. HTML Purifier is a very robust and secure PHP library that sanitizes HTML input according to rules that you provide. The HTML Purifier library’s downside is that it is slow and potentially difficult to configure.
There are times when you must build a SQL query based on input data.
Sometimes this input data arrives in an HTTP request query string
(e.g., ?user=1). Other times this input data arrives as an HTTP
request URI segment (e.g., /users/1). If you’re not careful, bad people can
purposefully malform your SQL queries and wreak havoc on your database.
For example, I see many beginner PHP programmers build SQL queries
by concatenating raw $_GET and $_POST input data, as in Example 5-2.
$sql=sprintf('UPDATE users SET password = "%s" WHERE id = %s',$_POST['password'],$_GET['id']);
This is bad! What if someone sends this HTTP request to your PHP script?
POST/user?id=1HTTP/1.1Content-Length:17Content-Type:application/x-www-form-urlencodedpassword=abc";--
This HTTP request sets every user’s password to abc because many SQL databases
consider -- to be the beginning of a comment causing subsequent text to be ignored. Never
use unsanitized input data in a SQL query. If you need to integrate input data
in a SQL query, use a PDO prepared statement. PDO is a database abstraction layer
built into PHP that presents a single interface to multiple databases. PDO
prepared statements are a PDO tool that sanitizes and safely embeds external data
into a SQL query to avoid problems like Example 5-2. I consider PDO and PDO
statements extremely important tools, so I’ve given them their own section later
in this chapter.
If your application has user accounts, you’ll likely encounter
email addresses, telephone numbers, zip codes, and other
profile-related information. PHP anticipates this scenario with the
filter_var() and filter_input() functions. These two functions
accept a variety of flags to sanitize different forms of input: emails,
URL-encoded strings, integers, floats, HTML characters, URLs, and
specific ASCII character ranges.
Example 5-3 demonstrates how to sanitize an email address by removing all characters except letters, digits, and !#$%&'*+-/=?^_`{|}~@.[].
<?php='john@example.com';$emailSafe=filter_var(,FILTER_SANITIZE_EMAIL);
Example 5-4 demonstrates how to sanitize a user’s bio by removing characters below ASCII 32 and escaping characters above ASCII 127.
<?php$string="\nIñtërnâtiônàlizætiøn\t";$safeString=filter_var($string,FILTER_SANITIZE_STRING,FILTER_FLAG_STRIP_LOW|FILTER_FLAG_ENCODE_HIGH);
Discover more filter_var() flags and options at http://php.net/manual/function.filter-var.php.
It is also important to validate data. Unlike sanitization, validation
does not remove information from input data. Validation only confirms that
input data meets your expectations. If you expect an email address, make
sure the input data is an email address. If you expect a phone number, make
sure the input data is a phone number. That’s all there is to it. Validation
ensures that you persist accurate and well-formatted information in your
application’s storage layer. If you encounter invalid data, you can abort
the data persistence operation and surface an appropriate error message
to your application’s user. Validation also prevents potential database
errors. For example, if MySQL expects a DATETIME value but is given
the string next year, MySQL will either error out or use a default
(and incorrect) value. Either way, your application’s data integrity is
compromised by invalid data.
You can validate user input with the filter_var() function with
any of the FILTER_VALIDATE_* flags. PHP provides flags to validate Booleans,
emails, floats, integers, IP addresses, regular expressions, and URLs.
Example 5-5 demonstrates how to validate an email address.
<?php$input='john@example.com';$isEmail=filter_var($input,FILTER_VALIDATE_EMAIL);if($isEmail!==false){echo"Success";}else{echo"Fail";}
Pay close attention to the filter_var() function’s return value. If
the validation succeeds, the return value is the original validated value.
If the validation fails, the return value is false.
Although the filter_var() function provides a number of validation flags,
it cannot validate everything. I recommend these additional
validation components, too:
You should validate and sanitize input data to make sure input data is safe and what you expect.
When it’s time to render output to a web page or API response, it is very important that you escape your output. This is one more layer of protection that prevents malicious code from being rendered and inadvertently executed by your application’s users.
Escape output with the PHP htmlentities() function that
we mentioned earlier. Be sure you use ENT_QUOTES as the second
argument so that it escapes both single and double quotes. Specify
the appropriate character encoding (usually UTF-8) as the
third argument. Example 5-6 demonstrates how to
escape HTML output before it is rendered.
<?php$output='<p><script>alert("NSA backdoor installed");</script>';echohtmlentities($output,ENT_QUOTES,'UTF-8');
Some PHP template engines like twig/twig
(my favorite) or smarty/smarty
escape output automatically. The Twig template engine by Sensio Labs, for example,
escapes all output by default unless you tell it otherwise. This is a brilliant
default and provides a nice safety net for your PHP web applications.
Password security is monumentally important given the growing number of online attacks. How often have you cancelled a credit card because a major retailer was hacked? Many retailers have (and will) fall victim to malicious hackers because they do not protect their systems with best security practices. Your PHP applications are no different, and they are vulnerable to the same attacks unless you use appropriate precautions.
One important precaution is password security. It is your duty to safely manage, hash, and store user passwords. It doesn’t matter if your application is a trivial game or a vault for top-secret business documents. Your users entrust you with their information and expect you to guard their information with the best security practices available. I meet many PHP developers who don’t understand how to safely manage passwords. After all, securely managing passwords is hard. Fortunately, PHP provides built-in tools that make password security fairly easy. This section demonstrates how to use these tools with modern security practices.
You should never know your users’ passwords. You should never be able to know your users’ passwords. If your application’s database is hacked, you don’t want plain-text or decryptable passwords sitting in your database. Leaked passwords are a serious breach of trust, and they dump a mountain of legal liability on you or your company. The less you know, the safer you are.
It frustrates me when a website requires my account password to satisfy a specific format. It makes me even angrier when my account password cannot be longer than {N} number of characters. Why!? I understand that password formats may be restricted for compatibility with legacy applications or databases, but this is not an excuse for poor security practices.
Never restrict your users’ passwords. If you require passwords to fit a particular pattern, you are effectively providing a roadmap for bad guys to hack your application. If you must restrict user passwords, I recommend you only require a minimum length. It is not unreasonable to blacklist commonly used or dictionary-based passwords, too.
Never send passwords via email. If you send my password via email, I know three things: you know my password; you are storing my password in plain text or in a decryptable format; and you have no qualms sending my password over the Internet in plain text.
Instead, send an email with a URL where I can choose or change my own password. Web applications often generate a unique token that can only be used once to choose or change a password. For example, suppose I forget my account password for your web application. I click the “Forgot password” link on your login form, and I am directed to a form where I enter my email address to request a new password. Your application generates a unique token, and it associates this token with the account identified by my email address. Your application sends an email to the account’s email address with a URL that includes the unique token as a URL segment or a query-string parameter. When I visit the URL, your application validates the token and, if the token is valid, allows me to choose a new password for my account. After I choose a new password, your application invalidates the token.
You should hash user passwords. Do not encrypt user passwords. Encryption and hashing are not synonymous. Encryption is a two-way algorithm, meaning what is encrypted can later be decrypted by design. Hashing is a one-way algorithm. Hashed data cannot be reverted to its original form, and identical data always produces the same hash values.
When you store a user password in your database, you hash the password first and store the password hash in your database. If hackers break into your database, they see only meaningless password hashes that require a massive amount of time and NSA resources to crack.
Many hashing algorithms are available (e.g., MD5, SHA1, bcrypt, scrypt). Some are fast and designed to verify data integrity. Others are slow and designed to be safe and secure. Slow, safe, and secure are what we want when it comes to password generation and storage.
The most secure peer-reviewed hashing algorithm known today is bcrypt. Unlike MD5 and SHA1, bcrypt is designed to be very slow. The bcrypt algorithm automatically salts data to foil potential rainbow table attacks. The bcrypt algorithm also consumes a large amount of time (measured in seconds) while iteratively hashing data to generate a super-secure final hash value. The number of hash iterations is called the work factor. A higher work factor makes it exponentially more expensive for a bad guy to crack password hashes. The bcrypt algorithm is future-proof, too, because you can simply increase its work factor as computers become faster.
The bcrypt algorithm is extensively peer-reviewed. Minds far greater than my own have reviewed the bcrypt algorithm for potential exploits, and so far none has been found. It is very important that you rely on peer-reviewed hashing algorithms. Never create your own. There is safety in numbers, and odds are you are not a cryptography expert (unless you are, in which case tell Bruce Schneier I said hello).
As you can see, there are a lot of considerations to make when working with user passwords. However, Anthony Ferrara was kind enough to build the native password hashing API available in PHP 5.5.0. PHP’s native password hashing API provides easy-to-use functions that drastically simplify password hashing and verification. The password hashing API also uses the bcrypt hashing algorithm by default.
Anthony Ferrara (also known as @ircmaxell on Twitter) is a Developer Advocate at Google, and he is an authoritative source for all things related to PHP performance and security. Anthony is also the author of the PHP password hashing API. I encourage you to follow Anthony on Twitter and read his blog. I want to say a big thank you to Anthony. His contributions to PHP have single-handedly improved PHP application security by making best security practices more accessible.
You’ll encounter two scenarios when building web applications: user registration and user login. Let’s explore how the PHP password hashing API simplifies both scenarios.
A web application can’t exist without users, and users need a way
to sign up for an account. Let’s assume our hypothetical application
has a PHP file available at the URL /register.php. This PHP file
receives a URL-encoded HTTP POST request with an email address and
password. We create a user account if the email address is valid
and the password contains at least eight characters. This is an example
HTTP POST request:
POST/register.phpHTTP/1.1Content-Length:43Content-Type:application/x-www-form-urlencodedemail=john@example.com&password=sekritshhh!
Example 5-7 is the register.php file that receives the HTTP POST request.
01<?php02try{03// Validate email04=filter_input(INPUT_POST,'email',FILTER_VALIDATE_EMAIL);05if(!){06thrownewException('Invalid email');07}0809// Validate password10$password=filter_input(INPUT_POST,'password');11if(!$password||mb_strlen($password)<8){12thrownewException('Password must contain 8+ characters');13}1415// Create password hash16$passwordHash=password_hash(17$password,18PASSWORD_DEFAULT,19['cost'=>12]20);21if($passwordHash===false){22thrownewException('Password hash failed');23}2425// Create user account (THIS IS PSUEDO-CODE)26$user=newUser();27$user->=;28$user->password_hash=$passwordHash;29$user->save();3031// Redirect to login page32header('HTTP/1.1 302 Redirect');33header('Location: /login.php');34}catch(Exception$e){35// Report error36header('HTTP/1.1 400 Bad request');37echo$e->getMessage();38}
In Example 5-7:
Lines 4–7 validate the user email address. We toss an exception if the email is invalid.
Lines 10–13 validate the plain-text user password pulled from the HTTP request body. We toss an exception if the plain-text user password contains fewer than eight characters.
Lines 16–23 create a password hash with the PHP password hashing API’s password_hash() function. The password_hash() function’s first argument is the plain-text user password. The second argument is the PASSWORD_DEFAULT constant, which tells PHP to use the bcrypt hashing algorithm. The final argument is an array of hashing options. The cost array key specifies the bcrypt work factor. A work factor of 10 is used by default, but you should increase the cost factor for your particular hardware so that password hashing requires 0.1 to 0.5 seconds to finish. We toss an exception if the password hashing fails.
Lines 26–29 demonstrate saving a hypothetical user account. These lines contain pseudocode; you should replace these lines with code appropriate for your own application. The point is that you persist the user record with the password hash—not the plain-text password pulled from the HTTP request body. We also persist the email address that is used to locate and log in a user account.
Our hypothetical application also has a PHP file available at
URL /login.php. This file accepts an HTTP POST request that
contains an email address and password used to identify,
authenticate, and log in a user. This is an example
HTTP POST request:
POST/login.phpHTTP/1.1Content-Length:43Content-Type:application/x-www-form-urlencodedemail=john@example.com&password=sekritshhh!
The login.php file finds the user account identified by the email address, it verifies the submitted password with the user account’s password hash, and it logs in the user account. Example 5-8 shows the login.php file.
01<?php02session_start();03try{04// Get email address from request body05=filter_input(INPUT_POST,'email');0607// Get password from request body08$password=filter_input(INPUT_POST,'password');0910// Find account with email address (THIS IS PSUEDO-CODE)11$user=User::findByEmail();1213// Verify password with account password hash14if(password_verify($password,$user->password_hash)===false){15thrownewException('Invalid password');16}1718// Re-hash password if necessary (see note below)19$currentHashAlgorithm=PASSWORD_DEFAULT;20$currentHashOptions=array('cost'=>15);21$passwordNeedsRehash=password_needs_rehash(22$user->password_hash,23$currentHashAlgorithm,24$currentHashOptions25);26if($passwordNeedsRehash===true){27// Save new password hash (THIS IS PSUEDO-CODE)28$user->password_hash=password_hash(29$password,30$currentHashAlgorithm,31$currentHashOptions32);33$user->save();34}3536// Save login status to session37$_SESSION['user_logged_in']='yes';38$_SESSION['user_email']=;3940// Redirect to profile page41header('HTTP/1.1 302 Redirect');42header('Location: /user-profile.php');43}catch(Exception$e){44header('HTTP/1.1 401 Unauthorized');45echo$e->getMessage();46}
In Example 5-8:
Line 5 and 8 retrieve the email address and password from the HTTP request body.
Line 11 locates the user record associated with the email address submitted in the HTTP request body. I use pseudocode in Example 5-8, and you should replace this line with code specific to your own application.
Lines 14–16 compare the plain-text password submitted in the HTTP
request body with the password hash stored in the user record. We
compare the password and password hash with the password_verify()
function. If verification fails, we toss an exception.
Lines 19–34 make sure the user record’s password hash value is
up-to-date with the most current password algorithm options by
invoking the password_needs_rehash() function. If the
user record’s password hash is out of date, we create a new hash value
using the most current algorithm options, and we update the user record
with the new hash value.
The password_verify() function compares the plain-text
password from the HTTP request body to the password hash stored in
the user record. This function accepts two arguments. The first argument
is the plain-text password. The second argument is the existing password hash
in the user record. If the password_verify() function returns true,
the plain-text password is valid and we log in the user. Otherwise,
the plain-text password is invalid and we abort the login process.
After line 17 in Example 5-8, authentication is successful and we can log in the user. Before we do, however, it is important to check if the existing password hash in the user record is outdated. If it is outdated, we create a new password hash.
Why should we create a new password hash? Pretend our application was
created two years ago when we used a bcrypt work factor of 10. Today
we use a bcrypt work factor of 20 because hackers are smarter and
computers are faster. Unfortunately, there are some user accounts
whose password hashes were generated with a bcrypt work factor of 10.
After we verify the login request’s authenticity, we check if the
existing user record’s password hash needs to be updated with the
password_needs_rehash() function. This function makes sure a given
password hash is created with the most current hashing
algorithm options. If a password hash does need to be rehashed,
rehash the plain-text password from the HTTP request body using the
current algorithm options and update the user record with the new hash value.
It’s easiest to employ the password_needs_rehash() function in
the user login script because I have access to the old password hash
and the plain-text password at the same time.
If you cannot use PHP 5.5.0 or newer, fear not. You can use Anthony Ferrara’s
ircmaxell/password-compat
component. It implements all of these PHP password hashing API functions:
password_hash()
password_get_info()
password_needs_rehash()
password_verify()
Ferrara’s ircmaxell/password-compat component is a drop-in replacement for the
modern PHP password hashing API. Include the component in your application
with Composer and you’re off and running.
Working with dates and times is hard. Pretty much every PHP developer
has, at one time or another, made a mistake working with dates and
times. This is precisely why I recommend you do not manage dates and
times on your own. There are too many considerations to juggle, including
date formats, time zones, daylight saving, leap years, leap seconds, and months with
variable numbers of days. It’s too easy for your own calculations to become
inaccurate. Instead, use the DateTime, DateInterval, and DateTimeZone classes
introduced in PHP 5.2.0. These helpful classes provide a simple object-oriented
interface to accurately create and manipulate dates, times, and timezones.
The first thing you should do is declare a default time zone for
PHP’s date and time functions. If you don’t set a default time zone,
PHP shows an E_WARNING message. There are two ways to set the default
time zone. You can declare the default time zone in the php.ini file like this:
date.timezone='America/New_York';
You can also declare the default time zone during runtime with the
date_default_timezone_set() function (Example 5-9).
<?phpdate_default_timezone_set('America/New_York');
Either solution requires a valid time-zone identifier. You can find a complete list of PHP time-zone identifiers at http://php.net/manual/timezones.php.
The DateTime class provides an object-oriented interface to manage
date and time values. A single DateTime instance represents a specific
date and time. The DateTime class constructor (Example 5-10) is the simplest way to
create a new DateTime instance.
<?php$datetime=newDateTime();
Without arguments, the DateTime class constructor creates an instance
that represents the current date and time. You can pass a string
argument into the DateTime class constructor to specify a custom
date and time (Example 5-11). The string argument must use one of the valid date and time
formats listed at http://php.net/manual/datetime.formats.php.
<?php$datetime=newDateTime('2014-04-27 5:03 AM');
In an ideal world, you are given date and time data in a format that PHP
understands. Unfortunately, this is not always the case. Sometimes you must
work with date and time values in different and unexpected formats. I experience
this problem on a daily basis. Many of my clients send Excel spreadsheets
with data to import into an application, and each client provides date
and time values in wildly different formats. The DateTime class makes
this a nonissue.
Use the DateTime::createFromFormat() static method to create a DateTime
instance with a date and time string that uses a custom format. This method’s
first argument is the date and time string format. The second argument is
the date and time string that uses said format (Example 5-12).
<?php$datetime=DateTime::createFromFormat('M j, Y H:i:s','Jan 2, 2014 23:04:12');
The DateTime::createFromFormat() static method accepts the same date and
time formats as the date() function. Valid date and time formats are
available at http://php.net/manual/datetime.createfromformat.php.
The DateInterval class is pretty much prerequisite knowledge for manipulating
DateTime instances. A DateInterval instance represents a fixed
length of time (e.g., “two days”) or a relative length of time (e.g.,
“yesterday”). You use DateInterval instances to modify DateTime instances.
For example, the DateTime class provides add() and sub() methods to
manipulate a DateTime instance’s value. Both methods accept a DateInterval
argument that specifies the amount of time added to or subtracted from a
DateTime instance.
Instantiate the DateInterval class with its constructor. The DateInterval
class constructor accepts a string argument that provides an interval specification.
Interval specifications are a little tricky at first, but there’s not
much to them. First, an interval specification is a string that begins
with the letter P. Next, you append an integer. And last, you append a period designator that qualifies the preceding integer value.
Valid period designators are:
Y (years)
M (months)
D (days)
W (weeks)
H (hours)
M (minutes)
S (seconds)
An interval specification can include both date and time values. If you
include a time value, separate the date and time parts with
the letter T. For example, the interval specification P2D means two
days. The interval specification P2DT5H2M means two days, five
hours, and two minutes.
Example 5-13 demonstrates how to modify a DateTime instance by a given
interval of time using the add() method.
<?php// Create DateTime instance$datetime=newDateTime('2014-01-01 14:00:00');// Create two weeks interval$interval=newDateInterval('P2W');// Modify DateTime instance$datetime->add($interval);echo$datetime->format('Y-m-d H:i:s');
You can create an inverted DateInterval, too (Example 5-14). This lets you traverse
a DatePeriod instance in reverse chronology!
$dateStart=new\DateTime();$dateInterval=\DateInterval::createFromDateString('-1 day');$datePeriod=new\DatePeriod($dateStart,$dateInterval,3);foreach($datePeriodas$date){echo$date->format('Y-m-d'),PHP_EOL;}
This outputs:
2014-12-08
2014-12-07
2014-12-06
2014-12-05
If your application caters to an international clientele, you’ve probably wrestled with time zones. Time zones are tricky, and they are a constant source of confusion for many PHP developers.
PHP represents time zones with the DateTimeZone class. All you have
to do is pass a valid time-zone identifier into the DateTimeZone
class constructor:
<?php$timezone=newDateTimeZone('America/New_York');
Find a complete list of valid time-zone identifiers at http://php.net/manual/timezones.php.
You often use DateTimeZone instances when creating DateTime instances.
The DateTime class constructor’s optional second argument is a
DateTimeZone instance. The DateTime instance’s value, and all
modifications to its value, are now relative to the specified time zone.
If you omit the constructor’s second argument, the time zone is determined
by your default time-zone setting:
<?php$timezone=newDateTimeZone('America/New_York');$datetime=newDateTime('2014-08-20',$timezone);
You can change a DateTime instance’s time zone after instantiation
with the setTimezone() method (Example 5-15).
<?php$timezone=newDateTimeZone('America/New_York');$datetime=new\DateTime('2014-08-20',$timezone);$datetime->setTimezone(newDateTimeZone('Asia/Hong_Kong'));
I find it easiest if I always work in the UTC time zone. My server’s
time zone is UTC, and my PHP default time zone is UTC. If I persist
date and time values into a database, I save them as the UTC timezone.
I convert the UTC date and time values to the appropriate time zone
when I display the data to application users.
Sometimes you need to iterate a sequence of dates and times that recur
over a specific interval of time. Repeating calendar events are a
good example. The DatePeriod class solves this problem. The DatePeriod
class constructor accepts three required arguments:
A DateTime instance that represents the date and time from
which iteration begins
A DateInterval instance that represents the interval of time
between subsequent dates and times
An integer that represents the number of total iterations
A DatePeriod instance is an iterator, and each iteration yields a
DateTime instance. Example 5-16 yields three dates and times
separated by two-week intervals.
<?php$start=newDateTime();$interval=newDateInterval('P2W');$period=newDatePeriod($start,$interval,3);foreach($periodas$nextDateTime){echo$nextDateTime->format('Y-m-d H:i:s'),PHP_EOL;}
The DatePeriod class constructor accepts an optional fourth argument that
specifies the period’s explicit end date and time. If you want to exclude the
start date from the period’s iteration, pass the DatePeriod::EXCLUDE_START_DATE
constant as the final constructor argument (Example 5-17).
<?php$start=newDateTime();$interval=newDateInterval('P2W');$period=newDatePeriod($start,$interval,3,DatePeriod::EXCLUDE_START_DATE);foreach($periodas$nextDateTime){echo$nextDateTime->format('Y-m-d H:i:s'),PHP_EOL;}
If you work with dates and times more often than not, you should use
Brian Nesbitt’s nesbot/carbon PHP
component. Carbon provides a simple user interface with many useful
methods for working with date and time values.
Many PHP applications persist information in a wide assortment of
databases like MySQL, PostgreSQL, SQLite, MSSQL, and Oracle. Each
database provides its own PHP extension to establish communication
between PHP and the database. MySQL, for example, uses the mysqli
extension, which adds various mysqli_*() functions to the PHP language.
SQLite3 uses the SQLite3 extension, which adds the SQLite3, SQLite3Stmt,
and SQLite3Result classes to the PHP language. If you work with different
databases in one or more projects, you have to install and learn various PHP
database extensions and interfaces. This increases your
cognitive and technical overhead.
This is exactly why PHP provides the native PDO extension. PDO (or PHP data objects) is a collection of PHP classes that communicate with many different SQL databases via a single user interface. Database implementations are abstracted away. Instead, we can write and execute database queries with a single interface regardless of the particular database system we happen to be using at the time.
Even though the PDO extension provides a single interface to different databases, we still must write our own SQL statements. This is the downside to PDO. Each database provides proprietary features, and these features often require unique SQL syntax. I recommend you write ANSI/ISO SQL when using PDO so that your SQL doesn’t break if/when you change database systems. If you absolutely must use a proprietary database feature, keep in mind you must update your SQL statements if you change database systems.
First, select the database system most appropriate for your application. Install
the database, create the schema, and optionally load an initial dataset. Next,
instantiate the PDO class in PHP. The PDO instance establishes a connection
between PHP and the database.
The PDO class constructor accepts a string argument called a DSN, or
data source name, that provides database connection details. A DSN begins with
the database driver name (e.g., mysql or sqlite), a :, and the remainder of the connection
string. The DSN connection string is different for each database, but it typically includes:
Hostname or IP address
Port number
Database name
Character set
Learn more about your database’s DSN format at http://php.net/manual/pdo.drivers.php.
The PDO class constructor’s second and third arguments are a username
and password for your database. Provide these arguments if your database requires
authentication.
Example 5-18 establishes a PDO connection to a MySQL database named
acme. The database is available at IP address 127.0.0.1, and it listens
on the standard MySQL port 3306. The database username is josh, and
the database password is sekrit. The connection character set is utf8.
<?phptry{$pdo=newPDO('mysql:host=127.0.0.1;dbname=books;port=3306;charset=utf8','USERNAME','PASSWORD');}catch(PDOException$e){// Database connection failedecho"Database connection failed";exit;}
The PDO class constructor’s first argument is the DSN. The DSN begins with mysql:.
This instructs PDO to use the PDO MySQL driver to connect to a MySQL database.
After the : character, we specify a semicolon-delimited list of keys and values. Specifically,
we specify the host, dbname, port, and charset settings.
The PDO constructor throws a PDOException instance if the database connection fails.
It’s important that you anticipate and catch this exception when creating PDO connections.
Example 5-18 is fine for demonstration purposes, but it isn’t safe. Never hard-code database credentials into PHP files, especially PHP files served to the public. If PHP exposes raw PHP code to HTTP clients due to a bug or server misconfiguration, your database credentials are naked for the world to see. Instead, move your database credentials into a configuration file above the document root and include them into your PHP files when necessary.
Do not version control your credentials, either. Protect your credentials with a .gitignore file. Otherwise, you will publish your secret credentials into your code repository for others to see. This is especially bad if you are using a public repository.
In this example, the settings.php file contains our database connection credentials. It lives beneath the project root directory but above the document root. The index.php file lives beneath the document root directory, and it is served to the public with a web server. The index.php file uses the credentials in the settings.php file:
[project_root]
    settings.php
    public_html/ <-- document root
        index.php
This is the settings.php file:
<?php$settings=['host'=>'127.0.0.1','port'=>'3306','name'=>'acme','username'=>'USERNAME','password'=>'PASSWORD','charset'=>'utf8'];
Example 5-19 shows the index.php file. It includes the settings.php file and establishes a PDO database connection.
<?phpinclude('../settings.php');$pdo=newPDO(sprintf('mysql:host=%s;dbname=%s;port=%s;charset=%s',$settings['host'],$settings['name'],$settings['port'],$settings['charset']),$settings['username'],$settings['password']);
This is much safer. If the index.php code leaks to the public, our database credentials remain secret.
We now have a PDO connection to a database, and we can use this connection to read from and write to the database with SQL statements. We’re not done yet. When I build PHP applications, I often need to customize SQL statements with dynamic information from the current HTTP request. For example, the URL /user?email=john@example.com shows profile information for a specific user account. The SQL statement for this URL might be:
SELECTidFROMusersWHERE="john@example.com";
A beginner PHP developer might build the SQL statement like this:
$sql=sprintf('SELECT id FROM users WHERE email = "%s"',filter_input(INPUT_GET,'email'));
This is bad because the SQL string uses raw input from the HTTP request query string. It provides a welcome mat for hackers to do bad things to your PHP application. Haven’t you heard of little Bobby Tables? It is extremely important to sanitize user input that is used in a SQL statement. Fortunately, the PDO extension makes input sanitization super-easy with prepared statements and bound parameters.
A prepared statement is a PDOStatement instance. However, I rarely
instantiate the PDOStatement class directly. Instead, I fetch a prepared
statement object with the PDO instance’s prepare() method. This method
accepts a SQL statement string as its first argument, and it returns a
PDOStatement instance:
<?php$sql='SELECT id FROM users WHERE email = :email';$statement=$pdo->prepare($sql);
Pay close attention to the SQL statement. The :email is
a named placeholder to which I can safely bind any value. In
Example 5-20, I bind the HTTP request query string to the :email
placeholder with the $statement instance’s bindValue() method.
<?php$sql='SELECT id FROM users WHERE email = :email';$statement=$pdo->prepare($sql);=filter_input(INPUT_GET,'email');$statement->bindValue(':email',);
The prepared statement automatically sanitizes the $email
value, and it protects our database from SQL injection attacks. You can
include multiple named placeholders in a SQL statement string and invoke
the prepared statement’s bindValue() method for each placeholder.
In Example 5-20, the :email named placeholder represents
a string value. What if we change our SQL statement to find a user by
a numeric ID? In this case, we must pass a third argument to the prepared
statement’s bindValue() method to specify the type of data bound
to the placeholder. Without the third argument, a prepared statement
assumes bound data is a string.
Example 5-21 shows a modification of Example 5-20 that finds a user by numeric ID
instead of an email address. The numeric ID is pulled from the HTTP query
string parameter named id.
<?php$sql='SELECT email FROM users WHERE id = :id';$statement=$pdo->prepare($sql);$userId=filter_input(INPUT_GET,'id');$statement->bindValue(':id',$userId,PDO::PARAM_INT);
We use the PDO::PARAM_INT constant as the third argument. This tells
PDO that the bound data is an integer. There are several PDO constants
you can use to specify various data types:
PDO::PARAM_BOOLPDO::PARAM_NULLPDO::PARAM_INTPDO::PARAM_STR(default)
See all PDO constants at http://php.net/manual/pdo.constants.php.
We now have a prepared statement, and we’re ready to execute SQL queries
against the database. The prepared statement’s execute() method executes
the statement’s SQL statement with any bound data. If you are
executing INSERT, UPDATE, or DELETE statements, invoke the execute()
method and you’re done. If you execute a SELECT statement, you probably
expect the database to return matching records. You can fetch query results
with the prepared statement’s fetch(), fetchAll(), fetchColumn(), and
fetchObject() methods.
The PDOStatement instance’s fetch() method returns the next row
from the result set. I use this method to iterate large result sets,
especially if the entire result set cannot fit in available memory (Example 5-22).
<?php// Build and execute SQL query$sql='SELECT id, email FROM users WHERE email = :email';$statement=$pdo->prepare($sql);=filter_input(INPUT_GET,'email');$statement->bindValue(':email',,PDO::PARAM_INT);$statement->execute();// Iterate resultswhile(($result=$statement->fetch(PDO::FETCH_ASSOC))!==false){echo$result['email'];}
In this example, I use the PDO::FETCH_ASSOC constant as the first
argument in the statement instance’s fetch() method. This argument
determines how the fetch() and fetchAll() methods return query
results. You can use any of these constants:
PDO::FETCH_ASSOCPrompts the fetch() or fetchAll() method to return an associative
array. The array keys are database column names.
PDO::FETCH_NUMPrompts the fetch() or fetchAll() method to return a numeric
array. The array keys are the numeric index of database columns in
your query result.
PDO::FETCH_BOTHPrompts the fetch() or fetchAll() method to return an array that
contains both associative and numeric array keys. This is a
combination of PDO::FETCH_ASSOC and PDO::FETCH_NUM.
PDO::FETCH_OBJPrompts the fetch() or fetchAll() method to return an object whose
properties are database column names.
Learn more about fetching PDO statement results at http://php.net/manual/pdostatement.fetch.php.
If you are working with smaller result sets, you can fetch all query
results with the prepared statement’s fetchAll() method (Example 5-23). I typically
discourage this method unless you are absolutely sure the complete
query result is small enough to fit in available memory.
<?php// Build and execute SQL query$sql='SELECT id, email FROM users WHERE email = :email';$statement=$pdo->prepare($sql);=filter_input(INPUT_GET,'email');$statement->bindValue(':email',,PDO::PARAM_INT);$statement->execute();// Iterate results$results=$statement->fetchAll(PDO::FETCH_ASSOC);foreach($resultsas$result){echo$result['email'];}
If you are concerned only with a single column in your query result, you
can use the prepared statement’s fetchColumn() method. This
method, similar to the fetch() method, returns the value of a single
column from the next row of the query result (Example 5-24). The fetchColumn() method’s
one and only argument is the index of the desired column.
The query result column order matches the column order specified in the SQL query.
<?php// Build and execute SQL query$sql='SELECT id, email FROM users WHERE email = :email';$statement=$pdo->prepare($sql);=filter_input(INPUT_GET,'email');$statement->bindValue(':email',,PDO::PARAM_INT);$statement->execute();// Iterate resultswhile((=$statement->fetchColumn(1))!==false){echo;}
In Example 5-24, the email column is listed second in the SQL query.
It therefore becomes the second column in each query result row, and
I pass the number 1 into the fetchColumn() method (columns
are zero-indexed).
You can also use the prepared statement’s fetchObject()
method to fetch the next query result row as an object whose
property names are the SQL query result columns (Example 5-25).
<?php// Build and execute SQL query$sql='SELECT id, email FROM users WHERE email = :email';$statement=$pdo->prepare($sql);=filter_input(INPUT_GET,'email');$statement->bindValue(':email',,PDO::PARAM_INT);$statement->execute();// Iterate resultswhile(($result=$statement->fetchObject())!==false){echo$result->name;}
The PDO extension also supports transactions. A transaction is a set of database statements that execute atomically. In other words, a transaction is a collection of SQL queries that are either all executed successfully or not executed at all. Transaction atomicity encourages data consistency, safety, and durability. A nice side effect of transactions is improved performance, because you are effectively queuing multiple queries to be executed together at one time.
Not all databases support transactions. Check your database’s documentation and its associated PHP PDO driver for more information.
Transactions are simple to use with the PDO extension. You build and
execute SQL statements exactly as demonstrated in Example 5-25. There is only one difference.
You surround SQL statement executions with the PDO instance’s
beginTransaction() and commit() methods. The beginTransaction() method
causes PDO to queue subsequent SQL query executions rather than execute
them immediately. The commit() method executes queued queries in an
atomic transaction. If a single query in the transaction fails, none of
the transaction queries is applied. Remember, a transaction is all or nothing.
Atomicity is important when data integrity is paramount. Let’s explore example code that handles bank account transactions. Our code can deposit funds into an account. It can also withdraw funds from an account assuming there are sufficient funds. The code in Example 5-26 transfers $50 from one account to another account. It does not use a database transaction.
<?phprequire'settings.php';// PDO connectiontry{$pdo=newPDO(sprintf('mysql:host=%s;dbname=%s;port=%s;charset=%s',$settings['host'],$settings['name'],$settings['port'],$settings['charset']),$settings['username'],$settings['password']);}catch(PDOException$e){// Database connection failedecho"Database connection failed";exit;}// Statements$stmtSubtract=$pdo->prepare('UPDATE accountsSET amount = amount - :amountWHERE name = :name');$stmtAdd=$pdo->prepare('UPDATE accountsSET amount = amount + :amountWHERE name = :name');// Withdraw funds from account 1$fromAccount='Checking';$withdrawal=50;$stmtSubtract->bindParam(':name',$fromAccount);$stmtSubtract->bindParam(':amount',$withDrawal,PDO::PARAM_INT);$stmtSubtract->execute();// Deposit funds into account 2$toAccount='Savings';$deposit=50;$stmtAdd->bindParam(':name',$toAccount);$stmtAdd->bindParam(':amount',$deposit,PDO::PARAM_INT);$stmtAdd->execute();
This seems fine, right? It’s not. What happens if our server suddenly shuts down after we withdraw $50 from account 1 and before we deposit $50 into account 2? Perhaps our hosting company had a power outage or a fire or a flood or was afflicted by some other calamity. What happens to the $50 withdrawn from account 1? The funds are not deposited into account 2. The funds disappear. We can protect data integrity with a database transaction (Example 5-27).
<?phprequire'settings.php';// PDO connectiontry{$pdo=newPDO(sprintf('mysql:host=%s;dbname=%s;port=%s;charset=%s',$settings['host'],$settings['name'],$settings['port'],$settings['charset']),$settings['username'],$settings['password']);}catch(PDOException$e){// Database connection failedecho"Database connection failed";exit;}// Statements$stmtSubtract=$pdo->prepare('UPDATE accountsSET amount = amount - :amountWHERE name = :name');$stmtAdd=$pdo->prepare('UPDATE accountsSET amount = amount + :amountWHERE name = :name');// Start transaction$pdo->beginTransaction();// Withdraw funds from account 1$fromAccount='Checking';$withdrawal=50;$stmtSubtract->bindParam(':name',$fromAccount);$stmtSubtract->bindParam(':amount',$withDrawal,PDO::PARAM_INT);$stmtSubtract->execute();// Deposit funds into account 2$toAccount='Savings';$deposit=50;$stmtAdd->bindParam(':name',$toAccount);$stmtAdd->bindParam(':amount',$deposit,PDO::PARAM_INT);$stmtAdd->execute();// Commit transaction$pdo->commit();
Example 5-27 wraps the withdrawal and deposit into a single database transaction. This ensures that both execute successfully or not at all. Our data remains consistent.
PHP assumes each character in a string is an 8-bit character that occupies a single byte of memory. Unfortunately, this is a naive assumption that breaks down as soon as you work with non-English characters. You might localize your PHP application for international users. Your blog might receive comments written in Spanish, German, or Norwegian. Your users’ names might contain accented characters. My point is that you’ll often encounter multibyte characters, and you must accommodate them correctly.
When I say multibyte character, I mean any character that is not one
of the 128 characters in the traditional ASCII character set. Some
examples are ñ, ë, â, ô, à, æ, and ø. There are many
others. PHP’s default string-manipulation functions assume all strings
use only 8-bit characters. If you manipulate a Unicode string that
contains multibyte characters with PHP’s native string functions, you
will get incorrect and unexpected results.
Unicode is an international standard that assigns a number to each unique character from many different languages. It is maintained by the Unicode Consortium.
You can avoid multibyte string errors by installing the
mbstring PHP extension.
This extension introduces multibyte-aware string functions
that replace most of PHP’s native string-manipulation functions. For
example, use the multibyte-aware mb_strlen() function instead of PHP’s
native strlen() function.
To this day I’m still training myself to use the mbstring multibyte
string functions instead of PHP’s default string functions. It’s a tough
habit to form, but you must use the multibyte string functions if
you work with Unicode strings. Otherwise, it’s easy for multibyte
Unicode data to become malformed.
I use the Iñtërnâtiônàlizætiøn string when testing my PHP applications
for multibyte character support.
Use UTF-8. If you leave this section with one piece of advice, this is it. All modern web browsers understand UTF-8 character encoding. A character encoding is a method of packaging Unicode data in a format that can be stored in memory or sent over the wire between a server and client. The UTF-8 character encoding is just one of many available character encodings. UTF-8, however, is the most popular character encoding and is supported by all modern web browsers.
Tom Scott provides the best explanation of Unicode and UTF-8 that I’ve seen. Joel Spolsky also writes a nice explanation of character encodings on his website.
Character encoding is complex and confuses a lot of developers. When you work with multibyte strings, keep this advice in mind:
Always know the character encoding of your data.
Store data with the UTF-8 character encoding.
Output data with the UTF-8 character encoding.
The mbstring extension doesn’t just manipulate Unicode strings. It
also converts multibyte strings between various character encodings.
This is useful when clients export Excel spreadsheet data with a
Windows-specific character encoding when what I really want is UTF-8
encoded data. Use the mb_detect_encoding() and mb_convert_encoding()
functions to convert Unicode strings from one character encoding to
another.
When you work with multibyte characters, it is important that you tell PHP you are working with the UTF-8 character encoding. It’s easiest to do this in your php.ini file like this:
default_charset = "UTF-8";
The default character set is used by many PHP functions, including
htmlentities(), html_entity_decode(), htmlspecialchars(),
and the mbstring functions. This value is also added to
the default Content-Type header returned by PHP unless
explicitly specified with the header() function like this:
<?phpheader('Content-Type: application/json;charset=utf-8');
You cannot use the header() function after any output is
returned from PHP.
I also recommend you include this meta tag in your HTML document header:
<metacharset="UTF-8"/>
Streams are probably the most amazing and least used modern PHP feature. Even though streams were introduced in PHP 4.3.0, many developers still don’t know about streams because they are rarely mentioned, and they are poorly documented.
Streams were introduced with PHP 4.3.0 as a way of generalizing file, network, data compression, and other operations which share a common set of functions and uses. In its simplest definition, a stream is a resource object which exhibits streamable behavior. That is, it can be read from or written to in a linear fashion, and may be able to fseek() to an arbitrary location within the stream.
PHP Manual
That’s a mouthful, right? Let’s reduce this into something more understandable. A stream is a transfer of data between an origin and destination. That’s it. The origin and destination can be a file, a command-line process, a network connection, a ZIP or TAR archive, temporary memory, standard input or output, or any other resource available via PHP’s stream wrappers.
If you’ve read from or written to a file, you’ve used
streams. If you’ve read from php://stdin or written to
php://stdout, you’ve used streams. Streams provide the
underlying implementation for many of PHP’s IO functions like
file_get_contents(), fopen(), fgets(), and fwrite(). PHP’s stream
functions help us manipulate different stream resources (origins
and destinations) with a single interface.
I think of streams as a pipe that carries water from one location to another. As water flows through the pipe from origin to destination, we can filter the water, we can transform the water, we can add water, and we can remove water. (Hint: The water is a metaphor for data.)
There are different types of streamable data that require unique protocols for reading and writing data. We call these protocols stream wrappers. For example, we can read and write data to the filesystem. We can talk with remote web servers via HTTP, HTTPS, or SSH (secure shell). We can open, read, and write ZIP, RAR, or PHAR archives. All of these communication methods imply the same generic process:
Open communication.
Read data.
Write data.
Close communication.
Although the process is the same, reading and writing a filesystem file is different from sending or receiving HTTP messages. Stream wrappers, however, encapsulate these differences behind a common interface.
Every stream has a scheme and a target. We specify the scheme and target in the stream’s identifier using this familiar format:
<scheme>://<target>
The <scheme> identifies the stream’s wrapper. The <target>
identifies the stream data source. Example 5-28 creates a PHP
stream to/from the Flickr API. It uses the HTTP stream wrapper.
<?php$json=file_get_contents('http://api.flickr.com/services/feeds/photos_public.gne?format=json');
Don’t be fooled by what appears to be a traditional website URL.
The file_get_contents() function’s string argument is actually
a stream identifier. The http scheme prompts PHP to use the HTTP stream
wrapper. The argument’s remainder is the stream target. The stream target
looks like a traditional website URL only because that’s what
the HTTP stream wrapper expects. This may not be true for other
stream wrappers.
Reread this paragraph several times until it becomes ingrained in your memory. Many PHP developers don’t understand that a traditional URL is actually a PHP stream wrapper identifier in disguise.
We use the file_get_contents(), fopen(), fwrite(), and
fclose() methods to read from and write to the filesystem.
We rarely consider these functions as using PHP streams, because
the default PHP stream wrapper is file://. We’re using PHP
streams and we don’t even realize it! Example 5-29 creates a
stream to/from the /etc/hosts file using the file:// stream wrapper.
<?php$handle=fopen('/etc/hosts','rb');while(feof($handle)!==true){echofgets($handle);}fclose($handle);
Example 5-30 accomplishes the same task. This
example, however, explicitly specifies the file://
stream wrapper in the stream identifier.
<?php$handle=fopen('file:///etc/hosts','rb');while(feof($handle)!==true){echofgets($handle);}fclose($handle);
We usually omit the file:// stream wrapper because PHP assumes
this is the default value.
PHP developers who write command-line scripts will appreciate the
php:// stream wrapper. This stream wrapper communicates with
the PHP script’s standard input, standard output, and standard error
file descriptors. You can open, read from, and write to these four
streams with PHP’s filesystem functions:
php://stdinThis read-only PHP stream exposes data provided via standard input. For example, a PHP script can use this stream to receive information piped into the script on the command line.
php://stdoutThis PHP stream lets you write data to the current output buffer. This stream is write-only and cannot be read or seeked.
php://memoryThis PHP stream lets you read and write data to system memory. The
downside to this PHP stream is that available memory is finite. It’s
safer to use the php://temp stream instead.
php://tempThis PHP stream acts just like php://memory, except that when
available memory is gone, PHP instead writes to a temporary file.
PHP and PHP extensions provide many other stream wrappers. For example,
there are stream wrappers to communicate with ZIP and TAR archives,
FTP servers, data-compression libraries, Amazon APIs, and more.
A popular misconception is that the fopen(), fgets(), fputs(),
feof(), fclose(), and other PHP filesystem functions are for
filesystem files only. This is not true. PHP’s filesystem functions
work with all stream wrappers that support them. For example, we can
use fopen(), fgets(), fputs(), feof(), and fclose() to
interact with a ZIP archive, Amazon S3 (with the custom
S3 wrapper), or even Dropbox (with the custom
Dropbox wrapper).
Learn more about the php:// stream wrapper at PHP.net.
It’s also possible to write your own custom PHP stream wrapper. PHP
provides an example streamWrapper class that demonstrates how to write
a custom stream wrapper that supports some or all of the PHP filesystem
functions. Learn more about custom PHP stream wrappers at:
Some PHP streams accept an optional set of parameters, or a stream
context, to customize the stream’s behavior. Different stream wrappers
expect different context parameters. You create a stream
context with the stream_context_create() function. The returned
context object can be passed into and used by most PHP filesystem
and stream functions.
For example, did you know that you can send an HTTP POST request
with the file_get_contents() function? You can with a stream
context object (Example 5-31).
<?php$requestBody='{"username":"josh"}';$context=stream_context_create(array('http'=>array('method'=>'POST','header'=>"Content-Type: application/json;charset=utf-8;\r\n"."Content-Length: ".mb_strlen($requestBody),'content'=>$requestBody)));$response=file_get_contents('https://my-api.com/users',false,$context);
The stream context is an associative array whose topmost array key is the stream wrapper name. The stream context’s array values are specific to each stream wrapper. Consult the appropriate PHP stream wrapper’s documentation for a list of valid settings.
So far we’ve talked about opening, reading from, and writing to PHP streams. However, the true power of PHP streams is filtering, transforming, adding, or removing stream data in transit. Imagine opening a stream to a Markdown file and converting it into HTML automatically as you read the file into memory.
PHP provides several built-in stream filters, including
string.rot13, string.toupper, string.tolower, and string.strip_tags.
These are not useful. Use custom stream filters, instead.
You attach a filter to an existing stream with the stream_filter_append()
function. Example 5-32 uses the string.toupper filter to read data from a text
file on the local filesystem and convert its content to uppercase characters.
I don’t encourage using this particular stream filter. I’m only demonstrating
how to attach a filter to a stream.
<?php$handle=fopen('data.txt','rb');stream_filter_append($handle,'string.toupper');while(feof($handle)!==true){echofgets($handle);// <-- Outputs all uppercase characters}fclose($handle);
You can also attach a filter to a stream with the php://filter stream wrapper.
This only works if you attach the filter when you first open the PHP stream.
Example 5-33 accomplishes the same task as the previous example, except it
attaches the filter with php://filter strategy.
<?php$handle=fopen('php://filter/read=string.toupper/resource=data.txt','rb');while(feof($handle)!==true){echofgets($handle);// <-- Outputs all uppercase characters}fclose($handle);
Pay close attention to the fopen() function’s first argument. The
argument is a stream identifier that uses the php:// stream wrapper.
This is the stream identifier target:
filter/read=<filter_name>/resource=<scheme>://<target>
This strategy may appear superfluous compared to the stream_filter_append()
function. However, some PHP filesystem functions like file() or fpassthru()
do not give you the opportunity to attach filters after the function is called.
The php://filter stream wrapper is the only way to attach stream filters
with these functions.
Let’s look at a more realistic stream filter example. At New Media Campaigns, our in-house content management system archives nginx access logs to rsync.net. We keep one log file per day, and each log file is compressed with bzip2. Log filenames use the format YYYY-MM-DD.log.bz2. I was asked to extract access data for a specific domain for the past 30 days. This seems like a lot of work, right? I need to calculate a date range, determine log filenames, FTP into rsync.net, download files, decompress files, iterate each file line-by-line, extract appropriate lines, and write access data to an output destination. Believe it or not, PHP streams let me do all of this in fewer than 20 lines of code (Example 5-34).
01<?php02$dateStart=new\DateTime();03$dateInterval=\DateInterval::createFromDateString('-1 day');04$datePeriod=new\DatePeriod($dateStart,$dateInterval,30);05foreach($datePeriodas$date){06$file='sftp://USER:PASS@rsync.net/'.$date->format('Y-m-d').'.log.bz2';07if(file_exists($file)){08$handle=fopen($file,'rb');09stream_filter_append($handle,'bzip2.decompress');10while(feof($handle)!==true){11$line=fgets($handle);12if(strpos($line,'www.example.com')!==false){13fwrite(STDOUT,$line);14}15}16fclose($handle);17}18}
In Example 5-34:
Lines 2–4 create a DatePeriod instance that spans the past 30
days using an inverted, one-day interval.
Line 6 creates a log filename using the DateTime instance returned
by each DatePeriod iteration.
Lines 8–9 open a stream resource to the log file on rsync.net with the
SFTP stream wrapper. We decompress the bzip2 log file on the fly by appending
the bzip2.decompress stream filter to the log file stream resource.
Lines 10–15 iterate the decompressed log file contents using PHP’s standard filesystem functions.
Lines 12–14 inspect each line for a given domain. If the domain is present, the line is written to standard output.
The bzip2.decompress stream filter lets us automatically decompress
log files as we read them. The alternative solution is manually decompressing
log files into a temporary directory with shell_exec() or bzdecompress(),
iterating the decompressed files, and cleaning up the decompressed files
when our PHP script completes. PHP streams are a simpler, more elegant solution.
It’s possible to write custom stream filters, too. In fact, custom stream
filters are the primary reason you use stream filters. Custom stream filters
are PHP classes that extend the php_user_filter
built-in class. The custom stream class must implement the filter(), onCreate(),
and onClose() methods. You must register custom stream filters with the
stream_filter_register() function.
A PHP stream subdivides data into sequential buckets, and each bucket contains a fixed amount of stream data (e.g., 4,096 bytes). If we use our pipe metaphor, water is carried from origin to destination in individual buckets that float through the pipe and pass through stream filters. Each stream filter receives and manipulates one or more buckets at a time. The bucket or buckets received by a filter at any given time is called a bucket brigade.
Let’s create a custom stream filter that censors dirty words from a stream
as its data is read into memory (Example 5-35). First, we must create a PHP class that
extends php_user_filter. This class must implement a filter() method that
acts as a sieve through which stream buckets pass. It receives a bucket brigade
from upstream, it manipulates each bucket object in the brigade, and it sends
each bucket into the downstream bucket brigade toward the stream destination.
This is our DirtyWordsFilter custom stream class.
Each bucket object in a bucket brigade has two public properties: data
and datalen. These are the bucket content and content length, respectively.
classDirtyWordsFilterextendsphp_user_filter{/*** @param resource $in Incoming bucket brigade* @param resource $out Outgoing bucket brigade* @param int $consumed Number of bytes consumed* @param bool $closing Last bucket brigade in stream?*/publicfunctionfilter($in,$out,&$consumed,$closing){$words=array('grime','dirt','grease');$wordData=array();foreach($wordsas$word){$replacement=array_fill(0,mb_strlen($word),'*');$wordData[$word]=implode('',$replacement);}$bad=array_keys($wordData);$good=array_values($wordData);// Iterate each bucket from incoming bucket brigadewhile($bucket=stream_bucket_make_writeable($in)){// Censor dirty words in bucket data$bucket->data=str_replace($bad,$good,$bucket->data);// Increment total data consumed$consumed+=$bucket->datalen;// Send bucket to downstream brigadestream_bucket_append($out,$bucket);}returnPSFS_PASS_ON;}}
The filter() method receives, manipulates, and forwards buckets of stream data.
Inside the filter() function, we iterate the buckets in the
$in bucket brigade and replace dirty words with their censored
values. This method returns the PSFS_PASS_ON constant to indicate
successful operation. This method accepts four arguments:
$inA brigade of one or more upstream buckets that contains stream data from the stream origin
$outA brigade of one or more buckets that continue downstream toward the stream destination
&$consumedThe total number of stream bytes consumed by our custom filter
$closingIs the filter() method receiving the last available bucket
brigade?
We must register the DirtWordsFilter custom stream filter with the
stream_filter_register() function (Example 5-36).
<?phpstream_filter_register('dirty_words_filter','DirtyWordsFilter');
The first argument is the filter name that identifies our custom filter. The second argument is our custom filter’s class name. We can now use our custom stream filter (Example 5-37).
<?php$handle=fopen('data.txt','rb');stream_filter_append($handle,'dirty_words_filter');while(feof($handle)!==true){echofgets($handle);// <-- Outputs censored text}fclose($handle);
If you want to learn more about PHP streams, watch Elizabeth Smith’s Nomad PHP presentation. It’s not free, but it’s worth the admission price. You can also read more about PHP streams in the PHP documentation.
Things go wrong. It’s a fact of life. No matter how hard we concentrate or how much time we pour into a project, there are always bugs and errors that we overlook. For example, have you ever used a PHP application that displays only a blank white page? Have you ever visited a PHP website that spits out an indecipherable stack trace? These unfortunate situations indicate an application error or uncaught exception.
Errors and exceptions are wonderful tools that help you anticipate the unexpected.
They help you catch problems and fail gracefully. Errors and exceptions,
however, are confusingly similar. They both announce when something is wrong,
they both provide an error message, and they both have an error type.
Errors, however, are older than exceptions. They are a procedural device
that halts script execution and, if possible, delegates error handling
to a global error handler function. Some errors are unrecoverable. Today we
largely rely on exceptions instead of errors, but we must still maintain a
defensive posture; many older PHP functions (e.g., fopen()) still trigger
errors when things go wrong.
It’s possible to circumvent PHP errors with the @ prefix in front of
a PHP function that might trigger an error (e.g., @fopen()). This is
an antipattern. I recommend you change your code to avoid these situations.
Exceptions are an object-oriented evolution of PHP’s error handling system.
They are instantiated, thrown, and caught. Exceptions are a more flexible
device that anticipates and handles problems in situ without halting script
execution. Exceptions are also an offensive and defensive device. We must
anticipate exceptions thrown by third-party vendor code with try {} catch {}
blocks. We can also act offensively by throwing an exception; this delegates
exception handling to other developers when we don’t know how to handle a
given situation on our own.
An exception is an object of class Exception that is thrown when you
encounter an irreparable situation from which you cannot recover (e.g., a remote API is unresponsive, a database query fails, or a precondition
is not satisfied). I call these exceptional situations. Exceptions are
used offensively to delegate responsibility when a problem occurs, and
they are used defensively to anticipate and mitigate potential problems.
You instantiate an Exception object with the new keyword just like
any other PHP object. An Exception object has two primary properties: a
message and a numeric code. The message describes what went wrong. The
numeric code is optional and can be used to provide context for a given
exception. You provide the message and optional numeric code when you
instantiate an Exception object like this:
<?php$exception=newException('Danger, Will Robinson!',100);
You can inspect an Exception object with its getCode() and
getMessage() public instance methods like this:
<?php$code=$exception->getCode();// 100$message=$exception->getMessage();// 'Danger...'
You can assign an exception to a variable upon instantiation, but exceptions are meant to be thrown. If you write code for other developers, you must act offensively in exceptional situations, meaning you throw exceptions when your code encounters exceptional situations or cannot otherwise operate under current conditions. PHP component and framework authors, in particular, cannot presume how to handle exceptional situations; instead, they throw an exception and delegate responsibility to the developer using their code.
When an exception is thrown, code execution is immediately halted and
subsequent PHP code is not run. To throw an exception, use the throw
keyword followed by the Exception instance:
<?phpthrownewException('Something went wrong. Time for lunch!');
You can only throw an instance of class Exception (or a subclass of
Exception). PHP provides these built-in Exception subclasses:
The Standard PHP Library (SPL) supplements
PHP’s built-in exceptions with these additional Exception subclasses:
Each subclass exists for a certain situation and provides context for
why an exception is thrown. For example, if a PHP component method
expects a string argument with at least five characters but is given a
string with only two characters, it can throw an
InvalidArgumentException instance. Because PHP provides an exception
class, you can easily extend the Exception class to create your own
custom exception subclasses with their own custom properties and
methods. Which exception subclass you use is subjective. Choose or
create the exception subclass that best answers why am I throwing this
exception?, and document your choice.
Thrown exceptions should be caught and handled gracefully. You must act defensively when using PHP components and frameworks written by other developers. Good PHP components and frameworks provide documentation that explains when and under what circumstances they throw exceptions. It is your responsibility to anticipate, catch, and handle these exceptions. Uncaught exceptions terminate your PHP application with a fatal error and, worse, can expose sensitive debugging details to your PHP application’s users. We’ve all seen this. It is very important that you catch exceptions and handle them gracefully.
Surround code that might throw an exception with a try/catch block
to intercept and handle potential exceptions. Example 5-38 demonstrates
a failed PDO database connection that throws a PDOException object.
The exception is caught by the catch block, and we show a
friendly error message instead of an ugly stack trace.
<?phptry{$pdo=newPDO('mysql://host=wrong_host;dbname=wrong_name');}catch(PDOException$e){// Inspect the exception for logging$code=$e->getCode();$message=$e->getMessage();// Display a nice message to the userecho'Something went wrong. Check back soon, please.';exit;}
You can use multiple catch blocks to intercept multiple types of
exceptions. This is useful if you need to act differently based on the
type of exception thrown. You can also use a finally block to always
run a block of code after you catch any exception (Example 5-39).
<?phptry{thrownewException('Not a PDO exception');$pdo=newPDO('mysql://host=wrong_host;dbname=wrong_name');}catch(PDOException$e){// Handle PDO exceptionecho"Caught PDO exception";}catch(Exception$e){// Handle all other exceptionsecho"Caught generic exception";}finally{// Always do thisecho"Always do this";}
In Example 5-39, the first catch block intercepts PDOException
exceptions. All other exceptions are intercepted by the second catch
block. Only one catch block is run for each caught exception. If PHP
does not find an applicable catch block, the exception continues
to bubble upward until the PHP script ultimately terminates with a
fatal error.
You may be thinking how am I supposed to catch every possible exception? And that’s a good question. PHP lets you register a global exception handler to catch otherwise uncaught exceptions. You should always set a global exception handler. An exception handler is a final safety net that lets you show an appropriate error message to your PHP application’s users if you otherwise fail to catch and handle an exception. For my own PHP applications, I use exception handlers to show debugging information during development and a user-friendly message during production.
An exception handler is anything that is callable. I prefer to use an
anonymous function, but you can also use a class method. Whatever you
choose, it must accept one argument of class Exception. You register
your exception handler with the set_exception_handler() function like
this:
<?phpset_exception_handler(function(Exception$e){// Handle and log exception});
I strongly recommend you log exceptions inside your exception handler. Your logger can alert you when things go wrong, and it saves exception details for later review.
In some situations, you may need to replace an existing exception
handler with your own exception handler. PHP etiquette suggests you
restore the existing exception handler when your code is finished.
You can restore a previous exception handler with the
restore_exception_handler() function (Example 5-40).
<?php// Register your exception handlerset_exception_handler(function(Exception$e){// Handle and log exception});// Your code goes here...// Restore previous exception handlerrestore_exception_handler();
PHP provides error-reporting functions in addition to exceptions. This confuses many PHP developers. PHP can trigger different types of errors, including fatal errors, runtime errors, compile-time errors, startup errors, and (more rarely) user-triggered errors. You’ll most often encounter PHP errors caused by syntax mistakes or uncaught exceptions.
The difference between errors and exceptions is subtle. Errors are often
triggered when a PHP script cannot fundamentally run as expected for
whatever reason (e.g., there is a syntax mistake). It is also possible
to trigger your own errors with the trigger_error() function and
handle them with a custom error handler, but it is better to use
exceptions when writing userland code. Unlike errors, PHP exceptions can
be thrown and caught at any level of your PHP application. Exceptions
provide more contextual information than PHP errors. And you can extend
the topmost Exception class with your own custom exception
subclasses. Exceptions and a good logger like Monolog are a far more
versatile solution than PHP errors. However, modern PHP developers must
anticipate and handle both PHP errors and PHP exceptions.
You can instruct PHP which errors to report, and which to ignore, with
the error_reporting() function or the error_reporting directive in
your php.ini file. Both accept named E_* constants that determine
which errors are reported and which are ignored.
Learn more about PHP error reporting at http://php.net/manual/function.error-reporting.php.
PHP error reporting can be as sensitive or stoic as you tell it to be. In development, I prefer PHP to obnoxiously display and log all error messages. In production, I instruct PHP to log most error messages but not display them. Whatever you do, you should always follow these four rules:
Always turn on error reporting.
Display errors during development.
Do not display errors during production.
Log errors during development and production.
Here are my error-reporting php.ini settings for development:
; Display errorsdisplay_startup_errors=Ondisplay_errors=On; Report all errorserror_reporting=-1; Turn on error logginglog_errors=On
Here are my error-reporting php.ini settings for production:
; DO NOT display errorsdisplay_startup_errors=Offdisplay_errors=Off; Report all errors EXCEPT noticeserror_reporting=E_ALL & ~E_NOTICE; Turn on error logginglog_errors=On
The main difference is that I display errors in my PHP script output during development. I do not display errors in my PHP script output in production. However, I log errors in both environments. If I have a bug in my production PHP application (and this never happens…cough), I can review my PHP log file for details.
Just as you can with exception handlers, you can set a global error handler to intercept and handle PHP errors with your own logic. The error handler lets you fail gracefully by cleaning up loose ends before terminating the PHP script.
An error handler, like an exception handler, is anything that is
callable (e.g., a function or class method). It is your responsibility
to die() or exit() inside of your error handler. If you don’t
manually terminate the PHP script inside your error handler, the PHP
script will continue executing from where the error occurred.
You register your global error handler with the set_error_handler(),
and you pass it an argument that is callable:
<?phpset_error_handler(function($errno,$errstr,$errfile,$errline){// Handle error});
Your error-handler callable receives five arguments:
$errnoThe error level (maps to a PHP E_* constant).
$errstrThe error message.
$errfileThe filename in which the error occurred.
$errlineThe file line number on which the error occurred.
$errcontextAn array that points to the active symbol table when the error occurred. This is optional and is only useful for advanced debugging purposes. I usually ignore this argument.
There’s one important caveat that you absolutely must know when using a
custom error handler. PHP will send all errors to your error handler,
even those that are excluded by your current error-reporting setting. It
is your responsibility to inspect each error code (the first argument)
and act appropriately. You can instruct your error handler to only
respond to a subset of error types with a second argument to the
set_error_handler() function; this argument is a bitwise mask of E_*
constants (e.g., E_ALL | E_STRICT).
This is as good a time as any to segue into a common practice that I
and many other PHP developers use in our PHP applications. I like to
convert PHP errors into ErrorException objects. The ErrorException
class is a subclass of Exception, and it comes built into PHP. This
lets me convert PHP errors into exceptions and funnel them into my
existing exception handling workflow.
Not all errors can be converted into exceptions! These errors include
E_ERROR, E_PARSE, E_CORE_ERROR, E_CORE_WARNING,
E_COMPILE_ERROR, E_COMPILE_WARNING, and most of E_STRICT.
Converting PHP errors is a bit tricky, and we must be careful to convert
only the errors that satisfy the error_reporting setting in our
php.ini file. Here’s an example error-handler function that converts
PHP errors into ErrorException objects:
<?phpset_error_handler(function($errno,$errstr,$errfile,$errline){if(!(error_reporting()&$errno)){// Error is not specified in the error_reporting// setting, so we ignore it.return;}thrownew\ErrorException($errstr,$errno,0,$errfile,$errline);});
This error-handler function converts the appropriate PHP errors into
ErrorException objects and throws them into our existing exception-handling system. It is considered good etiquette to restore the previous
error handler (if any) after your own code is done. You can restore the
previous handler with the restore_error_handler() function (Example 5-41).
<?php// Register error handlerset_error_handler(function($errno,$errstr,$errfile,$errline){if(!(error_reporting()&$errno)){// Error is not specified in the error_reporting// setting, so we ignore it.return;}thrownewErrorException($errstr,$errno,0,$errfile,$errline);});// Your code goes here...// Restore previous error handlerrestore_error_handler();
We know we should display errors during development. But PHP’s default error messages are ugly and often injected into the normal PHP script output, resulting in a hard-to-read mess. Use Whoops instead. Whoops is a modern PHP component that provides a well-designed, easy-to-read diagnostics page for PHP errors and exceptions. Whoops, created and maintained by Filipe Dobreira and Denis Sokolov, looks like Figure 5-1.
The Whoops diagnostic screen is light years better than the default PHP error and exception output.
Whoops is easy to implement, too. Update your composer.json file
as shown below, and run either composer install or composer update:
{"require":{"filp/whoops":"~1.0"}}
Next, register the Whoops error and exception handlers in your PHP application’s bootstrap file, as shown in Example 5-42.
<?php// Use composer autoloaderrequire'path/to/vendor/autoload.php';// Setup Whoops error and exception handlers$whoops=new\Whoops\Run;$whoops->pushHandler(new\Whoops\Handler\PrettyPageHandler);$whoops->register();
That’s it. When your script triggers a PHP error or when your application does not catch an exception, you’ll see the Whoops diagnostic screen.
Example 5-42 uses the Whoops PrettyPageHandler handler, which
creates the diagnostic screen shown in Figure 5-1. There are
other Whoops handlers, too, including a plain-text handler, a callback
handler, a JSON response handler, an XML response handler, and (if your
pointy-haired boss likes to say the word enterprise a lot) a SOAP
response handler. I use Whoops during development for each application I develop.
We know we should log errors in production. PHP provides the
error_log() function to write messages to the filesystem, to syslog,
or into an email. But there’s a better option, and it’s called
Monolog. Monolog is a very good
PHP component that specializes in one thing—logging. It’s
easy to integrate into your PHP applications with Composer.
First, require the monolog/monolog package in your composer.json file:
{"require":{"monolog/monolog":"~1.11"}}
Next, install the component with either composer install or
composer update, and add the code from Example 5-43 to the top of your PHP application’s bootstrap file.
<?php// Use Composer autoloaderrequire'path/to/vendor/autoload.php';// Import Monolog namespacesuseMonolog\Logger;useMonolog\Handler\StreamHandler;// Setup Monolog logger$log=newLogger('my-app-name');$log->pushHandler(newStreamHandler('path/to/your.log',Logger::WARNING));
That’s it. You now have a Monolog logger that will write all logged
messages of type Logger::WARNING or higher to the path/to/your.log file.
Monolog is very extensible. You can define multiple handlers that
only handle specific log levels. For example, we can push a second Monolog
handler that emails an administrator for critical, alert, or emergency
errors. We’ll need the SwiftMailer PHP component, so let’s add
that to the composer.json file and run composer update:
{"require":{"monolog/monolog":"~1.11","swiftmailer/swiftmailer":"~5.3"}}
Next, we’ll modify our code and add a new Monolog handler that accepts a SwiftMailer instance to send email messages (Example 5-44).
<?php// Use Composer autoloaderrequire'vendor/autoload.php';// Import Monolog namespacesuseMonolog\Logger;useMonolog\Handler\StreamHandler;useMonolog\Handler\SwiftMailerHandler;date_default_timezone_set('America/New_York');// Setup Monolog and basic handler$log=newLogger('my-app-name');$log->pushHandler(newStreamHandler('logs/production.log',Logger::WARNING));// Add SwiftMailer handler for critical errors$transport=\Swift_SmtpTransport::newInstance('smtp.example.com',587)->setUsername('USERNAME')->setPassword('PASSWORD');$mailer=\Swift_Mailer::newInstance($transport);$message=\Swift_Message::newInstance()->setSubject('Website error!')->setFrom(array('daemon@example.com'=>'John Doe'))->setTo(array('admin@example.com'));$log->pushHandler(newSwiftMailerHandler($mailer,$message,Logger::CRITICAL));// Use logger$log->critical('The server is on fire!');
Now when a critical, alert, or emergency message is logged, Monolog
emails the logged message using the SwiftMailer $mailer and $message
objects. The email body is the logged message text.
So you have a PHP application. Congratulations! However, it doesn’t do anyone any good unless your users can, you know, use it. You need to host your application on a server and make it accessible to its intended audience. Generally speaking, there are four ways to host PHP applications: shared servers, virtual private servers, dedicated servers, and platforms as a service. Each has its unique benefits and is suitable for different types of applications and budgets.
There are also many web hosting companies, and it can be overwhelming if you are brand new to the web hosting landscape. Some hosting companies provide only shared servers. Other companies provide a mix of shared servers, virtual private servers, and dedicated servers. This chapter will focus less on the companies themselves and more on hosting options.
A shared server is the most affordable hosting option and costs $1–10/month. You should avoid shared hosting plans. This is not a commentary on shared hosting companies’ quality of service or customer support. There are many good shared hosting companies. Simply put, shared hosting options are not developer-friendly.
A shared server, as its name implies, means that you share server resources with other people. If you purchase a shared hosting plan, your hosting account lives on the same physical machine as many other customers’. If your particular machine has 2 Gb of memory, your PHP application might receive only a fraction of that memory, depending on how many other customer accounts live on the same machine. If another account on the same machine runs a poorly coded script, it can negatively affect your own application. Some shared hosting companies oversell shared servers, and your PHP application constantly battles for system resources on a crowded machine.
Shared servers are also very difficult to customize. For example, your application may need Memcached or Redis for a fast, in-memory cache. You may want to install Elasticsearch to add search functionality to your application. Unfortunately, shared server software is difficult—if not impossible—to customize. Your applications suffer as a result.
Shared servers rarely provide remote SSH access. Instead, you’re often handicapped with (S)FTP access only. This limitation severely restricts your ability to automate PHP application deployment.
If your budget is super-small or your needs extremely modest, a shared server may be sufficient. However, if you’re building a business website or a moderately popular PHP application, you’re better off using a virtual private server, a dedicated server, or a PaaS.
A virtual private server (VPS) looks, feels, and acts like a bare-metal server. But it’s not a bare-metal server. A VPS is a collection of system resources that are distributed across one or many physical machines. A VPS still has its own filesystem, root user, system processes, and IP address. A VPS is allocated a specific amount of memory, CPU, and bandwidth—and they’re all yours.
VPSs provide more system resources than a shared server. A VPS provides root SSH access. And a VPS does not limit what software you can install. Great power, though, comes with great responsibility. VPSs give you root access to a virgin operating system. It is your responsibility to configure and secure the operating system for your PHP application. VPSs are ideal for most PHP applications. They provide sufficient system resources (e.g., CPU, memory, and disk space) that scale up or down on demand. A VPS costs $10–100/month based on the amount of system resources needed by your PHP application. If your PHP application becomes super-popular (hundreds of thousands of visitors a month) and a VPS becomes too costly, you might consider upgrading to a dedicated server.
I almost always prefer VPSs for their balance of cost, features, and flexibility. Linode, my favorite hosting company, provides VPS and dedicated hosting plans. Linode isn’t the cheapest option, but my personal experience shows Linode is fast and stable, and it comes with a vast treasure of helpful tutorials.
A dedicated server is a rack-mounted machine that your hosting company installs, runs, and maintains on your behalf. You configure dedicated servers to your exact specifications. Dedicated servers are real machines that must be transported, installed, and monitored. They cannot be set up and configured as quickly as VPSs. That being said, dedicated servers provide the ultimate performance for demanding PHP applications.
Dedicated servers act much like VPSs. You get root SSH access to a virgin operating system, and you must secure and configure the operating system for your PHP application. The benefit of a dedicated server is cost-effectiveness. Eventually a VPS becomes too costly as you consume more system resources. You save money by investing in your own infrastructure.
A dedicated server costs hundreds of dollars per month depending on the server specifications. It can be unmanaged (i.e., you manage the server yourself) or managed (i.e., you pay extra for your hosting company to manage the server).
Platforms as a service (PaaS) are a quick way to launch your PHP application, and—unlike with a virtual private or dedicated server—you don’t have to manage a PaaS. All you have to do is log into your PaaS provider’s control panel and click a few buttons. Some PaaS providers have a command-line or HTTP API with which you can deploy and manage your hosted PHP applications. Popular PHP PaaS providers include:
PaaS pricing varies by provider but is similar to virtual private servers: $10–100/month. You pay for the system resources allocated to your PHP application. System resources can be scaled up or down on demand. I recommend PaaS hosting plans for developers who do not want to manage their own servers.
Choose only what you need when you need it. You can always scale your hosting infrastructure up or down when necessary. For small PHP applications or prototypes, a PaaS provider like Engine Yard or Heroku is the best and quickest solution. If you prefer more control over your server configuration, get a VPS. If your application becomes super-popular and your VPS is buckling beneath the weight of millions of visitors (congratulations, by the way!), get a dedicated server. Whichever hosting option you choose, make sure it provides the latest stable PHP version and extensions required by your PHP application.
After you choose a host for your application, it’s time to configure and provision the server for your PHP application. I’ll be honest—provisioning a server is an art, not a science. How you provision your server depends entirely on your application’s needs.
If you use a PaaS, your server infrastructure is managed by the PaaS provider. All you have to do is follow the provider’s instructions to move your PHP application onto their platform, and you’re ready to go.
If you don’t use a PaaS, you must provision either a VPS or dedicated server to run your PHP application. Provisioning a server is not as hard as it sounds (stop laughing), but it does require familiarity with the command line. If the command line is alien to you, you’re better off with a PaaS like Engine Yard or Heroku.
I don’t consider myself a system administrator. However, basic system adminstration is an incredibly valuable skill for application developers that enables more flexible and robust application development. In this chapter, I’ll share my system administration knowledge so you can feel comfortable opening a terminal to provision a server for your PHP application. Afterward, I’ll suggest a few additional resources for you to continue improving your system administration skills.
In this chapter, I assume you know how to edit a text file using a command-line editor like nano or vim (these are available on most Linux distributions). Otherwise, you’ll need an alternative method of accessing and editing files on your server.
First, we need to acquire a virtual private or dedicated server. Next, we need to install a web server to receive HTTP requests. Finally, we need to set up and manage a group of PHP processes to handle PHP requests; these processes must communicate with our web server.
Several years ago, it was common practice to install the Apache web server and
the Apache mod_php module. The Apache web server spawns a unique child
process to handle each HTTP request. The Apache mod_php module embeds a
unique PHP interpreter inside each spawned child process—even processes
that serve only static assets like JavaScript, images, or stylesheets. This is
a lot of overhead that wastes system resources. I see fewer and fewer PHP
developers use Apache nowadays because there are more efficient solutions.
Today, we use the nginx web server, which sits in front of (and forwards PHP requests to) a collection of PHP-FPM processes. That’s the solution I’ll demonstrate in this chapter.
First, let’s set up a virtual private server (VPS). I absolutely adore Linode. It isn’t the cheapest VPS provider, but it’s one of the most reliable. Head over to Linode’s website (or your preferred vendor) and purchase a new VPS. Your vendor will ask you to choose a Linux distribution and a root password for your new server.
Many VPS providers, like Linode and Digital Ocean, bill by the hour. This means you can fire up and play with a VPS at virtually zero cost.
The first thing you should do is log in to your new server. Let’s do that now.
Open a terminal on your local machine and ssh into your server. Be
sure you swap in your own machine’s IP address:
ssh root@123.456.78.90
You may be asked to confirm the authenticity of your new server. Type
yes and press Enter:
The authenticity of host '123.456.78.90 (123.456.78.90)' can't be established.
RSA key fingerprint is 21:eb:37:f3:a5:d3:c0:77:47:c4:15:3d:3c:dc:3c:d1.
Are you sure you want to continue connecting (yes/no)?
Next, you’ll be prompted for the root user’s password. Type the password and press Enter:
root@123.456.78.90's password:
You are now logged into your new server!
The very next thing you should do is update your operating system’s software with these commands.
# Ubuntuapt-get update;apt-get upgrade;
# CentOS
yum update
These commands spit out a lot of information as software updates for your operating system are downloaded and applied. This is an important first step because it ensures you have the latest updates and security fixes for your operating system’s default software.
Your new server is not secure. Here are a few good practices to harden your new server’s security.
Create a nonroot user. You should log in to your server as this nonroot user in the future. The root user has unlimited power on your server. It is God. It can run any command without question. You should make it as difficult as possible to access your server as the root user.
Create a new nonroot user named deploy with the command in Example 7-1. Enter a user
password when prompted, and follow the remaining on-screen instructions.
adduser deploy
Next, assign the deploy user to the sudo group with this command:
usermod -a -G sudo deploy
This gives the deploy user sudo privileges (i.e., it can perform
privileged tasks with password authentication).
Create a new nonroot user named deploy with this command:
adduser deploy
Give the deploy user a password with this command. Enter and confirm
the new password when prompted:
passwd deploy
Next, assign the deploy user to the wheel group with this command:
usermod -a -G wheel deploy
This gives the deploy user sudo privileges (i.e., it can perform
privileged tasks with password authentication).
On your local machine, you can log into your new server as the nonroot
deploy user like this:
ssh deploy@123.456.78.90
You’ll be prompted for the deploy user’s password, and then you’ll be logged
in to the server. We can make the login process more secure by disabling password
authentication. Password authentication is vulnerable to brute-force attacks
in which bad guys try to guess your password over and over in quick succession.
Instead, we’ll use SSH key-pair authentication when we
ssh into our server.
Key-pair authentication is a complex subject. In basic terms, you create a pair of “keys” on your local machine. One key is private (this stays on your local machine), and one key is public (this goes on the remote server). They are called a key pair because messages encrypted with the public key can be decrypted only by the related private key.
When you log in to the remote machine using SSH key-pair authentication, the remote machine creates a random message, encrypts it with your public key, and sends it to your local machine. Your local machine decrypts the message with your private key and returns the decrypted message to the remote server. The remote server then validates the decrypted message and grants you access to the server. This is a dramatic simplification, but you get the point.
If you log in to your remote server from many different computers, you probably do not want to use SSH key-pair authentication. This would require you to generate public/private SSH key pairs for each local computer and copy each key pair’s public key to your remote server. In this case, it’s probably preferable to continue using password authentication with a secure password. However, if you are only accessing your remote server from a single local computer (as many developers often do), SSH key-pair authentication is the way to go. You can create an SSH key-pair on your local machine with this command:
ssh-keygen
Follow the subsequent on-screen instructions and enter the requested
information when prompted. This command creates two files on your local
machine: ~/.ssh/id_rsa.pub (your public key) and ~/.ssh/id_rsa
(your private key). The private key should stay on your local computer and
remain a secret. Your public key, however, must be copied onto your new server.
We can copy the public key with the scp (secure copy) command:
scp ~/.ssh/id_rsa.pub deploy@123.456.78.90:
Be sure you include the trailing : character! This command uploads your
public key to the deploy user’s home directory on your remote server. Next,
log in to your remote server as the deploy user. After you log in to your
remote server, make sure the ~/.ssh directory exists. If it does not exist,
create the ~/.ssh directory with this command:
mkdir ~/.ssh
Next, create the ~/.ssh/authorized_keys file with this command:
touch ~/.ssh/authorized_keys
This file will contain a list of public keys that are allowed to log into this remote server. Execute this command to append your recently uploaded public key to the ~/.ssh/authorized_keys file:
cat ~/id_rsa.pub >> ~/.ssh/authorized_keys
Finally, we need to modify a few directory and file permissions so that only
the deploy user can access its own ~/.ssh directory and read its own
~/.ssh/authorized_keys file. Assign these permissions with these commands:
chown -R deploy:deploy ~/.ssh;chmod700~/.ssh;chmod600~/.ssh/authorized_keys;
We’re done! On your local machine, you should now be able to ssh into the
remote server without entering a password.
You can only ssh into your remote server without a password from the local machine that has your private key!
Let’s make the remote server even more secure. We’ll disable password authentication
for all users, and we’ll prevent the root user from logging in—period.
Remember, the root user can do anything, so we want to make it as difficult
as possible to access our server as the root user.
Log in to the remote server as the deploy user and open the
/etc/ssh/sshd_config file in your preferred text editor. The is the SSH
server software’s configuration file. Find the PasswordAuthentication setting and
change its value to no; uncomment this setting if necessary. Find the PermitRootLogin
setting and change its value to no; uncomment this setting if necessary. Save your
changes and restart the SSH server with this command to apply your changes:
# Ubuntusudo service ssh restart# CentOSsudo systemctl restart sshd.service
You’re done. You’ve secured your server, and it’s time to install additional
software to run your PHP application. From this point forward, all instructions
should be completed on the remote server as the nonroot deploy user.
PHP-FPM (PHP FastCGI Process Manager)
is software that manages a pool of related PHP processes that receive and handle
requests from a web server like nginx. The PHP-FPM software creates one master
process (usually run by the operating system’s root user) that controls how
and when HTTP requests are forwarded to one or more child processes. The PHP-FPM
master process also controls when child PHP processes are created (to answer
additional web application traffic) and destroyed (if they are too old or no
longer necessary). Each PHP-FPM pool process lives longer than a single
HTTP request, and it can handle 10, 50, 100, 500, or more HTTP requests.
The simplest way to install PHP-FPM is with your operating sytem’s native package manager, as demonstrated by the following commands.
See Appendix A for a detailed PHP-FPM installation guide.
# Ubuntusudo apt-get install python-software-properties;sudo add-apt-repository ppa:ondrej/php5-5.6;sudo apt-get update;sudo apt-get install php5-fpm php5-cli php5-curl\php5-gd php5-json php5-mcrypt php5-mysqlnd;
# CentOSsudo rpm -Uvh\http://dl.fedoraproject.org/pub/epel/7/x86_64/e/epel-release-7-5.noarch.rpm;sudo rpm -Uvh\http://rpms.famillecollet.com/enterprise/remi-release-7.rpm;sudo yum -y --enablerepo=epel,remi,remi-php56 install php-fpm php-cli php-gd\php-mbstring php-mcrypt php-mysqlnd php-opcache php-pdo php-devel;
If the EPEL rpm installation fails, open a web browser and navigate to
http://dl.fedoraproject.org/pub/epel/7/x86_64/e/. Look for an updated
EPEL release version and use that.
On Ubuntu, the primary PHP-FPM cofiguration file is /etc/php5/fpm/php-fpm.conf. On CentOS, the primary PHP-FPM configuration file is /etc/php-fpm.conf. Open this file in your preferred text editor.
PHP-FPM configuration files use the INI file format. Learn more about the INI format on Wikipedia.
These are the most important global PHP-FPM settings that I recommend you change from their default values. These two settings might be commented out by default; uncomment them if necessary. These settings prompt the master PHP-FPM process to restart if a specific number of its child processes fail within a specific interval of time. These settings are a basic safety net for your PHP-FPM processes that can resolve simple issues. They are not a solution to more fundamental problems caused by bad PHP code.
emergency_restart_threshold = 10The maximum number of PHP-FPM child processes that can fail within a given time interval until the master PHP-FPM process gracefully restarts
emergency_restart_interval = 1mThe length of time that governs the emergency_restart_threshold setting
Read more about PHP-FPM global configuration at http://php.net/manual/en/install.fpm.configuration.php.
Elsewhere in the PHP-FPM configuration file is a section named
Pool Definitions. This section contains configuration settings
for each PHP-FPM pool. A PHP-FPM pool is a collection of related PHP child
processes. One PHP application typically has its own PHP-FPM pool.
On Ubuntu, the Pool Definitions section contains this one line:
include=/etc/php5/fpm/pool.d/*.conf
CentOS includes the pool definition files at the top of the primary PHP-FPM configuration file with this line:
include=/etc/php-fpm.d/*.conf
This line prompts PHP-FPM to load individual pool definition files located in the
/etc/php5/fpm/pool.d/ directory (for Ubuntu) or the /etc/php-fpm.d/
directory (for CentOS). Navigate into this directory, and you should see one
file named www.conf. This is the configuration file for the default PHP-FPM
pool named www. Open this file in your preferred text editor.
Each PHP-FPM pool configuration begins with a [ character, the pool name,
and a ] character. The default PHP-FPM pool configuration, for example,
begins with [www].
Each PHP-FPM pool runs as the operating system user and group that you specify.
I prefer to run each PHP-FPM pool as a unique nonroot user to help me
identify each PHP application’s PHP-FPM processes on the command line
with the top or ps aux commands. This is a good habit, too, because each
PHP-FPM pool’s processes are inherently sandboxed by the permissions available
to their operating system user and group.
We’ll configure the default www PHP-FPM pool to run as the deploy user and
group. If you haven’t already, open the www PHP-FPM pool configuration file
in your preferred text editor. Here are the settings I recommend you change
from their default values:
user = deployThe system user that owns this PHP-FPM pool’s child processes. Set this to your PHP application’s nonroot operating system user name.
group = deployThe system group that owns this PHP-FPM pool’s child processes. Set this to your PHP application’s nonroot operating system group name.
listen = 127.0.0.1:9000The IP address and port number on which this PHP-FPM pool listens for and
accepts inbound requests from nginx. The value 127.0.0.1:9000 instructs this specific
PHP-FPM pool to listen for incoming connections on local port 9000. I use
port 9000, but you can use any nonprivileged port number (any port number
greater than 1024) that is not already in use by another system process. We’ll
revisit this setting when we configure our nginx virtual host.
listen.allowed_clients = 127.0.0.1The IP address(es) that can send requests to this PHP-FPM pool. For security
reasons, I set this to 127.0.0.1. This means that only the current machine
can forward requests to this PHP-FPM pool. This setting might be commented
out by default. Uncomment this setting if necessary.
pm.max_children = 51This value sets the total number of PHP-FPM pool processes that can exist
at any given time. There is no correct value for this setting. You should
test your PHP application, determine how much memory each individual PHP
process uses, and set this to the total number of PHP processes that your
machine’s available memory can accommodate. Most small to medium-sized PHP
applications often use between 5 MB and 15 MB of memory for each individual PHP
process (your mileage may vary). Assuming we are on a machine with 512 MB of
memory available to this PHP-FPM pool, we can set this value to
512MB total / 10MB per process, or 51 processes.
pm.start_servers = 3The number of PHP-FPM pool processes that are available immediately when
PHP-FPM starts. Again, there is no correct value for this setting. For most
small or medium-sized PHP applications, I recommend a value of 2 or 3.
This ensures that your PHP application’s initial HTTP requests don’t have to
wait for PHP-FPM to initialize PHP-FPM pool processes. Two
or three processes are already ready and waiting.
pm.min_spare_servers = 2The smallest number of PHP-FPM pool processes that exist when your PHP
application is idle. This will typically be in the same ballpark as your
pm.start_servers setting, and it ensures that new HTTP requests don’t have
to wait for PHP-FPM to initialize new pool processes to handle new requests.
pm.max_spare_servers = 4The largest number of PHP-FPM pool processes that exist when your PHP
application is idle. This will typically be a bit more than your
pm.start_servers setting, and it ensures that new HTTP requests don’t have
to wait for PHP-FPM to initialize new pool processes to handle new requests.
pm.max_requests = 1000The maximum number of HTTP requests that each PHP-FPM pool process handles
before being recycled. This setting helps us avoid accumulating memory leaks
caused by poorly coded PHP extensions or libraries. I recommend a value
of 1000, but you should tweak this based on your own application’s needs.
slowlog = /path/to/slowlog.logThe absolute filesystem path to a log file that records information about
HTTP requests that take longer than {n} number of seconds to process. This
is helpful for identifying and debugging bottlenecks in your PHP
applications. Bear in mind, this PHP-FPM pool’s user or group must have
permission to write to this file. The value /path/to/slowlog.log is an
example; replace this value with your own file path.
request_slowlog_timeout = 5sThe length of time after which the current HTTP request’s backtrace is dumped
to the log file specified by the slowlog setting. The value you choose
depends on what you consider to be a slow request. A value of 5s is a
reasonable value to start with.
After you edit and save the PHP-FPM configuration file, restart the PHP-FPM master process with this command:
# Ubuntusudo service php5-fpm restart# CentOSsudo systemctl restart php-fpm.service
Read more about PHP-FPM pool configuration at http://php.net/manual/install.fpm.configuration.php.
nginx (pronounced in gen ex) is a web server similar to Apache, but it’s much simpler to configure and often uses less system memory. I don’t have time to dig into nginx in detail, but I do want to show you how to install nginx on your server and forward appropriate requests to your PHP-FPM pool.
The simplest way to install nginx is with your operating system’s native package manager.
On Ubuntu, install nginx with a PPA. This is an Ubuntu-specific term for a prepackaged archive maintained by the nginx community:
sudo add-apt-repository ppa:nginx/stable;sudo apt-get update;sudo apt-get install nginx;
On CentOS, install nginx using the same EPEL third-party software repository we added earlier. The default CentOS software repositories might not have the latest nginx version:
sudo yum install nginx;sudo systemctlenablenginx.service;sudo systemctl start nginx.service;
Next, we’ll configure an nginx virtual host for our PHP application. A virtual host is a group of settings that tell nginx our application’s domain name, where the PHP application lives on the filesystem, and how to forward HTTP requests to the PHP-FPM pool.
First, we must decide where our application lives on the filesystem.
The PHP application files must live in a filesystem directory that is
readable and writable by the nonroot deploy user. For this example,
I’ll place application files in the /home/deploy/apps/example.com/current
directory. We’ll also need a directory to store application log files.
I’ll place log files in the /home/deploy/apps/logs directory. Use these
commands to create the directories and assign correct permissions:
mkdir -p /home/deploy/apps/example.com/current/public;mkdir -p /home/deploy/apps/logs;chmod -R +rx /home/deploy;
Place your PHP application in the /home/deploy/apps/example.com/current directory. The nginx virtual host configuration assumes your PHP application has a public/ directory; this is the virtual host document root.
Each nginx virtual host has its own configuration file. If you use Ubuntu, create the /etc/nginx/sites-available/example.conf configuration file. If you use CentOS, create the /etc/nginx/conf.d/example.conf configuration file. Open the example.conf configuration file in your preferred text editor.
nginx virtual host settings live inside a server {} block. Here is the complete
virtual host configuration file:
server{listen 80;server_name example.com;index index.php;client_max_body_size 50M;error_log /home/deploy/apps/logs/example.error.log;access_log /home/deploy/apps/logs/example.access.log;root /home/deploy/apps/example.com/current/public;location /{try_files$uri$uri/ /index.php$is_args$args;}location ~\.php{try_files$uri=404;fastcgi_split_path_info ^(.+\.php)(/.+)$;include fastcgi_params;fastcgi_param SCRIPT_FILENAME$document_root$fastcgi_script_name;fastcgi_param SCRIPT_NAME$fastcgi_script_name;fastcgi_index index.php;fastcgi_pass 127.0.0.1:9000;}}
Copy and paste this code into the example.conf virtual host configuration file.
Make sure you update the server_name setting and swap the error_log,
access_log, and root paths with appropriate values. Here’s a quick
explanation of each virtual host setting:
listenThe port number on which nginx listens for inbound HTTP requests. In most
cases, this is port 80 for HTTP traffic or port 443 for HTTPS
traffic.
server_nameThe domain name that identifies this virtual host. Change this to your
application’s domain name, and ensure the domain name points at
your server’s IP address. nginx sends an HTTP request to this virtual
host if the request’s Host: header matches the virtual host’s
server_name value.
indexThe default files served if none is specified in the HTTP request URI.
client_max_body_sizeThe maximum HTTP request body size accepted by nginx for this virtual host.
If the request body size exceeds this value, nginx returns a HTTP 4xx response.
error_logThe filesystem path to this virtual host’s error log file.
access_logThe filesystem path to this virtual host’s access log file.
rootThe document root directory.
There are also two location blocks. These tell nginx how to
handle HTTP requests that match specific URL patterns. The first
location / {} block uses a try_files directive that looks for real files
that match the request URI. If a file is not found, it looks for a directory
that matches the request URI. If a directory is not found, it rewrites the
HTTP request URI to /index.php and appends the query string if available.
The rewritten URL, or any request whose URI ends with .php, is managed by
the location ~ \.php {} block.
The location ~ \.php {} block forwards HTTP requests to
our PHP-FPM pool. Remember how we set up our PHP-FPM pool to listen for requests
on port 9000? This block forwards PHP requests to port 9000,
and the PHP-FPM pool takes over.
There are a few extra lines in the location ~ \.php {} block. These lines
prevent potential remote code execution attacks.
On Ubuntu, we must symlink the virtual host configuration file into the /etc/nginx/sites-enabled/ directory with this command:
sudo ln -s /etc/nginx/sites-available/example.conf\/etc/nginx/sites-enabled/example.conf;
Finally, restart nginx with this command:
# Ubuntusudo service nginx restart# CentOSsudo systemctl restart nginx.service
Your PHP application is up and running! There are many ways to configure nginx. I’ve included only the most essential nginx settings in this chapter because this is a PHP book, not an nginx book. You can learn more about nginx configuration at any of these helpful resources:
Server provisioning is a lengthy process. It’s also not a fun process, especially if you manually provision many servers. Fortunately, there are tools available that help automate server provisioning. Some popular server provisioning tools are:
Each tool is different, but they all accomplish the same goal—they automatically provision new servers based on your exact specifications. If you are responsible for multiple servers, I strongly encourage you to explore provisioning tools, because they save a ton of time.
There are online services, too, that perform server provisioning on your behalf. An example service is Forge by Taylor Otwell. I was a Forge beta tester, and it really is a helpful service. Forge can provision multiple servers on Linode, Digital Ocean, and other popular VPS providers.
Each server provisioned by Forge is automatically secured using the same security practices I demonstrated earlier. Forge automatically installs an nginx and PHP-FPM software stack. Forge also simplifies PHP application deployment, SSL certificate installation, CRON task creation, and other mundane or confusing system administration tasks. I highly recommend Forge if system administration isn’t your cup of tea.
I find system administration fascinating. I don’t want to do it as a full-time job, but I enjoy tinkering on the command line. The best system administration learning resource for developers, in my opinion, is Servers for Hackers by Chris Fidao.
In this chapter we discussed how to provision a server to run PHP applications. Next we’ll talk about how to tune your server to eke out maximum performance for your PHP application.
By this point, your PHP application should be running alongside nginx with its own PHP-FPM process pool. We’re not done yet, though. We should tune PHP’s configuration with settings appropriate for your application and production server. Default PHP installations are like an average suit you find at your local department store; they fit, but they don’t fit well. A tuned PHP installation is a custom tailored suit prepared with your exact measurements.
Don’t get too excited. PHP tuning is not a universal cure for application performance. Bad code is still bad code. For example, PHP tuning cannot solve poorly written SQL queries or unresponsive API calls. However, PHP tuning is a low-hanging fruit that can improve PHP efficiency and application performance.
The PHP interpreter is configured and tuned with a file named php.ini. This
file can live in one of several directories on your operating system. If you run
PHP with PHP-FPM, as I demonstrated earlier, you can find the php.ini configuration
file at /etc/php5/fpm/php.ini. Oddly enough, this php.ini file does not control
the PHP interpreter used when you invoke php on the command line. PHP on
the command line uses its own php.ini file often located at /etc/php5/cli/php.ini.
If you built PHP from source, the php.ini location is likely beneath the $PREFIX directory specified when you configured the
PHP source files. I’ll assume you’re running PHP with PHP-FPM as described, but all of these optimizations are applicable to any php.ini file.
Scan your php.ini file for best security practices with the PHP Iniscan tool, written by Chris Cornutt.
The php.ini file uses the INI format. You can learn about the INI format on Wikipedia.
My first concern when running PHP is how much memory each PHP process consumes.
The memory_limit setting in the php.ini file determines the maximum amount
of system memory that can be used by a single PHP process.
The default value is 128M, and this is probably fine for most small to
medium-sized PHP applications. However, if you are running a tiny PHP
application, you can save system resouces by lowering this value to something
like 64M. If you are running a memory-intensive PHP application (e.g., a
Drupal website), you may see improved performance with a higher value
like 512M. The value you choose is dictated by the amount of available system memory.
Figuring out how much memory to allocate to PHP is more an art than
a science. These are the questions I ask myself to determine my PHP memory
limit and the number of PHP-FPM processes I can afford:
First, I determine how much system memory I can allocate for PHP. For example, I may be working with a Linode virtual machine with 2 GB of total memory. However, other processes (e.g., nginx, MySQL, or memcache) might run on the same machine and consume memory of their own. I think I can safely set aside 512 MB of memory for PHP.
Next, I determine how much memory, on average, is consumed by a single PHP
process. This requires me to monitor process memory usage. If you live in
the command line, then you can run top to see realtime stats for running
processes. You can also invoke the memory_get_peak_usage() PHP function
at the tail end of a PHP script to output the maximum amount of memory
consumed by the current script. Either way, run the same PHP script several
times (to warm caches) and take the average memory consumption. I often find
PHP processes consume between 5–20 MB of memory (your mileage may vary). If you
are working with file uploads, image data, or a memory-intensive application,
this value will obviously be higher.
I have 512 MB of total memory allocated for PHP. I determine that each PHP process, on average, consumes about 15 MB of memory. I divide the total memory by the amount of memory consumed by each PHP process, and I determine I can afford 34 PHP-FPM processes. This value is an estimate and should be refined with experimentation.
Finally, I ask myself if I believe I have sufficient system resources to run my PHP application and handle the expected web traffic. If yes, awesome. If no, I need to upgrade my server with more memory and return to the first question.
Use Apache Bench or Seige to stress-test your PHP applications under production-like conditions. If your PHP application does not have sufficient resources, it’s wise to figure this out before you take your application into production.
After I figure out my memory allocation, I configure the PHP Zend OPcache extension. This is an opcode cache. What’s an opcode cache? Let’s first examine how a typical PHP script is processed for every HTTP request. First, nginx forwards an HTTP request to PHP-FPM, and PHP-FPM assigns the request to a child PHP process. The PHP process finds the appropriate PHP scripts, it reads the PHP scripts, it compiles the PHP scripts into an opcode (or bytecode) format, and it executes the compiled PHP opcode to generate an HTTP response. The HTTP response is returned to nginx, and nginx returns the HTTP response to the HTTP client. This is a lot of overhead for every HTTP request.
We can speed this up by caching the compiled opcode for each PHP script. Then we can read and execute precompiled opcode from cache instead of finding, reading, and compiling PHP scripts for each HTTP request. The Zend OPcache extension is built into PHP 5.5.0+. Here are my php.ini settings to configure and optimize the Zend OPcache extension:
opcache.memory_consumption=64opcache.interned_strings_buffer=16opcache.max_accelerated_files=4000opcache.validate_timestamps=1opcache.revalidate_freq=0opcache.fast_shutdown=1
opcache.memory_consumption = 64The amount of memory (in megabytes) allocated for the opcode cache. This should be large enough to store the compiled opcode for all of your application’s PHP scripts. If you have a small PHP application with few scripts, this can be a lower value like 16 MB. If your PHP application is large with many scripts, use a larger value like 64 MB.
opcache.interned_strings_buffer = 16The amount of memory (in megabytes) used to store interned strings. What the heck is an interned string? That was my first question, too. The PHP interpreter, behind the scenes, detects multiple instances of identical strings and stores the string in memory once and uses pointers whenever the string is used again. This saves memory. By default, PHP’s string interning is isolated in each PHP process. This setting lets all PHP-FPM pool processes store their interned strings in a shared buffer so that interned strings can be referenced across multiple PHP-FPM pool processes. This saves even more memory. The default value is 4 MB, but I prefer to bump this to 16 MB.
opcache.max_accelerated_files = 4000The maximum number of PHP scripts that can be stored in the opcode cache.
You can use any number between 200 and 100000. I use 4000. Make sure this
number is larger than the number of files in your PHP application.
opcache.validate_timestamps = 1When this setting is enabled, PHP checks PHP scripts for
changes on the interval of time specified by the opcache.revalidate_freq
setting. If this setting is disabled, PHP does not check PHP scripts for
changes, and you must clear the opcode cache manually. I recommend you enable
this setting during development and disable this setting during production.
opcache.revalidate_freq = 0How often (in seconds) PHP checks compiled PHP files for changes. The
benefit of a cache is to avoid recompiling PHP scripts on each request. This setting
determines how long the opcode cache is considered fresh. After this time
interval, PHP checks PHP scripts for changes. If PHP detects a change,
PHP recompiles and recaches the script. I use a value of 0 seconds. This
value requires PHP to revalidate PHP files on every request if and only if
you enable the opcache.validate_timestamps setting. This means PHP
revalidates files on every request during development (a good thing).
This setting is moot during production because the opcache.validate_timestamps
setting is disabled anyway.
opcache.fast_shutdown = 1This prompts the opcache to use a faster shutdown sequence by delegating object deconstruction and memory release to the Zend Engine memory manager. Documentation is lacking for this setting. All you need to know is turn this on.
Does your PHP application accept file uploads? If not, turn off file uploads to improve application security. If your application does accept file uploads, it’s best to set a maximum upload filesize that your application accepts. It’s also best to set a maximum number of uploads that your application accepts at one time. These are the php.ini settings I use for my own applications:
file_uploads=1upload_max_filesize=10Mmax_file_uploads=3
By default, PHP allows up to 20 uploads in a single request. Each uploaded file can be up to 2 MB in size. You probably don’t need to allow 20 uploads at once; I only allow three uploads in a single request, but change this setting to a value that makes sense for your application.
If my PHP applications accept file uploads, they often need to accept files much
larger than 2 MB. I bump the upload_max_filesize setting to 10M or
higher based on each application’s requirements. Don’t set this to something too
large, otherwise your web server (e.g., nginx) may complain about the HTTP
request having too large a body or timing out.
If you accept very large file uploads, be sure your web server is configured
accordingly. You may need to adjust the
client_max_body_size
setting in your nginx virtual host configuration in addition to your php.ini file.
The max_execution_time setting in your php.ini file determines the maximum
length of time that a single PHP process can run before terminating. By
default, this is set to 30 seconds. You don’t want PHP processes running
for 30 seconds. We want our applications to be super-fast
(measured in milliseconds). I recommend you change this to 5 seconds:
max_execution_time=5
You can override this setting on a per-script basis with the
set_time_limit()
PHP function.
What if my PHP script needs to run a long time? you ask. It shouldn’t. The longer PHP runs, the longer your web application visitors must wait for a response. If you have long-running tasks (e.g., resizing images or generating reports), offload those tasks to a separate worker process.
I use the exec() PHP function to invoke the at bash command. This lets
me fork separate nonblocking processes that do not delay the current PHP process.
If you use the exec() PHP function, it is your responsibility to escape
shell arguments with the escapeshellarg
PHP function.
Assume we need to run a report and generate a PDF file with the results. This task may take 10 minutes to complete. Surely we don’t want the PHP request to sit around for 10 minutes. Instead, we create a separate PHP file called create-report.php that will chug along for 10 minutes and eventually generate our report. However, our web application will take only milliseconds to spin off a separate background process and return an HTTP response, like this:
<?phpexec('echo "create-report.php" | at now');echo'Report pending...';
The standalone create-report.php script runs in a separate background process; it can update a database or email the report recipient upon completion. There is absolutely no reason why the primary PHP script should hold up the user experience for long-running tasks.
If you find yourself spawning a lot of background processes, you may be better served with a dedicated job queue. PHP Resque is a great job queue manager based on the original Resque job queue manager from GitHub.
PHP’s default session handler can slow down larger applications because it stores session data on disk. This creates unnecessary file I/O that takes time. Instead, offload session handling to a faster in-memory data store like Memcached or Redis. This has the added benefit of future scalability. If your session data is stored on disk, this prevents you from scaling PHP across additional servers. If your session data is, instead, stored on a central Memcached or Redis data store, it can be accessed from any number of distributed PHP-FPM servers.
Install the the PECL Memcached extension to access a Memcached datastore from PHP. You can now change PHP’s default session store to Memcached by adding these lines to your php.ini file:
session.save_handler='memcached'session.save_path='127.0.0.2:11211'
Networks are more efficient when sending more data in fewer chunks, rather than less data in more chunks. In other words, deliver content to your visitor’s web browser in fewer pieces to reduce the total number of HTTP requests.
This is why you enable PHP output buffering. By default, PHP’s output buffer is enabled (except on the command line). PHP’s output buffer collects up to 4,096 bytes before flushing its contents back to the web server. Here are my recommended php.ini settings:
output_buffering=4096implicit_flush=false
If you change the output buffer size, make sure its value is a multiple of 4 (for 32-bit systems) or 8 (for 64-bit systems).
PHP maintains a cache of file paths that are used by your PHP application so it does not have to continually search the include path each time it includes or requires a file. This cache is called the realpath cache. If you are running a large PHP application that uses a lot of separate files (Drupal, Composer components, etc.), you can realize better performance by increasing the size of PHP’s realpath cache.
The default realpath cache size is 16k. It’s not obvious how to figure out
the exact size you need, but here’s a trick you can use. First, bump the
realpath cache size to something obnoxiously large, like 256k. Then output
the actual realpath cache size at the tail end of a PHP script with
print_r(realpath_cache_size());. Change your realpath cache size to
this actual value. You can set the realpath cache size in your php.ini
file:
realpath_cache_size=64k
We’ve got a server firing on all cylinders, and we’re ready to deploy our PHP application into production. In the next chapter we’ll discuss several strategies to automate PHP application deployment.
We’ve got a provisioned server running nginx and PHP-FPM. Now we need to deploy our PHP application to a production server. There are many ways to push code into production. FTP was a popular way to deploy PHP code back when PHP developers first started banging rocks together. FTP still works, but today there are safer and more predictable deployment strategies. This chapter shows you how to use modern tools to automate deployment in a simple, predictable, and reversible way.
I assume you are using version control, right? If you are, good job. If you aren’t, stop what you are doing and version control your code. I prefer to version control my code with Git, but other version control software like Mercurial works, too. I use Git because it’s what I know, and it works seamlessly with popular online repositories like Bitbucket and GitHub.
Version control is an invaluable tool for PHP application developers because it lets us track changes to our codebase. We can tag points in time as a release, we can roll back to a previous state, and we can experiment with new features on separate branches that do not affect our production code. More important, version control helps us automate PHP application deployment.
It is important that you automate application deployment so that it becomes a simple, predictable, and reversible process. The last thing you want to worry about is a complicated deployment process. Complicated deployments are scary, and scary things are used less often.
Instead, make your deployment process a simple one-line command. A simple deployment process is less scary, and that means you’re more likely to push code to production.
Make your deployment process predictable. A predictable process is even less scary because you know exactly what it is going to do. It should not have unexpected side effects. If it runs into an error, it aborts the deployment process and leaves the existing codebase in place.
Make your deployment process reversible. If you accidentily push bad code into production, it should be a simple one-line command to roll back to the previous stable codebase. This is your safety net. A reversible deployment process should make you excited—not afraid—to push code into production. If you screw up, just roll back to the previous release.
Capistrano is software that automates application deployment in a simple, predictable, and reversible way. Capistrano runs on your local machine and talks with remote servers via SSH. Capistrano was originally written to deploy Ruby applications, but it’s just as useful for any programming language—including PHP.
You install Capistrano on your local workstation. Capistrano deploys your PHP application to a remote server by issuing SSH commands from your local workstation to the remote server. Capistrano organizes application deployments in their own directories on the remote server. Capistrano maintains five or more application deployment directories in case you must roll back to an earlier release. Capistrano also creates a current/ directory that is a symlink to the current application deployment’s directory. Your production server’s Capistrano-managed directory structure might look like Example 9-1.
/
    home/
        deploy/
            apps/
                my_app/
                    current/
                    releases/
                        release1/
                        release2/
                        release3/
                        release4/
                        release5/
When you deploy a new application release to production, Capistrano first retrieves the latest version of your application code from its Git repository. Next, Capistrano places the application code in a new release directory. Finally, Capistrano symlinks the current/ directory to the new release directory. When you ask Capistrano to roll back to a previous release, Capistrano points the current/ directory symlink to a previous release directory. Capistrano is an elegant and simple deployment solution that makes PHP application deployments simple, predictable, and reversible.
Install Capistrano on your local machine. Do not install Capistrano on your
remote servers. You’ll need ruby and gem, too. OS X users already have
these. Linux users can install ruby and gem with their respective package managers.
After you install ruby and gem, install Capistrano with this command:
gem install capistrano
After you install Capistrano, you must initialize your project for Capistrano. Open a terminal, navigate to your project’s topmost directory, and run this command:
cap install
This command creates a file named Capfile, a directory named config/, and a directory named lib/. Your project’s topmost directory should now have these files and directories:
Capfile
config/
    deploy/
        production.rb
        staging.rb
    deploy.rb
lib/
    capistrano/
        tasks/
The Capfile file is Capistrano’s central configuration file, and it aggregates the configuration files located in the config/ directory. The config/ directory contains configuration files for each remote server environment (e.g., testing, staging, or production).
Capsitrano configuration files are written in the Ruby language. However, they are still easy to edit and understand.
By default, Capistrano assumes you have multiple environments for your application. For example, you might have separate staging and production environments. Capistrano provides a separate configuration file for each environment in the config/deploy/ directory. Capistrano also provides the config/deploy.rb configuration file, which contains settings common to all environments.
In each environment, Capistrano has the notion of server roles. For example,
your production environment may have a front-facing web server
(the web role), an application server (the app role), and a database server
(the db role). Only the largest applications necessitate this architecture.
Smaller PHP applications generally use only one machine that runs the web
server (nginx), application server (PHP-FPM), and database server (MariaDB).
For this demonstration, I’m only going to use Capistrano’s web role and
ignore its app and db roles. Capistrano’s roles let you organize tasks to
be executed only on servers that belong to a given role. This isn’t something
we’re going to worry about here. However, I am going to respect Capistrano’s
notion of server environments. This demonstration will use the production
environment, but the following steps are equally applicable to other environments
(e.g., staging or testing).
Let’s look at the config/deploy.rb file. This configuration file contains
settings common to all environments (e.g., staging and production). Most
of our Capistrano configuration settings go in this file. Open the config/deploy.rb
file in your preferred text editor and update these settings:
:applicationThis is the name of your PHP application. It should contain only letters, numbers, and underscores.
:repo_urlThis is your Git repository URL. This URL must point to a Git repository, and the repository must be accessible from your remote server.
:deploy_toThis is the absolute directory path on your remote server in which your PHP application is deployed. This would be /home/deploy/apps/my_app as shown in Example 9-1.
:keep_releasesThis is the number of old releases that should be retained in case you want to roll back your application to an earlier version.
This file contains settings only for your production environment. This file
defines the production environment roles, and it lists the servers that
belong to each role. We’re only using the web role, and we have only
one server that belongs to this role. Let’s use the server we provisioned
in Chapter 7. Update the entire config/deploy/production.rb
file with this content. Make sure you replace the example IP address:
role:web,%w{deploy@123.456.78.90}
Before we deploy our application with Capistrano, we must establish authentication between our local computer and our remote servers, and between our remote servers and the Git repository. We already discussed how to set up SSH key-pair authentication between our local computer and remote server. You should also establish SSH key-pair authentication between your remote servers and the Git repository.
Use the same instructions we discussed earlier to generate an SSH public and private keypair on each remote server. The Git repository should have access to each remote server’s public key; both GitHub and Bitbucket let you add multiple public SSH keys to your user account. Ultimately, you must be able to clone the Git repository to your remote servers without a password.
We’re almost ready to deploy our application. First, we need to prepare our
remote server. Log in to your remote server with SSH and create the directory
in which we’ll deploy our PHP application. This directory must be readable and writable
by the deploy user. I like to create a directory for my applications in the deploy
user’s home directory, like this:
/
    home/
        deploy/
            apps/
                my_app/
Capistrano symlinks the current/ directory to the current application release directory. Update your web server’s virtual host document root directory so that it points to Capistrano’s current/ directory. Given this filesystem diagram, your virtual host document root might become /home/deploy/apps/my_app/current/public/; this assumes your PHP application contains a public/ directory that serves as the document root. Restart your web server to load your virtual host configuration changes.
Capistrano allows us to run our own commands at specific moments (or hooks) during application deployment. Many PHP developers manage application dependencies with Composer. We can install Composer dependencies during each Capistrano deployment with a Capistrano hook. Open the config/deploy.rb file in your preferred text editor and append this Ruby code:
namespace:deploydodesc"Build"after:updated,:builddoonroles(:web)dowithinrelease_pathdoexecute:composer,"install --no-dev --quiet"endendendend
If your project uses the Composer dependency manager, make sure Composer is installed on your remote servers.
Our application’s dependencies are now installed automatically after each production deployment. You can read more about Capistrano hooks on the Capistrano website.
Now’s the fun part! Make sure you’ve committed and pushed your most recent application code to your Git repository. Then open a terminal on your local computer and navigate to your application’s topmost directory. If you’ve done everything correctly, you can deploy your PHP application with this one-line command:
cap production deploy
I’ve only scratched the surface. Capistrano has many more features that further streamline your deployment workflow. Capistrano is my favorite deployment tool, but there are many other tools available, including:
We’ve provisioned a server, and we’ve automated our PHP application deployments with Capistrano. Next we’ll discuss how to ensure our PHP applications run as expected. To do this, we’ll use testing and profiling.
Testing is an important part of PHP application development, but it is often neglected. I think many PHP developers don’t test because they consider testing an unnecessary burden that requires too much time for too few benefits. Other developers may not know how to test, because there are a large number of testing tools and an overwhelming learning curve.
In this chapter I hope to dispel these misunderstandings. I want you to feel comfortable and excited about testing your PHP code. I want you to consider testing an integral part of your workflow that happens at the beginning, middle, and end of the application development process.
We write tests to ensure that our PHP applications work, and continue to work, according to our expectations. It’s as simple as that. How often have you been afraid to deploy an application into production? Before I started testing my code, I was terrified to push a release into production. Would my code work? Would it break? All I could do was cross my fingers and hope for the best. This is no way to code. It’s scary and stressful, and it usually ends in frustration. Tests, however, mitigate uncertainty, and they let us write and deploy code with confidence.
Your pointy-haired boss may argue that there isn’t enough time to write tests. After all, time is money. This is shortsighted. Installing a testing infrastructure and writing tests takes time, but this is a wise investment that pays dividends into the future. Tests help us write code that works well the first time. Tests let us continuously iterate without breaking old code. We may move forward at a slower pace than if we didn’t use tests, but we won’t waste countless development hours in the future troubleshooting and refactoring bugs that were overlooked. In the long term, tests save money, prevent downtime, and inspire confidence.
I see many PHP developers write tests as an afterthought. These developers know testing is important, but they consider tests as something they must do instead of something they want to do. These developers often push testing to the very end of the application development process. They bang out a few passing tests to satisfy their management team and call it a day. This is wrong. Tests should be a foreground concern before development, during development, and after development.
Install and configure your testing tools before you develop your application. It doesn’t matter which testing tools you choose. Install them as if they are a vital application dependency. This makes it physically and mentally easier to test your application during development. This is also a good time to meet with your project manager to define higher-level application behavior.
Write and run tests as you build each piece of your application. Did you just add a new PHP class? Test it now, because you probably won’t test it later. Testing while you develop helps you build confident and stable code, and it also helps you quickly find and refactor new code that breaks existing functionality.
You probably won’t anticipate and test all of your application’s behaviors during development. If you find a bug after your launch your application, write a new test to ensure that your bug fix works correctly. Tests are not a once-and-done thing. Tests are continuously modified and improved, just like the application itself. If you update your application’s code, be sure you also update the affected tests.
We test the smallest pieces of our application. A PHP application, on a microcosmic scale, has PHP classes, methods, and functions. We should test each public class, method, and function to ensure it behaves as we expect in isolation. If we know each piece works well on its own, we can be confident it also works well when integrated into the whole application. These tests are called unit tests.
Unfortunately, testing each individual piece does not guarantee it works correctly with the whole application. This is why we also test our application at a macrocosmic scale with automated testing tools that verify our application’s higher-level behaviors. These tests are called functional tests.
We know why, when, and what to test. More important, let’s chat about how we test code. There are several popular ways PHP developers approach testing. Some developers prefer unit tests. Some developers prefer test-driven development (TDD). And other developers prefer behavior-driven development (BDD). These are not mutually exclusive.
The most popular approach to PHP application testing is unit testing. As I described previously, unit tests certify individual classes, methods, and functions in isolation from the larger application. The de facto standard PHP unit testing framework is PHPUnit, written by Sebastian Bergmann. Sebastian’s PHPUnit framework adheres to the xUnit test architecture.
There are alternative PHP unit testing frameworks, like PHPSpec, available for you to use, too. However, most popular PHP frameworks provide PHPUnit tests. It’s vital that you know how to read, write, and run PHPUnit tests if you intend to contribute to or release PHP components. I’ll show you how to install, write, and run PHP unit tests at the end of this chapter.
Test-driven development means you write tests before you write application code. These tests purposefully fail and describe how your application should behave. As you build application functionality, your tests will eventually run successfully. TDD helps you build with a purpose; you know ahead of time what you will build and how it should work.
This does not meant that you must write all of your application tests before you write any code. Instead, write a few tests and then build the related functionality. Write tests and build. Write tests and build. TDD is iterative. Move forward in small sprints until your application is complete.
Behavior-driven development means that you write stories that describe how your application behaves. There are two types of BDD: SpecBDD and StoryBDD.
SpecBDD is a type of unit test that uses a fluid and human-friendly language to describe your
application’s implementation. SpecBDD accomplishes the same goal as alternative unit testing
tools like PHPUnit. Unlike PHPUnit’s xUnit architecture, SpecBDD tests use human-readable stories
to describe behavior. For example, a PHPUnit test might be named testRenderTemplate(). An
equivalent SpecBDD test might be named itRendersTheTemplate(). The same SpecBDD test
might use helper methods named $this->shouldReturn(), $this->shouldBe(), and
$this->shouldThrow(). SpecBDD tests use a language that is much easier to read and
understand than alternative xUnit tools. The most popular SpecBDD testing tool is PHPSpec.
StoryBDD tools use the same human-friendly stories as SpecBDD tests. StoryBDD tools, however, are more concerned with higher-level behavior than with lower-level implementation. For example, a StoryBDD test confirms that your code creates and emails a PDF report. A SpecBDD test, on the other hand, confirms that a specific PDF generator class method correctly renders a PDF file for a given set of input parameters. The difference is scope. StoryBDD resembles something a project manager would write (e.g., “this should generate and email me a report”). A SpecBDD test resembles something a developer would write (e.g., “this class method should receive an array of data and write it to this PDF file”). StoryBDD and SpecBDD testing tools are not mutually exclusive. They are often used together to build a more comprehensive set of tests. You’ll often sit with your project manager to write generic StoryBDD tests that define your application’s generic behavior, and then you’ll write SpecBDD tests when you design and build your application’s implementation. The most popular StoryBDD testing tool is Behat.
Write StoryBDD tests that describe your business logic and not a specific implementation.
A good StoryBDD test confirms “a shopping cart total increases when I add a product to the cart.”
A bad StoryBDD test confirms “a shopping cart total increases when I send an HTTP PUT
request to the /cart URL with the body product_id=1&quantity=2.” The first test is
generic and describes only the high-level business logic. The second test is too specific
and describes a particular implementation.
Let’s talk about how to install, write, and run PHPUnit tests. It takes a bit of work to get the infrastructure in place, but it’s dead simple to write and run your PHPUnit tests afterward. Before we dig too deep into PHPUnit, let’s quickly review some vocabulary. Your PHPUnit tests are grouped into test cases, and your test cases are grouped into test suites. PHPUnit runs your test suites with a test runner.
A test case is a single PHP class that extends the PHPUnit_Framework_TestCase class.
Each test case contains public methods whose names begin with test; these methods are
individual tests that assert specific scenarios to be true. Each assertion can
pass or fail. You want all assertions to pass.
A test case class name must end with Test, and its filename must end
with Test.php. A hypothetical test case class name is FooTest, and that
class lives in a file named FooTest.php.
A test suite is a collection of related test cases. If you are working on a single PHP component, oftentimes you’ll only ever have a single test suite. If you are testing a larger PHP application with many different subsystems or components, you may find it best to organize tests into multiple test suites.
A test runner is exactly what it sounds like. It is a way for PHPUnit to run your test suites and output the result. The default PHPUnit test runner is the command-line runner that is invoked with the phpunit command in your terminal application.
Here’s how I prefer to organize my PHP projects. The topmost project directory has a src/ directory where I keep my source code. It also has a tests/ directory where I keep my tests. Here’s an example directory structure:
src/
tests/
    bootstrap.php
composer.json
phpunit.xml
.travis.yml
This directory contains my PHP project’s source code (i.e., PHP classes).
This directory contains my PHP project’s PHPUnit tests. This directory contains a bootstrap.php file that is included by PHPUnit before the unit tests are run.
This file lists my PHP project’s dependencies managed by Composer, including the PHPUnit test framework.
This file provides configuration details for the PHPUnit test runner.
This file provides configuration details for the Travis CI continuous testing web service.
Look at your favorite PHP component or framework’s source code on GitHub and you’ll see it uses a similar organization.
First we need to install PHPUnit and the Xdebug profiler. PHPUnit runs our tests. The Xdebug profiler generates helpful code coverage information. Composer is the easiest way to install the PHPUnit test framework. Open your terminal application, navigate to your project’s topmost directory, and run this command:
composer require --dev phpunit/phpunit
This command downloads the PHPUnit test framework into your project’s vendor/ directory,
and it updates your project’s composer.json file so that the phpunit/phpunit package
is listed as a project dependency. The phpunit binary is installed in your project’s
vendor/bin/ directory. You can add this directory to your environment path, or you
can reference vendor/bin/phpunit whenever you invoke the PHPUnit command line test
runner. The PHPUnit framework classes are autoloaded into your PHP application
with your project’s other Composer-managed dependencies.
The Xdebug PHP extension is a bit trickier to install. If you installed PHP with your package manager, you can install Xdebug the same way (Example 10-1).
# Ubuntusudo apt-get install php5-xdebug# CentOSsudo yum -y --enablerepo=epel,remi,remi-php56 install php-xdebug
If you installed PHP from source, you’ll need to install the Xdebug extension with
the pecl command:
pecl install xdebug
Next, update your php.ini configuration file with the path to the compiled Xdebug extension.
You can find your PHP extensions directory with the php-config --extension-dir
or php -i | grep extension_dir commands.
Append this line to your php.ini file using your own PHP extension path:
zend_extension="/PATH/TO/xdebug.so"
Restart PHP and you’re good to go. We’ll discuss the Xdebug profiler in Chapter 11.
Now let’s configure PHPUnit in our project’s phpunit.xml file.
<?xml version="1.0" encoding="UTF-8"?><phpunitbootstrap="tests/bootstrap.php"><testsuites><testsuitename="whovian"><directorysuffix="Test.php">tests</directory></testsuite></testsuites><filter><whitelist><directory>src</directory></whitelist></filter></phpunit>
PHPUnit test runner settings are attributes on the <phpunit> XML root element. The most
important setting, in my opinion, is the bootstrap setting; it specifies the path
(relative to the phpunit.xml file) to a PHP file that is included before the PHPUnit
test runner executes our tests. We’ll autoload our application’s Composer dependencies
in the bootstrap.php file so they are available to our PHPUnit tests. The bootstrap.php
file also specifies the path to our test suite (i.e., a directory that contains related
test cases); PHPUnit runs all PHP files in this directory whose file names end with Test.php.
Finally, this configuration file lists the directories included in our code coverage
analysis with the <filter> element. In the previous example XML, the <whitelist>
element tells PHPUnit to generate code coverage only for code in the src/ directory.
The gist of this configuration file is to specify our PHPUnit settings in one location.
This makes our lives easier locally because we don’t have to specify these settings
each time we use the phpunit command-line runner. This configuration file also lets
us apply the same PHPUnit settings on remote continuous testing servers like Travis CI.
After you update the phpunit.xml configuration file, update the tests/bootstrap.php
file with this code:
<?php// Enable Composer autoloaderrequiredirname(__DIR__).'/vendor/autoload.php';
Make sure you install your Composer dependencies before running PHPUnit tests.
Before we write unit tests, we need something to test. Here’s a hypothetical PHP class named Whovian that has a pretty strong opinion about a particular BBC television show. Place this class definition into the src/Whovian.php file:
<?phpclassWhovian{/*** @var string*/protected$favoriteDoctor;/*** Constructor* @param string $favoriteDoctor*/publicfunction__construct($favoriteDoctor){$this->favoriteDoctor=(string)$favoriteDoctor;}/*** Say* @return string*/publicfunctionsay(){return'The best doctor is '.$this->favoriteDoctor;}/*** Respond to* @param string $input* @return string* @throws \Exception*/publicfunctionrespondTo($input){$input=strtolower($input);$myDoctor=strtolower($this->favoriteDoctor);if(strpos($input,$myDoctor)===false){thrownewException(sprintf('No way! %s is the best doctor ever!',$this->favoriteDoctor));}return'I agree!';}}
The Whovian class constructor sets the instance’s favorite doctor. The say()
method returns a string with the instance’s favorite doctor. And its respondTo()
method receives a statement from another Whovian instance and responds accordingly.
The unit tests for our Whovian class live in the test/WhovianTest.php file. We call
a group of related tests a test suite. In our example, all tests beneath the test/
directory belong to the same test suite. Each class file beneath the test/ directory
is called a test case, and its class methods that begin with test (e.g., testThis
or testThat) are individual tests. Each individual test uses assertions to verify a
given condition. An assertion can pass or fail.
Find a list of PHPUnit assertions on the PHPUnit website. Some assertions are undocumented; you can find all available assertions in the source code on GitHub.
Each PHPUnit test case is a class that extends the PHPUnit_Framework_TestCase class.
Let’s declare a test case named WhovianTest in the test/WhovianTest.php file:
<?phprequiredirname(__DIR__).'/src/Whovian.php';classWhovianTestextendsPHPUnit_Framework_TestCase{// Individual tests go here}
Remember, unit tests verify a public interface’s expected behavior. We’ll test the three
public methods in the Whovian class. We’ll write a unit test to ensure that the __construct()
method argument becomes the instance’s preferred doctor. Next, we’ll write a unit test
to ensure that the say() method’s return value mentions the instance’s preferred doctor.
Finally, we’ll write two tests for the respondTo() method. One test ensures that the method’s
return value is the string "I agree!" if the input matches its preferred doctor. The
second test that ensures the method throws an exception if the input does not match its
preferred doctor.
Our first test confirms that the constructor sets the Whovian instance’s favorite doctor:
publicfunctiontestSetsDoctorWithConstructor(){$whovian=newWhovian('Peter Capaldi');$this->assertAttributeEquals('Peter Capaldi','favoriteDoctor',$whovian);}
This test instantiates a new Whovian instance with one string argument: "Peter Capaldi".
We use the PHPUnit assertion method assertAttributeEquals() to assert the favoriteDoctor
property on the $whovian instance equals the string "Peter Capaldi".
The PHPUnit assertion assertAttributeEquals() receives three arguments. The first argument
is the expected value; the second argument is the property name; and the final argument is
the object to inspect. What’s neat is that the assertAttributeEquals() method can inspect
and verify protected properties using PHP’s reflection capabilities.
Why do we inspect the favorite doctor value with the assertAttributeEquals() assertion
instead of a getter method (e.g., getFavoriteDoctor())? When we write a test, we
test only one specific method in isolation. Ideally, our test does not rely on other
methods. In this particular example, we test the __construct() method and verify that
it assigns its argument value to the object’s $favoriteDoctor property. The
assertAttributeEquals() assertion lets us inspect the object’s internal state without
relying on a separate, untested getter method.
Our next test confirms that the Whovian instance’s say() method returns a string
value that contains its favorite doctor’s name:
publicfunctiontestSaysDoctorName(){$whovian=newWhovian('David Tennant');$this->assertEquals('The best doctor is David Tennant',$whovian->say());}
We use the PHPUnit assertion assertEquals() to compare two values. The assertion’s
first argument is the expected value. Its second argument is the value to inspect.
Now let’s test how a Whovian instance responds in agreement with another Whovian:
publicfunctiontestRespondToInAgreement(){$whovian=newWhovian('David Tennant');$opinion='David Tennant is the best doctor, period';$this->assertEquals('I agree!',$whovian->respondTo($opinion));}
This test is successful because the Whovian instance’s respondTo() method receives
a string argument that includes the name of its favorite doctor.
But what if a Whovian disagrees? Get out of the area as quickly as possible,
because s#!t is going to hit the fan. Well, actually, it’ll just throw an exception. Let’s test that:
/*** @expectedException Exception*/publicfunctiontestRespondToInDisagreement(){$whovian=newWhovian('David Tennant');$opinion='No way. Matt Smith was awesome!';$whovian->respondTo($opinion);}
If this test throws an exception, the test passes. Otherwise, the test fails. We can
test this condition with the @expectedException annotation.
PHPUnit provides several annotations that can control a given test. Read more about PHPUnit annotations in the PHPUnit documentation.
After you write each test, you should run your test suite to ensure that it passes. This is really simple to do. Open your terminal application and navigate to your project’s topmost directory (the same directory as your phpunit.xml configuration file). We’ll use the PHPUnit binary installed with Composer. Use this command to start the PHPUnit test runner:
vendor/bin/phpunit -c phpunit.xml
The -c option specifies the path to the PHPUnit configuration file. The terminal
shows the results from the PHPUnit command-line test runner, and they look like Figure 10-1.
These results tell us:
PHPUnit read our configuration file.
PHPUnit took 24 ms to complete.
PHPUnit used 3.5 MB of memory.
PHPUnit successfully ran five tests and five assertions.
We know our PHPUnit tests pass. However, are we sure we tested as much of our code as possible? Perhaps we forgot to test something. We can see exactly which code is tested (and untested) with PHPUnit’s code coverage report (Figure 10-2). We already specify the path(s) to our source code files in the PHPUnit configuration file. All PHP files in the whitelisted directories are included in PHPUnit’s code coverage report. We can generate code coverage each time we run the PHPUnit test runner:
vendor/bin/phpunit -c phpunit.xml --coverage-html coverage
This is the same command we used earlier, except we append the new --coverage-html
option whose value is the path to a the code coverage report directory. After you run
this command, open the newly generated coverage/index.html file in a web browser
to see the code coverage results. Ideally, you want to see 100% coverage across the
board. However, 100% coverage is not realistic and definitely should not be a
requirement. How much coverage is good is subjective and varies from project to project.

Sometimes even the best PHP developers forget to write tests. This is why it is important to automate your tests. The best tests are like a good backup strategy—out of sight and out of mind. Tests should run automatically. My favorite continuous testing service is Travis CI because it has native hooks into GitHub repositories. I can run my application tests within Travis CI every time I push code to GitHub. Travis CI runs my tests against multiple PHP versions, too.
If you have not used Travis CI before, go to https://travis-ci.org (for public repositories) or https://travis-ci.com (for private repositories). Log in with your GitHub account. Follow the on-screen instructions to choose which repository to test with Travis CI.
Next, create the .travis.yml Travis CI configuration file in your application’s topmost directory. Don’t forget the leading . character! Save, commit, and push the Travis CI configuration file to your GitHub repository. Here’s an example Travis CI configuration:
language:phpphp:-5.4-5.5-5.6-hhvminstall:-composer install --no-dev --quietscript:phpunit -c phpunit.xml --coverage-text
The Travis CI configuration is written in YAML format and includes these settings:
languageThis is the language used for our application. We set this to php. This value
is case-sensitive!
phpTravis CI runs our application tests against these PHP versions. It is important that you test against all PHP versions supported by your application.
installThis is a bash command executed by Travis CI before it runs application tests. This
is where you instruct Travis CI to install your project’s Composer dependencies.
It is important that you use the --no-dev option to avoid installing unnecessary
development dependencies.
scriptThis is the bash command executed by Travis CI to run application tests. By default,
this is phpunit. You can override Travis CI’s default command with this setting.
In this example, we tell Travis CI to use our custom PHPUnit configuration file
and generate plain text coverage results.
Travis CI automatically runs your application tests every time you push new commits
to your GitHub repository and emails you the test results. How cool is that? There are,
of course, many more Travis CI settings to further customize the Travis CI testing environment
(e.g., install custom PHP extensions, use custom ini settings, and so on). Read
more about Travis CI configuration for PHP at Travis CI.
Here are a few links to help you learn more about PHP application testing:
In this chapter we learned why, when, and how to write tests. Testing our applications builds confidence and creates more predictable code. However, tests do not let us analyze application performance. This is why we must also profile our applications. That’s what I want to talk about next.
Profiling is how we analyze application performance. It is a great way to debug performance issues and pinpoint bottlenecks in your application code. In other words, if your application is slow, use a profiler to figure out why. Profilers let us traverse the entire PHP call stack, and they tell us which functions or methods are called, in what order, how many times, with what arguments, and for how long. We can also see how much memory and CPU are used throughout the application request lifecycle.
You don’t need to profile your PHP applications immediately. You only profile PHP applications if there is a performance issue that is otherwise hard to diagnose. How do you know if you have a performance issue? Some issues are obvious (e.g., a database query takes too long). Other issues may not be as obvious.
You can detect performance issues with benchmarking tools like Apache Bench and Siege. A benchmarking tool allows you to test your application performance externally, much as an application user would with a web browser. Benchmarking tools let you set the number of concurrent users and total number of requests that hit a specific application URL. When the benchmarking tool finishes, it tells you the number of requests per second that your application sustained (among other statistics). If you find a particular URL sustains only a small number of requests per second, you may have a performance issue. If the performance issue is not immediately obvious, you use a profiler.
There are two types of profilers. There are those that should run only during development, and there are those that can run during production.
Xdebug is a popular PHP profiling tool written by Derick Rethans, but it should only be used as a profiler during development because it consumes a lot of system resources to analyze your application. Xdebug profiler results are not human-readable, so you’ll need an application to parse and display the results. KCacheGrind and WinCacheGrind are good applications for visualizing Xdebug profiler results.
XHProf is a popular PHP profiler written by Facebook. It is intended to be run during development and production. XHProf’s profiler results are also not human-readable, but Facebook provides a companion web application called XHGUI to visualize and compare profiler results. I’ll talk more about XHGUI later in this chapter.
Both Xdebug and XHProf are PHP extensions, and you can install them with your operating
system’s package manager. They can also be installed with pecl.
Xdebug is one of the most popular PHP profilers, and it makes it easy to analyze your application’s call stack to find bottlenecks and performance issues. Refer to Example 10-1 in Chapter 10 for Xdebug installation instructions.
Xdebug configuration lives in your php.ini file. Here are the Xdebug profiler configuration settings I recommend. Make sure you specify your own profiler output directory. Restart your PHP process after saving these settings:
xdebug.profiler_enable=0xdebug.profiler_enable_trigger=1xdebug.profiler_output_dir=/path/to/profiler/results
xdebug.profiler_enable = 0This instructs Xdebug to not run automatically. We don’t want Xdebug to run automatically on each request, because that would drastically decrease performance and impede development.
xdebug.profiler_enable_trigger = 1This instructs Xdebug to run on-demand. We can activate Xdebug profiling
per-request by adding the XDEBUG_PROFILE=1 query parameter to any of
our PHP application’s URLs. When Xdebug detects this query parameter, it
profiles the current request and generates a report in the output directory
specified by the xdebug.profiler_output_dir setting.
xdebug.profiler_output_dir = /path/to/profiler/resultsThis is the directory path that contains generated profiler results. Profiler reports can be massive (e.g., 500 MB or larger) for complex PHP applications. Make sure you change this value to the correct filesystem path for your application.
I recommend you keep profiler results beneath your PHP application’s topmost directory. This makes it easy to find and review profiler results while developing your application.
The Xdebug profiler does not run automatically because the xdebug.profiler_enable
setting is 0. We trigger the Xdebug profiler for a single request by adding the
XDEBUG_PROFILE=1 query parameter to any PHP application URL. An example HTTP
request URL might be /users/show/1?XDEBUG_PROFILE=1. When Xdebug detects the
XDEBUG_PROFILE query parameter, it activates and runs the profiler for the
current request. The profiler results are dumped into the directory specified
by the xdebug.profiler_output_dir setting.
The Xdebug profiler generates results in the CacheGrind format. You’ll need a CacheGrind-compatible application to review the profiler results. Some good applications for reviewing CacheGrind files are:
WinCacheGrind for Windows
KCacheGrind for Linux
WebGrind for web browsers
Mac OS X users can install KCacheGrind with Homebrew using this command:
brew install qcachegrind
Homebrew is a package manager for OS X. We discuss Homebrew in Appendix A.
XHProf is a newer PHP application profiler. It is created by Facebook and is intended to be run during both development and production. It does not collect as much information as Xdebug’s profiler, but it consumes fewer system resources, making it suitable for production environments.
The easiest way to install XHProf is with your operating system’s package manager (assuming you installed PHP the same way):
# Ubuntusudo apt-get install build-essential;sudo pecl install mongo;sudo pecl install xhprof-beta;# CentOSsudo yum groupinstall'Development Tools';sudo pecl install mongo;sudo pecl install xhprof-beta;
Append these lines to your php.ini file, and restart your PHP process to load the new extensions:
extension=xhprof.soextension=mongo.so
XHProf is most useful when paired with XHGUI, Facebook’s companion web application used to review and compare XHProf profiler output. XHGUI is a PHP web application and requires:
Composer
Git
MongoDB
PHP 5.3+
PHP mongo extension
I assume these system requirements are installed. I also assume the XHGUI web application lives in the /var/sites/xhgui/ directory. This directory path is probably different on your server, so keep that in mind:
cd/var/sites;git clone https://github.com/perftools/xhgui.git;cdxhgui;php install.php;
The XHGUI web application has a webroot/ directory. Update your web server virtual host’s document root to this directory.
Open XHGUI’s config/config.default.php file in a text editor. By default, XHProf collects data for only 1% of all HTTP requests. This is fine for production, but you may want to collect data more frequently during development. You can increase XHProf’s data collection by editing these lines in the config/config.default.php file:
'profiler.enable'=>function(){returnrand(0,100)===42;},
Change these lines to:
'profiler.enable'=>function(){returntrue;// <-- Run on every request},
XHProf assumes your PHP application runs on a single server. It also assumes your MongoDB database does not require authentication. If your MongoDB server does require authentication, update the Mongo database connection in the config/config.default.php file.
You must include the XHGUI web application’s external/header.php file at the very beginning
of your PHP application. It’s easiest to use PHP’s auto_prepend_file INI configuration setting.
You can set this in the php.ini configuration file:
auto_prepend_file=/var/sites/xhgui/external/header.php
Or you can set this in your nginx virtual host configuration:
fastcgi_paramPHP_VALUE"auto_prepend_file=/var/sites/xhgui/external/header.php";
Or you can set this in your Apache virtual host configuration:
php_admin_valueauto_prepend_file"/var/sites/xhgui/external/header.php"
Restart PHP, and XHProf will begin collecting and saving information into its MongoDB database. You can review and compare XHProf runs at the XHGUI virtual host’s URL.
Another popular PHP profiler is New Relic. This is actually a web service that uses a custom operating system daemon and PHP extension to hook into your PHP application and report data back to the web service. Unlike Xdebug and XHProf, New Relic’s PHP profiler is not free. That being said, I adore New Relic and recommend it if your budget allows. Like XHProf, New Relic’s PHP profiler is meant to be run during production, and it gives you a near real-time view of your application’s performance with a really nice online dashboard. Learn more on New Relic’s website.
As I am writing this book, Symfony is currently testing a new PHP profiler called Blackfire. It provides unique visualization tools to help discover application bottlenecks. I hear it’s looking like a really good alternative to Xdebug and XHProf. Keep an eye on this one.
I hope I’ve introduced you to PHP profiling in this chapter so that you feel comfortable finding, installing, and using a PHP profiler most appropriate for your application. Here are a few links to help you learn more about PHP profiling:
At this point we’ve talked a lot about modern PHP, including new features, good practices, provisioning, tuning, deployment, testing, and profiling. I hope you have filled your brain with tons of fun ideas to implement in your next PHP applications.
Now I want to take a few minutes to chat about the future of PHP. A lot is happening in the PHP ecosystem. The future of PHP is unfolding as we speak thanks to forward-looking projects like PHP 7, HHVM, Hack, and the PHP-FIG. Let’s explore HHVM and Hack, specifically, and figure out what they mean for PHP’s future.
Think what you will about the Facebook application, but I have nothing but praise for the brilliant folks working at Facebook. Facebook Open Source has developed several important projects in the last few years, two of which have had significant impact in the PHP community.
The first initiative is HHVM, or the Hip Hop Virtual Machine. This alternative PHP engine was released in October 2013. Its just-in-time (JIT) compiler provides performance many times better than PHP-FPM. In fact, WP Engine recently migrated to HHVM and realized 3.9x faster custom Wordpress installations. MediaWiki also transitioned to HHVM, and it has realized drastic improvements in both response times and throughput.
The second initiative is Hack, a new server-side language that is a modification of the PHP language. Hack is mostly backward-compatible with PHP code, although it extends the PHP language with strict typing, new data structures, and a real-time type checking server. That being said, Hack’s own developers prefer to call Hack a dialect of PHP and not a new language.
Since 1994, if you said PHP interpreter you meant the Zend Engine. The Zend Engine was PHP. It was the one and only PHP interpreter. Then Mark Zuckerberg came along and created this little thing called Thefacebook on February 4, 2004. Mr. Zuckerberg and his growing company wrote the Facebook application predominantly with PHP because the language is easy to learn and simple to deploy. The PHP language lets Facebook quickly onboard new developers to grow, innovate, and iterate its platform.
Fast forward, and Facebook is a veritable empire. Its infrastructure is massive. Facebook is so huge that the traditional Zend Engine became a bottleneck for its developers. The Facebook team had a hugely growing user base (by 2007, its user base surpassed 1 in 10 people on the planet), and it had to figure out a way to improve performance without simply building more data centers and buying more servers.
The PHP language is traditionally interpreted, not compiled. This means that your PHP code remains PHP code until it is sent through an interpreter when executed on the command line or requested by a web server. The PHP script is read by the PHP interpreter and converted into a set of existing Zend Opcodes (machine-code instructions), and the Zend Opcodes are executed with the Zend Engine. Unfortunately, interpreted languages execute more slowly than compiled languages because they must be converted to machine code during every execution. This taxes system resources. Facebook realized this performance bottleneck and, in 2010, began working on a PHP-to-C++ compiler called HPHPc.
The HPHPc compiler converts PHP code into C++ code. It then compiles the C++ code into an executable that is deployed to production servers. HPHPc was largely successful; it improved Facebook’s performance and reduced the strain on its servers. However, HPHPc’s potential performance approached a ceiling, it was not 100% compatible with the complete PHP language, and it required a time-consuming compile process that created a lengthy feedback loop for developers. Facebook needed a hybrid solution that delivered superior performance but also allowed for faster development without expensive compile time.
Facebook began working on the next iteration of HPHPc, called HHVM. HHVM converts and caches PHP code into an intermediary bytecode format, and it uses a JIT compiler to translate and optimize its bytecode cache into x86_64 machine code. HHVM’s JIT compiler enables many low-level performance optimizations that are simply not possible by compiling PHP directly to C++ with HPHPc. HHVM also enables a fast feedback loop for developers because it compiles bytecode into machine code only when PHP scripts are requested by a web server—just in time, you might say—much like a traditional interpreted language. What’s more amazing is that HHVM’s performance eclipsed HPHPc’s performance in November 2012, and it continues to improve (Figure 12-1).
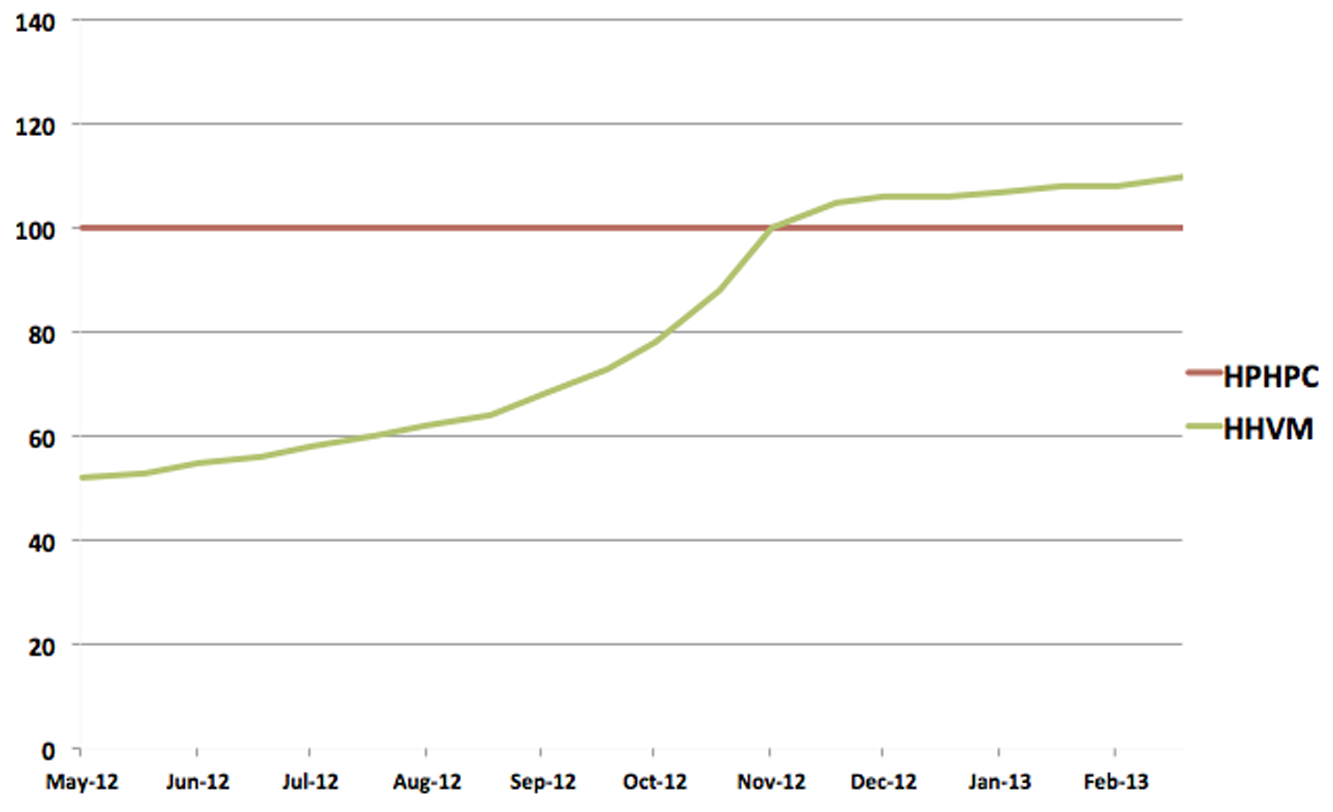
HPHPc was deprecated soon after HHVM’s peformance exceeded its own, and HHVM is currently Facebook’s preferred PHP interpreter.
Don’t let HHVM intimidate you! Its implementation may be complex, but at the end of the day HHVM is just a replacement for the more familiar php and php-fpm binaries:
You execute PHP scripts with the hhvm binary on the command line, just like the php binary.
You use the hhvm binary to create a FastCGI server, just like the php-fpm binary.
HHVM uses a php.ini configuration file, just like the traditional Zend Engine. It even uses the same INI directives.
HHVM has native support for many common PHP extensions.
Facebook’s original HPHPc compiler was not compatible with the complete PHP language (i.e., the Zend Engine). Complete parity is an aspiration for Facebook because it lets HHVM become a drop-in replacement for the Zend Engine.
Facebook tested HHVM against the most popular PHP frameworks to ensure compatibility with real-world PHP 5 code. Facebook is close to 100% compatibility. However, Facebook has shifted its focus to user-reported issues on the HHVM issue tracker to tackle remaining edge-case issues. HHVM is not yet 100% compatible with the traditional Zend Engine, but it’s getting closer every day. Facebook, Baidu, and Wikipedia already use HHVM in production. HHVM can also run Wordpress, Drupal, and many popular PHP frameworks.
HHVM isn’t the right choice for everyone. There are far easier ways to improve application performance. Reducing HTTP requests and optimizing database queries are low-hanging fruit that noticeably improve application performance and response time. If you have not made these optimizations, do them first before you consider HHVM. Facebook’s HHVM is for developers who have already made these optimizations and still need faster applications. If you believe you need HHVM, here are some resources to help you make the best decision:
View a list of PHP extensions compatible with HHVM.
Track HHVM parity with the most popular PHP frameworks.
Track open HHVM issues.
Read HHVM frequently asked questions.
Follow the latest HHVM news.
HHVM is easy to install on the most popular Linux distributions. It was originally developed for Ubuntu (my preferred Linux distibution), so I use Ubuntu in the following examples.
Facebook provides prebuilt packages for other Linux distributions, including Debian and Fedora. You can build HHVM from source on even more Linux distributions.
Per Facebook’s instructions, you can install HHVM on the latest version of Ubuntu with the Aptitude package manager like this:
wget -O -\http://dl.hhvm.com/conf/hhvm.gpg.key|sudo apt-key add -;echodeb\http://dl.hhvm.com/ubuntu trusty main|sudo tee /etc/apt/sources.list.d/hhvm.list;sudo apt-get update;sudo apt-get install hhvm;
If you’re feeling lucky, swap the last line with this one to install the latest nightly build:
sudo apt-get install hhvm-nightly;
The preceding code adds HHVM’s GNU Privacy Guard (GPG) public key for package verification. It adds the HHVM package repository to our local list of repositories. Finally, it installs HHVM with Aptitude like any other software package. The HHVM binary is installed at /usr/bin/hhvm.
HHVM uses a php.ini configuration file just as the Zend Engine does. This file exists at /etc/hhvm/php.ini by default, and it contains many of the same INI settings used by the Zend Engine. You can find a complete list of HHVM php.ini directives at http://docs.hhvm.com/manual/ini.list.php.
If you run HHVM as a FastCGI server, add server-related INI directives into the /etc/hhvm/server.ini file. You can find a complete list of HHVM server directives at https://github.com/facebook/hhvm/wiki/INI-Settings. The HHVM wiki page is weak on details, so you may want to peruse these HHVM support communities, too:
The default /etc/hhvm/server.ini file should be sufficient to get you started. It looks like this:
; php options

pid = /var/run/hhvm/pid

; hhvm specific

hhvm.server.port = 9000
hhvm.server.type = fastcgi
hhvm.server.default_document = index.php
hhvm.log.use_log_file = true
hhvm.log.file = /var/log/hhvm/error.log
hhvm.repo.central.path = /var/run/hhvm/hhvm.hhbc
The most notable settings are hhvm.server.port = 9000 and hhvm.server.type = fastcgi;
they tell HHVM to run as a FastCGI server on local port 9000.
When you execute the hhvm binary, you specify the path to your configuration files with
the -c option. If you use hhvm to execute command-line scripts, you only need the
/etc/hhvm/php.ini configuration file:
hhvm -c /etc/hhvm/php.ini my-script.php
If you use the hhvm binary to start a FastCGI server, you need both the /etc/hhvm/php.ini
and /etc/hhvm/server.ini files:
hhvm -m server -c /etc/hhvm/php.ini -c /etc/hhvm/server.ini
HHVM cannot use PHP extensions that are compiled for the Zend Engine unless the extensions use Facebook’s Zend Extension Source Compatibility Layer. Fortunately, most of the PHP extensions we take for granted are supported by HHVM out of the box. Other third-party PHP extensions (e.g., the GeoIP extension) can be compiled separately and loaded into HHVM as a dynamic extension. You can find a list of PHP extensions compatible with HHVM on GitHub.
HHVM is just fine for your production server, but it’s not infallible. I recommend you keep tabs on HHVM’s master process with Supervisord, a process monitor that starts the HHVM process on boot and automatically restarts the HHVM process if HHVM fails.
If you are unfamiliar with Supervisord, Chris Fidao has an excellent tutorial.
Install Supervisord with this command if you haven’t already:
sudo apt-get install supervisor
Next, make sure the /etc/supervisor/supervisord.conf configuration file has these two lines:
[include]
files = /etc/supervisor/conf.d/*.conf
These two lines let us create a configuration file in the /etc/supervisor/conf.d/ directory for each supervised application. Next, create the /etc/supervisor/conf.d/hhvm.conf file with this content:
[program:hhvm]
command=/usr/bin/hhvm -m server -c /etc/hhvm/php.ini -c /etc/hhvm/server.ini
directory=/home/deploy
autostart=true
autorestart=true
startretries=3
stderr_logfile=/home/deploy/logs/hhvm.err.log
stdout_logfile=/home/deploy/logs/hhvm.out.log
user=deploy
The most important settings are:
commandSupervisord runs this command to kick off the HHVM process. We use the -m option to
run HHVM in server mode. We also use the -c option to provide the path to HHVM’s
php.ini and server.ini configuration files.
autostartThis causes the HHVM process to start when the Supervisord process starts (e.g., on system boot).
autorestartThis prompts Supervisord to restart the HHVM process if it fails.
startretriesThis is the number of times Supervisord should try to start the HHVM process before Supervisord considers this process a failure.
userThis is the user that owns the HHVM process. I recommend you use an unprivileged user for
security purposes. In this example, I use the same unprivileged deploy user we
created in Example 7-1.
Make sure you manually create the /home/deploy/logs directory, because Supervisord does not create it for you.
After you finish editing the Supervisord configuration files, run these two commands to reload and apply your changes:
sudo supervisorctl reread;sudo supervisorctl update;
You can review all processes managed by Supervisord with this command:
sudo supervisorctl
You can start, stop, or restart a single Supervisord program as shown
in the example below. In this example, hhvm is the program name
specified at the top of the /etc/supervisor/conf.d/hhvm.conf file:
sudo supervisorctl start hhvm;sudo supervisorctl stop hhvm;sudo supervisorctl restart hhvm;
So far we’ve installed HHVM, and we monitor the HHVM process with Supervisord. We still need a web server to proxy requests to HHVM. Remember, HHVM runs a FastCGI server exactly as we do in Chapter 7 with PHP-FPM. We’ll use the HHVM FastCGI server to handle PHP requests sent from nginx.
HHVM communicates with a web server (e.g., nginx) with the FastCGI protocol. We need to create an nginx virtual host that proxies PHP requests to the HHVM FastCGI server. Here’s an example nginx virtual host definition that does that:
server {
    listen 80;
    server_name example.com;
    index index.php;
    client_max_body_size 50M;
    error_log /home/deploy/apps/logs/example.error.log;
    access_log /home/deploy/apps/logs/example.access.log;
    root /home/deploy/apps/example.com/current/public;

    location / {
        try_files $uri $uri/ /index.php$is_args$args;
    }

    location ~ \.php {
        include fastcgi_params;
        fastcgi_index  index.php;
        fastcgi_param  SCRIPT_FILENAME ument_root$fastcgi_script_name;
        fastcgi_pass 127.0.0.1:9000;
    }
}
From this point forward, I assume nginx is installed and running on your server. Refer to Chapter 7 for nginx installation instructions.
Assuming you followed the nginx installation instructions in Chapter 7, create a file at /home/deploy/apps/example.com/current/public/index.php with this content:
<?phpphpinfo();
Make sure the example.com domain points to your server’s IP address
and visit http://example.com/index.php in a web browser. You should
see the word “HipHop” appear in your browser window.
You can force your computer to point any domain name to any IP address
by updating your local /etc/hosts file. For example, this line points
the domain name example.com to IP address 192.168.33.10:
192.168.33.10 example.com
Congratulations! You’ve installed HHVM as a FastCGI server that can run your PHP application. But a FastCGI server isn’t cool. You know what’s cool? Hack. HHVM can run that, too.
Hack is a server-side language that is similar to and seamless with PHP. Hack’s developers even call Hack a dialect of PHP. Why did Facebook create something so similar to PHP? Facebook created the Hack language for several reasons. The Hack language adds new time-saving data structures and interfaces that are unavailable in PHP. More important, Hack introduces static typing to help us write more predictable and stable code. Static typing surfaces errors earlier in the development process using a near-realtime type checking server.
Are new data structures, interfaces, and static typing worth the time required to learn a new(ish) language and toolchain? Maybe. You have to remember that Facebook is Facebook. It has thousands of developers all working on a gargantuan codebase. If Facebook can optimize even the smallest part of its development process, it reaps a large reward in both developer efficiency and a more stable, well-performing codebase.
I do not recommend you drop what you’re doing and immediately port your existing applications from PHP to Hack. However, if you are starting a new project and have time to install and learn Hack, then—by all means—go wild. You’ll certainly benefit from Hack’s data structures and static typing.
To convert code from PHP to Hack, change <?php to <?hh.
That’s it. This is PHP code:
<?phpecho"I'm PHP";
And this is equivalent Hack code:
<?hhecho"I'm Hack";
Facebook makes it super-easy to go from PHP to Hack because it understands that
converting a large, existing codebase is not a quick task. Start your codebase
migration by only changing <?php to <?hh. Next, introduce a few static types.
Later on, explore some Hack data structures. The transition to Hack is gradual and painless, and it happens on your schedule; this is by design.
Before we compare dynamic and static typing, it’s probably helpful to define type.
Most PHP programmers think a type is the form of data assigned to a variable. For
example, the expression $foo = "bar" implies the $foo variable’s value is a
string. The expression $bar = 14 implies the $bar variable’s value is an integer.
These examples demonstrate types, yes, but they betray the full definition of a type.
A type is a nebulous label that we assign to properties of an application to prove that certain behaviors exist and, to our own expectations, are fundamentally correct. I’m paraphrasing Chris Smith’s excellent explanation of programming types.
We can expand our definition of a type to a syntactical annotation that clarifies the identity of program variables, arguments, or return values. Type annotations (or hints) are used in both PHP and Hack. You’ve probably seen code like this:
<?phpclassWidgetContainer{protected$widgets;publicfunction__construct($widgets=array()){$this->widgets=array_values($widgets);}publicfunctionaddWidget(Widget$widget){$this->widgets[]=$widget;returnthis;}publicfunctiongetWidget($index){if(isset($this->widgets[$index])===false){thrownewOutOfRangeException();}return$this->widgets[$index];}}
This is an arbitrary example, but it uses syntax hints to enforce specific
application properties. For example, in the addWidget() method signature
we use a Widget hint before the $widget argument to tell PHP we expect
the method argument to be an instance of class Widget. The PHP interpreter
enforces this expecation. If an argument is provided that is not an instance
of class Widget, the code fails. In this example, the type is our annotated
expectation that the addWidget() method accepts arguments only of class Widget.
Our earlier naive examples (e.g., $foo = "bar") and this WidgetContainer
example both demonstrate types. The first example demonstrates a type that proves
a variable is a string, even though we don’t explicitly annotate the expectation.
The PHP interpreter is smart enough to infer the string type in this example
based on the code syntax. The second example creates a type with an annotation
that explicitly defines the expected behavior of the addWidget() method, and
the PHP interpreter enforces this behavior based on our explicit hint rather
than making an inferrence.
Types are more than inferred identities and annotations. However, these are the two manifestations you’ll see and use most often when writing PHP and Hack code. You can learn more about programming types in Benjamin C. Pierce’s book “Types and Programming Languages.”
If you thought that PHP type hints are static types, you’re probably scratching your head right about now because I just burst your bubble. Both static and dynamic typing help us write code that behaves correctly according to our expectations, and both employ their own type systems. The main differences between static and dynamic typing are when program types are checked and how a program is tested for correctness.
The correct behavior of a statically typed program is implied by the code, via inferences, annotations, or other language-specific types. If a statically typed program compiles successfully, we can be confident the program is proven to behave as written. The program’s types become our tests, and they ensure that the program satisfies our basic expectations.
Did you notice I used the word compiles? Statically typed languages are often compiled. Type checking and error reporting are delegated to the language compiler. This is nice, because the compiler surfaces type-related program errors at compile time before the application is deployed into production. Unfortunately, compiled languages imply a lengthy feedback loop. A program must be compiled to reveal errors, and complicated programs take a long time to compile. This decelerates development.
The upside to statically typed programs is that they are usually more stable because their behavior is proven by the compiler’s type checker. However, we should still write separate tests to verify that the program behavior is correct. If a program compiles, that only means the program does what the code says it should do. That does not mean the program does what we intend it to do. That being said, static typing saves us from writing type-related unit tests as we do for dynamically typed programs.
Unlike static typing, dynamic typing cannot enforce code behavior at compile time, because the program types are not checked until runtime. Dynamically typed programs are often interpreted, too. PHP is a dynamically typed and interpreted language. This means that every time you execute a PHP script—either directly on the command line or indirectly via a web server—the PHP code is read by an interpreter, converted into a set of preexisting opcodes codes, and executed.
So how do you find errors if PHP is not compiled? Errors are surfaced during runtime. This is both a blessing and a curse. It’s good because we can iterate quickly. We write code and run it. Feedback is near-instantaneous. Unfortunately, we lose the inherent accuracy and tests provided by static type checking. Separate unit tests become far more important to ensure both proper types and intended behavior. Our tests must cover all possible behaviors. This works for the behavior we anticipate, but it fails miserably for the behavior we do not anticipate. Unanticipated behaviors gnash their teeth during runtime as PHP errors, and we must handle them gracefully with friendly messages and appropriate logging.
Static typing is Hack’s biggest selling point. Even more interesting is that Hack does static and dynamic typing. Remember, Hack is mostly backward-compatible with regular PHP. This means Hack supports all of PHP’s dynamic typing features that you expect. This is possible because Hack is run with HHVM’s JIT compiler. The Hack code is type checked as it is written with a standalone type checker. The Hack code is read, optimized, and cached into an intermediary bytecode by HHVM. A Hack file is only converted into x86_64 machine code and executed on demand. It’s really the best of both worlds. We get the accuracy and safety of static typing with Hack’s type checker (more on this next) and the flexibility and quick iteration of dynamic typing thanks to HHVM’s JIT compiler.
There are a few PHP features not supported by Hack. They are listed at http://docs.hhvm.com/manual/hack.unsupported.php. These features are supported by HHVM when executing normal PHP code.
Hack comes with a standalone type-checking server that runs in the background and type-checks your code in realtime. This is huge. This is also the main reason why Facebook created the Hack language. Hack’s instantaneous type checking provides the accuracy and safety of static typing without the lengthy feedback loop. If you are using Hack without its type checker, you’re holding it wrong.
Here’s how to set up Hack’s type checker for your application. First, I assume HHVM is
installed and running. If not, refer to the HHVM section for installation
instructions. Next, create an empty file named .hhconfig in your project’s topmost
directory. This tells the Hack type checker which directory to analyze. The type checker
watches files beneath this directory and type-checks the appropriate files whenever it
detects filesystem changes. Start the Hack type checker by executing the hh_client
command in or beneath your project’s topmost directory.
Hack’s type checker does have a few limitations. Per Hack’s online documentation:
The type checker assumes that there is a global autoloader that can load any class on demand. This means that it insists that all class and function names are unique, and has no notion of checking imports or anything of that nature. Futhermore, it does not support conditional definitions of functions or classes — it must be able to statically know what is and what is not defined. It is of course perfectly possible to have a project that meets these requirements without a global autoloader, and the type checker will work fine on such a project, but a project using an autoloader was the intended use case.
Mixing HTML and Hack code are not supported by the type checker. Following and statically analyzing these complicated mode switches is unsupported, particularly since much modern code doesn’t make use of this functionality. Hack code can output markup to the browser in a simple way via echo, or using a templating engine or XHP for more complex scenarios.
Hack code can be written in three modes: strict, partial, or decl. If you are starting
a project with Hack, I recommend you use strict mode. If you are migrating existing PHP code
to Hack, or if your project uses both PHP and Hack code, you may want to use partial mode.
The decl mode lets you integrate legacy, untyped PHP code into an otherwise strict Hack
codebase. You declare the mode at the very top of the file, after and adjacent to the opening
Hack or PHP tag (see the following examples). Mode names are case-sensitive:
<?hh // strictStrict mode requires all code to be appropriately annotated. The Hack type
checker will catch all possible type-related errors. This mode also prevents your Hack code
from using non-Hack code (e.g., legacy PHP code). Be sure you read up on Hack type annotations
before you commit to strict mode. Among other requirements, all Hack arrays must be typed;
you cannot use an untyped array in Hack. You must also annotate return types for functions
and methods.
<?hh // partialPartial mode (the default) allows Hack code to use PHP code that has not been converted to Hack. Partial mode also does not require you to annotate all of a function or method’s arguments. You can annotate a subset of the arguments without angering the Hack type checker. If you are just getting started with Hack, or if you are converting an existing PHP codebase, this is probably the best mode for you.
<?php // decldecl mode lets strict Hack code call untyped code. This is often the case
when newer Hack code depends on a legacy, untyped PHP class. In this scenario, the legacy PHP
code should declare itself in decl mode before the newer Hack code can use it.
Hack supports type annotations for class properties, method arguments, and return types. These annotations are checked with Hack’s standalone type checker in accordance with each file’s mode.
Read a complete list of available type annotations.
Let’s revisit our earlier WidgetContainer example and introduce type annotations.
The updated Hack code looks like this:
01.<?hh// strict02.classWidgetContainer03.{04.protectedVector<Widget>$widgets;05.06.publicfunction__construct(array<Widget>$widgets=array())07.{08.foreach($widgetsas$widget){09.$this->addWidget($widget);10.}11.}12.13.publicfunctionaddWidget(Widget$widget):this14.{15.$this->widgets[]=$widget;16.17.returnthis;18.}19.20.publicfunctiongetWidget(int$index):Widget21.{22.if($this->widgets->containsKey($index)===false){23.thrownewOutOfRangeException();24.}25.26.return$this->widgets[$index];27.}28.}
On line 4, we declare the $widgets class property with the Vector<Widget>
annotation. This annotation tells us two things:
This property is a Vector (similar to a numerically indexed array).
This property must contain only Widget instances.
This is probably familiar to those of you who already use PHP type hints. On line 6,
we annotate the __construct() method’s argument with the array<Widget> annotation.
This annotation tells us two things:
The argument must be an array.
The argument must contain only Widget instances.
Unlike the property annotation on line 4, this argument can be either a numeric or
an associative array. We iterate the array argument’s values and add them to the Vector
data structure. If you did want the argument to be either a numeric or an associative array,
you could use the array<int, Widget> or array<string, Widget> annotations respectively.
On lines 13 and 20, we annotate the methods’ return types. The addWidget() method
returns itself (more on this soon). The getWidget() method returns a Widget instance.
Return-type annotations are declared after the method signature’s closing parenthesis
and before the method body’s opening bracket.
The exception to this rule is the __construct() method. One might think the
constructor’s return value is void; it’s not. You should not annotate the
constructor method’s return type.
Some developers like to enable method chaining. This means that a class method returns itself so that multiple method calls can be chained together like this:
$object->methodOne()->methodTwo();
Hack lets you annotate this behavior with the this return type. We use the
this annotation with the addWidget() method on line 13.
The Hack language’s headline feature is static typing. However, Hack also provides new data structures and interfacs that are not found in PHP. These can potentially save you development time versus implementing similar workarounds in vanilla PHP. Some of Hack’s new data structures and interfaces are:
Collections (vectors, maps, sets, and pairs)
Many of these data structures complement, clarify, or supplement PHP’s functionality.
For example, Hack’s Collection interfaces clarify PHP’s array ambiguity. Generics let
you create data structures to handle homogenous values of a given type that is
inferred only when an instance of the generic class is created; this alleviates the
need to manually enforce type checking inside a class with PHP’s instanceof method.
Enums are helpful for creating a set of named constants without resorting to abstract
classes. Shapes help you type-check data structures that should have a
fixed set of keys. And tuples let you use arrays of an immutable length.
Please don’t feel like you need to rush out and implement all of these data structures. I admit, some of them are of limited and niche utility. Some data structures duplicate (and extend) functionality found in other data structures. I suggest you read up on which data structures are available and only use them if and when you need them.
I believe the most useful Hack data structures are the various Collection interfaces.
These provide more appropriate and predictable behavior than PHP’s array data structure.
It’s best to use a Collection instead of a PHP array.
If HHVM and Hack are so awesome, why should you use PHP? I’m asked this question a lot. I’m also asked if and when PHP will meet its demise. The answer is not black-and-white. It’s more a muddy neutral gray.
HHVM is the first true competitor to the traditional Zend Engine PHP runtime. As of PHP 5.x, HHVM is proven to perform better and be more memory-efficient than the Zend Engine on many real-world benchmarks. I think this caught the PHP core development team by surprise. In fact, HHVM’s mere existence is probably responsible for PHP’s renewed interest in increased performance and reduced memory usage. The PHP core development team is already working on PHP 7, which is scheduled for release in late 2015. The PHP 7 codebase promises to be competitive with, if not better than, HHVM. Whether that will be true or not is anyone’s guess. However, the point is that HHVM creates competition, and competition helps everyone. Both HHVM and the Zend Engine will improve, and PHP developers will reap the benefits. Neither HHVM nor the Zend Engine is going to win or lose. I believe they will coexist and feed off of their competitive energies.
The Hack language, in my opinion, is head-and-shoulders better than PHP. There are several reasons for this. First, the Hack language was built by Facebook to answer specific needs. It is focused. It has purpose. And it is not developed by committee. The PHP language, in contrast, has evolved piecemeal over a longer period of time. PHP answers many different needs, and it is controlled by a committee that is not known for its cordial agreements. As of PHP 5.x, the Hack language is the better option for its strict type checking and support for legacy PHP code. I believe a lot of Hack’s best features will eventually find their way into PHP. And vice versa. In fact, the Hack language team has said it intends to maintain future compatibility with the Zend Engine. Again, I believe competition will improve both languages and they’ll enjoy a symbiotic relationship.
An example of this symbiosis is the official PHP specification. Until recently, the PHP language was the Zend Engine for lack of alternative implementations. The introduction of HHVM prompted several developers at Facebook to announce a PHP language specification. This specification is an amazing development in the PHP community, and it ensures that current and future PHP implementations (Zend Engine, HHVM, and so on) all support the same fundamental language.
You can read the official PHP implementation on GitHub at https://github.com/php/php-langspec.
We’ve touched on a lot of HHVM and the Hack language in a very short period of time. There are simply not enough pages to cover everything these two initiatives have to offer. Instead, I’ll point you to these helpful resources:
The PHP community is your most valuable resource. It is diverse, vibrant, and global. I encourage you to participate in the PHP community to learn from and share with other PHP developers. There’s always more to learn, and your PHP community is the best way to continue learning. It’s also a great way to meet and help other developers.
My first advice is to find and join your local PHP User Group (PUG). Many cities have them. You can find your local PUG at http://php.ug. Your local PUG is the best opportunity to meet and network with fellow PHP developers in your local community.
If there isn’t a nearby PUG, you have several options. You can start your own PUG. Unless you live in the middle of a jungle, I bet there are like-minded nearby PHP developers who would love to join a PUG. Otherwise, you can join NomadPHP—an online user group with monthly speakers and lightning talks that cover all sorts of PHP features and practices.
There are numerous PHP conferences every year. Conferences are an excellent opportunity to meet and mingle with the greatest minds in the PHP community. You can listen to and talk with PHP speakers and thought leaders. And you can stay up-to-date with emerging features and modern practices. Conferences are also an excuse to take a minivacation. You can find a list of upcoming PHP conferences at http://php.net/conferences/.
If you are a beginner PHP developer and need advice or assistance, you can find a mentor at http://phpmentoring.org. Many expert PHP developers donate their time to help new PHP developers become better. If you are already an expert PHP developer, consider signing up as a PHP mentor. There are many beginner PHP developers who don’t know how or where to start, and your mentorship will be invaluable.
Linux is my favorite development environment. I own a Macbook Pro with
OS X, but my development happens in a Linux virtual machine. PHP is easy
to install on Linux with a package manager such as aptitude on Ubuntu
Server or yum on CentOS.
For now, we’re concerned only with PHP for command-line usage. We discuss how to setup PHP-FPM and the nginx web server in Chapter 7.
Most Linux distributions provide their own package manager. For
example, Ubuntu uses the aptitude package manager. CentOS and Red Hat
Enterprise Linux (RHEL) use the yum package manager. Package managers
are the simplest way to find, install, update, and remove software on
our Linux operating system.
Sometimes Linux package managers install out-of-date software. For example, Ubuntu 14.04 LTS provides PHP 5.5.9; this is already behind the latest release—PHP 5.6.3 (as of December 2014).
Fortunately, we can supplement our Linux package manager’s default
software sources with third-party repositories that contain more
up-to-date, community-maintained software packages. We’ll use a custom
software repository for both Ubuntu and CentOS to install the most
recent PHP version. Before we go any further, make sure you are the
system root user or a user with sudo power. This is required to
install software with a Linux package manager.
Ubuntu does not provide the latest PHP version in its default software
repositories. We’ll need to add a community-maintained Personal Package Archive (PPA)
instead. The term PPA is unique to Ubuntu, but the concept remains
the same: we are using a third-party software repository to expand
Ubuntu’s default software selection. Ondřej Surý maintains an excellent
PPA that provides nightly builds for the latest stable PHP release.
This PPA is named ppa:ondrej/php5-5.6.
Before we add Ondřej Surý’s PPA, we must make sure the add-apt-repository
binary is available on our operating system. This binary is included in
the python-software-properties Ubuntu package. Type this command into
your terminal application and press Enter. Enter your account password if prompted:
sudo apt-get install python-software-properties
This command installs the Python Software Properties package that includes
the add-apt-repository binary. Now we can add the custom PPA.
This PPA expands Ubuntu’s available software selection beyond the default Ubuntu software repositories. Type this command into your terminal application and press Enter. Enter your account password if prompted:
sudo add-apt-repository ppa:ondrej/php5-5.6
This command adds the Ondřej Surý PPA to Ubuntu’s list of software sources. It also downloads the PPA’s GPG public key and appends it to our local GPG keyring. The GPG public key enables Ubuntu to verify that the packages in the PPA have not been tampered with since they were built and signed by their original author.
Ubuntu caches the list of all available software. When we add new software sources, we need to refresh Ubuntu’s cache. Type this command in your terminal application and press Enter. Enter your account password if prompted:
sudo apt-get update
We can now use Ubuntu’s aptitude package manager to install the latest
PHP stable release from the Ondřej Surý PPA. Before we do, it is
important to know which PHP packages are available and what they do. PHP
is distributed in two forms. One form is a CLI package that enables you
to use PHP on the command line (we will use this one). There are several
other PHP packages that integrate PHP with the Apache or nginx web
servers (we discuss these in Chapter 7). For now, we’ll stick
with the PHP CLI package.
First, let’s install the PHP CLI package. Type this command in your terminal application and press Enter. Enter your account password if prompted:
sudo apt-get install php5-cli
The Linux package manager also contains packages for individual PHP extensions that can be installed separately. Let’s install a few of those now. Type this command in your terminal application and press Enter. Enter your account password if prompted:
sudo apt-get install php5-curl php5-gd php5-json php5-mcrypt php5-mysqlnd
Verify PHP was installed successfully with this terminal command:
php -v
This command should output something similar to:
PHP 5.5.11-3+deb.sury.org~trusty+1 (cli) (built: Apr 23 2014 12:15:16)
Copyright (c) 1997-2014 The PHP Group
Zend Engine v2.5.0, Copyright (c) 1998-2014 Zend Technologies
    with Zend OPcache v7.0.4-dev, Copyright (c) 1999-2014, by Zend Technologies
Like Ubuntu, CentOS and RHEL do not provide the latest stable version of PHP in their default software repositories. RHEL is very particular about which software packages are included in its official distribution because it prides itself on superior security and stability; software updates are added slowly for the sake of safety.
We’re not a Fortune 500 company, so we can afford to install the latest PHP stable release in our CentOS/RHEL Linux distribution. To do so, we’ll use the EPEL (Extra Packages for Enterprise Linux) repository. The EPEL describes itself as:
…a Fedora Special Interest Group that creates, maintains, and manages a high quality set of additional packages for Enterprise Linux, including, but not limited to, Red Hat Enterprise Linux (RHEL), CentOS, Scientific Linux (SL), and Oracle Enterprise Linux(OEL).
The EPEL repository is unrelated to the official CentOS/RHEL Linux distributions, but it can still supplement the default CentOS/RHEL software repositories. And that’s exactly what we’re going to do.
Let’s tell our CentOS/RHEL system to use the EPEL software repository. Type these commands into your terminal application one-by-one, and press Enter after each command. Enter your account password if prompted:
sudo rpm -Uvh\http://dl.fedoraproject.org/pub/epel/7/x86_64/e/epel-release-7-5.noarch.rpm;sudo rpm -Uvh\http://rpms.famillecollet.com/enterprise/remi-release-7.rpm;
These commands add the third-party EPEL and remi software repositories to our CentOS/RHEL system. You should now see epel.repo and remi.repo files in the /etc/yum.repos.d directory.
Now we’ll install the latest PHP version from the EPEL and remi repositories. As I mentioned earlier in the Ubuntu PHP installation, PHP is distributed in two forms. One form is a CLI package that enables you to use PHP on the command line. For now, we’ll stick with the PHP CLI package.
First, let’s install the PHP CLI package. Type this command in your terminal application and press Enter. Enter your account password if prompted.
sudo yum -y --enablerepo=epel,remi,remi-php56 install php-cli
Next, let’s install a few additional PHP extensions. You can search for
a complete list of PHP extensions with the yum package manager. Type
this command into your terminal application and press Enter:
yum search php
Once you find a list of PHP extensions, install them as I do in this example. Your package names might be different:
sudo yum -y --enablerepo=epel,remi,remi-php56\install php-gd php-mbstring php-mcrypt php-mysqlnd php-opcache php-pdo
The important takeaway from this command is the --enablerepo option.
This option tells yum to install the specified software packages from
the EPEL, remi, and remi-php56 repositories. Without this option,
yum only references its default software sources.
Verify that PHP was installed successfully. Type this command in your terminal application and press Enter:
php -v
This command should output something similar to:
PHP 5.6.3 (cli) (built: Nov 16 2014 08:32:30)
Copyright (c) 1997-2014 The PHP Group
Zend Engine v2.6.0, Copyright (c) 1998-2014 Zend Technologies
    with Zend OPcache v7.0.4-dev, Copyright (c) 1999-2014, by Zend Technologies
OS X includes PHP out of the box, but it’s probably not the latest version and it may not have the PHP extensions you need. I recommend you ignore the PHP that comes with OS X and use a custom PHP build instead. There are many ways to install PHP on OS X, but I recommend two methods: MAMP and Homebrew.
MAMP is the best way to install PHP on OS X if you cringe at the mere thought of the command-line terminal. MAMP (which stands for Mac, Apache, MySQL, and PHP) provides a traditional web-development software stack that includes an Apache web server, a MySQL database server, and PHP. MAMP is an OS X application with a GUI. Many users prefer the familiar GUI interface because it provides a nice point-and-click interface for installing and configuring the MAMP software (Figure A-1). MAMP lives in your /Applications folder, and you double-click its application icon to launch it. It has a simple OS X package (.pkg) installer that makes it dead simple to install and use. You can even drag it into your OS X Dock for quick access.
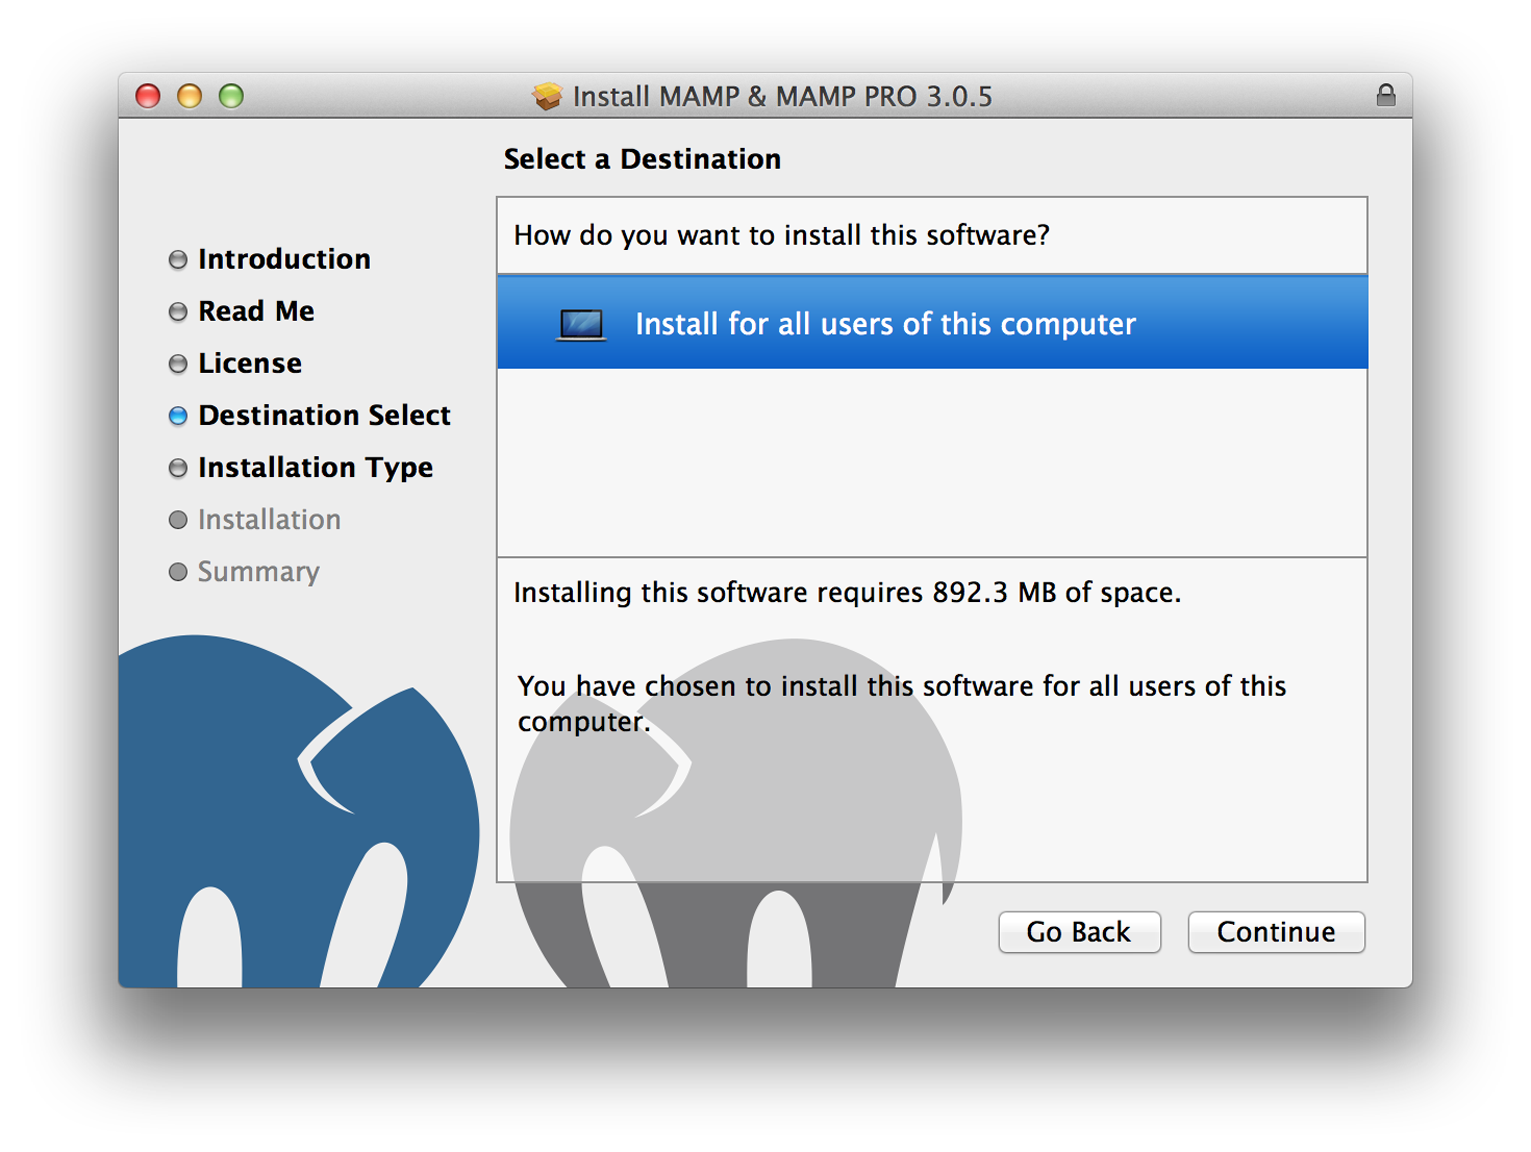
Download the MAMP package (.pkg) installer from http://www.mamp.info, and double-click the MAMP package installer. Follow the on-screen instructions.
When the MAMP installer finishes, find the MAMP application in your /Applications folder and launch it by double-clicking its application icon. After MAMP opens, click the Start Servers button to start the Apache and MySQL servers (Figure A-2). It’s really that simple.
What about PHP?, you ask. MAMP embeds PHP inside of the Apache web
server using the mod_php Apache module. Without getting into too much
detail, you can use PHP if the Apache web server is running. We
discuss PHP deployment strategies in Chapter 7.
After you start the Apache and MySQL servers, open your web browser and go to http://localhost:8888. You should see a MAMP welcome page if MAMP is successfully installed.
The Apache web server typically listens for connections on port 80. MAMP, however, runs Apache on port 8888. Likewise, MySQL typically listens for connections on port 3306. MAMP, however, runs MySQL on port 8889. You can change MAMPs default ports in the MAMP application preferences. MAMP’s Apache web server document root is /Applications/MAMP/htdocs. Any PHP files in this directory can be accessed in a web browser at http://localhost:8888.
If you will use MAMP a lot, go into the MAMP application preferences (Figure A-3) and make sure Start Servers when starting MAMP is checked. Then add the MAMP application to your OS X account’s Login Items. This will start MAMP’s Apache and MySQL servers automatically when you log in to OS X.
It is possible to download MAMP add-ons that provide different PHP versions for your local MAMP installation. MAMP is updated frequently and most likely comes bundled with the latest PHP version. But if for whatever reason it doesn’t, or if you need an older PHP version, go to the MAMP website and download the PHP version you need.
The MAMP free version provides only one Apache virtual host, and it does not let you easily modify PHP’s configuration or extensions. MAMP is very basic and provides only the bare necessities for PHP development on OS X.
MAMP provides a paid “Pro” version that lets you create multiple Apache virtual hosts, easily edit your php.ini configuration file, and fine-tune PHP extensions. MAMP Pro is nice, don’t get me wrong. But instead of forking out a good bit of money for MAMP Pro, you’re better off learning a few command-line fundamentals so you can use the excellent Homebrew package manager instead.
Homebrew is an OS X package manager comparable to
Ubuntu’s aptitude and RHEL’s yum package managers. Homebrew lets you
easily browse, find, install, update, and remove any number of custom
software packages on OS X. However, Homebrew is a command-line
application. If you are not familiar with the OS X command line,
you will be more comfortable with MAMP.
Homebrew uses formulae to install software packages on your computer.
Homebrew provides default formulae for lots of software that’s not
provided out of the box with OS X. For example, there are Homebrew
formulae for wget, phploc, phpmd, and php-code-sniffer (to name
just a few). If Homebrew’s default formulae are insufficient, you can tap into
third-party formulae repositories to expand your available Homebrew
software selection. Homebrew is, without exception, my favorite way to
install PHP on OS X.
Before we can install Homebrew, we must first install the XCode
Command-Line Tools provided (for free) by Apple, Inc. These
command-line tools include the gcc compiler (among other tools) needed
by Homebrew to build and install software packages. If you are running
OS X Mavericks 10.9.2 or newer, open the OS X Terminal application,
type this command, and press Enter:
xcode-select --install
This command opens this modal window shown in Figure A-4.
Click Install to begin installing the XCode Command-Line Tools. Click Agree when the software license agreement appears. After the XCode Command-Line Tools software is installed, click Done and continue to the next step.
If you are using an older version of OS X, you must log into the Apple Developer Portal to download and run a standalone XCode Command-Line Tools package (.pkg) installer.
After you install the XCode Command-Line Tools, type this command in the OS X Terminal application and press Enter:
ruby -e"$(curl -fsSL https://raw.github.com/Homebrew/homebrew/go/install)"
This command executes Ruby code that is downloaded from a remote URL. You should always inspect the remote code before you execute it, no matter how legitimate the source may be.
Homebrew downloads and ferments software in the /usr/local/Cellar directory. It symlinks installed software binaries to the /usr/local directory. Your OS X user account must be able to access the /usr/local directory to use software installed with the Homebrew package manager.
Let’s make sure your OS X user account owns the /usr/local directory. Type this command into the OS X Terminal application and press Enter. Enter your administrator password if prompted:
sudo chown -R`whoami`/usr/local
The chown command means “change the owner” of the specified directory,
the -R command flag means “make this change recursively to all
subdirectories” of the specified directory, and the whoami argument is
dynamically substituted with your OS X user account name. After you run
this command, your OS X user account will own (and therefore have access
to) the /usr/local directory.
Next, add the /usr/local directory to your OS X environment PATH.
The environment PATH is a list of directories to be searched when you
execute software using only the software’s name instead of the
software’s absolute filesystem path. For example, if I execute wget,
OS X will search all directories on my environment PATH for the wget
software. Otherwise, I’d have to type /usr/local/wget every time I
want to use wget. Type this command into the OS X Terminal application
and press Enter:
echo'export PATH="/usr/local/bin:$PATH"'>> ~/.bash_profile
Before we install PHP with Homebrew, we must tap additional repositories that contain PHP-related formulae that do not exist in the default Homebrew repository.
First, we’ll tap the homebrew/dupes repository. This repository
contains formulae for software that already exists on OS X. This
repository, however, contains newer software versions than OS X. Type
this command in the OS X Terminal application and press Enter:
brew tap homebrew/dupes
Next, we’ll tap the homebrew/versions repository. This repository
contains multiple versions of existing OS X software. Type this command
in the OS X Terminal application and press Enter:
brew tap homebrew/versions
Finally, we’ll tap the homebrew/php repository. This repository
contains PHP-related formulae that might not be included in the default
Homebrew repositories. The default Homebrew software repository is not
maintained by PHP developers. This repository is, and it includes software
appropriate for PHP developers. Type this command in the OS X
Terminal application and press Enter:
brew tap homebrew/php
So far, we’ve installed the Homebrew package manager, configured
filesystem permissions, updated the environment PATH, and tapped into
additional formulae repositories. Now it’s time to install PHP. There are
Homebrew formulae for each PHP version and each PHP version’s extensions.
Homebrew provides a very simple way to search for available formulae.
Type this command in the OS X Terminal application and press Enter:
brew search php
You should see a lengthy list of Homebrew PHP formulae. Find the latest
stable PHP version in the formulae list (PHP 5.5.x will be named
php55, PHP 5.6.x will be named php56, and so on). I’ll pick php56
since PHP 5.6.x is the latest stable version (as of December 2014). Type this
command in the OS X Terminal application and press Enter:
brew install php56
Installation may take a while, so feel free to grab a coffee and check
back in a few minutes. After the PHP software package is installed, you
can confirm the installation by executing php -v in the OS X Terminal
application; this command outputs the full name and version number
of the PHP interpreter installed by Homebrew.
Homebrew lets you install PHP extensions separately from the PHP
interpreter. You can search for PHP extensions just as you searched
for PHP previously. Assuming you chose php56, type this command in the
OS X Terminal application and press Enter:
brew search php56
You should see a lengthy list of PHP 5.6 extensions prefixed with
php56-. After you find the extensions you want, type this command in
the OS X Terminal application and press Enter. Swap the formulae in
this example with the extension formulae you want to install:
brew install php56-intl php56-mcrypt php56-xhprof
The Homebrew package manager is much more powerful than what I’ve
shown here. Type brew into the OS X Terminal application and press
Enter to see a complete list of Homebrew commands. You can also read
the complete Homebrew documentation online at http://brew.sh.
The precompiled PHP binary provided by your operating system’s package manager may not always be up-to-date or exactly what you want. If this is true, you’re better off building PHP from source code. Yes, this sounds scary. It took me a long time to build up enough confidence before I compiled PHP for the first time. I can assure you, it’s less scary than it sounds.
The build process is simple. We’ll download and extract the PHP source
code. We’ll configure the source code and make sure all of its
software dependencies are installed. And then we’ll make the actual
PHP binaries. Download. Configure. Make. Three simple steps.
Compiling PHP from source code gives you the flexibility to tweak the PHP build to your exact specifications. Although there are many ways to configure PHP, for the sake of time I’ll show you how I prefer to build PHP for my own projects. In addition to PHP’s default features, I typically want PHP to support:
OpenSSL
Bytecode caching
FPM (FastCGI process management)
PDO database abstraction
Encryption
Multibyte strings
Image manipulation
Network sockets
Curl
With this list in mind, let’s start building PHP. Try to follow along on your own computer. If this is your first time building PHP from source code, I strongly encourage you to do this on a virtual machine. You can set up a local virtual machine with VMware, Parallels, or VirtualBox. You can also fire up a dirt-cheap remote virtual machine with DigitalOcean, Linode, and other web hosts that bill by the hour. If you mess up, you can destroy the virtual machine, rebuild it, and try again without consequence.
Now take a deep breath, open your terminal application, and (most important) don’t be afraid to make mistakes.
First, let’s download the PHP source code. Locate the latest stable version of the PHP source code at http://www.php.net/downloads.php. For me, the latest stable release happens to be version 5.6.3, but this may be different for you. Type the following commands into your Terminal application and press Enter after each command.
First, we create a src/ directory in our home folder. This folder will
contain the source code that we download from PHP.net. We cd into the
src/ directory so that it becomes our current working directory:
mkdir ~/src;cd~/src;
Next, we use wget to download the PHP source code as a tar.gz
archive. The downloaded file will be located at ~/src/php.tar.gz:
wget -O php.tar.gz http://www.php.net/get/php-5.6.3.tar.gz/from/this/mirror
Extract the PHP source code archive with the tar command, and cd into the
unarchived source code directory:
tar -xzvf php.tar.gz;cdphp-*;
We’ve downloaded the PHP source code. Now we need to configure it.
Before we do, we must install a few software dependencies. How do I know
what dependencies to install? I run the ./configure command (see
the next subsection) until it works. When the ./configure command fails due to a
missing software dependency, it indicates what software is missing.
Install the missing dependency and rerun the ./configure command.
Rinse and repeat until it works.
Luckily for you, I’ve already figured out what software dependencies are
needed for the PHP ./configure command we’ll be using. Let’s install
these software dependencies now. I use commands for both Ubuntu/Debian
and CentOS/RHEL Linux distributions; use the commands appropriate for
your Linux distribution.
If for whatever reason the ./configure command reports additional
missing dependencies, you can search for the missing dependency software
packages online at http://packages.ubuntu.com/ (for Ubuntu) or at
https://fedoraproject.org/wiki/EPEL (for CentOS).
We’ll need these fundamental software binaries to build PHP on your
operating system. These binaries include gcc, automake, and other
fundamental development software:
# Ubuntusudo apt-get install build-essential;# CentOSsudo yum groupinstall"Development Tools";
libxml2We’ll need the libxml2 library. This is used by PHP’s XML-related functions:
# Ubuntusudo apt-get install libxml2-dev;# CentOSsudo yum install libxml2-devel;
OpenSSLWe’ll need the openssl library. This is required to enable HTTPS
stream wrappers in PHP, which is kind of important, right?
# Ubuntusudo apt-get install libssl-dev;# CentOSsudo yum install openssl-devel;
We’ll need the libcurl library. This is required by PHP’s Curl functions:
# Ubuntusudo apt-get install libcurl4-dev;# CentOSsudo yum install libcurl-devel;
We’ll need the GD, JPEG, PNG, and other image-related system libraries. Fortunately, all of these are bundled into a single package. These are required to manipulate images with PHP:
# Ubuntusudo apt-get install libgd-dev;# CentOSsudo yum install gd-devel;
McryptWe’ll need the mcrypt system library to enable PHP’s Mcrypt encryption
and decryption functions. For whatever reason, there is no default
CentOS Mcrypt package. We’ll need to supplement the default CentOS
packages with the third-party EPEL package repository to install Mcrypt:
# Ubuntusudo apt-get install libmcrypt-dev;# CentOSwget http://dl.fedoraproject.org/pub/epel/6/x86_64/epel-release-6-8.noarch.rpm;sudo rpm -Uvh epel-release-6*.rpm;sudo yum install libmcrypt-devel;
Now that our software dependencies are installed, let’s configure PHP.
Type the following ./configure command in your Terminal application
and press Enter:
./configure
    --prefix=/usr/local/php5.6.3
    --enable-opcache
    --enable-fpm
    --with-gd
    --with-zlib
    --with-jpeg-dir=/usr
    --with-png-dir=/usr
    --with-pdo-mysql=mysqlnd
    --enable-mbstring
    --enable-sockets
    --with-curl
    --with-mcrypt
    --with-openssl;
This is a lengthy command with a lot of options. Don’t be
overwhelmed. Each command option has a specific purpose. You can find a
list of all available options with ./configure --help. We’ll go
through this ./configure command line by line so you know exactly what
it does:
--prefix=/usr/local/php5.6.3The --prefix option defines the path to a filesystem directory that
will contain the compiled PHP binaries, includes, libraries, and
configuration files. I prefer to keep my custom PHP build and related
files together in a single parent directory for the sake of
organization. Your user account will need permission to write to this
directory. If you don’t have write permission to /usr/local, you can
set the --prefix to a directory in your user account’s home folder
instead (e.g., ~/local/php-5.5.13). Regardless, make sure the
--prefix directory exists before you run the ./configure command.
--enable-opcacheThe --enable-opcache option enables PHP’s built-in bytecode caching
system. You will most always want to enable this. The performance
benefits are tremendous.
--enable-fpmThe --enable-fpm option enables the built-in PHP FastCGI Process
Manager. This lets you run PHP as a FastCGI process that is accessible
via a TCP port or a local Unix socket. FPM is fast becoming the
preferred way to run PHP (especially with the nginx web server). If in
doubt, I recommend you enable this option.
--with-gdThe --with-gd option lets PHP interface with your operating system’s
GD image-manipulation library. You will want to enable this option if
you plan on using PHP to manipulate images.
--with-zlibThe --with-zlib option lets PHP interface with your operating system’s
Zlib library. Zlib is a data-compression library that is needed by the
GD image library to create and manipulate PNG image data. This option is
required if you use the --with-gd option.
--with-jpeg-dirThe --with-jpeg-dir option specifies the path to the filesystem
directory that contains the JPEG libraries. This option is required if
you use the --with-gd option.
--with-png-dirThe --with-png-dir option specifies the path to the filesystem
directory that contains the PNG libraries. This option is required if
you use the --with-gd option.
--with-pdo-mysql=mysqlndThe --with-pdo-mysql option instructs PHP to enable the PDO database
abstraction API for the MySQL database using PHP’s own native MySQL
driver. If you use MySQL, you’ll want to enable this option.
--enable-mbstringThe --enable-mbstring option instructs PHP to enable multibyte (read
“Unicode”) string support. You’ll most always want to enable this
option.
--enable-socketsThe --enable-sockets option instructs PHP to enable network socket
support so that you can talk with remote machines via TCP sockets.
You’ll most always want to enable this option.
--with-curlThe --with-curl option lets PHP interface with your operating system’s
curl library. This lets you use PHP’s curl functions to send and
receive HTTP requests. You’ll most always want to enable this option.
--with-mcryptThe --with-mcrypt option lets PHP interface with your operating
system’s mcrypt library for data encryption and decryption. Although
this option is by no means required, it is used by a growing number of
PHP components. I strongly recommend you enable this option.
--with-opensslThe --with-openssl option lets PHP interface with your operating
system’s openssl library. This is required to use PHP’s HTTPS stream
wrapper. Although this option is technically optional, it’s really not.
Make Edward Snowden proud. Enable this option.
Configuring PHP and installing its software dependencies was the hard
part. It’s all downhill from here. Assuming the ./configure command executed successfully, type this command in your terminal
application and press Enter:
make && make install
This will compile PHP and may take a while. Now is a good time to grab a coffee or two. Eventually the command will finish and PHP will be installed. That wasn’t too bad, right?
The compiled PHP binaries are available in the bin/ directory beneath
your --prefix directory. The php-fpm binary is available in the
sbin/ directory beneath your --prefix directory. Be sure the bin/
and sbin/ directories are added to your system’s environment PATH so
you can reference the php binary by name instead of absolute path.
Let’s not forget about our php.ini file. This may not be created
automatically. The PHP GitHub repository has a php.ini preconfigured
for local development. Our php.ini file should exist in the lib/
directory beneath your --prefix directory. Let’s create it now. Type
the following commands into your terminal application and press Enter after
each command.
First, cd into our PHP installation’s lib/ directory. This path may
be different if you used a different --prefix path in your
./configure command:
cd /usr/local/php5.6.3/libNext, download the PHP.ini file from PHP’s GitHub repository into a file named php.ini:
curl -o php.ini \
  https://raw.githubusercontent.com/php/php-src/master/php.ini-development
That’s it. We’re all set to execute PHP files with the newly installed
php interpreter. We talked more about the php-fpm binary when we
discussed PHP deployment strategies in Chapter 7.
Yes, you can run PHP on Windows. However, I encourage you to use a Linux virtual machine instead. It is very likely that your production server will be running a Linux distribution, and you should set up your local development environment to closely match your production environment. But if you must use Windows locally, here’s how.
The fine folks over at PHP.net provide prebuilt PHP binaries for Windows at http://php.net/windows. Download the appropriate PHP release (provided as a ZIP archive) and unpack it to a directory of your choice. I’ll unpack it to C:\PHP\. Copy the php.ini-production file to php.ini in the same folder. No other changes are required to use PHP on the Windows command line. You can execute a custom PHP script with optional arguments like this:
C:\PHP\php.exe -f "C:\path\to\script.php" -- -arg1 -arg2 -arg3
You should add the PHP executable to your Windows PATH variable
and append the .php extension to your Windows PATHEXT variable
to save your future self from a lot of extra typing.
You can also download and install WAMP
to set up a quick and dirty local PHP development environment. Like its
OS X counterpart, MAMP, WAMP is an all-in-one software package that
provides a traditional web-development stack out-of-the-box. It includes
an Apache web server, a MySQL database server, and PHP. It has a Windows
software installer that will guide you through every step of the install
process. WAMP also provides a configuration menu in the Windows Taskbar
notification area where you can quickly and easily start, stop, or restart
your Apache and MySQL servers. Like MAMP, WAMP embeds PHP in the Apache
web server using the mod_php Apache module. If your Apache server is
running, you can use PHP.
WAMP is your best bet for quickly installing a local PHP development stack on your Windows machine. However, just as with MAMP, you are limited to the software and extensions provided with WAMP. You can download additional PHP versions separately on the WAMP website. Learn more at http://www.wampserver.com/.
Another all-in-one solution is Zend Server. It is available in both free and paid versions. Like WAMP, it provides an Apache web server, the latest PHP interpreter and popular PHP extensions, a MySQL database server, and Zend’s own debugging tools in one easy-to-install package. Just download the installer (.exe) file, run it, and follow the on-screen instructions. Learn more at http://www.zend.com/en/products/server/.
We’ve talked a lot about production server provisioning and application deployment. However, we haven’t discussed how to develop applications on your local computer. What tools do you use? How do you reconcile your development environment with your production environment? This chapter has answers.
Many beginner PHP developers rely on their operating system’s default software stack—typically older versions of Apache and PHP. I strongly encourage you not to use your operating system’s default software. Many OS X users (including me) have been devastated when an OS X upgrade vaporized our heavily customized Apache configuration files. Steer clear of built-in software; it’s often out of date, and it may be overwritten by operating system upgrades. Instead, build a local development environment in a virtual machine that is safely isolated from your local operating system. A virtual machine is a software-emulated operating system. For example, you can create a virtual machine on OS X that runs Ubuntu or CentOS. The virtual machine behaves exactly like a separate computer.
Make sure your virtual machine runs the same operating system as your production server (I prefer Ubuntu Server). It’s important that your local development and production server environments use the same operating system to prevent unexpected deployment and runtime errors caused by operating system software discrepancies.
There are many software programs that create and manage virtual machines. Some are commercial products (e.g., VMWare Fusion or Parallels), and others are open source products (e.g., VirtualBox). To be honest, VirtualBox is a solid product. It works as advertised, and it’s free. VirtualBox is not pretty like its commercial alternatives, but it gets the job done. You can download VirtualBox for OS X or Windows at https://www.virtualbox.org. It uses a traditional GUI installer appropriate for your operating system (Figure B-1).
Although VirtualBox lets us create virtual machines, it does not provide a user-friendly interface to start, provision, stop, and destroy virtual machines. Instead, we use Vagrant—a virtualization tool that helps you create, start, stop, and destroy VirtualBox virtual machines with a single command. It complements (and abstracts) VirtualBox with a user-friendly, command-line interface. You can download Vagrant for OS X and Windows at https://www.vagrantup.com. It also uses a traditional GUI installer appropriate for your operating system.
After installation, you can use the vagrant command in your terminal application to
create, provision, start, stop, and destroy VirtualBox virtual machines. These are the
Vagrant commands you’ll use most often:
vagrant initThis creates a new Vagrantfile configurations script in the current working
directory. We use this script to configure a virtual machine’s properties
and provisioning details.
vagrant upThis creates and/or starts a virtual machine.
vagrant provisionThis provisions a virtual machine using the specified provisioning scripts. We’ll discuss provisioning later in this chapter.
vagrant sshThis logs you into a virtual machine via SSH.
vagrant haltThis stops a virtual machine.
vagrant destroyThis destroys a virtual machine.
I recommend you create command-line aliases for these Vagrant commands
because you’ll type them a lot. Drop these into your ~/.bash_profile
file and restart your terminal application:
aliasvi="vagrant init"aliasvu="sudo echo 'Starting VM' && vagrant up"aliasvup="sudo echo 'Starting VM' && vagrant up --provision"aliasvp="vagrant provision"aliasvh="vagrant halt"aliasvs="vagrant ssh"
We have VirtualBox and Vagrant installed. Now what? We need to choose a Vagrant box as a starting point for our virtual machine. A Vagrant box is a preconfigured virtual machine that provides a foundation on which we provision our server and build our PHP application. Some boxes are spartan shells used as a blank canvas. Other boxes include complete software stacks that cater to certain types of applications. You can browse available boxes at https://vagrantcloud.com.
I usually choose the spartan ubuntu/trusty64 box, and then I use Puppet to provision the box with a specific software stack required by my application. If you find another Vagrant box that already includes the tools you need, by all means use that box to save time.
After you find a Vagrant box, navigate into the appropriate working directory
with your terminal application. Initialize a new Vagrantfile with this command:
vagrant init
Open the new Vagrantfile file in your preferred text editor. This file
is written with Ruby, but it’s easy to read. Find the config.vm.box
setting, and change its value to the name of your Vagrant box. For example,
if I prefer the Ubuntu box I change this setting to ubuntu/trusty64.
The updated Vagrantfile line should read:
config.vm.box="ubuntu/trusty64"
Next, uncomment this line so we can access our virtual machine in a web browser
on our local network at IP address 192.168.33.10:
config.vm.network"private_network",ip:"192.168.33.10"
Finally, create the virtual machine with this command:
vagrant up
This command downloads the remote Vagrant box (if necessary), and it creates a new VirtualBox virtual machine based on the Vagrant box.
Unless you use a Vagrant box that provides a preconfigured software stack,
your virtual machine doesn’t do anything. You need to provision the virtual
machine with the software to run your PHP application. At the very least,
you want a web server, PHP, and possibly a database. Provisioning a virtual
machine is a topic far too large for this book. I can, however, point
you in the right direction. You can provision a virtual machine
with Vagrant and either Puppet or Chef. Both Puppet and Chef can be
enabled and configured in the the Vagrantfile configuration file.
Erika Heidi gave a great NomadPHP presentation on Vagrant and provisioning tools like Puppet and Chef. She also wrote the Vagrant Cookbook, now available on LeanPub.
If you scroll down the Vagrantfile file, you’ll see a section
that looks like this. It may be commented out by default:
config.vm.provision"puppet"do|puppet|puppet.manifests_path="manifests"puppet.manifest_file="default.pp"end
If you uncomment this section, Vagrant will provision the virtual machine with Puppet using your Puppet manifests. You can learn more about Puppet at http://puppetlabs.com.
If you prefer Chef’s provisioning tools, you can instead uncomment this section
of the Vagrantfile file:
config.vm.provision"chef_solo"do|chef|chef.cookbooks_path="../my-recipes/cookbooks"chef.roles_path="../my-recipes/roles"chef.data_bags_path="../my-recipes/data_bags"chef.add_recipe"mysql"chef.add_role"web"# You may also specify custom JSON attributes:chef.json={mysql_password:"foo"}end
Provide your own cookbooks, roles, and recipes. Vagrant will provision your virtual machine accordingly. You can learn more about Chef at https://www.chef.io/chef/.
In either case, it’s often useful to map your local machine’s project directory to
a directory in the virtual machine. For example, you can map your local project directory
to the virtual machine’s /var/www directory. If the virtual machine’s web server
virtual host is /var/www/public, your local project’s public/ directory is now
served by the virtual machine’s web server. Any local changes are reflected immediately
in the virtual machine. You can uncomment this line in your Vagrantfile file to
enable synced directories between your local and virtual machines:
config.vm.synced_folder".","/vagrant_data"
The first argument (.) is your local path relative to the Vagrantfile configuration
file. The second argument (/vagrant_data) is the absolute path on the virtual machine
to which the local directory is mapped. The virtual machine directory largely depends on
your virtual machine’s web server virtual host configuration. OS X users should enable
NFS synced folders. Change the config.vm.synced_folder line to this:
config.vm.synced_folder".","/vagrant_data",type:"nfs"
Then uncomment these lines and boost the VirtualBox machine’s memory to 1024MB:
config.vm.provider"virtualbox"do|vb|# Don't boot with headless mode# vb.gui = true# Use VBoxManage to customize the VM. For example to change memory:vb.customize["modifyvm",:id,"--memory","1024"]end
Puppet and Chef are not easy to learn, especially for Vagrant newcomers. There are tools available to help you get started with Vagrant that don’t require you to write your own Puppet and Chef manifests.
Homestead is an abstraction on top of Vagrant. It is also a Vagrant box that is preconfigured with a complete software stack including:
Ubuntu 14.04
PHP 5.6
HHVM
Nginx
MySQL
Postgres
Node (With Bower, Grunt, and Gulp)
Redis
Memcached
Beanstalkd
Laravel Envoy
Homestead works great for any PHP application, too. I use Homestead on my local machine to develop Slim and Symfony applications. Learn more about Homestead at http://laravel.com/docs/4.2/homestead.
PuPHPet is ideal for those who don’t know how to write Puppet
manifests. This is a point-and-click website that creates a Puppet configuration
automatically (Figure B-2). You download the resultant Puppet configuration and run vagrant up.
It really is that simple.
Vaprobash is similar to PuPHPet. It doesn’t
provide a point-and-click website, but it’s almost as easy. You download
the Vaprobash Vagrantfile, and you uncomment the lines for the tools you need.
Do you want nginx? Uncomment the nginx line. Do you want MySQL? Uncomment the
MySQL line. Do you want Elasticsearch? Uncomment the Elasticsearch line.
When ready, run vagrant up in your terminal application and Vagrant will
provision your virtual machine.
The animal on the cover of Modern PHP is a straw-necked ibis (Threskiornis spinicollis). It can be found throughout Australia, New Guinea, and parts of Indonesia.
Straw-necked ibises are large birds, growing up to 30 inches long. The distinctive stiff feathers on the neck from which the bird gets its name appear during adulthood. They have long, curved beaks that help them sift through water for insects, mollusks, and frogs. Farmers welcome straw-necked ibises in their fields because the birds will eat insects, grasshoppers, crickets and locusts that would have otherwise destroyed crops.
These birds are very nomadic, and travel in flocks between habitats. They favor shallow freshwater wetlands, cultivated pastures, swamps, lagoons, and grasslands. During breeding season, these ibises will build a large, cup-shaped nest of sticks and reeds high up in trees over water. They are also known to nest in colonies, often together with the Australian white ibis. For this reason, they are easily spotted standing in the high branches of bare trees, creating a striking silhouette against the sky.
Many of the animals on O’Reilly covers are endangered; all of them are important to the world. To learn more about how you can help, go to animals.oreilly.com.
The cover image is from Woods Illustrated Natural History. The cover fonts are URW Typewriter and Guardian Sans. The text font is Adobe Minion Pro; the heading font is Adobe Myriad Condensed; and the code font is Dalton Maag’s Ubuntu Mono.
New Features and Good Practices
Copyright © 2015 Josh Lockhart. All rights reserved.
Printed in the United States of America.
Published by O’Reilly Media, Inc., 1005 Gravenstein Highway North, Sebastopol, CA 95472.
O’Reilly books may be purchased for educational, business, or sales promotional use. Online editions are also available for most titles (http://safaribooksonline.com). For more information, contact our corporate/institutional sales department: 800-998-9938 or corporate@oreilly.com.
See http://oreilly.com/catalog/errata.csp?isbn=9781491905012 for release details.
The O’Reilly logo is a registered trademark of O’Reilly Media, Inc. Modern PHP, the cover image, and related trade dress are trademarks of O’Reilly Media, Inc.
While the publisher and the author have used good faith efforts to ensure that the information and instructions contained in this work are accurate, the publisher and the author disclaim all responsibility for errors or omissions, including without limitation responsibility for damages resulting from the use of or reliance on this work. Use of the information and instructions contained in this work is at your own risk. If any code samples or other technology this work contains or describes is subject to open source licenses or the intellectual property rights of others, it is your responsibility to ensure that your use thereof complies with such licenses and/or rights.
978-1-491-90501-2
[LSI]
For Laurel
There are a million PHP tutorials online. Most of these tutorials are outdated and demonstrate obsolete practices. Unfortunately, these tutorials are still referenced today thanks to their Google immortality. Outdated information is dangerous to unaware PHP programmers who unknowingly create slow and insecure PHP applications. I recognized this issue in 2013, and it is the primary reason I began PHP The Right Way, a community initiative to provide PHP programmers easy access to high-quality and up-to-date information from authoritative members of the PHP community.
Modern PHP is my next endeavor toward the same goal. This book is not a reference manual. Nope. This book is a friendly and fun conversation between you and me. I’ll introduce you to the modern PHP programming language. I’ll show you the latest PHP techniques that I use every day at work and on my open source projects. And I’ll help you use the latest coding standards so you can share your PHP components and libraries with the PHP community.
You’ll hear me say “community” over and over (and over). The PHP community is friendly and helpful and welcoming—although not without occasional drama. If you become curious about a specific feature mentioned in this book, reach out to your local PHP user group with questions. I guarantee you there are nearby PHP developers who would love to help you become a better PHP programmer. Your local PHP user group is an invaluable resource as you continue to improve your PHP skills long after you finish this book.
Before we get started, I want to set a few expectations. First, it is impossible for me to cover every way to use PHP. There isn’t enough time. Instead, I will show you how I use PHP. Yes, this is an opinionated approach, but I use the very same practices and standards adopted by many other PHP developers. What you take away from our brief conversation will be immediately applicable in your own projects.
Second, I assume you are familiar with variables, conditionals, loops, and so on; you don’t have to know PHP, but you should at least bring a basic understanding of these fundamental programming concepts. You can also bring coffee (I love coffee). I’ll supply everything else.
Third, I do not assume you are using a specific operating system. However, my code examples are written for Linux. Bash commands are provided for Ubuntu and CentOS and may also work on OS X. If you use Windows, I highly recommend you spin up a Linux virtual machine so you can run the example code in this book.
Part I demonstrates new PHP features like namespaces, generators, and traits. It introduces you to the modern PHP language, and it exposes you to features you may not have known about until now.
Part II explores good practices that you should implement in your PHP applications. Have you heard the term PSR, but you’re not entirely sure what it is or how to use it? Do you want to learn how to sanitize user input and use safe database queries? This chapter is for you.
Part III is more technical than the first two parts. It demonstrates how to deploy, tune, test, and profile PHP applications. We dive into deployment strategies with Capistrano. We talk about testing tools like PHPUnit and Travis CI. And we explore how to tune PHP so it performs as well as possible for your application.
Appendix A provides step-by-step instructions for installing and configuring PHP-FPM on your machine.
Appendix B explains how to build a local development environment that closely matches your production server. We explore Vagrant, Puppet, Chef, and alternative tools to help you get started quickly.
The following typographical conventions are used in this book:
Indicates new terms, URLs, email addresses, filenames, and file extensions.
Constant widthUsed for program listings, as well as within paragraphs to refer to program elements such as variable or function names, databases, data types, environment variables, statements, and keywords.
Constant width boldShows commands or other text that should be typed literally by the user.
Constant width italicShows text that should be replaced with user-supplied values or by values determined by context.
This element signifies a tip or suggestion.
This element signifies a general note.
This element indicates a warning or caution.
Supplemental material (code examples, exercises, etc.) is available for download at https://github.com/codeguy/modern-php.
This book is here to help you get your job done. In general, if example code is offered with this book, you may use it in your programs and documentation. You do not need to contact us for permission unless you’re reproducing a significant portion of the code. For example, writing a program that uses several chunks of code from this book does not require permission. Selling or distributing a CD-ROM of examples from O’Reilly books does require permission. Answering a question by citing this book and quoting example code does not require permission. Incorporating a significant amount of example code from this book into your product’s documentation does require permission.
We appreciate, but do not require, attribution. An attribution usually includes the title, author, publisher, and ISBN. For example: “Modern PHP by Josh Lockhart (O’Reilly). Copyright 2015 Josh Lockhart, 978-1-491-90501-2.”
If you feel your use of code examples falls outside fair use or the permission given above, feel free to contact us at permissions@oreilly.com.
Safari Books Online is an on-demand digital library that delivers expert content in both book and video form from the world’s leading authors in technology and business.
Technology professionals, software developers, web designers, and business and creative professionals use Safari Books Online as their primary resource for research, problem solving, learning, and certification training.
Safari Books Online offers a range of plans and pricing for enterprise, government, education, and individuals.
Members have access to thousands of books, training videos, and prepublication manuscripts in one fully searchable database from publishers like O’Reilly Media, Prentice Hall Professional, Addison-Wesley Professional, Microsoft Press, Sams, Que, Peachpit Press, Focal Press, Cisco Press, John Wiley & Sons, Syngress, Morgan Kaufmann, IBM Redbooks, Packt, Adobe Press, FT Press, Apress, Manning, New Riders, McGraw-Hill, Jones & Bartlett, Course Technology, and hundreds more. For more information about Safari Books Online, please visit us online.
Please address comments and questions concerning this book to the publisher:
We have a web page for this book, where we list errata, examples, and any additional information. You can access this page at http://bit.ly/modern_php.
To comment or ask technical questions about this book, send email to bookquestions@oreilly.com.
For more information about our books, courses, conferences, and news, see our website at http://www.oreilly.com.
Find us on Facebook: http://facebook.com/oreilly
Follow us on Twitter: http://twitter.com/oreillymedia
Watch us on YouTube: http://www.youtube.com/oreillymedia
This is my first book. When O’Reilly approached me about writing Modern PHP, I was equally excited and scared to death. The first thing I did was a Walter Huston dance; I mean, O’Reilly wanted me to write a book. How cool is that!? Then I asked myself can I really write that many pages? A book isn’t a quick or small task.
Of course, I immediately said “yes.” I knew I could write Modern PHP because I had family, friends, coworkers, editors, and reviewers supporting me the entire way. I want to acknowledge and thank my supporters for their invaluable feedback. Without them, this book would never have happened.
First, I want to thank my editor at O’Reilly Media—Allyson MacDonald (@allyatoreilly). Ally was nice, critical, supportive, and smart. She knew exactly how and when to gently nudge me in the right direction whenever I got off track. I can’t imagine working with a better editor.
I also want to thank my technical reviewers—Adam Fairholm (@adamfairholm) and Ed Finkler (@funkatron). Adam is a brilliant web developer at Newfangled, and he is perhaps best known for his work on IMVDb—the popular music video database. Ed is well-known throughout the PHP community for his incredible PHP skills, his personality on the /dev/hell podcast, and his commendable Open Sourcing Mental Illness campaign. Adam and Ed both pointed out everything dumb, illogical, and incorrect in my early drafts. This book is far better than anything I could write on my own thanks to their brutally honest feedback. I am forever indebted to them for their guidance and wisdom. If any faults or inaccuracies wriggled their way into the final manuscript, those faults are surely my own.
My coworkers at New Media Campaigns have been a constant source of encouragement. Joel, Clay, Kris, Alex, Patrick, Ashley, Lenny, Claire, Todd, Pascale, Henry, and Nathan—I tip my hat to all of you for your kind words of encouragement from beginning to end.
And most important, I want to thank my family—Laurel, Ethan, Tessa, Charlie, Lisa, Glenn, and Liz. Thank you for your encouragement, without which I would have never finished this book. To my lovely wife, Laurel, thank you for your patience. Thank you for accompanying me to Caribou Coffee for so many late-night writing sessions. Thank you for letting me abandon you on weekends. Thank you for keeping me motivated and on schedule. I love you now and forever.
The PHP language is experiencing a renaissance. PHP is transforming into a modern scripting language with helpful features like namespaces, traits, closures, and a built-in opcode cache. The modern PHP ecosystem is evolving, too. PHP developers rely less on monolithic frameworks and more on smaller specialized components. The Composer dependency manager is revolutionizing how we build PHP applications; it emancipates us from a framework’s walled garden and lets us mix and match interoperable PHP components best suited for our custom PHP applications. Component interoperability would not be possible without community standards proposed and curated by the PHP Framework Interop Group.
Modern PHP is your guide to the new PHP, and it will show you how to build and deploy amazing PHP applications using community standards, good practices, and interoperable components.
Before we explore modern PHP, it is important to understand PHP’s origin. PHP is an interpreted server-side scripting language. This means you write PHP code, upload it to a web server, and execute it with an interpreter. PHP is typically used with a web server like Apache or nginx to serve dynamic content. However, PHP can also be used to build powerful command-line applications (just like bash, Ruby, Python, and so on). Many PHP developers don’t realize this and miss out on a really exciting feature. Not you, though.
You can read the official PHP history at http://php.net/manual/history.php.php. I won’t repeat what has already been said so well by Rasmus Lerdorf (the creator of PHP). What I will tell you is that PHP has a tumultuous past. PHP began as a collection of CGI scripts written by Rasmus Lerdorf to track visits to his online resume. Lerdorf named his set of CGI scripts “Personal Home Page Tools.” This early incarnation was completely different from the PHP we know today. Lerdorf’s early PHP Tools were not a scripting language; they were tools that provided rudimentary variables and automatic form variable interpretation using an HTML embedded syntax.
Between 1994 and 1998, PHP underwent numerous revisions and even received a few ground-up rewrites. Andi Gutmans and Zeev Suraski, two developers from Tel Aviv, joined forces with Rasmus Lerdorf to transform PHP from a small collection of CGI tools into a full-fledged programming language with a more consistent syntax and basic support for object-oriented programming. They named their final product PHP 3 and released it in late 1998. The new PHP moniker was a departure from earlier names, and it is a recursive acronym for PHP: Hypertext Preprocessor. PHP 3 was the first version that most resembled the PHP we know today. It provided superior extensibility to various databases, protocols, and APIs. PHP 3’s extensibility attracted many new developers to the project. By late 1998, PHP 3 was already installed on a staggering 10% of the world’s web servers.
Today, the PHP language is quickly evolving and is supported by dozens of core team developers from around the world. Development practices have changed, too. In the past, it was common practice to write a PHP file, upload it to a production server with FTP, and hope it worked. This is a terrible development strategy, but it was necessary due to a lack of viable local development environments.
Nowadays, we eschew FTP and use version control instead. Version control software like Git helps maintain an auditable code history that can be branched, forked, and merged. Local development environments are identical to production servers thanks to virtualization tools like Vagrant and provisioning tools like Ansible, Chef, and Puppet. We leverage specialized PHP components with the Composer dependency manager. Our PHP code adheres to PSRs—community standards managed by the PHP Framework Interop Group. We thoroughly test our code with tools like PHPUnit. We deploy our applications with PHP’s FastCGI process manager behind a web server like nginx. And we increase application performance with an opcode cache.
Modern PHP encompasses many new practices that may be unfamiliar to those of you new to PHP, or to those upgrading from older PHP versions. Don’t feel overwhelmed. I’ll walk through each concept later in this book.
I’m also excited that PHP now has an official draft specification—something it lacked until 2014.
Most mature programming languages have a specification. In layman’s terms, a specification is a canonical blueprint that defines what it means to be PHP. This blueprint is used by developers who create programs that parse, interpret, and execute PHP code. It is not for developers who create applications and websites with PHP.
Sara Golemon and Facebook announced the first PHP specification draft at O’Reilly’s OSCON conference in 2014. You can read the official announcement on the PHP internals mailing list, and you can read the PHP specification on GitHub.
An official PHP language specification is becoming more important given the introduction of multiple competing PHP engines. The original PHP engine is the Zend Engine, a PHP interpreter written in C and introduced in PHP 4. The Zend Engine was created by Rasmus Lerdorf, Andi Gutmans, and Zeev Suraski. Today the Zend Engine is the Zend company’s main contribution to the PHP community. However, there is now a second major PHP engine—the HipHop Virtual Machine from Facebook. A language specification ensures that both engines maintain a baseline compatibility.
A PHP engine is a program that parses, interprets, and executes PHP code (e.g., the Zend Engine or Facebook’s HipHop Virtual Machine). This is not to be confused with PHP, which is a generic reference to the PHP language.
The Zend Engine is improving at a rapid pace with new features and improved performance. I attribute the Zend Engine’s improvements to its new competition, specifically Facebook’s HipHop Virtual Machine and Hack programming language.
Hack is a new programming language built on top of PHP. It introduces static typing, new data structures, and additional interfaces while maintaining backward compatibility with existing dynamically typed PHP code. Hack is targeted at developers who appreciate PHP’s rapid development characteristics but need the predictability and stability from static typing.
We’ll discuss dynamic versus static typing later in this book. The difference between the two is when PHP types are checked. Dynamic types are checked at runtime, whereas static types are checked at compile time. Jump ahead to Chapter 12 for more information.
The HipHop Virtual Machine (HHVM) is a PHP and Hack interpreter that uses a just in time (JIT) compiler to improve application performance and reduce memory usage.
I don’t foresee Hack and HHVM replacing the Zend Engine, but Facebook’s new contributions are creating a giant splash in the PHP community. Increasing competition has prompted the Zend Engine core team to announce PHP 7, an optimized Zend Engine said to be on par with HHVM. We’ll discuss these developments further in Chapter 12.
It’s an exciting time to be a PHP programmer. The PHP community has never been this energized, fun, and innovative. I hope this book helps you firmly embrace modern PHP practices. There are a ton of new things to learn, and many more things on the horizon. Consider this your roadmap. Now let’s get started.
The modern PHP language has many exciting new features. Many of these features will be brand new to PHP programmers upgrading from earlier versions, and they’ll be a nice surprise to programmers migrating to PHP from another language. These new features make the PHP language a powerful platform and provide a pleasant experience for building web applications and command-line tools.
Some of these features aren’t essential, but they still make our lives easier. Some features, however, are essential. Namespaces, for example, are a cornerstone of modern PHP standards and enable development practices that modern PHP developers take for granted (e.g., autoloading). I’ll introduce each new feature, explain why it is useful, and show you how to implement it in your own projects.
I encourage you to follow along on your own computer. You can find all of the text’s code examples in this book’s companion GitHub repository.
If there is one modern PHP feature I want you to know, it is namespaces. Introduced in PHP 5.3.0, namespaces are an important tool that organizes PHP code into a virtual hierarchy, comparable to your operating system’s filesystem directory structure. Each modern PHP component and framework organizes its code beneath its own globally unique vendor namespace so that it does not conflict with, or lay claim to, common class names used by other vendors.
Don’t you hate it when you walk into a coffee shop and this one obnoxious person has a mess of books, cables, and whatnot spread across several tables? Not to mention he’s sitting next to, but not using, the only available power outlet. He’s wasting valuable space that could otherwise be useful to you. Figuratively speaking, this person is not using namespaces. Don’t be this person.
Let’s see how a real-world PHP component uses namespaces. The Symfony Framework’s
own symfony/httpfoundation
is a popular PHP component that manages HTTP requests and responses. More important,
the symfony/httpfoundation component uses common PHP class names like Request,
Response, and Cookie. I guarantee you there are many other PHP components that use
these same class names. How can we use the symfony/httpfoundation PHP component if
other PHP code uses the same class names? We can safely use the symfony/httpfoundation
component precisely because its code is sandboxed beneath the unique Symfony vendor namespace.
Visit the symfony/httpfoundation component on GitHub
and navigate to the Response.php
file. It looks like Figure 2-1.
Look closely at line 12. It contains this code:
namespaceSymfony\Component\HttpFoundation;
This is a PHP namespace declaration, and it always appears on a new line immediately after the
opening <?php tag. This particular namespace declaration tells us several things.
First, we know the Response class lives beneath the Symfony vendor namespace
(the vendor namespace is the topmost namespace). We know the Response class
lives beneath the Component subnamespace. We also know the Response class
lives beneath yet another subnamespace named HttpFoundation. You can view other
files adjacent to Response.php, and you’ll see they use the
same namespace declaration. A namespace (or subnamespace) encapsulates and organizes
related PHP classes, just as a filesystem directory contains related files.
Subnamespaces are separated with a \ character.
Unlike your operating system’s physical filesystem, PHP namespaces are a virtual concept and do not necessarily map 1:1 with filesystem directories. That being said, most PHP components do, in fact, map subnamespaces to filesystem directories for compatibility with the popular PSR-4 autoloader standard (we’ll talk more about this in Chapter 3).
Technically speaking, namespaces are merely a PHP language notation referenced by the PHP interpreter to apply a common name prefix to a set of classes, interfaces, functions, and constants.
Namespaces are important because they let us create sandboxed code that works alongside other developers’ code. This is the cornerstone concept of the modern PHP component ecosystem. Component and framework authors build and distribute code for a large number of PHP developers, and they have no way of knowing or controlling what classes, interfaces, functions, and constants are used alongside their own code. This problem applies to your own in-house projects, too. If you write custom PHP components or classes for a project, that code must work alongside your project’s third-party dependencies.
As I mentioned earlier with the symfony/httpfoundation component, your
code and other developers’ code might use the same class, interface, function,
or constant names. Without namespaces, a name collision causes PHP
to fail. With namespaces, your code and other developers’ code can
use the same class, interface, function, or constant name assuming
your code lives beneath a unique vendor namespace.
If you’re building a tiny personal project with only a few dependencies, class name collisions probably won’t be an issue. But when you’re working on a team building a large project with numerous third-party dependencies, name collisions become a very real concern. You cannot control which classes, interfaces, functions, and constants are introduced into the global namespace by your project’s dependencies. This is why namespacing your code is important.
Every PHP class, interface, function, and constant lives beneath a
namespace (or subnamespace). Namespaces are declared at the top of a
PHP file on a new line immediately after the opening <?php tag.
The namespace declaration begins with namespace, then a space character,
then the namespace name, and then a closing semicolon ;
character.
Remember that namespaces are often used to establish a top-level vendor name.
This example namespace declaration establishes the Oreilly vendor name:
<?phpnamespaceOreilly;
All PHP classes, interfaces, functions, or constants declared
beneath this namespace declaration live in the Oreilly namespace and are,
in some way, related to O’Reilly Media. What if we wanted to organize code
related to this book? We use a subnamespace.
Subnamespaces are declared exactly the same as in the previous example.
The only difference is that we separate namespace and subnamespace names
with the \ character. The following example declares a subnamespace
named ModernPHP that lives beneath the topmost Oreilly vendor namespace:
<?phpnamespaceOreilly\ModernPHP;
All classes, interfaces, functions, and constants declared
beneath this namespace declaration live in the Oreilly\ModernPHP
subnamespace and are, in some way, related to this book.
All classes in the same namespace or subnamespace don’t have to be declared in the same PHP file. You can specify a namespace or subnamespace at the top of any PHP file, and that file’s code becomes a part of that namespace or subnamespace. This makes it possible to write multiple classes in separate files that belong to a common namespace.
Before we had namespaces, PHP developers solved the name collision problem with Zend-style class names. This was a class-naming scheme popularized by the Zend Framework where PHP class names used underscores in lieu of filesystem directory separators. This convention accomplished two things: it ensured class names were unique, and it enabled a naive autoloader implementation that replaced underscores in PHP class names with filesystem directory separators to determine the class file path.
For example, the PHP class Zend_Cloud_DocumentService_Adapter_WindowsAzure_Query
corresponds to the PHP file Zend/Cloud/DocumentService/Adapter/WindowsAzure/Query.php.
A side effect of the Zend-style naming convention, as you can see, is
absurdly long class names. Call me lazy, but there’s no way I’m
typing that class name more than once.
Modern PHP namespaces present a similar problem. For example, the full Response class name
in the symfony\httpfoundation component is \Symfony\Component\HttpFoundation\Response.
Fortunately, PHP lets us import and alias namespaced code.
By import, I mean that I tell PHP which namespaces, classes, interfaces, functions, and constants I will use in each PHP file. I can then use these without typing their full namespaces.
By alias, I mean that I tell PHP that I will reference an imported class, interface, function, or constant with a shorter name.
You can import and alias PHP classes, interfaces, and other namespaces as of PHP 5.3. You can import and alias PHP functions and constants as of PHP 5.6.
The code shown in Example 2-1 creates and sends a 400 Bad Request HTTP response
without importing and aliasing.
<?php$response=new\Symfony\Component\HttpFoundation\Response('Oops',400);$response->send();
This isn’t terrible, but imagine you have to instantiate a Response instance
several times in a single PHP file. Your fingers will get tired quickly.
Now look at Example 2-2. It does the same thing with importing.
<?phpuseSymfony\Component\HttpFoundation\Response;$response=newResponse('Oops',400);$response->send();
We tell PHP we intend to use the Symfony\Component\HttpFoundation\Response class
with the use keyword. We type the long, fully qualified class name once. Then we
can instantiate the Response class without using its fully namespaced class name.
How cool is that?
Some days I feel really lazy. This is a good opportunity to use an alias. Let’s
extend Example 2-2. Instead of typing Response, maybe I just want to
type Res instead. Example 2-3 shows how I can do that.
<?phpuseSymfony\Component\HttpFoundation\ResponseasRes;$r=newRes('Oops',400);$r->send();
In this example, I changed the import line to import the Response class. I also appended
as Res to the end of the import line; this tells PHP to consider Res an alias for
the Response class. If we don’t append the as Res alias to the import line, PHP
assumes a default alias that is the same as the imported class name.
You should import code with the use keyword at the top of each PHP file,
immediately after the opening <?php tag or namespace declaration.
You don’t need a leading \ character when importing code with the use
keyword because PHP assumes imported namespaces are fully qualified.
The use keyword must exist in the global scope (i.e., not inside of
a class or function) because it is used at compile time. It can, however, be
located beneath a namespace declaration to import code into another namespace.
As of PHP 5.6, it’s possible to import functions and constants. This
requires a tweak to the use keyword syntax. To import
a function, change use to use func:
<?phpusefuncNamespace\functionName;functionName();
To import a constant, change use to use constant:
<?phpuseconstantNamespace\CONST_NAME;echoCONST_NAME;
Function and constant aliases work the same as classes.
If you import multiple classes, interfaces, functions, or constants
into a single PHP file, you’ll end up with multiple use statements
at the top of your PHP file. PHP accepts a shorthand import syntax
that combines multiple use statements on a single line like this:
<?phpuseSymfony\Component\HttpFoundation\Request,Symfony\Component\HttpFoundation\Response,Symfony\Component\HttpFoundation\Cookie;
Don’t do this. It’s confusing and easy to mess up. I recommend you keep
each use statement on its own line like this:
<?phpuseSymfony\Component\HttpFoundation\Request;useSymfony\Component\HttpFoundation\Response;useSymfony\Component\HttpFoundation\Cookie;
You’ll type a few extra characters, but your code is easier to read and troubleshoot.
PHP lets you define multiple namespaces in a single PHP file like this:
<?phpnamespaceFoo{// Declare classes, interfaces, functions, and constants here}namespaceBar{// Declare classes, interfaces, functions, and constants here}
This is confusing and violates the recommended one class per file good practice. Use only one namespace per file to make your code simpler and easier to troubleshoot.
If you reference a class, interface, function, or constant without a namespace,
PHP assumes the class, interface, function, or constant lives in the current
namespace. If this assumption is wrong, PHP attempts to resolve the class, interface,
function, or constant. If you need to reference
a namespaced class, interface, function, or constant inside another namespace,
you must use the fully qualified PHP class name (namespace + class name). You
can type the fully qualified PHP class name, or you can import the code
into the current namespace with the use keyword.
Some code might not have a namespace and, therefore, lives in the global namespace.
The native Exception class is a good example. You can reference globally namespaced
code inside another namespace by prepending a \ character to the class, interface, function, or constant
name. For example, the \My\App\Foo::doSomething()
method in Example 2-4 fails because PHP searches for a \My\App\Exception
class that does not exist.
<?phpnamespaceMy\App;classFoo{publicfunctiondoSomething(){$exception=newException();}}
Instead, add a \ prefix to the Exception class name, as shown in Example 2-5. This tells PHP to look for
the Exception class in the global namespace instead of the current namespace.
<?phpnamespaceMy\App;classFoo{publicfunctiondoSomething(){thrownew\Exception();}}
Namespaces also provide the bedrock for the PSR4 autoloader standard created by the PHP Framework Interop Group (PHP-FIG). This autoloader pattern is used by most modern PHP components, and it lets us autoload project dependencies using the Composer dependency manager. We’ll talk about Composer and the PHP-FIG in Chapter 4. For now, just understand that the modern PHP ecosystem and its emerging component-based architecture would be impossible without namespaces.
Learning how to code to an interface changed my life as a PHP programmer, and it profoundly improved my ability to integrate third-party PHP components into my own applications. Interfaces are not a new feature, but they are an important feature that you should know about and use on a daily basis.
So what is a PHP interface? An interface is a contract between two PHP objects that lets one object depend not on what another object is but, instead, on what another object can do. An interface decouples our code from its dependencies, and it allows our code to depend on any third-party code that implements the expected interface. We don’t care how the third-party code implements the interface; we care only that the third-party code does implement the interface. Here’s a more down-to-earth example.
Let’s pretend I just arrived in Miami, Florida for the Sunshine PHP Developer Conference. I need a way to get around town, so I head straight for the local car rental place. They have a tiny Hyundai compact, a Subaru wagon, and (much to my surprise) a Bugatti Veyron. I know I need a way to get around town, and all three vehicles can help me do that. But each vehicle does so differently. The Hyundai Accent is OK, but I’d like something with a bit more oomph. I don’t have kids, so the wagon has more seating than I need. I’ll take the Bugatti, please.
The reality is that I can drive any of these three cars because they all share a common and expected interface. Each car has a steering wheel, a gas pedal, a brake pedal, and turn signals, and each uses gasoline for fuel. The Bugatti is probably more power than I can handle, but the driving interface is the same as the Hyundai’s. Because all three cars share the same expected interface, and I have the opportunity to choose my preferred vehicle (and if we’re being honest, I’d probably go with the Hyundai).
This is the exact same concept in object-oriented PHP. If I write code that expects an object of a specific class (and therefore a specific implementation), my code’s utility is inherently limited because it can only use objects of that one class, forever. However, if I write code that expects an interface, my code immediately knows how to use any object that implements that interface. My code does not care how the interface is implemented; my code cares only that the interface is implemented. Let’s drive this home with a demo.
I have a hypothetical PHP class named DocumentStore that collects text from different
sources: it fetches HTML from remote URLs; it reads stream resources; and it collects
terminal command output. Each document stored in a DocumentStore instance has a unique ID.
Example 2-6 shows the DocumentStore class.
classDocumentStore{protected$data=[];publicfunctionaddDocument(Documentable$document){$key=$document->getId();$value=$document->getContent();$this->data[$key]=$value;}publicfunctiongetDocuments(){return$this->data;}}
How exactly does this work if the addDocument() method only accepts instances of
the Documentable class? That’s a good observation. However, Documentable is not a
class. It’s an interface, and it looks like Example 2-7.
interfaceDocumentable{publicfunctiongetId();publicfunctiongetContent();}
This interface definition says that any object implementing the Documentable interface
must provide a public getId() method and a public getContent() method.
So how exactly is this helpful? It’s helpful because we can create separate document-fetching classes with wildly different implementations. Example 2-8 shows an implementation that can fetch HTML from a remote URL with curl.
classHtmlDocumentimplementsDocumentable{protected$url;publicfunction__construct($url){$this->url=$url;}publicfunctiongetId(){return$this->url;}publicfunctiongetContent(){$ch=curl_init();curl_setopt($ch,CURLOPT_URL,$this->url);curl_setopt($ch,CURLOPT_RETURNTRANSFER,1);curl_setopt($ch,CURLOPT_CONNECTTIMEOUT,3);curl_setopt($ch,CURLOPT_FOLLOWLOCATION,1);curl_setopt($ch,CURLOPT_MAXREDIRS,3);$html=curl_exec($ch);curl_close($ch);return$html;}}
Another implementation (Example 2-9) can read a stream resource.
classStreamDocumentimplementsDocumentable{protected$resource;protected$buffer;publicfunction__construct($resource,$buffer=4096){$this->resource=$resource;$this->buffer=$buffer;}publicfunctiongetId(){return'resource-'.(int)$this->resource;}publicfunctiongetContent(){$streamContent='';rewind($this->resource);while(feof($this->resource)===false){$streamContent.=fread($this->resource,$this->buffer);}return$streamContent;}}
And another implementation (Example 2-10) can fetch the result of a terminal command.
classCommandOutputDocumentimplementsDocumentable{protected$command;publicfunction__construct($command){$this->command=$command;}publicfunctiongetId(){return$this->command;}publicfunctiongetContent(){returnshell_exec($this->command);}}
Example 2-11 shows how we can use the DocumentStore class with our three document-collecting implementations.
<?php$documentStore=newDocumentStore();// Add HTML document$htmlDoc=newHtmlDocument('https://php.net');$documentStore->addDocument($htmlDoc);// Add stream document$streamDoc=newStreamDocument(fopen('stream.txt','rb'));$documentStore->addDocument($streamDoc);// Add terminal command document$cmdDoc=newCommandOutputDocument('cat /etc/hosts');$documentStore->addDocument($cmdDoc);print_r($documentStore->getDocuments());
This is really cool because the HtmlDocument, StreamDocument, and CommandOutputDocument classes
have nothing in common other than a common interface.
At the end of the day, coding to an interface creates more-flexible code that delegates implementation concerns to others. Many more people (e.g., your office buddies, your open source project’s users, or developers you’ve never met) can write code that works seamlessly with your code by knowing nothing more than an interface.
Many of my PHP developer friends are confused by traits, a new concept introduced in PHP 5.4.0. Traits behave like classes but look like interfaces. Which one are they? Neither and both.
A trait is a partial class implementation (i.e., constants, properties, and methods) that can be mixed into one or more existing PHP classes. Traits work double duty: they say what a class can do (like an interface), and they provide a modular implementation (like a class).
You may be familiar with traits in other languages. For example, PHP traits are similar to Ruby’s composable modules, or mixins.
The PHP language uses a classical inheritance model. This means you start with a single generalized root class that provides a base implementation. You extend the root class to create more specialized classes that inherit their immediate parent’s implementation. This is called an inheritance hierarchy, and it is a common pattern used by many programming languages.
If it helps, picture yourself back in grade school Biology. Remember how you learned about the biological classification system? There are six kingdoms. Each kingdom is extended by phyla. Each phylum is extended by biological classes. Classes are extended by orders, orders by families, families by genera, and genera by species. Each hierarchy extension represents further specialization.
The classical inheritance model works well most of the time. However,
what do we do if two unrelated PHP classes need to exhibit similar behavior?
For example, a PHP class RetailStore and another PHP class Car
are very different classes and don’t share a common parent in their
inheritance hierarchies. However, both classes should be geocodable
into latitude and longitude coordinates for display on a map.
Traits were created for exactly this purpose. They enable modular implementations that can be injected into otherwise unrelated classes. Traits also encourage code reuse.
My first (bad) reaction is to create a common parent class Geocodable
that both RetailStore and Car extend. This is a bad solution
because it forces two otherwise unrelated classes to share a common
ancestor that does not naturally belong in either inheritance hierarchy.
My second (better) reaction is to create a Geocodable interface that
defines which methods are required to implement the geocoding behavior.
The RetailStore and Car classes can both implement the Geocodable
interface. This is a good solution that allows each class to retain
its natural inheritance hierarchy, but it requires us to duplicate the
same geocoding behavior in both classes. This is not a DRY solution.
DRY is an acronym for Do not repeat yourself. It’s considered a good practice never to duplicate the same code in multiple locations. You should not need to change code in one location because you changed code in another location. Read more on Wikipedia.
My third (best) reaction is to create a Geocodable trait that defines
and implements the geocodable methods. I can then mix the Geocodable
trait into both the RetailStore and Car classes without polluting
their natural inheritance hierarchies.
Here’s how you define a PHP trait:
<?phptraitMyTrait{// Trait implementation goes here}
It is considered a good practice to define only one trait per file, just like class and interface definitions.
Let’s return to our Geocodable example to better demonstrate traits in
practice. We agree both RetailStore and Car classes need to provide
geocodable behavior, and we’ve decided inheritance and interfaces are
not the best solution. Instead, we create a Geocodable trait that
returns latitude and longitude coordinates that we can plot on a map.
Our complete Geocodable trait looks like Example 2-12.
<?phptraitGeocodable{/** @var string */protected$address;/** @var \Geocoder\Geocoder */protected$geocoder;/** @var \Geocoder\Result\Geocoded */protected$geocoderResult;publicfunctionsetGeocoder(\Geocoder\GeocoderInterface$geocoder){$this->geocoder=$geocoder;}publicfunctionsetAddress($address){$this->address=$address;}publicfunctiongetLatitude(){if(isset($this->geocoderResult)===false){$this->geocodeAddress();}return$this->geocoderResult->getLatitude();}publicfunctiongetLongitude(){if(isset($this->geocoderResult)===false){$this->geocodeAddress();}return$this->geocoderResult->getLongitude();}protectedfunctiongeocodeAddress(){$this->geocoderResult=$this->geocoder->geocode($this->address);returntrue;}}
The Geocodable trait defines only the properties and methods necessary
to implement the geocodable behavior. It does not do anything else.
Our Geocodable trait defines three class properties: an address
(string), a geocoder object (an instance of \Geocoder\Geocoder from
the excellent willdurand/geocoder component by
William Durand), and a geocoder result object (an instance of \Geocoder\Result\Geocoded).
We also define four public methods and one protected method. The setGeocoder() method is
used to inject the Geocoder object. The setAddress() method is used to
set an address. The getLatitude() and getLongitude() methods return
their respective coordinates. And the geocodeAddress() method
passes the address string into the Geocoder instance to retrieve the
geocoder result.
Using a PHP trait is easy. Add the code use MyTrait; inside a
PHP class definition. Here’s an example. Obviously, replace MyTrait
with the appropriate PHP trait name:
<?phpclassMyClass{useMyTrait;// Class implementation goes here}
Both namespaces and traits are imported with the use keyword. Where
they are imported is different. We import namespaces, classes, interfaces,
functions, and constants outside of a class definition. We import traits
inside a class definition. The difference is subtle but important.
Let’s return to our Geocodable example. We defined the Geocodable
trait in Example 2-12. Let’s update our RetailStore class so that it uses the
Geocodable trait (Example 2-13). For the sake of brevity, I do not provide the
complete RetailStore class implementation.
<?phpclassRetailStore{useGeocodable;// Class implementation goes here}
That’s all we have to do. Now each RetailStore instance can use the
properties and methods provided by the Geocodable trait, as shown in Example 2-14.
<?php$geocoderAdapter=new\Geocoder\HttpAdapter\CurlHttpAdapter();$geocoderProvider=new\Geocoder\Provider\GoogleMapsProvider($geocoderAdapter);$geocoder=new\Geocoder\Geocoder($geocoderProvider);$store=newRetailStore();$store->setAddress('420 9th Avenue, New York, NY 10001 USA');$store->setGeocoder($geocoder);$latitude=$store->getLatitude();$longitude=$store->getLongitude();echo$latitude,':',$longitude;
The PHP interpreter copies and pastes traits into class definitions at compile time, and it does not protect against incompatibilities introduced by this action. If your PHP trait assumes a class property or method exists (that is not defined in the trait itself), be sure those properties and methods exist in the appropriate classes.
PHP generators are an underutilized yet remarkably helpful feature introduced in PHP 5.5.0. I think many PHP developers are unaware of generators because their purpose is not immediately obvious. Generators are simple iterators. That’s it.
Unlike your standard PHP iterator, PHP generators don’t require you to
implement the Iterator interface in a heavyweight class. Instead,
generators compute and yield iteration values on-demand. This has
profound implications for application performance. Think about it.
A standard PHP iterator often iterates in-memory, precomputed
data sets. This is inefficient, especially with large and formulaic
data sets that can be computed instead. This is why we use generators
to compute and yield subsequent values on the fly without commandeering
valuable memory.
PHP generators are not a panacea for your iteration needs. Because generators never know the next iteration value until asked, it’s impossible to rewind or fast-forward a generator. You can iterate in only one direction—forward. Generators are also a once-and-done deal. You can’t iterate the same generator more than once. However, you are free to rebuild or clone a generator if necessary.
Generators are easy to create because they are just PHP functions that
use the yield keyword one or more times. Unlike regular PHP functions,
generators never return a value. They only yield values. Example 2-15 shows a simple generator.
<?phpfunctionmyGenerator(){yield'value1';yield'value2';yield'value3';}
Pretty simple, huh? When you invoke the generator function, PHP returns an
object that belongs to the Generator class. This object can be iterated
with the foreach() function. During each iteration, PHP asks the Generator
instance to compute and provide the next iteration value. What’s neat is
that the generator pauses its internal state whenever it yields a value.
The generator resumes internal state when it is asked for the next value. The generator
continues pausing and resuming until it reaches the end of its
function definition or an empty return; statement. We can invoke and
iterate the generator in Example 2-15 like this:
<?phpforeach(myGenerator()as$yieldedValue){echo$yieldedValue,PHP_EOL;}
This outputs:
value1value2value3
I like to demonstrate how a PHP generator saves memory by implementing
a simple range() function. First, let’s do it the wrong way (Example 2-16).
<?phpfunctionmakeRange($length){$dataset=[];for($i=0;$i<$length;$i++){$dataset[]=$i;}return$dataset;}$customRange=makeRange(1000000);foreach($customRangeas$i){echo$i,PHP_EOL;}
Example 2-16 makes poor use of memory. The makeRange() method in Example 2-16 allocates one million integers into a precomputed array.
A PHP generator can do the same thing while allocating memory for only one integer at any given time, as shown in Example 2-17.
<?phpfunctionmakeRange($length){for($i=0;$i<$length;$i++){yield$i;}}foreach(makeRange(1000000)as$i){echo$i,PHP_EOL;}
This is a contrived example. However, just imagine all of the potential data sets that you can compute. Number sequences (e.g., Fibonacci) are an obvious candidate. You can also iterate a stream resource. Imagine you need to iterate a 4 GB comma-separated value (CSV) file and your virtual private server (VPS) has only 1 GB of memory available to PHP. There’s no way you can pull the entire file into memory. Example 2-18 shows how we can use a generator instead!
<?phpfunctiongetRows($file){$handle=fopen($file,'rb');if($handle===false){thrownewException();}while(feof($handle)===false){yieldfgetcsv($handle);}fclose($handle);}foreach(getRows('data.csv')as$row){print_r($row);}
This example allocates memory for only one CSV row at a time instead of reading the entire 4 GB CSV file into memory. It also encapsulates the iteration implementation into a tidy package; this lets us quickly change how we get data (e.g., CSV, XML, JSON) without interrupting our application code that iterates the data.
Generators are a tradeoff between versatility and simplicity. Generators are forward-only iterators. This means you cannot use a generator to rewind, fast-forward, or seek a data set. You can only ask a generator to compute and yield its next value. Generators are most useful for iterating large or numerically sequenced data sets with only a tiny amount of system memory. They are also useful for accomplishing the same simple tasks as larger iterators with less code.
Generators do not add functionality to PHP. You can do what generators
do without a generator. However, generators greatly simply certain tasks
while using less memory. If you require more versatility to rewind,
fast-forward, or seek through a data set, you’re better off writing a
custom class that implements the Iterator interface,
or using one of PHP’s prebuilt Standard PHP Library (SPL) iterators.
For more generator examples, read What Generators Can Do For You by Anthony Ferrara (@ircmaxell on Twitter).
Closures and anonymous functions were introduced in PHP 5.3.0, and they’re two of my favorite and most used PHP features. They sound scary (at least I thought so when I first learned about them), but they’re actually pretty simple to understand. They’re extremely useful tools that every PHP developer should have in the toolbox.
A closure is a function that encapsulates its surrounding state at the time it is created. The encapsulated state exists inside the closure even when the closure lives after its original environment ceases to exist. This is a difficult concept to grasp, but once you do it’ll be a life-changing moment.
An anonymous function is exactly that—a function without a name. Anonymous functions can be assigned to variables and passed around just like any other PHP object. But it’s still a function, so you can invoke it and pass it arguments. Anonymous functions are especially useful as function or method callbacks.
Closures and anonymous functions are, in theory, separate things. However, PHP considers them to be one and the same. So when I say closure, I also mean anonymous function. And vice versa.
PHP closures and anonymous functions use the same syntax as a
function, but don’t let them fool you. They’re actually objects disguised as
PHP functions. If you inspect a PHP closure or anonymous function, you’ll
find they are instances of the Closure class. Closures are considered first-class
value types, just like a string or integer.
So we know PHP closures look like functions. You should not be surprised, then, that you create a PHP closure like Example 2-19.
<?php$closure=function($name){returnsprintf('Hello %s',$name);};echo$closure("Josh");// Outputs --> "Hello Josh"
That’s it. Example 2-19 creates a closure object and assigns it
to the $closure variable. It looks like a standard PHP function:
it uses the same syntax, it accepts arguments, and it returns a value.
However, it does not have a name.
We can invoke the $closure variable because the variable’s value is a closure,
and closure objects implement the \__invoke() magic method. PHP looks for and calls
the __invoke() method whenever () follows a variable name.
I typically use PHP closure objects as function and method callbacks. Many PHP functions expect callback functions, like array_map()
and preg_replace_callback(). This is a perfect opportunity to use PHP anonymous functions!
Remember, closures can be passed into other PHP functions as arguments, just like
any other value. In Example 2-20, I use a closure object as a callback argument
in the array_map() function.
<?php$numbersPlusOne=array_map(function($number){return$number+1;},[1,2,3]);print_r($numbersPlusOne);// Outputs --> [2,3,4]
OK, so that wasn’t that impressive. But remember, before closures PHP developers had no choice but to create a separate named function and refer to that function by name. This was slightly slower to execute, and it segregated a callback’s implementation from its usage. Old-school PHP developers used code like this:
<?php// Named callback implementationfunctionincrementNumber($number){return$number+1;}// Named callback usage$numbersPlusOne=array_map('incrementNumber',[1,2,3]);print_r($numbersPlusOne);
This code works, but it’s not as succinct and tidy as Example 2-20. We don’t need a separate incrementNumber()
named function if we use the function only once as a callback. Closures
used as callbacks create more concise and legible code.
So far I’ve demonstrated nameless (or anonymous) functions used as callbacks.
Let’s explore how to attach and enclose state with a PHP closure. JavaScript developers
might be confused by PHP closures because they do not automatically enclose application
state like true JavaScript closures. Instead, you must manually attach state
to a PHP closure with the closure object’s bindTo() method or the use keyword.
It’s far more common to attach closure state with the use keyword, so let’s look
at that first (Example 2-21). When you attach a variable to a closure via the use keyword, the attached variable
retains the value assigned to it at the time it is attached to the closure.
<?phpfunctionenclosePerson($name){returnfunction($doCommand)use($name){returnsprintf('%s, %s',$name,$doCommand);};}// Enclose "Clay" string in closure$clay=enclosePerson('Clay');// Invoke closure with commandecho$clay('get me sweet tea!');// Outputs --> "Clay, get me sweet tea!"
In Example 2-21, the enclosePerson() named function accepts
a $name argument, and it returns a closure object that encloses
the $name argument. The returned closure object preserves the $name
argument’s value even after the closure exits the enclosePerson()
function’s scope. The $name variable still exists in the closure!
You can pass multiple arguments into a closure with the use keyword.
Separate multiple arguments with a comma, just as you do with
any PHP function or method arguments.
Don’t forget, PHP closures are objects. Each closure instance has its
own internal state that is accessible with the $this keyword just like
any other PHP object. A closure object’s default state is pretty boring;
it has a magic __invoke() method and a bindTo() method. That’s it.
However, the bindTo() method opens the door to some interesting possibilities.
This method lets us bind a Closure object’s internal state to a
different object. The bindTo() method accepts an important second
argument that specifies the PHP class of the object to which the closure
is bound. This lets the closure access protected and private member
variables of the object to which it is bound.
You’ll find the bindTo() method is often used by
PHP frameworks that map route URLs to anonymous callback functions.
Frameworks accept an anonymous function and bind it to the application
object. This lets you reference the primary application object inside the
anonymous function with the $this keyword, as shown in Example 2-22.
01.<?php02.classApp03.{04.protected$routes=array();05.protected$responseStatus='200 OK';06protected$responseContentType='text/html';07.protected$responseBody='Hello world';08.09.publicfunctionaddRoute($routePath,$routeCallback)10.{11.$this->routes[$routePath]=$routeCallback->bindTo($this,__CLASS__);12.}13.14.publicfunctiondispatch($currentPath)15.{16.foreach($this->routesas$routePath=>$callback){17.if($routePath===$currentPath){18.$callback();19.}20.}21.22.header('HTTP/1.1 '.$this->responseStatus);23.header('Content-type: '.$this->responseContentType);24.header('Content-length: '.mb_strlen($this->responseBody));25.echo$this->responseBody;26.}27.}
Pay close attention to the addRoute() method. It accepts a route
path (e.g., /users/josh) and a route callback. The dispatch() method
accepts the current HTTP request path and invokes the matching route callback.
The magic happens on line 11 when we bind the route callback to the current
App instance. This lets us create a callback function that can manipulate
the App instance state:
<?php$app=newApp();$app->addRoute('/users/josh',function(){$this->responseContentType='application/json;charset=utf8';$this->responseBody='{"name": "Josh"}';});$app->dispatch('/users/josh');
Bytecode caches are not new to PHP. We’ve had optional standalone extensions like Alternative PHP Cache (APC), eAccelerator, ionCube, and XCache. But none of these was built into the PHP core distribution until now. As of PHP 5.5.0, PHP has its own built-in bytecode cache called Zend OPcache.
First, let me explain what a bytecode cache is and why it is important. PHP is an interpreted language. When the PHP interpreter executes a PHP script, the interpreter parses the PHP script code, compiles the PHP code into a set of existing Zend Opcodes (machine-code instructions), and executes the bytecode. This happens for each PHP file during every request. This is a lot of overhead, especially if PHP must parse, compile, and execute PHP scripts over and over again for every HTTP request. If only there were a way to cache precompiled bytecode to reduce application response times and reduce stress on our system resources. You’re in luck.
A bytecode cache stores precompiled PHP bytecode. This means the PHP interpreter does not need to read, parse, and compile PHP code on every request. Instead, the PHP interpreter can read the precompiled bytecode from memory and execute it immediately. This is a huge timesaver and can drastically improve application performance.
Zend OPcache isn’t enabled by default; you must explicitly enable Zend OPcache when you compile PHP.
If you choose a shared web host, be sure you choose a good hosting company that provides PHP 5.5.0 or newer with Zend OPcache enabled.
If you compile PHP yourself (i.e., on a VPS or dedicated server),
you must include this option in your PHP ./configure command:
--enable-opcacheAfter you compile PHP, you must also specify the path to the Zend OPcache extension in your php.ini file with this line:
zend_extension=/path/to/opcache.so
The Zend OPcache extension file path is displayed immediately after PHP compiles successfully. If you forget to look for this as I often do, you can also find the PHP extension directory with this command:
php-config --extension-dir
If you use the popular Xdebug profiler by the incomparable Derick Rethans, your php.ini file must load the Zend OPcache extension before Xdebug.
After you update the php.ini file, restart the PHP process and you’re ready to go. You can confirm Zend OPcache is working correctly by creating a PHP file with this content:
<?phpphpinfo();
View this PHP file in a web browser and scroll down until you see the Zend OPcache extension section shown in Figure 2-2. If you don’t see this section, Zend OPcache is not running.
When Zend OPcache is enabled, you should configure the Zend OPcache settings in your php.ini configuration file. Here are the OPcache settings I like to use:
opcache.validate_timestamps=1 // "0" in productionopcache.revalidate_freq=0opcache.memory_consumption=64opcache.interned_strings_buffer=16opcache.max_accelerated_files=4000opcache.fast_shutdown=1
This part’s easy because the Zend OPcache works automatically when enabled. Zend OPcache automatically caches precompiled PHP bytecode in memory and executes the bytecode if available.
Be careful if the opcache.validate_timestamps INI directive is false. When
this setting is false, the Zend OPcache does not know about changes to your
PHP scripts, and you must manually clear Zend OPcache’s bytecode cache before
it recognizes changes to your PHP files. This setting is good for production
but inconvenient for development. You can enable automatic cache revalidation
with these php.ini configuration settings:
opcache.validate_timestamps=1opcache.revalidate_freq=0
Did you know that PHP has a built-in web server as of PHP 5.4.0? This is another hidden gem unknown to PHP developers who assume they need Apache or nginx to preview PHP applications. You shouldn’t use it for production, but PHP’s built-in web server is a perfect tool for local development.
I use PHP’s built-in web server every day, whether I’m writing PHP or not. I use it to preview Laravel and Slim Framework applications. I use it while building websites with the Drupal content-management framework. I also use it to preview static HTML and CSS if I’m just building out markup.
Remember, the PHP built-in server is a web server. It speaks HTTP, and it can serve static assets in addition to PHP files. It’s a great way to write and preview HTML locally without installing MAMP, WAMP, or a heavyweight web server.
It’s easy to start the PHP web server. Open your terminal application, navigate to your project’s document root directory, and execute this command:
php -S localhost:4000
This command starts a new PHP web server accessible at localhost. It listens on port 4000. Your current working directory is the web server’s document root.
You can now open your web browser and navigate to http://localhost:4000 to
preview your application. As you browse your application in your web browser, each
HTTP request is logged to standard out in your terminal application so you can see
if you application throws 400 or 500 responses.
Sometimes it’s useful to access the PHP web server from other machines
on your local network (e.g., for previewing on your iPad or local Windows box).
To do this, tell the PHP web server to listen on all interfaces by using
0.0.0.0 instead of localhost:
php-S0.0.0.0:4000
When you are ready to stop the PHP web server, close your terminal application or press Ctrl+C.
It’s not uncommon for an application to require its own
PHP INI configuration file, especially if it has unique
requirements for memory usage, file uploads, profiling,
or bytecode caching. You can tell the PHP built-in
server to use a specific INI file with the -c option:
php -S localhost:8000 -c app/config/php.ini
It’s a good idea to keep the custom INI file beneath the application’s root directory and, optionally, version-control the INI file if it should be shared with other developers on your team.
The PHP built-in server has one glaring omission. Unlike Apache or nginx, it doesn’t support .htaccess files. This makes it difficult to use front controllers that are common in many popular PHP frameworks.
A front controller is a single PHP file to which all HTTP requests are forwarded (via .htaccess files or rewrite rules). The front-controller PHP file is responsible for routing the request and dispatching the appropriate PHP code. This is a common pattern used by Symfony and other popular frameworks.
The PHP built-in server mitigates this omission with router scripts. The router script is executed before every HTTP request. If the router script returns false, the static asset referenced by the current HTTP request URI is returned. Otherwise, the output of the router script is returned as the HTTP response body. In other words, if you use a router script you’re effectively hardcoding the same functionality as an .htaccess file.
Using a router script is easy. Just pass the PHP script file path as a an argument when you start up the PHP built-in server:
php -S localhost:8000 router.php
Sometimes it’s helpful to know if your PHP script is served by PHP’s
built-in web server versus a traditional web server like Apache or
nginx. Perhaps you need to set specific headers for nginx (e.g.,
Status:) that should not be set for the PHP web server. You can detect
the PHP web server with the php_sapi_name() function. This function
returns the string cli-server if the current script is served with
the PHP built-in server:
<?phpif(php_sapi_name()==='cli-server'){// PHP web server}else{// Other web server}
PHP’s built-in web server should not be used for production. It is for local development only. If you use the PHP built-in web server on a production machine, be prepared for a lot of disappointed users and a flood of Pingdom downtime notifications.
The built-in server performs suboptimally because it handles one request at a time, and each HTTP request is blocking. Your web application will stall if a PHP file must wait on a slow database query or remote API response.
The built-in server supports only a limited number of mimetypes.
The built-in server has limited URL rewriting with router scripts. You’ll need Apache or nginx for more advanced URL rewrite behavior.
The modern PHP language has a lot of powerful features that can improve your applications. I’ve talked about my favorite features in this chapter. You can learn more about PHP’s latest features on the PHP website.
I’m sure you’re excited to start using these fun features in your applications. However, it’s important that you use these features correctly according to PHP community standards. And that’s exactly what we talk about in the next chapter.
There is a mind-boggling number of PHP components and frameworks. There are macro frameworks like Symfony and Laravel. There are micro frameworks like Silex and Slim. And there are legacy frameworks like CodeIgniter that were built long before modern PHP components existed. The modern PHP ecosystem is a veritable melting pot of code that helps us developers build amazing applications.
Unfortunately, older PHP frameworks were developed in isolation and do not share code with other PHP frameworks. If your project uses one of these older PHP frameworks, you’re stuck with the framework and must live inside the framework’s ecosystem. This centralized environment is OK if you are happy with the framework’s tools. However, what if you use the CodeIgniter framework but want to cherry-pick a helper library from the Symfony framework? You’re probably out of luck unless you write a one-off adapter specifically for your project.
What we’ve got here is a failure to communicate.
Cool Hand Luke
Do you see the problem? Frameworks created in isolation were not designed to communicate with other frameworks. This is extremely inefficient, both for developers (creativity is limited by framework choice) and for frameworks themselves (they re-invent code that already exists elsewhere). I have good news, though. The PHP community has evolved from a centralized framework model to a distributed ecosystem of efficient, interoperable, and specialized components.
Several PHP framework developers recognized this problem and began a
conversation at php|tek (a popular PHP conference) in 2009. They
discussed how to improve intraframework communication and efficiency.
Instead of writing a new and tightly coupled logging class, for example,
what if a PHP framework could share a decoupled logging class like
monolog? Instead of writing its own HTTP request and response classes,
what if a PHP framework could instead cherry-pick the excellent HTTP request
and response classes from the Symfony Framework’s symfony/httpfoundation
component? For this to work, PHP frameworks must speak a common language that allows them to
communicate and share with other frameworks. They need standards.
The PHP framework developers who serendipitously met at php|tek eventually created the PHP Framework Interop Group (PHP-FIG). The PHP-FIG is a group of PHP framework representatives who, according to the PHP-FIG website, “talk about the commonalities between our projects and find ways we can work together.” The PHP-FIG creates recommendations that PHP frameworks can voluntarily implement to improve communication and sharing with other frameworks.
The PHP-FIG is a self-appointed group of framework representatives. Its members are not elected, and they are not special in any way other than their willingness to improve the PHP community. Anyone can request membership. And anyone can submit feedback to PHP-FIG recommendations that are in the proposal process. Final PHP-FIG recommendations are typically adopted and implemented by many of the largest and most popular PHP frameworks. I highly encourage you to get involved with the PHP-FIG, if only to send feedback and help shape the future of your favorite PHP frameworks.
The PHP-FIG’s mission is framework interoperability. And framework interoperability means working together via interfaces, autoloading, and style.
PHP frameworks work together via shared interfaces. PHP interfaces allow frameworks to assume what methods are provided by third-party dependencies without worrying about how the dependencies implement the interface.
Refer to Chapter 2 for an in-depth explanation of PHP interfaces.
For example, a framework is happy to share a third-party logger object
assuming the shared logger object implements the
emergency(), alert(), critical(), error(), warning(),
notice(), info(), and debug() methods. Exactly how these methods
are implemented is irrelevant. Each framework cares only that the third-party
dependency does implement these methods.
Interfaces enable PHP developers to build, share, and use specialized components instead of monolithic frameworks.
PHP frameworks work together via autoloading. Autoloading is the process by which a PHP class is automatically located and loaded on-demand by the PHP interpreter during runtime.
Before PHP standards, PHP components and frameworks implemented their
own unique autoloaders using the magic \__autoload() method or the more
recent spl_autoload_register() method. This required us to
learn and use a unique autoloader for each component and framework.
Nowadays, most modern PHP components and frameworks are compatible with
a common autoloader standard. This means we can mix and match multiple
PHP components with only one autoloader.
PHP frameworks work together via code style. Your code style determines spacing, capitalization, and bracket placement (among other things). If PHP frameworks agree on a standard code style, PHP developers don’t need to learn a new style every time they use a new PHP framework. Instead, PHP framework code is immediately familiar. A standard code style also lowers the barrier for new project contributors, who can spend more time squashing bugs and less time learning an unfamiliar style.
Standard code style also improves our own projects. Every developer has a unique style with more than a few idiosyncrasies, and these become a problem when multiple developers work on the same codebase. A standard code style helps all team members immediately understand the same codebase regardless of its author.
PSR is an acronym for PHP standards recommendation. If you’ve recently read a PHP-related blog, you have probably seen the terms PSR-1, PSR-2, PSR-3, and so on. These are PHP-FIG recommendations. Their names begin with PSR- and end with a number. Each PHP-FIG recommendation solves a specific problem that is frequently encountered by most PHP frameworks. Instead of PHP frameworks continually re-solving the same problems, frameworks can instead adopt the PHP-FIG’s recommendations and build upon shared solutions.
The PHP-FIG has published five recommendations as of this book’s publication:
If you counted only four recommendations, you are correct. The PHP-FIG deprecated its first PSR-0 recommendation. This first recommendation was replaced by the newer PSR-4 recommendation.
Notice how the PHP-FIG recommendations coincide nicely with the three interoperability methods I mentioned earlier: interfaces, autoloading, and code style. This is not a coincidence.
I’m really excited about the PHP-FIG recommendations. They are the bedrock beneath the modern PHP ecosystem. They define the means with which PHP components and frameworks interoperate. I admit, PHP standards are not the most scintillating of topics, but they are (in my mind) prerequisite to understanding modern PHP.
If you want to write PHP code that is compatible with community standards, start with PSR-1. It’s the easiest PHP standard to use. It’s so easy, you’re probably already using it without even trying. PSR-1 provides simple guidelines that are easy to implement with minimal effort. The point of PSR-1 is to provide a baseline code style for participating PHP frameworks. You must satisfy these requirements to be compatible with PSR-1:
You must surround your PHP code with either the <?php ?>
or <?= ?> tags. You must not use any other PHP tag syntax.
All PHP files must be encoded with the UTF-8 character set without a byte order mark (BOM). This sounds complicated, but your text editor or IDE can do this for you automatically.
A single PHP file can either define symbols (a class, trait, function, constant, etc.) or perform an action that has side effects (e.g., create output or manipulate data). A PHP file should not do both. This is a simple task and requires only a little foresight and planning on your part.
Your PHP namespaces and classes must support the PSR-4 autoloader standard. All you have to do is choose appropriate names for your PHP symbols and make sure their definition files are in the expected location. We’ll chat about PSR-4 soon.
Your PHP class names must use the common CamelCase
format. This format is also called TitleCase. Examples are
CoffeeGrinder, CoffeeBean, and PourOver.
Your PHP constants must use all uppercase characters.
They may use underscores to separate words if necessary. Examples are
WOOT, LET_OUR_POWERS_COMBINE, and GREAT_SCOTT.
Your PHP method names must use the common camelCase
format. This means the method name’s first character is lowercase, and
the first letter of each subsequent word in the method name is
uppercase. Examples are phpIsAwesome, iLoveBacon, and
tennantIsMyFavoriteDoctor.
After you implement PSR-1, the next step is to implement PSR-2. The PSR-2 standard further defines PHP code style with stricter guidelines.
The PSR-2 code style is a godsend for PHP frameworks that have many contributors from around the world, all of whom bring their own unique style and preferences. A common strict code style lets developers write code that is easily and quickly understood by other contributors.
Unlike PSR-1, the PSR-2 recommendation contains stricter guidelines. Some of PSR-2’s guidelines may not be what you prefer. However, PSR-2 is the preferred code style of many popular PHP frameworks. You don’t have to use PSR-2, but doing so will drastically improve the ability for other developers to read, use, and contribute to your PHP code.
You should use the stricter PSR-2 code style. Even though I call it strict, it’s easy enough to write. Eventually it’ll become second nature. Also, there are tools available to automatically format existing PHP code into the PSR-2 style.
The PSR-2 code style requires that you implement the PSR-1 code style.
This is a hot topic that is typically divided into two camps. The first camp prefers to indent code with a single tab character. The second (and much cooler) camp prefers to indent code with several space characters. The PSR-2 recommendation says PHP code should be indented with four space characters.
From personal experience, space characters are better suited for indentation because a space is a definitive measure that largely renders the same in different code editors. A tab, however, can vary in width and renders differently in different code editors. Use four space characters to indent code to ensure the best visual continuity for your code.
Your PHP files must use Unix linefeed (LF) endings, must end with a
single blank line, and must not include a trailing ?> PHP tag. Each line
of code should not exceed 80 characters. Ultimately, each line of code
must not exceed 120 characters. Each line must not have trailing white space.
This sounds like a lot of work, but it’s really not. Most code editors can
automatically wrap code to a specific width, strip trailing whitespace,
and use Unix line endings. All of these should happen automatically with
little to no thought on your part.
Omitting the trailing ?> PHP tag was odd to me at first.
However, it is good practice to omit the closing tag to avoid
unexpected output errors. If you do include the ?> closing tag, and also a
blank line after the closing tag, the blank line is considered output
and can cause errors (e.g., when you set HTTP headers).
I know many PHP developers who type TRUE, FALSE, and NULL in
uppercase characters. If you do this, try to unlearn this practice and
instead use only lowercase characters from now on. The PSR-2 recommendation
says that you should type all PHP keywords in lowercase.
Each namespace declaration must be followed by one blank
line. Likewise, when you import or alias namespaces with the use
keyword, you must follow the block of use declarations with one blank
line. Here’s an example:
<?phpnamespaceMy\Component;useSymfony\Components\HttpFoundation\Request;useSymfony\Components\HttpFoundation\Response;classApp{// Class definition body}
Like indentation, class definition bracket placement is another topic
that attracts heated debate. Some prefer the opening bracket to reside
on the same line as the class name. Others prefer the opening bracket to
reside on a new line after the class name. The PSR-2 recommendation
says a class definition’s opening bracket must reside on a new line
immediately after the class definition name as shown in the following example. The class definition’s closing bracket must reside on a new
line after the end of the class definition body. This is probably what
you have been doing already so it’s not as big a deal. If your class extends
another class or implements an interface, the extends and implements keywords
must appear on the same line as the class name:
<?phpnamespaceMy\App;classAdministratorextendsUser{// Class definition body}
Method definition bracket placement is the same as class definition bracket placement. The method definition’s opening bracket resides on a new line immediately after the method name. The method definition’s closing bracket resides on a new line immediately after the method definition body. Pay close attention to the method arguments. The first parenthesis does not have a trailing space, and the last parenthesis does not have a preceding space. Each method argument (except the last) is followed immediately by a comma and one space character:
<?phpnamespaceAnimals;classStrawNeckedIbis{publicfunctionflapWings($numberOfTimes=3,$speed='fast'){// Method definition body}}
You must declare a visibility for
each class property and method. A visibility is one of public,
protected, or private; visibility determines how a property or method
is accessible within and outside of its class. Old-school PHP developers
may be accustomed to prefixing class properties with the var keyword
and prefixing private methods with the underscore _ character. Do not
do this. Use one of the visibilities listed previously instead. If you declare a
class property or method as abstract or final, the abstract and final
qualifiers must appear before the visibility. If you declare a property or
method as static, the static qualifier must appear after the visibility:
<?phpnamespaceAnimals;classStrawNeckedIbis{// Static property with visibilitypublicstatic$numberOfBirds=0;// Method with visibilitypublicfunction__construct(){static::$numberOfBirds++;}}
This is probably the one guideline that trips me up the most. All control structure keywords must be followed by a single space character.
A control structure keyword is if, elseif, else, switch,
case, while, do while, for, foreach, try, or catch.
If the control structure keyword requires a set of parentheses, make sure
the first parenthesis is not followed by a space character, and make
sure the last parenthesis is not preceded by a space character. Unlike in
class and method definitions, opening brackets that appear after a control
structure keyword must remain on the same line as the control structure keyword.
The control structure keyword’s closing bracket must reside on a new line.
Here’s a brief example that demonstrates these guidelines:
<?php$gorilla=new\Animals\Gorilla;$ibis=new\Animals\StrawNeckedIbis;if($gorilla->isAwake()===true){do{$gorilla->beatChest();}while($ibis->isAsleep()===true);$ibis->flyAway();}
You can automate PSR-1 and PSR-2 code style compatibility. Many
code editors automatically format your code according to PSR-1 and PSR-2.
There are tools available to help you audit and format your code
against PHP standards, too. One such tool is the PHP Code Sniffer,
also called phpcs. This tool (used directly on the command line or via your IDE)
reports inconsistencies between your code and a given PHP code standard. You
can install phpcs with most package managers (e.g., PEAR, Homebrew, Aptitude, or Yum).
You can also use Fabien Potencier’s PHP-CS-Fixer to correct most incompatibilities automatically. This tool is not perfect, but it’ll get you most of the way toward PSR compatibility with little or no effort on your part.
The third PHP-FIG recommendation is not a set of guidelines like its predecessors. PSR-3 is an interface, and it prescribes methods that can be implemented by PHP logger components.
A logger is an object that writes messages of varying importance
to a given output. Logged messages are used to diagnose, inspect, and
troubleshoot application operation, stability, and performance. Examples
include writing debug information to a text file during development,
capturing website traffic statistics into a database, or emailing fatal
error diagnostics to a website administrator. The most popular PHP
logger component is monolog/monolog,
created by Jordi Boggiano.
Many PHP frameworks implement logging in some capacity. Before the PHP-FIG, each framework solved logging differently, often with a proprietary implementation. In the spirit of interoperability and specialization—recurring motifs in modern PHP—the PHP-FIG established the PSR-3 logger interface. Frameworks that accept PSR-3 compatible loggers accomplish two important things: logging concerns are delegated to a third party, and end users can provide their preferred logger component. It’s a win-win for everyone.
A PHP logger component compatible with the PSR-3 recommendation must include
a PHP class that implements the interface named Psr\Log\LoggerInterface.
The PSR-3 interface replicates the RFC 5424 syslog protocol
and prescribes nine methods:
<?phpnamespacePsr\Log;interfaceLoggerInterface{publicfunctionemergency($message,array$context=array());publicfunctionalert($message,array$context=array());publicfunctioncritical($message,array$context=array());publicfunctionerror($message,array$context=array());publicfunctionwarning($message,array$context=array());publicfunctionnotice($message,array$context=array());publicfunctioninfo($message,array$context=array());publicfunctiondebug($message,array$context=array());publicfunctionlog($level,$message,array$context=array());}
Each interface method maps to a corresponding RFC 5424 protocol level and accepts
two arguments. The first $message argument must be a string or an object
with a __toString() method. The second $context argument is optional and
provides an array of placeholder values that replace tokens in the first argument.
Use the $context argument to construct complicated logger messages.
You use placeholders in the message text. A placeholder looks
like {placeholder_name}; it contains a {, the placeholder name,
and a }. A placeholder does not contain spaces. The $context argument
is an associative array; its keys are placeholder names (without brackets),
and its values replace the related placeholders in the message text.
To write a PSR-3 logger, create a new PHP class that implements the
Psr\Log\LoggerInterface interface and provide a concrete
implementation for each interface method.
If you are creating your own PSR-3 logger, stop and reconsider if you are spending your time wisely. I strongly discourage you from writing your own logger. Why? Because there are some truly amazing PHP logger components already available!
If you need a PSR-3 logger, just use monolog/monolog.
Don’t waste time looking elsewhere. The Monolog PHP component
fully implements the PSR-3 interface, and it’s easily extended with custom message
formatters and handlers. Monolog’s message handlers let you send log messages to
text files, syslog, email, HipChat, Slack, networked servers, remote APIs, databases,
and pretty much anywhere else you can imagine. In the very unlikely event Monolog
does not provide a handler for your desired output destination, it’s
super-easy to write and integrate your own Monolog message handler. Example 3-1 demonstrates how easy it is to setup Monolog and log messages to a text file.
<?phpuseMonolog\Logger;useMonolog\Handler\StreamHandler;// Prepare logger$log=newLogger('myApp');$log->pushHandler(newStreamHandler('logs/development.log',Logger::DEBUG));$log->pushHandler(newStreamHandler('logs/production.log',Logger::WARNING));// Use logger$log->debug('This is a debug message');$log->warning('This is a warning message');
The fourth PHP-FIG recommendation describes a standardized autoloader strategy. An autoloader is a strategy for finding a PHP class, interface, or trait and loading it into the PHP interpreter on-demand at runtime. PHP components and frameworks that support the PSR-4 autoloader standard can be located by and loaded into the PHP interpreter with only one autoloader. This is a big deal given the modern PHP ecosystem’s affinity for many interoperable components.
How often have you seen code like this at the top of your PHP files?
<?phpinclude'path/to/file1.php';include'path/to/file2.php';include'path/to/file3.php';
All too often, right? You’re probably familiar with the require(), require_once(), include(),
and include_once() functions. These functions load an external PHP file into the
current script, and they work wonderfully if you have only a few PHP scripts.
However, what if you need to include a hundred PHP scripts? What if you need to include a thousand PHP
scripts? The require() and include() functions do not scale well, and this is why
PHP autoloaders are important. An autoloader is a strategy for finding a PHP class,
interface, or trait and loading it into the PHP interpreter on-demand at runtime, without
explicitly including files as the example does.
Before the PHP-FIG introduced its PSR-4 recommendation, PHP component and framework authors
used the __autoload() and spl_autoload_register() functions to register custom
autoloader strategies. Unfortunately, each PHP component and framework used a unique
autoloader, and every autoloader used different logic to locate and load PHP classes,
interfaces, and traits. Developers using these components and frameworks were obliged
to invoke each component’s autoloader when bootstrapping a PHP application. I use Sensio Labs’
Twig template component all the time. It’s awesome. Without PSR-4, however, I have
to read Twig’s documentation and figure out how to register its custom autoloader
in my application’s bootstrap file, like this:
<?phprequire_once'/path/to/lib/Twig/Autoloader.php';Twig_Autoloader::register();
Imagine having to research and register unique autoloaders for every PHP component in your application. The PHP-FIG recognized this problem and proposed the PSR-4 autoloader recommendation to facilitate component interoperability. Thanks to PSR-4, we can autoload all of our application’s PHP components with only one autoloader. This is amazing. Most modern PHP components and frameworks are compatible with PSR-4. If you write and distribute your own components, make sure they are compatible with PSR-4, too! Participating components include Symfony, Doctrine, Monolog, Twig, Guzzle, SwiftMailer, PHPUnit, Carbon, and many others.
Like any PHP autoloader, PSR-4 describes a strategy to locate and load PHP classes, interfaces, and traits during runtime. The PSR-4 recommendation does not require you to change your code’s implementation. Instead, PSR-4 only suggests how your code is organized into filesystem directories and PHP namespaces. The PSR-4 autoloader strategy relies on PHP namespaces and filesystem directories to locate and load PHP classes, interfaces, and traits.
The essence of PSR-4 is mapping a top-level namespace prefix to a specific
filesystem directory. For example, I can tell PHP that classes, interfaces,
or traits beneath the \Oreilly\ModernPHP namespace live beneath the src/
physical filesystem directory. PHP now knows that any classes, interfaces, or traits
that use the \Oreilly\ModernPHP namespace prefix correspond to directories and files
beneath the src/ directory. For example, the \Oreilly\ModernPHP\Chapter1 namespace
corresponds to the src/Chapter1 directory, and the \Oreilly\ModernPHP\Chapter1\Example
class corresponds to the src/Chapter1/Example.php file.
PSR-4 lets you map a namespace prefix to a filesystem directory. The namespace prefix can be one top-level namespace. The namespace prefix can also be a top-level namespace and any number of subnamespaces. It’s quite flexible.
Remember when we talked about vendor namespaces in Chapter 2? The PSR-4 autoloader strategy is most relevant to component and framework authors who distribute code to other developers. A PHP component’s code lives beneath a unique vendor namespace, and the component’s author specifies which filesystem directory corresponds to the component’s vendor namespace—exactly as I demonstrated earlier. We’ll explore this concept more in Chapter 4.
We know that PSR-4 compatible code has a namespace prefix that maps to a base filesystem directory. We also know that subnamespaces beneath the namespace prefix map to subdirectories beneath the base filesystem directory. Example 3-2 shows an autoloader implementation, borrowed from the PHP-FIG website, that finds and loads classes, interfaces, and traits based on the PSR-4 autoloader strategy.
<?php/*** An example of a project-specific implementation.** After registering this autoload function with SPL, the following line* would cause the function to attempt to load the \Foo\Bar\Baz\Qux class* from /path/to/project/src/Baz/Qux.php:** new \Foo\Bar\Baz\Qux;** @param string $class The fully qualified class name.* @return void*/spl_autoload_register(function($class){// project-specific namespace prefix$prefix='Foo\\Bar\\';// base directory for the namespace prefix$base_dir=__DIR__.'/src/';// does the class use the namespace prefix?$len=strlen($prefix);if(strncmp($prefix,$class,$len)!==0){// no, move to the next registered autoloaderreturn;}// get the relative class name$relative_class=substr($class,$len);// replace the namespace prefix with the base directory, replace namespace// separators with directory separators in the relative class name, append// with .php$file=$base_dir.str_replace('\\','/',$relative_class).'.php';// if the file exists, require itif(file_exists($file)){require$file;}});
Copy and paste this into your application, change the $prefix and $base_dir
variables, and you have yourself a working PSR-4 autoloader. However,
if you find yourself writing your own PSR-4 autoloader, stop and ask
yourself if what you are doing is really necessary. Why? Because we
can use PSR-4 autoloaders that are automagically generated by the
Composer dependency manager. Conveniently enough, that’s exactly
what we’ll talk about next in Chapter 4.
Modern PHP is less about monolithic frameworks and more about composing solutions from specialized and interoperable components. When I build a new PHP application, rarely do I reach straight for Laravel or Symfony. Instead, I think about which existing PHP components I can combine to solve my problem.
Modern PHP components are a new concept to many PHP programmers. I had no idea about PHP components until a few years ago. Before I knew better, I instinctually started PHP applications with a massive framework like Symfony or CodeIgniter without considering other options. I invested in a single framework’s closed ecosystem and used the tools it provided. If the framework did not provide what I needed, I was out of luck and I built additional functionality on my own. It was also difficult to integrate custom or third-party libraries into larger frameworks because they did not share common interfaces. I am relieved to inform you that times have changed, and we are no longer beholden to monolithic frameworks and their walled gardens.
Today, we choose from a vast and continually growing collection of specialized components
to create custom applications. Why waste time coding an HTTP request and response library
when the guzzle/http component already exists?
Why create a new router when the aura/router
and orno/route components work great? Why spend
time coding an adapter to Amazon’s S3 online storage service when the
aws/aws-sdk-php and
league/flysystem components can be used
instead? You get my drift. Other developers have spent countless development hours creating,
perfecting, and testing specialized components that do one thing really well. It’s silly not
to take advantage of these components to build better applications more quickly instead of
wasting time reinventing the wheel.
A component is a bundle of code that helps solve a specific problem in your PHP application. For example, if your PHP application sends and receives HTTP requests, there’s a component to do that. If your PHP application parses comma-delimited data, there’s a PHP component to do that. If your PHP application needs a way to log messages, there’s a component for that. Instead of rebuilding already-solved functionality, we use PHP components and spend more time solving our project’s larger objectives.
Technically speaking, a PHP component is a collection of related classes, interfaces, and traits that solve a single problem. A component’s classes, interfaces, and traits usually live beneath a common namespace.
In any marketplace, there are good products and there are bad products. The same concept applies to PHP components. Just as you inspect an apple at the grocery store, you can use a few tricks to spot a good PHP component. Here are a few characteristics of good PHP components:
A PHP component is laser-focused and exists only to solve a single problem very well. It is not a jack-of-all-trades and master of none; it is a master of one. It is obsessed with solving a single problem, and it encapsulates its genius beneath a simple user interface.
A PHP component is no larger than it needs to be. It contains the least amount of PHP code necessary to solve one problem. The amount of code varies. A PHP component can have one PHP class. It can also have several PHP classes organized into subnamespaces. There is no correct number of classes in a PHP component. It uses however many are necessary to solve its one problem.
A PHP component plays well with others. After all, this is the point of PHP components—their existence depends on their cooperation with other components to build larger solutions. A PHP component does not pollute the global namespace with its own code. Instead, a PHP component lives beneath its own namespace to avoid name collisions with other components.
A PHP component is well-tested. This is easy to accomplish thanks to its small size. If a PHP component is small and laser-focused, it is very likely easily tested. Its concerns are few, and its dependencies can be easily identified and mocked. The best PHP components provide their own tests and have sufficient test coverage.
A PHP component is well-documented. It should be easy for developers to install, understand, and use. Good documentation makes this possible. The PHP component should have a README file that says what the component does, how to install it, and how to use it. The component may also have its own website with more in-depth information. And good documentation should also extend into the PHP component’s source code. Its classes, methods, and properties should have inline docblocks that describe the code, its parameters, its return values, and its potential exceptions.
The problem with frameworks (particularly older frameworks) is that they are an expensive investment. When we choose a framework, we invest in that framework’s tools. Frameworks usually provide a smorgasbord of tools. But sometimes we need a specific something that the framework does not provide, and it becomes our burden to find and integrate a custom PHP library. Integrating third-party code into a framework is difficult because the third-party code and the PHP framework probably don’t share common interfaces.
When we choose a framework, we invest in that framework’s future. We put our faith behind the framework’s core development team. We assume the framework’s developers will continue investing their own time into developing the framework and ensuring that its code remains up-to-date with modern standards. And often this does not happen. Frameworks are very large, and they require a lot of time and effort to maintain. Project maintainers have their own lives, jobs, and interests. And lives, jobs, and interests change.
To be fair, larger PHP components are also at risk of abandonment, especially if a component only has one core developer.
Also, who’s to say that a particular framework will remain the best tool for the job? Large projects that exist for many years must perform well and be well-tuned now and into the future. The wrong PHP framework may hinder this ability. Older PHP frameworks that have fallen out of fashion may become slower and outmoded as they lose community support. Older frameworks are often written with procedural code instead of modern object-oriented code. Your newer team members may be unfamiliar with an older framework’s codebase. There is a lot to consider when deciding whether or not to use a PHP framework.
So far I’ve spoken only about the downsides of frameworks. Frameworks are not all bad. Symfony is an excellent example of a modern PHP framework. Fabien Potencier and Sensio Labs built the Symfony Framework as an amalgam of smaller and decoupled Symfony components. These components can be used together as a framework or piecemeal in custom applications.
Other, older frameworks are making a similar transition to modern PHP components. The Drupal content management framework is another example. Drupal 7 is written with procedural PHP code that lives in the global PHP namespace. It ignores modern PHP practices to support its legacy codebase. However, Drupal 8 is a ginormous and commendable leap into modern PHP. Drupal 8 leverages the comparative advantages of many different PHP components to build a modern content management platform.
Laravel is also a popular PHP framework written by Taylor Otwell. Like Symfony, Laravel is built atop its own Illuminate component library. However (at time of publishing), Laravel’s components are not easily decoupled for use in non-Laravel applications. Laravel does not use the PSR-2 community standards, and Laravel does not adhere to the Semantic Versioning scheme. Don’t let this dissuade you though. Laravel is still an amazing framework that can create very powerful applications.
Should you use components or a framework? Use the right tool for the job. Most modern PHP frameworks are only a set of conventions built atop smaller PHP components.
If you are working on a smaller project that can be solved with a precise collection of PHP components, then use components. Components make it super-easy to shop for and use existing tools so we can focus less on boilerplate and more on the larger task at hand. Components also help our code remain lightweight and nimble. We use only the code we need, and it’s super-easy to swap one component with another that may be better suited for our project.
If you are working on a large project with multiple team members and can benefit from the conventions, discipline, and structure provided by a framework, then use a framework. However, frameworks make many decisions for us and require us to adhere to its set of conventions. Frameworks are less flexible, but we do get far more out-of-the-box than we do with a collection of PHP components. If these tradeoffs are acceptable, by all means use a framework to guide and expedite your project development.
You can find modern PHP components on Packagist (Figure 4-1), the de facto PHP component directory. This website aggregates PHP components and makes them searchable by keyword. The best PHP components are listed on Packagist. I tip my hat to Jordi Boggiano and Igor Wiedler for creating such an invaluable community resource.
I’m often asked which components I believe are the best PHP components. This is a subjective question. However, I largely agree with the PHP components listed at Awesome PHP. This is a list of good PHP components curated by Jamie York.
Do not waste your time solving problems that are already solved. Do you need to send or receive HTTP
messages? Go to Packagist and search for http; Guzzle is the first result. Use it. Do you need to
parse a CSV file? Go to Packagist and search for csv; pick a CSV component and use it. Think of
Packagist as a grocery store for PHP components where you can shop for the best ingredients. Packagist
probably has a PHP component that solves your problem.
What if there are multiple PHP components on Packagist that do what you need? How do you pick the best one? Packagist keeps statistics about each PHP component. Packagist tells you how many times each PHP component has been downloaded and starred (Figure 4-2). More downloads and stars indicate a component may be a good option (this is not always true). That being said, don’t discount newer packages with fewer downloads. Many new components are added every day.
It can be difficult to find the perfect PHP component if your Packagist keyword search returns a large number of results. You can’t always rely on download statistics, because crowds are not always right. This is a problem that Packagist must address as it becomes more popular. I recommend you rely on word of mouth and peer recommendations to confirm your PHP component selection.
If you find a PHP component that you like, star the PHP component on Packagist and share it with your fellow PHP developers on Twitter, Facebook, IRC, Slack, and your other communication channels. This helps the best PHP components bubble up so they are discovered by other developers.
Packagist is where you find PHP components. Composer is how you install PHP components. Composer is a dependency manager for PHP components that runs on the command line. You tell Composer which PHP components you need, and Composer downloads and autoloads the components into your project. It’s as simple as that. Because Composer is a dependency manager, it also resolves and downloads your components’ dependencies (and their dependencies, ad infinitum).
Composer works hand-in-hand with Packagist, too. When you tell Composer you want to use the
guzzlehttp/guzzle component, Composer fetches the guzzlehttp/guzzle component listing on
Packagist, finds the component’s repository URL, determines the appropriate version to use,
and discovers the component’s dependencies. Composer then downloads the guzzlehttp/guzzle
component and its dependencies into your project.
Composer is important because dependency management and autoloading are hard problems to solve.
Autoloading is the process of automatically loading PHP classes on-demand without explicitly
loading them with the require(), require_once(), include(), or include_once() functions.
Older PHP versions let us write custom autoloaders with the \__autoload() function; this function
is automatically invoked by the PHP interpreter when we instantiate a class that has not already
been loaded. PHP later introduced the more flexible spl_autoload_register() function in its
SPL library. Exactly how a PHP class is autoloaded is entirely up to the developer. Unfortunately,
the lack of a common autoloader standard often necessitates a unique autoloader implementation
for every project. This makes it difficult to use code created and shared by other developers
if each developer provides a unique autoloader.
The PHP Framework Interop Group recognized this problem and created the PSR-0 standard (superseded by the PSR-4 standard). The PSR-0 and PSR-4 standards suggest how to organize code into namespaces and filesystem directories so it is compatible with one standard autoloader implementation. As I alluded to in Chapter 3, we don’t have to write a PSR-4 autoloader on our own. Instead, the Composer dependency manager automatically generates a PSR-compatible autoloader for all of our project’s PHP components. Composer effectively abstracts away dependency management and autoloading.
I believe Composer is the most important addition to the PHP community, period. It changed the way I create PHP applications. I use Composer for every PHP project because it drastically simplifies integrating and using third-party PHP components in my applications. If you haven’t used Composer yet, you should start researching Composer today.
Composer is easy to install. Open a terminal and execute this command:
curl -sS https://getcomposer.org/installer | php
This command downloads the Composer installer script with curl, executes the installer script
with php, and creates a composer.phar file in the current working directory. The composer.phar
file is the Composer binary.
Never execute code that you blindly download from a remote URL. Be sure you review the remote code first so you know exactly what it will do. Also make sure you download the remote code over HTTPS.
I prefer to move and rename the downloaded Composer binary to /usr/local/bin/composer with this command:
sudo mv composer.phar /usr/local/bin/composer
Be sure you run this command to make the composer binary executable:
sudo chmod +x /usr/local/bin/composer
Finally, add the /usr/local/bin directory to your environment PATH by appending this
line to your ~/.bash_profile file:
PATH=/usr/local/bin:$PATH
You should now be able to execute composer in your terminal application to see a list
of Composer options (Figure 4-3).
Now that Composer is installed, let’s download some PHP components. Composer is typically used to download PHP components on a per-project basis.
First, you should make a list of the components you need for your project. Specifically,
note each component’s vendor and package names. Each PHP
component has a vendor name and a package name. For example, the popular
league/flysystem component’s vendor name is
league and its package name is flysystem. The vendor and package names are separated with
a / character. Together, the vendor and package names form the full component name
league/flysystem.
The vendor name is globally unique and provides the global identity to
which its encompassed packages belong. The package name uniquely identifies a single package
beneath a given vendor name. Composer and Packagist use the vendor/package naming convention
to avoid name collisions among PHP components from different vendors. You can find a PHP
component’s vendor and package names on the component’s Packagist directory listing (Figure 4-4).
Each PHP component can have many available versions (e.g., 1.0.0, 1.5.0, or 2.15.0).
All available versions are listed on the component’s Packagist directory listing.
Modern PHP components use the Semantic Versioning scheme and contain three
numbers separated with a period (.) character (e.g., 1.13.2). The first number is the
major release number; the major release number is incremented whenever the PHP component is
updated with changes that break backward compatibility. The second number is the minor release
number; the minor release number is incremented whenever the PHP component is updated with minor
features that do not break backward compatibility. The third and final number is the
patch release number; the patch release number is incremented when the PHP component receives
backward-compatible bug fixes.
Fortunately, we don’t have to figure out each component’s most stable version number. Composer does this for us. Navigate to your project’s topmost directory in your terminal application and run this command once for each PHP component:
composer require vendor/package
Replace vendor/package with the component’s vendor and package names. To install the Flysystem component,
for example, run this command:
composer require league/flysystem
This command instructs Composer to find and install the PHP component’s most stable version. It also
instructs Composer to update the component up to, but not including, the component’s next major version.
The previous example, as of October 2014, installs Flysystem version 0.5.9, and it will update the
Flysystem component up to, but not including, version 1.*.
You can review the result of this command in the newly created or updated composer.json file in your project’s topmost directory. This command also creates a composer.lock file. Commit both of these files into your version control system.
Let’s reinforce our Composer skills by building an example PHP application that scans URLs from a CSV
file and reports all inaccessible URLs. Our project will send an HTTP request to each URL. If a
URL returns an HTTP response with a status code greater than or equal to 400, we’ll send the
inaccessible URL to standard out. Our project will be a command-line application, and the path
to the CSV file will be the first and only command-line argument. Ultimately, we’ll execute our
script, pass it the CSV file path, and see a list of inaccessible URLs on standard out:
php scan.php /path/to/urls.csv
Our project directory looks like Figure 4-5.
The first thing I do when starting a new PHP project is determine what tasks can be solved with existing PHP components. The scan.php script opens and iterates a CSV file, so we’ll need a PHP component that can read and iterate CSV data. The scan.php script also sends an HTTP request to each URL in the CSV file, so we’ll need a PHP component that can send HTTP requests and inspect HTTP responses. It is certainly possible to write our own code to iterate a CSV file or send HTTP requests, but why should we waste our time if these problems are already solved? Remember, our goal is to scan a list of URLs. Our job is not to build HTTP and CSV parser libraries.
After browsing Packagist, I find the guzzlehttp/guzzle and league/csv PHP components. The former
handles HTTP messages and the latter parses and iterates CSV data. Let’s install these components
with Composer using these commands in the project’s topmost directory:
composer require guzzlehttp/guzzle;composer require league/csv;
These commands instruct Composer to download these two components into a new vendor/ directory in the project’s topmost directory. It also creates a composer.json file and a composer.lock file.
After you install project dependencies with Composer, you’ll notice that Composer creates a composer.lock file. This file lists all of the PHP components used by our project and the components’ exact version numbers (including major, minor, and patch numbers). This effectively locks our project to these specific PHP component versions.
Why is this important? If a composer.lock file is present, Composer downloads the specific PHP component versions listed in the composer.lock file regardless of the component’s latest available version on Packagist. You should version control the composer.lock file and distribute it to your team members so they can use the same PHP component versions as you. If your team members, your staging server, and your production server all use the same PHP component versions, you minimize the risk of bugs caused by component version discrepancies.
The one downside with the composer.lock file is that composer install will not install versions
newer than those listed in the composer.lock file. If you do need to download newer component
versions and update your composer.lock file, use composer update. The composer update
command updates your components to their latest stable versions and also updates the composer.lock
file with new PHP component version numbers.
Now that our project’s PHP components are installed with Composer, how do we use them? Luckily for us,
when Composer downloads the PHP components it also creates a single PSR-compatible autoloader for all
of our project dependencies. All we have to do is require Composer’s autoloader at the top of
the scan.php file:
<?phprequire'vendor/autoload.php';
Composer’s autoloader is just a PHP file named autoload.php located inside the vendor/ directory. When Composer downloads each PHP component, Composer inspects each component’s own composer.json file to determine how the component prefers to be autoloaded and, with this information, creates a local PSR-compatible autoloader for it. Ultimately, we can instantiate any of our project’s PHP components and they are autoloaded on-demand! Pretty neat, huh?
Let’s finish the scan.php script using the Guzzle and CSV components. Remember, the path to
the CSV file is provided as the first command-line argument (accessible in the $argv array)
when our PHP script is executed. The scan.php script looks like Example 4-1.
<?php// 1. Use Composer autoloaderrequire'vendor/autoload.php';// 2. Instantiate Guzzle HTTP client$client=new\GuzzleHttp\Client();// 3. Open and iterate CSV$csv=new\League\Csv\Reader($argv[1]);foreach($csvas$csvRow){try{// 4. Send HTTP OPTIONS request$httpResponse=$client->options($csvRow[0]);// 5. Inspect HTTP response status codeif($httpResponse->getStatusCode()>=400){thrownew\Exception();}}catch(\Exception$e){// 6. Send bad URLs to standard outecho$csvRow[0].PHP_EOL;}}
Pay attention to how we use the \League\Csv and \GuzzleHttp namespaces when we
instantiate the guzzlehttp/guzzle and league/csv components. How do we know to
use these particular namespaces? I read the guzzlehttp/guzzle and league/csv
documentation. Remember, good PHP components have documentation.
Add a few URLs to the urls.csv file, one URL per line. Make sure at least one URL is invalid. Next, open a terminal and execute the scan.php script:
php scan.php urls.csv
We execute the php binary and pass it two arguments. The first argument is the path
to the scan.php script. The second argument is the path to the CSV file that contains
a list of URLs. If any of the URLs return an unsuccessful HTTP response, they are output
to the terminal screen.
So far I’ve assumed you are using open source PHP components that are publicly available. As much as I create and use open source software, I recognize that using only open source PHP components may not always be possible. Sometimes we have to mix open source and proprietary components in the same application. This is especially true for companies that use internally developed PHP components that cannot be open sourced due to licensing or security concerns. Composer makes this a nonissue.
Composer can manage private PHP components whose repositories require authentication.
When you run composer install or composer update, Composer prompts you if a
component’s repository requires authentication credentials. Composer also asks if
you want to save the repository authentication credentials in a local auth.json
file (created adjacent to the composer.json file). An example auth.json file looks like this:
{"http-basic":{"example.org":{"username":"your-username","password":"your-password"}}}
In most cases, you should not version control the auth.json file. Instead, let project developers create their own auth.json file with their own authentication credentials.
If you’d rather not wait for Composer to request authentication credentials, you can manually tell Composer your authentication credentials for a remote machine with this command:
composer config http-basic.example.org your-username your-password
In this example, http-basic lets Composer know we are adding authentication details
for a given domain. The example.org hostname identifies the remote machine that
contains the private component repository. The final two arguments are the username
and password credentials. By default, this command saves credentials in the current
project’s auth.json file.
You can also save authentication credentials system-wide by using the --global flag.
This flag lets Composer use your credentials for all projects on your local machine:
composer config --global http-basic.example.org your-username your-password
Global credentials are saved in the ~/.composer/auth.json file. If you are using Windows, global credentials are saved in %APPDATA%/Composer.
Learn more about Composer and private repositories in Authentication management in Composer.
By this point you should be able to find and use PHP components. Let’s switch gears and talk about creating PHP components. Specifically, we’ll convert the URL scanner application into a PHP component and submit it to the Packagist component directory.
Creating PHP components is a great way to share your work with the greater PHP community. The PHP community is built on a foundation of sharing and helping others. If you use open source components in your applications, it’s always nice to return the favor with a new and innovative open source component.
Be careful that you do not rewrite components that already exist. If you improve upon an existing component, consider sending your improvements to the original component as a pull request. Otherwise, you risk confusing and fragmenting the PHP component ecosystem with duplicate components.
Before I build a PHP component, I choose the component’s vendor and package name. Remember, each PHP component uses a globally unique vendor and package name combination to avoid name collisions with other components. I recommend you use only lowercase letters for your vendor and package names.
A vendor name is the brand or identity to which a component belongs. Many of my own
PHP components use the codeguy vendor name because this is my online identity.
Choose a vendor name that best represents you or your component’s brand.
Search Packagist before you choose a vendor name to make sure it is not already claimed by another developer.
A package name identifies a PHP component beneath a given vendor name. Many components
can live beneath a single vendor name. For this example, I’ll use modernphp as the vendor
name and scanner as the package name.
As we discussed in Chapter 2, each component lives beneath its own PHP namespace so that it does not pollute the global namespace or collide with other components that use the same PHP class names.
A common misconception is that the component’s PHP namespace must match the component’s vendor and package names. This is not true. The component’s PHP namespace is unrelated to the component’s vendor and package names. The vendor and package names are only used by Packagist and Composer to identify a component. You use the component’s namespace when using the component in your PHP code.
For this tutorial, we’ll create our component beneath the PHP namespace Oreilly\ModernPHP. This
namespace does not exist yet. I just pulled this out of thin air for this particular component.
PHP components have largely standardized on this filesystem structure:
This directory contains the component’s source code (e.g., PHP class files).
This directory contains the component’s tests. We will not use this directory in this example.
This is the Composer configuration file. This file describes the component and tells Composer’s
autoloader to map your component’s PSR-4 namespace to the src/ directory.
This Markdown file provides helpful information about this component, including its name, description, author, usage, contributor guidelines, software license, and credits.
This Markdown file describes how others can contribute to this component.
This plain-text file contains the component’s software license.
This Markdown file lists changes introduced in each new component version.
If you’re having trouble starting your own PHP component, have a look at the PHP League’s excellent PHP component boilerplate repository.
The composer.json file is required and must contain valid JSON. It includes information used by Composer to find, install, and autoload the PHP component. It also contains information for the component’s Packagist directory listing.
Example 4-2 shows a composer.json file for our URL scanner component. It includes all of the composer.json properties that I use most often for my own PHP components.
{"name":"modernphp/scanner","description":"Scan URLs from a CSV file and report inaccessible URLs","keywords":["url","scanner","csv"],"homepage":"http://example.com","license":"MIT","authors":[{"name":"Josh Lockhart","homepage":"https://github.com/codeguy","role":"Developer"}],"support":{"email":"help@example.com"},"require":{"php":">=5.4.0","guzzlehttp/guzzle":"~5.0"},"require-dev":{"phpunit/phpunit":"~4.3"},"suggest":{"league/csv":"~6.0"},"autoload":{"psr-4":{"Oreilly\\ModernPHP\\":"src/"}}}
This is admittedly a lot to digest, so let’s step through each composer.json property in detail:
nameThis is the component’s vendor and package name, separated with a / character. This value is
displayed on Packagist.
descriptionThis contains a few sentences that succinctly describe the component. This description is displayed on Packagist.
keywordsThis contains an appropriate number of keywords that describe the component. These keywords help others find this component on Packagist.
homepageThis is the URL of the component’s website.
licenseThis is the software license with which the PHP component is released. I prefer to use the MIT Public License. You can read more about software licenses at http://choosealicense.com. Remember to always release your code with a license.
authorsThis is an array of information for each project author. You should include at least a name and URL for each author.
supportThis is how the component’s users find technical support. I prefer to include an email address and support forum URL. You could also list an IRC channel, for example.
requireThis lists the PHP component’s own component dependencies. You should list each dependency’s vendor/package name and minimum version number. I also like to list the minimum PHP version required by this component. All dependencies listed beneath this property are installed for both development and production project installations.
require-devThis acts like the require property, but it lists only the dependencies required to develop
this component. For example, I often list phpunit as a dev dependency so that other component
contributors can write and run tests. These dependencies are installed only during development.
They are not installed in production projects.
suggestThis acts like the require property, but it merely suggests other components because they may
be useful when used with our component. Unlike the require property, this object’s values are
free text fields that describe each suggested component. Composer does not install suggested components.
autoloadThis tells the Composer autoloader how to autoload this component. I recommend you use
the PSR-4 autoloader, as demonstrated in Example 4-2. Beneath the psr-4 property, you map
the component’s namespace prefix to a filesystem path relative to the component’s root directory.
This makes our component compatible with a standard PSR-4 autoloader. In Example 4-2, I map
the Oreilly\ModernPHP namespace to the src/ directory. The mapping’s namespace must end with
two back slash characters (\\) to avoid conflicts with other components that use a namespace with
a similar sequence of characters. Based on the example mapping, if we instantiate a hypothetical
Oreilly\ModernPHP\Url\Scanner class, Composer will autoload the PHP class file at src/Url/Scanner.php.
Learn more about the complete composer.json schema at getcomposer.org.
README fileThe README file is often the component’s first introduction to its users. This is especially true for components hosted on GitHub and Bitbucket. Therefore, it’s important that the component’s README file provides, at a minimum, this information:
Component name and description
Install instructions
Usage instructions
Testing instructions
Contributing instructions
Support resources
Author credits
Software license
GitHub and Bitbucket can render README files in Markdown format. This means you can write well-formatted README files with headers, lists, links, and images. Use this to your advantage! All you have to do is add the .md or .markdown file extension to the README file. The same principle applies to the CONTRIBUTING and CHANGELOG files. Learn more about the Markdown format at Daring Fireball.
And now we arrive at the component’s meat and potatoes—its implementation. This is where you write the PHP classes, interfaces, and traits that form the PHP component. What classes you write, and how many, depends entirely on the PHP component’s purpose. However, all component classes, interfaces, and traits must live in the src/ directory and exist beneath the component’s namespace prefix listed in the composer.json file.
For this demonstration, I’ll create a single PHP class named Scanner that exists beneath the Url subnamespace beneath the Oreilly\ModernPHP namespace listed in the composer.json file. The Scanner class file lives at src/Url/Scanner.php. The Scanner class implements the same logic as our earlier URL scanner example application, except it encapsulates the URL
scanning behavior in a PHP class (Example 4-3).
<?phpnamespaceOreilly\ModernPHP\Url;classScanner{/*** @var array An array of URLs*/protected$urls;/*** @var \GuzzleHttp\Client*/protected$httpClient;/*** Constructor* @param array $urls An array of URLs to scan*/publicfunction__construct(array$urls){$this->urls=$urls;$this->httpClient=new\GuzzleHttp\Client();}/*** Get invalid URLs* @return array*/publicfunctiongetInvalidUrls(){$invalidUrls=[];foreach($this->urlsas$url){try{$statusCode=$this->getStatusCodeForUrl($url);}catch(\Exception$e){$statusCode=500;}if($statusCode>=400){array_push($invalidUrls,['url'=>$url,'status'=>$statusCode]);}}return$invalidUrls;}/*** Get HTTP status code for URL* @param string $url The remote URL* @return int The HTTP status code*/protectedfunctiongetStatusCodeForUrl($url){$httpResponse=$this->httpClient->options($url);return$httpResponse->getStatusCode();}}
Instead of parsing and iterating a CSV file, we inject an array of URLs into the Scanner class constructor.
We want our URL scanner class to be as generic as possible. If we demand a CSV file, we inherently limit
our component’s usefulness. If we accept an array of URLs, we let the end user decide how to fetch an array of
URLs (from a PHP array, a CSV file, an iterator, etc). That being said, we still recommend the
league/csv component because it can be helpful for developers using our component. We include the
league/csv component in the composer.json manifest’s suggest property.
The Scanner class has a hard dependency on the guzzlehttp/guzzle component. However, we isolate each
URL’s HTTP request in the getStatusCodeForUrl() method. This lets us stub (or override) this method’s
implementation in our component’s unit tests so that our tests do not rely on a working Internet connection.
We’re almost done. Before we submit our component to Packagist, we must publish it to a public code repository. I prefer to publish my open source PHP components to GitHub. However, any public Git repository is fine (I have published this component to GitHub).
It’s also a good idea to tag each component release using the Semantic Versioning scheme. This lets component
consumers request specific versions of your component (e.g., ~1.2). I’ll create a 1.0.0 tag for the URL
scanner component.
Now we’re ready to submit the component to Packagist. If you don’t use GitHub, go ahead and create a Packagist account. You can also log in to Packagist with your GitHub credentials.
Once logged in, click the big green Submit Package button at the top right of the website. Enter the full Git repository URL into the Repository URL text field and click the Check button. Packagist verifies the repository URL and prompts you to confirm your submission. Click Submit to finalize your component submission. Packagist creates and redirects you to the component listing, which looks Figure 4-6.
You’ll notice it pulls the component name, description, keywords, dependencies, and suggestions
from the component’s composer.json file. You’ll also notice that it shows the repository branches
and tags, too. Packagist establishes a direct correlation between repository tags and semantic version
numbers. This is why I recommend your repository tags be valid version numbers like 1.0.0, 1.1.0,
and so on. However, we still have that big red alert message that reads:
This package is not auto-updated. Please set up the GitHub Service Hook for Packagist so that it gets updated whenever you push!
We can activate a GitHub or Bitbucket hook that notifies Packagist whenever the component repository is updated. Learn how to setup this repository hook at https://packagist.org/profile/.
We’re done! Now anyone can install the URL scanner component with Composer and use it in their PHP applications. Run this command in your terminal to install the URL scanner component with Composer:
composer require modernphp/scanner
Then you can use the URL scanner component, as shown in Example 4-4.
<?phprequire'vendor/autoload.php';$urls=['http://www.apple.com','http://php.net','http://sdfssdwerw.org'];$scanner=new\Oreilly\ModernPHP\Url\Scanner($urls);print_r($scanner->getInvalidUrls());
This chapter contains an assortment of good practices that you should apply when building PHP applications. Following good practices makes your applications faster, more secure, and more stable. The PHP language is an accumulation of tools introduced piecemeal over a long period of time, and we use these tools to apply good practices. Tools change with the passage of time as newer and better solutions are introduced in newer PHP versions. Unfortunately, the PHP language still contains outdated tools from its past, and it’s possible to build slow and insecure applications with these outmoded tools if you’re not careful. The trick is knowing which tools to use and which to ignore. That’s what this chapter is all about.
I’m not preaching “best practices” from atop an academic ivory tower. This chapter contains good and practical advice that I use every day in all of my own projects. You can immediately apply this knowledge to your own projects.
Good practices demonstrated in this chapter have always been possible with past and present PHP versions. However, how you implement these practices changes as the PHP language evolves. Newer PHP versions introduce tools that make it easier to apply good practices. This chapter demonstrates how to apply good practices with the latest tools in PHP 5.3+.
Fox Mulder is correct—trust no one. Never trust any data that originates from a source not under your direct control. A few external sources are:
$_GET
$_POST
$_REQUEST
$_COOKIE
$argv
php://stdin
php://input
file_get_contents()
Remote databases
Remote APIs
Data from your clients
All of these external data sources are potential attack vectors that can inject malicious data into your PHP scripts (intentionally or accidentally). Writing a PHP script that receives user input and renders output is easy. Doing so safely requires a bit more thought. The simplest advice I can give you is this: sanitize input, validate data, and escape output.
When you sanitize input (i.e., data from any of the sources listed previously),
you escape or remove unsafe characters. It’s important to sanitize input data
before it reaches your application’s storage layer (e.g., Redis or MySQL).
This is your first line of defense. For example, assume your website comment
form accepts HTML. By default, nothing prevents a visitor from adding a devious
<script> tag to the comment text like this:
<p>This was a helpful article!</p><script>window.location.href='http://example.com';</script>
If you don’t sanitize this comment, you’ll inject malevolent code into your database that can be rendered into your website’s markup. When your website visitors go to a page with this unsanitized comment, they’re redirected to a website that does bad things. This is one example why you must sanitize input data that you do not control. In my experience, there are several types of input data that you’ll run into most often: HTML, SQL queries, and user profile information (i.e., email addresses and phone numbers).
You sanitize HTML special characters (e.g., &, >, ″) into their
HTML entity equivalents with the htmlentities() function (Example 5-1). This function
escapes all HTML characters in a given string and renders the string safe
for your application’s storage layer.
The htmlentities() function is dumb, though. It does not validate HTML
input. It does not escape single quotes by default. And it cannot
detect the input string’s character set. Here’s how to use the
htmlentities() function correctly. The first argument is the input string.
The second argument is the ENT_QUOTES constant, which prompts the function
to encode single quotes. The third argument specifies the input string’s
character set.
<?php$input='<p><script>alert("You won the Nigerian lottery!");</script></p>';echohtmlentities($input,ENT_QUOTES,'UTF-8');
If you require more finesse when sanitizing HTML input, use the HTML Purifier library. HTML Purifier is a very robust and secure PHP library that sanitizes HTML input according to rules that you provide. The HTML Purifier library’s downside is that it is slow and potentially difficult to configure.
There are times when you must build a SQL query based on input data.
Sometimes this input data arrives in an HTTP request query string
(e.g., ?user=1). Other times this input data arrives as an HTTP
request URI segment (e.g., /users/1). If you’re not careful, bad people can
purposefully malform your SQL queries and wreak havoc on your database.
For example, I see many beginner PHP programmers build SQL queries
by concatenating raw $_GET and $_POST input data, as in Example 5-2.
$sql=sprintf('UPDATE users SET password = "%s" WHERE id = %s',$_POST['password'],$_GET['id']);
This is bad! What if someone sends this HTTP request to your PHP script?
POST/user?id=1HTTP/1.1Content-Length:17Content-Type:application/x-www-form-urlencodedpassword=abc";--
This HTTP request sets every user’s password to abc because many SQL databases
consider -- to be the beginning of a comment causing subsequent text to be ignored. Never
use unsanitized input data in a SQL query. If you need to integrate input data
in a SQL query, use a PDO prepared statement. PDO is a database abstraction layer
built into PHP that presents a single interface to multiple databases. PDO
prepared statements are a PDO tool that sanitizes and safely embeds external data
into a SQL query to avoid problems like Example 5-2. I consider PDO and PDO
statements extremely important tools, so I’ve given them their own section later
in this chapter.
If your application has user accounts, you’ll likely encounter
email addresses, telephone numbers, zip codes, and other
profile-related information. PHP anticipates this scenario with the
filter_var() and filter_input() functions. These two functions
accept a variety of flags to sanitize different forms of input: emails,
URL-encoded strings, integers, floats, HTML characters, URLs, and
specific ASCII character ranges.
Example 5-3 demonstrates how to sanitize an email address by removing all characters except letters, digits, and !#$%&'*+-/=?^_`{|}~@.[].
<?php='john@example.com';$emailSafe=filter_var(,FILTER_SANITIZE_EMAIL);
Example 5-4 demonstrates how to sanitize a user’s bio by removing characters below ASCII 32 and escaping characters above ASCII 127.
<?php$string="\nIñtërnâtiônàlizætiøn\t";$safeString=filter_var($string,FILTER_SANITIZE_STRING,FILTER_FLAG_STRIP_LOW|FILTER_FLAG_ENCODE_HIGH);
Discover more filter_var() flags and options at http://php.net/manual/function.filter-var.php.
It is also important to validate data. Unlike sanitization, validation
does not remove information from input data. Validation only confirms that
input data meets your expectations. If you expect an email address, make
sure the input data is an email address. If you expect a phone number, make
sure the input data is a phone number. That’s all there is to it. Validation
ensures that you persist accurate and well-formatted information in your
application’s storage layer. If you encounter invalid data, you can abort
the data persistence operation and surface an appropriate error message
to your application’s user. Validation also prevents potential database
errors. For example, if MySQL expects a DATETIME value but is given
the string next year, MySQL will either error out or use a default
(and incorrect) value. Either way, your application’s data integrity is
compromised by invalid data.
You can validate user input with the filter_var() function with
any of the FILTER_VALIDATE_* flags. PHP provides flags to validate Booleans,
emails, floats, integers, IP addresses, regular expressions, and URLs.
Example 5-5 demonstrates how to validate an email address.
<?php$input='john@example.com';$isEmail=filter_var($input,FILTER_VALIDATE_EMAIL);if($isEmail!==false){echo"Success";}else{echo"Fail";}
Pay close attention to the filter_var() function’s return value. If
the validation succeeds, the return value is the original validated value.
If the validation fails, the return value is false.
Although the filter_var() function provides a number of validation flags,
it cannot validate everything. I recommend these additional
validation components, too:
You should validate and sanitize input data to make sure input data is safe and what you expect.
When it’s time to render output to a web page or API response, it is very important that you escape your output. This is one more layer of protection that prevents malicious code from being rendered and inadvertently executed by your application’s users.
Escape output with the PHP htmlentities() function that
we mentioned earlier. Be sure you use ENT_QUOTES as the second
argument so that it escapes both single and double quotes. Specify
the appropriate character encoding (usually UTF-8) as the
third argument. Example 5-6 demonstrates how to
escape HTML output before it is rendered.
<?php$output='<p><script>alert("NSA backdoor installed");</script>';echohtmlentities($output,ENT_QUOTES,'UTF-8');
Some PHP template engines like twig/twig
(my favorite) or smarty/smarty
escape output automatically. The Twig template engine by Sensio Labs, for example,
escapes all output by default unless you tell it otherwise. This is a brilliant
default and provides a nice safety net for your PHP web applications.
Password security is monumentally important given the growing number of online attacks. How often have you cancelled a credit card because a major retailer was hacked? Many retailers have (and will) fall victim to malicious hackers because they do not protect their systems with best security practices. Your PHP applications are no different, and they are vulnerable to the same attacks unless you use appropriate precautions.
One important precaution is password security. It is your duty to safely manage, hash, and store user passwords. It doesn’t matter if your application is a trivial game or a vault for top-secret business documents. Your users entrust you with their information and expect you to guard their information with the best security practices available. I meet many PHP developers who don’t understand how to safely manage passwords. After all, securely managing passwords is hard. Fortunately, PHP provides built-in tools that make password security fairly easy. This section demonstrates how to use these tools with modern security practices.
You should never know your users’ passwords. You should never be able to know your users’ passwords. If your application’s database is hacked, you don’t want plain-text or decryptable passwords sitting in your database. Leaked passwords are a serious breach of trust, and they dump a mountain of legal liability on you or your company. The less you know, the safer you are.
It frustrates me when a website requires my account password to satisfy a specific format. It makes me even angrier when my account password cannot be longer than {N} number of characters. Why!? I understand that password formats may be restricted for compatibility with legacy applications or databases, but this is not an excuse for poor security practices.
Never restrict your users’ passwords. If you require passwords to fit a particular pattern, you are effectively providing a roadmap for bad guys to hack your application. If you must restrict user passwords, I recommend you only require a minimum length. It is not unreasonable to blacklist commonly used or dictionary-based passwords, too.
Never send passwords via email. If you send my password via email, I know three things: you know my password; you are storing my password in plain text or in a decryptable format; and you have no qualms sending my password over the Internet in plain text.
Instead, send an email with a URL where I can choose or change my own password. Web applications often generate a unique token that can only be used once to choose or change a password. For example, suppose I forget my account password for your web application. I click the “Forgot password” link on your login form, and I am directed to a form where I enter my email address to request a new password. Your application generates a unique token, and it associates this token with the account identified by my email address. Your application sends an email to the account’s email address with a URL that includes the unique token as a URL segment or a query-string parameter. When I visit the URL, your application validates the token and, if the token is valid, allows me to choose a new password for my account. After I choose a new password, your application invalidates the token.
You should hash user passwords. Do not encrypt user passwords. Encryption and hashing are not synonymous. Encryption is a two-way algorithm, meaning what is encrypted can later be decrypted by design. Hashing is a one-way algorithm. Hashed data cannot be reverted to its original form, and identical data always produces the same hash values.
When you store a user password in your database, you hash the password first and store the password hash in your database. If hackers break into your database, they see only meaningless password hashes that require a massive amount of time and NSA resources to crack.
Many hashing algorithms are available (e.g., MD5, SHA1, bcrypt, scrypt). Some are fast and designed to verify data integrity. Others are slow and designed to be safe and secure. Slow, safe, and secure are what we want when it comes to password generation and storage.
The most secure peer-reviewed hashing algorithm known today is bcrypt. Unlike MD5 and SHA1, bcrypt is designed to be very slow. The bcrypt algorithm automatically salts data to foil potential rainbow table attacks. The bcrypt algorithm also consumes a large amount of time (measured in seconds) while iteratively hashing data to generate a super-secure final hash value. The number of hash iterations is called the work factor. A higher work factor makes it exponentially more expensive for a bad guy to crack password hashes. The bcrypt algorithm is future-proof, too, because you can simply increase its work factor as computers become faster.
The bcrypt algorithm is extensively peer-reviewed. Minds far greater than my own have reviewed the bcrypt algorithm for potential exploits, and so far none has been found. It is very important that you rely on peer-reviewed hashing algorithms. Never create your own. There is safety in numbers, and odds are you are not a cryptography expert (unless you are, in which case tell Bruce Schneier I said hello).
As you can see, there are a lot of considerations to make when working with user passwords. However, Anthony Ferrara was kind enough to build the native password hashing API available in PHP 5.5.0. PHP’s native password hashing API provides easy-to-use functions that drastically simplify password hashing and verification. The password hashing API also uses the bcrypt hashing algorithm by default.
Anthony Ferrara (also known as @ircmaxell on Twitter) is a Developer Advocate at Google, and he is an authoritative source for all things related to PHP performance and security. Anthony is also the author of the PHP password hashing API. I encourage you to follow Anthony on Twitter and read his blog. I want to say a big thank you to Anthony. His contributions to PHP have single-handedly improved PHP application security by making best security practices more accessible.
You’ll encounter two scenarios when building web applications: user registration and user login. Let’s explore how the PHP password hashing API simplifies both scenarios.
A web application can’t exist without users, and users need a way
to sign up for an account. Let’s assume our hypothetical application
has a PHP file available at the URL /register.php. This PHP file
receives a URL-encoded HTTP POST request with an email address and
password. We create a user account if the email address is valid
and the password contains at least eight characters. This is an example
HTTP POST request:
POST/register.phpHTTP/1.1Content-Length:43Content-Type:application/x-www-form-urlencodedemail=john@example.com&password=sekritshhh!
Example 5-7 is the register.php file that receives the HTTP POST request.
01<?php02try{03// Validate email04=filter_input(INPUT_POST,'email',FILTER_VALIDATE_EMAIL);05if(!){06thrownewException('Invalid email');07}0809// Validate password10$password=filter_input(INPUT_POST,'password');11if(!$password||mb_strlen($password)<8){12thrownewException('Password must contain 8+ characters');13}1415// Create password hash16$passwordHash=password_hash(17$password,18PASSWORD_DEFAULT,19['cost'=>12]20);21if($passwordHash===false){22thrownewException('Password hash failed');23}2425// Create user account (THIS IS PSUEDO-CODE)26$user=newUser();27$user->=;28$user->password_hash=$passwordHash;29$user->save();3031// Redirect to login page32header('HTTP/1.1 302 Redirect');33header('Location: /login.php');34}catch(Exception$e){35// Report error36header('HTTP/1.1 400 Bad request');37echo$e->getMessage();38}
In Example 5-7:
Lines 4–7 validate the user email address. We toss an exception if the email is invalid.
Lines 10–13 validate the plain-text user password pulled from the HTTP request body. We toss an exception if the plain-text user password contains fewer than eight characters.
Lines 16–23 create a password hash with the PHP password hashing API’s password_hash() function. The password_hash() function’s first argument is the plain-text user password. The second argument is the PASSWORD_DEFAULT constant, which tells PHP to use the bcrypt hashing algorithm. The final argument is an array of hashing options. The cost array key specifies the bcrypt work factor. A work factor of 10 is used by default, but you should increase the cost factor for your particular hardware so that password hashing requires 0.1 to 0.5 seconds to finish. We toss an exception if the password hashing fails.
Lines 26–29 demonstrate saving a hypothetical user account. These lines contain pseudocode; you should replace these lines with code appropriate for your own application. The point is that you persist the user record with the password hash—not the plain-text password pulled from the HTTP request body. We also persist the email address that is used to locate and log in a user account.
Our hypothetical application also has a PHP file available at
URL /login.php. This file accepts an HTTP POST request that
contains an email address and password used to identify,
authenticate, and log in a user. This is an example
HTTP POST request:
POST/login.phpHTTP/1.1Content-Length:43Content-Type:application/x-www-form-urlencodedemail=john@example.com&password=sekritshhh!
The login.php file finds the user account identified by the email address, it verifies the submitted password with the user account’s password hash, and it logs in the user account. Example 5-8 shows the login.php file.
01<?php02session_start();03try{04// Get email address from request body05=filter_input(INPUT_POST,'email');0607// Get password from request body08$password=filter_input(INPUT_POST,'password');0910// Find account with email address (THIS IS PSUEDO-CODE)11$user=User::findByEmail();1213// Verify password with account password hash14if(password_verify($password,$user->password_hash)===false){15thrownewException('Invalid password');16}1718// Re-hash password if necessary (see note below)19$currentHashAlgorithm=PASSWORD_DEFAULT;20$currentHashOptions=array('cost'=>15);21$passwordNeedsRehash=password_needs_rehash(22$user->password_hash,23$currentHashAlgorithm,24$currentHashOptions25);26if($passwordNeedsRehash===true){27// Save new password hash (THIS IS PSUEDO-CODE)28$user->password_hash=password_hash(29$password,30$currentHashAlgorithm,31$currentHashOptions32);33$user->save();34}3536// Save login status to session37$_SESSION['user_logged_in']='yes';38$_SESSION['user_email']=;3940// Redirect to profile page41header('HTTP/1.1 302 Redirect');42header('Location: /user-profile.php');43}catch(Exception$e){44header('HTTP/1.1 401 Unauthorized');45echo$e->getMessage();46}
In Example 5-8:
Line 5 and 8 retrieve the email address and password from the HTTP request body.
Line 11 locates the user record associated with the email address submitted in the HTTP request body. I use pseudocode in Example 5-8, and you should replace this line with code specific to your own application.
Lines 14–16 compare the plain-text password submitted in the HTTP
request body with the password hash stored in the user record. We
compare the password and password hash with the password_verify()
function. If verification fails, we toss an exception.
Lines 19–34 make sure the user record’s password hash value is
up-to-date with the most current password algorithm options by
invoking the password_needs_rehash() function. If the
user record’s password hash is out of date, we create a new hash value
using the most current algorithm options, and we update the user record
with the new hash value.
The password_verify() function compares the plain-text
password from the HTTP request body to the password hash stored in
the user record. This function accepts two arguments. The first argument
is the plain-text password. The second argument is the existing password hash
in the user record. If the password_verify() function returns true,
the plain-text password is valid and we log in the user. Otherwise,
the plain-text password is invalid and we abort the login process.
After line 17 in Example 5-8, authentication is successful and we can log in the user. Before we do, however, it is important to check if the existing password hash in the user record is outdated. If it is outdated, we create a new password hash.
Why should we create a new password hash? Pretend our application was
created two years ago when we used a bcrypt work factor of 10. Today
we use a bcrypt work factor of 20 because hackers are smarter and
computers are faster. Unfortunately, there are some user accounts
whose password hashes were generated with a bcrypt work factor of 10.
After we verify the login request’s authenticity, we check if the
existing user record’s password hash needs to be updated with the
password_needs_rehash() function. This function makes sure a given
password hash is created with the most current hashing
algorithm options. If a password hash does need to be rehashed,
rehash the plain-text password from the HTTP request body using the
current algorithm options and update the user record with the new hash value.
It’s easiest to employ the password_needs_rehash() function in
the user login script because I have access to the old password hash
and the plain-text password at the same time.
If you cannot use PHP 5.5.0 or newer, fear not. You can use Anthony Ferrara’s
ircmaxell/password-compat
component. It implements all of these PHP password hashing API functions:
password_hash()
password_get_info()
password_needs_rehash()
password_verify()
Ferrara’s ircmaxell/password-compat component is a drop-in replacement for the
modern PHP password hashing API. Include the component in your application
with Composer and you’re off and running.
Working with dates and times is hard. Pretty much every PHP developer
has, at one time or another, made a mistake working with dates and
times. This is precisely why I recommend you do not manage dates and
times on your own. There are too many considerations to juggle, including
date formats, time zones, daylight saving, leap years, leap seconds, and months with
variable numbers of days. It’s too easy for your own calculations to become
inaccurate. Instead, use the DateTime, DateInterval, and DateTimeZone classes
introduced in PHP 5.2.0. These helpful classes provide a simple object-oriented
interface to accurately create and manipulate dates, times, and timezones.
The first thing you should do is declare a default time zone for
PHP’s date and time functions. If you don’t set a default time zone,
PHP shows an E_WARNING message. There are two ways to set the default
time zone. You can declare the default time zone in the php.ini file like this:
date.timezone='America/New_York';
You can also declare the default time zone during runtime with the
date_default_timezone_set() function (Example 5-9).
<?phpdate_default_timezone_set('America/New_York');
Either solution requires a valid time-zone identifier. You can find a complete list of PHP time-zone identifiers at http://php.net/manual/timezones.php.
The DateTime class provides an object-oriented interface to manage
date and time values. A single DateTime instance represents a specific
date and time. The DateTime class constructor (Example 5-10) is the simplest way to
create a new DateTime instance.
<?php$datetime=newDateTime();
Without arguments, the DateTime class constructor creates an instance
that represents the current date and time. You can pass a string
argument into the DateTime class constructor to specify a custom
date and time (Example 5-11). The string argument must use one of the valid date and time
formats listed at http://php.net/manual/datetime.formats.php.
<?php$datetime=newDateTime('2014-04-27 5:03 AM');
In an ideal world, you are given date and time data in a format that PHP
understands. Unfortunately, this is not always the case. Sometimes you must
work with date and time values in different and unexpected formats. I experience
this problem on a daily basis. Many of my clients send Excel spreadsheets
with data to import into an application, and each client provides date
and time values in wildly different formats. The DateTime class makes
this a nonissue.
Use the DateTime::createFromFormat() static method to create a DateTime
instance with a date and time string that uses a custom format. This method’s
first argument is the date and time string format. The second argument is
the date and time string that uses said format (Example 5-12).
<?php$datetime=DateTime::createFromFormat('M j, Y H:i:s','Jan 2, 2014 23:04:12');
The DateTime::createFromFormat() static method accepts the same date and
time formats as the date() function. Valid date and time formats are
available at http://php.net/manual/datetime.createfromformat.php.
The DateInterval class is pretty much prerequisite knowledge for manipulating
DateTime instances. A DateInterval instance represents a fixed
length of time (e.g., “two days”) or a relative length of time (e.g.,
“yesterday”). You use DateInterval instances to modify DateTime instances.
For example, the DateTime class provides add() and sub() methods to
manipulate a DateTime instance’s value. Both methods accept a DateInterval
argument that specifies the amount of time added to or subtracted from a
DateTime instance.
Instantiate the DateInterval class with its constructor. The DateInterval
class constructor accepts a string argument that provides an interval specification.
Interval specifications are a little tricky at first, but there’s not
much to them. First, an interval specification is a string that begins
with the letter P. Next, you append an integer. And last, you append a period designator that qualifies the preceding integer value.
Valid period designators are:
Y (years)
M (months)
D (days)
W (weeks)
H (hours)
M (minutes)
S (seconds)
An interval specification can include both date and time values. If you
include a time value, separate the date and time parts with
the letter T. For example, the interval specification P2D means two
days. The interval specification P2DT5H2M means two days, five
hours, and two minutes.
Example 5-13 demonstrates how to modify a DateTime instance by a given
interval of time using the add() method.
<?php// Create DateTime instance$datetime=newDateTime('2014-01-01 14:00:00');// Create two weeks interval$interval=newDateInterval('P2W');// Modify DateTime instance$datetime->add($interval);echo$datetime->format('Y-m-d H:i:s');
You can create an inverted DateInterval, too (Example 5-14). This lets you traverse
a DatePeriod instance in reverse chronology!
$dateStart=new\DateTime();$dateInterval=\DateInterval::createFromDateString('-1 day');$datePeriod=new\DatePeriod($dateStart,$dateInterval,3);foreach($datePeriodas$date){echo$date->format('Y-m-d'),PHP_EOL;}
This outputs:
2014-12-08 2014-12-07 2014-12-06 2014-12-05
If your application caters to an international clientele, you’ve probably wrestled with time zones. Time zones are tricky, and they are a constant source of confusion for many PHP developers.
PHP represents time zones with the DateTimeZone class. All you have
to do is pass a valid time-zone identifier into the DateTimeZone
class constructor:
<?php$timezone=newDateTimeZone('America/New_York');
Find a complete list of valid time-zone identifiers at http://php.net/manual/timezones.php.
You often use DateTimeZone instances when creating DateTime instances.
The DateTime class constructor’s optional second argument is a
DateTimeZone instance. The DateTime instance’s value, and all
modifications to its value, are now relative to the specified time zone.
If you omit the constructor’s second argument, the time zone is determined
by your default time-zone setting:
<?php$timezone=newDateTimeZone('America/New_York');$datetime=newDateTime('2014-08-20',$timezone);
You can change a DateTime instance’s time zone after instantiation
with the setTimezone() method (Example 5-15).
<?php$timezone=newDateTimeZone('America/New_York');$datetime=new\DateTime('2014-08-20',$timezone);$datetime->setTimezone(newDateTimeZone('Asia/Hong_Kong'));
I find it easiest if I always work in the UTC time zone. My server’s
time zone is UTC, and my PHP default time zone is UTC. If I persist
date and time values into a database, I save them as the UTC timezone.
I convert the UTC date and time values to the appropriate time zone
when I display the data to application users.
Sometimes you need to iterate a sequence of dates and times that recur
over a specific interval of time. Repeating calendar events are a
good example. The DatePeriod class solves this problem. The DatePeriod
class constructor accepts three required arguments:
A DateTime instance that represents the date and time from
which iteration begins
A DateInterval instance that represents the interval of time
between subsequent dates and times
An integer that represents the number of total iterations
A DatePeriod instance is an iterator, and each iteration yields a
DateTime instance. Example 5-16 yields three dates and times
separated by two-week intervals.
<?php$start=newDateTime();$interval=newDateInterval('P2W');$period=newDatePeriod($start,$interval,3);foreach($periodas$nextDateTime){echo$nextDateTime->format('Y-m-d H:i:s'),PHP_EOL;}
The DatePeriod class constructor accepts an optional fourth argument that
specifies the period’s explicit end date and time. If you want to exclude the
start date from the period’s iteration, pass the DatePeriod::EXCLUDE_START_DATE
constant as the final constructor argument (Example 5-17).
<?php$start=newDateTime();$interval=newDateInterval('P2W');$period=newDatePeriod($start,$interval,3,DatePeriod::EXCLUDE_START_DATE);foreach($periodas$nextDateTime){echo$nextDateTime->format('Y-m-d H:i:s'),PHP_EOL;}
If you work with dates and times more often than not, you should use
Brian Nesbitt’s nesbot/carbon PHP
component. Carbon provides a simple user interface with many useful
methods for working with date and time values.
Many PHP applications persist information in a wide assortment of
databases like MySQL, PostgreSQL, SQLite, MSSQL, and Oracle. Each
database provides its own PHP extension to establish communication
between PHP and the database. MySQL, for example, uses the mysqli
extension, which adds various mysqli_*() functions to the PHP language.
SQLite3 uses the SQLite3 extension, which adds the SQLite3, SQLite3Stmt,
and SQLite3Result classes to the PHP language. If you work with different
databases in one or more projects, you have to install and learn various PHP
database extensions and interfaces. This increases your
cognitive and technical overhead.
This is exactly why PHP provides the native PDO extension. PDO (or PHP data objects) is a collection of PHP classes that communicate with many different SQL databases via a single user interface. Database implementations are abstracted away. Instead, we can write and execute database queries with a single interface regardless of the particular database system we happen to be using at the time.
Even though the PDO extension provides a single interface to different databases, we still must write our own SQL statements. This is the downside to PDO. Each database provides proprietary features, and these features often require unique SQL syntax. I recommend you write ANSI/ISO SQL when using PDO so that your SQL doesn’t break if/when you change database systems. If you absolutely must use a proprietary database feature, keep in mind you must update your SQL statements if you change database systems.
First, select the database system most appropriate for your application. Install
the database, create the schema, and optionally load an initial dataset. Next,
instantiate the PDO class in PHP. The PDO instance establishes a connection
between PHP and the database.
The PDO class constructor accepts a string argument called a DSN, or
data source name, that provides database connection details. A DSN begins with
the database driver name (e.g., mysql or sqlite), a :, and the remainder of the connection
string. The DSN connection string is different for each database, but it typically includes:
Hostname or IP address
Port number
Database name
Character set
Learn more about your database’s DSN format at http://php.net/manual/pdo.drivers.php.
The PDO class constructor’s second and third arguments are a username
and password for your database. Provide these arguments if your database requires
authentication.
Example 5-18 establishes a PDO connection to a MySQL database named
acme. The database is available at IP address 127.0.0.1, and it listens
on the standard MySQL port 3306. The database username is josh, and
the database password is sekrit. The connection character set is utf8.
<?phptry{$pdo=newPDO('mysql:host=127.0.0.1;dbname=books;port=3306;charset=utf8','USERNAME','PASSWORD');}catch(PDOException$e){// Database connection failedecho"Database connection failed";exit;}
The PDO class constructor’s first argument is the DSN. The DSN begins with mysql:.
This instructs PDO to use the PDO MySQL driver to connect to a MySQL database.
After the : character, we specify a semicolon-delimited list of keys and values. Specifically,
we specify the host, dbname, port, and charset settings.
The PDO constructor throws a PDOException instance if the database connection fails.
It’s important that you anticipate and catch this exception when creating PDO connections.
Example 5-18 is fine for demonstration purposes, but it isn’t safe. Never hard-code database credentials into PHP files, especially PHP files served to the public. If PHP exposes raw PHP code to HTTP clients due to a bug or server misconfiguration, your database credentials are naked for the world to see. Instead, move your database credentials into a configuration file above the document root and include them into your PHP files when necessary.
Do not version control your credentials, either. Protect your credentials with a .gitignore file. Otherwise, you will publish your secret credentials into your code repository for others to see. This is especially bad if you are using a public repository.
In this example, the settings.php file contains our database connection credentials. It lives beneath the project root directory but above the document root. The index.php file lives beneath the document root directory, and it is served to the public with a web server. The index.php file uses the credentials in the settings.php file:
[project_root]
settings.php
public_html/ <-- document root
index.php
This is the settings.php file:
<?php$settings=['host'=>'127.0.0.1','port'=>'3306','name'=>'acme','username'=>'USERNAME','password'=>'PASSWORD','charset'=>'utf8'];
Example 5-19 shows the index.php file. It includes the settings.php file and establishes a PDO database connection.
<?phpinclude('../settings.php');$pdo=newPDO(sprintf('mysql:host=%s;dbname=%s;port=%s;charset=%s',$settings['host'],$settings['name'],$settings['port'],$settings['charset']),$settings['username'],$settings['password']);
This is much safer. If the index.php code leaks to the public, our database credentials remain secret.
We now have a PDO connection to a database, and we can use this connection to read from and write to the database with SQL statements. We’re not done yet. When I build PHP applications, I often need to customize SQL statements with dynamic information from the current HTTP request. For example, the URL /user?email=john@example.com shows profile information for a specific user account. The SQL statement for this URL might be:
SELECTidFROMusersWHERE="john@example.com";
A beginner PHP developer might build the SQL statement like this:
$sql=sprintf('SELECT id FROM users WHERE email = "%s"',filter_input(INPUT_GET,'email'));
This is bad because the SQL string uses raw input from the HTTP request query string. It provides a welcome mat for hackers to do bad things to your PHP application. Haven’t you heard of little Bobby Tables? It is extremely important to sanitize user input that is used in a SQL statement. Fortunately, the PDO extension makes input sanitization super-easy with prepared statements and bound parameters.
A prepared statement is a PDOStatement instance. However, I rarely
instantiate the PDOStatement class directly. Instead, I fetch a prepared
statement object with the PDO instance’s prepare() method. This method
accepts a SQL statement string as its first argument, and it returns a
PDOStatement instance:
<?php$sql='SELECT id FROM users WHERE email = :email';$statement=$pdo->prepare($sql);
Pay close attention to the SQL statement. The :email is
a named placeholder to which I can safely bind any value. In
Example 5-20, I bind the HTTP request query string to the :email
placeholder with the $statement instance’s bindValue() method.
<?php$sql='SELECT id FROM users WHERE email = :email';$statement=$pdo->prepare($sql);=filter_input(INPUT_GET,'email');$statement->bindValue(':email',);
The prepared statement automatically sanitizes the $email
value, and it protects our database from SQL injection attacks. You can
include multiple named placeholders in a SQL statement string and invoke
the prepared statement’s bindValue() method for each placeholder.
In Example 5-20, the :email named placeholder represents
a string value. What if we change our SQL statement to find a user by
a numeric ID? In this case, we must pass a third argument to the prepared
statement’s bindValue() method to specify the type of data bound
to the placeholder. Without the third argument, a prepared statement
assumes bound data is a string.
Example 5-21 shows a modification of Example 5-20 that finds a user by numeric ID
instead of an email address. The numeric ID is pulled from the HTTP query
string parameter named id.
<?php$sql='SELECT email FROM users WHERE id = :id';$statement=$pdo->prepare($sql);$userId=filter_input(INPUT_GET,'id');$statement->bindValue(':id',$userId,PDO::PARAM_INT);
We use the PDO::PARAM_INT constant as the third argument. This tells
PDO that the bound data is an integer. There are several PDO constants
you can use to specify various data types:
PDO::PARAM_BOOLPDO::PARAM_NULLPDO::PARAM_INTPDO::PARAM_STR(default)
See all PDO constants at http://php.net/manual/pdo.constants.php.
We now have a prepared statement, and we’re ready to execute SQL queries
against the database. The prepared statement’s execute() method executes
the statement’s SQL statement with any bound data. If you are
executing INSERT, UPDATE, or DELETE statements, invoke the execute()
method and you’re done. If you execute a SELECT statement, you probably
expect the database to return matching records. You can fetch query results
with the prepared statement’s fetch(), fetchAll(), fetchColumn(), and
fetchObject() methods.
The PDOStatement instance’s fetch() method returns the next row
from the result set. I use this method to iterate large result sets,
especially if the entire result set cannot fit in available memory (Example 5-22).
<?php// Build and execute SQL query$sql='SELECT id, email FROM users WHERE email = :email';$statement=$pdo->prepare($sql);=filter_input(INPUT_GET,'email');$statement->bindValue(':email',,PDO::PARAM_INT);$statement->execute();// Iterate resultswhile(($result=$statement->fetch(PDO::FETCH_ASSOC))!==false){echo$result['email'];}
In this example, I use the PDO::FETCH_ASSOC constant as the first
argument in the statement instance’s fetch() method. This argument
determines how the fetch() and fetchAll() methods return query
results. You can use any of these constants:
PDO::FETCH_ASSOCPrompts the fetch() or fetchAll() method to return an associative
array. The array keys are database column names.
PDO::FETCH_NUMPrompts the fetch() or fetchAll() method to return a numeric
array. The array keys are the numeric index of database columns in
your query result.
PDO::FETCH_BOTHPrompts the fetch() or fetchAll() method to return an array that
contains both associative and numeric array keys. This is a
combination of PDO::FETCH_ASSOC and PDO::FETCH_NUM.
PDO::FETCH_OBJPrompts the fetch() or fetchAll() method to return an object whose
properties are database column names.
Learn more about fetching PDO statement results at http://php.net/manual/pdostatement.fetch.php.
If you are working with smaller result sets, you can fetch all query
results with the prepared statement’s fetchAll() method (Example 5-23). I typically
discourage this method unless you are absolutely sure the complete
query result is small enough to fit in available memory.
<?php// Build and execute SQL query$sql='SELECT id, email FROM users WHERE email = :email';$statement=$pdo->prepare($sql);=filter_input(INPUT_GET,'email');$statement->bindValue(':email',,PDO::PARAM_INT);$statement->execute();// Iterate results$results=$statement->fetchAll(PDO::FETCH_ASSOC);foreach($resultsas$result){echo$result['email'];}
If you are concerned only with a single column in your query result, you
can use the prepared statement’s fetchColumn() method. This
method, similar to the fetch() method, returns the value of a single
column from the next row of the query result (Example 5-24). The fetchColumn() method’s
one and only argument is the index of the desired column.
The query result column order matches the column order specified in the SQL query.
<?php// Build and execute SQL query$sql='SELECT id, email FROM users WHERE email = :email';$statement=$pdo->prepare($sql);=filter_input(INPUT_GET,'email');$statement->bindValue(':email',,PDO::PARAM_INT);$statement->execute();// Iterate resultswhile((=$statement->fetchColumn(1))!==false){echo;}
In Example 5-24, the email column is listed second in the SQL query.
It therefore becomes the second column in each query result row, and
I pass the number 1 into the fetchColumn() method (columns
are zero-indexed).
You can also use the prepared statement’s fetchObject()
method to fetch the next query result row as an object whose
property names are the SQL query result columns (Example 5-25).
<?php// Build and execute SQL query$sql='SELECT id, email FROM users WHERE email = :email';$statement=$pdo->prepare($sql);=filter_input(INPUT_GET,'email');$statement->bindValue(':email',,PDO::PARAM_INT);$statement->execute();// Iterate resultswhile(($result=$statement->fetchObject())!==false){echo$result->name;}
The PDO extension also supports transactions. A transaction is a set of database statements that execute atomically. In other words, a transaction is a collection of SQL queries that are either all executed successfully or not executed at all. Transaction atomicity encourages data consistency, safety, and durability. A nice side effect of transactions is improved performance, because you are effectively queuing multiple queries to be executed together at one time.
Not all databases support transactions. Check your database’s documentation and its associated PHP PDO driver for more information.
Transactions are simple to use with the PDO extension. You build and
execute SQL statements exactly as demonstrated in Example 5-25. There is only one difference.
You surround SQL statement executions with the PDO instance’s
beginTransaction() and commit() methods. The beginTransaction() method
causes PDO to queue subsequent SQL query executions rather than execute
them immediately. The commit() method executes queued queries in an
atomic transaction. If a single query in the transaction fails, none of
the transaction queries is applied. Remember, a transaction is all or nothing.
Atomicity is important when data integrity is paramount. Let’s explore example code that handles bank account transactions. Our code can deposit funds into an account. It can also withdraw funds from an account assuming there are sufficient funds. The code in Example 5-26 transfers $50 from one account to another account. It does not use a database transaction.
<?phprequire'settings.php';// PDO connectiontry{$pdo=newPDO(sprintf('mysql:host=%s;dbname=%s;port=%s;charset=%s',$settings['host'],$settings['name'],$settings['port'],$settings['charset']),$settings['username'],$settings['password']);}catch(PDOException$e){// Database connection failedecho"Database connection failed";exit;}// Statements$stmtSubtract=$pdo->prepare('UPDATE accountsSET amount = amount - :amountWHERE name = :name');$stmtAdd=$pdo->prepare('UPDATE accountsSET amount = amount + :amountWHERE name = :name');// Withdraw funds from account 1$fromAccount='Checking';$withdrawal=50;$stmtSubtract->bindParam(':name',$fromAccount);$stmtSubtract->bindParam(':amount',$withDrawal,PDO::PARAM_INT);$stmtSubtract->execute();// Deposit funds into account 2$toAccount='Savings';$deposit=50;$stmtAdd->bindParam(':name',$toAccount);$stmtAdd->bindParam(':amount',$deposit,PDO::PARAM_INT);$stmtAdd->execute();
This seems fine, right? It’s not. What happens if our server suddenly shuts down after we withdraw $50 from account 1 and before we deposit $50 into account 2? Perhaps our hosting company had a power outage or a fire or a flood or was afflicted by some other calamity. What happens to the $50 withdrawn from account 1? The funds are not deposited into account 2. The funds disappear. We can protect data integrity with a database transaction (Example 5-27).
<?phprequire'settings.php';// PDO connectiontry{$pdo=newPDO(sprintf('mysql:host=%s;dbname=%s;port=%s;charset=%s',$settings['host'],$settings['name'],$settings['port'],$settings['charset']),$settings['username'],$settings['password']);}catch(PDOException$e){// Database connection failedecho"Database connection failed";exit;}// Statements$stmtSubtract=$pdo->prepare('UPDATE accountsSET amount = amount - :amountWHERE name = :name');$stmtAdd=$pdo->prepare('UPDATE accountsSET amount = amount + :amountWHERE name = :name');// Start transaction$pdo->beginTransaction();// Withdraw funds from account 1$fromAccount='Checking';$withdrawal=50;$stmtSubtract->bindParam(':name',$fromAccount);$stmtSubtract->bindParam(':amount',$withDrawal,PDO::PARAM_INT);$stmtSubtract->execute();// Deposit funds into account 2$toAccount='Savings';$deposit=50;$stmtAdd->bindParam(':name',$toAccount);$stmtAdd->bindParam(':amount',$deposit,PDO::PARAM_INT);$stmtAdd->execute();// Commit transaction$pdo->commit();
Example 5-27 wraps the withdrawal and deposit into a single database transaction. This ensures that both execute successfully or not at all. Our data remains consistent.
PHP assumes each character in a string is an 8-bit character that occupies a single byte of memory. Unfortunately, this is a naive assumption that breaks down as soon as you work with non-English characters. You might localize your PHP application for international users. Your blog might receive comments written in Spanish, German, or Norwegian. Your users’ names might contain accented characters. My point is that you’ll often encounter multibyte characters, and you must accommodate them correctly.
When I say multibyte character, I mean any character that is not one
of the 128 characters in the traditional ASCII character set. Some
examples are ñ, ë, â, ô, à, æ, and ø. There are many
others. PHP’s default string-manipulation functions assume all strings
use only 8-bit characters. If you manipulate a Unicode string that
contains multibyte characters with PHP’s native string functions, you
will get incorrect and unexpected results.
Unicode is an international standard that assigns a number to each unique character from many different languages. It is maintained by the Unicode Consortium.
You can avoid multibyte string errors by installing the
mbstring PHP extension.
This extension introduces multibyte-aware string functions
that replace most of PHP’s native string-manipulation functions. For
example, use the multibyte-aware mb_strlen() function instead of PHP’s
native strlen() function.
To this day I’m still training myself to use the mbstring multibyte
string functions instead of PHP’s default string functions. It’s a tough
habit to form, but you must use the multibyte string functions if
you work with Unicode strings. Otherwise, it’s easy for multibyte
Unicode data to become malformed.
I use the Iñtërnâtiônàlizætiøn string when testing my PHP applications
for multibyte character support.
Use UTF-8. If you leave this section with one piece of advice, this is it. All modern web browsers understand UTF-8 character encoding. A character encoding is a method of packaging Unicode data in a format that can be stored in memory or sent over the wire between a server and client. The UTF-8 character encoding is just one of many available character encodings. UTF-8, however, is the most popular character encoding and is supported by all modern web browsers.
Tom Scott provides the best explanation of Unicode and UTF-8 that I’ve seen. Joel Spolsky also writes a nice explanation of character encodings on his website.
Character encoding is complex and confuses a lot of developers. When you work with multibyte strings, keep this advice in mind:
Always know the character encoding of your data.
Store data with the UTF-8 character encoding.
Output data with the UTF-8 character encoding.
The mbstring extension doesn’t just manipulate Unicode strings. It
also converts multibyte strings between various character encodings.
This is useful when clients export Excel spreadsheet data with a
Windows-specific character encoding when what I really want is UTF-8
encoded data. Use the mb_detect_encoding() and mb_convert_encoding()
functions to convert Unicode strings from one character encoding to
another.
When you work with multibyte characters, it is important that you tell PHP you are working with the UTF-8 character encoding. It’s easiest to do this in your php.ini file like this:
default_charset = "UTF-8";
The default character set is used by many PHP functions, including
htmlentities(), html_entity_decode(), htmlspecialchars(),
and the mbstring functions. This value is also added to
the default Content-Type header returned by PHP unless
explicitly specified with the header() function like this:
<?phpheader('Content-Type: application/json;charset=utf-8');
You cannot use the header() function after any output is
returned from PHP.
I also recommend you include this meta tag in your HTML document header:
<metacharset="UTF-8"/>
Streams are probably the most amazing and least used modern PHP feature. Even though streams were introduced in PHP 4.3.0, many developers still don’t know about streams because they are rarely mentioned, and they are poorly documented.
Streams were introduced with PHP 4.3.0 as a way of generalizing file, network, data compression, and other operations which share a common set of functions and uses. In its simplest definition, a stream is a resource object which exhibits streamable behavior. That is, it can be read from or written to in a linear fashion, and may be able to fseek() to an arbitrary location within the stream.
PHP Manual
That’s a mouthful, right? Let’s reduce this into something more understandable. A stream is a transfer of data between an origin and destination. That’s it. The origin and destination can be a file, a command-line process, a network connection, a ZIP or TAR archive, temporary memory, standard input or output, or any other resource available via PHP’s stream wrappers.
If you’ve read from or written to a file, you’ve used
streams. If you’ve read from php://stdin or written to
php://stdout, you’ve used streams. Streams provide the
underlying implementation for many of PHP’s IO functions like
file_get_contents(), fopen(), fgets(), and fwrite(). PHP’s stream
functions help us manipulate different stream resources (origins
and destinations) with a single interface.
I think of streams as a pipe that carries water from one location to another. As water flows through the pipe from origin to destination, we can filter the water, we can transform the water, we can add water, and we can remove water. (Hint: The water is a metaphor for data.)
There are different types of streamable data that require unique protocols for reading and writing data. We call these protocols stream wrappers. For example, we can read and write data to the filesystem. We can talk with remote web servers via HTTP, HTTPS, or SSH (secure shell). We can open, read, and write ZIP, RAR, or PHAR archives. All of these communication methods imply the same generic process:
Open communication.
Read data.
Write data.
Close communication.
Although the process is the same, reading and writing a filesystem file is different from sending or receiving HTTP messages. Stream wrappers, however, encapsulate these differences behind a common interface.
Every stream has a scheme and a target. We specify the scheme and target in the stream’s identifier using this familiar format:
<scheme>://<target>
The <scheme> identifies the stream’s wrapper. The <target>
identifies the stream data source. Example 5-28 creates a PHP
stream to/from the Flickr API. It uses the HTTP stream wrapper.
<?php$json=file_get_contents('http://api.flickr.com/services/feeds/photos_public.gne?format=json');
Don’t be fooled by what appears to be a traditional website URL.
The file_get_contents() function’s string argument is actually
a stream identifier. The http scheme prompts PHP to use the HTTP stream
wrapper. The argument’s remainder is the stream target. The stream target
looks like a traditional website URL only because that’s what
the HTTP stream wrapper expects. This may not be true for other
stream wrappers.
Reread this paragraph several times until it becomes ingrained in your memory. Many PHP developers don’t understand that a traditional URL is actually a PHP stream wrapper identifier in disguise.
We use the file_get_contents(), fopen(), fwrite(), and
fclose() methods to read from and write to the filesystem.
We rarely consider these functions as using PHP streams, because
the default PHP stream wrapper is file://. We’re using PHP
streams and we don’t even realize it! Example 5-29 creates a
stream to/from the /etc/hosts file using the file:// stream wrapper.
<?php$handle=fopen('/etc/hosts','rb');while(feof($handle)!==true){echofgets($handle);}fclose($handle);
Example 5-30 accomplishes the same task. This
example, however, explicitly specifies the file://
stream wrapper in the stream identifier.
<?php$handle=fopen('file:///etc/hosts','rb');while(feof($handle)!==true){echofgets($handle);}fclose($handle);
We usually omit the file:// stream wrapper because PHP assumes
this is the default value.
PHP developers who write command-line scripts will appreciate the
php:// stream wrapper. This stream wrapper communicates with
the PHP script’s standard input, standard output, and standard error
file descriptors. You can open, read from, and write to these four
streams with PHP’s filesystem functions:
php://stdinThis read-only PHP stream exposes data provided via standard input. For example, a PHP script can use this stream to receive information piped into the script on the command line.
php://stdoutThis PHP stream lets you write data to the current output buffer. This stream is write-only and cannot be read or seeked.
php://memoryThis PHP stream lets you read and write data to system memory. The
downside to this PHP stream is that available memory is finite. It’s
safer to use the php://temp stream instead.
php://tempThis PHP stream acts just like php://memory, except that when
available memory is gone, PHP instead writes to a temporary file.
PHP and PHP extensions provide many other stream wrappers. For example,
there are stream wrappers to communicate with ZIP and TAR archives,
FTP servers, data-compression libraries, Amazon APIs, and more.
A popular misconception is that the fopen(), fgets(), fputs(),
feof(), fclose(), and other PHP filesystem functions are for
filesystem files only. This is not true. PHP’s filesystem functions
work with all stream wrappers that support them. For example, we can
use fopen(), fgets(), fputs(), feof(), and fclose() to
interact with a ZIP archive, Amazon S3 (with the custom
S3 wrapper), or even Dropbox (with the custom
Dropbox wrapper).
Learn more about the php:// stream wrapper at PHP.net.
It’s also possible to write your own custom PHP stream wrapper. PHP
provides an example streamWrapper class that demonstrates how to write
a custom stream wrapper that supports some or all of the PHP filesystem
functions. Learn more about custom PHP stream wrappers at:
Some PHP streams accept an optional set of parameters, or a stream
context, to customize the stream’s behavior. Different stream wrappers
expect different context parameters. You create a stream
context with the stream_context_create() function. The returned
context object can be passed into and used by most PHP filesystem
and stream functions.
For example, did you know that you can send an HTTP POST request
with the file_get_contents() function? You can with a stream
context object (Example 5-31).
<?php$requestBody='{"username":"josh"}';$context=stream_context_create(array('http'=>array('method'=>'POST','header'=>"Content-Type: application/json;charset=utf-8;\r\n"."Content-Length: ".mb_strlen($requestBody),'content'=>$requestBody)));$response=file_get_contents('https://my-api.com/users',false,$context);
The stream context is an associative array whose topmost array key is the stream wrapper name. The stream context’s array values are specific to each stream wrapper. Consult the appropriate PHP stream wrapper’s documentation for a list of valid settings.
So far we’ve talked about opening, reading from, and writing to PHP streams. However, the true power of PHP streams is filtering, transforming, adding, or removing stream data in transit. Imagine opening a stream to a Markdown file and converting it into HTML automatically as you read the file into memory.
PHP provides several built-in stream filters, including
string.rot13, string.toupper, string.tolower, and string.strip_tags.
These are not useful. Use custom stream filters, instead.
You attach a filter to an existing stream with the stream_filter_append()
function. Example 5-32 uses the string.toupper filter to read data from a text
file on the local filesystem and convert its content to uppercase characters.
I don’t encourage using this particular stream filter. I’m only demonstrating
how to attach a filter to a stream.
<?php$handle=fopen('data.txt','rb');stream_filter_append($handle,'string.toupper');while(feof($handle)!==true){echofgets($handle);// <-- Outputs all uppercase characters}fclose($handle);
You can also attach a filter to a stream with the php://filter stream wrapper.
This only works if you attach the filter when you first open the PHP stream.
Example 5-33 accomplishes the same task as the previous example, except it
attaches the filter with php://filter strategy.
<?php$handle=fopen('php://filter/read=string.toupper/resource=data.txt','rb');while(feof($handle)!==true){echofgets($handle);// <-- Outputs all uppercase characters}fclose($handle);
Pay close attention to the fopen() function’s first argument. The
argument is a stream identifier that uses the php:// stream wrapper.
This is the stream identifier target:
filter/read=<filter_name>/resource=<scheme>://<target>
This strategy may appear superfluous compared to the stream_filter_append()
function. However, some PHP filesystem functions like file() or fpassthru()
do not give you the opportunity to attach filters after the function is called.
The php://filter stream wrapper is the only way to attach stream filters
with these functions.
Let’s look at a more realistic stream filter example. At New Media Campaigns, our in-house content management system archives nginx access logs to rsync.net. We keep one log file per day, and each log file is compressed with bzip2. Log filenames use the format YYYY-MM-DD.log.bz2. I was asked to extract access data for a specific domain for the past 30 days. This seems like a lot of work, right? I need to calculate a date range, determine log filenames, FTP into rsync.net, download files, decompress files, iterate each file line-by-line, extract appropriate lines, and write access data to an output destination. Believe it or not, PHP streams let me do all of this in fewer than 20 lines of code (Example 5-34).
01<?php02$dateStart=new\DateTime();03$dateInterval=\DateInterval::createFromDateString('-1 day');04$datePeriod=new\DatePeriod($dateStart,$dateInterval,30);05foreach($datePeriodas$date){06$file='sftp://USER:PASS@rsync.net/'.$date->format('Y-m-d').'.log.bz2';07if(file_exists($file)){08$handle=fopen($file,'rb');09stream_filter_append($handle,'bzip2.decompress');10while(feof($handle)!==true){11$line=fgets($handle);12if(strpos($line,'www.example.com')!==false){13fwrite(STDOUT,$line);14}15}16fclose($handle);17}18}
In Example 5-34:
Lines 2–4 create a DatePeriod instance that spans the past 30
days using an inverted, one-day interval.
Line 6 creates a log filename using the DateTime instance returned
by each DatePeriod iteration.
Lines 8–9 open a stream resource to the log file on rsync.net with the
SFTP stream wrapper. We decompress the bzip2 log file on the fly by appending
the bzip2.decompress stream filter to the log file stream resource.
Lines 10–15 iterate the decompressed log file contents using PHP’s standard filesystem functions.
Lines 12–14 inspect each line for a given domain. If the domain is present, the line is written to standard output.
The bzip2.decompress stream filter lets us automatically decompress
log files as we read them. The alternative solution is manually decompressing
log files into a temporary directory with shell_exec() or bzdecompress(),
iterating the decompressed files, and cleaning up the decompressed files
when our PHP script completes. PHP streams are a simpler, more elegant solution.
It’s possible to write custom stream filters, too. In fact, custom stream
filters are the primary reason you use stream filters. Custom stream filters
are PHP classes that extend the php_user_filter
built-in class. The custom stream class must implement the filter(), onCreate(),
and onClose() methods. You must register custom stream filters with the
stream_filter_register() function.
A PHP stream subdivides data into sequential buckets, and each bucket contains a fixed amount of stream data (e.g., 4,096 bytes). If we use our pipe metaphor, water is carried from origin to destination in individual buckets that float through the pipe and pass through stream filters. Each stream filter receives and manipulates one or more buckets at a time. The bucket or buckets received by a filter at any given time is called a bucket brigade.
Let’s create a custom stream filter that censors dirty words from a stream
as its data is read into memory (Example 5-35). First, we must create a PHP class that
extends php_user_filter. This class must implement a filter() method that
acts as a sieve through which stream buckets pass. It receives a bucket brigade
from upstream, it manipulates each bucket object in the brigade, and it sends
each bucket into the downstream bucket brigade toward the stream destination.
This is our DirtyWordsFilter custom stream class.
Each bucket object in a bucket brigade has two public properties: data
and datalen. These are the bucket content and content length, respectively.
classDirtyWordsFilterextendsphp_user_filter{/*** @param resource $in Incoming bucket brigade* @param resource $out Outgoing bucket brigade* @param int $consumed Number of bytes consumed* @param bool $closing Last bucket brigade in stream?*/publicfunctionfilter($in,$out,&$consumed,$closing){$words=array('grime','dirt','grease');$wordData=array();foreach($wordsas$word){$replacement=array_fill(0,mb_strlen($word),'*');$wordData[$word]=implode('',$replacement);}$bad=array_keys($wordData);$good=array_values($wordData);// Iterate each bucket from incoming bucket brigadewhile($bucket=stream_bucket_make_writeable($in)){// Censor dirty words in bucket data$bucket->data=str_replace($bad,$good,$bucket->data);// Increment total data consumed$consumed+=$bucket->datalen;// Send bucket to downstream brigadestream_bucket_append($out,$bucket);}returnPSFS_PASS_ON;}}
The filter() method receives, manipulates, and forwards buckets of stream data.
Inside the filter() function, we iterate the buckets in the
$in bucket brigade and replace dirty words with their censored
values. This method returns the PSFS_PASS_ON constant to indicate
successful operation. This method accepts four arguments:
$inA brigade of one or more upstream buckets that contains stream data from the stream origin
$outA brigade of one or more buckets that continue downstream toward the stream destination
&$consumedThe total number of stream bytes consumed by our custom filter
$closingIs the filter() method receiving the last available bucket
brigade?
We must register the DirtWordsFilter custom stream filter with the
stream_filter_register() function (Example 5-36).
<?phpstream_filter_register('dirty_words_filter','DirtyWordsFilter');
The first argument is the filter name that identifies our custom filter. The second argument is our custom filter’s class name. We can now use our custom stream filter (Example 5-37).
<?php$handle=fopen('data.txt','rb');stream_filter_append($handle,'dirty_words_filter');while(feof($handle)!==true){echofgets($handle);// <-- Outputs censored text}fclose($handle);
If you want to learn more about PHP streams, watch Elizabeth Smith’s Nomad PHP presentation. It’s not free, but it’s worth the admission price. You can also read more about PHP streams in the PHP documentation.
Things go wrong. It’s a fact of life. No matter how hard we concentrate or how much time we pour into a project, there are always bugs and errors that we overlook. For example, have you ever used a PHP application that displays only a blank white page? Have you ever visited a PHP website that spits out an indecipherable stack trace? These unfortunate situations indicate an application error or uncaught exception.
Errors and exceptions are wonderful tools that help you anticipate the unexpected.
They help you catch problems and fail gracefully. Errors and exceptions,
however, are confusingly similar. They both announce when something is wrong,
they both provide an error message, and they both have an error type.
Errors, however, are older than exceptions. They are a procedural device
that halts script execution and, if possible, delegates error handling
to a global error handler function. Some errors are unrecoverable. Today we
largely rely on exceptions instead of errors, but we must still maintain a
defensive posture; many older PHP functions (e.g., fopen()) still trigger
errors when things go wrong.
It’s possible to circumvent PHP errors with the @ prefix in front of
a PHP function that might trigger an error (e.g., @fopen()). This is
an antipattern. I recommend you change your code to avoid these situations.
Exceptions are an object-oriented evolution of PHP’s error handling system.
They are instantiated, thrown, and caught. Exceptions are a more flexible
device that anticipates and handles problems in situ without halting script
execution. Exceptions are also an offensive and defensive device. We must
anticipate exceptions thrown by third-party vendor code with try {} catch {}
blocks. We can also act offensively by throwing an exception; this delegates
exception handling to other developers when we don’t know how to handle a
given situation on our own.
An exception is an object of class Exception that is thrown when you
encounter an irreparable situation from which you cannot recover (e.g., a remote API is unresponsive, a database query fails, or a precondition
is not satisfied). I call these exceptional situations. Exceptions are
used offensively to delegate responsibility when a problem occurs, and
they are used defensively to anticipate and mitigate potential problems.
You instantiate an Exception object with the new keyword just like
any other PHP object. An Exception object has two primary properties: a
message and a numeric code. The message describes what went wrong. The
numeric code is optional and can be used to provide context for a given
exception. You provide the message and optional numeric code when you
instantiate an Exception object like this:
<?php$exception=newException('Danger, Will Robinson!',100);
You can inspect an Exception object with its getCode() and
getMessage() public instance methods like this:
<?php$code=$exception->getCode();// 100$message=$exception->getMessage();// 'Danger...'
You can assign an exception to a variable upon instantiation, but exceptions are meant to be thrown. If you write code for other developers, you must act offensively in exceptional situations, meaning you throw exceptions when your code encounters exceptional situations or cannot otherwise operate under current conditions. PHP component and framework authors, in particular, cannot presume how to handle exceptional situations; instead, they throw an exception and delegate responsibility to the developer using their code.
When an exception is thrown, code execution is immediately halted and
subsequent PHP code is not run. To throw an exception, use the throw
keyword followed by the Exception instance:
<?phpthrownewException('Something went wrong. Time for lunch!');
You can only throw an instance of class Exception (or a subclass of
Exception). PHP provides these built-in Exception subclasses:
The Standard PHP Library (SPL) supplements
PHP’s built-in exceptions with these additional Exception subclasses:
Each subclass exists for a certain situation and provides context for
why an exception is thrown. For example, if a PHP component method
expects a string argument with at least five characters but is given a
string with only two characters, it can throw an
InvalidArgumentException instance. Because PHP provides an exception
class, you can easily extend the Exception class to create your own
custom exception subclasses with their own custom properties and
methods. Which exception subclass you use is subjective. Choose or
create the exception subclass that best answers why am I throwing this
exception?, and document your choice.
Thrown exceptions should be caught and handled gracefully. You must act defensively when using PHP components and frameworks written by other developers. Good PHP components and frameworks provide documentation that explains when and under what circumstances they throw exceptions. It is your responsibility to anticipate, catch, and handle these exceptions. Uncaught exceptions terminate your PHP application with a fatal error and, worse, can expose sensitive debugging details to your PHP application’s users. We’ve all seen this. It is very important that you catch exceptions and handle them gracefully.
Surround code that might throw an exception with a try/catch block
to intercept and handle potential exceptions. Example 5-38 demonstrates
a failed PDO database connection that throws a PDOException object.
The exception is caught by the catch block, and we show a
friendly error message instead of an ugly stack trace.
<?phptry{$pdo=newPDO('mysql://host=wrong_host;dbname=wrong_name');}catch(PDOException$e){// Inspect the exception for logging$code=$e->getCode();$message=$e->getMessage();// Display a nice message to the userecho'Something went wrong. Check back soon, please.';exit;}
You can use multiple catch blocks to intercept multiple types of
exceptions. This is useful if you need to act differently based on the
type of exception thrown. You can also use a finally block to always
run a block of code after you catch any exception (Example 5-39).
<?phptry{thrownewException('Not a PDO exception');$pdo=newPDO('mysql://host=wrong_host;dbname=wrong_name');}catch(PDOException$e){// Handle PDO exceptionecho"Caught PDO exception";}catch(Exception$e){// Handle all other exceptionsecho"Caught generic exception";}finally{// Always do thisecho"Always do this";}
In Example 5-39, the first catch block intercepts PDOException
exceptions. All other exceptions are intercepted by the second catch
block. Only one catch block is run for each caught exception. If PHP
does not find an applicable catch block, the exception continues
to bubble upward until the PHP script ultimately terminates with a
fatal error.
You may be thinking how am I supposed to catch every possible exception? And that’s a good question. PHP lets you register a global exception handler to catch otherwise uncaught exceptions. You should always set a global exception handler. An exception handler is a final safety net that lets you show an appropriate error message to your PHP application’s users if you otherwise fail to catch and handle an exception. For my own PHP applications, I use exception handlers to show debugging information during development and a user-friendly message during production.
An exception handler is anything that is callable. I prefer to use an
anonymous function, but you can also use a class method. Whatever you
choose, it must accept one argument of class Exception. You register
your exception handler with the set_exception_handler() function like
this:
<?phpset_exception_handler(function(Exception$e){// Handle and log exception});
I strongly recommend you log exceptions inside your exception handler. Your logger can alert you when things go wrong, and it saves exception details for later review.
In some situations, you may need to replace an existing exception
handler with your own exception handler. PHP etiquette suggests you
restore the existing exception handler when your code is finished.
You can restore a previous exception handler with the
restore_exception_handler() function (Example 5-40).
<?php// Register your exception handlerset_exception_handler(function(Exception$e){// Handle and log exception});// Your code goes here...// Restore previous exception handlerrestore_exception_handler();
PHP provides error-reporting functions in addition to exceptions. This confuses many PHP developers. PHP can trigger different types of errors, including fatal errors, runtime errors, compile-time errors, startup errors, and (more rarely) user-triggered errors. You’ll most often encounter PHP errors caused by syntax mistakes or uncaught exceptions.
The difference between errors and exceptions is subtle. Errors are often
triggered when a PHP script cannot fundamentally run as expected for
whatever reason (e.g., there is a syntax mistake). It is also possible
to trigger your own errors with the trigger_error() function and
handle them with a custom error handler, but it is better to use
exceptions when writing userland code. Unlike errors, PHP exceptions can
be thrown and caught at any level of your PHP application. Exceptions
provide more contextual information than PHP errors. And you can extend
the topmost Exception class with your own custom exception
subclasses. Exceptions and a good logger like Monolog are a far more
versatile solution than PHP errors. However, modern PHP developers must
anticipate and handle both PHP errors and PHP exceptions.
You can instruct PHP which errors to report, and which to ignore, with
the error_reporting() function or the error_reporting directive in
your php.ini file. Both accept named E_* constants that determine
which errors are reported and which are ignored.
Learn more about PHP error reporting at http://php.net/manual/function.error-reporting.php.
PHP error reporting can be as sensitive or stoic as you tell it to be. In development, I prefer PHP to obnoxiously display and log all error messages. In production, I instruct PHP to log most error messages but not display them. Whatever you do, you should always follow these four rules:
Always turn on error reporting.
Display errors during development.
Do not display errors during production.
Log errors during development and production.
Here are my error-reporting php.ini settings for development:
; Display errorsdisplay_startup_errors=Ondisplay_errors=On; Report all errorserror_reporting=-1; Turn on error logginglog_errors=On
Here are my error-reporting php.ini settings for production:
; DO NOT display errorsdisplay_startup_errors=Offdisplay_errors=Off; Report all errors EXCEPT noticeserror_reporting=E_ALL & ~E_NOTICE; Turn on error logginglog_errors=On
The main difference is that I display errors in my PHP script output during development. I do not display errors in my PHP script output in production. However, I log errors in both environments. If I have a bug in my production PHP application (and this never happens…cough), I can review my PHP log file for details.
Just as you can with exception handlers, you can set a global error handler to intercept and handle PHP errors with your own logic. The error handler lets you fail gracefully by cleaning up loose ends before terminating the PHP script.
An error handler, like an exception handler, is anything that is
callable (e.g., a function or class method). It is your responsibility
to die() or exit() inside of your error handler. If you don’t
manually terminate the PHP script inside your error handler, the PHP
script will continue executing from where the error occurred.
You register your global error handler with the set_error_handler(),
and you pass it an argument that is callable:
<?phpset_error_handler(function($errno,$errstr,$errfile,$errline){// Handle error});
Your error-handler callable receives five arguments:
$errnoThe error level (maps to a PHP E_* constant).
$errstrThe error message.
$errfileThe filename in which the error occurred.
$errlineThe file line number on which the error occurred.
$errcontextAn array that points to the active symbol table when the error occurred. This is optional and is only useful for advanced debugging purposes. I usually ignore this argument.
There’s one important caveat that you absolutely must know when using a
custom error handler. PHP will send all errors to your error handler,
even those that are excluded by your current error-reporting setting. It
is your responsibility to inspect each error code (the first argument)
and act appropriately. You can instruct your error handler to only
respond to a subset of error types with a second argument to the
set_error_handler() function; this argument is a bitwise mask of E_*
constants (e.g., E_ALL | E_STRICT).
This is as good a time as any to segue into a common practice that I
and many other PHP developers use in our PHP applications. I like to
convert PHP errors into ErrorException objects. The ErrorException
class is a subclass of Exception, and it comes built into PHP. This
lets me convert PHP errors into exceptions and funnel them into my
existing exception handling workflow.
Not all errors can be converted into exceptions! These errors include
E_ERROR, E_PARSE, E_CORE_ERROR, E_CORE_WARNING,
E_COMPILE_ERROR, E_COMPILE_WARNING, and most of E_STRICT.
Converting PHP errors is a bit tricky, and we must be careful to convert
only the errors that satisfy the error_reporting setting in our
php.ini file. Here’s an example error-handler function that converts
PHP errors into ErrorException objects:
<?phpset_error_handler(function($errno,$errstr,$errfile,$errline){if(!(error_reporting()&$errno)){// Error is not specified in the error_reporting// setting, so we ignore it.return;}thrownew\ErrorException($errstr,$errno,0,$errfile,$errline);});
This error-handler function converts the appropriate PHP errors into
ErrorException objects and throws them into our existing exception-handling system. It is considered good etiquette to restore the previous
error handler (if any) after your own code is done. You can restore the
previous handler with the restore_error_handler() function (Example 5-41).
<?php// Register error handlerset_error_handler(function($errno,$errstr,$errfile,$errline){if(!(error_reporting()&$errno)){// Error is not specified in the error_reporting// setting, so we ignore it.return;}thrownewErrorException($errstr,$errno,0,$errfile,$errline);});// Your code goes here...// Restore previous error handlerrestore_error_handler();
We know we should display errors during development. But PHP’s default error messages are ugly and often injected into the normal PHP script output, resulting in a hard-to-read mess. Use Whoops instead. Whoops is a modern PHP component that provides a well-designed, easy-to-read diagnostics page for PHP errors and exceptions. Whoops, created and maintained by Filipe Dobreira and Denis Sokolov, looks like Figure 5-1.
The Whoops diagnostic screen is light years better than the default PHP error and exception output.
Whoops is easy to implement, too. Update your composer.json file
as shown below, and run either composer install or composer update:
{"require":{"filp/whoops":"~1.0"}}
Next, register the Whoops error and exception handlers in your PHP application’s bootstrap file, as shown in Example 5-42.
<?php// Use composer autoloaderrequire'path/to/vendor/autoload.php';// Setup Whoops error and exception handlers$whoops=new\Whoops\Run;$whoops->pushHandler(new\Whoops\Handler\PrettyPageHandler);$whoops->register();
That’s it. When your script triggers a PHP error or when your application does not catch an exception, you’ll see the Whoops diagnostic screen.
Example 5-42 uses the Whoops PrettyPageHandler handler, which
creates the diagnostic screen shown in Figure 5-1. There are
other Whoops handlers, too, including a plain-text handler, a callback
handler, a JSON response handler, an XML response handler, and (if your
pointy-haired boss likes to say the word enterprise a lot) a SOAP
response handler. I use Whoops during development for each application I develop.
We know we should log errors in production. PHP provides the
error_log() function to write messages to the filesystem, to syslog,
or into an email. But there’s a better option, and it’s called
Monolog. Monolog is a very good
PHP component that specializes in one thing—logging. It’s
easy to integrate into your PHP applications with Composer.
First, require the monolog/monolog package in your composer.json file:
{"require":{"monolog/monolog":"~1.11"}}
Next, install the component with either composer install or
composer update, and add the code from Example 5-43 to the top of your PHP application’s bootstrap file.
<?php// Use Composer autoloaderrequire'path/to/vendor/autoload.php';// Import Monolog namespacesuseMonolog\Logger;useMonolog\Handler\StreamHandler;// Setup Monolog logger$log=newLogger('my-app-name');$log->pushHandler(newStreamHandler('path/to/your.log',Logger::WARNING));
That’s it. You now have a Monolog logger that will write all logged
messages of type Logger::WARNING or higher to the path/to/your.log file.
Monolog is very extensible. You can define multiple handlers that
only handle specific log levels. For example, we can push a second Monolog
handler that emails an administrator for critical, alert, or emergency
errors. We’ll need the SwiftMailer PHP component, so let’s add
that to the composer.json file and run composer update:
{"require":{"monolog/monolog":"~1.11","swiftmailer/swiftmailer":"~5.3"}}
Next, we’ll modify our code and add a new Monolog handler that accepts a SwiftMailer instance to send email messages (Example 5-44).
<?php// Use Composer autoloaderrequire'vendor/autoload.php';// Import Monolog namespacesuseMonolog\Logger;useMonolog\Handler\StreamHandler;useMonolog\Handler\SwiftMailerHandler;date_default_timezone_set('America/New_York');// Setup Monolog and basic handler$log=newLogger('my-app-name');$log->pushHandler(newStreamHandler('logs/production.log',Logger::WARNING));// Add SwiftMailer handler for critical errors$transport=\Swift_SmtpTransport::newInstance('smtp.example.com',587)->setUsername('USERNAME')->setPassword('PASSWORD');$mailer=\Swift_Mailer::newInstance($transport);$message=\Swift_Message::newInstance()->setSubject('Website error!')->setFrom(array('daemon@example.com'=>'John Doe'))->setTo(array('admin@example.com'));$log->pushHandler(newSwiftMailerHandler($mailer,$message,Logger::CRITICAL));// Use logger$log->critical('The server is on fire!');
Now when a critical, alert, or emergency message is logged, Monolog
emails the logged message using the SwiftMailer $mailer and $message
objects. The email body is the logged message text.
So you have a PHP application. Congratulations! However, it doesn’t do anyone any good unless your users can, you know, use it. You need to host your application on a server and make it accessible to its intended audience. Generally speaking, there are four ways to host PHP applications: shared servers, virtual private servers, dedicated servers, and platforms as a service. Each has its unique benefits and is suitable for different types of applications and budgets.
There are also many web hosting companies, and it can be overwhelming if you are brand new to the web hosting landscape. Some hosting companies provide only shared servers. Other companies provide a mix of shared servers, virtual private servers, and dedicated servers. This chapter will focus less on the companies themselves and more on hosting options.
A shared server is the most affordable hosting option and costs $1–10/month. You should avoid shared hosting plans. This is not a commentary on shared hosting companies’ quality of service or customer support. There are many good shared hosting companies. Simply put, shared hosting options are not developer-friendly.
A shared server, as its name implies, means that you share server resources with other people. If you purchase a shared hosting plan, your hosting account lives on the same physical machine as many other customers’. If your particular machine has 2 Gb of memory, your PHP application might receive only a fraction of that memory, depending on how many other customer accounts live on the same machine. If another account on the same machine runs a poorly coded script, it can negatively affect your own application. Some shared hosting companies oversell shared servers, and your PHP application constantly battles for system resources on a crowded machine.
Shared servers are also very difficult to customize. For example, your application may need Memcached or Redis for a fast, in-memory cache. You may want to install Elasticsearch to add search functionality to your application. Unfortunately, shared server software is difficult—if not impossible—to customize. Your applications suffer as a result.
Shared servers rarely provide remote SSH access. Instead, you’re often handicapped with (S)FTP access only. This limitation severely restricts your ability to automate PHP application deployment.
If your budget is super-small or your needs extremely modest, a shared server may be sufficient. However, if you’re building a business website or a moderately popular PHP application, you’re better off using a virtual private server, a dedicated server, or a PaaS.
A virtual private server (VPS) looks, feels, and acts like a bare-metal server. But it’s not a bare-metal server. A VPS is a collection of system resources that are distributed across one or many physical machines. A VPS still has its own filesystem, root user, system processes, and IP address. A VPS is allocated a specific amount of memory, CPU, and bandwidth—and they’re all yours.
VPSs provide more system resources than a shared server. A VPS provides root SSH access. And a VPS does not limit what software you can install. Great power, though, comes with great responsibility. VPSs give you root access to a virgin operating system. It is your responsibility to configure and secure the operating system for your PHP application. VPSs are ideal for most PHP applications. They provide sufficient system resources (e.g., CPU, memory, and disk space) that scale up or down on demand. A VPS costs $10–100/month based on the amount of system resources needed by your PHP application. If your PHP application becomes super-popular (hundreds of thousands of visitors a month) and a VPS becomes too costly, you might consider upgrading to a dedicated server.
I almost always prefer VPSs for their balance of cost, features, and flexibility. Linode, my favorite hosting company, provides VPS and dedicated hosting plans. Linode isn’t the cheapest option, but my personal experience shows Linode is fast and stable, and it comes with a vast treasure of helpful tutorials.
A dedicated server is a rack-mounted machine that your hosting company installs, runs, and maintains on your behalf. You configure dedicated servers to your exact specifications. Dedicated servers are real machines that must be transported, installed, and monitored. They cannot be set up and configured as quickly as VPSs. That being said, dedicated servers provide the ultimate performance for demanding PHP applications.
Dedicated servers act much like VPSs. You get root SSH access to a virgin operating system, and you must secure and configure the operating system for your PHP application. The benefit of a dedicated server is cost-effectiveness. Eventually a VPS becomes too costly as you consume more system resources. You save money by investing in your own infrastructure.
A dedicated server costs hundreds of dollars per month depending on the server specifications. It can be unmanaged (i.e., you manage the server yourself) or managed (i.e., you pay extra for your hosting company to manage the server).
Platforms as a service (PaaS) are a quick way to launch your PHP application, and—unlike with a virtual private or dedicated server—you don’t have to manage a PaaS. All you have to do is log into your PaaS provider’s control panel and click a few buttons. Some PaaS providers have a command-line or HTTP API with which you can deploy and manage your hosted PHP applications. Popular PHP PaaS providers include:
PaaS pricing varies by provider but is similar to virtual private servers: $10–100/month. You pay for the system resources allocated to your PHP application. System resources can be scaled up or down on demand. I recommend PaaS hosting plans for developers who do not want to manage their own servers.
Choose only what you need when you need it. You can always scale your hosting infrastructure up or down when necessary. For small PHP applications or prototypes, a PaaS provider like Engine Yard or Heroku is the best and quickest solution. If you prefer more control over your server configuration, get a VPS. If your application becomes super-popular and your VPS is buckling beneath the weight of millions of visitors (congratulations, by the way!), get a dedicated server. Whichever hosting option you choose, make sure it provides the latest stable PHP version and extensions required by your PHP application.
After you choose a host for your application, it’s time to configure and provision the server for your PHP application. I’ll be honest—provisioning a server is an art, not a science. How you provision your server depends entirely on your application’s needs.
If you use a PaaS, your server infrastructure is managed by the PaaS provider. All you have to do is follow the provider’s instructions to move your PHP application onto their platform, and you’re ready to go.
If you don’t use a PaaS, you must provision either a VPS or dedicated server to run your PHP application. Provisioning a server is not as hard as it sounds (stop laughing), but it does require familiarity with the command line. If the command line is alien to you, you’re better off with a PaaS like Engine Yard or Heroku.
I don’t consider myself a system administrator. However, basic system adminstration is an incredibly valuable skill for application developers that enables more flexible and robust application development. In this chapter, I’ll share my system administration knowledge so you can feel comfortable opening a terminal to provision a server for your PHP application. Afterward, I’ll suggest a few additional resources for you to continue improving your system administration skills.
In this chapter, I assume you know how to edit a text file using a command-line editor like nano or vim (these are available on most Linux distributions). Otherwise, you’ll need an alternative method of accessing and editing files on your server.
First, we need to acquire a virtual private or dedicated server. Next, we need to install a web server to receive HTTP requests. Finally, we need to set up and manage a group of PHP processes to handle PHP requests; these processes must communicate with our web server.
Several years ago, it was common practice to install the Apache web server and
the Apache mod_php module. The Apache web server spawns a unique child
process to handle each HTTP request. The Apache mod_php module embeds a
unique PHP interpreter inside each spawned child process—even processes
that serve only static assets like JavaScript, images, or stylesheets. This is
a lot of overhead that wastes system resources. I see fewer and fewer PHP
developers use Apache nowadays because there are more efficient solutions.
Today, we use the nginx web server, which sits in front of (and forwards PHP requests to) a collection of PHP-FPM processes. That’s the solution I’ll demonstrate in this chapter.
First, let’s set up a virtual private server (VPS). I absolutely adore Linode. It isn’t the cheapest VPS provider, but it’s one of the most reliable. Head over to Linode’s website (or your preferred vendor) and purchase a new VPS. Your vendor will ask you to choose a Linux distribution and a root password for your new server.
Many VPS providers, like Linode and Digital Ocean, bill by the hour. This means you can fire up and play with a VPS at virtually zero cost.
The first thing you should do is log in to your new server. Let’s do that now.
Open a terminal on your local machine and ssh into your server. Be
sure you swap in your own machine’s IP address:
ssh root@123.456.78.90
You may be asked to confirm the authenticity of your new server. Type
yes and press Enter:
The authenticity of host '123.456.78.90 (123.456.78.90)' can't be established. RSA key fingerprint is 21:eb:37:f3:a5:d3:c0:77:47:c4:15:3d:3c:dc:3c:d1. Are you sure you want to continue connecting (yes/no)?
Next, you’ll be prompted for the root user’s password. Type the password and press Enter:
root@123.456.78.90's password:
You are now logged into your new server!
The very next thing you should do is update your operating system’s software with these commands.
# Ubuntuapt-get update;apt-get upgrade;
# CentOS
yum updateThese commands spit out a lot of information as software updates for your operating system are downloaded and applied. This is an important first step because it ensures you have the latest updates and security fixes for your operating system’s default software.
Your new server is not secure. Here are a few good practices to harden your new server’s security.
Create a nonroot user. You should log in to your server as this nonroot user in the future. The root user has unlimited power on your server. It is God. It can run any command without question. You should make it as difficult as possible to access your server as the root user.
Create a new nonroot user named deploy with the command in Example 7-1. Enter a user
password when prompted, and follow the remaining on-screen instructions.
adduser deploy
Next, assign the deploy user to the sudo group with this command:
usermod -a -G sudo deploy
This gives the deploy user sudo privileges (i.e., it can perform
privileged tasks with password authentication).
Create a new nonroot user named deploy with this command:
adduser deploy
Give the deploy user a password with this command. Enter and confirm
the new password when prompted:
passwd deploy
Next, assign the deploy user to the wheel group with this command:
usermod -a -G wheel deploy
This gives the deploy user sudo privileges (i.e., it can perform
privileged tasks with password authentication).
On your local machine, you can log into your new server as the nonroot
deploy user like this:
ssh deploy@123.456.78.90
You’ll be prompted for the deploy user’s password, and then you’ll be logged
in to the server. We can make the login process more secure by disabling password
authentication. Password authentication is vulnerable to brute-force attacks
in which bad guys try to guess your password over and over in quick succession.
Instead, we’ll use SSH key-pair authentication when we
ssh into our server.
Key-pair authentication is a complex subject. In basic terms, you create a pair of “keys” on your local machine. One key is private (this stays on your local machine), and one key is public (this goes on the remote server). They are called a key pair because messages encrypted with the public key can be decrypted only by the related private key.
When you log in to the remote machine using SSH key-pair authentication, the remote machine creates a random message, encrypts it with your public key, and sends it to your local machine. Your local machine decrypts the message with your private key and returns the decrypted message to the remote server. The remote server then validates the decrypted message and grants you access to the server. This is a dramatic simplification, but you get the point.
If you log in to your remote server from many different computers, you probably do not want to use SSH key-pair authentication. This would require you to generate public/private SSH key pairs for each local computer and copy each key pair’s public key to your remote server. In this case, it’s probably preferable to continue using password authentication with a secure password. However, if you are only accessing your remote server from a single local computer (as many developers often do), SSH key-pair authentication is the way to go. You can create an SSH key-pair on your local machine with this command:
ssh-keygen
Follow the subsequent on-screen instructions and enter the requested
information when prompted. This command creates two files on your local
machine: ~/.ssh/id_rsa.pub (your public key) and ~/.ssh/id_rsa
(your private key). The private key should stay on your local computer and
remain a secret. Your public key, however, must be copied onto your new server.
We can copy the public key with the scp (secure copy) command:
scp ~/.ssh/id_rsa.pub deploy@123.456.78.90:
Be sure you include the trailing : character! This command uploads your
public key to the deploy user’s home directory on your remote server. Next,
log in to your remote server as the deploy user. After you log in to your
remote server, make sure the ~/.ssh directory exists. If it does not exist,
create the ~/.ssh directory with this command:
mkdir ~/.ssh
Next, create the ~/.ssh/authorized_keys file with this command:
touch ~/.ssh/authorized_keys
This file will contain a list of public keys that are allowed to log into this remote server. Execute this command to append your recently uploaded public key to the ~/.ssh/authorized_keys file:
cat ~/id_rsa.pub >> ~/.ssh/authorized_keys
Finally, we need to modify a few directory and file permissions so that only
the deploy user can access its own ~/.ssh directory and read its own
~/.ssh/authorized_keys file. Assign these permissions with these commands:
chown -R deploy:deploy ~/.ssh;chmod700~/.ssh;chmod600~/.ssh/authorized_keys;
We’re done! On your local machine, you should now be able to ssh into the
remote server without entering a password.
You can only ssh into your remote server without a password from the local machine that has your private key!
Let’s make the remote server even more secure. We’ll disable password authentication
for all users, and we’ll prevent the root user from logging in—period.
Remember, the root user can do anything, so we want to make it as difficult
as possible to access our server as the root user.
Log in to the remote server as the deploy user and open the
/etc/ssh/sshd_config file in your preferred text editor. The is the SSH
server software’s configuration file. Find the PasswordAuthentication setting and
change its value to no; uncomment this setting if necessary. Find the PermitRootLogin
setting and change its value to no; uncomment this setting if necessary. Save your
changes and restart the SSH server with this command to apply your changes:
# Ubuntusudo service ssh restart# CentOSsudo systemctl restart sshd.service
You’re done. You’ve secured your server, and it’s time to install additional
software to run your PHP application. From this point forward, all instructions
should be completed on the remote server as the nonroot deploy user.
PHP-FPM (PHP FastCGI Process Manager)
is software that manages a pool of related PHP processes that receive and handle
requests from a web server like nginx. The PHP-FPM software creates one master
process (usually run by the operating system’s root user) that controls how
and when HTTP requests are forwarded to one or more child processes. The PHP-FPM
master process also controls when child PHP processes are created (to answer
additional web application traffic) and destroyed (if they are too old or no
longer necessary). Each PHP-FPM pool process lives longer than a single
HTTP request, and it can handle 10, 50, 100, 500, or more HTTP requests.
The simplest way to install PHP-FPM is with your operating sytem’s native package manager, as demonstrated by the following commands.
See Appendix A for a detailed PHP-FPM installation guide.
# Ubuntusudo apt-get install python-software-properties;sudo add-apt-repository ppa:ondrej/php5-5.6;sudo apt-get update;sudo apt-get install php5-fpm php5-cli php5-curl\php5-gd php5-json php5-mcrypt php5-mysqlnd;
# CentOSsudo rpm -Uvh\http://dl.fedoraproject.org/pub/epel/7/x86_64/e/epel-release-7-5.noarch.rpm;sudo rpm -Uvh\http://rpms.famillecollet.com/enterprise/remi-release-7.rpm;sudo yum -y --enablerepo=epel,remi,remi-php56 install php-fpm php-cli php-gd\php-mbstring php-mcrypt php-mysqlnd php-opcache php-pdo php-devel;
If the EPEL rpm installation fails, open a web browser and navigate to
http://dl.fedoraproject.org/pub/epel/7/x86_64/e/. Look for an updated
EPEL release version and use that.
On Ubuntu, the primary PHP-FPM cofiguration file is /etc/php5/fpm/php-fpm.conf. On CentOS, the primary PHP-FPM configuration file is /etc/php-fpm.conf. Open this file in your preferred text editor.
PHP-FPM configuration files use the INI file format. Learn more about the INI format on Wikipedia.
These are the most important global PHP-FPM settings that I recommend you change from their default values. These two settings might be commented out by default; uncomment them if necessary. These settings prompt the master PHP-FPM process to restart if a specific number of its child processes fail within a specific interval of time. These settings are a basic safety net for your PHP-FPM processes that can resolve simple issues. They are not a solution to more fundamental problems caused by bad PHP code.
emergency_restart_threshold = 10The maximum number of PHP-FPM child processes that can fail within a given time interval until the master PHP-FPM process gracefully restarts
emergency_restart_interval = 1mThe length of time that governs the emergency_restart_threshold setting
Read more about PHP-FPM global configuration at http://php.net/manual/en/install.fpm.configuration.php.
Elsewhere in the PHP-FPM configuration file is a section named
Pool Definitions. This section contains configuration settings
for each PHP-FPM pool. A PHP-FPM pool is a collection of related PHP child
processes. One PHP application typically has its own PHP-FPM pool.
On Ubuntu, the Pool Definitions section contains this one line:
include=/etc/php5/fpm/pool.d/*.conf
CentOS includes the pool definition files at the top of the primary PHP-FPM configuration file with this line:
include=/etc/php-fpm.d/*.conf
This line prompts PHP-FPM to load individual pool definition files located in the
/etc/php5/fpm/pool.d/ directory (for Ubuntu) or the /etc/php-fpm.d/
directory (for CentOS). Navigate into this directory, and you should see one
file named www.conf. This is the configuration file for the default PHP-FPM
pool named www. Open this file in your preferred text editor.
Each PHP-FPM pool configuration begins with a [ character, the pool name,
and a ] character. The default PHP-FPM pool configuration, for example,
begins with [www].
Each PHP-FPM pool runs as the operating system user and group that you specify.
I prefer to run each PHP-FPM pool as a unique nonroot user to help me
identify each PHP application’s PHP-FPM processes on the command line
with the top or ps aux commands. This is a good habit, too, because each
PHP-FPM pool’s processes are inherently sandboxed by the permissions available
to their operating system user and group.
We’ll configure the default www PHP-FPM pool to run as the deploy user and
group. If you haven’t already, open the www PHP-FPM pool configuration file
in your preferred text editor. Here are the settings I recommend you change
from their default values:
user = deployThe system user that owns this PHP-FPM pool’s child processes. Set this to your PHP application’s nonroot operating system user name.
group = deployThe system group that owns this PHP-FPM pool’s child processes. Set this to your PHP application’s nonroot operating system group name.
listen = 127.0.0.1:9000The IP address and port number on which this PHP-FPM pool listens for and
accepts inbound requests from nginx. The value 127.0.0.1:9000 instructs this specific
PHP-FPM pool to listen for incoming connections on local port 9000. I use
port 9000, but you can use any nonprivileged port number (any port number
greater than 1024) that is not already in use by another system process. We’ll
revisit this setting when we configure our nginx virtual host.
listen.allowed_clients = 127.0.0.1The IP address(es) that can send requests to this PHP-FPM pool. For security
reasons, I set this to 127.0.0.1. This means that only the current machine
can forward requests to this PHP-FPM pool. This setting might be commented
out by default. Uncomment this setting if necessary.
pm.max_children = 51This value sets the total number of PHP-FPM pool processes that can exist
at any given time. There is no correct value for this setting. You should
test your PHP application, determine how much memory each individual PHP
process uses, and set this to the total number of PHP processes that your
machine’s available memory can accommodate. Most small to medium-sized PHP
applications often use between 5 MB and 15 MB of memory for each individual PHP
process (your mileage may vary). Assuming we are on a machine with 512 MB of
memory available to this PHP-FPM pool, we can set this value to
512MB total / 10MB per process, or 51 processes.
pm.start_servers = 3The number of PHP-FPM pool processes that are available immediately when
PHP-FPM starts. Again, there is no correct value for this setting. For most
small or medium-sized PHP applications, I recommend a value of 2 or 3.
This ensures that your PHP application’s initial HTTP requests don’t have to
wait for PHP-FPM to initialize PHP-FPM pool processes. Two
or three processes are already ready and waiting.
pm.min_spare_servers = 2The smallest number of PHP-FPM pool processes that exist when your PHP
application is idle. This will typically be in the same ballpark as your
pm.start_servers setting, and it ensures that new HTTP requests don’t have
to wait for PHP-FPM to initialize new pool processes to handle new requests.
pm.max_spare_servers = 4The largest number of PHP-FPM pool processes that exist when your PHP
application is idle. This will typically be a bit more than your
pm.start_servers setting, and it ensures that new HTTP requests don’t have
to wait for PHP-FPM to initialize new pool processes to handle new requests.
pm.max_requests = 1000The maximum number of HTTP requests that each PHP-FPM pool process handles
before being recycled. This setting helps us avoid accumulating memory leaks
caused by poorly coded PHP extensions or libraries. I recommend a value
of 1000, but you should tweak this based on your own application’s needs.
slowlog = /path/to/slowlog.logThe absolute filesystem path to a log file that records information about
HTTP requests that take longer than {n} number of seconds to process. This
is helpful for identifying and debugging bottlenecks in your PHP
applications. Bear in mind, this PHP-FPM pool’s user or group must have
permission to write to this file. The value /path/to/slowlog.log is an
example; replace this value with your own file path.
request_slowlog_timeout = 5sThe length of time after which the current HTTP request’s backtrace is dumped
to the log file specified by the slowlog setting. The value you choose
depends on what you consider to be a slow request. A value of 5s is a
reasonable value to start with.
After you edit and save the PHP-FPM configuration file, restart the PHP-FPM master process with this command:
# Ubuntusudo service php5-fpm restart# CentOSsudo systemctl restart php-fpm.service
Read more about PHP-FPM pool configuration at http://php.net/manual/install.fpm.configuration.php.
nginx (pronounced in gen ex) is a web server similar to Apache, but it’s much simpler to configure and often uses less system memory. I don’t have time to dig into nginx in detail, but I do want to show you how to install nginx on your server and forward appropriate requests to your PHP-FPM pool.
The simplest way to install nginx is with your operating system’s native package manager.
On Ubuntu, install nginx with a PPA. This is an Ubuntu-specific term for a prepackaged archive maintained by the nginx community:
sudo add-apt-repository ppa:nginx/stable;sudo apt-get update;sudo apt-get install nginx;
On CentOS, install nginx using the same EPEL third-party software repository we added earlier. The default CentOS software repositories might not have the latest nginx version:
sudo yum install nginx;sudo systemctlenablenginx.service;sudo systemctl start nginx.service;
Next, we’ll configure an nginx virtual host for our PHP application. A virtual host is a group of settings that tell nginx our application’s domain name, where the PHP application lives on the filesystem, and how to forward HTTP requests to the PHP-FPM pool.
First, we must decide where our application lives on the filesystem.
The PHP application files must live in a filesystem directory that is
readable and writable by the nonroot deploy user. For this example,
I’ll place application files in the /home/deploy/apps/example.com/current
directory. We’ll also need a directory to store application log files.
I’ll place log files in the /home/deploy/apps/logs directory. Use these
commands to create the directories and assign correct permissions:
mkdir -p /home/deploy/apps/example.com/current/public;mkdir -p /home/deploy/apps/logs;chmod -R +rx /home/deploy;
Place your PHP application in the /home/deploy/apps/example.com/current directory. The nginx virtual host configuration assumes your PHP application has a public/ directory; this is the virtual host document root.
Each nginx virtual host has its own configuration file. If you use Ubuntu, create the /etc/nginx/sites-available/example.conf configuration file. If you use CentOS, create the /etc/nginx/conf.d/example.conf configuration file. Open the example.conf configuration file in your preferred text editor.
nginx virtual host settings live inside a server {} block. Here is the complete
virtual host configuration file:
server{listen 80;server_name example.com;index index.php;client_max_body_size 50M;error_log /home/deploy/apps/logs/example.error.log;access_log /home/deploy/apps/logs/example.access.log;root /home/deploy/apps/example.com/current/public;location /{try_files$uri$uri/ /index.php$is_args$args;}location ~\.php{try_files$uri=404;fastcgi_split_path_info ^(.+\.php)(/.+)$;include fastcgi_params;fastcgi_param SCRIPT_FILENAME$document_root$fastcgi_script_name;fastcgi_param SCRIPT_NAME$fastcgi_script_name;fastcgi_index index.php;fastcgi_pass 127.0.0.1:9000;}}
Copy and paste this code into the example.conf virtual host configuration file.
Make sure you update the server_name setting and swap the error_log,
access_log, and root paths with appropriate values. Here’s a quick
explanation of each virtual host setting:
listenThe port number on which nginx listens for inbound HTTP requests. In most
cases, this is port 80 for HTTP traffic or port 443 for HTTPS
traffic.
server_nameThe domain name that identifies this virtual host. Change this to your
application’s domain name, and ensure the domain name points at
your server’s IP address. nginx sends an HTTP request to this virtual
host if the request’s Host: header matches the virtual host’s
server_name value.
indexThe default files served if none is specified in the HTTP request URI.
client_max_body_sizeThe maximum HTTP request body size accepted by nginx for this virtual host.
If the request body size exceeds this value, nginx returns a HTTP 4xx response.
error_logThe filesystem path to this virtual host’s error log file.
access_logThe filesystem path to this virtual host’s access log file.
rootThe document root directory.
There are also two location blocks. These tell nginx how to
handle HTTP requests that match specific URL patterns. The first
location / {} block uses a try_files directive that looks for real files
that match the request URI. If a file is not found, it looks for a directory
that matches the request URI. If a directory is not found, it rewrites the
HTTP request URI to /index.php and appends the query string if available.
The rewritten URL, or any request whose URI ends with .php, is managed by
the location ~ \.php {} block.
The location ~ \.php {} block forwards HTTP requests to
our PHP-FPM pool. Remember how we set up our PHP-FPM pool to listen for requests
on port 9000? This block forwards PHP requests to port 9000,
and the PHP-FPM pool takes over.
There are a few extra lines in the location ~ \.php {} block. These lines
prevent potential remote code execution attacks.
On Ubuntu, we must symlink the virtual host configuration file into the /etc/nginx/sites-enabled/ directory with this command:
sudo ln -s /etc/nginx/sites-available/example.conf\/etc/nginx/sites-enabled/example.conf;
Finally, restart nginx with this command:
# Ubuntusudo service nginx restart# CentOSsudo systemctl restart nginx.service
Your PHP application is up and running! There are many ways to configure nginx. I’ve included only the most essential nginx settings in this chapter because this is a PHP book, not an nginx book. You can learn more about nginx configuration at any of these helpful resources:
Server provisioning is a lengthy process. It’s also not a fun process, especially if you manually provision many servers. Fortunately, there are tools available that help automate server provisioning. Some popular server provisioning tools are:
Each tool is different, but they all accomplish the same goal—they automatically provision new servers based on your exact specifications. If you are responsible for multiple servers, I strongly encourage you to explore provisioning tools, because they save a ton of time.
There are online services, too, that perform server provisioning on your behalf. An example service is Forge by Taylor Otwell. I was a Forge beta tester, and it really is a helpful service. Forge can provision multiple servers on Linode, Digital Ocean, and other popular VPS providers.
Each server provisioned by Forge is automatically secured using the same security practices I demonstrated earlier. Forge automatically installs an nginx and PHP-FPM software stack. Forge also simplifies PHP application deployment, SSL certificate installation, CRON task creation, and other mundane or confusing system administration tasks. I highly recommend Forge if system administration isn’t your cup of tea.
I find system administration fascinating. I don’t want to do it as a full-time job, but I enjoy tinkering on the command line. The best system administration learning resource for developers, in my opinion, is Servers for Hackers by Chris Fidao.
In this chapter we discussed how to provision a server to run PHP applications. Next we’ll talk about how to tune your server to eke out maximum performance for your PHP application.
By this point, your PHP application should be running alongside nginx with its own PHP-FPM process pool. We’re not done yet, though. We should tune PHP’s configuration with settings appropriate for your application and production server. Default PHP installations are like an average suit you find at your local department store; they fit, but they don’t fit well. A tuned PHP installation is a custom tailored suit prepared with your exact measurements.
Don’t get too excited. PHP tuning is not a universal cure for application performance. Bad code is still bad code. For example, PHP tuning cannot solve poorly written SQL queries or unresponsive API calls. However, PHP tuning is a low-hanging fruit that can improve PHP efficiency and application performance.
The PHP interpreter is configured and tuned with a file named php.ini. This
file can live in one of several directories on your operating system. If you run
PHP with PHP-FPM, as I demonstrated earlier, you can find the php.ini configuration
file at /etc/php5/fpm/php.ini. Oddly enough, this php.ini file does not control
the PHP interpreter used when you invoke php on the command line. PHP on
the command line uses its own php.ini file often located at /etc/php5/cli/php.ini.
If you built PHP from source, the php.ini location is likely beneath the $PREFIX directory specified when you configured the
PHP source files. I’ll assume you’re running PHP with PHP-FPM as described, but all of these optimizations are applicable to any php.ini file.
Scan your php.ini file for best security practices with the PHP Iniscan tool, written by Chris Cornutt.
The php.ini file uses the INI format. You can learn about the INI format on Wikipedia.
My first concern when running PHP is how much memory each PHP process consumes.
The memory_limit setting in the php.ini file determines the maximum amount
of system memory that can be used by a single PHP process.
The default value is 128M, and this is probably fine for most small to
medium-sized PHP applications. However, if you are running a tiny PHP
application, you can save system resouces by lowering this value to something
like 64M. If you are running a memory-intensive PHP application (e.g., a
Drupal website), you may see improved performance with a higher value
like 512M. The value you choose is dictated by the amount of available system memory.
Figuring out how much memory to allocate to PHP is more an art than
a science. These are the questions I ask myself to determine my PHP memory
limit and the number of PHP-FPM processes I can afford:
First, I determine how much system memory I can allocate for PHP. For example, I may be working with a Linode virtual machine with 2 GB of total memory. However, other processes (e.g., nginx, MySQL, or memcache) might run on the same machine and consume memory of their own. I think I can safely set aside 512 MB of memory for PHP.
Next, I determine how much memory, on average, is consumed by a single PHP
process. This requires me to monitor process memory usage. If you live in
the command line, then you can run top to see realtime stats for running
processes. You can also invoke the memory_get_peak_usage() PHP function
at the tail end of a PHP script to output the maximum amount of memory
consumed by the current script. Either way, run the same PHP script several
times (to warm caches) and take the average memory consumption. I often find
PHP processes consume between 5–20 MB of memory (your mileage may vary). If you
are working with file uploads, image data, or a memory-intensive application,
this value will obviously be higher.
I have 512 MB of total memory allocated for PHP. I determine that each PHP process, on average, consumes about 15 MB of memory. I divide the total memory by the amount of memory consumed by each PHP process, and I determine I can afford 34 PHP-FPM processes. This value is an estimate and should be refined with experimentation.
Finally, I ask myself if I believe I have sufficient system resources to run my PHP application and handle the expected web traffic. If yes, awesome. If no, I need to upgrade my server with more memory and return to the first question.
Use Apache Bench or Seige to stress-test your PHP applications under production-like conditions. If your PHP application does not have sufficient resources, it’s wise to figure this out before you take your application into production.
After I figure out my memory allocation, I configure the PHP Zend OPcache extension. This is an opcode cache. What’s an opcode cache? Let’s first examine how a typical PHP script is processed for every HTTP request. First, nginx forwards an HTTP request to PHP-FPM, and PHP-FPM assigns the request to a child PHP process. The PHP process finds the appropriate PHP scripts, it reads the PHP scripts, it compiles the PHP scripts into an opcode (or bytecode) format, and it executes the compiled PHP opcode to generate an HTTP response. The HTTP response is returned to nginx, and nginx returns the HTTP response to the HTTP client. This is a lot of overhead for every HTTP request.
We can speed this up by caching the compiled opcode for each PHP script. Then we can read and execute precompiled opcode from cache instead of finding, reading, and compiling PHP scripts for each HTTP request. The Zend OPcache extension is built into PHP 5.5.0+. Here are my php.ini settings to configure and optimize the Zend OPcache extension:
opcache.memory_consumption=64opcache.interned_strings_buffer=16opcache.max_accelerated_files=4000opcache.validate_timestamps=1opcache.revalidate_freq=0opcache.fast_shutdown=1
opcache.memory_consumption = 64The amount of memory (in megabytes) allocated for the opcode cache. This should be large enough to store the compiled opcode for all of your application’s PHP scripts. If you have a small PHP application with few scripts, this can be a lower value like 16 MB. If your PHP application is large with many scripts, use a larger value like 64 MB.
opcache.interned_strings_buffer = 16The amount of memory (in megabytes) used to store interned strings. What the heck is an interned string? That was my first question, too. The PHP interpreter, behind the scenes, detects multiple instances of identical strings and stores the string in memory once and uses pointers whenever the string is used again. This saves memory. By default, PHP’s string interning is isolated in each PHP process. This setting lets all PHP-FPM pool processes store their interned strings in a shared buffer so that interned strings can be referenced across multiple PHP-FPM pool processes. This saves even more memory. The default value is 4 MB, but I prefer to bump this to 16 MB.
opcache.max_accelerated_files = 4000The maximum number of PHP scripts that can be stored in the opcode cache.
You can use any number between 200 and 100000. I use 4000. Make sure this
number is larger than the number of files in your PHP application.
opcache.validate_timestamps = 1When this setting is enabled, PHP checks PHP scripts for
changes on the interval of time specified by the opcache.revalidate_freq
setting. If this setting is disabled, PHP does not check PHP scripts for
changes, and you must clear the opcode cache manually. I recommend you enable
this setting during development and disable this setting during production.
opcache.revalidate_freq = 0How often (in seconds) PHP checks compiled PHP files for changes. The
benefit of a cache is to avoid recompiling PHP scripts on each request. This setting
determines how long the opcode cache is considered fresh. After this time
interval, PHP checks PHP scripts for changes. If PHP detects a change,
PHP recompiles and recaches the script. I use a value of 0 seconds. This
value requires PHP to revalidate PHP files on every request if and only if
you enable the opcache.validate_timestamps setting. This means PHP
revalidates files on every request during development (a good thing).
This setting is moot during production because the opcache.validate_timestamps
setting is disabled anyway.
opcache.fast_shutdown = 1This prompts the opcache to use a faster shutdown sequence by delegating object deconstruction and memory release to the Zend Engine memory manager. Documentation is lacking for this setting. All you need to know is turn this on.
Does your PHP application accept file uploads? If not, turn off file uploads to improve application security. If your application does accept file uploads, it’s best to set a maximum upload filesize that your application accepts. It’s also best to set a maximum number of uploads that your application accepts at one time. These are the php.ini settings I use for my own applications:
file_uploads=1upload_max_filesize=10Mmax_file_uploads=3
By default, PHP allows up to 20 uploads in a single request. Each uploaded file can be up to 2 MB in size. You probably don’t need to allow 20 uploads at once; I only allow three uploads in a single request, but change this setting to a value that makes sense for your application.
If my PHP applications accept file uploads, they often need to accept files much
larger than 2 MB. I bump the upload_max_filesize setting to 10M or
higher based on each application’s requirements. Don’t set this to something too
large, otherwise your web server (e.g., nginx) may complain about the HTTP
request having too large a body or timing out.
If you accept very large file uploads, be sure your web server is configured
accordingly. You may need to adjust the
client_max_body_size
setting in your nginx virtual host configuration in addition to your php.ini file.
The max_execution_time setting in your php.ini file determines the maximum
length of time that a single PHP process can run before terminating. By
default, this is set to 30 seconds. You don’t want PHP processes running
for 30 seconds. We want our applications to be super-fast
(measured in milliseconds). I recommend you change this to 5 seconds:
max_execution_time=5
You can override this setting on a per-script basis with the
set_time_limit()
PHP function.
What if my PHP script needs to run a long time? you ask. It shouldn’t. The longer PHP runs, the longer your web application visitors must wait for a response. If you have long-running tasks (e.g., resizing images or generating reports), offload those tasks to a separate worker process.
I use the exec() PHP function to invoke the at bash command. This lets
me fork separate nonblocking processes that do not delay the current PHP process.
If you use the exec() PHP function, it is your responsibility to escape
shell arguments with the escapeshellarg
PHP function.
Assume we need to run a report and generate a PDF file with the results. This task may take 10 minutes to complete. Surely we don’t want the PHP request to sit around for 10 minutes. Instead, we create a separate PHP file called create-report.php that will chug along for 10 minutes and eventually generate our report. However, our web application will take only milliseconds to spin off a separate background process and return an HTTP response, like this:
<?phpexec('echo "create-report.php" | at now');echo'Report pending...';
The standalone create-report.php script runs in a separate background process; it can update a database or email the report recipient upon completion. There is absolutely no reason why the primary PHP script should hold up the user experience for long-running tasks.
If you find yourself spawning a lot of background processes, you may be better served with a dedicated job queue. PHP Resque is a great job queue manager based on the original Resque job queue manager from GitHub.
PHP’s default session handler can slow down larger applications because it stores session data on disk. This creates unnecessary file I/O that takes time. Instead, offload session handling to a faster in-memory data store like Memcached or Redis. This has the added benefit of future scalability. If your session data is stored on disk, this prevents you from scaling PHP across additional servers. If your session data is, instead, stored on a central Memcached or Redis data store, it can be accessed from any number of distributed PHP-FPM servers.
Install the the PECL Memcached extension to access a Memcached datastore from PHP. You can now change PHP’s default session store to Memcached by adding these lines to your php.ini file:
session.save_handler='memcached'session.save_path='127.0.0.2:11211'
Networks are more efficient when sending more data in fewer chunks, rather than less data in more chunks. In other words, deliver content to your visitor’s web browser in fewer pieces to reduce the total number of HTTP requests.
This is why you enable PHP output buffering. By default, PHP’s output buffer is enabled (except on the command line). PHP’s output buffer collects up to 4,096 bytes before flushing its contents back to the web server. Here are my recommended php.ini settings:
output_buffering=4096implicit_flush=false
If you change the output buffer size, make sure its value is a multiple of 4 (for 32-bit systems) or 8 (for 64-bit systems).
PHP maintains a cache of file paths that are used by your PHP application so it does not have to continually search the include path each time it includes or requires a file. This cache is called the realpath cache. If you are running a large PHP application that uses a lot of separate files (Drupal, Composer components, etc.), you can realize better performance by increasing the size of PHP’s realpath cache.
The default realpath cache size is 16k. It’s not obvious how to figure out
the exact size you need, but here’s a trick you can use. First, bump the
realpath cache size to something obnoxiously large, like 256k. Then output
the actual realpath cache size at the tail end of a PHP script with
print_r(realpath_cache_size());. Change your realpath cache size to
this actual value. You can set the realpath cache size in your php.ini
file:
realpath_cache_size=64k
We’ve got a server firing on all cylinders, and we’re ready to deploy our PHP application into production. In the next chapter we’ll discuss several strategies to automate PHP application deployment.
We’ve got a provisioned server running nginx and PHP-FPM. Now we need to deploy our PHP application to a production server. There are many ways to push code into production. FTP was a popular way to deploy PHP code back when PHP developers first started banging rocks together. FTP still works, but today there are safer and more predictable deployment strategies. This chapter shows you how to use modern tools to automate deployment in a simple, predictable, and reversible way.
I assume you are using version control, right? If you are, good job. If you aren’t, stop what you are doing and version control your code. I prefer to version control my code with Git, but other version control software like Mercurial works, too. I use Git because it’s what I know, and it works seamlessly with popular online repositories like Bitbucket and GitHub.
Version control is an invaluable tool for PHP application developers because it lets us track changes to our codebase. We can tag points in time as a release, we can roll back to a previous state, and we can experiment with new features on separate branches that do not affect our production code. More important, version control helps us automate PHP application deployment.
It is important that you automate application deployment so that it becomes a simple, predictable, and reversible process. The last thing you want to worry about is a complicated deployment process. Complicated deployments are scary, and scary things are used less often.
Instead, make your deployment process a simple one-line command. A simple deployment process is less scary, and that means you’re more likely to push code to production.
Make your deployment process predictable. A predictable process is even less scary because you know exactly what it is going to do. It should not have unexpected side effects. If it runs into an error, it aborts the deployment process and leaves the existing codebase in place.
Make your deployment process reversible. If you accidentily push bad code into production, it should be a simple one-line command to roll back to the previous stable codebase. This is your safety net. A reversible deployment process should make you excited—not afraid—to push code into production. If you screw up, just roll back to the previous release.
Capistrano is software that automates application deployment in a simple, predictable, and reversible way. Capistrano runs on your local machine and talks with remote servers via SSH. Capistrano was originally written to deploy Ruby applications, but it’s just as useful for any programming language—including PHP.
You install Capistrano on your local workstation. Capistrano deploys your PHP application to a remote server by issuing SSH commands from your local workstation to the remote server. Capistrano organizes application deployments in their own directories on the remote server. Capistrano maintains five or more application deployment directories in case you must roll back to an earlier release. Capistrano also creates a current/ directory that is a symlink to the current application deployment’s directory. Your production server’s Capistrano-managed directory structure might look like Example 9-1.
/
home/
deploy/
apps/
my_app/
current/
releases/
release1/
release2/
release3/
release4/
release5/When you deploy a new application release to production, Capistrano first retrieves the latest version of your application code from its Git repository. Next, Capistrano places the application code in a new release directory. Finally, Capistrano symlinks the current/ directory to the new release directory. When you ask Capistrano to roll back to a previous release, Capistrano points the current/ directory symlink to a previous release directory. Capistrano is an elegant and simple deployment solution that makes PHP application deployments simple, predictable, and reversible.
Install Capistrano on your local machine. Do not install Capistrano on your
remote servers. You’ll need ruby and gem, too. OS X users already have
these. Linux users can install ruby and gem with their respective package managers.
After you install ruby and gem, install Capistrano with this command:
gem install capistrano
After you install Capistrano, you must initialize your project for Capistrano. Open a terminal, navigate to your project’s topmost directory, and run this command:
cap install
This command creates a file named Capfile, a directory named config/, and a directory named lib/. Your project’s topmost directory should now have these files and directories:
Capfile
config/
deploy/
production.rb
staging.rb
deploy.rb
lib/
capistrano/
tasks/
The Capfile file is Capistrano’s central configuration file, and it aggregates the configuration files located in the config/ directory. The config/ directory contains configuration files for each remote server environment (e.g., testing, staging, or production).
Capsitrano configuration files are written in the Ruby language. However, they are still easy to edit and understand.
By default, Capistrano assumes you have multiple environments for your application. For example, you might have separate staging and production environments. Capistrano provides a separate configuration file for each environment in the config/deploy/ directory. Capistrano also provides the config/deploy.rb configuration file, which contains settings common to all environments.
In each environment, Capistrano has the notion of server roles. For example,
your production environment may have a front-facing web server
(the web role), an application server (the app role), and a database server
(the db role). Only the largest applications necessitate this architecture.
Smaller PHP applications generally use only one machine that runs the web
server (nginx), application server (PHP-FPM), and database server (MariaDB).
For this demonstration, I’m only going to use Capistrano’s web role and
ignore its app and db roles. Capistrano’s roles let you organize tasks to
be executed only on servers that belong to a given role. This isn’t something
we’re going to worry about here. However, I am going to respect Capistrano’s
notion of server environments. This demonstration will use the production
environment, but the following steps are equally applicable to other environments
(e.g., staging or testing).
Let’s look at the config/deploy.rb file. This configuration file contains
settings common to all environments (e.g., staging and production). Most
of our Capistrano configuration settings go in this file. Open the config/deploy.rb
file in your preferred text editor and update these settings:
:applicationThis is the name of your PHP application. It should contain only letters, numbers, and underscores.
:repo_urlThis is your Git repository URL. This URL must point to a Git repository, and the repository must be accessible from your remote server.
:deploy_toThis is the absolute directory path on your remote server in which your PHP application is deployed. This would be /home/deploy/apps/my_app as shown in Example 9-1.
:keep_releasesThis is the number of old releases that should be retained in case you want to roll back your application to an earlier version.
This file contains settings only for your production environment. This file
defines the production environment roles, and it lists the servers that
belong to each role. We’re only using the web role, and we have only
one server that belongs to this role. Let’s use the server we provisioned
in Chapter 7. Update the entire config/deploy/production.rb
file with this content. Make sure you replace the example IP address:
role:web,%w{deploy@123.456.78.90}
Before we deploy our application with Capistrano, we must establish authentication between our local computer and our remote servers, and between our remote servers and the Git repository. We already discussed how to set up SSH key-pair authentication between our local computer and remote server. You should also establish SSH key-pair authentication between your remote servers and the Git repository.
Use the same instructions we discussed earlier to generate an SSH public and private keypair on each remote server. The Git repository should have access to each remote server’s public key; both GitHub and Bitbucket let you add multiple public SSH keys to your user account. Ultimately, you must be able to clone the Git repository to your remote servers without a password.
We’re almost ready to deploy our application. First, we need to prepare our
remote server. Log in to your remote server with SSH and create the directory
in which we’ll deploy our PHP application. This directory must be readable and writable
by the deploy user. I like to create a directory for my applications in the deploy
user’s home directory, like this:
/
home/
deploy/
apps/
my_app/
Capistrano symlinks the current/ directory to the current application release directory. Update your web server’s virtual host document root directory so that it points to Capistrano’s current/ directory. Given this filesystem diagram, your virtual host document root might become /home/deploy/apps/my_app/current/public/; this assumes your PHP application contains a public/ directory that serves as the document root. Restart your web server to load your virtual host configuration changes.
Capistrano allows us to run our own commands at specific moments (or hooks) during application deployment. Many PHP developers manage application dependencies with Composer. We can install Composer dependencies during each Capistrano deployment with a Capistrano hook. Open the config/deploy.rb file in your preferred text editor and append this Ruby code:
namespace:deploydodesc"Build"after:updated,:builddoonroles(:web)dowithinrelease_pathdoexecute:composer,"install --no-dev --quiet"endendendend
If your project uses the Composer dependency manager, make sure Composer is installed on your remote servers.
Our application’s dependencies are now installed automatically after each production deployment. You can read more about Capistrano hooks on the Capistrano website.
Now’s the fun part! Make sure you’ve committed and pushed your most recent application code to your Git repository. Then open a terminal on your local computer and navigate to your application’s topmost directory. If you’ve done everything correctly, you can deploy your PHP application with this one-line command:
cap production deploy
I’ve only scratched the surface. Capistrano has many more features that further streamline your deployment workflow. Capistrano is my favorite deployment tool, but there are many other tools available, including:
We’ve provisioned a server, and we’ve automated our PHP application deployments with Capistrano. Next we’ll discuss how to ensure our PHP applications run as expected. To do this, we’ll use testing and profiling.
Testing is an important part of PHP application development, but it is often neglected. I think many PHP developers don’t test because they consider testing an unnecessary burden that requires too much time for too few benefits. Other developers may not know how to test, because there are a large number of testing tools and an overwhelming learning curve.
In this chapter I hope to dispel these misunderstandings. I want you to feel comfortable and excited about testing your PHP code. I want you to consider testing an integral part of your workflow that happens at the beginning, middle, and end of the application development process.
We write tests to ensure that our PHP applications work, and continue to work, according to our expectations. It’s as simple as that. How often have you been afraid to deploy an application into production? Before I started testing my code, I was terrified to push a release into production. Would my code work? Would it break? All I could do was cross my fingers and hope for the best. This is no way to code. It’s scary and stressful, and it usually ends in frustration. Tests, however, mitigate uncertainty, and they let us write and deploy code with confidence.
Your pointy-haired boss may argue that there isn’t enough time to write tests. After all, time is money. This is shortsighted. Installing a testing infrastructure and writing tests takes time, but this is a wise investment that pays dividends into the future. Tests help us write code that works well the first time. Tests let us continuously iterate without breaking old code. We may move forward at a slower pace than if we didn’t use tests, but we won’t waste countless development hours in the future troubleshooting and refactoring bugs that were overlooked. In the long term, tests save money, prevent downtime, and inspire confidence.
I see many PHP developers write tests as an afterthought. These developers know testing is important, but they consider tests as something they must do instead of something they want to do. These developers often push testing to the very end of the application development process. They bang out a few passing tests to satisfy their management team and call it a day. This is wrong. Tests should be a foreground concern before development, during development, and after development.
Install and configure your testing tools before you develop your application. It doesn’t matter which testing tools you choose. Install them as if they are a vital application dependency. This makes it physically and mentally easier to test your application during development. This is also a good time to meet with your project manager to define higher-level application behavior.
Write and run tests as you build each piece of your application. Did you just add a new PHP class? Test it now, because you probably won’t test it later. Testing while you develop helps you build confident and stable code, and it also helps you quickly find and refactor new code that breaks existing functionality.
You probably won’t anticipate and test all of your application’s behaviors during development. If you find a bug after your launch your application, write a new test to ensure that your bug fix works correctly. Tests are not a once-and-done thing. Tests are continuously modified and improved, just like the application itself. If you update your application’s code, be sure you also update the affected tests.
We test the smallest pieces of our application. A PHP application, on a microcosmic scale, has PHP classes, methods, and functions. We should test each public class, method, and function to ensure it behaves as we expect in isolation. If we know each piece works well on its own, we can be confident it also works well when integrated into the whole application. These tests are called unit tests.
Unfortunately, testing each individual piece does not guarantee it works correctly with the whole application. This is why we also test our application at a macrocosmic scale with automated testing tools that verify our application’s higher-level behaviors. These tests are called functional tests.
We know why, when, and what to test. More important, let’s chat about how we test code. There are several popular ways PHP developers approach testing. Some developers prefer unit tests. Some developers prefer test-driven development (TDD). And other developers prefer behavior-driven development (BDD). These are not mutually exclusive.
The most popular approach to PHP application testing is unit testing. As I described previously, unit tests certify individual classes, methods, and functions in isolation from the larger application. The de facto standard PHP unit testing framework is PHPUnit, written by Sebastian Bergmann. Sebastian’s PHPUnit framework adheres to the xUnit test architecture.
There are alternative PHP unit testing frameworks, like PHPSpec, available for you to use, too. However, most popular PHP frameworks provide PHPUnit tests. It’s vital that you know how to read, write, and run PHPUnit tests if you intend to contribute to or release PHP components. I’ll show you how to install, write, and run PHP unit tests at the end of this chapter.
Test-driven development means you write tests before you write application code. These tests purposefully fail and describe how your application should behave. As you build application functionality, your tests will eventually run successfully. TDD helps you build with a purpose; you know ahead of time what you will build and how it should work.
This does not meant that you must write all of your application tests before you write any code. Instead, write a few tests and then build the related functionality. Write tests and build. Write tests and build. TDD is iterative. Move forward in small sprints until your application is complete.
Behavior-driven development means that you write stories that describe how your application behaves. There are two types of BDD: SpecBDD and StoryBDD.
SpecBDD is a type of unit test that uses a fluid and human-friendly language to describe your
application’s implementation. SpecBDD accomplishes the same goal as alternative unit testing
tools like PHPUnit. Unlike PHPUnit’s xUnit architecture, SpecBDD tests use human-readable stories
to describe behavior. For example, a PHPUnit test might be named testRenderTemplate(). An
equivalent SpecBDD test might be named itRendersTheTemplate(). The same SpecBDD test
might use helper methods named $this->shouldReturn(), $this->shouldBe(), and
$this->shouldThrow(). SpecBDD tests use a language that is much easier to read and
understand than alternative xUnit tools. The most popular SpecBDD testing tool is PHPSpec.
StoryBDD tools use the same human-friendly stories as SpecBDD tests. StoryBDD tools, however, are more concerned with higher-level behavior than with lower-level implementation. For example, a StoryBDD test confirms that your code creates and emails a PDF report. A SpecBDD test, on the other hand, confirms that a specific PDF generator class method correctly renders a PDF file for a given set of input parameters. The difference is scope. StoryBDD resembles something a project manager would write (e.g., “this should generate and email me a report”). A SpecBDD test resembles something a developer would write (e.g., “this class method should receive an array of data and write it to this PDF file”). StoryBDD and SpecBDD testing tools are not mutually exclusive. They are often used together to build a more comprehensive set of tests. You’ll often sit with your project manager to write generic StoryBDD tests that define your application’s generic behavior, and then you’ll write SpecBDD tests when you design and build your application’s implementation. The most popular StoryBDD testing tool is Behat.
Write StoryBDD tests that describe your business logic and not a specific implementation.
A good StoryBDD test confirms “a shopping cart total increases when I add a product to the cart.”
A bad StoryBDD test confirms “a shopping cart total increases when I send an HTTP PUT
request to the /cart URL with the body product_id=1&quantity=2.” The first test is
generic and describes only the high-level business logic. The second test is too specific
and describes a particular implementation.
Let’s talk about how to install, write, and run PHPUnit tests. It takes a bit of work to get the infrastructure in place, but it’s dead simple to write and run your PHPUnit tests afterward. Before we dig too deep into PHPUnit, let’s quickly review some vocabulary. Your PHPUnit tests are grouped into test cases, and your test cases are grouped into test suites. PHPUnit runs your test suites with a test runner.
A test case is a single PHP class that extends the PHPUnit_Framework_TestCase class.
Each test case contains public methods whose names begin with test; these methods are
individual tests that assert specific scenarios to be true. Each assertion can
pass or fail. You want all assertions to pass.
A test case class name must end with Test, and its filename must end
with Test.php. A hypothetical test case class name is FooTest, and that
class lives in a file named FooTest.php.
A test suite is a collection of related test cases. If you are working on a single PHP component, oftentimes you’ll only ever have a single test suite. If you are testing a larger PHP application with many different subsystems or components, you may find it best to organize tests into multiple test suites.
A test runner is exactly what it sounds like. It is a way for PHPUnit to run your test suites and output the result. The default PHPUnit test runner is the command-line runner that is invoked with the phpunit command in your terminal application.
Here’s how I prefer to organize my PHP projects. The topmost project directory has a src/ directory where I keep my source code. It also has a tests/ directory where I keep my tests. Here’s an example directory structure:
src/
tests/
bootstrap.php
composer.json
phpunit.xml
.travis.yml
This directory contains my PHP project’s source code (i.e., PHP classes).
This directory contains my PHP project’s PHPUnit tests. This directory contains a bootstrap.php file that is included by PHPUnit before the unit tests are run.
This file lists my PHP project’s dependencies managed by Composer, including the PHPUnit test framework.
This file provides configuration details for the PHPUnit test runner.
This file provides configuration details for the Travis CI continuous testing web service.
Look at your favorite PHP component or framework’s source code on GitHub and you’ll see it uses a similar organization.
First we need to install PHPUnit and the Xdebug profiler. PHPUnit runs our tests. The Xdebug profiler generates helpful code coverage information. Composer is the easiest way to install the PHPUnit test framework. Open your terminal application, navigate to your project’s topmost directory, and run this command:
composer require --dev phpunit/phpunit
This command downloads the PHPUnit test framework into your project’s vendor/ directory,
and it updates your project’s composer.json file so that the phpunit/phpunit package
is listed as a project dependency. The phpunit binary is installed in your project’s
vendor/bin/ directory. You can add this directory to your environment path, or you
can reference vendor/bin/phpunit whenever you invoke the PHPUnit command line test
runner. The PHPUnit framework classes are autoloaded into your PHP application
with your project’s other Composer-managed dependencies.
The Xdebug PHP extension is a bit trickier to install. If you installed PHP with your package manager, you can install Xdebug the same way (Example 10-1).
# Ubuntusudo apt-get install php5-xdebug# CentOSsudo yum -y --enablerepo=epel,remi,remi-php56 install php-xdebug
If you installed PHP from source, you’ll need to install the Xdebug extension with
the pecl command:
pecl install xdebug
Next, update your php.ini configuration file with the path to the compiled Xdebug extension.
You can find your PHP extensions directory with the php-config --extension-dir
or php -i | grep extension_dir commands.
Append this line to your php.ini file using your own PHP extension path:
zend_extension="/PATH/TO/xdebug.so"
Restart PHP and you’re good to go. We’ll discuss the Xdebug profiler in Chapter 11.
Now let’s configure PHPUnit in our project’s phpunit.xml file.
<?xml version="1.0" encoding="UTF-8"?><phpunitbootstrap="tests/bootstrap.php"><testsuites><testsuitename="whovian"><directorysuffix="Test.php">tests</directory></testsuite></testsuites><filter><whitelist><directory>src</directory></whitelist></filter></phpunit>
PHPUnit test runner settings are attributes on the <phpunit> XML root element. The most
important setting, in my opinion, is the bootstrap setting; it specifies the path
(relative to the phpunit.xml file) to a PHP file that is included before the PHPUnit
test runner executes our tests. We’ll autoload our application’s Composer dependencies
in the bootstrap.php file so they are available to our PHPUnit tests. The bootstrap.php
file also specifies the path to our test suite (i.e., a directory that contains related
test cases); PHPUnit runs all PHP files in this directory whose file names end with Test.php.
Finally, this configuration file lists the directories included in our code coverage
analysis with the <filter> element. In the previous example XML, the <whitelist>
element tells PHPUnit to generate code coverage only for code in the src/ directory.
The gist of this configuration file is to specify our PHPUnit settings in one location.
This makes our lives easier locally because we don’t have to specify these settings
each time we use the phpunit command-line runner. This configuration file also lets
us apply the same PHPUnit settings on remote continuous testing servers like Travis CI.
After you update the phpunit.xml configuration file, update the tests/bootstrap.php
file with this code:
<?php// Enable Composer autoloaderrequiredirname(__DIR__).'/vendor/autoload.php';
Make sure you install your Composer dependencies before running PHPUnit tests.
Before we write unit tests, we need something to test. Here’s a hypothetical PHP class named Whovian that has a pretty strong opinion about a particular BBC television show. Place this class definition into the src/Whovian.php file:
<?phpclassWhovian{/*** @var string*/protected$favoriteDoctor;/*** Constructor* @param string $favoriteDoctor*/publicfunction__construct($favoriteDoctor){$this->favoriteDoctor=(string)$favoriteDoctor;}/*** Say* @return string*/publicfunctionsay(){return'The best doctor is '.$this->favoriteDoctor;}/*** Respond to* @param string $input* @return string* @throws \Exception*/publicfunctionrespondTo($input){$input=strtolower($input);$myDoctor=strtolower($this->favoriteDoctor);if(strpos($input,$myDoctor)===false){thrownewException(sprintf('No way! %s is the best doctor ever!',$this->favoriteDoctor));}return'I agree!';}}
The Whovian class constructor sets the instance’s favorite doctor. The say()
method returns a string with the instance’s favorite doctor. And its respondTo()
method receives a statement from another Whovian instance and responds accordingly.
The unit tests for our Whovian class live in the test/WhovianTest.php file. We call
a group of related tests a test suite. In our example, all tests beneath the test/
directory belong to the same test suite. Each class file beneath the test/ directory
is called a test case, and its class methods that begin with test (e.g., testThis
or testThat) are individual tests. Each individual test uses assertions to verify a
given condition. An assertion can pass or fail.
Find a list of PHPUnit assertions on the PHPUnit website. Some assertions are undocumented; you can find all available assertions in the source code on GitHub.
Each PHPUnit test case is a class that extends the PHPUnit_Framework_TestCase class.
Let’s declare a test case named WhovianTest in the test/WhovianTest.php file:
<?phprequiredirname(__DIR__).'/src/Whovian.php';classWhovianTestextendsPHPUnit_Framework_TestCase{// Individual tests go here}
Remember, unit tests verify a public interface’s expected behavior. We’ll test the three
public methods in the Whovian class. We’ll write a unit test to ensure that the __construct()
method argument becomes the instance’s preferred doctor. Next, we’ll write a unit test
to ensure that the say() method’s return value mentions the instance’s preferred doctor.
Finally, we’ll write two tests for the respondTo() method. One test ensures that the method’s
return value is the string "I agree!" if the input matches its preferred doctor. The
second test that ensures the method throws an exception if the input does not match its
preferred doctor.
Our first test confirms that the constructor sets the Whovian instance’s favorite doctor:
publicfunctiontestSetsDoctorWithConstructor(){$whovian=newWhovian('Peter Capaldi');$this->assertAttributeEquals('Peter Capaldi','favoriteDoctor',$whovian);}
This test instantiates a new Whovian instance with one string argument: "Peter Capaldi".
We use the PHPUnit assertion method assertAttributeEquals() to assert the favoriteDoctor
property on the $whovian instance equals the string "Peter Capaldi".
The PHPUnit assertion assertAttributeEquals() receives three arguments. The first argument
is the expected value; the second argument is the property name; and the final argument is
the object to inspect. What’s neat is that the assertAttributeEquals() method can inspect
and verify protected properties using PHP’s reflection capabilities.
Why do we inspect the favorite doctor value with the assertAttributeEquals() assertion
instead of a getter method (e.g., getFavoriteDoctor())? When we write a test, we
test only one specific method in isolation. Ideally, our test does not rely on other
methods. In this particular example, we test the __construct() method and verify that
it assigns its argument value to the object’s $favoriteDoctor property. The
assertAttributeEquals() assertion lets us inspect the object’s internal state without
relying on a separate, untested getter method.
Our next test confirms that the Whovian instance’s say() method returns a string
value that contains its favorite doctor’s name:
publicfunctiontestSaysDoctorName(){$whovian=newWhovian('David Tennant');$this->assertEquals('The best doctor is David Tennant',$whovian->say());}
We use the PHPUnit assertion assertEquals() to compare two values. The assertion’s
first argument is the expected value. Its second argument is the value to inspect.
Now let’s test how a Whovian instance responds in agreement with another Whovian:
publicfunctiontestRespondToInAgreement(){$whovian=newWhovian('David Tennant');$opinion='David Tennant is the best doctor, period';$this->assertEquals('I agree!',$whovian->respondTo($opinion));}
This test is successful because the Whovian instance’s respondTo() method receives
a string argument that includes the name of its favorite doctor.
But what if a Whovian disagrees? Get out of the area as quickly as possible,
because s#!t is going to hit the fan. Well, actually, it’ll just throw an exception. Let’s test that:
/*** @expectedException Exception*/publicfunctiontestRespondToInDisagreement(){$whovian=newWhovian('David Tennant');$opinion='No way. Matt Smith was awesome!';$whovian->respondTo($opinion);}
If this test throws an exception, the test passes. Otherwise, the test fails. We can
test this condition with the @expectedException annotation.
PHPUnit provides several annotations that can control a given test. Read more about PHPUnit annotations in the PHPUnit documentation.
After you write each test, you should run your test suite to ensure that it passes. This is really simple to do. Open your terminal application and navigate to your project’s topmost directory (the same directory as your phpunit.xml configuration file). We’ll use the PHPUnit binary installed with Composer. Use this command to start the PHPUnit test runner:
vendor/bin/phpunit -c phpunit.xml
The -c option specifies the path to the PHPUnit configuration file. The terminal
shows the results from the PHPUnit command-line test runner, and they look like Figure 10-1.
These results tell us:
PHPUnit read our configuration file.
PHPUnit took 24 ms to complete.
PHPUnit used 3.5 MB of memory.
PHPUnit successfully ran five tests and five assertions.
We know our PHPUnit tests pass. However, are we sure we tested as much of our code as possible? Perhaps we forgot to test something. We can see exactly which code is tested (and untested) with PHPUnit’s code coverage report (Figure 10-2). We already specify the path(s) to our source code files in the PHPUnit configuration file. All PHP files in the whitelisted directories are included in PHPUnit’s code coverage report. We can generate code coverage each time we run the PHPUnit test runner:
vendor/bin/phpunit -c phpunit.xml --coverage-html coverage
This is the same command we used earlier, except we append the new --coverage-html
option whose value is the path to a the code coverage report directory. After you run
this command, open the newly generated coverage/index.html file in a web browser
to see the code coverage results. Ideally, you want to see 100% coverage across the
board. However, 100% coverage is not realistic and definitely should not be a
requirement. How much coverage is good is subjective and varies from project to project.
Sometimes even the best PHP developers forget to write tests. This is why it is important to automate your tests. The best tests are like a good backup strategy—out of sight and out of mind. Tests should run automatically. My favorite continuous testing service is Travis CI because it has native hooks into GitHub repositories. I can run my application tests within Travis CI every time I push code to GitHub. Travis CI runs my tests against multiple PHP versions, too.
If you have not used Travis CI before, go to https://travis-ci.org (for public repositories) or https://travis-ci.com (for private repositories). Log in with your GitHub account. Follow the on-screen instructions to choose which repository to test with Travis CI.
Next, create the .travis.yml Travis CI configuration file in your application’s topmost directory. Don’t forget the leading . character! Save, commit, and push the Travis CI configuration file to your GitHub repository. Here’s an example Travis CI configuration:
language:phpphp:-5.4-5.5-5.6-hhvminstall:-composer install --no-dev --quietscript:phpunit -c phpunit.xml --coverage-text
The Travis CI configuration is written in YAML format and includes these settings:
languageThis is the language used for our application. We set this to php. This value
is case-sensitive!
phpTravis CI runs our application tests against these PHP versions. It is important that you test against all PHP versions supported by your application.
installThis is a bash command executed by Travis CI before it runs application tests. This
is where you instruct Travis CI to install your project’s Composer dependencies.
It is important that you use the --no-dev option to avoid installing unnecessary
development dependencies.
scriptThis is the bash command executed by Travis CI to run application tests. By default,
this is phpunit. You can override Travis CI’s default command with this setting.
In this example, we tell Travis CI to use our custom PHPUnit configuration file
and generate plain text coverage results.
Travis CI automatically runs your application tests every time you push new commits
to your GitHub repository and emails you the test results. How cool is that? There are,
of course, many more Travis CI settings to further customize the Travis CI testing environment
(e.g., install custom PHP extensions, use custom ini settings, and so on). Read
more about Travis CI configuration for PHP at Travis CI.
Here are a few links to help you learn more about PHP application testing:
In this chapter we learned why, when, and how to write tests. Testing our applications builds confidence and creates more predictable code. However, tests do not let us analyze application performance. This is why we must also profile our applications. That’s what I want to talk about next.
Profiling is how we analyze application performance. It is a great way to debug performance issues and pinpoint bottlenecks in your application code. In other words, if your application is slow, use a profiler to figure out why. Profilers let us traverse the entire PHP call stack, and they tell us which functions or methods are called, in what order, how many times, with what arguments, and for how long. We can also see how much memory and CPU are used throughout the application request lifecycle.
You don’t need to profile your PHP applications immediately. You only profile PHP applications if there is a performance issue that is otherwise hard to diagnose. How do you know if you have a performance issue? Some issues are obvious (e.g., a database query takes too long). Other issues may not be as obvious.
You can detect performance issues with benchmarking tools like Apache Bench and Siege. A benchmarking tool allows you to test your application performance externally, much as an application user would with a web browser. Benchmarking tools let you set the number of concurrent users and total number of requests that hit a specific application URL. When the benchmarking tool finishes, it tells you the number of requests per second that your application sustained (among other statistics). If you find a particular URL sustains only a small number of requests per second, you may have a performance issue. If the performance issue is not immediately obvious, you use a profiler.
There are two types of profilers. There are those that should run only during development, and there are those that can run during production.
Xdebug is a popular PHP profiling tool written by Derick Rethans, but it should only be used as a profiler during development because it consumes a lot of system resources to analyze your application. Xdebug profiler results are not human-readable, so you’ll need an application to parse and display the results. KCacheGrind and WinCacheGrind are good applications for visualizing Xdebug profiler results.
XHProf is a popular PHP profiler written by Facebook. It is intended to be run during development and production. XHProf’s profiler results are also not human-readable, but Facebook provides a companion web application called XHGUI to visualize and compare profiler results. I’ll talk more about XHGUI later in this chapter.
Both Xdebug and XHProf are PHP extensions, and you can install them with your operating
system’s package manager. They can also be installed with pecl.
Xdebug is one of the most popular PHP profilers, and it makes it easy to analyze your application’s call stack to find bottlenecks and performance issues. Refer to Example 10-1 in Chapter 10 for Xdebug installation instructions.
Xdebug configuration lives in your php.ini file. Here are the Xdebug profiler configuration settings I recommend. Make sure you specify your own profiler output directory. Restart your PHP process after saving these settings:
xdebug.profiler_enable=0xdebug.profiler_enable_trigger=1xdebug.profiler_output_dir=/path/to/profiler/results
xdebug.profiler_enable = 0This instructs Xdebug to not run automatically. We don’t want Xdebug to run automatically on each request, because that would drastically decrease performance and impede development.
xdebug.profiler_enable_trigger = 1This instructs Xdebug to run on-demand. We can activate Xdebug profiling
per-request by adding the XDEBUG_PROFILE=1 query parameter to any of
our PHP application’s URLs. When Xdebug detects this query parameter, it
profiles the current request and generates a report in the output directory
specified by the xdebug.profiler_output_dir setting.
xdebug.profiler_output_dir = /path/to/profiler/resultsThis is the directory path that contains generated profiler results. Profiler reports can be massive (e.g., 500 MB or larger) for complex PHP applications. Make sure you change this value to the correct filesystem path for your application.
I recommend you keep profiler results beneath your PHP application’s topmost directory. This makes it easy to find and review profiler results while developing your application.
The Xdebug profiler does not run automatically because the xdebug.profiler_enable
setting is 0. We trigger the Xdebug profiler for a single request by adding the
XDEBUG_PROFILE=1 query parameter to any PHP application URL. An example HTTP
request URL might be /users/show/1?XDEBUG_PROFILE=1. When Xdebug detects the
XDEBUG_PROFILE query parameter, it activates and runs the profiler for the
current request. The profiler results are dumped into the directory specified
by the xdebug.profiler_output_dir setting.
The Xdebug profiler generates results in the CacheGrind format. You’ll need a CacheGrind-compatible application to review the profiler results. Some good applications for reviewing CacheGrind files are:
WinCacheGrind for Windows
KCacheGrind for Linux
WebGrind for web browsers
Mac OS X users can install KCacheGrind with Homebrew using this command:
brew install qcachegrind
Homebrew is a package manager for OS X. We discuss Homebrew in Appendix A.
XHProf is a newer PHP application profiler. It is created by Facebook and is intended to be run during both development and production. It does not collect as much information as Xdebug’s profiler, but it consumes fewer system resources, making it suitable for production environments.
The easiest way to install XHProf is with your operating system’s package manager (assuming you installed PHP the same way):
# Ubuntusudo apt-get install build-essential;sudo pecl install mongo;sudo pecl install xhprof-beta;# CentOSsudo yum groupinstall'Development Tools';sudo pecl install mongo;sudo pecl install xhprof-beta;
Append these lines to your php.ini file, and restart your PHP process to load the new extensions:
extension=xhprof.soextension=mongo.so
XHProf is most useful when paired with XHGUI, Facebook’s companion web application used to review and compare XHProf profiler output. XHGUI is a PHP web application and requires:
Composer
Git
MongoDB
PHP 5.3+
PHP mongo extension
I assume these system requirements are installed. I also assume the XHGUI web application lives in the /var/sites/xhgui/ directory. This directory path is probably different on your server, so keep that in mind:
cd/var/sites;git clone https://github.com/perftools/xhgui.git;cdxhgui;php install.php;
The XHGUI web application has a webroot/ directory. Update your web server virtual host’s document root to this directory.
Open XHGUI’s config/config.default.php file in a text editor. By default, XHProf collects data for only 1% of all HTTP requests. This is fine for production, but you may want to collect data more frequently during development. You can increase XHProf’s data collection by editing these lines in the config/config.default.php file:
'profiler.enable'=>function(){returnrand(0,100)===42;},
Change these lines to:
'profiler.enable'=>function(){returntrue;// <-- Run on every request},
XHProf assumes your PHP application runs on a single server. It also assumes your MongoDB database does not require authentication. If your MongoDB server does require authentication, update the Mongo database connection in the config/config.default.php file.
You must include the XHGUI web application’s external/header.php file at the very beginning
of your PHP application. It’s easiest to use PHP’s auto_prepend_file INI configuration setting.
You can set this in the php.ini configuration file:
auto_prepend_file=/var/sites/xhgui/external/header.php
Or you can set this in your nginx virtual host configuration:
fastcgi_paramPHP_VALUE"auto_prepend_file=/var/sites/xhgui/external/header.php";
Or you can set this in your Apache virtual host configuration:
php_admin_valueauto_prepend_file"/var/sites/xhgui/external/header.php"
Restart PHP, and XHProf will begin collecting and saving information into its MongoDB database. You can review and compare XHProf runs at the XHGUI virtual host’s URL.
Another popular PHP profiler is New Relic. This is actually a web service that uses a custom operating system daemon and PHP extension to hook into your PHP application and report data back to the web service. Unlike Xdebug and XHProf, New Relic’s PHP profiler is not free. That being said, I adore New Relic and recommend it if your budget allows. Like XHProf, New Relic’s PHP profiler is meant to be run during production, and it gives you a near real-time view of your application’s performance with a really nice online dashboard. Learn more on New Relic’s website.
As I am writing this book, Symfony is currently testing a new PHP profiler called Blackfire. It provides unique visualization tools to help discover application bottlenecks. I hear it’s looking like a really good alternative to Xdebug and XHProf. Keep an eye on this one.
I hope I’ve introduced you to PHP profiling in this chapter so that you feel comfortable finding, installing, and using a PHP profiler most appropriate for your application. Here are a few links to help you learn more about PHP profiling:
At this point we’ve talked a lot about modern PHP, including new features, good practices, provisioning, tuning, deployment, testing, and profiling. I hope you have filled your brain with tons of fun ideas to implement in your next PHP applications.
Now I want to take a few minutes to chat about the future of PHP. A lot is happening in the PHP ecosystem. The future of PHP is unfolding as we speak thanks to forward-looking projects like PHP 7, HHVM, Hack, and the PHP-FIG. Let’s explore HHVM and Hack, specifically, and figure out what they mean for PHP’s future.
Think what you will about the Facebook application, but I have nothing but praise for the brilliant folks working at Facebook. Facebook Open Source has developed several important projects in the last few years, two of which have had significant impact in the PHP community.
The first initiative is HHVM, or the Hip Hop Virtual Machine. This alternative PHP engine was released in October 2013. Its just-in-time (JIT) compiler provides performance many times better than PHP-FPM. In fact, WP Engine recently migrated to HHVM and realized 3.9x faster custom Wordpress installations. MediaWiki also transitioned to HHVM, and it has realized drastic improvements in both response times and throughput.
The second initiative is Hack, a new server-side language that is a modification of the PHP language. Hack is mostly backward-compatible with PHP code, although it extends the PHP language with strict typing, new data structures, and a real-time type checking server. That being said, Hack’s own developers prefer to call Hack a dialect of PHP and not a new language.
Since 1994, if you said PHP interpreter you meant the Zend Engine. The Zend Engine was PHP. It was the one and only PHP interpreter. Then Mark Zuckerberg came along and created this little thing called Thefacebook on February 4, 2004. Mr. Zuckerberg and his growing company wrote the Facebook application predominantly with PHP because the language is easy to learn and simple to deploy. The PHP language lets Facebook quickly onboard new developers to grow, innovate, and iterate its platform.
Fast forward, and Facebook is a veritable empire. Its infrastructure is massive. Facebook is so huge that the traditional Zend Engine became a bottleneck for its developers. The Facebook team had a hugely growing user base (by 2007, its user base surpassed 1 in 10 people on the planet), and it had to figure out a way to improve performance without simply building more data centers and buying more servers.
The PHP language is traditionally interpreted, not compiled. This means that your PHP code remains PHP code until it is sent through an interpreter when executed on the command line or requested by a web server. The PHP script is read by the PHP interpreter and converted into a set of existing Zend Opcodes (machine-code instructions), and the Zend Opcodes are executed with the Zend Engine. Unfortunately, interpreted languages execute more slowly than compiled languages because they must be converted to machine code during every execution. This taxes system resources. Facebook realized this performance bottleneck and, in 2010, began working on a PHP-to-C++ compiler called HPHPc.
The HPHPc compiler converts PHP code into C++ code. It then compiles the C++ code into an executable that is deployed to production servers. HPHPc was largely successful; it improved Facebook’s performance and reduced the strain on its servers. However, HPHPc’s potential performance approached a ceiling, it was not 100% compatible with the complete PHP language, and it required a time-consuming compile process that created a lengthy feedback loop for developers. Facebook needed a hybrid solution that delivered superior performance but also allowed for faster development without expensive compile time.
Facebook began working on the next iteration of HPHPc, called HHVM. HHVM converts and caches PHP code into an intermediary bytecode format, and it uses a JIT compiler to translate and optimize its bytecode cache into x86_64 machine code. HHVM’s JIT compiler enables many low-level performance optimizations that are simply not possible by compiling PHP directly to C++ with HPHPc. HHVM also enables a fast feedback loop for developers because it compiles bytecode into machine code only when PHP scripts are requested by a web server—just in time, you might say—much like a traditional interpreted language. What’s more amazing is that HHVM’s performance eclipsed HPHPc’s performance in November 2012, and it continues to improve (Figure 12-1).
HPHPc was deprecated soon after HHVM’s peformance exceeded its own, and HHVM is currently Facebook’s preferred PHP interpreter.
Don’t let HHVM intimidate you! Its implementation may be complex, but at the end of the day HHVM is just a replacement for the more familiar php and php-fpm binaries:
You execute PHP scripts with the hhvm binary on the command line, just like the php binary.
You use the hhvm binary to create a FastCGI server, just like the php-fpm binary.
HHVM uses a php.ini configuration file, just like the traditional Zend Engine. It even uses the same INI directives.
HHVM has native support for many common PHP extensions.
Facebook’s original HPHPc compiler was not compatible with the complete PHP language (i.e., the Zend Engine). Complete parity is an aspiration for Facebook because it lets HHVM become a drop-in replacement for the Zend Engine.
Facebook tested HHVM against the most popular PHP frameworks to ensure compatibility with real-world PHP 5 code. Facebook is close to 100% compatibility. However, Facebook has shifted its focus to user-reported issues on the HHVM issue tracker to tackle remaining edge-case issues. HHVM is not yet 100% compatible with the traditional Zend Engine, but it’s getting closer every day. Facebook, Baidu, and Wikipedia already use HHVM in production. HHVM can also run Wordpress, Drupal, and many popular PHP frameworks.
HHVM isn’t the right choice for everyone. There are far easier ways to improve application performance. Reducing HTTP requests and optimizing database queries are low-hanging fruit that noticeably improve application performance and response time. If you have not made these optimizations, do them first before you consider HHVM. Facebook’s HHVM is for developers who have already made these optimizations and still need faster applications. If you believe you need HHVM, here are some resources to help you make the best decision:
View a list of PHP extensions compatible with HHVM.
Track HHVM parity with the most popular PHP frameworks.
Track open HHVM issues.
Read HHVM frequently asked questions.
Follow the latest HHVM news.
HHVM is easy to install on the most popular Linux distributions. It was originally developed for Ubuntu (my preferred Linux distibution), so I use Ubuntu in the following examples.
Facebook provides prebuilt packages for other Linux distributions, including Debian and Fedora. You can build HHVM from source on even more Linux distributions.
Per Facebook’s instructions, you can install HHVM on the latest version of Ubuntu with the Aptitude package manager like this:
wget -O -\http://dl.hhvm.com/conf/hhvm.gpg.key|sudo apt-key add -;echodeb\http://dl.hhvm.com/ubuntu trusty main|sudo tee /etc/apt/sources.list.d/hhvm.list;sudo apt-get update;sudo apt-get install hhvm;
If you’re feeling lucky, swap the last line with this one to install the latest nightly build:
sudo apt-get install hhvm-nightly;
The preceding code adds HHVM’s GNU Privacy Guard (GPG) public key for package verification. It adds the HHVM package repository to our local list of repositories. Finally, it installs HHVM with Aptitude like any other software package. The HHVM binary is installed at /usr/bin/hhvm.
HHVM uses a php.ini configuration file just as the Zend Engine does. This file exists at /etc/hhvm/php.ini by default, and it contains many of the same INI settings used by the Zend Engine. You can find a complete list of HHVM php.ini directives at http://docs.hhvm.com/manual/ini.list.php.
If you run HHVM as a FastCGI server, add server-related INI directives into the /etc/hhvm/server.ini file. You can find a complete list of HHVM server directives at https://github.com/facebook/hhvm/wiki/INI-Settings. The HHVM wiki page is weak on details, so you may want to peruse these HHVM support communities, too:
The default /etc/hhvm/server.ini file should be sufficient to get you started. It looks like this:
; php options pid = /var/run/hhvm/pid ; hhvm specific hhvm.server.port = 9000 hhvm.server.type = fastcgi hhvm.server.default_document = index.php hhvm.log.use_log_file = true hhvm.log.file = /var/log/hhvm/error.log hhvm.repo.central.path = /var/run/hhvm/hhvm.hhbc
The most notable settings are hhvm.server.port = 9000 and hhvm.server.type = fastcgi;
they tell HHVM to run as a FastCGI server on local port 9000.
When you execute the hhvm binary, you specify the path to your configuration files with
the -c option. If you use hhvm to execute command-line scripts, you only need the
/etc/hhvm/php.ini configuration file:
hhvm -c /etc/hhvm/php.ini my-script.php
If you use the hhvm binary to start a FastCGI server, you need both the /etc/hhvm/php.ini
and /etc/hhvm/server.ini files:
hhvm -m server -c /etc/hhvm/php.ini -c /etc/hhvm/server.ini
HHVM cannot use PHP extensions that are compiled for the Zend Engine unless the extensions use Facebook’s Zend Extension Source Compatibility Layer. Fortunately, most of the PHP extensions we take for granted are supported by HHVM out of the box. Other third-party PHP extensions (e.g., the GeoIP extension) can be compiled separately and loaded into HHVM as a dynamic extension. You can find a list of PHP extensions compatible with HHVM on GitHub.
HHVM is just fine for your production server, but it’s not infallible. I recommend you keep tabs on HHVM’s master process with Supervisord, a process monitor that starts the HHVM process on boot and automatically restarts the HHVM process if HHVM fails.
If you are unfamiliar with Supervisord, Chris Fidao has an excellent tutorial.
Install Supervisord with this command if you haven’t already:
sudo apt-get install supervisor
Next, make sure the /etc/supervisor/supervisord.conf configuration file has these two lines:
[include] files = /etc/supervisor/conf.d/*.conf
These two lines let us create a configuration file in the /etc/supervisor/conf.d/ directory for each supervised application. Next, create the /etc/supervisor/conf.d/hhvm.conf file with this content:
[program:hhvm] command=/usr/bin/hhvm -m server -c /etc/hhvm/php.ini -c /etc/hhvm/server.ini directory=/home/deploy autostart=true autorestart=true startretries=3 stderr_logfile=/home/deploy/logs/hhvm.err.log stdout_logfile=/home/deploy/logs/hhvm.out.log user=deploy
The most important settings are:
commandSupervisord runs this command to kick off the HHVM process. We use the -m option to
run HHVM in server mode. We also use the -c option to provide the path to HHVM’s
php.ini and server.ini configuration files.
autostartThis causes the HHVM process to start when the Supervisord process starts (e.g., on system boot).
autorestartThis prompts Supervisord to restart the HHVM process if it fails.
startretriesThis is the number of times Supervisord should try to start the HHVM process before Supervisord considers this process a failure.
userThis is the user that owns the HHVM process. I recommend you use an unprivileged user for
security purposes. In this example, I use the same unprivileged deploy user we
created in Example 7-1.
Make sure you manually create the /home/deploy/logs directory, because Supervisord does not create it for you.
After you finish editing the Supervisord configuration files, run these two commands to reload and apply your changes:
sudo supervisorctl reread;sudo supervisorctl update;
You can review all processes managed by Supervisord with this command:
sudo supervisorctl
You can start, stop, or restart a single Supervisord program as shown
in the example below. In this example, hhvm is the program name
specified at the top of the /etc/supervisor/conf.d/hhvm.conf file:
sudo supervisorctl start hhvm;sudo supervisorctl stop hhvm;sudo supervisorctl restart hhvm;
So far we’ve installed HHVM, and we monitor the HHVM process with Supervisord. We still need a web server to proxy requests to HHVM. Remember, HHVM runs a FastCGI server exactly as we do in Chapter 7 with PHP-FPM. We’ll use the HHVM FastCGI server to handle PHP requests sent from nginx.
HHVM communicates with a web server (e.g., nginx) with the FastCGI protocol. We need to create an nginx virtual host that proxies PHP requests to the HHVM FastCGI server. Here’s an example nginx virtual host definition that does that:
server {
listen 80;
server_name example.com;
index index.php;
client_max_body_size 50M;
error_log /home/deploy/apps/logs/example.error.log;
access_log /home/deploy/apps/logs/example.access.log;
root /home/deploy/apps/example.com/current/public;
location / {
try_files $uri $uri/ /index.php$is_args$args;
}
location ~ \.php {
include fastcgi_params;
fastcgi_index index.php;
fastcgi_param SCRIPT_FILENAME ument_root$fastcgi_script_name;
fastcgi_pass 127.0.0.1:9000;
}
}
From this point forward, I assume nginx is installed and running on your server. Refer to Chapter 7 for nginx installation instructions.
Assuming you followed the nginx installation instructions in Chapter 7, create a file at /home/deploy/apps/example.com/current/public/index.php with this content:
<?phpphpinfo();
Make sure the example.com domain points to your server’s IP address
and visit http://example.com/index.php in a web browser. You should
see the word “HipHop” appear in your browser window.
You can force your computer to point any domain name to any IP address
by updating your local /etc/hosts file. For example, this line points
the domain name example.com to IP address 192.168.33.10:
192.168.33.10 example.com
Congratulations! You’ve installed HHVM as a FastCGI server that can run your PHP application. But a FastCGI server isn’t cool. You know what’s cool? Hack. HHVM can run that, too.
Hack is a server-side language that is similar to and seamless with PHP. Hack’s developers even call Hack a dialect of PHP. Why did Facebook create something so similar to PHP? Facebook created the Hack language for several reasons. The Hack language adds new time-saving data structures and interfaces that are unavailable in PHP. More important, Hack introduces static typing to help us write more predictable and stable code. Static typing surfaces errors earlier in the development process using a near-realtime type checking server.
Are new data structures, interfaces, and static typing worth the time required to learn a new(ish) language and toolchain? Maybe. You have to remember that Facebook is Facebook. It has thousands of developers all working on a gargantuan codebase. If Facebook can optimize even the smallest part of its development process, it reaps a large reward in both developer efficiency and a more stable, well-performing codebase.
I do not recommend you drop what you’re doing and immediately port your existing applications from PHP to Hack. However, if you are starting a new project and have time to install and learn Hack, then—by all means—go wild. You’ll certainly benefit from Hack’s data structures and static typing.
To convert code from PHP to Hack, change <?php to <?hh.
That’s it. This is PHP code:
<?phpecho"I'm PHP";
And this is equivalent Hack code:
<?hhecho"I'm Hack";
Facebook makes it super-easy to go from PHP to Hack because it understands that
converting a large, existing codebase is not a quick task. Start your codebase
migration by only changing <?php to <?hh. Next, introduce a few static types.
Later on, explore some Hack data structures. The transition to Hack is gradual and painless, and it happens on your schedule; this is by design.
Before we compare dynamic and static typing, it’s probably helpful to define type.
Most PHP programmers think a type is the form of data assigned to a variable. For
example, the expression $foo = "bar" implies the $foo variable’s value is a
string. The expression $bar = 14 implies the $bar variable’s value is an integer.
These examples demonstrate types, yes, but they betray the full definition of a type.
A type is a nebulous label that we assign to properties of an application to prove that certain behaviors exist and, to our own expectations, are fundamentally correct. I’m paraphrasing Chris Smith’s excellent explanation of programming types.
We can expand our definition of a type to a syntactical annotation that clarifies the identity of program variables, arguments, or return values. Type annotations (or hints) are used in both PHP and Hack. You’ve probably seen code like this:
<?phpclassWidgetContainer{protected$widgets;publicfunction__construct($widgets=array()){$this->widgets=array_values($widgets);}publicfunctionaddWidget(Widget$widget){$this->widgets[]=$widget;returnthis;}publicfunctiongetWidget($index){if(isset($this->widgets[$index])===false){thrownewOutOfRangeException();}return$this->widgets[$index];}}
This is an arbitrary example, but it uses syntax hints to enforce specific
application properties. For example, in the addWidget() method signature
we use a Widget hint before the $widget argument to tell PHP we expect
the method argument to be an instance of class Widget. The PHP interpreter
enforces this expecation. If an argument is provided that is not an instance
of class Widget, the code fails. In this example, the type is our annotated
expectation that the addWidget() method accepts arguments only of class Widget.
Our earlier naive examples (e.g., $foo = "bar") and this WidgetContainer
example both demonstrate types. The first example demonstrates a type that proves
a variable is a string, even though we don’t explicitly annotate the expectation.
The PHP interpreter is smart enough to infer the string type in this example
based on the code syntax. The second example creates a type with an annotation
that explicitly defines the expected behavior of the addWidget() method, and
the PHP interpreter enforces this behavior based on our explicit hint rather
than making an inferrence.
Types are more than inferred identities and annotations. However, these are the two manifestations you’ll see and use most often when writing PHP and Hack code. You can learn more about programming types in Benjamin C. Pierce’s book “Types and Programming Languages.”
If you thought that PHP type hints are static types, you’re probably scratching your head right about now because I just burst your bubble. Both static and dynamic typing help us write code that behaves correctly according to our expectations, and both employ their own type systems. The main differences between static and dynamic typing are when program types are checked and how a program is tested for correctness.
The correct behavior of a statically typed program is implied by the code, via inferences, annotations, or other language-specific types. If a statically typed program compiles successfully, we can be confident the program is proven to behave as written. The program’s types become our tests, and they ensure that the program satisfies our basic expectations.
Did you notice I used the word compiles? Statically typed languages are often compiled. Type checking and error reporting are delegated to the language compiler. This is nice, because the compiler surfaces type-related program errors at compile time before the application is deployed into production. Unfortunately, compiled languages imply a lengthy feedback loop. A program must be compiled to reveal errors, and complicated programs take a long time to compile. This decelerates development.
The upside to statically typed programs is that they are usually more stable because their behavior is proven by the compiler’s type checker. However, we should still write separate tests to verify that the program behavior is correct. If a program compiles, that only means the program does what the code says it should do. That does not mean the program does what we intend it to do. That being said, static typing saves us from writing type-related unit tests as we do for dynamically typed programs.
Unlike static typing, dynamic typing cannot enforce code behavior at compile time, because the program types are not checked until runtime. Dynamically typed programs are often interpreted, too. PHP is a dynamically typed and interpreted language. This means that every time you execute a PHP script—either directly on the command line or indirectly via a web server—the PHP code is read by an interpreter, converted into a set of preexisting opcodes codes, and executed.
So how do you find errors if PHP is not compiled? Errors are surfaced during runtime. This is both a blessing and a curse. It’s good because we can iterate quickly. We write code and run it. Feedback is near-instantaneous. Unfortunately, we lose the inherent accuracy and tests provided by static type checking. Separate unit tests become far more important to ensure both proper types and intended behavior. Our tests must cover all possible behaviors. This works for the behavior we anticipate, but it fails miserably for the behavior we do not anticipate. Unanticipated behaviors gnash their teeth during runtime as PHP errors, and we must handle them gracefully with friendly messages and appropriate logging.
Static typing is Hack’s biggest selling point. Even more interesting is that Hack does static and dynamic typing. Remember, Hack is mostly backward-compatible with regular PHP. This means Hack supports all of PHP’s dynamic typing features that you expect. This is possible because Hack is run with HHVM’s JIT compiler. The Hack code is type checked as it is written with a standalone type checker. The Hack code is read, optimized, and cached into an intermediary bytecode by HHVM. A Hack file is only converted into x86_64 machine code and executed on demand. It’s really the best of both worlds. We get the accuracy and safety of static typing with Hack’s type checker (more on this next) and the flexibility and quick iteration of dynamic typing thanks to HHVM’s JIT compiler.
There are a few PHP features not supported by Hack. They are listed at http://docs.hhvm.com/manual/hack.unsupported.php. These features are supported by HHVM when executing normal PHP code.
Hack comes with a standalone type-checking server that runs in the background and type-checks your code in realtime. This is huge. This is also the main reason why Facebook created the Hack language. Hack’s instantaneous type checking provides the accuracy and safety of static typing without the lengthy feedback loop. If you are using Hack without its type checker, you’re holding it wrong.
Here’s how to set up Hack’s type checker for your application. First, I assume HHVM is
installed and running. If not, refer to the HHVM section for installation
instructions. Next, create an empty file named .hhconfig in your project’s topmost
directory. This tells the Hack type checker which directory to analyze. The type checker
watches files beneath this directory and type-checks the appropriate files whenever it
detects filesystem changes. Start the Hack type checker by executing the hh_client
command in or beneath your project’s topmost directory.
Hack’s type checker does have a few limitations. Per Hack’s online documentation:
The type checker assumes that there is a global autoloader that can load any class on demand. This means that it insists that all class and function names are unique, and has no notion of checking imports or anything of that nature. Futhermore, it does not support conditional definitions of functions or classes — it must be able to statically know what is and what is not defined. It is of course perfectly possible to have a project that meets these requirements without a global autoloader, and the type checker will work fine on such a project, but a project using an autoloader was the intended use case.
Mixing HTML and Hack code are not supported by the type checker. Following and statically analyzing these complicated mode switches is unsupported, particularly since much modern code doesn’t make use of this functionality. Hack code can output markup to the browser in a simple way via echo, or using a templating engine or XHP for more complex scenarios.
Hack code can be written in three modes: strict, partial, or decl. If you are starting
a project with Hack, I recommend you use strict mode. If you are migrating existing PHP code
to Hack, or if your project uses both PHP and Hack code, you may want to use partial mode.
The decl mode lets you integrate legacy, untyped PHP code into an otherwise strict Hack
codebase. You declare the mode at the very top of the file, after and adjacent to the opening
Hack or PHP tag (see the following examples). Mode names are case-sensitive:
<?hh // strictStrict mode requires all code to be appropriately annotated. The Hack type
checker will catch all possible type-related errors. This mode also prevents your Hack code
from using non-Hack code (e.g., legacy PHP code). Be sure you read up on Hack type annotations
before you commit to strict mode. Among other requirements, all Hack arrays must be typed;
you cannot use an untyped array in Hack. You must also annotate return types for functions
and methods.
<?hh // partialPartial mode (the default) allows Hack code to use PHP code that has not been converted to Hack. Partial mode also does not require you to annotate all of a function or method’s arguments. You can annotate a subset of the arguments without angering the Hack type checker. If you are just getting started with Hack, or if you are converting an existing PHP codebase, this is probably the best mode for you.
<?php // decldecl mode lets strict Hack code call untyped code. This is often the case
when newer Hack code depends on a legacy, untyped PHP class. In this scenario, the legacy PHP
code should declare itself in decl mode before the newer Hack code can use it.
Hack supports type annotations for class properties, method arguments, and return types. These annotations are checked with Hack’s standalone type checker in accordance with each file’s mode.
Read a complete list of available type annotations.
Let’s revisit our earlier WidgetContainer example and introduce type annotations.
The updated Hack code looks like this:
01.<?hh// strict02.classWidgetContainer03.{04.protectedVector<Widget>$widgets;05.06.publicfunction__construct(array<Widget>$widgets=array())07.{08.foreach($widgetsas$widget){09.$this->addWidget($widget);10.}11.}12.13.publicfunctionaddWidget(Widget$widget):this14.{15.$this->widgets[]=$widget;16.17.returnthis;18.}19.20.publicfunctiongetWidget(int$index):Widget21.{22.if($this->widgets->containsKey($index)===false){23.thrownewOutOfRangeException();24.}25.26.return$this->widgets[$index];27.}28.}
On line 4, we declare the $widgets class property with the Vector<Widget>
annotation. This annotation tells us two things:
This property is a Vector (similar to a numerically indexed array).
This property must contain only Widget instances.
This is probably familiar to those of you who already use PHP type hints. On line 6,
we annotate the __construct() method’s argument with the array<Widget> annotation.
This annotation tells us two things:
The argument must be an array.
The argument must contain only Widget instances.
Unlike the property annotation on line 4, this argument can be either a numeric or
an associative array. We iterate the array argument’s values and add them to the Vector
data structure. If you did want the argument to be either a numeric or an associative array,
you could use the array<int, Widget> or array<string, Widget> annotations respectively.
On lines 13 and 20, we annotate the methods’ return types. The addWidget() method
returns itself (more on this soon). The getWidget() method returns a Widget instance.
Return-type annotations are declared after the method signature’s closing parenthesis
and before the method body’s opening bracket.
The exception to this rule is the __construct() method. One might think the
constructor’s return value is void; it’s not. You should not annotate the
constructor method’s return type.
Some developers like to enable method chaining. This means that a class method returns itself so that multiple method calls can be chained together like this:
$object->methodOne()->methodTwo();
Hack lets you annotate this behavior with the this return type. We use the
this annotation with the addWidget() method on line 13.
The Hack language’s headline feature is static typing. However, Hack also provides new data structures and interfacs that are not found in PHP. These can potentially save you development time versus implementing similar workarounds in vanilla PHP. Some of Hack’s new data structures and interfaces are:
Collections (vectors, maps, sets, and pairs)
Many of these data structures complement, clarify, or supplement PHP’s functionality.
For example, Hack’s Collection interfaces clarify PHP’s array ambiguity. Generics let
you create data structures to handle homogenous values of a given type that is
inferred only when an instance of the generic class is created; this alleviates the
need to manually enforce type checking inside a class with PHP’s instanceof method.
Enums are helpful for creating a set of named constants without resorting to abstract
classes. Shapes help you type-check data structures that should have a
fixed set of keys. And tuples let you use arrays of an immutable length.
Please don’t feel like you need to rush out and implement all of these data structures. I admit, some of them are of limited and niche utility. Some data structures duplicate (and extend) functionality found in other data structures. I suggest you read up on which data structures are available and only use them if and when you need them.
I believe the most useful Hack data structures are the various Collection interfaces.
These provide more appropriate and predictable behavior than PHP’s array data structure.
It’s best to use a Collection instead of a PHP array.
If HHVM and Hack are so awesome, why should you use PHP? I’m asked this question a lot. I’m also asked if and when PHP will meet its demise. The answer is not black-and-white. It’s more a muddy neutral gray.
HHVM is the first true competitor to the traditional Zend Engine PHP runtime. As of PHP 5.x, HHVM is proven to perform better and be more memory-efficient than the Zend Engine on many real-world benchmarks. I think this caught the PHP core development team by surprise. In fact, HHVM’s mere existence is probably responsible for PHP’s renewed interest in increased performance and reduced memory usage. The PHP core development team is already working on PHP 7, which is scheduled for release in late 2015. The PHP 7 codebase promises to be competitive with, if not better than, HHVM. Whether that will be true or not is anyone’s guess. However, the point is that HHVM creates competition, and competition helps everyone. Both HHVM and the Zend Engine will improve, and PHP developers will reap the benefits. Neither HHVM nor the Zend Engine is going to win or lose. I believe they will coexist and feed off of their competitive energies.
The Hack language, in my opinion, is head-and-shoulders better than PHP. There are several reasons for this. First, the Hack language was built by Facebook to answer specific needs. It is focused. It has purpose. And it is not developed by committee. The PHP language, in contrast, has evolved piecemeal over a longer period of time. PHP answers many different needs, and it is controlled by a committee that is not known for its cordial agreements. As of PHP 5.x, the Hack language is the better option for its strict type checking and support for legacy PHP code. I believe a lot of Hack’s best features will eventually find their way into PHP. And vice versa. In fact, the Hack language team has said it intends to maintain future compatibility with the Zend Engine. Again, I believe competition will improve both languages and they’ll enjoy a symbiotic relationship.
An example of this symbiosis is the official PHP specification. Until recently, the PHP language was the Zend Engine for lack of alternative implementations. The introduction of HHVM prompted several developers at Facebook to announce a PHP language specification. This specification is an amazing development in the PHP community, and it ensures that current and future PHP implementations (Zend Engine, HHVM, and so on) all support the same fundamental language.
You can read the official PHP implementation on GitHub at https://github.com/php/php-langspec.
We’ve touched on a lot of HHVM and the Hack language in a very short period of time. There are simply not enough pages to cover everything these two initiatives have to offer. Instead, I’ll point you to these helpful resources:
The PHP community is your most valuable resource. It is diverse, vibrant, and global. I encourage you to participate in the PHP community to learn from and share with other PHP developers. There’s always more to learn, and your PHP community is the best way to continue learning. It’s also a great way to meet and help other developers.
My first advice is to find and join your local PHP User Group (PUG). Many cities have them. You can find your local PUG at http://php.ug. Your local PUG is the best opportunity to meet and network with fellow PHP developers in your local community.
If there isn’t a nearby PUG, you have several options. You can start your own PUG. Unless you live in the middle of a jungle, I bet there are like-minded nearby PHP developers who would love to join a PUG. Otherwise, you can join NomadPHP—an online user group with monthly speakers and lightning talks that cover all sorts of PHP features and practices.
There are numerous PHP conferences every year. Conferences are an excellent opportunity to meet and mingle with the greatest minds in the PHP community. You can listen to and talk with PHP speakers and thought leaders. And you can stay up-to-date with emerging features and modern practices. Conferences are also an excuse to take a minivacation. You can find a list of upcoming PHP conferences at http://php.net/conferences/.
If you are a beginner PHP developer and need advice or assistance, you can find a mentor at http://phpmentoring.org. Many expert PHP developers donate their time to help new PHP developers become better. If you are already an expert PHP developer, consider signing up as a PHP mentor. There are many beginner PHP developers who don’t know how or where to start, and your mentorship will be invaluable.
Linux is my favorite development environment. I own a Macbook Pro with
OS X, but my development happens in a Linux virtual machine. PHP is easy
to install on Linux with a package manager such as aptitude on Ubuntu
Server or yum on CentOS.
For now, we’re concerned only with PHP for command-line usage. We discuss how to setup PHP-FPM and the nginx web server in Chapter 7.
Most Linux distributions provide their own package manager. For
example, Ubuntu uses the aptitude package manager. CentOS and Red Hat
Enterprise Linux (RHEL) use the yum package manager. Package managers
are the simplest way to find, install, update, and remove software on
our Linux operating system.
Sometimes Linux package managers install out-of-date software. For example, Ubuntu 14.04 LTS provides PHP 5.5.9; this is already behind the latest release—PHP 5.6.3 (as of December 2014).
Fortunately, we can supplement our Linux package manager’s default
software sources with third-party repositories that contain more
up-to-date, community-maintained software packages. We’ll use a custom
software repository for both Ubuntu and CentOS to install the most
recent PHP version. Before we go any further, make sure you are the
system root user or a user with sudo power. This is required to
install software with a Linux package manager.
Ubuntu does not provide the latest PHP version in its default software
repositories. We’ll need to add a community-maintained Personal Package Archive (PPA)
instead. The term PPA is unique to Ubuntu, but the concept remains
the same: we are using a third-party software repository to expand
Ubuntu’s default software selection. Ondřej Surý maintains an excellent
PPA that provides nightly builds for the latest stable PHP release.
This PPA is named ppa:ondrej/php5-5.6.
Before we add Ondřej Surý’s PPA, we must make sure the add-apt-repository
binary is available on our operating system. This binary is included in
the python-software-properties Ubuntu package. Type this command into
your terminal application and press Enter. Enter your account password if prompted:
sudo apt-get install python-software-properties
This command installs the Python Software Properties package that includes
the add-apt-repository binary. Now we can add the custom PPA.
This PPA expands Ubuntu’s available software selection beyond the default Ubuntu software repositories. Type this command into your terminal application and press Enter. Enter your account password if prompted:
sudo add-apt-repository ppa:ondrej/php5-5.6
This command adds the Ondřej Surý PPA to Ubuntu’s list of software sources. It also downloads the PPA’s GPG public key and appends it to our local GPG keyring. The GPG public key enables Ubuntu to verify that the packages in the PPA have not been tampered with since they were built and signed by their original author.
Ubuntu caches the list of all available software. When we add new software sources, we need to refresh Ubuntu’s cache. Type this command in your terminal application and press Enter. Enter your account password if prompted:
sudo apt-get update
We can now use Ubuntu’s aptitude package manager to install the latest
PHP stable release from the Ondřej Surý PPA. Before we do, it is
important to know which PHP packages are available and what they do. PHP
is distributed in two forms. One form is a CLI package that enables you
to use PHP on the command line (we will use this one). There are several
other PHP packages that integrate PHP with the Apache or nginx web
servers (we discuss these in Chapter 7). For now, we’ll stick
with the PHP CLI package.
First, let’s install the PHP CLI package. Type this command in your terminal application and press Enter. Enter your account password if prompted:
sudo apt-get install php5-cli
The Linux package manager also contains packages for individual PHP extensions that can be installed separately. Let’s install a few of those now. Type this command in your terminal application and press Enter. Enter your account password if prompted:
sudo apt-get install php5-curl php5-gd php5-json php5-mcrypt php5-mysqlnd
Verify PHP was installed successfully with this terminal command:
php -v
This command should output something similar to:
PHP 5.5.11-3+deb.sury.org~trusty+1 (cli) (built: Apr 23 2014 12:15:16)
Copyright (c) 1997-2014 The PHP Group
Zend Engine v2.5.0, Copyright (c) 1998-2014 Zend Technologies
with Zend OPcache v7.0.4-dev, Copyright (c) 1999-2014, by Zend Technologies
Like Ubuntu, CentOS and RHEL do not provide the latest stable version of PHP in their default software repositories. RHEL is very particular about which software packages are included in its official distribution because it prides itself on superior security and stability; software updates are added slowly for the sake of safety.
We’re not a Fortune 500 company, so we can afford to install the latest PHP stable release in our CentOS/RHEL Linux distribution. To do so, we’ll use the EPEL (Extra Packages for Enterprise Linux) repository. The EPEL describes itself as:
…a Fedora Special Interest Group that creates, maintains, and manages a high quality set of additional packages for Enterprise Linux, including, but not limited to, Red Hat Enterprise Linux (RHEL), CentOS, Scientific Linux (SL), and Oracle Enterprise Linux(OEL).
The EPEL repository is unrelated to the official CentOS/RHEL Linux distributions, but it can still supplement the default CentOS/RHEL software repositories. And that’s exactly what we’re going to do.
Let’s tell our CentOS/RHEL system to use the EPEL software repository. Type these commands into your terminal application one-by-one, and press Enter after each command. Enter your account password if prompted:
sudo rpm -Uvh\http://dl.fedoraproject.org/pub/epel/7/x86_64/e/epel-release-7-5.noarch.rpm;sudo rpm -Uvh\http://rpms.famillecollet.com/enterprise/remi-release-7.rpm;
These commands add the third-party EPEL and remi software repositories to our CentOS/RHEL system. You should now see epel.repo and remi.repo files in the /etc/yum.repos.d directory.
Now we’ll install the latest PHP version from the EPEL and remi repositories. As I mentioned earlier in the Ubuntu PHP installation, PHP is distributed in two forms. One form is a CLI package that enables you to use PHP on the command line. For now, we’ll stick with the PHP CLI package.
First, let’s install the PHP CLI package. Type this command in your terminal application and press Enter. Enter your account password if prompted.
sudo yum -y --enablerepo=epel,remi,remi-php56 install php-cli
Next, let’s install a few additional PHP extensions. You can search for
a complete list of PHP extensions with the yum package manager. Type
this command into your terminal application and press Enter:
yum search php
Once you find a list of PHP extensions, install them as I do in this example. Your package names might be different:
sudo yum -y --enablerepo=epel,remi,remi-php56\install php-gd php-mbstring php-mcrypt php-mysqlnd php-opcache php-pdo
The important takeaway from this command is the --enablerepo option.
This option tells yum to install the specified software packages from
the EPEL, remi, and remi-php56 repositories. Without this option,
yum only references its default software sources.
Verify that PHP was installed successfully. Type this command in your terminal application and press Enter:
php -v
This command should output something similar to:
PHP 5.6.3 (cli) (built: Nov 16 2014 08:32:30)
Copyright (c) 1997-2014 The PHP Group
Zend Engine v2.6.0, Copyright (c) 1998-2014 Zend Technologies
with Zend OPcache v7.0.4-dev, Copyright (c) 1999-2014, by Zend Technologies
OS X includes PHP out of the box, but it’s probably not the latest version and it may not have the PHP extensions you need. I recommend you ignore the PHP that comes with OS X and use a custom PHP build instead. There are many ways to install PHP on OS X, but I recommend two methods: MAMP and Homebrew.
MAMP is the best way to install PHP on OS X if you cringe at the mere thought of the command-line terminal. MAMP (which stands for Mac, Apache, MySQL, and PHP) provides a traditional web-development software stack that includes an Apache web server, a MySQL database server, and PHP. MAMP is an OS X application with a GUI. Many users prefer the familiar GUI interface because it provides a nice point-and-click interface for installing and configuring the MAMP software (Figure A-1). MAMP lives in your /Applications folder, and you double-click its application icon to launch it. It has a simple OS X package (.pkg) installer that makes it dead simple to install and use. You can even drag it into your OS X Dock for quick access.
Download the MAMP package (.pkg) installer from http://www.mamp.info, and double-click the MAMP package installer. Follow the on-screen instructions.
When the MAMP installer finishes, find the MAMP application in your /Applications folder and launch it by double-clicking its application icon. After MAMP opens, click the Start Servers button to start the Apache and MySQL servers (Figure A-2). It’s really that simple.
What about PHP?, you ask. MAMP embeds PHP inside of the Apache web
server using the mod_php Apache module. Without getting into too much
detail, you can use PHP if the Apache web server is running. We
discuss PHP deployment strategies in Chapter 7.
After you start the Apache and MySQL servers, open your web browser and go to http://localhost:8888. You should see a MAMP welcome page if MAMP is successfully installed.
The Apache web server typically listens for connections on port 80. MAMP, however, runs Apache on port 8888. Likewise, MySQL typically listens for connections on port 3306. MAMP, however, runs MySQL on port 8889. You can change MAMPs default ports in the MAMP application preferences. MAMP’s Apache web server document root is /Applications/MAMP/htdocs. Any PHP files in this directory can be accessed in a web browser at http://localhost:8888.
If you will use MAMP a lot, go into the MAMP application preferences (Figure A-3) and make sure Start Servers when starting MAMP is checked. Then add the MAMP application to your OS X account’s Login Items. This will start MAMP’s Apache and MySQL servers automatically when you log in to OS X.
It is possible to download MAMP add-ons that provide different PHP versions for your local MAMP installation. MAMP is updated frequently and most likely comes bundled with the latest PHP version. But if for whatever reason it doesn’t, or if you need an older PHP version, go to the MAMP website and download the PHP version you need.
The MAMP free version provides only one Apache virtual host, and it does not let you easily modify PHP’s configuration or extensions. MAMP is very basic and provides only the bare necessities for PHP development on OS X.
MAMP provides a paid “Pro” version that lets you create multiple Apache virtual hosts, easily edit your php.ini configuration file, and fine-tune PHP extensions. MAMP Pro is nice, don’t get me wrong. But instead of forking out a good bit of money for MAMP Pro, you’re better off learning a few command-line fundamentals so you can use the excellent Homebrew package manager instead.
Homebrew is an OS X package manager comparable to
Ubuntu’s aptitude and RHEL’s yum package managers. Homebrew lets you
easily browse, find, install, update, and remove any number of custom
software packages on OS X. However, Homebrew is a command-line
application. If you are not familiar with the OS X command line,
you will be more comfortable with MAMP.
Homebrew uses formulae to install software packages on your computer.
Homebrew provides default formulae for lots of software that’s not
provided out of the box with OS X. For example, there are Homebrew
formulae for wget, phploc, phpmd, and php-code-sniffer (to name
just a few). If Homebrew’s default formulae are insufficient, you can tap into
third-party formulae repositories to expand your available Homebrew
software selection. Homebrew is, without exception, my favorite way to
install PHP on OS X.
Before we can install Homebrew, we must first install the XCode
Command-Line Tools provided (for free) by Apple, Inc. These
command-line tools include the gcc compiler (among other tools) needed
by Homebrew to build and install software packages. If you are running
OS X Mavericks 10.9.2 or newer, open the OS X Terminal application,
type this command, and press Enter:
xcode-select --install
This command opens this modal window shown in Figure A-4.
Click Install to begin installing the XCode Command-Line Tools. Click Agree when the software license agreement appears. After the XCode Command-Line Tools software is installed, click Done and continue to the next step.
If you are using an older version of OS X, you must log into the Apple Developer Portal to download and run a standalone XCode Command-Line Tools package (.pkg) installer.
After you install the XCode Command-Line Tools, type this command in the OS X Terminal application and press Enter:
ruby -e"$(curl -fsSL https://raw.github.com/Homebrew/homebrew/go/install)"
This command executes Ruby code that is downloaded from a remote URL. You should always inspect the remote code before you execute it, no matter how legitimate the source may be.
Homebrew downloads and ferments software in the /usr/local/Cellar directory. It symlinks installed software binaries to the /usr/local directory. Your OS X user account must be able to access the /usr/local directory to use software installed with the Homebrew package manager.
Let’s make sure your OS X user account owns the /usr/local directory. Type this command into the OS X Terminal application and press Enter. Enter your administrator password if prompted:
sudo chown -R`whoami`/usr/local
The chown command means “change the owner” of the specified directory,
the -R command flag means “make this change recursively to all
subdirectories” of the specified directory, and the whoami argument is
dynamically substituted with your OS X user account name. After you run
this command, your OS X user account will own (and therefore have access
to) the /usr/local directory.
Next, add the /usr/local directory to your OS X environment PATH.
The environment PATH is a list of directories to be searched when you
execute software using only the software’s name instead of the
software’s absolute filesystem path. For example, if I execute wget,
OS X will search all directories on my environment PATH for the wget
software. Otherwise, I’d have to type /usr/local/wget every time I
want to use wget. Type this command into the OS X Terminal application
and press Enter:
echo'export PATH="/usr/local/bin:$PATH"'>> ~/.bash_profile
Before we install PHP with Homebrew, we must tap additional repositories that contain PHP-related formulae that do not exist in the default Homebrew repository.
First, we’ll tap the homebrew/dupes repository. This repository
contains formulae for software that already exists on OS X. This
repository, however, contains newer software versions than OS X. Type
this command in the OS X Terminal application and press Enter:
brew tap homebrew/dupes
Next, we’ll tap the homebrew/versions repository. This repository
contains multiple versions of existing OS X software. Type this command
in the OS X Terminal application and press Enter:
brew tap homebrew/versions
Finally, we’ll tap the homebrew/php repository. This repository
contains PHP-related formulae that might not be included in the default
Homebrew repositories. The default Homebrew software repository is not
maintained by PHP developers. This repository is, and it includes software
appropriate for PHP developers. Type this command in the OS X
Terminal application and press Enter:
brew tap homebrew/php
So far, we’ve installed the Homebrew package manager, configured
filesystem permissions, updated the environment PATH, and tapped into
additional formulae repositories. Now it’s time to install PHP. There are
Homebrew formulae for each PHP version and each PHP version’s extensions.
Homebrew provides a very simple way to search for available formulae.
Type this command in the OS X Terminal application and press Enter:
brew search php
You should see a lengthy list of Homebrew PHP formulae. Find the latest
stable PHP version in the formulae list (PHP 5.5.x will be named
php55, PHP 5.6.x will be named php56, and so on). I’ll pick php56
since PHP 5.6.x is the latest stable version (as of December 2014). Type this
command in the OS X Terminal application and press Enter:
brew install php56
Installation may take a while, so feel free to grab a coffee and check
back in a few minutes. After the PHP software package is installed, you
can confirm the installation by executing php -v in the OS X Terminal
application; this command outputs the full name and version number
of the PHP interpreter installed by Homebrew.
Homebrew lets you install PHP extensions separately from the PHP
interpreter. You can search for PHP extensions just as you searched
for PHP previously. Assuming you chose php56, type this command in the
OS X Terminal application and press Enter:
brew search php56
You should see a lengthy list of PHP 5.6 extensions prefixed with
php56-. After you find the extensions you want, type this command in
the OS X Terminal application and press Enter. Swap the formulae in
this example with the extension formulae you want to install:
brew install php56-intl php56-mcrypt php56-xhprof
The Homebrew package manager is much more powerful than what I’ve
shown here. Type brew into the OS X Terminal application and press
Enter to see a complete list of Homebrew commands. You can also read
the complete Homebrew documentation online at http://brew.sh.
The precompiled PHP binary provided by your operating system’s package manager may not always be up-to-date or exactly what you want. If this is true, you’re better off building PHP from source code. Yes, this sounds scary. It took me a long time to build up enough confidence before I compiled PHP for the first time. I can assure you, it’s less scary than it sounds.
The build process is simple. We’ll download and extract the PHP source
code. We’ll configure the source code and make sure all of its
software dependencies are installed. And then we’ll make the actual
PHP binaries. Download. Configure. Make. Three simple steps.
Compiling PHP from source code gives you the flexibility to tweak the PHP build to your exact specifications. Although there are many ways to configure PHP, for the sake of time I’ll show you how I prefer to build PHP for my own projects. In addition to PHP’s default features, I typically want PHP to support:
OpenSSL
Bytecode caching
FPM (FastCGI process management)
PDO database abstraction
Encryption
Multibyte strings
Image manipulation
Network sockets
Curl
With this list in mind, let’s start building PHP. Try to follow along on your own computer. If this is your first time building PHP from source code, I strongly encourage you to do this on a virtual machine. You can set up a local virtual machine with VMware, Parallels, or VirtualBox. You can also fire up a dirt-cheap remote virtual machine with DigitalOcean, Linode, and other web hosts that bill by the hour. If you mess up, you can destroy the virtual machine, rebuild it, and try again without consequence.
Now take a deep breath, open your terminal application, and (most important) don’t be afraid to make mistakes.
First, let’s download the PHP source code. Locate the latest stable version of the PHP source code at http://www.php.net/downloads.php. For me, the latest stable release happens to be version 5.6.3, but this may be different for you. Type the following commands into your Terminal application and press Enter after each command.
First, we create a src/ directory in our home folder. This folder will
contain the source code that we download from PHP.net. We cd into the
src/ directory so that it becomes our current working directory:
mkdir ~/src;cd~/src;
Next, we use wget to download the PHP source code as a tar.gz
archive. The downloaded file will be located at ~/src/php.tar.gz:
wget -O php.tar.gz http://www.php.net/get/php-5.6.3.tar.gz/from/this/mirror
Extract the PHP source code archive with the tar command, and cd into the
unarchived source code directory:
tar -xzvf php.tar.gz;cdphp-*;
We’ve downloaded the PHP source code. Now we need to configure it.
Before we do, we must install a few software dependencies. How do I know
what dependencies to install? I run the ./configure command (see
the next subsection) until it works. When the ./configure command fails due to a
missing software dependency, it indicates what software is missing.
Install the missing dependency and rerun the ./configure command.
Rinse and repeat until it works.
Luckily for you, I’ve already figured out what software dependencies are
needed for the PHP ./configure command we’ll be using. Let’s install
these software dependencies now. I use commands for both Ubuntu/Debian
and CentOS/RHEL Linux distributions; use the commands appropriate for
your Linux distribution.
If for whatever reason the ./configure command reports additional
missing dependencies, you can search for the missing dependency software
packages online at http://packages.ubuntu.com/ (for Ubuntu) or at
https://fedoraproject.org/wiki/EPEL (for CentOS).
We’ll need these fundamental software binaries to build PHP on your
operating system. These binaries include gcc, automake, and other
fundamental development software:
# Ubuntusudo apt-get install build-essential;# CentOSsudo yum groupinstall"Development Tools";
libxml2We’ll need the libxml2 library. This is used by PHP’s XML-related functions:
# Ubuntusudo apt-get install libxml2-dev;# CentOSsudo yum install libxml2-devel;
OpenSSLWe’ll need the openssl library. This is required to enable HTTPS
stream wrappers in PHP, which is kind of important, right?
# Ubuntusudo apt-get install libssl-dev;# CentOSsudo yum install openssl-devel;
We’ll need the libcurl library. This is required by PHP’s Curl functions:
# Ubuntusudo apt-get install libcurl4-dev;# CentOSsudo yum install libcurl-devel;
We’ll need the GD, JPEG, PNG, and other image-related system libraries. Fortunately, all of these are bundled into a single package. These are required to manipulate images with PHP:
# Ubuntusudo apt-get install libgd-dev;# CentOSsudo yum install gd-devel;
McryptWe’ll need the mcrypt system library to enable PHP’s Mcrypt encryption
and decryption functions. For whatever reason, there is no default
CentOS Mcrypt package. We’ll need to supplement the default CentOS
packages with the third-party EPEL package repository to install Mcrypt:
# Ubuntusudo apt-get install libmcrypt-dev;# CentOSwget http://dl.fedoraproject.org/pub/epel/6/x86_64/epel-release-6-8.noarch.rpm;sudo rpm -Uvh epel-release-6*.rpm;sudo yum install libmcrypt-devel;
Now that our software dependencies are installed, let’s configure PHP.
Type the following ./configure command in your Terminal application
and press Enter:
./configure
--prefix=/usr/local/php5.6.3
--enable-opcache
--enable-fpm
--with-gd
--with-zlib
--with-jpeg-dir=/usr
--with-png-dir=/usr
--with-pdo-mysql=mysqlnd
--enable-mbstring
--enable-sockets
--with-curl
--with-mcrypt
--with-openssl;
This is a lengthy command with a lot of options. Don’t be
overwhelmed. Each command option has a specific purpose. You can find a
list of all available options with ./configure --help. We’ll go
through this ./configure command line by line so you know exactly what
it does:
--prefix=/usr/local/php5.6.3The --prefix option defines the path to a filesystem directory that
will contain the compiled PHP binaries, includes, libraries, and
configuration files. I prefer to keep my custom PHP build and related
files together in a single parent directory for the sake of
organization. Your user account will need permission to write to this
directory. If you don’t have write permission to /usr/local, you can
set the --prefix to a directory in your user account’s home folder
instead (e.g., ~/local/php-5.5.13). Regardless, make sure the
--prefix directory exists before you run the ./configure command.
--enable-opcacheThe --enable-opcache option enables PHP’s built-in bytecode caching
system. You will most always want to enable this. The performance
benefits are tremendous.
--enable-fpmThe --enable-fpm option enables the built-in PHP FastCGI Process
Manager. This lets you run PHP as a FastCGI process that is accessible
via a TCP port or a local Unix socket. FPM is fast becoming the
preferred way to run PHP (especially with the nginx web server). If in
doubt, I recommend you enable this option.
--with-gdThe --with-gd option lets PHP interface with your operating system’s
GD image-manipulation library. You will want to enable this option if
you plan on using PHP to manipulate images.
--with-zlibThe --with-zlib option lets PHP interface with your operating system’s
Zlib library. Zlib is a data-compression library that is needed by the
GD image library to create and manipulate PNG image data. This option is
required if you use the --with-gd option.
--with-jpeg-dirThe --with-jpeg-dir option specifies the path to the filesystem
directory that contains the JPEG libraries. This option is required if
you use the --with-gd option.
--with-png-dirThe --with-png-dir option specifies the path to the filesystem
directory that contains the PNG libraries. This option is required if
you use the --with-gd option.
--with-pdo-mysql=mysqlndThe --with-pdo-mysql option instructs PHP to enable the PDO database
abstraction API for the MySQL database using PHP’s own native MySQL
driver. If you use MySQL, you’ll want to enable this option.
--enable-mbstringThe --enable-mbstring option instructs PHP to enable multibyte (read
“Unicode”) string support. You’ll most always want to enable this
option.
--enable-socketsThe --enable-sockets option instructs PHP to enable network socket
support so that you can talk with remote machines via TCP sockets.
You’ll most always want to enable this option.
--with-curlThe --with-curl option lets PHP interface with your operating system’s
curl library. This lets you use PHP’s curl functions to send and
receive HTTP requests. You’ll most always want to enable this option.
--with-mcryptThe --with-mcrypt option lets PHP interface with your operating
system’s mcrypt library for data encryption and decryption. Although
this option is by no means required, it is used by a growing number of
PHP components. I strongly recommend you enable this option.
--with-opensslThe --with-openssl option lets PHP interface with your operating
system’s openssl library. This is required to use PHP’s HTTPS stream
wrapper. Although this option is technically optional, it’s really not.
Make Edward Snowden proud. Enable this option.
Configuring PHP and installing its software dependencies was the hard
part. It’s all downhill from here. Assuming the ./configure command executed successfully, type this command in your terminal
application and press Enter:
make && make install
This will compile PHP and may take a while. Now is a good time to grab a coffee or two. Eventually the command will finish and PHP will be installed. That wasn’t too bad, right?
The compiled PHP binaries are available in the bin/ directory beneath
your --prefix directory. The php-fpm binary is available in the
sbin/ directory beneath your --prefix directory. Be sure the bin/
and sbin/ directories are added to your system’s environment PATH so
you can reference the php binary by name instead of absolute path.
Let’s not forget about our php.ini file. This may not be created
automatically. The PHP GitHub repository has a php.ini preconfigured
for local development. Our php.ini file should exist in the lib/
directory beneath your --prefix directory. Let’s create it now. Type
the following commands into your terminal application and press Enter after
each command.
First, cd into our PHP installation’s lib/ directory. This path may
be different if you used a different --prefix path in your
./configure command:
cd /usr/local/php5.6.3/libNext, download the PHP.ini file from PHP’s GitHub repository into a file named php.ini:
curl -o php.ini \
https://raw.githubusercontent.com/php/php-src/master/php.ini-development
That’s it. We’re all set to execute PHP files with the newly installed
php interpreter. We talked more about the php-fpm binary when we
discussed PHP deployment strategies in Chapter 7.
Yes, you can run PHP on Windows. However, I encourage you to use a Linux virtual machine instead. It is very likely that your production server will be running a Linux distribution, and you should set up your local development environment to closely match your production environment. But if you must use Windows locally, here’s how.
The fine folks over at PHP.net provide prebuilt PHP binaries for Windows at http://php.net/windows. Download the appropriate PHP release (provided as a ZIP archive) and unpack it to a directory of your choice. I’ll unpack it to C:\PHP\. Copy the php.ini-production file to php.ini in the same folder. No other changes are required to use PHP on the Windows command line. You can execute a custom PHP script with optional arguments like this:
C:\PHP\php.exe -f "C:\path\to\script.php" -- -arg1 -arg2 -arg3
You should add the PHP executable to your Windows PATH variable
and append the .php extension to your Windows PATHEXT variable
to save your future self from a lot of extra typing.
You can also download and install WAMP
to set up a quick and dirty local PHP development environment. Like its
OS X counterpart, MAMP, WAMP is an all-in-one software package that
provides a traditional web-development stack out-of-the-box. It includes
an Apache web server, a MySQL database server, and PHP. It has a Windows
software installer that will guide you through every step of the install
process. WAMP also provides a configuration menu in the Windows Taskbar
notification area where you can quickly and easily start, stop, or restart
your Apache and MySQL servers. Like MAMP, WAMP embeds PHP in the Apache
web server using the mod_php Apache module. If your Apache server is
running, you can use PHP.
WAMP is your best bet for quickly installing a local PHP development stack on your Windows machine. However, just as with MAMP, you are limited to the software and extensions provided with WAMP. You can download additional PHP versions separately on the WAMP website. Learn more at http://www.wampserver.com/.
Another all-in-one solution is Zend Server. It is available in both free and paid versions. Like WAMP, it provides an Apache web server, the latest PHP interpreter and popular PHP extensions, a MySQL database server, and Zend’s own debugging tools in one easy-to-install package. Just download the installer (.exe) file, run it, and follow the on-screen instructions. Learn more at http://www.zend.com/en/products/server/.
We’ve talked a lot about production server provisioning and application deployment. However, we haven’t discussed how to develop applications on your local computer. What tools do you use? How do you reconcile your development environment with your production environment? This chapter has answers.
Many beginner PHP developers rely on their operating system’s default software stack—typically older versions of Apache and PHP. I strongly encourage you not to use your operating system’s default software. Many OS X users (including me) have been devastated when an OS X upgrade vaporized our heavily customized Apache configuration files. Steer clear of built-in software; it’s often out of date, and it may be overwritten by operating system upgrades. Instead, build a local development environment in a virtual machine that is safely isolated from your local operating system. A virtual machine is a software-emulated operating system. For example, you can create a virtual machine on OS X that runs Ubuntu or CentOS. The virtual machine behaves exactly like a separate computer.
Make sure your virtual machine runs the same operating system as your production server (I prefer Ubuntu Server). It’s important that your local development and production server environments use the same operating system to prevent unexpected deployment and runtime errors caused by operating system software discrepancies.
There are many software programs that create and manage virtual machines. Some are commercial products (e.g., VMWare Fusion or Parallels), and others are open source products (e.g., VirtualBox). To be honest, VirtualBox is a solid product. It works as advertised, and it’s free. VirtualBox is not pretty like its commercial alternatives, but it gets the job done. You can download VirtualBox for OS X or Windows at https://www.virtualbox.org. It uses a traditional GUI installer appropriate for your operating system (Figure B-1).
Although VirtualBox lets us create virtual machines, it does not provide a user-friendly interface to start, provision, stop, and destroy virtual machines. Instead, we use Vagrant—a virtualization tool that helps you create, start, stop, and destroy VirtualBox virtual machines with a single command. It complements (and abstracts) VirtualBox with a user-friendly, command-line interface. You can download Vagrant for OS X and Windows at https://www.vagrantup.com. It also uses a traditional GUI installer appropriate for your operating system.
After installation, you can use the vagrant command in your terminal application to
create, provision, start, stop, and destroy VirtualBox virtual machines. These are the
Vagrant commands you’ll use most often:
vagrant initThis creates a new Vagrantfile configurations script in the current working
directory. We use this script to configure a virtual machine’s properties
and provisioning details.
vagrant upThis creates and/or starts a virtual machine.
vagrant provisionThis provisions a virtual machine using the specified provisioning scripts. We’ll discuss provisioning later in this chapter.
vagrant sshThis logs you into a virtual machine via SSH.
vagrant haltThis stops a virtual machine.
vagrant destroyThis destroys a virtual machine.
I recommend you create command-line aliases for these Vagrant commands
because you’ll type them a lot. Drop these into your ~/.bash_profile
file and restart your terminal application:
aliasvi="vagrant init"aliasvu="sudo echo 'Starting VM' && vagrant up"aliasvup="sudo echo 'Starting VM' && vagrant up --provision"aliasvp="vagrant provision"aliasvh="vagrant halt"aliasvs="vagrant ssh"
We have VirtualBox and Vagrant installed. Now what? We need to choose a Vagrant box as a starting point for our virtual machine. A Vagrant box is a preconfigured virtual machine that provides a foundation on which we provision our server and build our PHP application. Some boxes are spartan shells used as a blank canvas. Other boxes include complete software stacks that cater to certain types of applications. You can browse available boxes at https://vagrantcloud.com.
I usually choose the spartan ubuntu/trusty64 box, and then I use Puppet to provision the box with a specific software stack required by my application. If you find another Vagrant box that already includes the tools you need, by all means use that box to save time.
After you find a Vagrant box, navigate into the appropriate working directory
with your terminal application. Initialize a new Vagrantfile with this command:
vagrant init
Open the new Vagrantfile file in your preferred text editor. This file
is written with Ruby, but it’s easy to read. Find the config.vm.box
setting, and change its value to the name of your Vagrant box. For example,
if I prefer the Ubuntu box I change this setting to ubuntu/trusty64.
The updated Vagrantfile line should read:
config.vm.box="ubuntu/trusty64"
Next, uncomment this line so we can access our virtual machine in a web browser
on our local network at IP address 192.168.33.10:
config.vm.network"private_network",ip:"192.168.33.10"
Finally, create the virtual machine with this command:
vagrant up
This command downloads the remote Vagrant box (if necessary), and it creates a new VirtualBox virtual machine based on the Vagrant box.
Unless you use a Vagrant box that provides a preconfigured software stack,
your virtual machine doesn’t do anything. You need to provision the virtual
machine with the software to run your PHP application. At the very least,
you want a web server, PHP, and possibly a database. Provisioning a virtual
machine is a topic far too large for this book. I can, however, point
you in the right direction. You can provision a virtual machine
with Vagrant and either Puppet or Chef. Both Puppet and Chef can be
enabled and configured in the the Vagrantfile configuration file.
Erika Heidi gave a great NomadPHP presentation on Vagrant and provisioning tools like Puppet and Chef. She also wrote the Vagrant Cookbook, now available on LeanPub.
If you scroll down the Vagrantfile file, you’ll see a section
that looks like this. It may be commented out by default:
config.vm.provision"puppet"do|puppet|puppet.manifests_path="manifests"puppet.manifest_file="default.pp"end
If you uncomment this section, Vagrant will provision the virtual machine with Puppet using your Puppet manifests. You can learn more about Puppet at http://puppetlabs.com.
If you prefer Chef’s provisioning tools, you can instead uncomment this section
of the Vagrantfile file:
config.vm.provision"chef_solo"do|chef|chef.cookbooks_path="../my-recipes/cookbooks"chef.roles_path="../my-recipes/roles"chef.data_bags_path="../my-recipes/data_bags"chef.add_recipe"mysql"chef.add_role"web"# You may also specify custom JSON attributes:chef.json={mysql_password:"foo"}end
Provide your own cookbooks, roles, and recipes. Vagrant will provision your virtual machine accordingly. You can learn more about Chef at https://www.chef.io/chef/.
In either case, it’s often useful to map your local machine’s project directory to
a directory in the virtual machine. For example, you can map your local project directory
to the virtual machine’s /var/www directory. If the virtual machine’s web server
virtual host is /var/www/public, your local project’s public/ directory is now
served by the virtual machine’s web server. Any local changes are reflected immediately
in the virtual machine. You can uncomment this line in your Vagrantfile file to
enable synced directories between your local and virtual machines:
config.vm.synced_folder".","/vagrant_data"
The first argument (.) is your local path relative to the Vagrantfile configuration
file. The second argument (/vagrant_data) is the absolute path on the virtual machine
to which the local directory is mapped. The virtual machine directory largely depends on
your virtual machine’s web server virtual host configuration. OS X users should enable
NFS synced folders. Change the config.vm.synced_folder line to this:
config.vm.synced_folder".","/vagrant_data",type:"nfs"
Then uncomment these lines and boost the VirtualBox machine’s memory to 1024MB:
config.vm.provider"virtualbox"do|vb|# Don't boot with headless mode# vb.gui = true# Use VBoxManage to customize the VM. For example to change memory:vb.customize["modifyvm",:id,"--memory","1024"]end
Puppet and Chef are not easy to learn, especially for Vagrant newcomers. There are tools available to help you get started with Vagrant that don’t require you to write your own Puppet and Chef manifests.
Homestead is an abstraction on top of Vagrant. It is also a Vagrant box that is preconfigured with a complete software stack including:
Ubuntu 14.04
PHP 5.6
HHVM
Nginx
MySQL
Postgres
Node (With Bower, Grunt, and Gulp)
Redis
Memcached
Beanstalkd
Laravel Envoy
Homestead works great for any PHP application, too. I use Homestead on my local machine to develop Slim and Symfony applications. Learn more about Homestead at http://laravel.com/docs/4.2/homestead.
PuPHPet is ideal for those who don’t know how to write Puppet
manifests. This is a point-and-click website that creates a Puppet configuration
automatically (Figure B-2). You download the resultant Puppet configuration and run vagrant up.
It really is that simple.
Vaprobash is similar to PuPHPet. It doesn’t
provide a point-and-click website, but it’s almost as easy. You download
the Vaprobash Vagrantfile, and you uncomment the lines for the tools you need.
Do you want nginx? Uncomment the nginx line. Do you want MySQL? Uncomment the
MySQL line. Do you want Elasticsearch? Uncomment the Elasticsearch line.
When ready, run vagrant up in your terminal application and Vagrant will
provision your virtual machine.
The animal on the cover of Modern PHP is a straw-necked ibis (Threskiornis spinicollis). It can be found throughout Australia, New Guinea, and parts of Indonesia.
Straw-necked ibises are large birds, growing up to 30 inches long. The distinctive stiff feathers on the neck from which the bird gets its name appear during adulthood. They have long, curved beaks that help them sift through water for insects, mollusks, and frogs. Farmers welcome straw-necked ibises in their fields because the birds will eat insects, grasshoppers, crickets and locusts that would have otherwise destroyed crops.
These birds are very nomadic, and travel in flocks between habitats. They favor shallow freshwater wetlands, cultivated pastures, swamps, lagoons, and grasslands. During breeding season, these ibises will build a large, cup-shaped nest of sticks and reeds high up in trees over water. They are also known to nest in colonies, often together with the Australian white ibis. For this reason, they are easily spotted standing in the high branches of bare trees, creating a striking silhouette against the sky.
Many of the animals on O’Reilly covers are endangered; all of them are important to the world. To learn more about how you can help, go to animals.oreilly.com.
The cover image is from Woods Illustrated Natural History. The cover fonts are URW Typewriter and Guardian Sans. The text font is Adobe Minion Pro; the heading font is Adobe Myriad Condensed; and the code font is Dalton Maag’s Ubuntu Mono.