Writing software often involves collaboration. This is true if you are part of a development team but also if you are involved in open source projects, or if you are an individual developer who has interactions with customers. Microsoft strongly supports both collaboration and open source, so Visual Studio Code provides an integrated source control system based on Git and that can be extended to other providers.
This chapter describes all the integrated tools for collaboration over source code from within Visual Studio Code that are available out of the box, but also how to use extensions that you will find very useful in the real life to better review your code and to push your work to Visual Studio Team Services.
Source Control in Visual Studio Code
Visual Studio Code supports different source control providers via extensibility, but it offers integrated support for Git. Git ( https://git-scm.com/ ) is a very popular distributed, cross-platform version control engine that makes collaboration easier for small and large projects. One of the reasons for its popularity is that Git is open source, and therefore it has always been loved by large open source communities.
Visual Studio Code works with any Git repository, such as GitHub or Visual Studio Team Services, and provides an integrated way to manage your code commits.
Notice that this chapter is not a guide to Git; rather it is a place to learn how Visual Studio Code works with it, so for further information, visit the Git official page. Also, remember that Visual Studio Code requires the Git engine to be installed locally, so make sure it is available on your machine or download it from https://git-scm.com/downloads . In order to demonstrate how Git version control works with Visual Studio Code, I will use a small TypeScript project called Greeter, available in the TypeScript Samples repository from Microsoft ( https://github.com/Microsoft/TypeScriptSamples ). You can download the repository on your system and extract the Greeter subfolder on your disk. Obviously, you are totally free to use another example or another project of your choice, regardless of the language. At this point, open the project in Visual Studio Code to start collaborating over the source code.
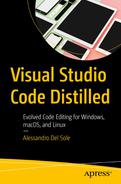
Downloading Other Source Control Providers
Installing additional source control providers
Because VS Code provides in-the-box support only for Git, other source control providers will not be discussed in this chapter. If you wish to install SCM extensions, make sure you refer to the documentation provided by the producer.
Managing Repositories
With Git, version control requires both a local and a remote repository to work. This section explains how to create both, supplying information that you will not find in the documentation especially for remote repositories.
Note
A very popular abbreviation for repository is repo. This will not be used in this book, but you will find it very often especially when searching for information about open source projects.
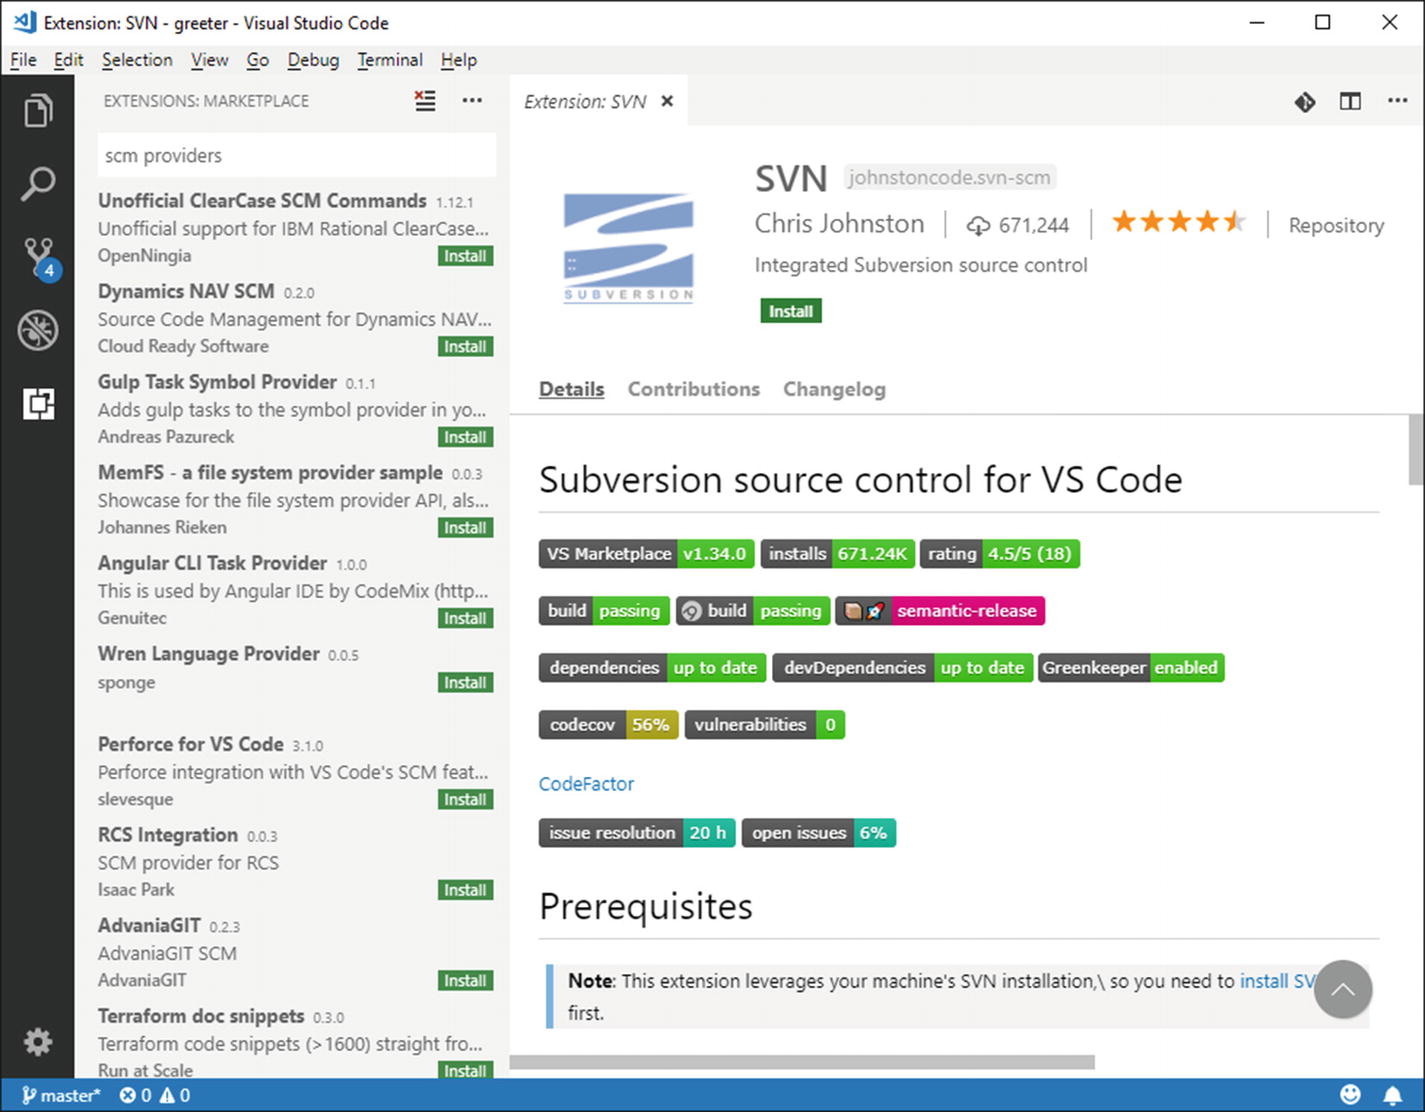
Initializing a Local Git Repository
Ready to initialize a local Git repository
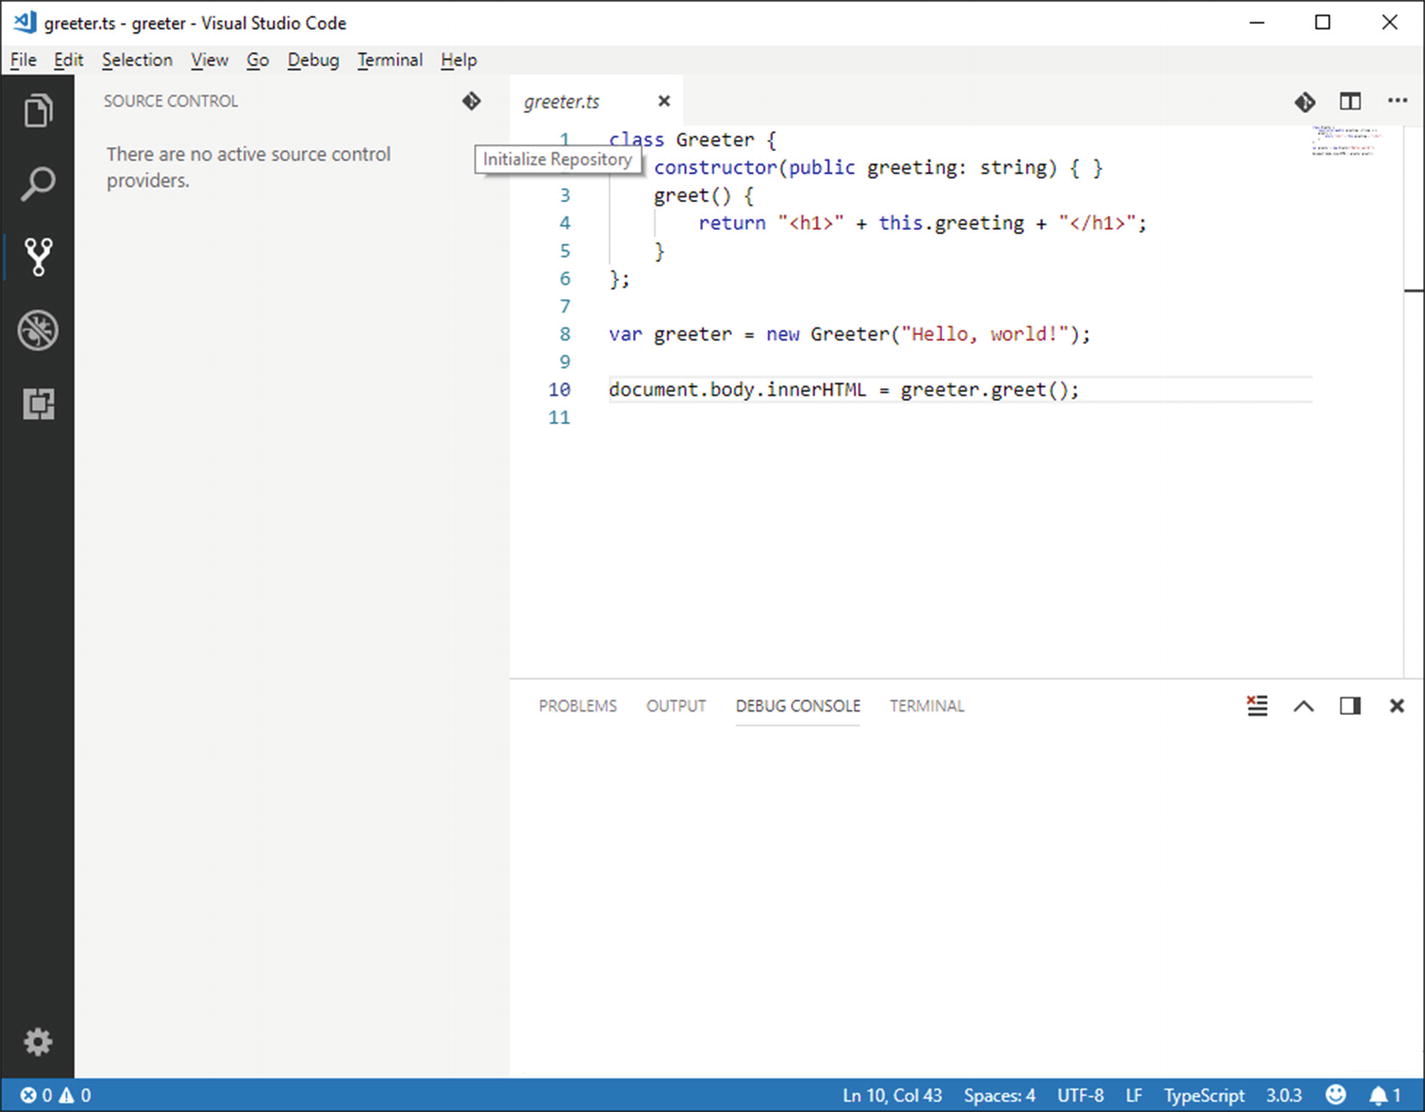
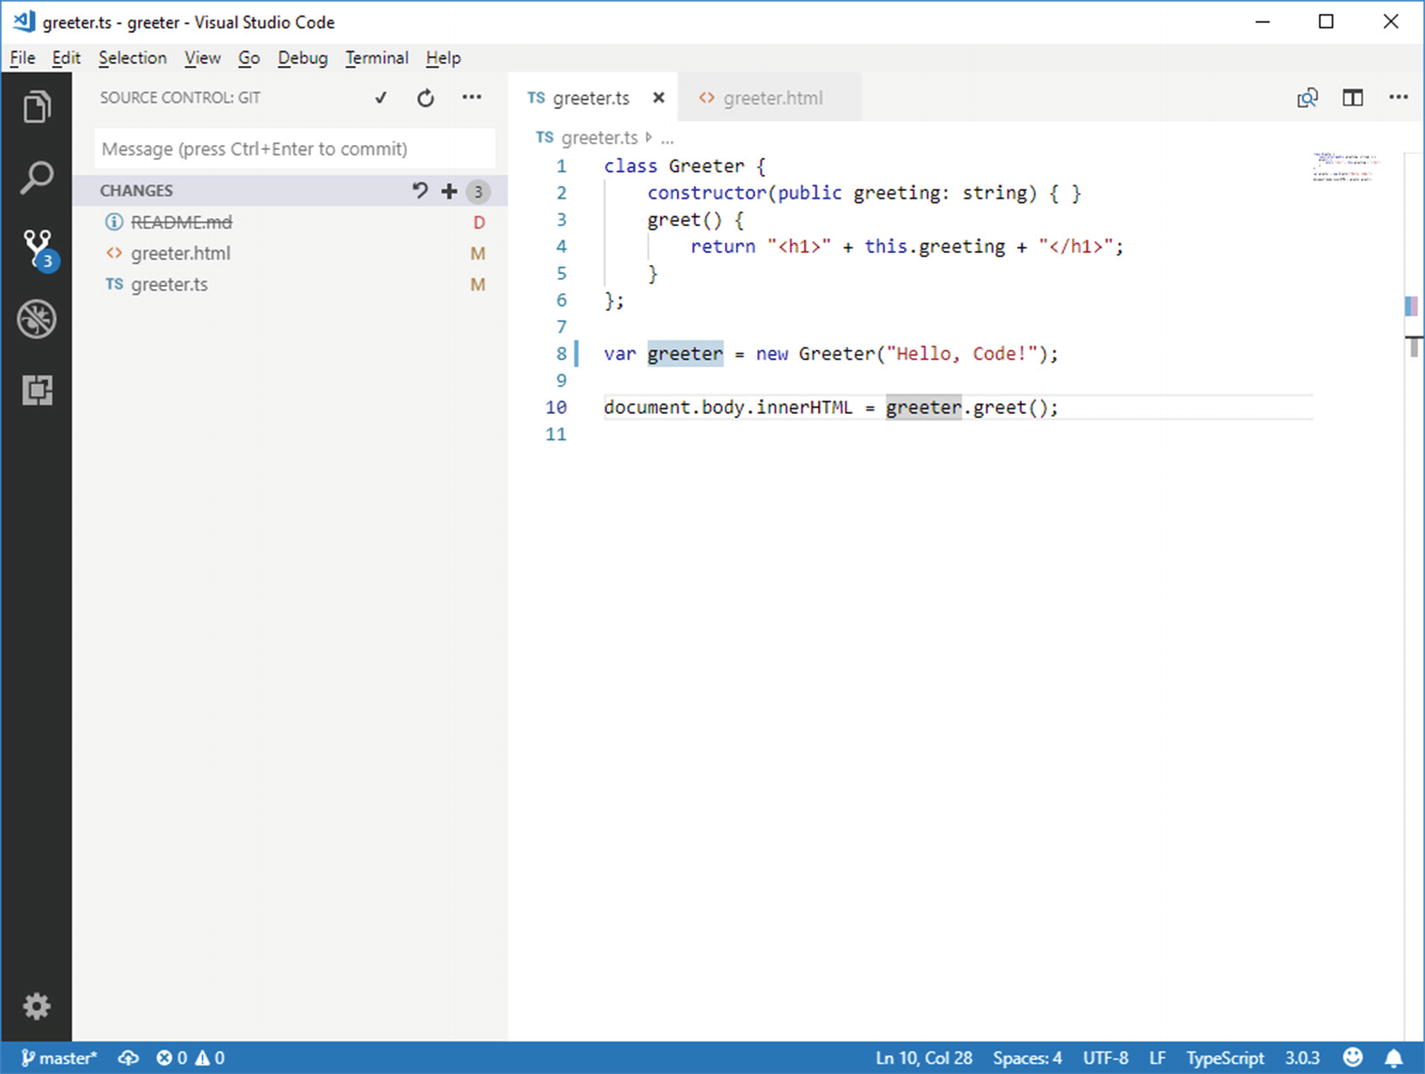
Files are under version control but not committed yet
Notice how the Git icon shows the number of pending changes. This is an important indicator that you will always see any time you have pending, uncommitted changes. Write a commit description and then press Ctrl+Enter. At this point, files are committed to the local repository, and the list of pending changes will be cleaned. Now there is a problem: you need a remote repository, but the official documentation does not describe how to associate one to Code. Let’s see how to accomplish this too.
Creating a Remote Repository
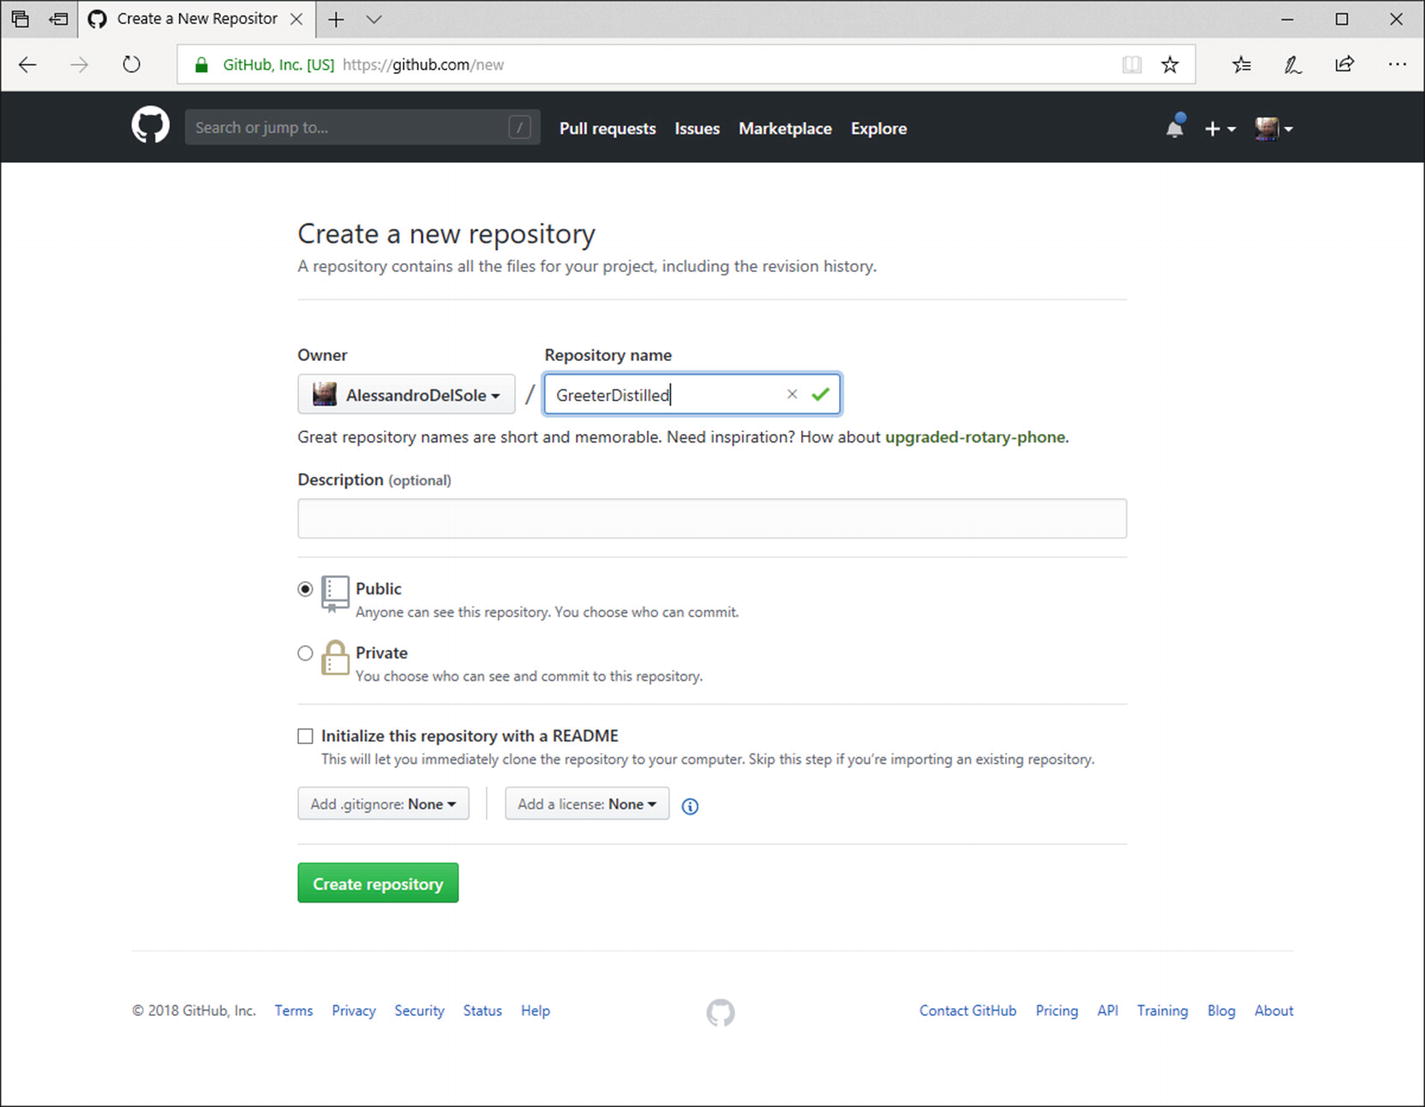
Creating a remote repository
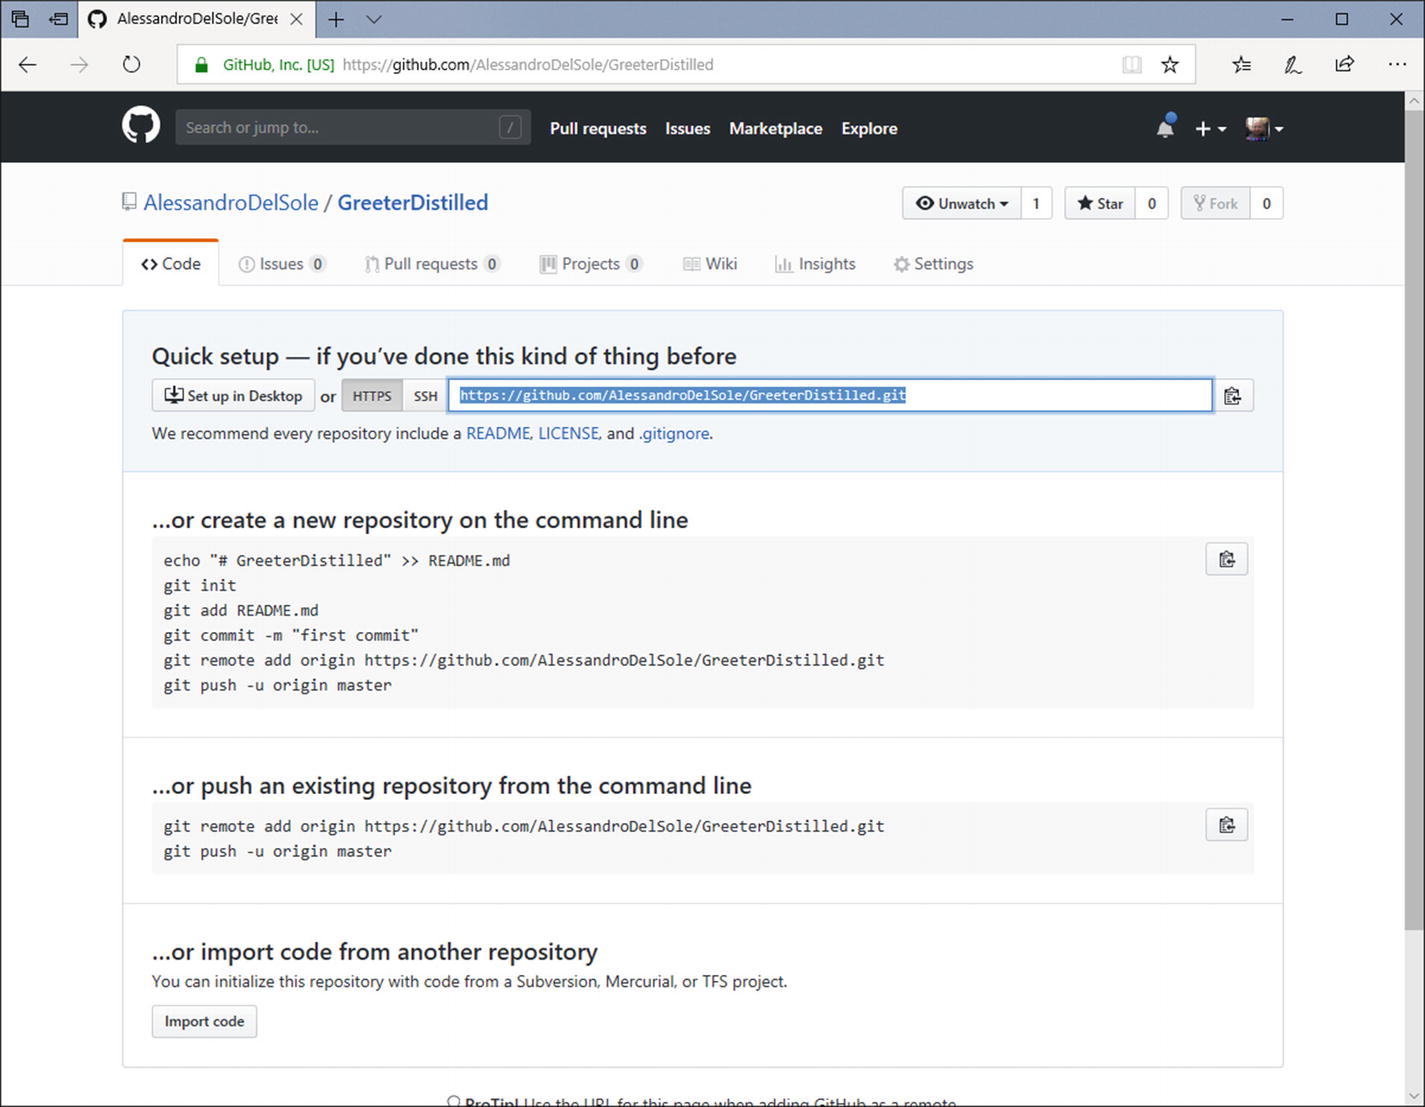
The information you need to push the local repository
This command makes a first synchronization between the local and remote repositories, uploading files to a default branch called master. Now you really have everything you need and you can start discovering the Git integration that Visual Studio Code offers.
Handling File Changes
Getting the number of pending changes
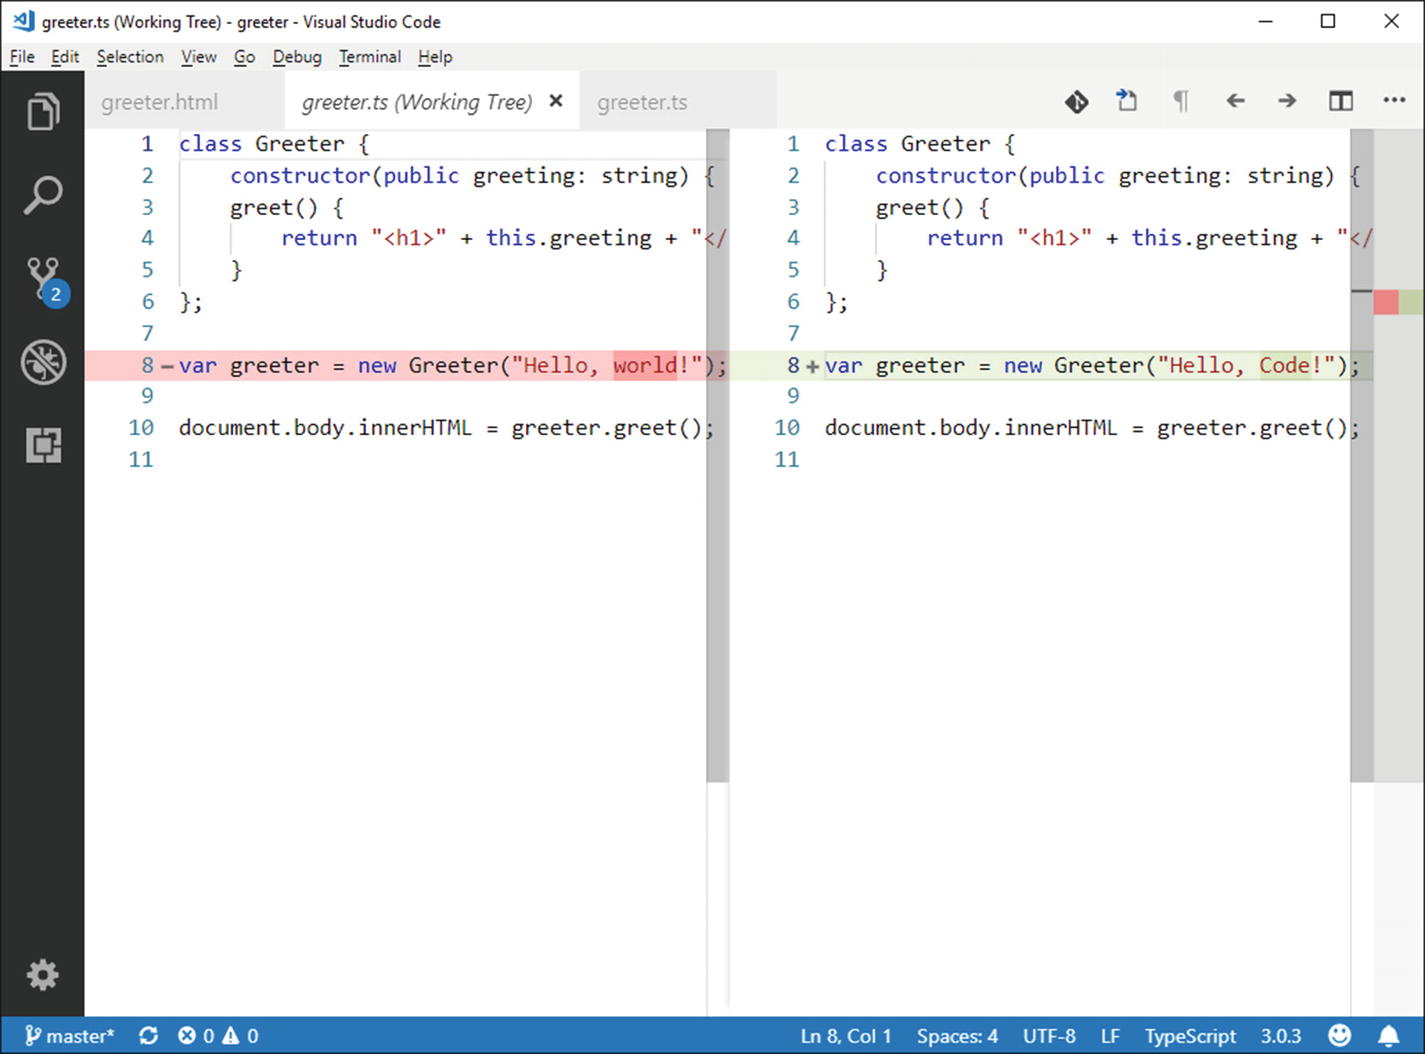
Comparing file versions with the Diff tool
On the left side, you have the old version, while the new one is on the right. The line highlighted in red represents code that has been removed, whereas the line highlighted in green represents new code. This is a very important tool when working with any version control engine.
Staging Changes
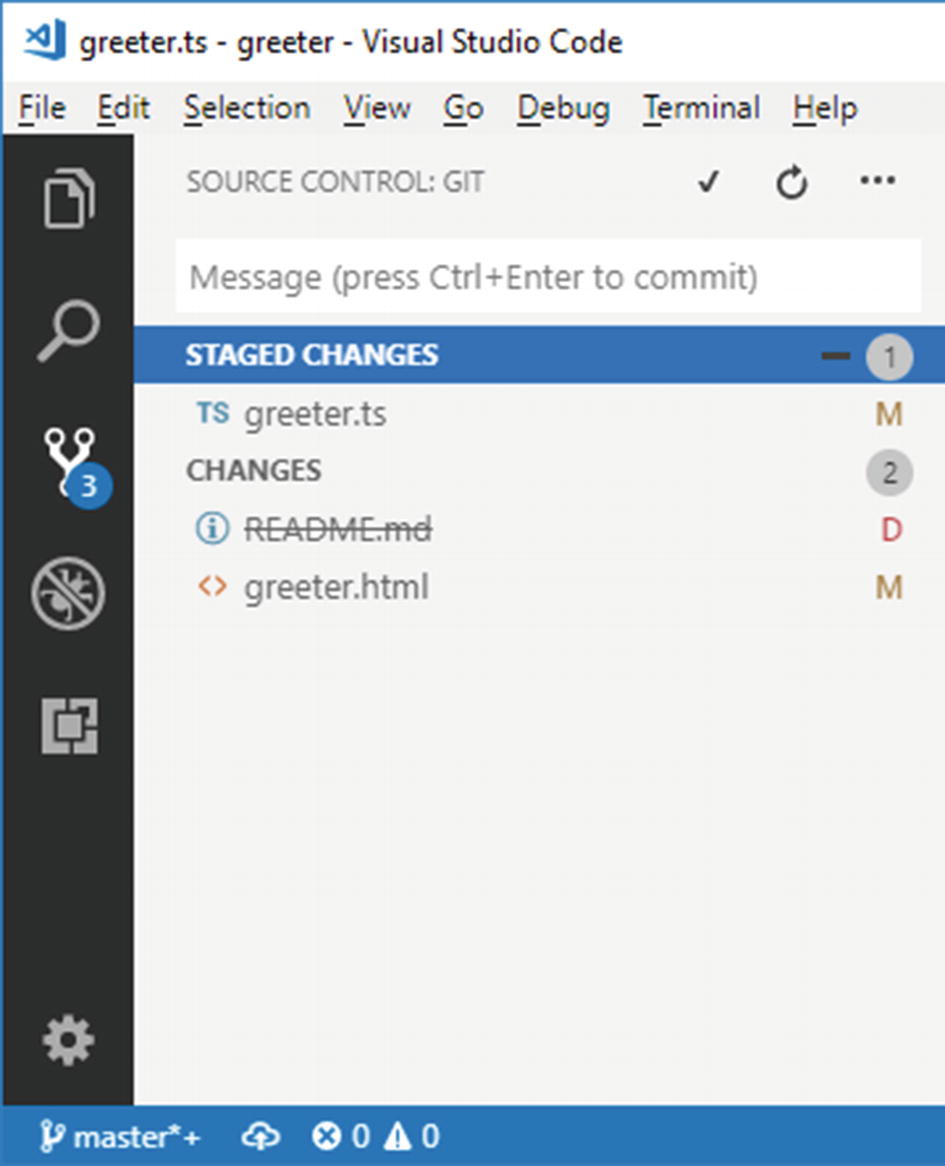
The view of staged and unstaged changes
The workflow based on staging is very convenient, because if you no longer want to commit a file, you can simply unstage it before the code goes to the server.
Managing Commits
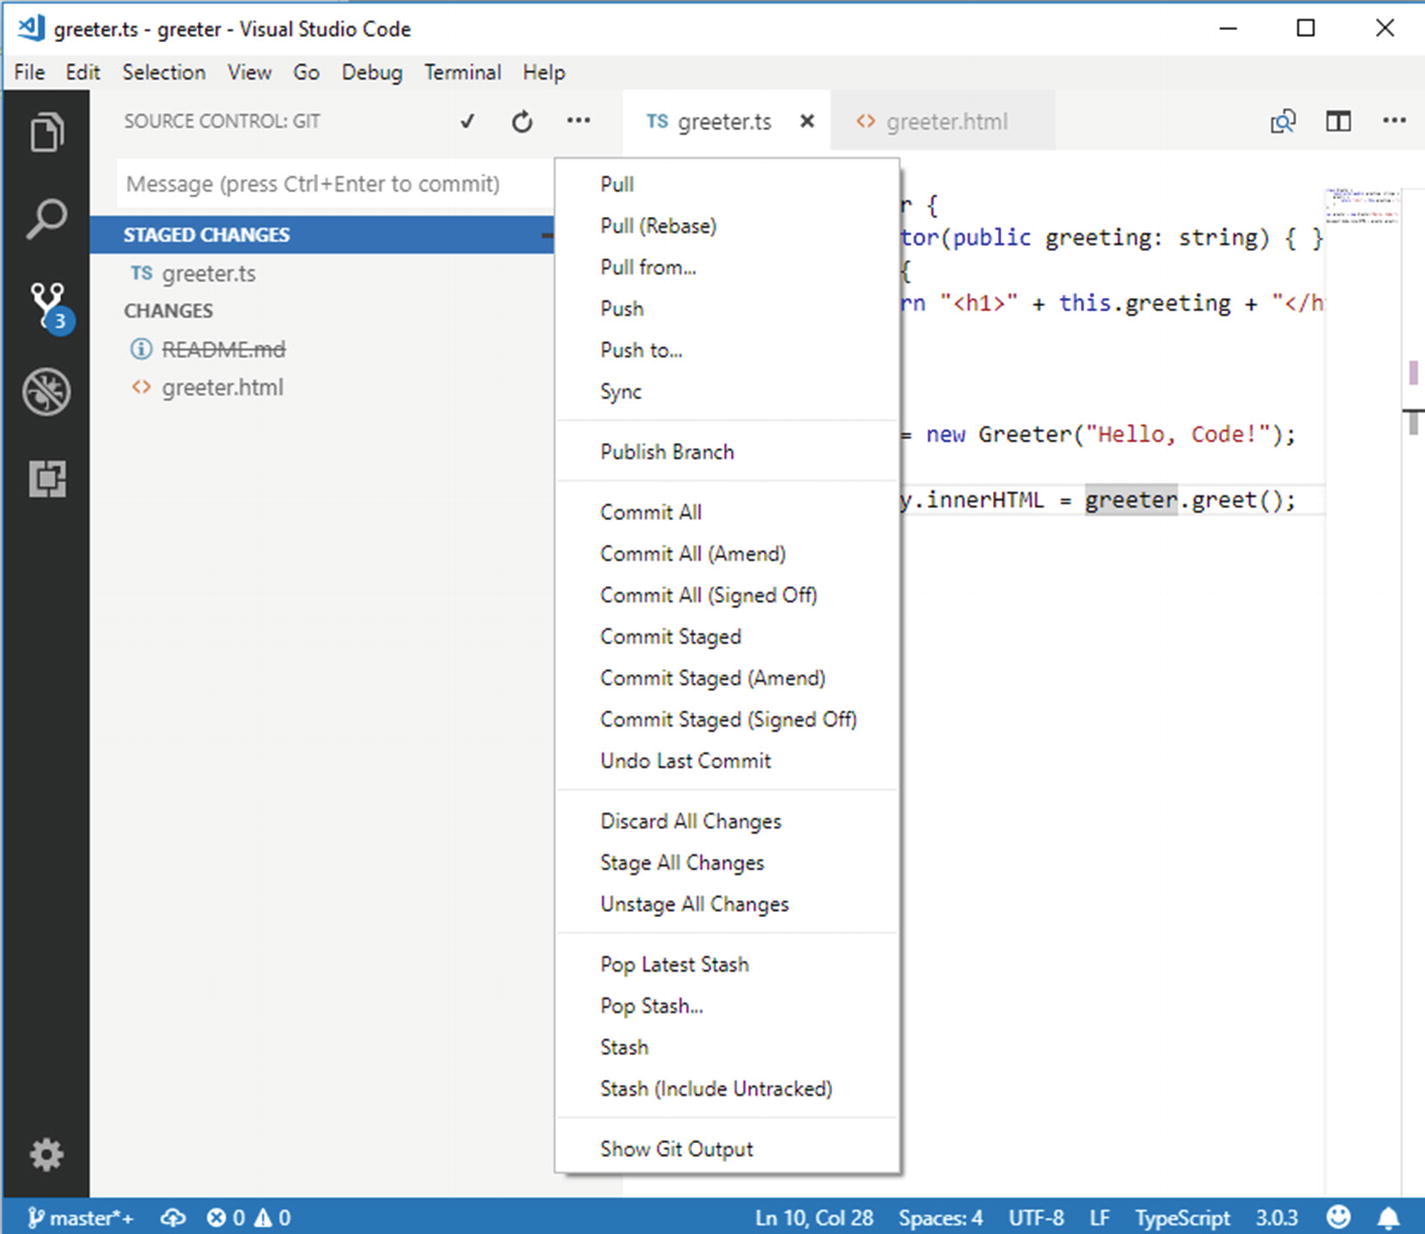
Shortcuts to commit and synchronize changes
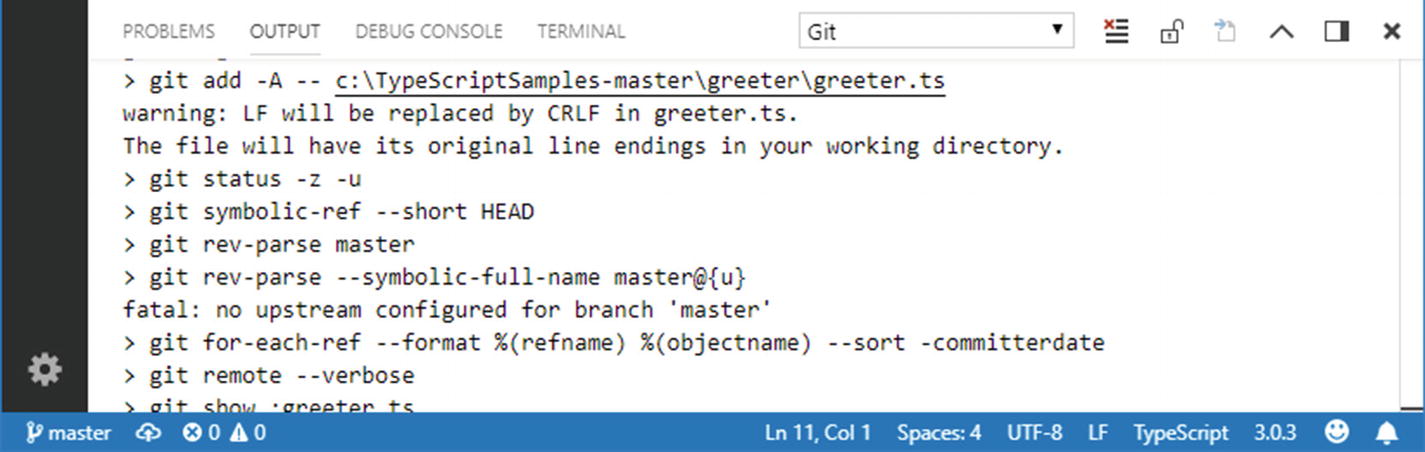
Messages from the Git command line are shown in the Output panel
You will need to select Git from the dropdown in the Output panel in order to see the Git output. You can also open the Output panel using the Show Git Output command from the popup menu as you can see in Figure 7-9.
Working with the Git Command Line Interface
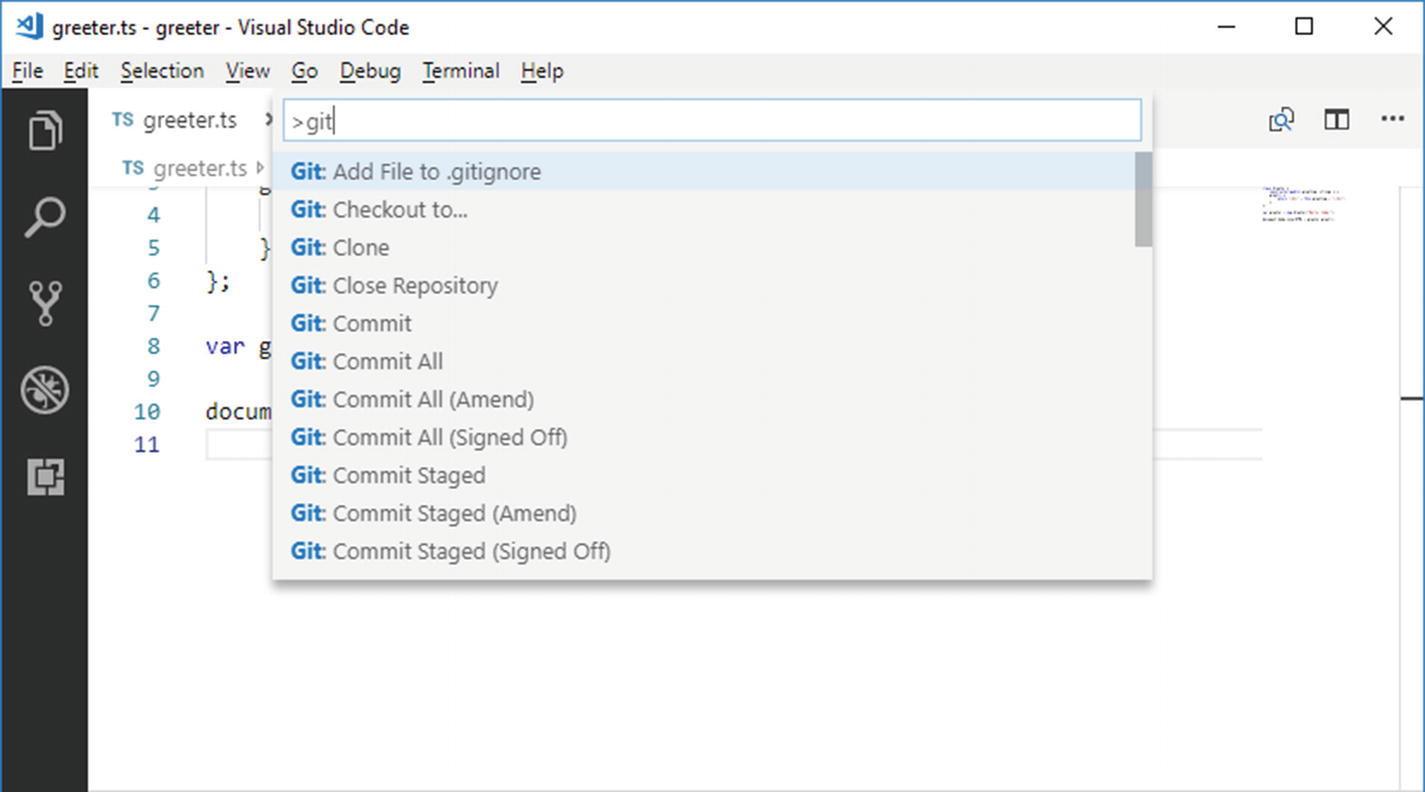
Supported Git commands in the Command Palette
For instance, you can use Git Sync to synchroniz the local and remote repositories, or you can use Git Push to send pending changes to the remote repository. A common scenario in which you use Git commands is with branches.
Creating and Managing Branches
For a better understanding of what a branch is, suppose you have a project that, at a certain point of its lifecycle, goes to production. You need to continue the development of your project, but you do not want to do it over the code you have written so far.
Creating a branch

The new branch is set as active and ready to be published
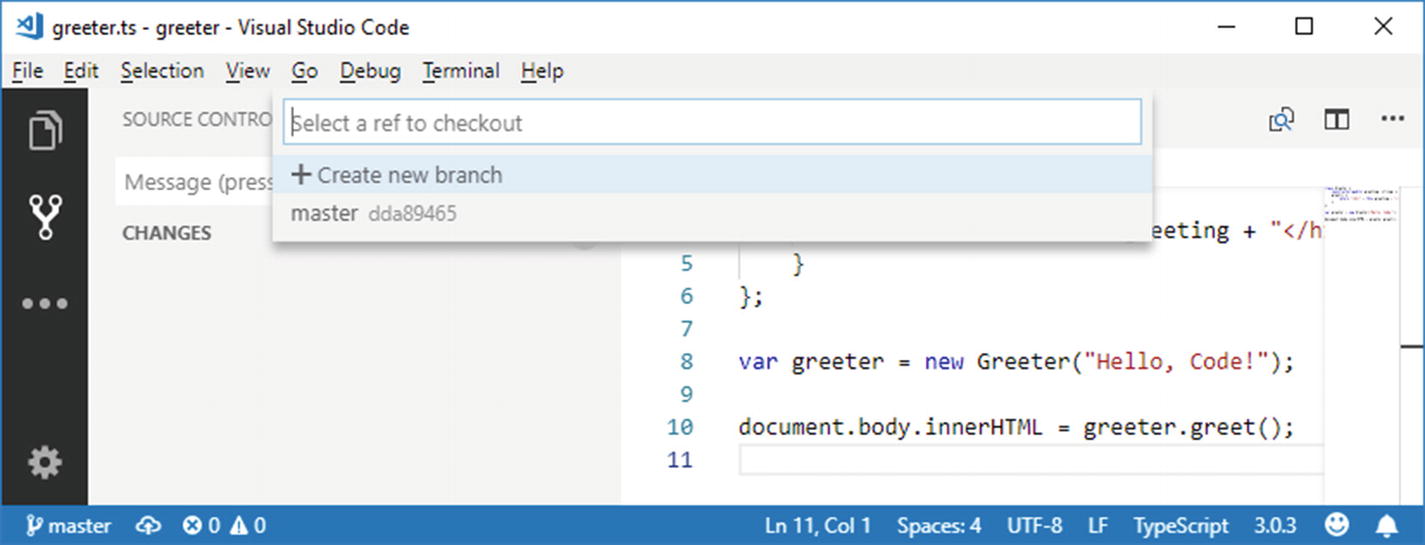
Switching to a Different Branch
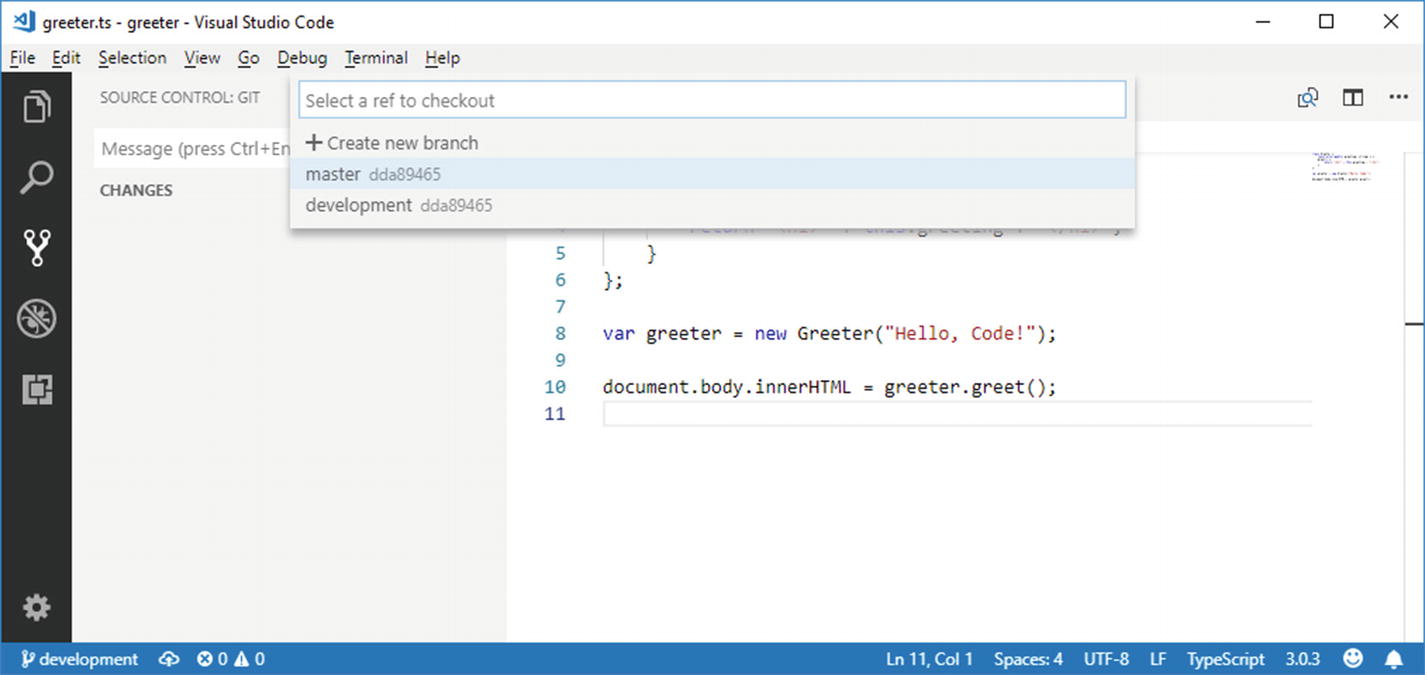
Selecting a different branch
Click the desired branch, and VS Code will check it out and set it as the active branch.
Merging from a Branch
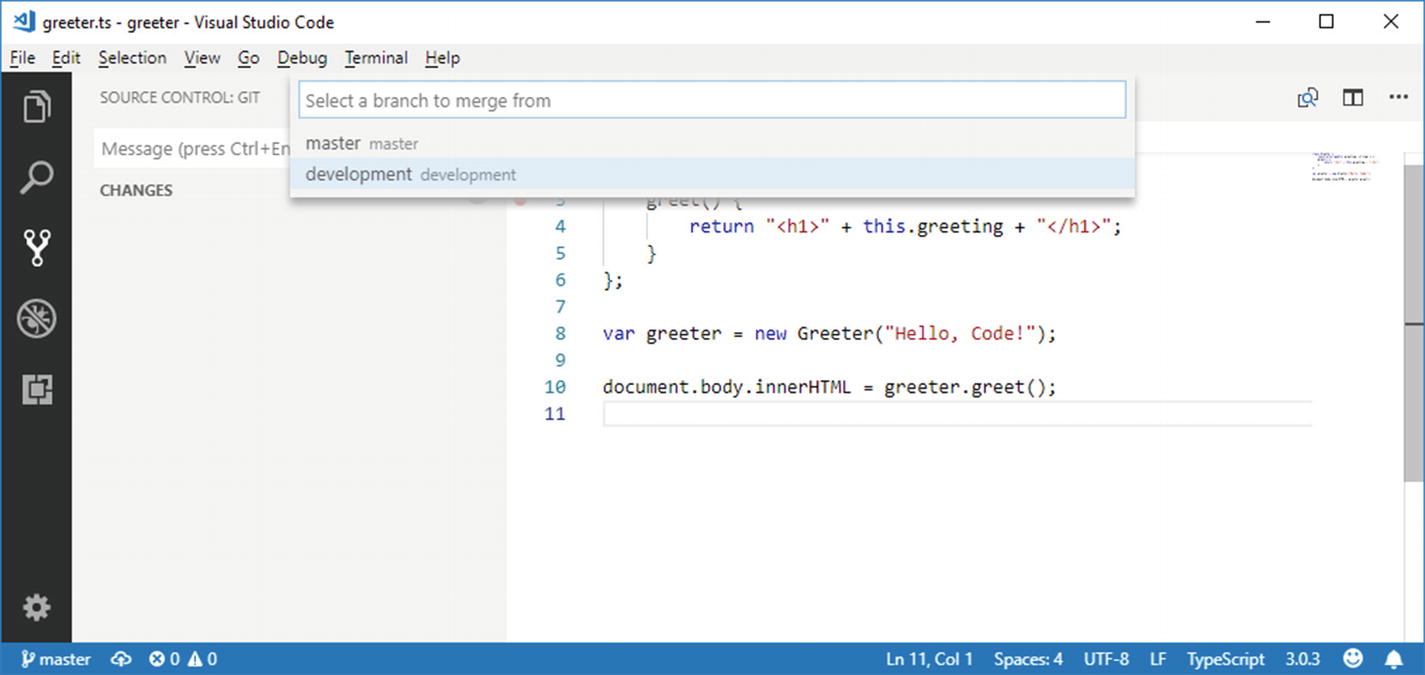
Merging from a branch
Note
Remember that the branch that receives the merge is the active branch, so make sure you have switched to the proper branch before starting a merge operation.
Once the merge operation is completed, remember to push your changes to the remote repository.
Deleting Branches
Deleting a branch is not very common, because branches help keep the history of the source code, but sometimes you might have branches that have been created only for testing some code and that are not really necessary in the application lifecycle management. In this case, in the Command Palette, you can use the Git: Delete Branch command.
With a user interface like what you see in Figure 7-15, VS Code shows the list of branches. Select the branch you want to delete and press Enter. Remember that the active branch cannot be deleted, and you first need to switch to a different branch.
Adding Power to the Git Tooling with Extensions
The integrated tools for Git cover all the needs that you, as a developer, can have when working with local and remote repositories to manage your source code, but there are extensions that provide additional power to the integrated tools.
This section describes the most useful free extensions that will improve your collaboration experience in Visual Studio Code.
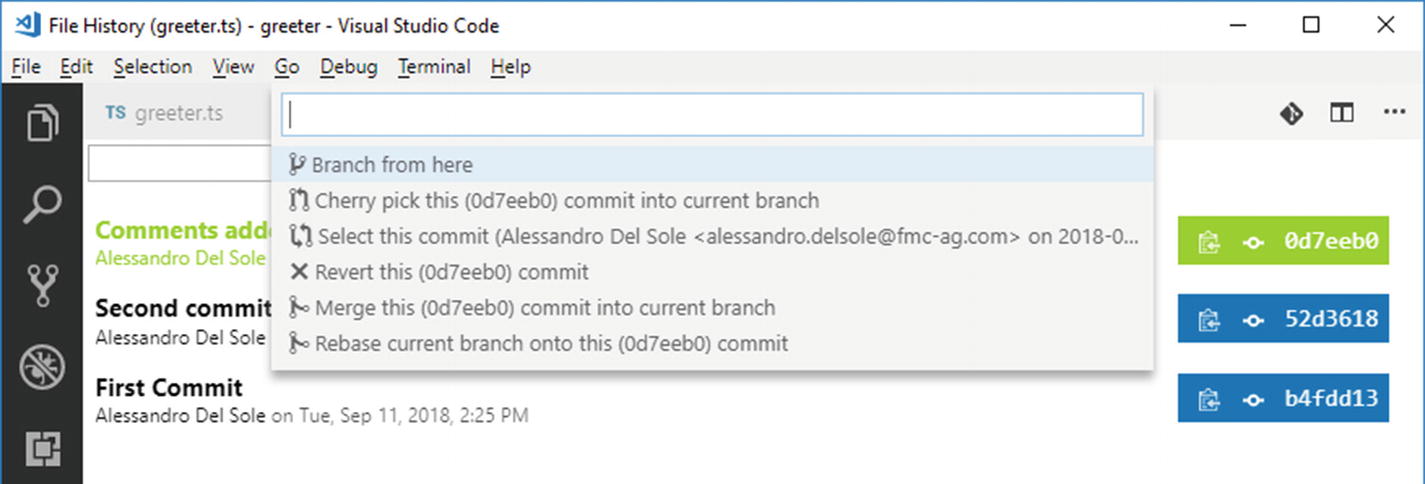
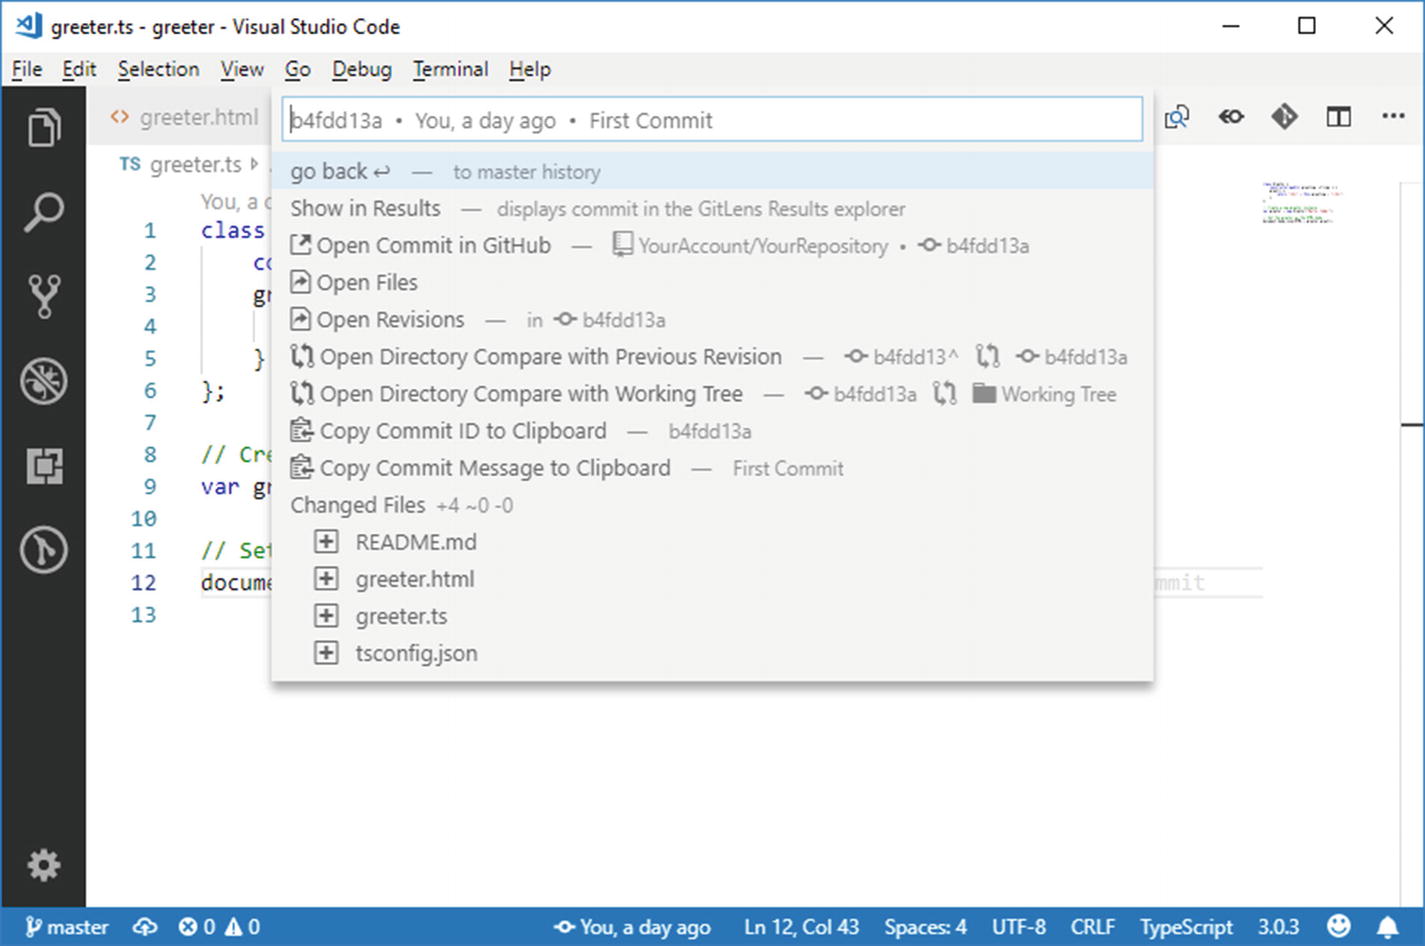
Git History
Git History is a free extension that adds the option to get a very detailed view of the history of your source code, such as information and author about each commit and that can display how a file has gone through branches; plus it adds commands that make it easier to manage your code against Git. Assuming you have installed the extension, for example, you can right-click a file and select Git: View File History.

Viewing the history of commits with Git History
Note
If the commit authors have associated a picture to the Git credentials, Git History will show the picture near the author name.
Git History provides commands that make it easier to work with commits
At the bottom of the view, you will see the list of files involved in the selected commit. If you click a file name, another menu will appear providing shortcuts to compare the file with the previous version and to view the history of that file. Git History is a very useful extension especially when your team works with the Agile methodologies, and for each task in the backlog, a new branch is created and then merged into one branch at the end of the sprint, making it easier to walk through the history of the work.
GitLens
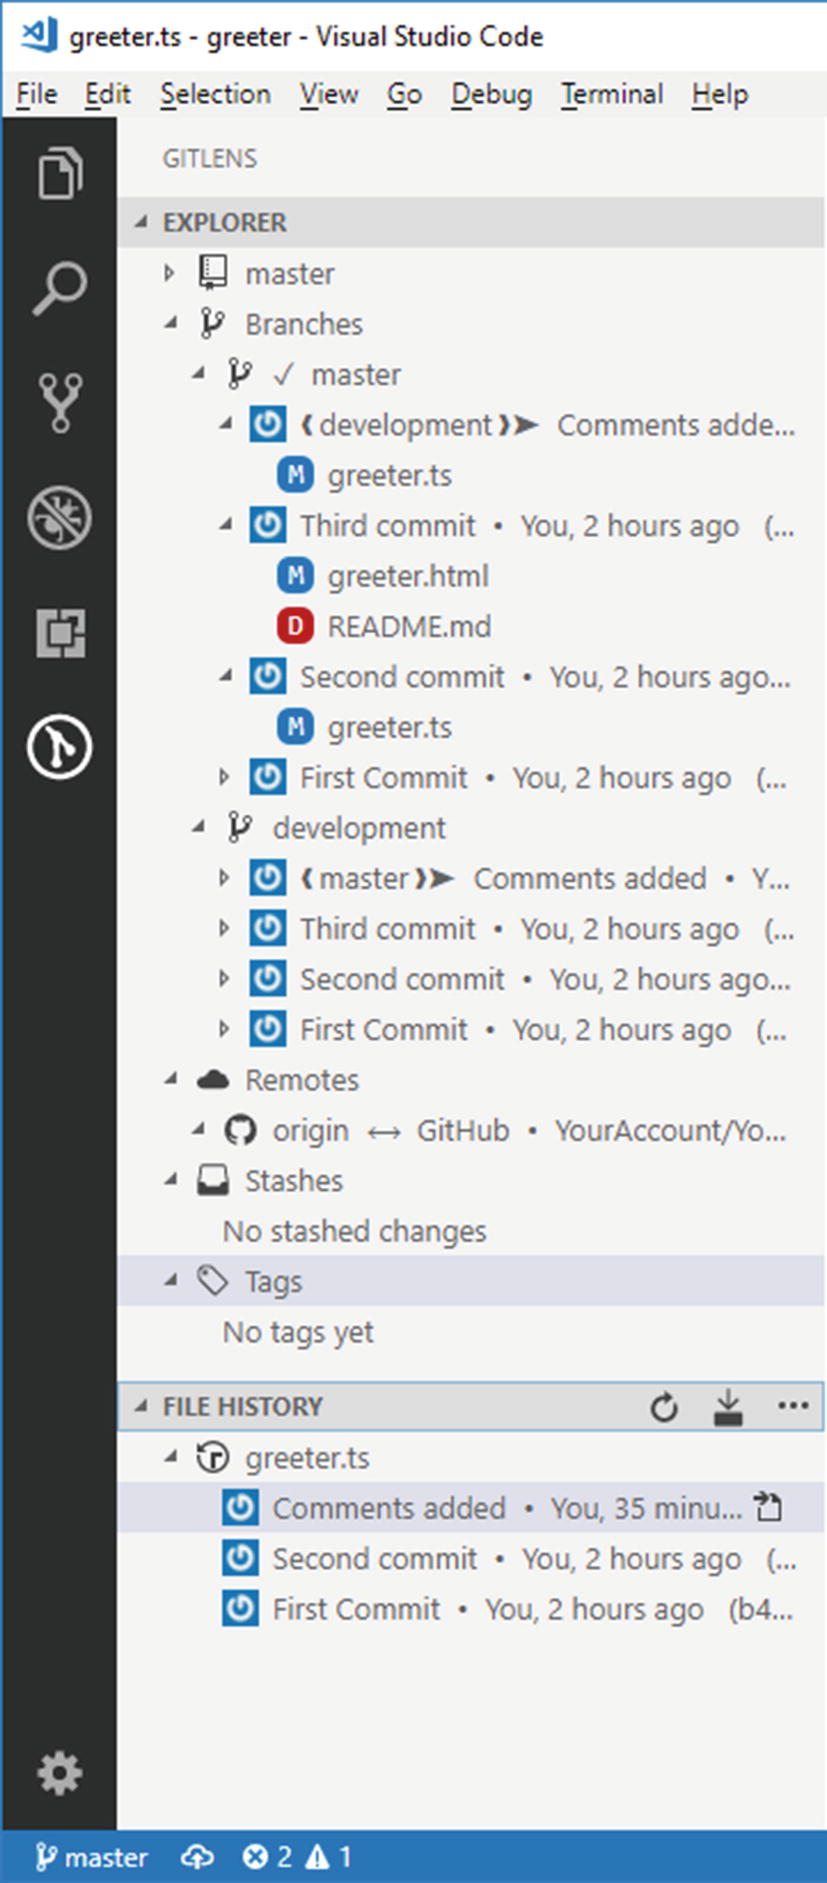
The GitLens bar with the Explorer and File History
GitLens commands
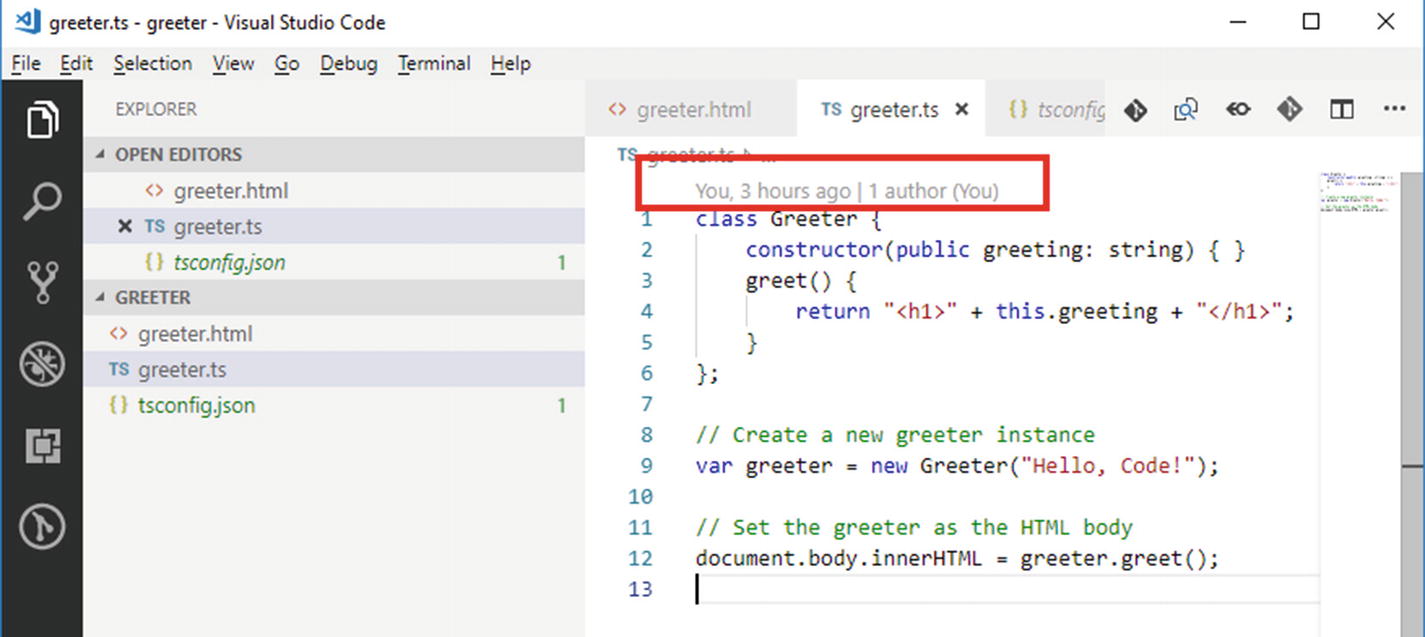
GitLens adds summary information about a code snippet
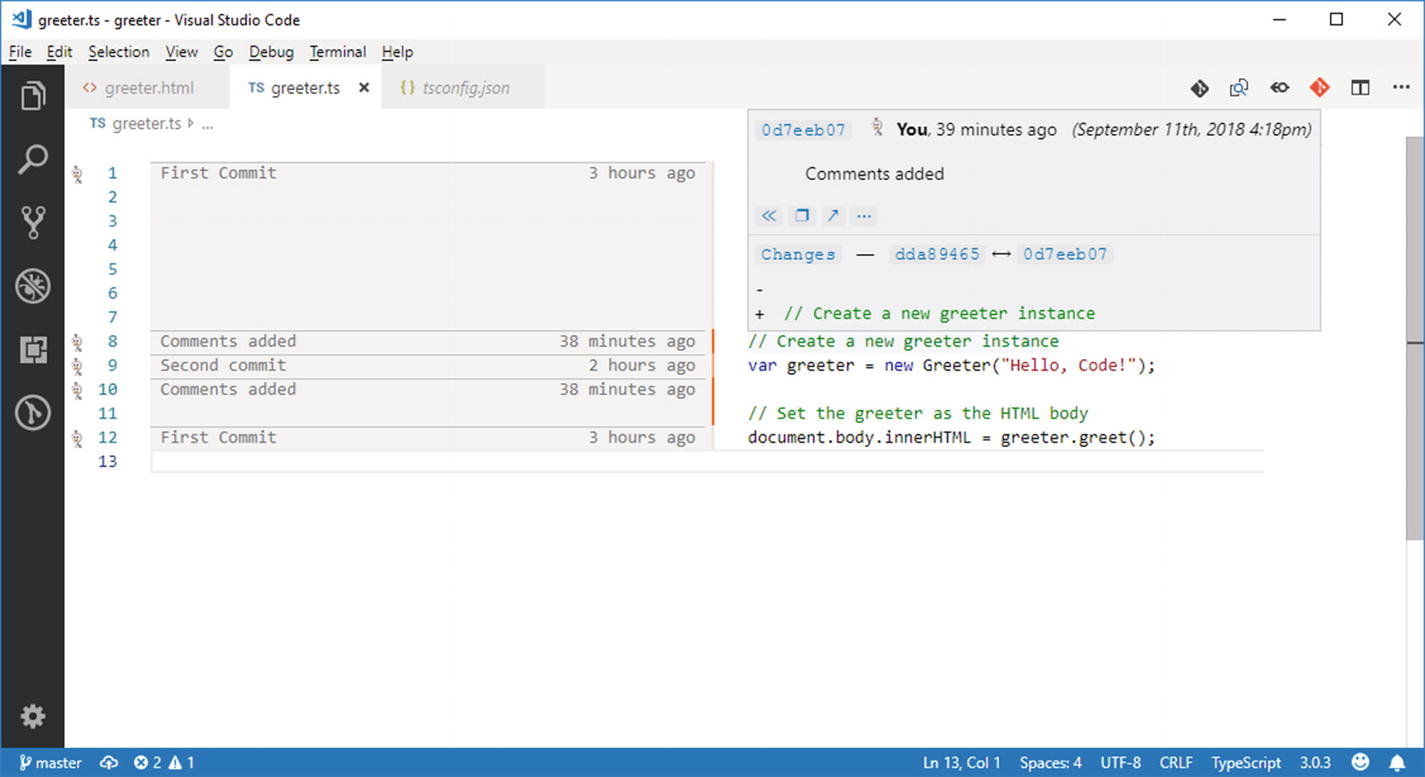
GitLens shows information about a commit
Other commands are available in the context menu when you right-click the code editor, such as Copy Commit ID To Clipboard, Copy Message To Clipboard, and Copy Remote File URL To Clipboard, all self-explanatory.
Note
All the preceding commands described are also available via shortcuts that you can find on the upper right corner of the code editor bar (see Figure 7-21).
GitHub Pull Requests
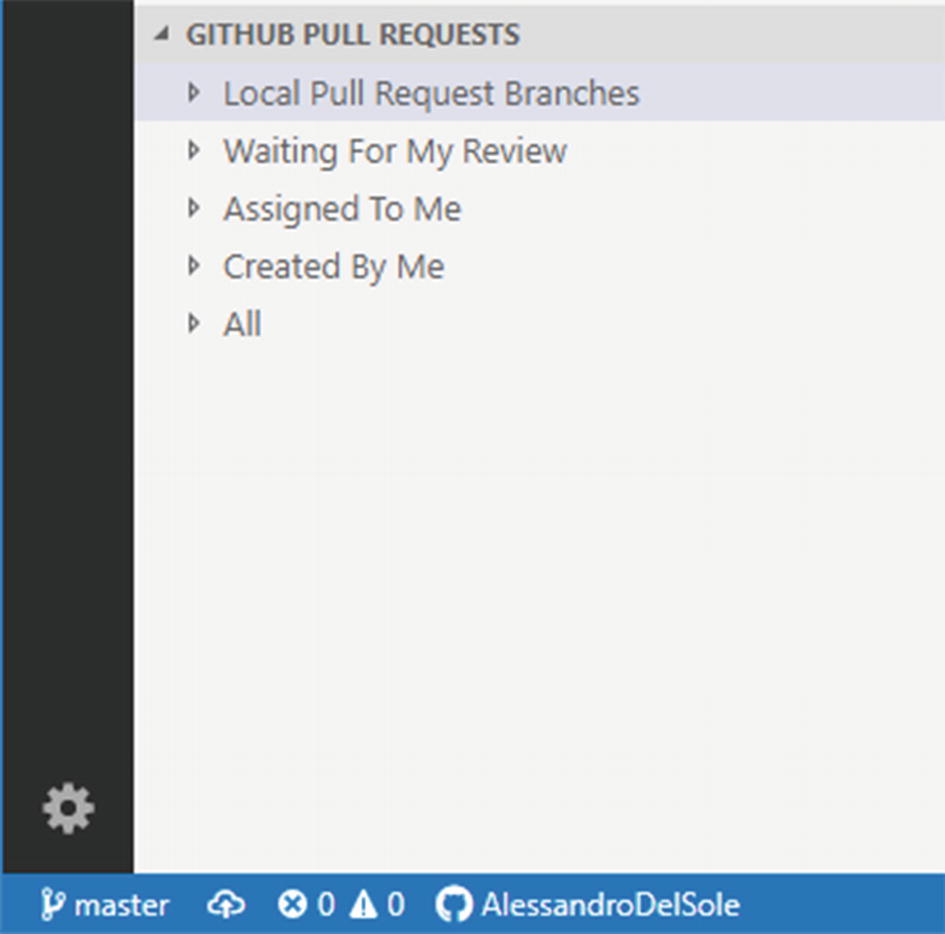
The GitHub Pull Requests view
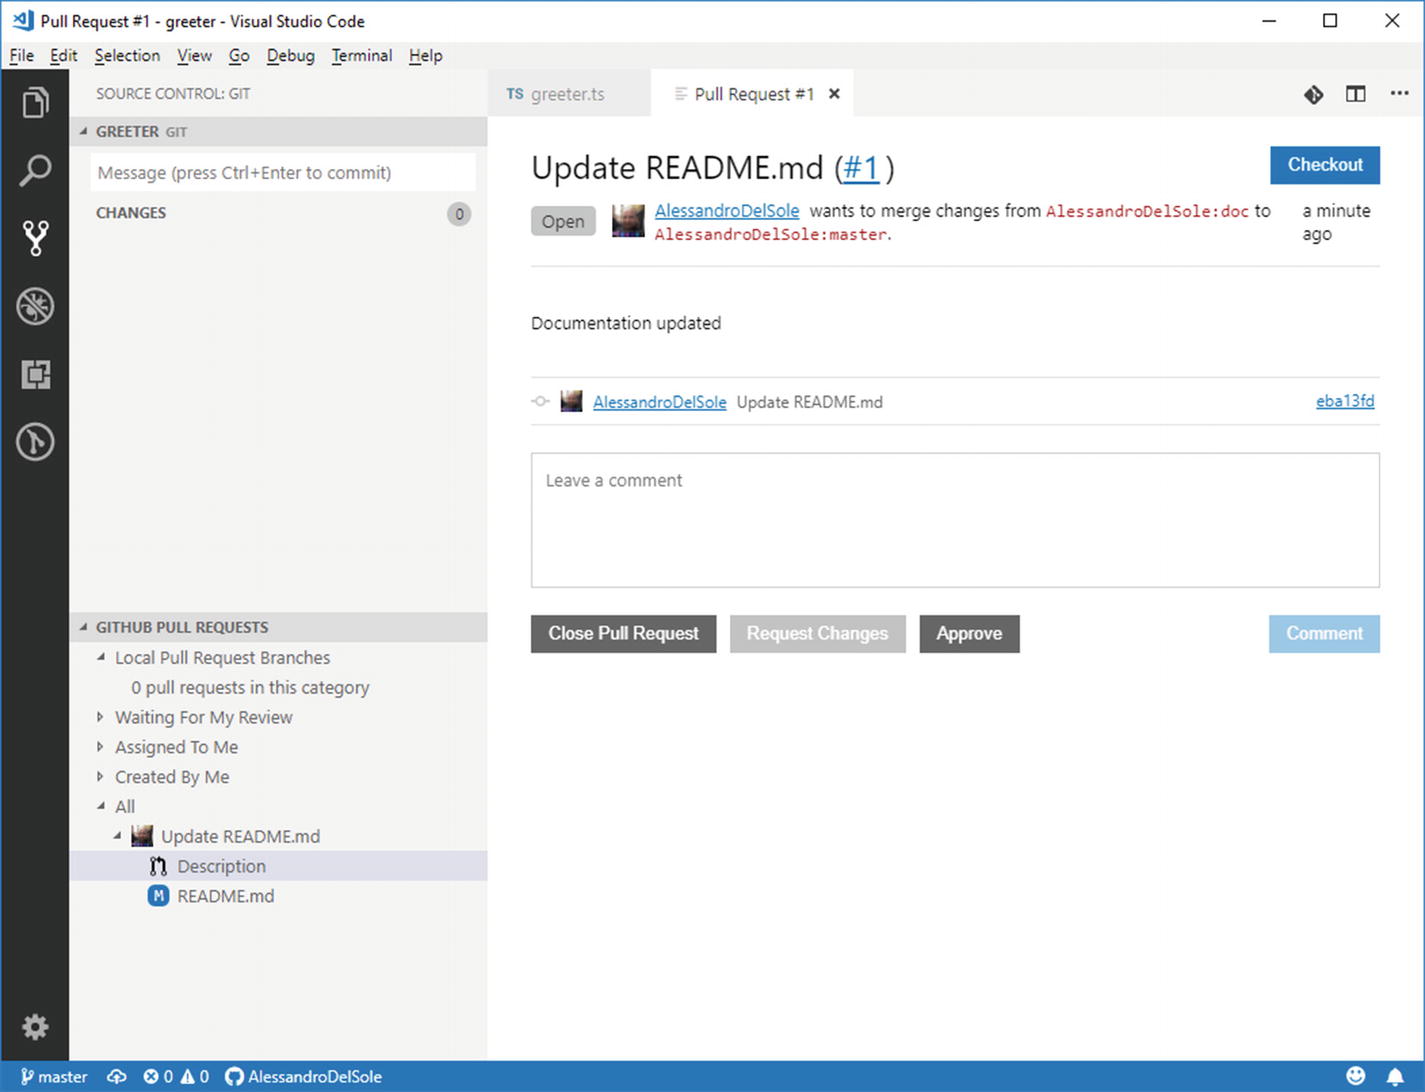
Managing a pull request from VS Code
You will also be able to work on the pull request locally if you click the Checkout button, and it will be displayed under the Local Pull Request Branches node in the treeview. This is a very useful extension especially if you work within Agile teams, but remember it only supports GitHub as the host.
Working with Azure DevOps and Team Foundation Server
Azure DevOps ( https://azure.microsoft.com/en-us/solutions/devops ), formerly Visual Studio Team Services, and Team Foundation Server are the complete solutions from Microsoft to manage the entire application lifecycle, from development to testing to continuous integration and delivery. Azure DevOps is a cloud service, whereas Team Foundation Server works on premises. Among the many features, they both provide source control capabilities based on two engines: Git and the Microsoft Team Foundation Server engine.
In this section I will explain how to configure a Git repository that you can use for source control with Visual Studio Code. I will use Azure DevOps so that you do not need to have an on-premise installation of Team Foundation Server.
Before going on reading, you will need to install the Visual Studio Team Services extension for Visual Studio Code, following the steps you are already familiar with. This extension suits for both Azure DevOps and Team Foundation Server.
Note
According to the extension documentation, you will also need the Team Foundation command line client installed. If you have Visual Studio 2017 on Windows or Visual Studio for Mac installed, you already have all you need. If not, or if you are on Linux, visit https://bit.ly/2x99fEH and search for the most appropriate installer based on your system.
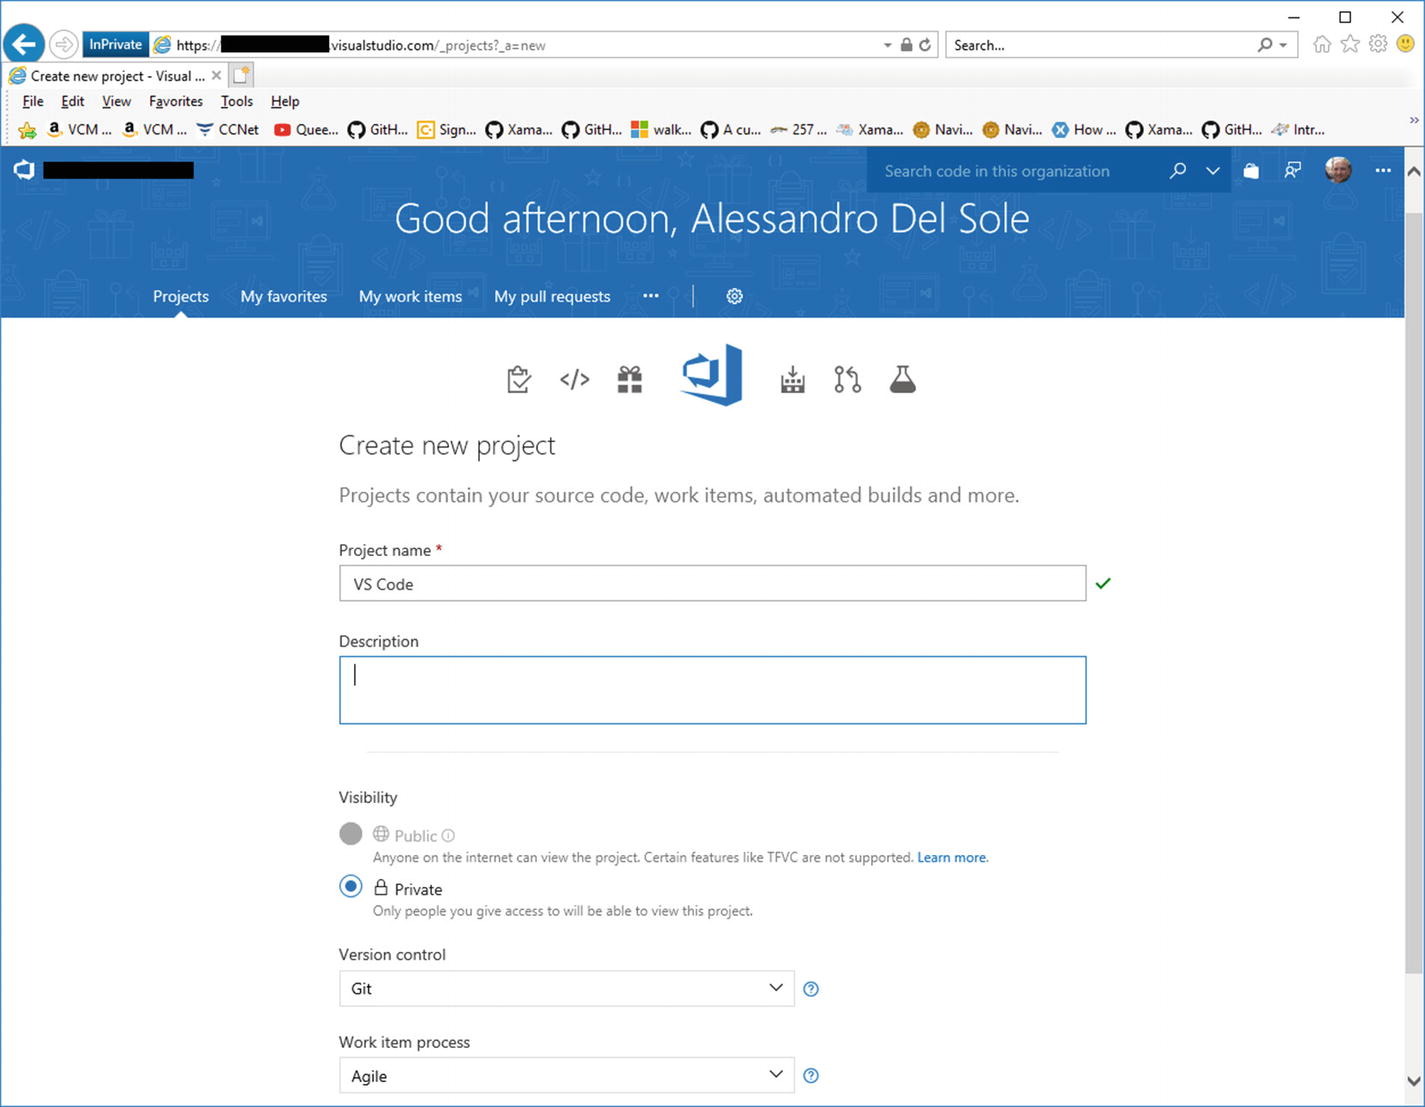
Creating a team project in Azure DevOps
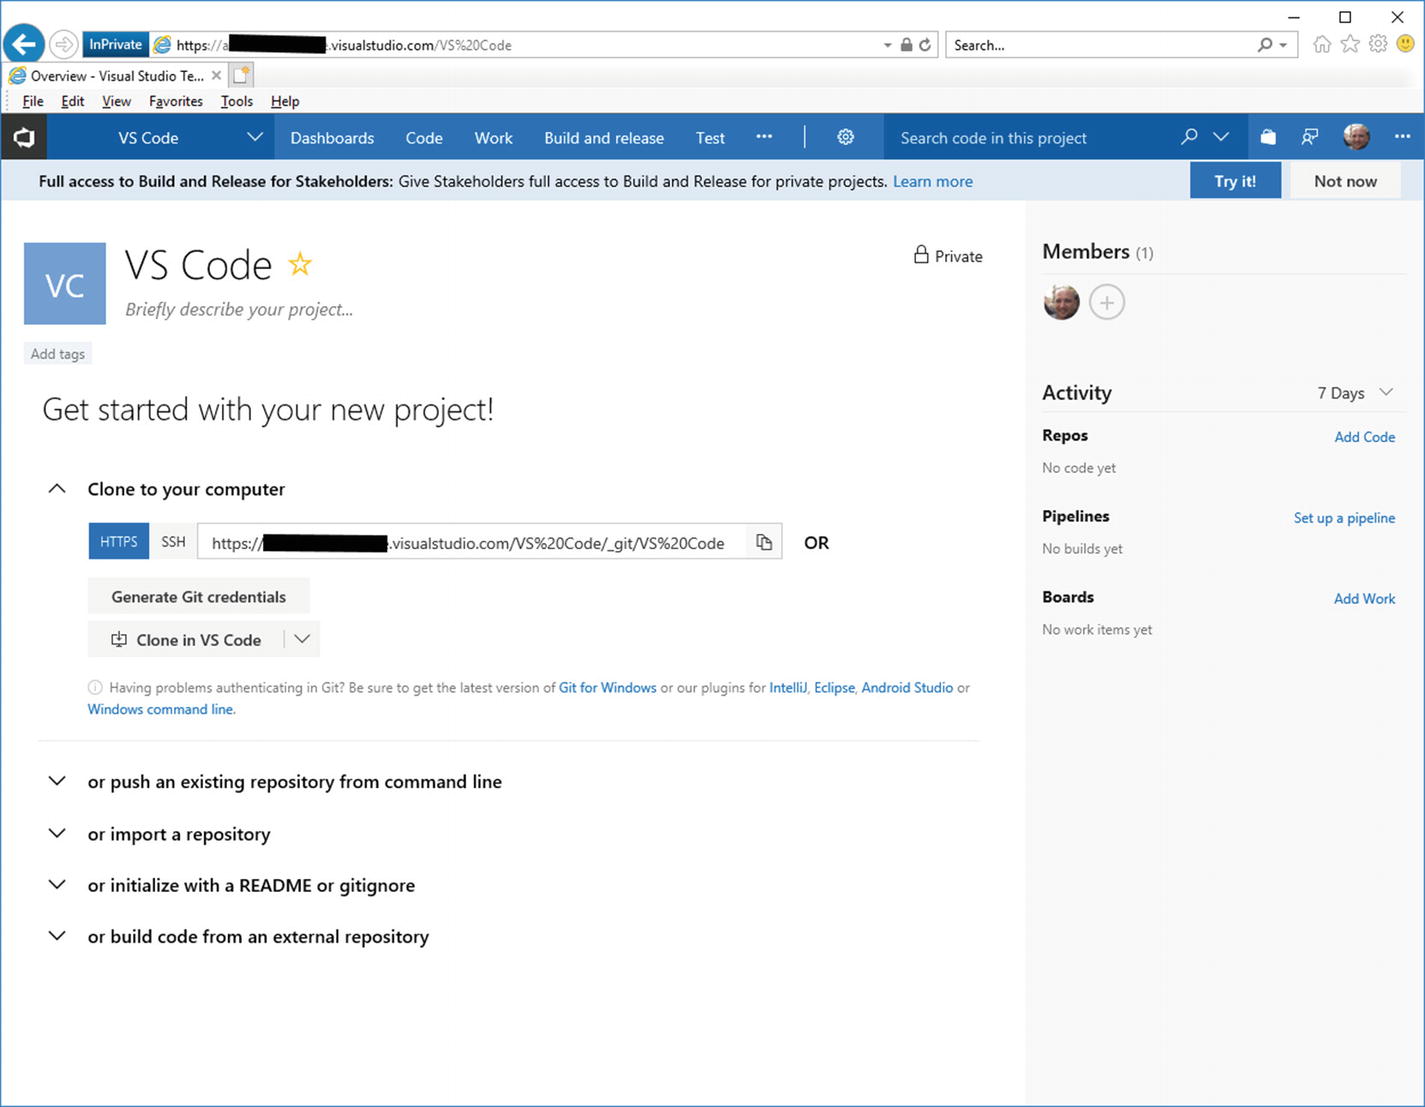
Cloning a repository from Azure DevOps

The Team Services buttons in the status bar
More specifically, from left to right, after the branch name and the Synchronize Changes button, you can see the name of the team project, then a shortcut that allows for browsing pull requests on the web portal, a shortcut for opening build definitions on the web portal, a shortcut for viewing pinned work items, and a feedback button you can use to share your thoughts about the extension.
Though most of the operations that are not strictly related to Git, such as opening build definitions and work items, must be done in the web portal, both Azure DevOps and Team Foundation Server are very popular and widely used services among enterprises, so having an option to connect them to Visual Studio Code so easily will save you a lot of time.
Summary
Writing software involves collaboration. This is true if you are part of a development team but also if you are involved in open source projects, or if you are an individual developer who has interactions with customers. In this chapter you have seen how Visual Studio Code provides integrated tools to work with Git, the popular open source and cross-platform source control provider.
You have seen how to create a local repository with the Git bar and how to associate it to a remote repository with a couple of commands from the integrated terminal. Then you have seen how you can handle file changes, including commits, and how you can create and manage branches directly from within the environment. In addition, you were introduced to some useful extensions, such as Git History, Git Lens, and GitHub Pull Requests, that will boost your productivity by adding important features that every developer needs when it comes to team collaboration. Finally, you have seen how easy it is to open in VS Code a Git repository hosted on Azure DevOps, the premiere cloud solution from Microsoft to manage the whole application lifecycle. Behind the scenes, Visual Studio Code invokes the Git command in order to execute operations over your source code, and it is preconfigured to work with this external tool.
However, it is not limited to work with a small set of predefined tools, rather it can be configured to work with basically any external program. This is what you will learn in the next chapter.