
Visual Studio Code is an extremely versatile development tool that can be customized and extended in many ways. In fact, you can customize its appearance, the code editor, and key shortcuts to make your editing experience extremely personalized.
Additionally, you can install third-party extensions such as new languages, debuggers, themes, linters, and code snippets. This chapter explains how to customize Visual Studio Code, explaining the difference between customizations and extensions. Then, in the next chapter, you will learn how to work with extensions.
Customizations and Extensions Explained
You can personalize the environment of Visual Studio Code with both customizations and extensions. The difference is that extensions add new instrumentation or they add functionalities to a tool or change the behavior of existing functionalities. Implementing IntelliSense for a language that does not have it by default, adding commands to the status bar, and adding custom debuggers are examples of extensions.
Customizations and Extensions
Feature | Description | Type |
|---|---|---|
Color themes | Style the environment layout with different colors. | Customization |
User and workspace settings | Specify environment preferences. | Customization |
Key bindings | Redefine keyboard shortcuts. | Customization |
Language grammar and syntax colorizers | Add support to additional languages with syntax colorizers. | Customization |
Code snippets | Add TextMate and Sublime Text snippets and write repetitive code faster. | Customization |
Debuggers | Add new debuggers for specific languages and platforms. | Extension |
Language servers | Implement your validation logic for files opened in VS Code. | Extension |
Activation | Load an extension when a specific file type is detected or when a command is selected in the Command Palette. | Extension |
Editor | Work against the code editor’s content, including text manipulation and selection. | Extension |
Workspace | Enhance the status bar, working file list, and other tools. | Extension |
Eventing | Interact with Code’s lifecycle events such as open and close. | Extension |
Evolved editing | Improve language support with IntelliSense, Peek Definition, Go To Definition, and all the advanced, supported editing capabilities. | Extension |
In this chapter, you will see how to customize Visual Studio Code by changing the existing preferences. Then in the next chapter, you will see how to install extensions, including extensions that add new customizations to the development environment, such as themes and key bindings.
Customizing Visual Studio Code
In this section, you will discover how easy it is customizing Visual Studio Code, walking through the customization types described in Table 5-1.
Theme Selection
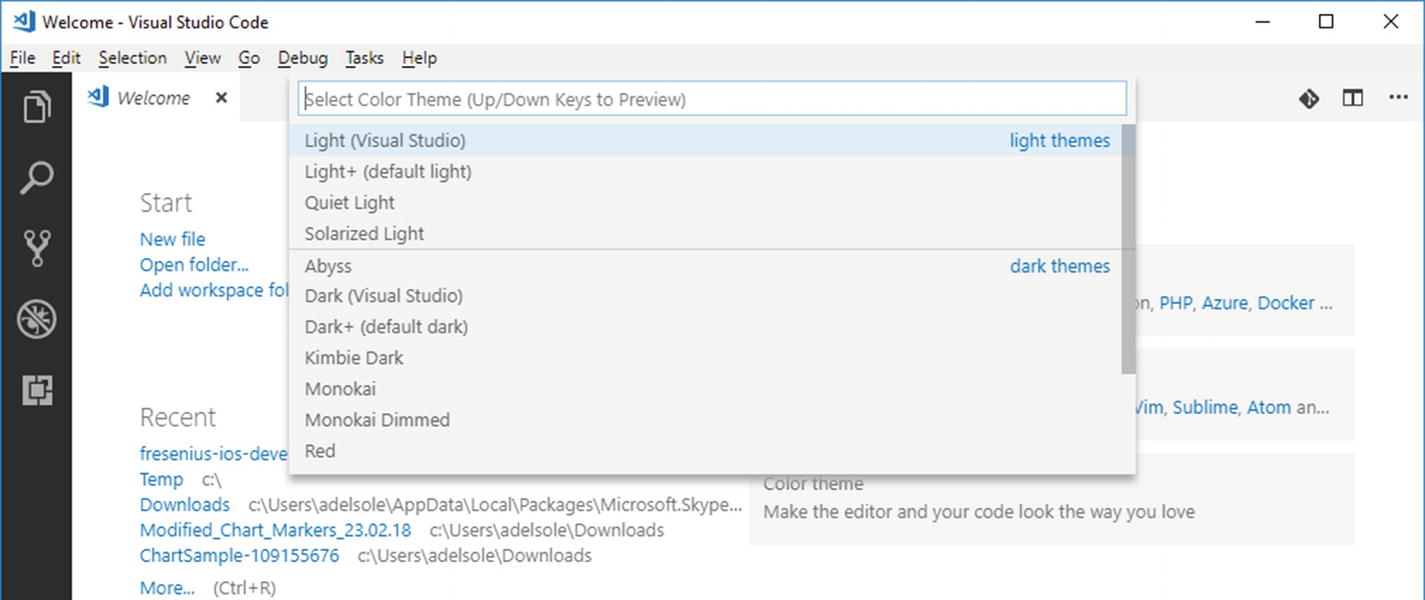
Selecting a theme
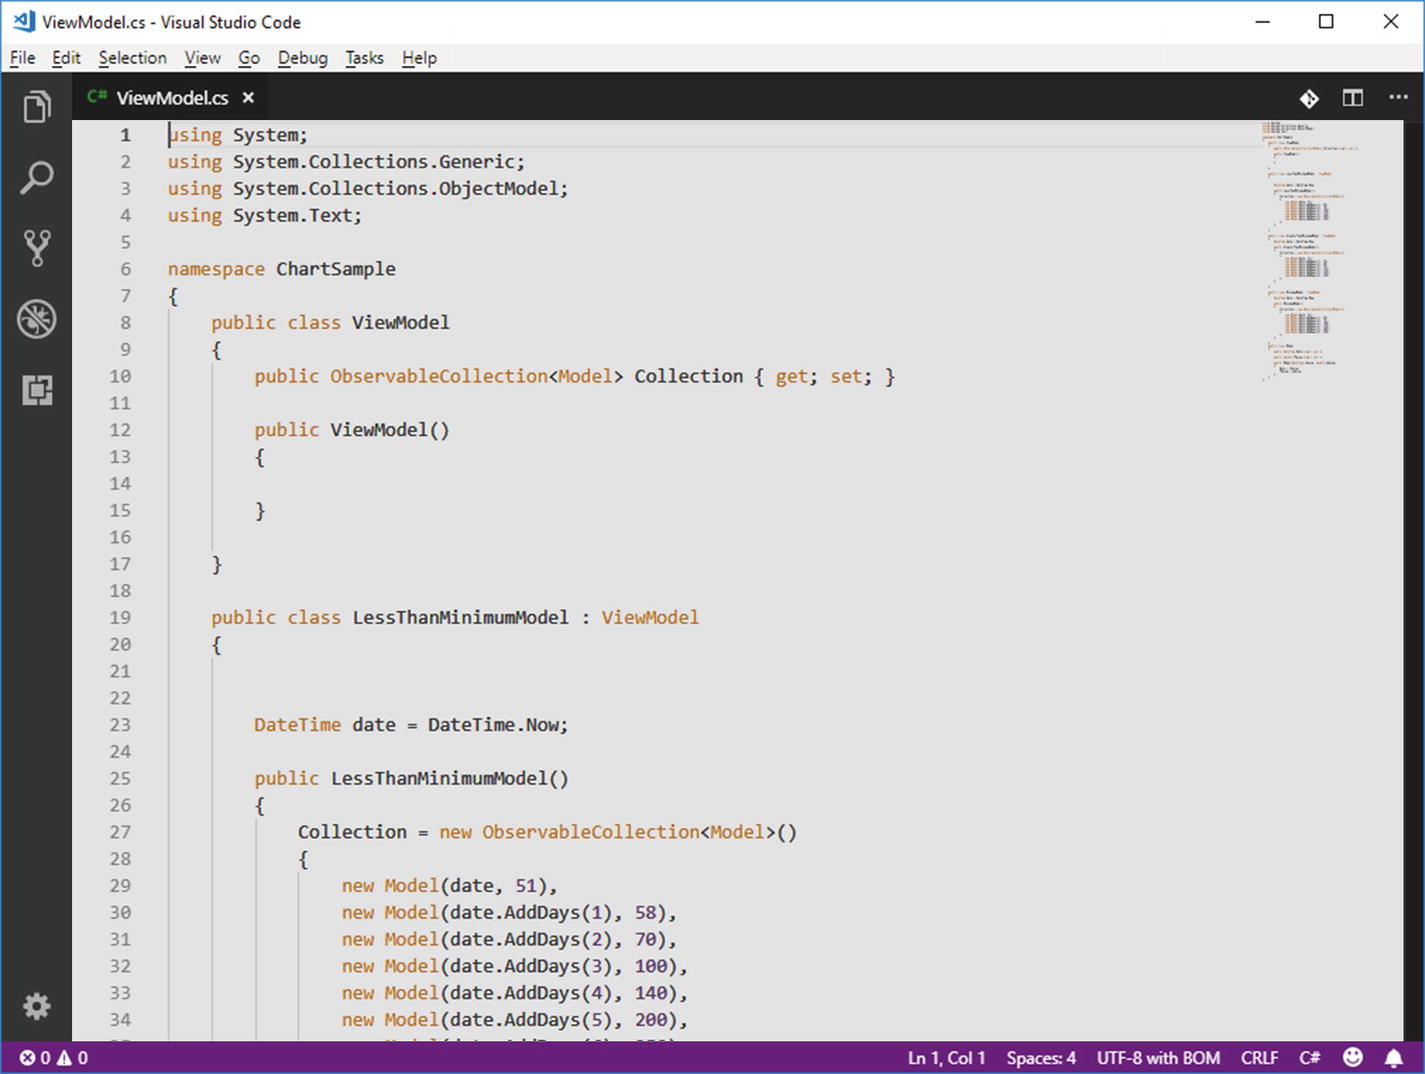
The Dark (Visual Studio) theme applied to Visual Studio Code
As you might expect, applying a theme also affects colors used in the code editor so that there is an appropriate brightness and contrast balance. In the next chapter, you will see how to install additional themes as extensions.
Customizing the Environment
In most applications, including other IDEs, you set environment settings and preferences via a convenient user interface, and VS Code is no less. There are two different types of settings: user settings and workspace settings. User settings apply globally to the development environment, while workspace settings only apply to the current project or folder. I will now cover both user and workspace settings.
Understanding User Settings
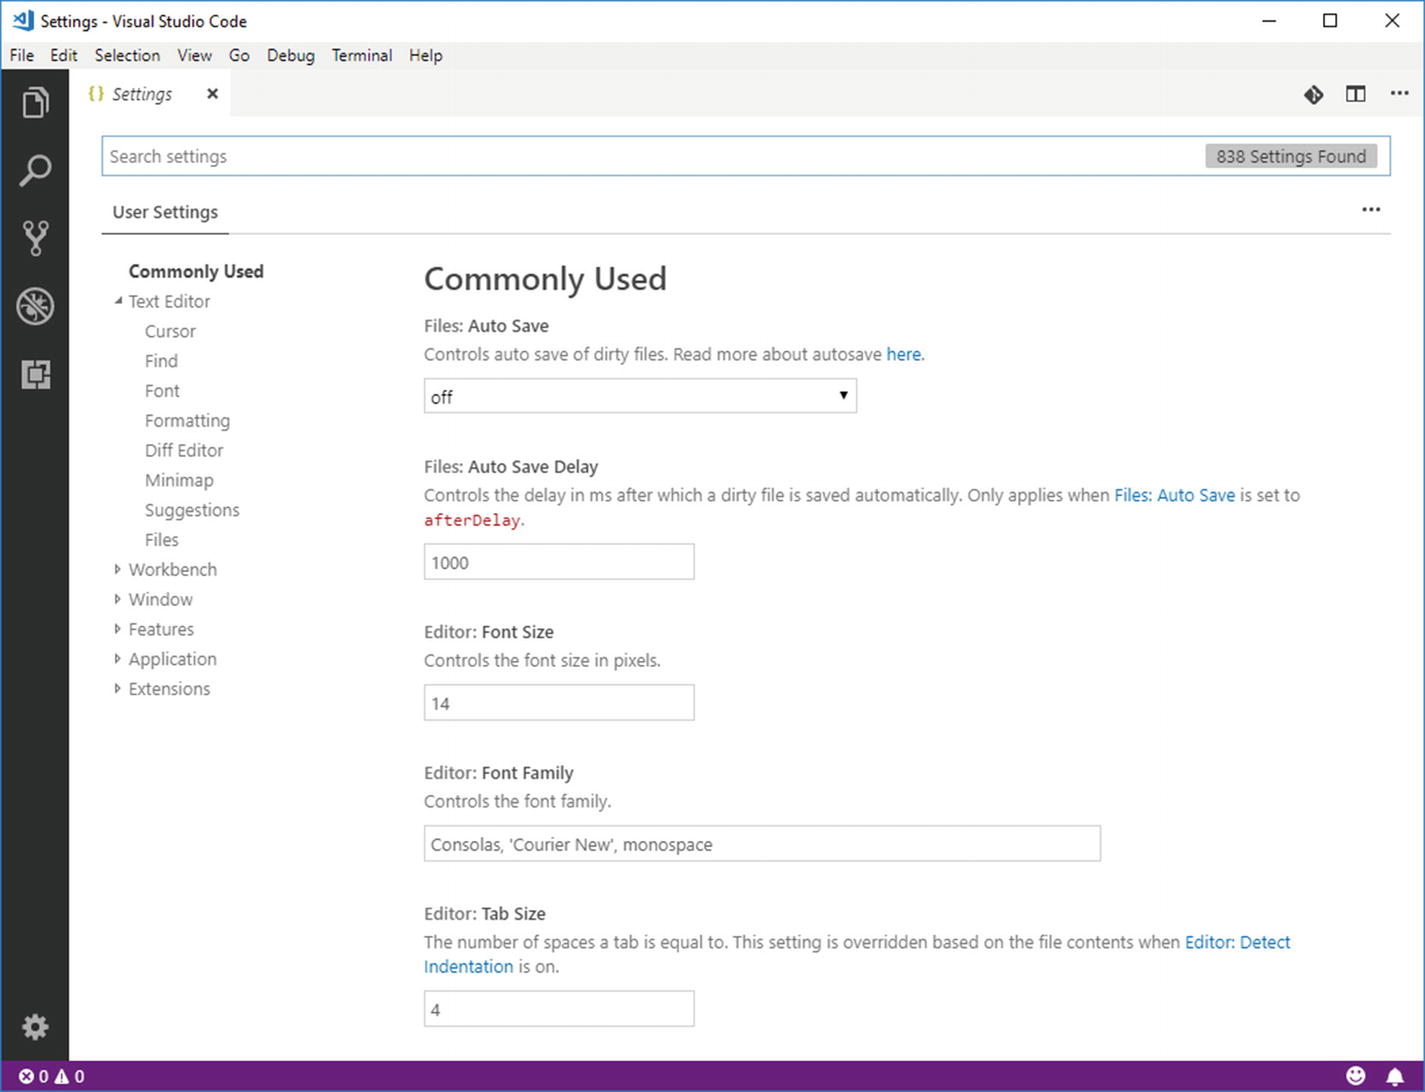
Working with user settings
Changing user settings
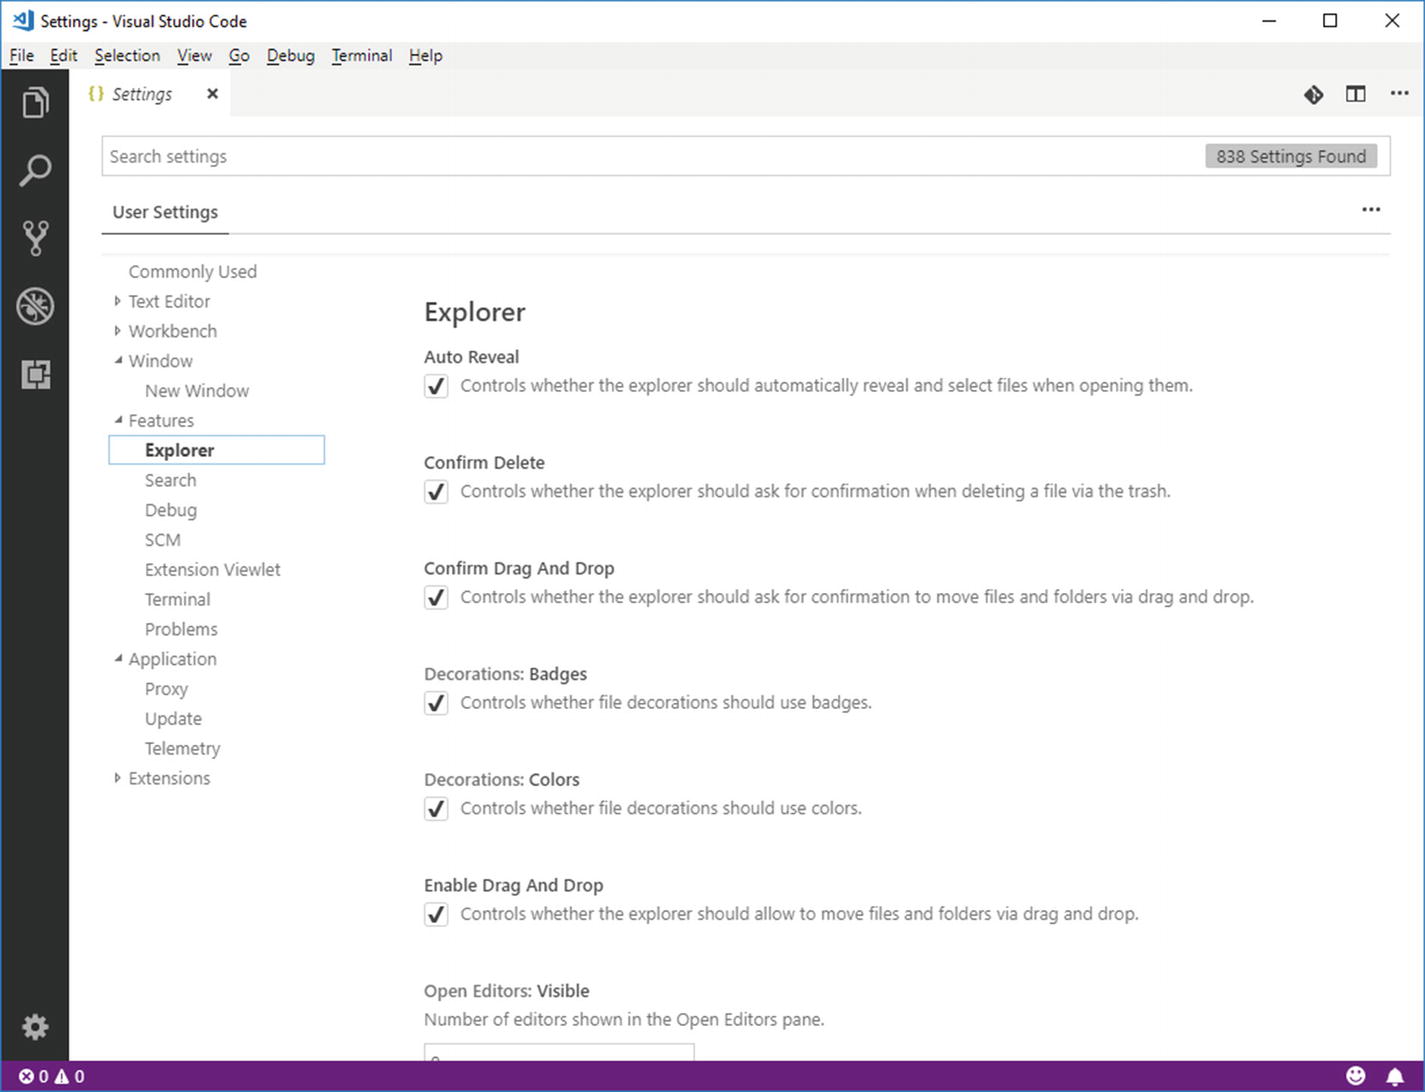
Similarly, you could change settings and preferences for the text editor, the whole application, and extension settings. In fact, extensions that allow for customizing preferences store their settings in the same place as VS Code does, so that you have a unique settings editor. There are hundreds of settings and the number varies depending on your configuration and installed extensions, so it’s not possible to list all settings here. For more details about available settings, visit the official documentation ( https://code.visualstudio.com/docs/getstarted/settings ).
Note
Remember that changes will be applied only after you save your edits with File ➤ Save.
Behind the Scenes: The settings.json File
Behind the scenes, VS Code (and extensions) stores settings inside a file called settings.json . In this file, each key/value pair represents a specific setting and its value. Before Visual Studio Code 1.27.1, settings could only be edited manually by modifying the settings.json file, and only in version 1.27.1, the editor discussed in the previous section was introduced.
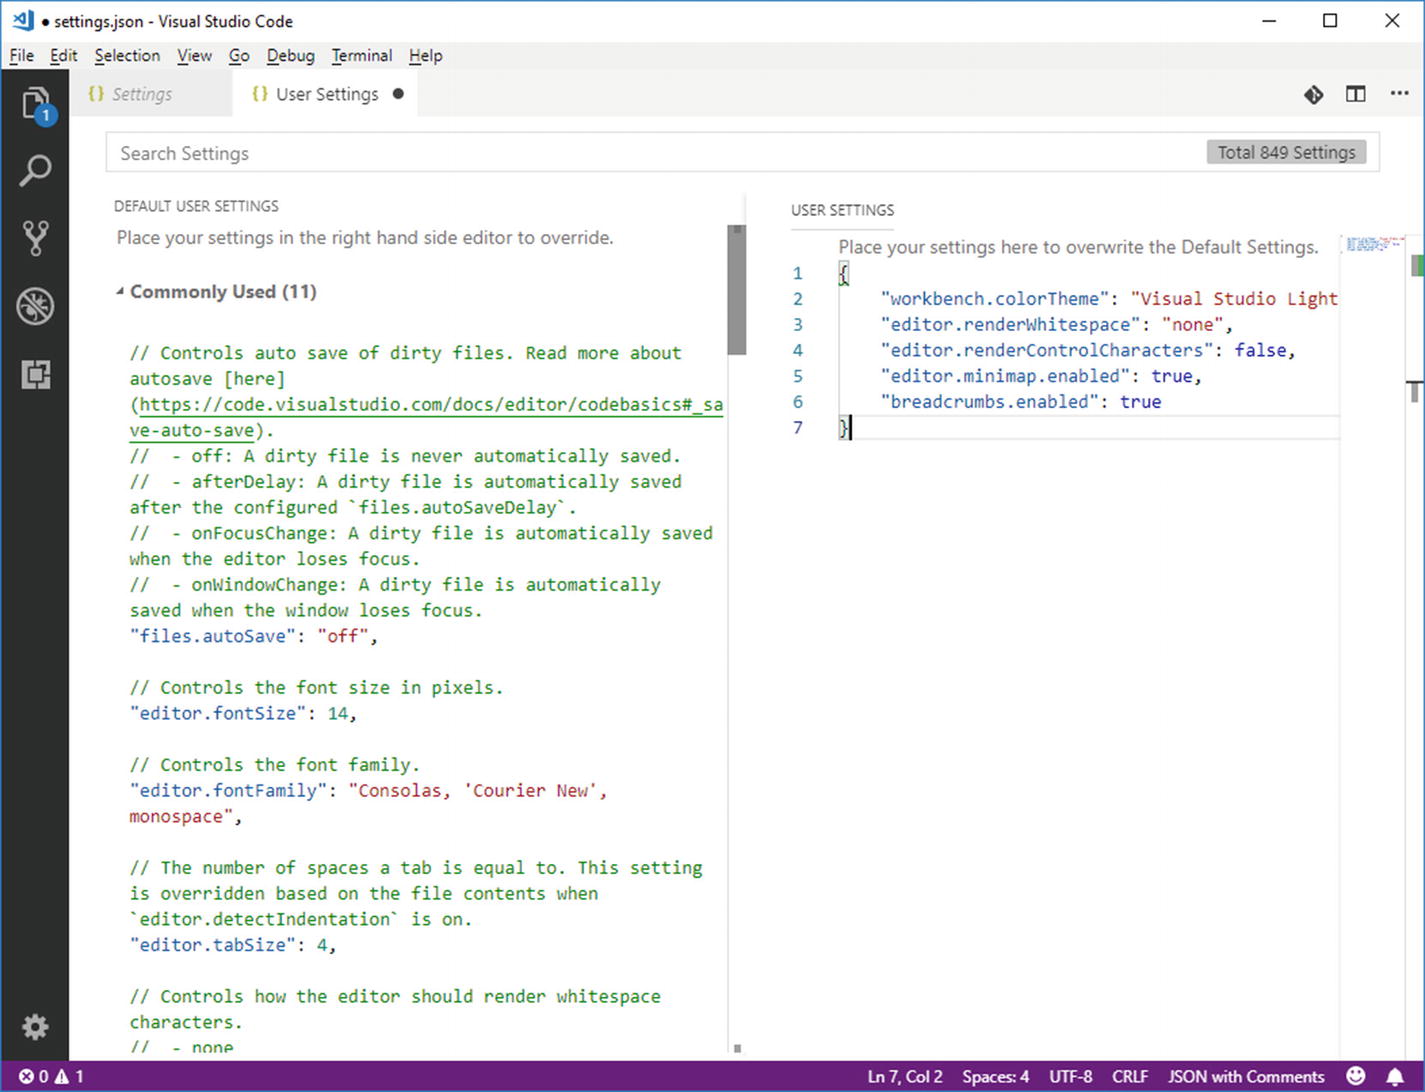
Working with the settings.json file
As you can see, the editor view is split in two areas: the DEFAULT USER SETTINGS on the left and the USER SETTINGS on the right.
Default user settings relate to Visual Studio Code’s environment and tools but also to supported languages and to installed extensions’ behavior (if any). The default settings view provides detailed comment for each available setting expressed with JSON format so that you can easily understand what setting a particular line applies to. You can easily provide custom settings by overriding one or more default settings, writing inside settings.json. Figure 5-5 shows an example where you can see how to change the theme, how to control white characters, how to control characters and breadcrumbs in the code editor, and how to enable the Minimap mode. Also, you will see how IntelliSense helps you choose among available settings as you type. It is worth mentioning that you can search for settings by typing a search key in the Search Settings box. The settings editor will highlight occurrences of the search key as you type .
IntelliSense also allows you to get more information about a given settings by clicking the information icon, which shows hints about the setting with a convenient tooltip exactly as you would expect after learning about IntelliSense’s features in Chapter 3, “Language Support and Code Editing Features.” When done, do not forget to save settings.json otherwise your changes will be lost.
A Real-World Example: Working with Proxies
If you work for an enterprise, the network might probably be behind a proxy server. In this case, you or the system administrator might need to configure Visual Studio Code to work with the proxy. If you do not, you will not be able to download packages, extensions, and product updates. Visual Studio Code should automatically detect proxies and ask for your credentials, but this does not always happen, so you might need some manual steps.
vscode-update.azurewebsites.net
vscode.blob.core.windows.net
marketplace.visualstudio.com
*.gallerycdn.vsassets.io
rink.hockeyapp.net
vscode.search.windows.net
raw.githubusercontent.com
vsmarketplacebadge.apphb.com

Configuring VS Code to work behind a proxy server
If your proxy also requires an authorization header, this must be specified in the settings.json file, so you have to click the Edit in settings.json hyperlink and then enter the value supplied by your network administrator as the value for http.proxyAuthorization key. Also, flag the Proxy Strict SSL option if the certificate should be verified against the list of supplied certification authorities.
Save your changes and try to see if Visual Studio Code is able to download extensions, packages and libraries required by some languages, and product updates. If you still encounter network issues, you should ask your network administrator to help you configure the proxy settings.
Note
Some protection programs such as Symantec Endpoint Protection block some Visual Studio Code installation (and update) files because they are recognized as Cryptolocker virus instances. Obviously, these are false positives, but you might want to talk to your network administrator to review the protection rules for Visual Studio Code.
Understanding Workspace Settings
Differently from user settings, which globally apply to VS Code’s environment, workspace settings only apply to the current folder. As an implication, you first need to open an existing folder in order to customize workspace settings.
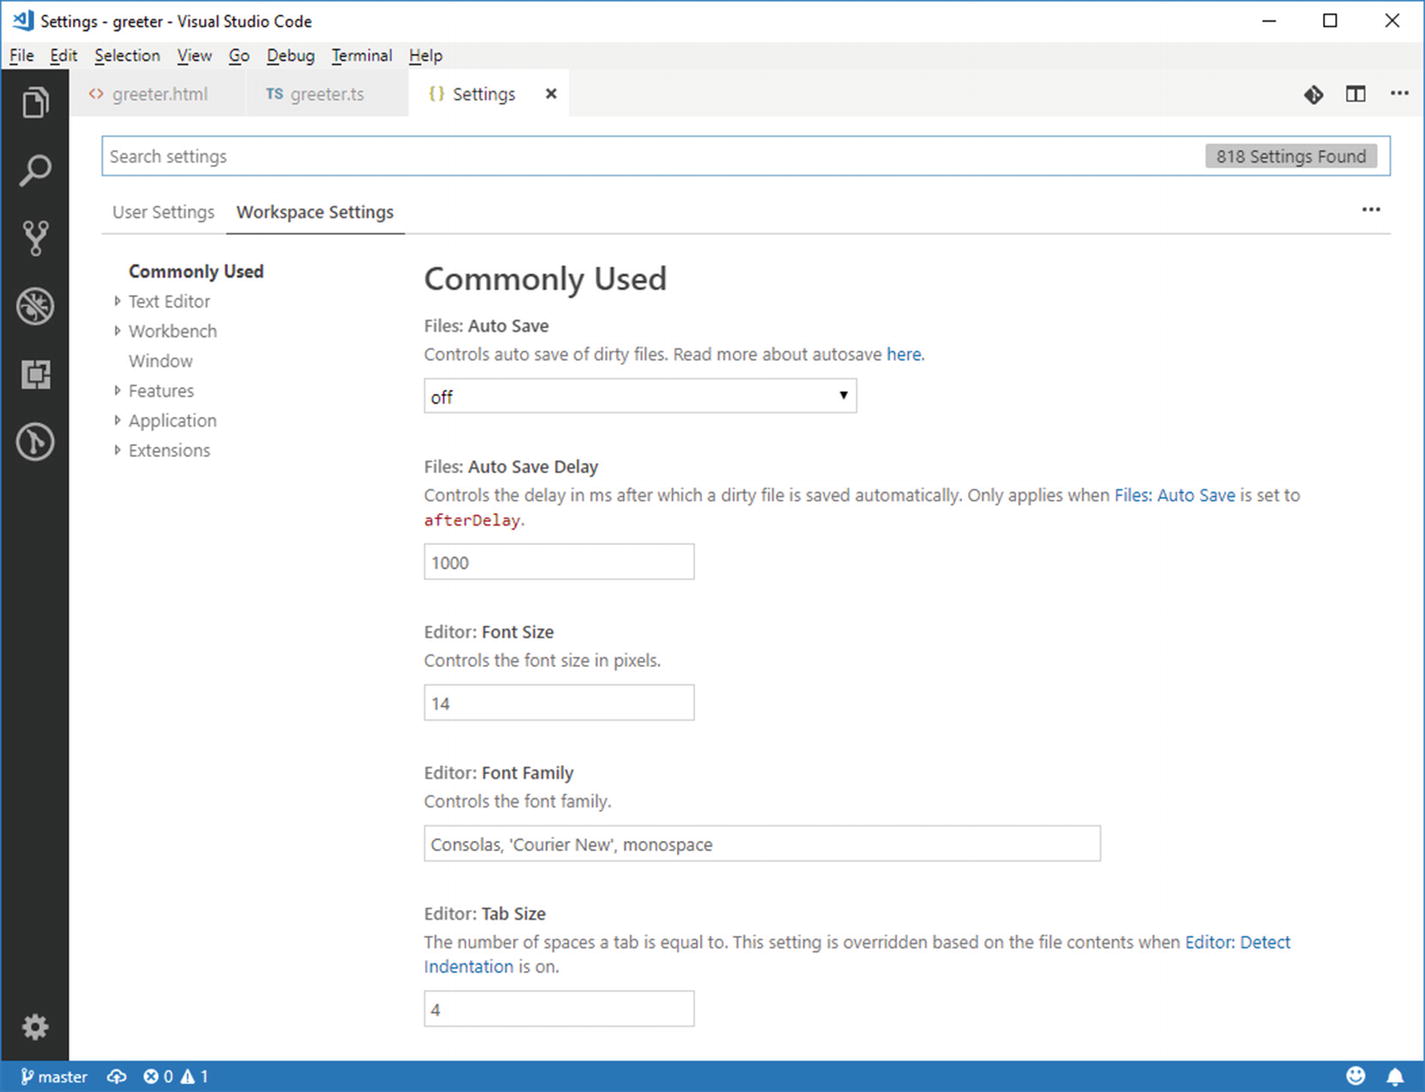
Customizing workspace settings
You customize workspace settings exactly as you do with user settings, so you have not only a second view in the settings editor but also another settings.json file where you can specify your preferences. The settings.json for workspace settings is saved under the .vscode subfolder that Visual Studio Code creates inside the opened folder, restricting settings availability to the current folder only.
Customizing Key Bindings
In the VS Code terminology, key bindings represent shortcuts you use to invoke commands and actions from the keyboard instead of using the mouse. Visual Studio Code includes a huge number of keyboard shortcuts that you can override with custom values. This is particularly useful if you used to work with other development tools and you want to get the same keyboard shortcuts in Visual Studio Code. You will see how to accomplish this by downloading ready-to-use key binding extensions, but it’s important for you to know how key bindings work.
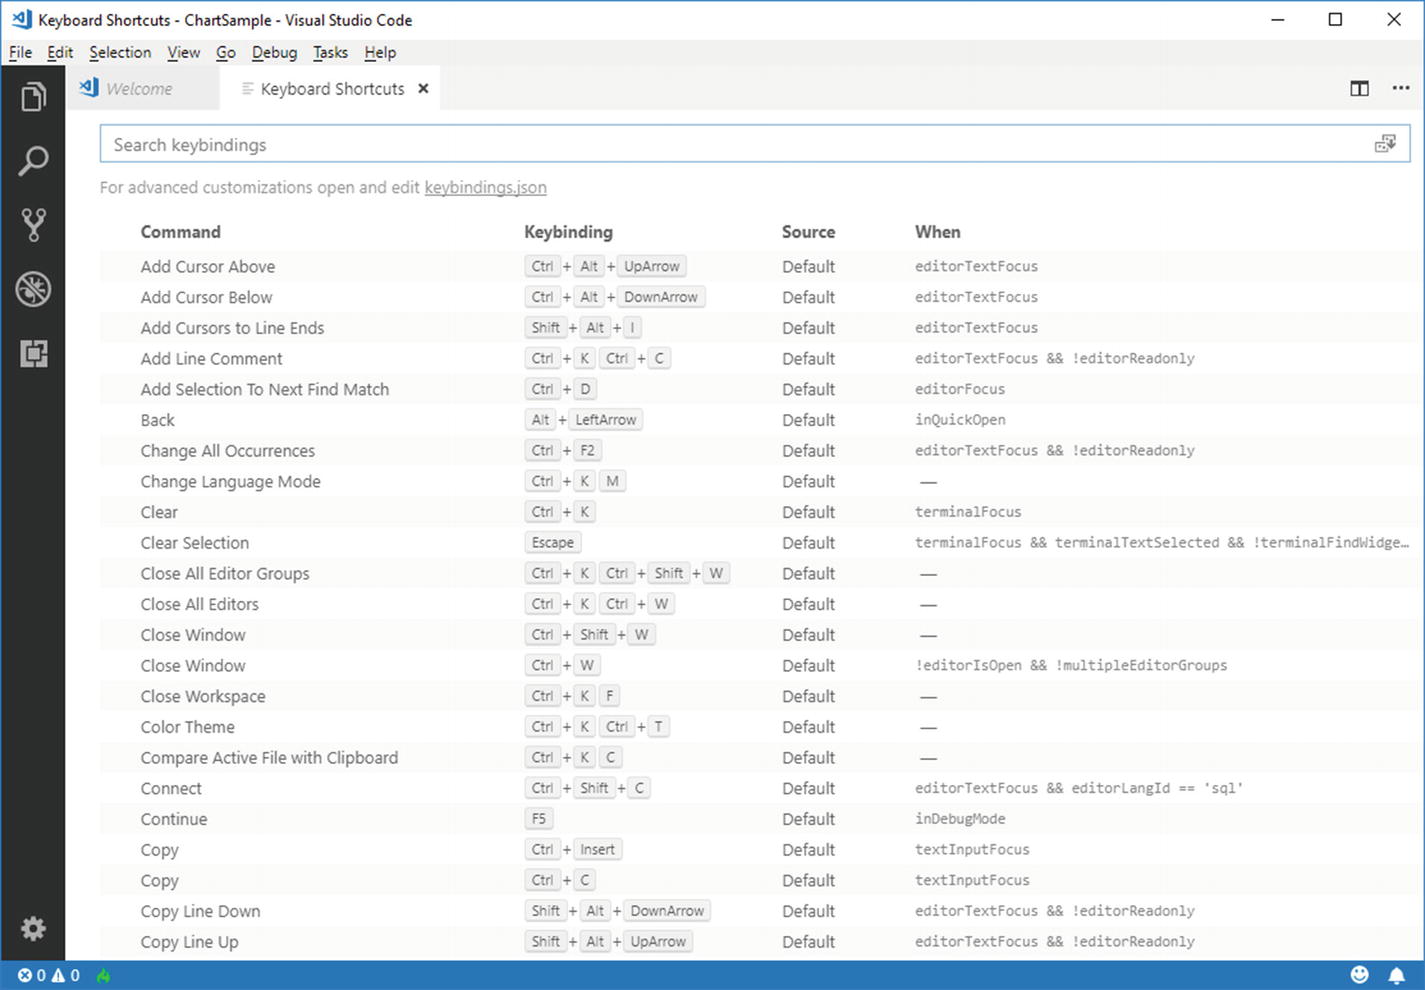
The list of current key bindings
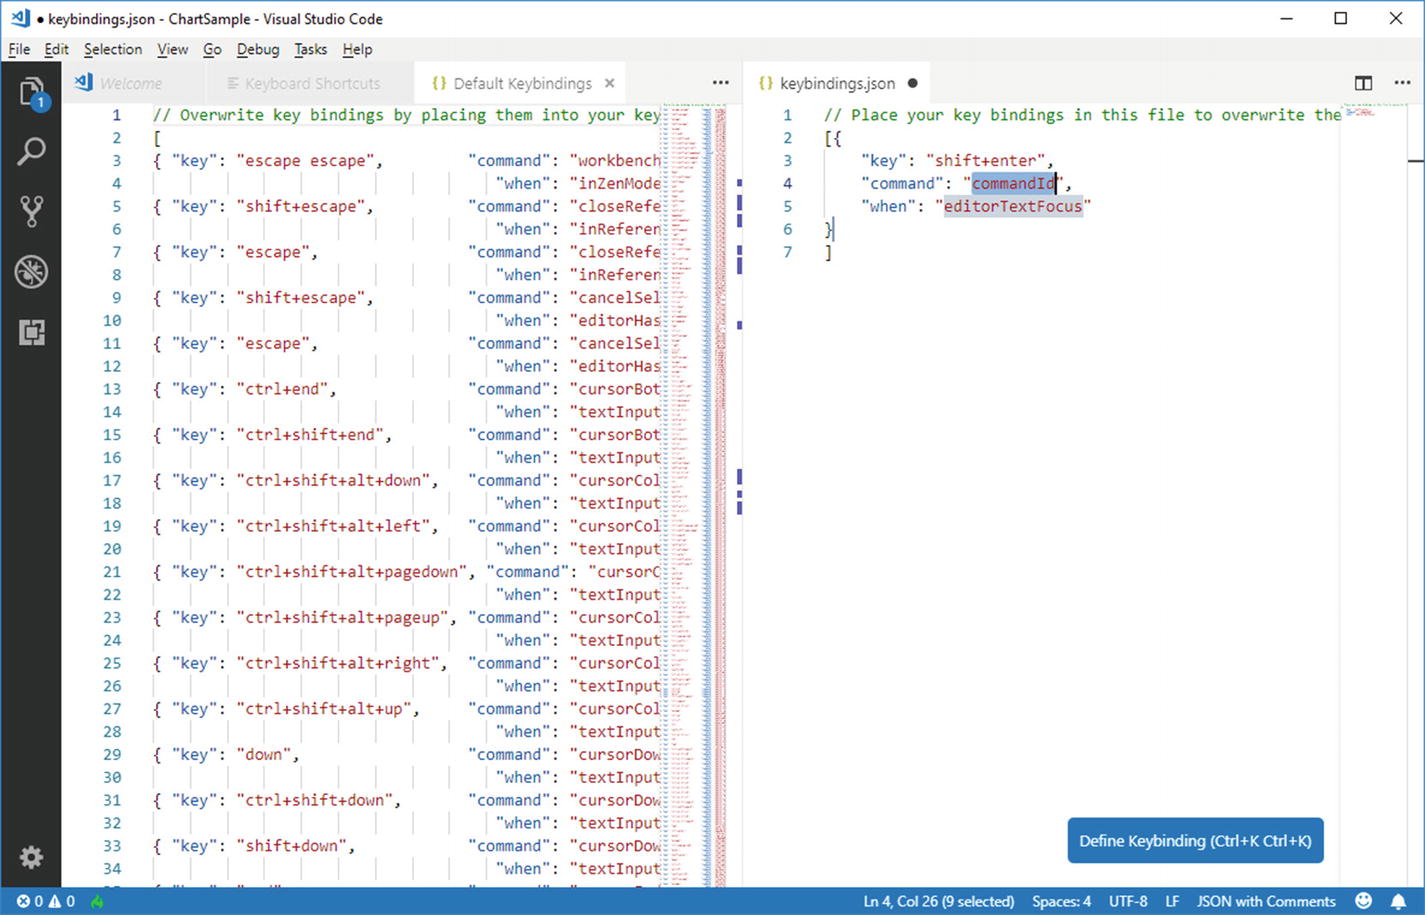
In order to customize key bindings, all you need to do is clicking the keybindings.json hyperlink under the search box and edit the keybindings.json file that Code generates for you. The code editor gets split into two views: on the left view, you can see the full list of default key bindings, whereas on the right view, you can override default shortcuts with custom ones (see Figure 5-7).
Note
Remember that Visual Studio Code has (and allows for customizing) different default key bindings depending on what operating system it is running on.
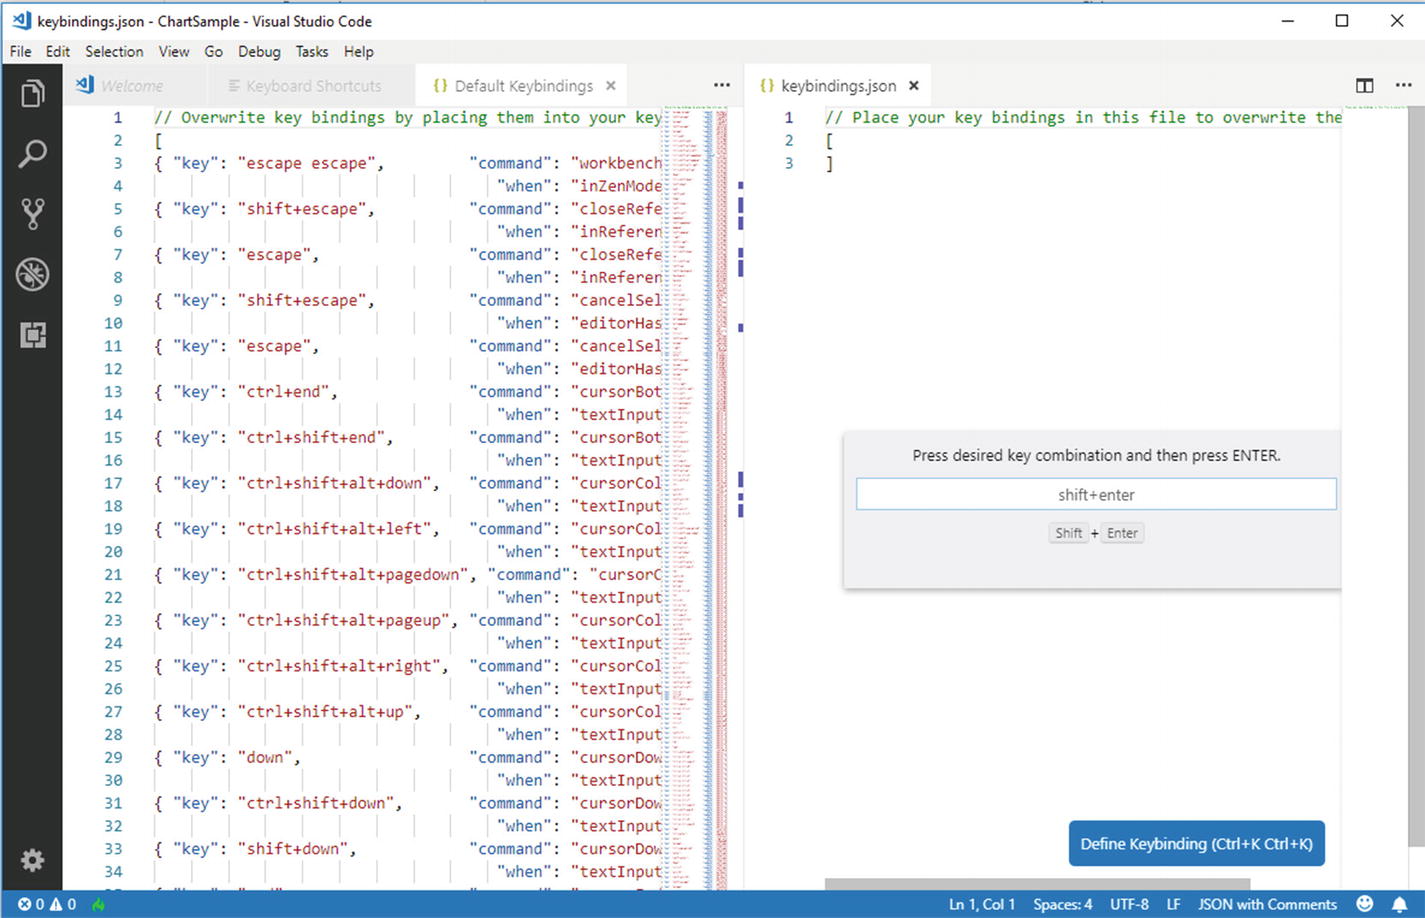
Adding a keyboard shortcut
Editing the new keyboard shortcut
You will need to edit the command and when elements with the command you want to map and for which scenario. You can look at the original markup on the left to get them both. Actually, the when element is optional. Save your changes to the keybindings.json file to get your new keyboard shortcuts ready.
Summary
Visual Studio Code allows for several customizations that will help you feel at home especially if you used to work with other development tools or code editors. You can select a different color theme from a list, you can customize the environment settings globally or for a specific folder, and you can even create custom keyboard shortcuts.
But the very good news is that customizations can also be downloaded as extensions, as well as new languages, debuggers, and tools. Extensibility is discussed in the next chapter.