
Beijing • Cambridge • Farnham • Köln • Sebastopol • Tokyo
Supplemental files and examples for this book can be found at http://examples.oreilly.com/0636920024606/. Please use a standard desktop web browser to access these files, as they may not be accessible from all ereader devices.
All code files or examples referenced in the book will be available online. For physical books that ship with an accompanying disc, whenever possible, we’ve posted all CD/DVD content. Note that while we provide as much of the media content as we are able via free download, we are sometimes limited by licensing restrictions. Please direct any questions or concerns to booktech@oreilly.com.
You picked the perfect time to learn Node.
The technology evolving around Node is still young and vibrant, with interesting new variations and twists popping up on a regular basis. At the same time, the technology has reached a level of maturity that assures you your time learning Node will be well spent: installation has never been easier, even on Windows; the “best of breed” modules are beginning to surface from the seeming hundreds available for use; the infrastructure is becoming robust enough for production use.
There are two important things to keep in mind when you work with Node. The first is that it is based in JavaScript, more or less the same JavaScript you’re used to working with in client-side development. True, you can use another language variation, such as CoffeeScript, but JavaScript is the lingua franca of the technology.
The second important thing to remember is that Node isn’t your ordinary JavaScript. This is server-side technology, which means some of the functionality—and safeguards—you’ve come to expect in your browser environment just won’t be there, and all sorts of new and potentially very unfamiliar capabilities will.
Of course, if Node were like JavaScript in the browser, what fun would that be?
If you explore the source code for Node, you’ll find the source code for Google’s V8, the JavaScript (technically, ECMAScript) engine that’s also at the core of Google’s Chrome browser. One advantage to Node.js, then, is that you can develop Node applications for just one implementation of JavaScript—not half a dozen different browsers and browser versions.
Node is designed to be used for applications that are heavy on input/output (I/O), but light on computation. More importantly, it provides this functionality directly out of the box. You don’t have to worry about the application blocking any further processing while waiting for a file to finish loading or a database to finish updating, because most of the functionality is asynchronous I/O by default. And you don’t have to worry about working with threads, because Node is implemented on a single thread.
Asynchronous I/O means that applications don’t wait for an input/output process to finish before going on to the next step in the application code. Chapter 1 goes into more detail on the asynchronous nature of Node.
Most importantly, Node is written in a language that many traditional web developers are familiar with: JavaScript. You may be learning how to use new technologies, such as working with WebSockets or developing to a framework like Express, but at least you won’t have to learn a new language along with the concepts. This language familiarity makes it a lot easier to just focus on the new material.
One of the challenges associated with working with Node is that there is an assumption that most people coming into Node development have come from a Ruby or Python environment, or have worked with Rails. I don’t have this assumption, so I won’t explain a Node component by saying it’s “just like Sinatra.”
This book’s only assumption is that you, the reader, have worked
with JavaScript and are comfortable with it. You don’t have to be an
expert, but you should know what I’m talking about when I mention
closures, and have worked with Ajax and are familiar
with event handling in the client environment. In addition, you’ll get
more from this book if you have done some traditional web development and
are familiar with concepts such as HTTP methods (GET and POST), web sessions, cookies, and so on. You’ll
also need to be familiar with working either with the Console in Windows,
or the Unix command line in Mac OS X or Linux.
You’ll also enjoy the book more if you’re interested in some of the new technologies such as WebSockets, or working with frameworks to create applications. I cover these as a way of introducing you to how Node can be used in real-world applications.
Most importantly, as you progress through the book, keep an open mind. Be prepared to hit an occasional alpha/beta wall and run into the gotchas that plague a dynamic technology. Above all, meet the prospect of learning Node with anticipation, because it really can be a lot of fun.
You don’t have to read this book’s chapters in order, but there are paths through the book that are dependent on what you’re after and how much experience you have with Node.
If you’ve never worked with Node, then you’re going to want to start with Chapter 1 and read through at least Chapter 5. These chapters cover getting both Node and the package manager (npm) installed, how to use them, creating your first applications, and utilizing modules. Chapter 5 also covers some of the style issues associated with Node, including how to deal with Node’s unique approach to asynchronous development.
If you have had some exposure to Node, have worked with both the built-in Node modules and a few external ones, and have also used REPL (read-eval-print loop—the interactive console), you could comfortably skip Chapter 1–Chapter 4, but I still recommend starting no later than Chapter 5.
I incorporate the use of the Express framework, which also utilizes the Connect middleware, throughout the book. If you’ve not worked with Express, you’re going to want to go through Chapter 6–Chapter 8, which cover the concepts of routing, proxies, web servers, and middleware, and introduce Express. In particular, if you’re curious about using Express in a Model-View-Controller (MVC) framework, definitely read Chapter 7 and Chapter 8.
After these foundation chapters, you can skip around a bit. For instance, if you’re primarily working with key/value pairs, you’ll want to read the Redis discussion in Chapter 9; if you’re interested in document-centric data, check out Chapter 10, which introduces how to use MongoDB with Node. Of course, if you’re going to work only with a relational database, you can go directly to Chapter 11 and skip the Redis and MongoDB chapters, though do check them out sometime—they might provide a new viewpoint to working with data.
After those three data chapters, we get into specialized application use. Chapter 12 focuses purely on graphics and media access, including how to provide media for the new HTML5 video element, as well as working with PDF documents and Canvas. Chapter 13 covers the very popular Sockets.io module, especially for working with the new web socket functionality.
After the split into two different specialized uses of Node in Chapter 12 and Chapter 13, we come back together again at the end of the book. After you’ve had some time to work with the examples in the other chapters, you’re going to want to spend some in Chapter 14, learning in-depth practices for Node debugging and testing.
Chapter 15 is probably one of the tougher chapters, and also one of the more important. It covers issues of security and authority. I don’t recommend that it be one of the first chapters you read, but it is essential that you spend time in this chapter before you roll a Node application out for general use.
Chapter 16 is the final chapter, and you can safely leave it for last, regardless of your interest and experience. It focuses on how to prepare your application for production use, including how to deploy your Node application not only on your own system, but also in one of the cloud servers that are popping up to host Node applications. I’ll also cover how to deploy a Node application to your server, including how to ensure it plays well with another web server such as Apache, and how to ensure your application survives a crash and restarts when the system is rebooted.
Node is heavily connected with the Git source control technique, and most (if not all) Node modules are hosted on GitHub. The Appendix A provides a Git/GitHub survival guide for those who haven’t worked with either.
I mentioned earlier that you don’t have to follow the chapters in order, but I recommend that you do. Many of the chapters work off effort in previous chapters, and you may miss out on important points if you skip around. In addition, though there are numerous standalone examples all throughout the book, I do use one relatively simple Express application called Widget Factory that begins life in Chapter 7 and is touched on, here and there, in most of the rest of the chapters. I believe you’ll have a better time with the book if you start at the beginning and then lightly skim the sections that you know, rather than skip a chapter altogether.
As the king says in Alice in Wonderland, “Begin at the beginning and go on till you come to the end: then stop.”
The examples in this book were created in various releases of Node 0.6.x. Most were tested in a Linux environment, but should work, as is, in any Node environment.
Node 0.8.x released just as this book went to production. The examples in the chapters do work with Node 0.8.x for the most part; I have indicated the instances where you’ll need to make a code change to ensure that the application works with the newest Node release.
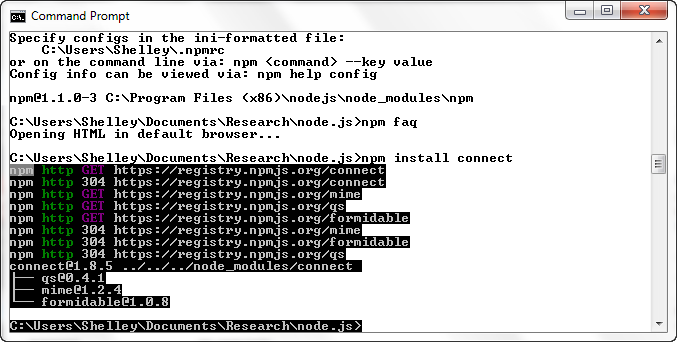
You can find the examples as a compressed file at the O’Reilly web page for this book (http://oreil.ly/Learning_node). Once you’ve downloaded and uncompressed it, and you have Node installed, you can install all the dependency libraries for the examples by changing to the examples directory and typing:
npm install -d
I’ll cover more on using the Node package manager (npm) in Chapter 4.
The following typographical conventions are used in this book:
Indicates menu titles, menu options, menu buttons, and keyboard accelerators (such as Alt and Ctrl).
Indicates new terms, URLs, email addresses, filenames, file extensions, pathnames, directories, and Unix utilities.
Constant widthIndicates commands, options, switches, variables, attributes, keys, functions, types, classes, namespaces, methods, modules, properties, parameters, values, objects, events, event handlers, XML tags, HTML tags, macros, the contents of files, or the output from commands.
Constant width
        bold
Shows commands or other text that should be typed literally by the user.
Constant width italicShows text that should be replaced with user-supplied values.
This icon signifies a tip, suggestion, or general note.
This icon indicates a warning or caution.
This book is here to help you get your job done. In general, you may use the code in this book in your programs and documentation. You do not need to contact us for permission unless you’re reproducing a significant portion of the code. For example, writing a program that uses several chunks of code from this book does not require permission. Selling or distributing a CD-ROM of examples from O’Reilly books does require permission. Answering a question by citing this book and quoting example code does not require permission. Incorporating a significant amount of example code from this book into your product’s documentation does require permission.
We appreciate, but do not require, attribution. An attribution usually includes the title, author, publisher, and ISBN. For example: “Learning Node by Shelley Powers (O’Reilly). Copyright 2012 Shelley Powers, 978-1-449-32307-3.”
If you feel your use of code examples falls outside fair use or the permission given above, feel free to contact us at permissions@oreilly.com.
Safari Books Online (www.safaribooksonline.com) is an on-demand digital library that delivers expert content in both book and video form from the world’s leading authors in technology and business.
Technology professionals, software developers, web designers, and business and creative professionals use Safari Books Online as their primary resource for research, problem solving, learning, and certification training.
Safari Books Online offers a range of product mixes and pricing programs for organizations, government agencies, and individuals. Subscribers have access to thousands of books, training videos, and prepublication manuscripts in one fully searchable database from publishers like O’Reilly Media, Prentice Hall Professional, Addison-Wesley Professional, Microsoft Press, Sams, Que, Peachpit Press, Focal Press, Cisco Press, John Wiley & Sons, Syngress, Morgan Kaufmann, IBM Redbooks, Packt, Adobe Press, FT Press, Apress, Manning, New Riders, McGraw-Hill, Jones & Bartlett, Course Technology, and dozens more. For more information about Safari Books Online, please visit us online.
Please address comments and questions concerning this book to the publisher:
| O’Reilly Media, Inc. |
| 1005 Gravenstein Highway North |
| Sebastopol, CA 95472 |
| 800-998-9938 (in the United States or Canada) |
| 707-829-0515 (international or local) |
| 707-829-0104 (fax) |
We have a web page for this book, where we list errata, examples, and any additional information. You can access this page at http://oreil.ly/Learning_node.
To comment or ask technical questions about this book, please send email to bookquestions@oreilly.com.
For more information about our books, courses, conferences, and news, see our website at http://www.oreilly.com.
Find us on Facebook: http://facebook.com/oreilly
Follow us on Twitter: http://twitter.com/oreillymedia
Watch us on YouTube: http://www.youtube.com/oreillymedia
Thanks, as always, to friends and family who help keep me sane when I work on a book. Special thanks to my editor, Simon St. Laurent, who listened to me vent more than once.
My thanks also to the production crew who helped take this book from an idea to the work you’re now holding: Rachel Steely, Rachel Monaghan, Kiel Van Horn, Aaron Hazelton, and Rebecca Demarest.
When you work with Node, you’re the recipient of a great deal of generosity, starting with the creator of Node.js, Ryan Dahl, and including the creator of npm, Isaac Schlueter, who is also now the Node.js gatekeeper.
Others who provided extremely useful code and modules in this book are Bert Belder, TJ Holowaychuk, Jeremy Ashkenas, Mikeal Rogers, Guillermo Rauch, Jared Hanson, Felix Geisendörfer, Steve Sanderson, Matt Ranney, Caolan McMahon, Remy Sharp, Chris O’Hara, Mariano Iglesias, Marco Aurélio, Damián Suárez, Jeremy Ashkenas, Nathan Rajlich, Christian Amor Kvalheim, and Gianni Chiappetta. My apologies for any module developers I have inadvertently omitted.
And what would Node be without the good people who provide tutorials, how-tos, and helpful guides? Thanks to Tim Caswell, Felix Geisendörfer, Mikato Takada, Geo Paul, Manuel Kiessling, Scott Hanselman, Peter Krumins, Tom Hughes-Croucher, Ben Nadel, and the entire crew of Nodejitsu and Joyent.
Node.js is a server-side technology that’s based on Google’s V8 JavaScript engine. It’s a highly scalable system that uses asynchronous, event-driven I/O (input/output), rather than threads or separate processes. It’s ideal for web applications that are frequently accessed but computationally simple.
If you’re using a traditional web server, such as Apache, each time a web resource is requested, Apache creates a separate thread or invokes a new process in order to handle the request. Even though Apache responds quickly to requests, and cleans up after the request has been satisfied, this approach can still tie up a lot of resources. A popular web application is going to have serious performance issues.
Node, on the other hand, doesn’t create a new thread or process for every request. Instead, it listens for specific events, and when the event happens, responds accordingly. Node doesn’t block any other request while waiting for the event functionality to complete, and events are handled—first come, first served—in a relatively uncomplicated event loop.
Node applications are created with JavaScript (or an alternative language that compiles to JavaScript). The JavaScript is the same as you’d use in your client-side applications. However, unlike JavaScript in a browser, with Node you have to set up a development environment.
Node can be installed in a Unix/Linux, Mac OS, or Windows environment. This chapter will walk you through setting up a development environment for Node in Windows 7 and Linux (Ubuntu). Installation on a Mac should be similar to installation on Linux. I’ll also cover any requirements or preparation you need to take before installing the application.
Once your development environment is operational, I’ll demonstrate a basic Node application and walk you through the important bit—the event loop I mentioned earlier.
There is more than one way to install Node in most environments. Which approach you use is dependent on your existing development environment, your comfort level working with source code, or how you plan to use Node in your existing applications.
Package installers are provided for both Windows and Mac OS, but you can install Node by grabbing a copy of the source and compiling the application. You can also use Git to clone (check out) the Node repo (repository) in all three environments.
In this section I’m going to demonstrate how to get Node working in a Linux system (an Ubuntu 10.04 VPS, or virtual private server), by retrieving and compiling the source directly. I’ll also demonstrate how to install Node so that you can use it with Microsoft’s WebMatrix on a Windows 7 PC.
Download source and basic package installers for Node from http://nodejs.org/#download. There’s a wiki page providing some basic instruction for installing Node in various environments at https://github.com/joyent/node/wiki/Installing-Node-via-package-manager. I also encourage you to search for the newest tutorials for installing Node in your environment, as Node is very dynamic.
Before installing Node in Linux, you need to prepare your environment. As noted in the documentation provided in the Node wiki, first make sure Python is installed, and then install libssl-dev if you plan to use SSL/TLS (Secure Sockets Layer/Transport Layer Security). Depending on your Linux installation, Python may already be installed. If not, you can use your systems package installer to install the most stable version of Python available for your system, as long as it’s version 2.6 or 2.7 (required for the most recent version of Node).
This book assumes only that you have previous experience with JavaScript and traditional web development. Given that, I’m erring on the side of caution and being verbose in descriptions of what you need to do to install Node.
For both Ubuntu and Debian, you’ll also need to install other libraries. Using the Advanced Packaging Tool (APT) available in most Debian GNU/Linux systems, you can ensure the libraries you need are installed with the following commands:
sudo apt-get update
sudo apt-get upgrade
sudo apt-get install build-essential openssl libssl-dev pkg-config
The update command just ensures
the package index on your system is up to date, and the upgrade command upgrades any existing outdated
packages. The third command line is the one that installs all of the
necessary packages. Any existing package dependencies are pulled in by
the package manager.
Once your system is prepared, download the Node
tarball (the compressed, archived file of the
source) to your system. I use wget to
access tarballs, though you can also use curl. At the time I’m writing this, the most
recent source for Node is version 0.8.2:
wget http://nodejs.org/dist/v0.8.2/node-v0.8.2.tar.gz
Once you’ve downloaded it, unzip and untar the file:
tar -zxf node-v0.8.2.tar.gz
You now have a directory labeled node-v0.6.18. Change into the directory and issue the following commands to compile and install Node:
./configure
make
sudo make install
If you’ve not used the make
utility in Unix before, these three commands set up the
makefile based on your system environment and
installation, run a preliminary make
to check for dependencies, and then perform a final make with installation. After processing these
commands, Node should now be installed and accessible globally via the
command line.
The fun challenge of programming is that no two systems are alike. This sequence of actions should be successful in most Linux environments, but the operative word here is should.
Notice in the last command that you had to use sudo to install Node. You need root privileges
to install Node this way (see the upcoming note). However, you can
install Node locally by using the following, which installs Node in a
given local subdirectory:
mkdir ~/working
./configure --prefix=~/working
make
make install
echo 'export PATH=~/working/bin:${PATH}' >> ~/.bashrc
. ~/.bashrc
So, as you can see here, setting the prefix configuration
option to a specified path in your home directory installs Node locally.
You’ll need to remember to update your PATH environmental
variable accordingly.
To use sudo, you have to be
granted root, or superuser, privileges, and your
username must be listed in a special file located at /etc/sudoers.
Although you can install Node locally, if you’re thinking of using this approach to use Node in your shared hosting environment, think again. Installing Node is just one part of using Node in an environment. You also need privileges to compile an application, as well as run applications off of certain ports (such as port 80). Most shared hosting environments will not allow you to install your own version of Node.
Unless there’s a compelling reason, I recommend installing Node
using sudo.
At one time there was a security concern about running the Node package manager (npm), covered in Chapter 4, with root privilege. However, those security issues have since been addressed.
You can install Node in Windows using a very basic installation sequence as outlined in the wiki installation page provided earlier. However, chances are that if you’re going to use Node in a Windows environment, you’re going to use it as part of a Windows web development infrastructure.
There are two different Windows infrastructures you can use Node with at this time. One is the new Windows Azure cloud platform, which allows developers to host applications in a remote service (called a cloud). Microsoft provides instructions for installing the Windows Azure SDK for Node, so I won’t be covering that process in this chapter (though I will examine and demonstrate the SDK later in the book).
You can find the Windows Azure SDK for Node and installation instructions at https://www.windowsazure.com/en-us/develop/nodejs/.
The other approach to using Node on Windows—in this case, Windows 7—is by integrating Node into Microsoft’s WebMatrix, a tool for web developers integrating open source technologies. Here are the steps we’ll need to take to get Node up and running with WebMatrix in Windows 7:
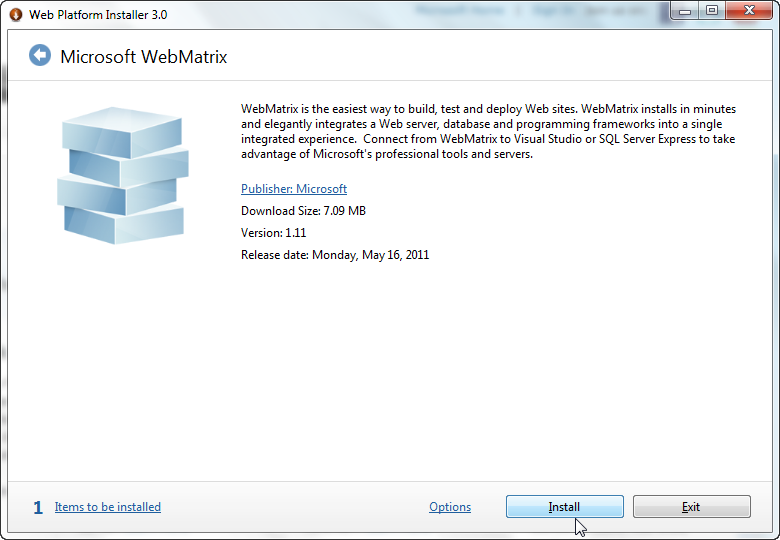
You install WebMatrix using the Microsoft Web Platform Installer, as shown in Figure 1-1. The tool also installs IIS Express, which is a developer version of Microsoft’s web server. Download WebMatrix from http://www.microsoft.com/web/webmatrix/.
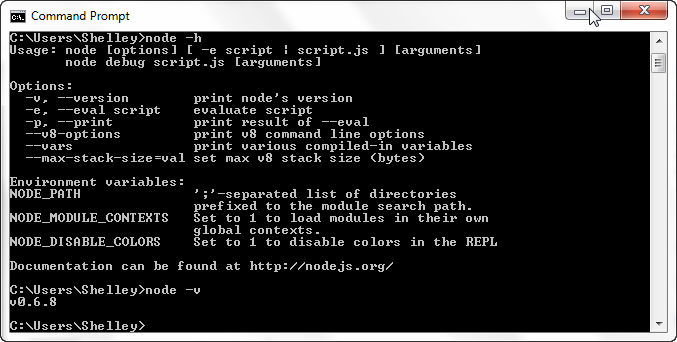
Once the WebMatrix installation is finished, install the latest
version of Node using the installer provided at the primary Node site
(http://nodejs.org/#download). Installation is
one-click, and once you’re finished you can open a Command window and
type node to check for yourself
that the application is operational, as shown in Figure 1-2.
For Node to work with IIS in Windows, install iisnode, a native IIS 7.x module created and maintained by Tomasz Janczuk. As with Node, installation is a snap using the prebuilt installation package, available at https://github.com/tjanczuk/iisnode. There are x86 and x64 installations, but for x64, you’ll need to install both.
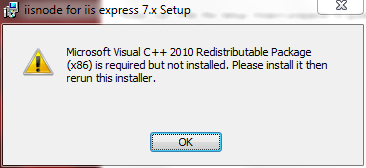
During the iisnode installation, a window may pop up telling you that you’re missing the Microsoft Visual C++ 2010 Redistributable Package, as shown in Figure 1-3. If so, you’ll need to install this package, making sure you get the one that matches the version of iisnode you’re installing—either the x86 package (available at http://www.microsoft.com/download/en/details.aspx?id=5555) or the x64 package (available at http://www.microsoft.com/download/en/details.aspx?id=14632), or both. Once you’ve installed the requisite package, run the iisnode installation again.
If you want to install the iisnode samples, open a Command window with administrator privileges, go to the directory where iisnode is installed—either Program Files for 64-bit, or Program Files (x86)—and run the setupsamples.bat file.
To complete the WebMatrix/Node setup, download and install the Node templates for WebMatrix, created by Steve Sanderson and found at https://github.com/SteveSanderson/Node-Site-Templates-for-WebMatrix.
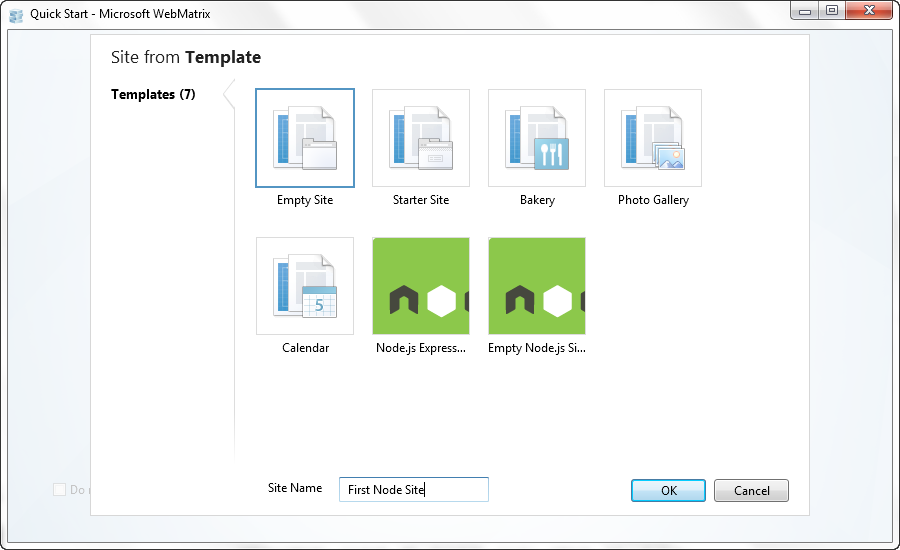
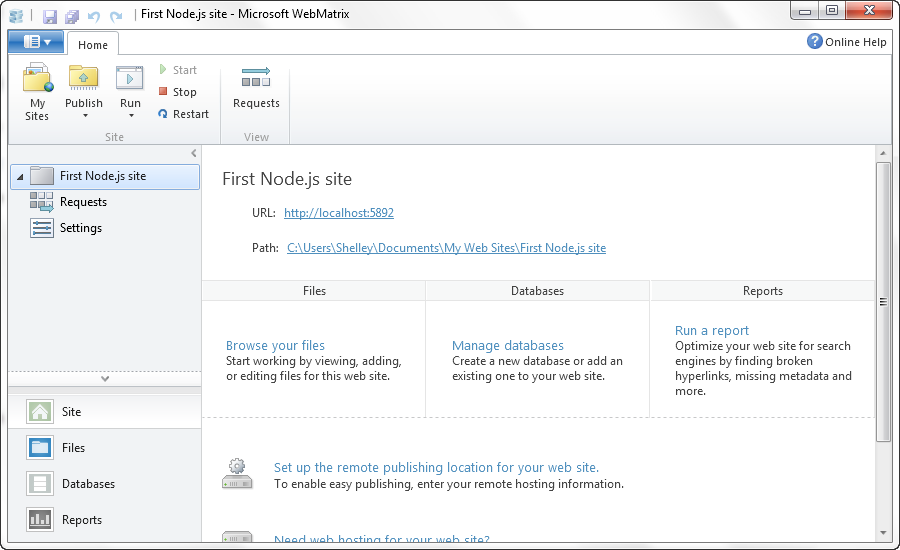
You can test that everything works by running WebMatrix, and in the opening pages, select the “Site from Template” option. In the page that opens, shown in Figure 1-4, you’ll see two Node template options: one for Express (introduced in Chapter 7) and one for creating a basic, empty site configured for Node. Choose the latter option, giving the site a name of First Node Site, or whatever you want to use.
Figure 1-5 shows WebMatrix once the site has been generated. Click the Run button, located in the top left of the page, and a browser page should open with the ubiquitous “Hello, world!” message displayed.
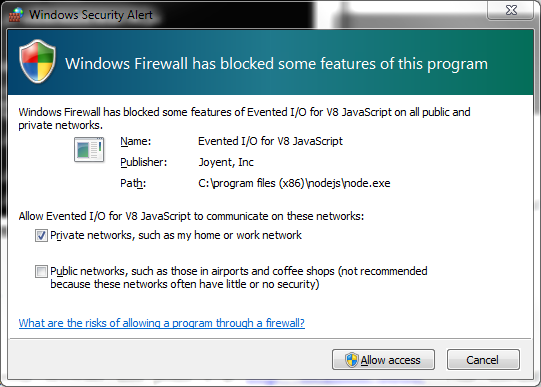
If you’re running the Windows Firewall, the first time you run a Node application, you may get a warning like that shown in Figure 1-6. You need to let the Firewall know this application is acceptable by checking the “Private networks” option and then the “Allow access” button. You want to restrict communication to just your private network on your development machine.
If you look at the generated files for your new WebMatrix Node project, you’ll see one named app.js. This is the Node file, and it contains the following code:
var http = require('http');

http.createServer(function (req, res) {

    res.writeHead(200, { 'Content-Type': 'text/html' });
    res.end('Hello, world!');

}).listen(process.env.PORT || 8080);
What this all means, I’ll get into in the second part of this chapter. The important item to take away from this code right now is that we can run this same application in any operating system where Node is installed and get the exact same functionality: a service that returns a simple message to the user.
Node stable releases are even numbered, such as the current 0.8.x, while the development releases are odd numbered (currently 0.9.x). I recommend sticking with stable releases only—at least until you have some experience with Node.
Updating your Node installation isn’t complicated. If you used the
package installer, using it for the new version should just override the
old installation. If you’re working directly with the source, you can
always uninstall the old source and install the new if you’re concerned
about potential clutter or file corruption. In the Node source
directory, just issue the uninstall
make option:
make uninstall
Download the new source, compile it, and install it, and you’re ready to go again.
The challenge with updating Node is determining whether a specific environment, module, or other application works with the new version. In most cases, you shouldn’t have version troubles. However, if you do, there is an application you can use to “switch” Node versions. The application is the Node Version Manager (Nvm).
You can download Nvm from GitHub, at https://github.com/creationix/nvm. Like Node, Nvm must be compiled and installed on your system.
To install a specific version of Node, install it with Nvm:
nvm install v0.4.1
To switch to a specific version, use the following:
nvm run v0.4.1
To see which versions are available, use:
nvm ls
Now that you have Node installed, it’s time to jump into your first application.
As is typical for testing out any new development environment, language, or tool, the first application we’ll create is “Hello, World”—a simple application that prints out a greeting to whomever accesses it.
Example 1-1 shows all the text needed to create Hello, World in Node.
// load http module
var http = require('http');

// create http server
http.createServer(function (req, res) {

  // content header
  res.writeHead(200, {'content-type': 'text/plain'});

  // write message and signal communication is complete
  res.end("Hello, World!\n");
}).listen(8124);

console.log('Server running on 8124');
The code is saved in a file named helloworld.js. As server-side functionality goes, this Node application is neither too verbose, nor too cryptic; one can intuit what’s happening, even without knowing Node. Best of all, it’s familiar since it’s written in a language we know well: JavaScript.
To run the application, from the command line in Linux, the Terminal window in Mac OS, or the Command window in Windows, type:
node helloworld.js
The following is printed to the command line once the program has successfully started:
Server running at 8124
Now, access the site using any browser. If the application is running on your local machine, you’ll use localhost:8124. If it’s running remotely, use the URL of the remote site, with the 8124 port. A web page with the words “Hello, World!” is displayed. You’ve now created your first complete and working Node application.
If you’re installing Node in a Fedora system, be aware that Node is renamed due to name conflicts with existing functionality. There’s more on this at http://nodejs.tchol.org/.
Since we didn’t use an ampersand (&) following the
node command—telling
the application to run in the background—the application starts and
doesn’t return you to the command line. You can continue accessing the
application, and the same words get displayed. The application continues
until you type Ctrl-C to cancel it, or otherwise kill the
process.
If you want to run the application in the background within a Linux system, use the following:
node helloworld.js &
However, you’ll then have to find the process identifier using
ps -ef, and manually kill the right
process—in this case, the one with the process identifier 3747—using
kill:
ps -ef | grep node
kill 3747
Exiting the terminal window will also kill the process.
In Chapter 16, I cover how to create a persistent Node application installation.
You won’t be able to start another Node application listening at the same port: you can run only one Node application against one port at a time. If you’re running Apache at port 80, you won’t be able to run the Node application at this port, either. You must use a different port for each application.
You can also add helloworld.js as a new file to the existing WebMatrix website you created earlier, if you’re using WebMatrix. Just open the site, choose the “New File...” option from the menu bar, and add the text shown in Example 1-1 to the file. Then click the Run button.
I’ll get more in depth on the anatomy of Node applications in the next couple of chapters, but for now, let’s take a closer look at the Hello, World application.
Returning to the text in Example 1-1, the first line of code is:
var http = require('http');Most Node functionality is provided through external applications and libraries called modules. This line of JavaScript loads the HTTP module, assigning it to a local variable. The HTTP module provides basic HTTP functionality, enabling network access of the application.
The next line of code is:
http.createServer(function (req, res) { ...In this line of code, a new server is created with createServer, and an
anonymous function is passed as the parameter to the function call. This
anonymous function is the requestListener
function, and has two parameters: a server request (http.ServerRequest) and a server response
(http.ServerResponse).
Within the anonymous function, we have the following line:
res.writeHead(200, {'content-Type': 'text/plain'});The http.ServerResponse
object has a method, writeHead, that sends a
response header with the response status code (200), as well as provides
the content-type of the
response. You can also include other response header information within
the headers object, such as
content-length or
connection:
{ 'content-length': '123',
  'content-type': 'text/plain',
  'connection': 'keep-alive',
  'accept': '*/*' }
A second, optional parameter to writeHead is a
reasonPhrase, which is
a textual description of the status code.
Following the code to create the header is the command to write the “Hello, World!” message:
res.end("Hello, World!\n");The http.ServerResponse.end
method signals that the communication is finished; all headers and the
response body have been sent. This method must be
used with every http.ServerResponse
object.
The end method has two
parameters:
A chunk of data, which can be either a string or a buffer.
If the chunk of data is a string, the second parameter specifies the encoding.
Both parameters are optional, and the second parameter is required
only if the encoding of the string is anything other than utf8, which is the default.
Instead of passing the text in the end function, I could have used another
method, write:
res.write("Hello, World!\n");and then:
res.end();
The anonymous function and the createServer function
are both finished on the next line in the code:
}).listen(8124);
The http.Server.listen method
chained at the end of the createServer method
listens for incoming connections on a given port—in this case, port
8124. Optional parameters are a hostname and a callback function. If a hostname
isn’t provided, the server accepts connections to web addresses, such as
http://oreilly.com or http://examples.burningbird.net.
More on the callback function later in this chapter.
The listen method is asynchronous, which means the
application doesn’t block program execution, waiting for the connection
to be established. Whatever code following the listen call is processed, and the listen callback function is invoked when the
listening event is
fired—when the port connection is established.
The last line of code is:
console.log('Server running on 8124/');The console object is one
of the objects from the browser world that is incorporated into Node.
It’s a familiar construct for most JavaScript developers, and provides a
way to output text to the command line (or development environment),
rather than to the client.
The fundamental design behind Node is that an application is executed on a single thread (or process), and all events are handled asynchronously.
Consider how the typical web server, such as Apache, works. Apache has two different approaches to how it handles incoming requests. The first is to assign each request to a separate process until the request is satisfied; the second is to spawn a separate thread for each request.
The first approach (known as the prefork multiprocessing model, or prefork MPM) can create as many child processes as specified in an Apache configuration file. The advantage to creating a separate process is that applications accessed via the request, such as a PHP application, don’t have to be thread-safe. The disadvantage is that each process is memory intensive and doesn’t scale very well.
The second approach (known as the worker MPM), implements a hybrid process-thread approach. Each incoming request is handled via a new thread. It’s more efficient from a memory perspective, but also requires that all applications be thread-safe. Though the popular web language PHP is now thread-safe, there’s no guarantee that the many different libraries used with it are also thread-safe.
Regardless of the approach used, both types respond to requests in parallel. If five people access a web application at the exact same time, and the server is set up accordingly, the web server handles all five requests simultaneously.
Node does things differently. When you start a Node application, it’s created on a single thread of execution. It sits there, waiting for an application to come along and make a request. When Node gets a request, no other request can be processed until it’s finished processing the code for the current one.
You might be thinking that this doesn’t sound very efficient, and it wouldn’t be except for one thing: Node operates asynchronously, via an event loop and callback functions. An event loop is nothing more than functionality that basically polls for specific events and invokes event handlers at the proper time. In Node, a callback function is this event handler.
Unlike with other single-threaded applications, when you make a request to a Node application and it must, in turn, make some request of resources (such as a database request or file access), Node initiates the request, but doesn’t wait around until the request receives a response. Instead, it attaches a callback function to the request. When whatever has been requested is ready (or finished), an event is emitted to that effect, triggering the associated callback function to do something with either the results of the requested action or the resources requested.
If five people access a Node application at the exact same time, and the application needs to access a resource from a file, Node attaches a callback function to a response event for each request. As the resource becomes available for each, the callback function is called, and each person’s request is satisfied in turn. In the meantime, the Node application can be handling other requests, either for the same applications or a different application.
Though the application doesn’t process the requests in parallel, depending on how busy it is and how it’s designed, most people usually won’t perceive any delay in the response. Best of all, the application is very frugal with memory and other limited resources.
To demonstrate Node’s asynchronous nature, Example 1-2 modifies the Hello, World application from earlier in the chapter. Instead of just typing out “Hello, World!” it actually opens up the previously created helloworld.js and outputs the contents to the client.
// load http module
var http = require('http');
var fs = require('fs');

// create http server
http.createServer(function (req, res) {

   // open and read in helloworld.js
   fs.readFile('helloworld.js', 'utf8', function(err, data) {

      res.writeHead(200, {'Content-Type': 'text/plain'});
      if (err)
         res.write('Could not find or open file for reading\n');
      else

         // if no error, write JS file to client
         res.write(data);
      res.end();
     });
}).listen(8124, function() { console.log('bound to port 8124');});

console.log('Server running on 8124/');
A new module, File System (fs), is used in this example. The File System
module wraps standard POSIX file functionality, including opening up and
accessing the contents from a file. The method used is readFile. In Example 1-2, it’s passed the
name of the file to open, the encoding, and an anonymous
function.
The two instances of asynchronous behavior I want to point out in
Example 1-2 are the
callback function that’s attached to the readFile method, and
the callback function attached to the listen method.
As discussed earlier, the listen method tells the
HTTP server object to begin listening for connections on the given port.
Node doesn’t block, waiting for the connection to be established, so if
we need to do something once the connection is established, we provide a
callback function, as shown in Example 1-2.
When the connection is established, a listening event is
emitted, which then invokes the callback function, outputting a message
to the console.
The second, more important callback instance is the one attached
to readFile. Accessing a
file is a time-consuming operation, relatively speaking, and a
single-threaded application
accessed by multiple clients that blocked on file access would soon bog
down and be unusable.
Instead, the file is opened and the contents are read
asynchronously. Only when the contents have been read into the data
buffer—or an error occurs during the process—is the callback function
passed to the readFile method called.
It’s passed the error (if any), and the data if no error occurs.
In the callback function, the error is checked, and if there is no error, the data is then written out to the response back to the client.
Most people who have developed with JavaScript have done so in client applications, meant to be run by one person at a time in a browser. Using JavaScript in the server may seem odd. Creating a JavaScript application accessed by multiple people at the same time may seem even odder.
Our job is made easier because of the Node event loop and being able to put our trust in asynchronous function calls. However, we’re no longer in Kansas, Dorothy—we are developing for a different environment.
To demonstrate the differences in this new environment, I created two new applications: one as a service, and one to test the new service. Example 1-3 shows the code for the service application.
In the code, a function is called, synchronously, to write out numbers from 1 to 100. Then a file is opened, similar to what happened in Example 1-2, but this time the name of the file is passed in as a query string parameter. In addition, the file is opened only after a timer event.
var http = require('http');
var fs = require('fs');

// write out numbers
function writeNumbers(res) {

  var counter = 0;

  // increment global, write to client
  for (var i = 0; i<100; i++) {
    counter++;
    res.write(counter.toString() + '\n');
   }
}

// create http server
http.createServer(function (req, res) {

   var query = require('url').parse(req.url).query;
   var app = require('querystring').parse(query).file + ".txt";

   // content header
   res.writeHead(200, {'Content-Type': 'text/plain'});

   // write out numbers
   writeNumbers(res);

   // timer to open file and read contents
   setTimeout(function() {

      console.log('opening ' + app);
      // open and read in file contents
      fs.readFile(app, 'utf8', function(err, data) {
         if (err)
            res.write('Could not find or open file for reading\n');
         else {
            res.write(data);
         }
         // response is done
         res.end();
      });
   },2000);
}).listen(8124);

console.log('Server running at 8124');
The loop to print out the numbers is used to delay the
application, similar to what could happen if you performed a
computationally intensive process and then blocked until the process was
finished. The setTimeout function is
another asynchronous function, which in turn invokes a second
asynchronous function: readFile. The
application combines both asynchronous and synchronous processes.
Create a text file named main.txt, containing any text you want.
Running the application and accessing the page from Chrome with a query
string of file=main generates the
following console output:
Server running at 8124/
opening main.txt
opening undefined.txt
The first two lines are expected. The first is the result of
running console.log at the end of the
application, and the second is a printout of the file being opened. But
what’s undefined.txt in the third
line?
When processing a web request from a browser, be aware that browsers may send more than one request. For instance, a browser may also send a second request, looking for a favicon.ico. Because of this, when you’re processing the query string, you must check to see if the data you need is being provided, and ignore requests without the data.
The browser sending multiple requests can impact your application if you’re expecting values via a query string. You must adjust your application accordingly. And yes, you’ll still need to test your application with several different browsers.
So far, all we’ve done is test our Node applications from a browser. This isn’t really putting much stress on the asynchronous nature of the Node application.
Example 1-4 contains the code for a very simple test application. All it does is use the HTTP module to request the example server several times in a loop. The requests aren’t asynchronous. However, we’ll also be accessing the service using the browser as we run the test program. Both, combined, asynchronously test the application.
I’ll cover creating asynchronous testing applications in Chapter 14.
var http = require('http');

//The url we want, plus the path and options we need
var options = {
   host: 'localhost',
   port: 8124,
   path: '/?file=secondary',
   method: 'GET'
};

var processPublicTimeline = function(response) {
   // finished? ok, write the data to a file
   console.log('finished request');
};

for (var i = 0; i < 2000; i++) {
   // make the request, and then end it, to close the connection
   http.request(options, processPublicTimeline).end();
}
Create the second text file, named secondary.txt. Put whatever you wish in it, but make the contents obviously different from main.txt.
After making sure the Node application is running, start the test application:
node test.js
As the test application is running, access the application using your browser. If you look at the console messages being output by the application, you’ll see it process both your manual and the test application’s automated requests. Yet the results are consistent with what we would expect, a web page with:
The numbers 1 through 100 printed out
The contents of the text file—in this case, main.txt
Now, let’s mix things up a bit. In Example 1-3, make the counter global rather than local to the loop
function, and start the application again. Then run the test program and
access the page in the browser.
The results have definitely changed. Rather than the numbers starting at 1 and going to 100, they start at numbers like 2,601 and 26,301. They still print out the next sequential 99 numbers, but the starting value is different.
The reason is, of course, the use of the global counter. Since you’re accessing the same
application in the browser manually as the test program is doing
automatically, you’re both updating counter. Both the manual and automated
application requests are processed, in turn, so there’s no contention
for the shared data (a major problem with thread safety in a
multithreaded environment), but if you’re expecting a consistent
beginning value, you might be surprised.
Now change the application again, but this time remove the
var keyword in front of
the app variable—“accidentally”
making it a global variable. We all have, from time to time, forgotten
the var keyword with our
client-side JavaScript applications. The only time we get bit by this
mistake is if any libraries we’re using are using the same variable
name.
Run the test application and access the Node service in your
browser a couple of times. Chances are, you’ll end up with the text from
the secondary.txt file in your
browser window, rather than the requested main.txt file. The reason is that in the time
between when you processed the query for the filename and when you
actually opened the file, the automatic application modified the
app variable. The test application is
able to do so because you made an asynchronous function request,
basically ceding program control to another request while your request
was still mid-process.
By now you have a working Node installation—possibly even more than one.
You’ve also had a chance to create a couple of Node applications and
test out the differences between synchronous and asynchronous code (and
what happens if you accidentally forget the var keyword).
Node isn’t all asynchronous function calls. Some objects may provide both synchronous and asynchronous versions of the same function. However, Node works best when you use asynchronous coding as much as possible.
The Node event loop and callback functions have two major benefits.
First, the application can easily scale, since a single thread of execution doesn’t have an enormous amount of overhead. If we were to create a PHP application similar to the Node application in Example 1-3, the user would see the same page—but your system would definitely notice the difference. If you ran the PHP application in Apache with the default prefork MPM, each time the application was requested, it would have to be handled in a separate child process. Chances are, unless you have a significantly loaded system, you’ll only be able to run—at most—a couple of hundred child processes in parallel. More than that number of requests means that a client needs to wait for a response.
A second benefit to Node is that you minimize resource usage, but without having to resort to multithreaded development. In other words, you don’t have to create a thread-safe application. If you’ve ever developed a thread-safe application previously, you’re probably feeling profoundly glad at this statement.
However, as was demonstrated in the last example application, you
aren’t developing JavaScript applications for single users to run in the
browser, either. When you work with asynchronous applications, you need to
make sure that you don’t build in dependencies on one asynchronous
function call finishing ahead of another, because there are no
guarantees—not unless you call the second function call within the code of
the first. In addition, global variables are extremely hazardous in Node,
as is forgetting the var keyword.
Still, these are issues we can work with—especially considering the benefits of Node’s low resource requirements and not having to worry about threads.
While you’re exploring the use of Node and figuring out the code for your custom module or Node application, you don’t have to type JavaScript into a file and run it with Node to test your code. Node also comes with an interactive component known as REPL, or read-eval-print loop, which is the subject of this chapter.
REPL (pronounced “repple”) supports a simplified Emacs style of line editing and a small set of basic commands. Whatever you type into REPL is processed no differently than if you had typed the JavaScript into a file and run the file using Node. You can actually use REPL to code your entire application—literally testing the application on the fly.
In this chapter, I’ll also cover some interesting quirks of REPL, along with some ways you can work around them. These workarounds include replacing the underlying mechanism that persists commands, as well as using some command-line editing.
Lastly, if the built-in REPL doesn’t provide exactly what you need for an interactive environment, there’s also an API to create your own custom REPL, which I’ll demonstrate in the latter part of the chapter.
You’ll find a handy guide for using REPL at http://docs.nodejitsu.com/articles/REPL/how-to-use-nodejs-repl. The Nodejitsu site also provides a nice tutorial on how to create a custom REPL at http://docs.nodejitsu.com/articles/REPL/how-to-create-a-custom-repl.
To begin REPL, simply type node without providing any Node application
file, like so:
$ node
REPL then provides a command-line prompt—an angle bracket (>)—by default. Anything you type from this point on is processed by the underlying V8 JavaScript engine.
REPL is very simple to use. Just start typing in your JavaScript, like you’d add it to a file:
> a = 2;
2
The tool prints out the result of whatever expression you just
typed. In this session excerpt, the value of the expression is 2. In the following, the expression result is an
array with three elements:
> b = ['a','b','c'];
[ 'a', 'b', 'c' ]
To access the last expression, use the underscore/underline
character (_). In the following, a is
set to 2, and the resulting expression
is incremented by 1, and then 1 again:
> a = 2;
2
> _ ++;
3
> _ ++;
4
You can even access properties or call methods on the underscored expression:
> ['apple','orange','lime']
[ 'apple', 'orange', 'lime' ]
> _.length
3
> 3 + 4
7
> _.toString();
'7'
You can use the var keyword with REPL in
order to access an expression or value at a later time, but you might get
an unexpected result. For instance, the following line in REPL:
var a = 2;
doesn’t return the value 2, it
returns a value of undefined. The
reason is that the result of the expression is undefined, since variable
assignment doesn’t return a result when evaluated.
Consider the following instead, which is what’s happening, more or less, under the hood in REPL:
console.log(eval('a = 2'));
console.log(eval('var a = 2'));
Typing the preceding lines into a file and running that file using Node returns:
2
undefined
There is no result from the second call to eval, and hence the value returned is undefined. Remember, REPL is a read-eval-print
loop, with emphasis on the eval.
Still, you can use the variable in REPL, just as you would in a Node application:
> var a = 2;
undefined
> a++;
2
> a++;
3
The latter two command lines do have results, which are printed out by REPL.
I’ll demonstrate how to create your own custom REPL—one that
doesn’t output undefined—in the
section Custom REPL.
To end the REPL session, either press Ctrl-C twice, or Ctrl-D once. We’ll cover other ways to end the session later, in REPL Commands.
Here’s a typical demonstration of REPL:
> 3 > 2 > 1;
false
This code snippet is a good example of how REPL can be useful. At
first glance, we might expect the expression we typed to evaluate to
true, since 3 is greater than 2, which
is greater than 1. However, in JavaScript, expressions are evaluated left
to right, and each expression’s result is returned for the next
evaluation.
A better way of looking at what’s happening with the preceding code snippet is this REPL session:
> 3 > 2 > 1;
false
> 3 > 2;
true
> true > 1;
false
Now the result makes more sense. What’s happening is that the
expression 3 > 2 is evaluated, returning true. But then the value of true is compared to the numeric 1. JavaScript
provides automatic data type conversion, after which true and 1 are equivalent values. Hence,
true is not greater than 1, and the
result is false.
REPL’s helpfulness is in enabling us to discover these little
interesting quirks in JavaScript. Hopefully, after testing our code in
REPL, we don’t have unexpected side effects in our applications (such as
expecting a result of true but getting
a result of false).
You can type the same JavaScript into REPL just like you’d
type it into a file, including require statements to
import modules. A session to try out the Query String (qs) module is repeated in the following
text:
$ node
> qs = require('querystring');
{ unescapeBuffer: [Function],
  unescape: [Function],
  escape: [Function],
  encode: [Function],
  stringify: [Function],
  decode: [Function],
  parse: [Function] }
> val = qs.parse('file=main&file=secondary&test=one').file;
[ 'main', 'secondary' ]
Since you didn’t use the var keyword, the
expression result is printed out—in this instance, the interface for the
querystring object. How’s
that for a bonus? Not only are you getting access to the object, but
you’re also learning more about the object’s interface while you’re at it.
However, if you want to forgo the potentially lengthy output of text, use
the var keyword:
> var qs = require('querystring');You’ll be able to access the querystring object with
the qs variable with either
approach.
In addition to being able to incorporate external modules, REPL gracefully handles multiline expressions, providing a textual indicator of code that’s nested following an opening curly brace ({):
> var test = function (x, y) {
... var val = x * y;
... return val;
... };
undefined
> test(3,4);
12
REPL provides repeating dots to indicate that everything that’s being typed follows an open curly brace and hence the command isn’t finished yet. It does the same for an open parenthesis, too:
> test(4,
... 5);
20
Increasing levels of nesting generates more dots; this is necessary in an interactive environment, where you might lose track of where you are, as you type:
> var test = function (x, y) {
... var test2 = function (x, y) {
..... return x * y;
..... }
... return test2(x,y);
... }
undefined
> test(3,4);
12
>
You can type in, or copy and paste in, an entire Node application and run it from REPL:
> var http = require('http');
undefined
> http.createServer(function (req, res) {
...
...   // content header
...   res.writeHead(200, {'Content-Type': 'text/plain'});
...
...   res.end("Hello person\n");
... }).listen(8124);
{ connections: 0,
  allowHalfOpen: true,
  _handle:
   { writeQueueSize: 0,
     onconnection: [Function: onconnection],
     socket: [Circular] },
  _events:
   { request: [Function],
     connection: [Function: connectionListener] },
  httpAllowHalfOpen: false }
>
undefined
> console.log('Server running at http://127.0.0.1:8124/');
Server running at http://127.0.0.1:8124/
Undefined
You can access this application from a browser no differently than if you had typed the text into a file and run it using Node. And again, the responses back from REPL can provide an interesting look at the code, as shown in the boldfaced text.
In fact, my favorite use of REPL is to get a quick look at objects.
For instance, the Node core object global is sparsely
documented at the Node.js website. To get a better look, I opened up a
REPL session and passed the object to the console.log method like
so:
> console.log(global)
I could have done the following, which has the same result:
> gl = global;
I’m not replicating what was displayed in REPL; I’ll leave that for
you to try on your own installation, since the interface for global is so large. The
important point to take away from this exercise is that we can, at any
time, quickly and easily get a quick look at an object’s interface. It’s a
handy way of remembering what a method is called, or what properties are
available.
There’s more on global in Chapter 3.
You can use the up and down arrow keys to traverse through the commands you’ve typed into REPL. This can be a handy way of reviewing what you’ve done, as well as a way of editing what you’ve done, though in a somewhat limited capacity.
Consider the following session in REPL:
> var myFruit = function(fruitArray,pickOne) {
... return fruitArray[pickOne - 1];
... }
undefined
> fruit = ['apples','oranges','limes','cherries'];
[ 'apples',
  'oranges',
  'limes',
  'cherries' ]
> myFruit(fruit,2);
'oranges'
> myFruit(fruit,0);
undefined
> var myFruit = function(fruitArray,pickOne) {
... if (pickOne <= 0) return 'invalid number';
... return fruitArray[pickOne - 1];
... };
undefined
> myFruit(fruit,0);
'invalid number'
> myFruit(fruit,1);
'apples'
Though it’s not demonstrated in this printout, when I modified the
function to check the input value, I actually arrowed up through the
content to the beginning function declaration, and then hit Enter to
restart the function. I added the new line, and then again used the arrow
keys to repeat previously typed entries until the function was finished. I
also used the up arrow key to repeat the function call that resulted in an
undefined result.
It seems like a lot of work just to avoid retyping something so simple, but consider working with regular expressions, such as the following:
> var ssRe = /^\d{3}-\d{2}-\d{4}$/;
undefined
> ssRe.test('555-55-5555');
true
> var decRe = /^\s*(\+|-)?((\d+(\.\d+)?)|(\.\d+))\s*$/;
undefined
> decRe.test(56.5);
true
I’m absolutely useless when it comes to regular expressions, and have to tweak them several times before they’re just right. Using REPL to test regular expressions is very attractive. However, retyping long regular expressions would be a monstrous amount of work.
Luckily, all we have to do with REPL is arrow up to find the line where the regular expression was created, tweak it, hit Enter, and continue with the next test.
In addition to the arrow keys, you can also use the Tab key to
autocomplete text. As an example, type
va at the command line and then
press Tab; REPL will autocomplete var. You can also
use the Tab key to autocomplete any global or local variable. Table 2-1
offers a quick summary of keyboard commands that work with REPL.
Keyboard entry | What it does |
Ctrl-C | Terminates current command. Pressing Ctrl-C twice forces an exit. |
Ctrl-D | Exits REPL. |
Tab | Autocompletes global or local variable. |
Up arrow | Traverses up through command history. |
Down arrow | Traverses down through command history. |
Underscore (_) | References result of last expression. |
If you’re concerned about spending a lot of time coding in REPL with
nothing to show for it when you’re done, no worries: you can save the
results of the current context with the .save command. It and the
other REPL commands are covered in the next section.
REPL has a simple interface with a small set of useful
commands. In the preceding section, I mentioned .save. The .save command saves
your inputs in the current object context into a file. Unless you
specifically created a new object context or used the .clear command, the
context should comprise all of the input in the current REPL
session:
> .save ./dir/session/save.js
Only your inputs are saved, as if you had typed them directly into a file using a text editor.
Here is the complete list of REPL commands and their purposes:
.breakIf you get lost during a multiline entry, typing .break will start
you over again. You’ll lose the multiline content, though.
.clearResets the context object and clears any multiline expression. This command basically starts you over again.
.exitExits REPL.
.helpDisplays all available REPL commands.
.saveSaves the current REPL session to a file.
.loadLoads a file into the current session (.load /path/to/file.js).
If you’re working on an application using REPL as an editor,
here’s a hint: save your work often using .save. Though current
commands are persisted to history, trying to recreate your code from
history would be a painful exercise.
Speaking of persistence and history, now let’s go over how to customize both with REPL.
The Node.js website documentation for REPL mentions
setting up an environmental variable so you can use REPL with rlwrap. What is rlwrap, and why would you use it with
REPL?
The rlwrap utility is a wrapper
that adds GNU readline library
functionality to command lines that allow increased flexibility with
keyboard input. It intercepts keyboard input and provides additional
functionality, such as enhanced line editing, as well as a persistent
history of commands.
You’ll need to install rlwrap
and readline to use this facility
with REPL, though most flavors of Unix provide an easy package
installation. For instance, in my own Ubuntu system, installing rlwrap was this simple:
apt-get install rlwrap
Mac users should use the appropriate installer for these applications. Windows users have to use a Unix environmental emulator, such as Cygwin.
Here’s a quick and visual demonstration of using REPL with
rlwrap to change the REPL prompt to
purple:
env NODE_NO_READLINE=1 rlwrap -ppurple node
If I always want my REPL prompt to be purple, I can add an alias to my bashrc file:
alias node="env NODE_NO_READLINE=1 rlwrap -ppurple node"
To change both the prompt and the color, I’d use the following:
env NODE_NO_READLINE=1 rlwrap -ppurple -S "::>" node
Now my prompt would be:
::>
in purple.
The especially useful component of rlwrap is its ability to persist history
across REPL sessions. By default, we have access to command-line history
only within a REPL session. By using rlwrap, the next time we access REPL, not only
will we have access to a history of commands within the current session,
but also a history of commands in past sessions (and other command-line
entries). In the following session output, the commands shown were not
typed in, but were instead pulled from history with the up arrow
key:
# env NODE_NO_READLINE=1 rlwrap -ppurple -S "::>" node
::>e = ['a','b'];
[ 'a', 'b' ]
::>3 > 2 > 1;
false
As helpful as rlwrap is, we still end
up with undefined every time we type
in an expression that doesn’t return a value. However, we can adjust
this, and other functionality, just by creating our own custom REPL,
discussed next.
Node provides us access to creating our own custom REPL.
To do so, first we need to include the REPL module (repl):
var repl = require("repl");To create a new REPL, we call the start method on the
repl object. The syntax
for this method is:
repl.start([prompt], [stream], [eval], [useGlobal], [ignoreUndefined]);
All of the parameters are optional. If not provided, default values will be used for each as follows:
I find the undefined expression
result in REPL to be unedifying, so I created my own REPL. It took
exactly two lines of code (not including the comment):
repl = require("repl");

// start REPL with ignoreUndefined set to true
repl.start("node via stdin> ", null, null, null, true);
I ran the file, repl.js, using Node:
node repl.js
Then I used the custom REPL just like I use the built-in version,
except now I have a different prompt and no longer get the annoying
undefined after the first variable
assignment. I do still get the
other responses that aren’t undefined:
node via stdin> var ct = 0;
node via stdin> ct++;
0
node via stdin> console.log(ct);
1
node via stdin> ++ct;
2
node via stdin> console.log(ct);
2
In my code, I wanted the defaults for all but prompt and ignoreUndefined. Setting the other parameters
to null triggers Node to use the
default values for each.
You can replace the eval function with your
custom REPL. The only requirement is that it has a specific
format:
function eval(cmd, callback) {
   callback(null, result);
}
The stream option is
interesting. You can run multiple versions of REPL, taking input from
both the standard input (the default), as well as sockets. The
documentation for REPL at the Node.js site provides an example of a REPL
listening in on a TCP socket, using code similar to the
following:
var repl = require("repl"),
net = require("net");
// start REPL with ignoreUndefined set to true
repl.start("node via stdin> ", null, null, null, true);
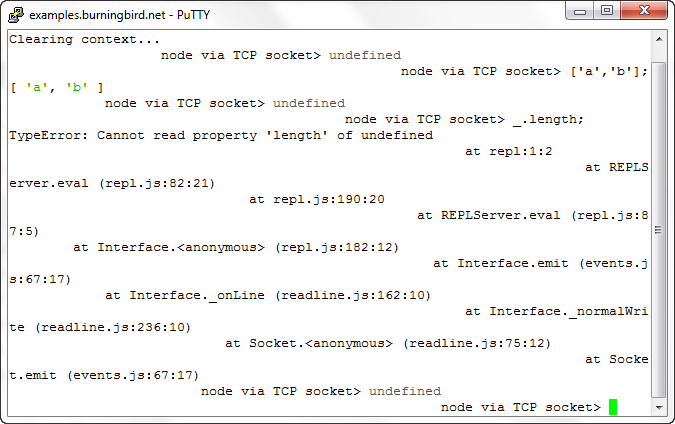
net.createServer(function (socket) {
repl.start("node via TCP socket> ", socket);
}).listen(8124);When you run the application, you get the standard input
prompt where the Node application is running. However, you can also
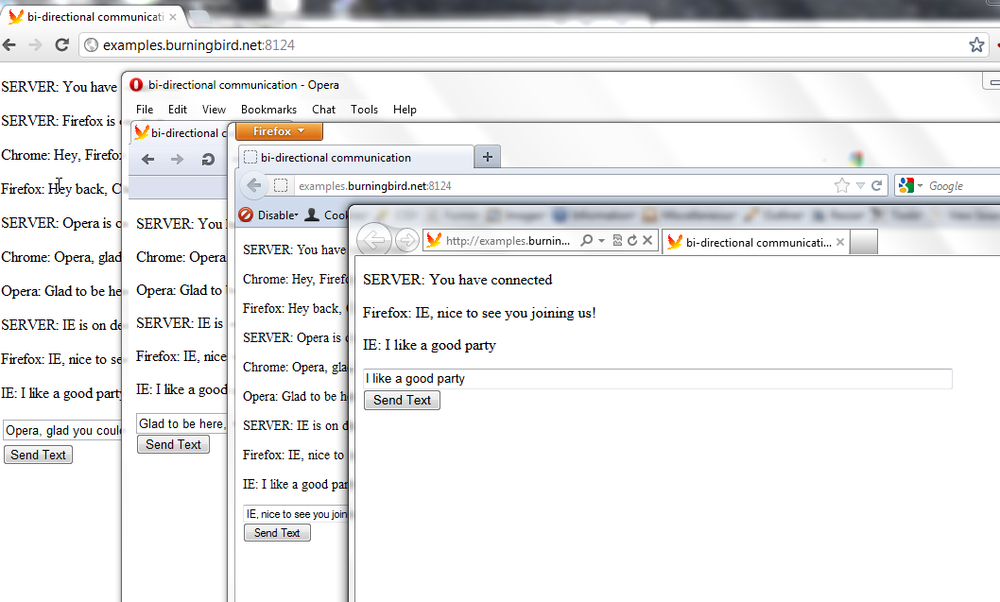
access REPL via TCP. I used PuTTY as a Telnet client to access this
TCP-enabled version of REPL. It does work...to a point. I had to issue a
.clear first, the
formatting is off, and when I tried to use the underscore to reference
the last expression, Node didn’t know what I was talking about, as shown
in Figure 2-1.
I also tried with the Windows 7 Telnet client, and the response was even worse. However, using my Linux Telnet client worked without a hitch.
The problem here, as you might expect, is Telnet client settings.
However, I didn’t pursue it further, because running REPL from an
exposed Telnet socket is not something I plan to implement, and not
something I would recommend, either—at least, not without heavy
security. It’s like using eval() in
your client-side code, and not scrubbing the text your users send you to
run—but worse.
You could keep a running REPL and communicate via a Unix socket with something like the GNU Netcat utility:
nc -U /tmp/node-repl-sock
You can type in commands no differently than typing them in using
stdin. Be aware, though, if you’re using either a TCP
or Unix socket, that any console.log commands
are printed out to the server console, not to the client:
console.log(someVariable); // actually printed out to server
An application option that I consider to be more useful is to
create a REPL application that preloads modules. In the application in
Example 2-1, after the
REPL is started, the http, os, and util modules are loaded
and assigned to context properties.
var repl = require('repl');
var context = repl.start(">>", null, null, null, true).context;

// preload in modules
context.http = require('http');
context.util = require('util');
context.os = require('os');
Running the application with Node brings up the REPL prompt, where we can then access the modules:
>>os.hostname();
'einstein'
>>util.log('message');
5 Feb 11:33:15 - message
>>
If you want to run the REPL application like an executable in Linux, add the following line as the first line in the application:
#!/usr/local/bin/node
Modify the file to be an executable and run it:
# chmod u+x replcontext.js
# ./replcontext.js
>>
Node’s REPL is a handy interactive tool that can make our development tasks a little easier. REPL allows us not only to try out JavaScript before including it in our files, but also to actually create our applications interactively and then save the results when we’re finished.
Another useful REPL feature is that it enables us to create a custom
REPL so that we can eliminate the unhelpful undefined responses, preload modules, change the
prompt or the eval routine we use, and
more.
I also strongly recommend that you look into using REPL with
rlwrap in order to
persist commands across sessions. This could end up being a major time
saver. Plus, who among us doesn’t like additional editing
capability?
As you explore REPL further, there’s one very important thing to keep in mind from this chapter:
Stuff happens. Save often.
If you’ll be spending a lot of time developing in REPL, even with
the use of rlwrap to persist
history, you’re going to want to frequently save your work. Working in
REPL is no different than working in other editing environments, so I’ll
repeat: stuff happens—save often.
Chapter 1 provided a first look at a Node application with the traditional (and always entertaining) Hello, World application. The examples in the chapter made use of a couple of modules from what is known as the Node core: the API providing much of the functionality necessary for building Node applications.
In this chapter, I’m going to provide more detail on the Node core system. It’s not an exhaustive overview, since the API is quite large and dynamic in nature. Instead, we’ll focus on key elements of the API, and take a closer look at those that we’ll use in later chapters and/or are complex enough to need a more in-depth review.
Topics covered in this chapter include:
Node global objects, such as global, process, and Buffer
The timer methods, such as setTimeout
A quick overview of socket and stream modules and functionality
The Utilities object,
especially the part it plays in Node inheritance
The EventEmitter object and
events
Node.js documentation for the current stable release is available at http://nodejs.org/api/.
There are several objects available to all Node applications without the user having to incorporate any module. The Node.js website groups these items under the descriptive label of globals.
We’ve been using one global, require, to include modules into our
applications. We’ve also made extensive use of another global, console, to log messages to the console. Other
globals are essential to the underlying implementation of Node, but aren’t
necessarily anything we’d access or
need to know about directly. Some, though, are important enough for us to
take a closer look at, because they help define key aspects of how Node
works.
In particular, we’re going to explore:
The global object—that is,
the global namespace
The process object, which
provides essential functionality, such as wrappers for the three
STDIO (Standard IO) streams, and functionality to
transform a synchronous function into an asynchronous callback
The Buffer class, a global
object that provides raw data storage and manipulation
Child processes
Modules useful for domain resolution and URL processing
global is the global
namespace object. In some ways, it’s similar to
windows in a browser environment, in
that it provides access to global properties and methods and doesn’t
have to be explicitly referenced by name.
From REPL, you can print out the global object to the console like so:
> console.log(global)
What prints out is the interface for all of the other global objects, as well as a good deal of information about the system in which you’re running.
I mentioned that global is like
the windows object in a browser, but
there are key differences—and not just the methods and properties
available. The windows object in a
browser is truly global in nature. If you define a global variable in
client-side JavaScript, it’s accessible by the web page and by every
single library. However, if you create a variable at the top-level scope
in a Node module (a variable outside a function), it only becomes global
to the module, not to all of the modules.
You can actually see what happens to the global object when you define a module/global
variable in REPL. First, define the top-level variable:
> var test = "This really isn't global, as we know global";
Then print out global:
> console.log(global);
You should see your variable, as a new property of global, at the bottom. For another interesting
perspective, assign global to a
variable, but don’t use the var
keyword:
gl = global;
The global object interface is
printed out to the console, and at the bottom you’ll see the local
variable assigned as a circular reference:
> gl = global;
...
  gl: [Circular],
  _: [Circular] }
Any other global object or method, including require, is part of the global object’s interface.
When Node developers discuss context, they’re really referring to
the global object. In Example 2-1 in Chapter 2, the code accessed the context object when creating a custom REPL
object. The context object is a global object. When an application creates a
custom REPL, it exists within a new context, which in this case means it
has its own global object. The way to
override this and use the existing global object is to create a custom REPL and
set the useGlobal flag to
true, rather than the default of
false.
Modules exist in their own global namespace, which means that if you define a top-level variable in one module, it is not available in other modules. More importantly, it means that only what is explicitly exported from the module becomes part of whatever application includes the module. In fact, you can’t access a top-level module variable in an application or other module, even if you deliberately try.
To demonstrate, the following code contains a very simple module
that has a top-level variable named globalValue, and functions to set and return
the value. In the function that returns the value, the global object is printed out using a
console.log method
call.
var globalValue;

exports.setGlobal = function(val) {
   globalValue = val;
};

exports.returnGlobal = function() {
   console.log(global);
   return globalValue;
};
We might expect that in the printout of the global object we’ll see globalValue, as we do when we set a variable
in our applications. This doesn’t happen, though.
Start a REPL session and issue a require call to include the new module:
> var mod1 = require('./mod1.js');Set the value and then ask for the value back:
> mod1.setGlobal(34);
> var val = mod1.returnGlobal();
The console.log method
prints out the global object before
returning its globally defined value. We can see at the bottom the new
variable holding a reference to the imported module, but val is undefined because the variable hasn’t yet been
set. In addition, the output includes no reference to that module’s own
top-level globalValue:
  mod1: { setGlobal: [Function], returnGlobal: [Function] },
  _: undefined,
  val: undefined }
If we ran the command again, then the outer application variable
would be set, but we still wouldn’t see globalValue:
  mod1: { setGlobal: [Function], returnGlobal: [Function] },
  _: undefined,
  val: 34 }
The only access we have to the module data is by whatever means the module provides. For JavaScript developers, this means no more unexpected and harmful data collisions because of accidental or intentional global variables in libraries.
Each Node application is an instance of a Node process object, and as such, comes with
certain built-in functionality.
Many of the process object’s
methods and properties provide identification or information about the
application and its environment. The process.execPath method
returns the execution path for the Node application; process.version
provides the Node version; and process.platform
identifies the server platform:
console.log(process.execPath);
console.log(process.version);
console.log(process.platform);
This code returns the following in my system (at the time of this writing):
/usr/local/bin/node
v0.6.9
linux
The process object also wraps
the STDIO streams stdin, stdout, and stderr. Both stdin and stdout are
asynchronous, and are readable and writable, respectively. stderr, however, is a
synchronous, blocking stream.
To demonstrate how to read and write data from stdin and stdout, in Example 3-1 the Node
application listens for data in stdin, and repeats the
data to stdout. The stdin stream is paused
by default, so we have to issue a resume call before
sending data.
process.stdin.resume();

process.stdin.on('data', function (chunk) {
  process.stdout.write('data: ' + chunk);
});
Run the application using Node, and then start typing into the terminal. Every time you type something and press Enter, what you typed is reflected back to you.
Another useful process method is
memoryUsage, which
tells us how much memory the Node application is using. This could be
helpful for performance tuning, or just to satisfy your general
curiosity about the application. The response has the following
structure:
{ rss: 7450624, heapTotal: 2783520, heapUsed: 1375720 }The heapTotal and
heapUsed properties
refer to the V8 engine’s memory usage.
The last process method I’m
going to cover is process.nextTick. This
method attaches a callback function that’s fired during the next tick
(loop) in the Node event loop.
You would use process.nextTick if you
wanted to delay a function for some reason, but you wanted to delay it
asynchronously. A good example would be if you’re creating a new
function that has a callback function as a parameter and you want to
ensure that the callback is truly asynchronous. The following code is a
demonstration:
function asynchFunction = function (data, callback) {
   process.nextTick(function() {
      callback(val);
   });
);
If we just called the callback function, then the action would be synchronous. Now, the callback function won’t be called until the next tick in the event loop, rather than right away.
You could use setTimeout with a zero
(0) millisecond delay instead of
process.nextTick:
setTimeout(function() {
   callback(val);
}, 0);
However, setTimeout isn’t as
efficient as process.nextTick. When
they were tested against each other, process.nextTick was
called far more quickly than setTimeout with a
zero-millisecond delay. You might also use process.nextTick if
you’re running an application that has a function performing some
computationally complex, and time-consuming, operation. You could break
the process into sections, each called via process.nextTick, to
allow other requests to the Node application to be processed without
waiting for the time-consuming process to finish.
Of course, the converse of this is that you don’t want to break up a process that you need to ensure executes sequentially, because you may end up with unexpected results.
The Buffer class, also
a global object, is a way of handling binary data in Node. In the
section Servers, Streams, and Sockets later
in the chapter, I’ll cover the fact that streams are often binary data
rather than strings. To convert the binary data to a string, the data
encoding for the stream socket is changed using setEncoding.
As a demonstration, you can create a new buffer with the following:
var buf = new Buffer(string);
If the buffer holds a string, you can pass in an optional second parameter with the encoding. Possible encodings are:
asciiSeven-bit ASCII
utf8Multibyte encoded Unicode characters
usc2Two bytes, little-endian-encoded Unicode characters
base64Base64 encoding
hexEncodes each byte as two hexadecimal characters
You can also write a string to an existing buffer, providing an
optional offset, length, and encoding:
buf.write(string); // offset defaults to 0, length defaults to
                     buffer.length - offset, encoding is utf8
Data sent between sockets is transmitted as a buffer (in binary
format) by default. To send a string instead, you either need to call
setEncoding directly on
the socket, or specify the encoding in the function that writes to the
socket. By default, the TCP (Transmission Control Protocol) socket.write method
sets the second parameter to utf8,
but the socket returned in the connectionListener
callback to the TCP createServer function
sends the data as a buffer, not a string.
The timer functions in client-side JavaScript are part of
the global windows object. They’re not
part of JavaScript, but have become such a ubiquitous part of JavaScript
development that the Node developers incorporated them into the Node core
API.
The timer functions operate in Node just like they operate in the browser. In fact, they operate in Node exactly the same as they would in Chrome, since Node is based on Chrome’s V8 JavaScript engine.
The Node setTimeout function takes
a callback function as first parameter, the delay time (in milliseconds)
as second parameter, and an optional list of arguments:
// timer to open file and read contents to HTTP response object
function on_OpenAndReadFile(filename, res) {

  console.log('opening ' + filename);

  // open and read in file contents
  fs.readFile(filename, 'utf8', function(err, data) {
     if (err)
         res.write('Could not find or open file for reading\n');
     else {
         res.write(data);
     }
  // reponse is done
  res.end();
}

setTimeout(openAndReadFile, 2000, filename, res);
In the code, the callback function on_OpenAndReadFile opens and reads a file to the
HTTP response when the function is called after approximately 2,000
milliseconds have passed.
As the Node documentation carefully notes, there’s no guarantee
that the callback function will be invoked in exactly
n milliseconds (whatever
n is). This is no different than the use of
setTimeout in a
browser—we don’t have absolute control over the environment, and factors
could slightly delay the timer.
The function clearTimeout clears a
preset setTimeout. If you need
to have a repeating timer, you can use setInterval to call a
function every n
milliseconds—n being the second parameter
passed to the function. Clear the interval with clearInterval.
Much of the Node core API has to do with creating services that listen to specific types of communications. In the examples in Chapter 1, we used the HTTP module to create an HTTP web server. Other methods can create a TCP server, a TLS (Transport Layer Security) server, and a UDP (User Datagram Protocol)/datagram socket. I’ll cover TLS in Chapter 15, but in this section I want to introduce the TCP and UDP Node core functionality. First, though, I’ll offer a brief introduction to the terms used in this section.
A socket is an endpoint in a communication, and a network socket is an endpoint in a communication between applications running on two different computers on the network. The data flows between the sockets in what’s known as a stream. The data in the stream can be transmitted as binary data in a buffer, or in Unicode as a string. Both types of data are transmitted as packets: parts of the data split off into specifically sized pieces. There is a special kind of packet, a finish packet (FIN), that is sent by a socket to signal that the transmission is done. How the communication is managed, and how reliable the stream is, depends on the type of socket created.
We can create a basic TCP server and client with the Node Net module. TCP forms the basis for most Internet applications, such as web service and email. It provides a way of reliably transmitting data between client and server sockets.
Creating the TCP server is a little different than creating the
HTTP server in Example 1-1
in Chapter 1. We create
the server, passing in a callback function. The TCP server differs from
the HTTP server in that, rather than passing a requestListener, the TCP callback function’s
sole argument is an instance of a socket listening for incoming
connections.
Example 3-2 contains the code to create a TCP server. Once the server socket is created, it listens for two events: when data is received, and when the client closes the connection.
var net = require('net');

var server = net.createServer(function(conn) {
   console.log('connected');

   conn.on('data', function (data) {
      console.log(data + ' from ' + conn.remoteAddress + ' ' +
        conn.remotePort);
      conn.write('Repeating: ' + data);
   });

   conn.on('close', function() {
        console.log('client closed connection');
   });

}).listen(8124);

console.log('listening on port 8124');
There is an optional parameter for createServer: allowHalfOpen. Setting
this parameter to true instructs the
socket not to send a FIN when it receives a FIN packet from the client.
Doing this keeps the socket open for writing (not reading). To close the
socket, you’d then need to explicitly use the end method. By default,
allowHalfOpen is
false.
Notice how a callback function is attached to the two events via
the on method. Many objects
in Node that emit events provide a way to attach a function as an event
listener by using the on method. This method
takes the name of the event as first parameter, and the function
listener as the second.
Node objects that inherit from a special object, the EventEmitter, expose
the on method event
handling, as discussed later in this chapter.
The TCP client is just as simple to create as the server, as shown
in Example 3-3. The call
to the setEncoding method on
the client changes the encoding for the received data. As discussed
earlier in the section Buffer, data is transmitted as
a buffer, but we can use setEncoding to read it
as a utf8 string. The socket’s
write method is used to
transmit the data. It also attaches listener functions to two events:
data, for received
data, and close, in case the
server closes the connection.
 var net = require('net');

var client = new net.Socket();
client.setEncoding('utf8');

// connect to server
client.connect ('8124','localhost', function () {
    console.log('connected to server');
    client.write('Who needs a browser to communicate?');
});

// prepare for input from terminal
process.stdin.resume();

// when receive data, send to server
process.stdin.on('data', function (data) {
   client.write(data);
});

// when receive data back, print to console
client.on('data',function(data) {
    console.log(data);
});

// when server closed
client.on('close',function() {
    console.log('connection is closed');
});
The data being transmitted between the two sockets is typed in at
the terminal, and transmitted when you press Enter. The client
application first sends the string you just typed, which the TCP server
writes out to the console. The server repeats the message back to the
client, which in turn writes the message out to the console. The server
also prints out the IP address and port for the client using the
socket’s remoteAddress and
remotePort properties.
Following is the console output for the server after several strings
were sent from the client (with the IP address edited out for
security):
Hey, hey, hey, hey-now.
 from #ipaddress 57251
Don't be mean, we don't have to be mean.
 from #ipaddress 57251
Cuz remember, no matter where you go,
 from #ipaddress 57251
there you are.
 from #ipaddress 57251
The connection between the client and server is maintained until
you kill one or the other using Ctrl-C. Whichever socket is still open
receives a close event that’s
printed out to the console. The server can also serve more than one
connection from more than one client, since all the relevant functions
are asynchronous.
As I mentioned earlier, TCP is the underlying transport mechanism for much of the functionality we use on the Internet today, including HTTP, which we’ll cover next.
You had a chance to work with the HTTP module in Chapter 1. We created servers using the
createServer method,
passing in the function that will act as the requestListener.
Requests are processed as they come, asynchronously.
In a network, TCP is the transportation layer and HTTP is the
application layer. If you scratch around in the modules included with
Node, you’ll see that when you create an HTTP server, you’re inheriting
functionality from the TCP-based net.Server.
For the HTTP server, the requestListener is a
socket, while the http.ServerRequest
object is a readable stream and the http.ServerResponse is
a writable stream. HTTP adds another level of complexity because of the
chunked transfer encoding it supports. The chunked
transfer encoding allows transfer of data when the exact size of the
response isn’t known until it’s fully processed. Instead, a zero-sized
chunk is sent to indicate the end of a query. This type of encoding is
useful when you’re processing a request such as a large database query
output to an HTML table: writing the data can begin before the rest of
the query data has been received.
More on streams in the upcoming section titled, appropriately enough, Streams, Pipes, and Readline.
The TCP examples earlier in this chapter, and the HTTP examples in Chapter 1, were both coded to work with network sockets. However, all of the server/socket modules can also connect to a Unix socket, rather than a specific network port. Unlike a network socket, a Unix or IPC (interprocess communication) socket enables communication between processes within the same system.
To demonstrate Unix socket communication, I duplicated Example 1-3’s code, but
instead of binding to a port, the new server binds to a Unix socket, as
shown in Example 3-4. The
application also makes use of readFileSync, the
synchronous version of the function to open a file and read its
contents.
// create server
// and callback function
var http = require('http');
var fs = require('fs');

http.createServer(function (req, res) {

  var query = require('url').parse(req.url).query;
  console.log(query);
  file = require('querystring').parse(query).file;

  // content header
  res.writeHead(200, {'Content-Type': 'text/plain'});

  // increment global, write to client
  for (var i = 0; i<100; i++) {
    res.write(i + '\n');
  }

  // open and read in file contents
  var data = fs.readFileSync(file, 'utf8');
  res.write(data);
  res.end();
}).listen('/tmp/node-server-sock');
The client is based on a code sample provided in the Node core
documentation for the http.request object at
the Node.js site. The http.request object, by
default, makes use of http.globalAgent, which
supports pooled sockets. The size of this pool is five sockets by
default, but you can adjust it by changing the agent.maxSockets
value.
The client accepts the chunked data returned from the server, printing out to the console. It also triggers a response on the server with a couple of minor writes, as shown in Example 3-5.
var http = require('http');

var options = {
   method: 'GET',
   socketPath: '/tmp/node-server-sock',
   path: "/?file=main.txt"
};

var req = http.request(options, function(res) {
  console.log('STATUS: ' + res.statusCode);
  console.log('HEADERS: ' + JSON.stringify(res.headers));
  res.setEncoding('utf8');
  res.on('data', function (chunk) {
    console.log('chunk o\' data: ' + chunk);
  });
});

req.on('error', function(e) {
  console.log('problem with request: ' + e.message);
});

// write data to request body
req.write('data\n');
req.write('data\n');
req.end();
I didn’t use the asynchronous file read function with the
http.request object
because the connection is already closed when the asynchronous function
is called and no file contents are returned.
Before leaving this section on the HTTP module, be aware that much of the behavior you’ve come to expect with Apache or other web servers isn’t built into a Node HTTP server. For instance, if you password-protect your website, Apache will pop up a window asking for your username and password; a Node HTTP server will not. If you want this functionality, you’re going to have to code for it.
Chapter 15 covers the SSL version of HTTP, HTTPS, along with Crypto and TLS/SSL.
TCP requires a dedicated connection between the two endpoints of the communication. UDP is a connectionless protocol, which means there’s no guarantee of a connection between the two endpoints. For this reason, UDP is less reliable and robust than TCP. On the other hand, UDP is generally faster than TCP, which makes it more popular for real-time uses, as well as technologies such as VoIP (Voice over Internet Protocol), where the TCP connection requirements could adversely impact the quality of the signal.
Node core supports both types of sockets. In the last couple of sections, I demonstrated the TCP functionality. Now, it’s UDP’s turn.
The UDP module identifier is dgram:
require ('dgram');To create a UDP socket, use the createSocket method,
passing in the type of socket—either udp4 or udp6. You can also pass in a callback function
to listen for events. Unlike messages sent with TCP, messages sent using
UDP must be sent as buffers, not strings.
Example 3-6
contains the code for a demonstration UDP client. In it, data is
accessed via process.stdin, and then
sent, as is, via the UDP socket. Note that we don’t have to set the
encoding for the string, since the UDP socket accepts only a buffer, and
the process.stdin data
is a buffer. We do, however, have to convert the
buffer to a string, using the buffer’s toString method, in
order to get a meaningful string for the console.log method call that echoes the
input.
var dgram = require('dgram');

var client = dgram.createSocket("udp4");

// prepare for input from terminal
process.stdin.resume();

process.stdin.on('data', function (data) {
   console.log(data.toString('utf8'));
   client.send(data, 0, data.length, 8124, "examples.burningbird.net",
      function (err, bytes) {
        if (err)
          console.log('error: ' + err);
        else
          console.log('successful');
   });
});
The UDP server, shown in Example 3-7, is even simpler
than the client. All the server application does is create the socket,
bind it to a specific port (8124), and listen for the message event. When a
message arrives, the application prints it out using console.log, along with the IP address
and port of the sender. Note especially that no encoding is necessary to
print out the message—it’s automatically converted from a buffer to a
string.
We didn’t have to bind the socket to a port. However, without the binding, the socket would attempt to listen in on every port.
var dgram = require('dgram');

var server = dgram.createSocket("udp4");

server.on ("message", function(msg, rinfo) {
   console.log("Message: " + msg + " from " + rinfo.address + ":"
                + rinfo.port);
});

server.bind(8124);
I didn’t call the close method on either
the client or the server after sending/receiving the message. However,
no connection is being maintained between the client and server—just the
sockets capable of sending a message and receiving
communication.
The communication stream between the sockets discussed in
the previous sections is an implementation of the underlying abstract
stream interface. Streams can be
readable, writable, or both, and all streams are instances of EventEmitter, discussed
in the upcoming section Events and EventEmitter.
It’s important to take away from this section that all of these
communication streams, including process.stdin and
process.stdout, are
implementations of the abstract stream interface. Because of this underlying
interface, there is basic functionality available in all streams in
Node:
You can change the encoding for the stream data with
setEncoding.
You can check whether the stream is readable, writable, or both.
You can capture stream events, such as data received or connection closed, and attach callback functions for each.
You can pause and resume the stream.
You can pipe data from a readable stream to a writable stream.
The last capability is one we haven’t covered yet. A simple way to demonstrate a pipe is to open a REPL session and type in the following:
> process.stdin.resume();
> process.stdin.pipe(process.stdout);
...and then enjoy the fact that everything you type from that point on is echoed back to you.
If you want to keep the output stream open for continued data,
pass an option, { end: false }, to
the output stream:
process.stdin.pipe(process.stdout, { end : false });There is one additional object that provides a specific
functionality to readable streams: readline. You include
the Readline module with code like the following:
var readline = require('readline');The Readline module allows line-by-line reading of a stream. Be
aware, though, that once you include this module, the Node program
doesn’t terminate until you close the interface and the stdin stream. The Node
site documentation contains an example of how to begin and terminate a
Readline interface, which I adapted in Example 3-8. The application
asks a question as soon as you run it, and then outputs the answer. It
also listens for any “command,” which is really any line that terminates
with \n. If the command is
.leave, it leaves the
application; otherwise, it just repeats the command and prompts the user
for more. A Ctrl-C or Ctrl-D key combination also causes the application
to terminate.
var readline = require('readline');

// create a new interface
var interface = readline.createInterface(process.stdin, process.stdout, null);

// ask question
interface.question(">>What is the meaning of life?  ", function(answer) {
   console.log("About the meaning of life, you said " + answer);
   interface.setPrompt(">>");
   interface.prompt();
});

// function to close interface
function closeInterface() {
   console.log('Leaving interface...');
   process.exit();
}
// listen for .leave
interface.on('line', function(cmd) {
   if (cmd.trim() == '.leave') {
      closeInterface();
      return;
   } else {
      console.log("repeating command: " + cmd);
   }
   interface.setPrompt(">>");
   interface.prompt();
});

interface.on('close', function() {
    closeInterface();
});
Here’s an example session:
>>What is the meaning of life?  ===
About the meaning of life, you said ===
>>This could be a command
repeating command: This could be a command
>>We could add eval in here and actually run this thing
repeating command: We could add eval in here and actually run this thing
>>And now you know where REPL comes from
repeating command: And now you know where REPL comes from
>>And that using rlwrap replaces this Readline functionality
repeating command: And that using rlwrap replaces this Readline functionality
>>Time to go
repeating command: Time to go
>>.leave
Leaving interface...
This should look familiar. Remember from Chapter 2 that we can use rlwrap to override the
command-line functionality for REPL. We use the following to trigger its
use:
env NODE_NO_READLINE=1 rlwrap node
And now we know what the flag is triggering—it’s instructing REPL
not to use Node’s Readline module for command-line processing, but to
use rlwrap instead.
This is a quick introduction to the Node stream modules. Now it’s time to change course, and check out Node’s child processes.
Operating systems provide access to a great deal of functionality, but much of it is only accessible via the command line. It would be nice to be able to access this functionality from a Node application. That’s where child processes come in.
Node enables us to run a system command within a new child process, and listen in on its input/output. This includes being able to pass arguments to the command, and even pipe the results of one command to another. The next several sections explore this functionality in more detail.
All but the last example demonstrated in this section use Unix commands. They work on a Linux system, and should work in a Mac. They won’t, however, work in a Windows Command window.
There are four different techniques you can use to create
a child process. The most common one is using the spawn method. This
launches a command in a new process, passing in any arguments. In the
following, we create a child process to call the Unix pwd command to print
the current directory. The command takes no arguments:
var spawn = require('child_process').spawn,
    pwd = spawn('pwd');

pwd.stdout.on('data', function (data) {
  console.log('stdout: ' + data);
});

pwd.stderr.on('data', function (data) {
  console.log('stderr: ' + data);
});

pwd.on('exit', function (code) {
  console.log('child process exited with code ' + code);
});
Notice the events that are captured on the child process’s
stdout and stderr. If no error
occurs, any output from the command is transmitted to the child
process’s stdout, triggering a
data event on the
process. If an error occurs, such as in the following where we’re
passing an invalid option to the command:
var spawn = require('child_process').spawn,
    pwd = spawn('pwd', ['-g']);
Then the error gets sent to stderr, which prints
out the error to the console:
stderr: pwd: invalid option -- 'g'
Try `pwd --help' for more information.

child process exited with code 1
The process exited with a code of 1, which signifies that an error occurred. The
exit code varies depending on the operating system and error. When no
error occurs, the child process exits with a code of 0.
The earlier code demonstrated sending output to the child
process’s stdout and stderr, but what about
stdin? The Node documentation for
child processes includes an example of directing data to stdin. It’s used to
emulate a Unix pipe (|) whereby the result of one command is immediately
directed as input to another command. I adapted the example in order to
demonstrate one of my favorite uses of the Unix pipe—being able to look
through all subdirectories, starting in the local directory, for a file
with a specific word (in this case, test) in its
name:
find . -ls | grep test
Example 3-9
implements this functionality as child processes. Note that the first
command, which performs the find, takes two
arguments, while the second one takes just one: a term passed in via
user input from stdin. Also note that,
unlike the example in the Node documentation, the grep child process’s
stdout encoding is
changed via setEncoding. Otherwise,
when the data is printed out, it would be printed out as a
buffer.
var spawn = require('child_process').spawn,
    find = spawn('find',['.','-ls']),
    grep = spawn('grep',['test']);

grep.stdout.setEncoding('utf8');

// direct results of find to grep
find.stdout.on('data', function(data) {
   grep.stdin.write(data);
});

// now run grep and output results
grep.stdout.on('data', function (data) {
  console.log(data);
});

// error handling for both
find.stderr.on('data', function (data) {
  console.log('grep stderr: ' + data);
});
grep.stderr.on('data', function (data) {
  console.log('grep stderr: ' + data);
});

// and exit handling for both
find.on('exit', function (code) {
  if (code !== 0) {
    console.log('find process exited with code ' + code);
  }

  // go ahead and end grep process
  grep.stdin.end();
});

grep.on('exit', function (code) {
  if (code !== 0) {
    console.log('grep process exited with code ' + code);
  }
});
When you run the application, you’ll get a listing of all files in the current directory and any subdirectories that contain test in their filename.
All of the example applications up to this point work the same in Node 0.8 as in Node 0.6. Example 3-9 is an exception because of a change in the underlying API.
In Node 0.6, the exit event would not be
emitted until the child process exits and all STDIO pipes are closed. In
Node 0.8, the event is emitted as soon as the child process finishes.
This causes the application to crash, because the grep child process’s STDIO pipe is closed when
it tries to process its data. For the application to work in Node 0.8,
the application needs to listen for the close event on the
find child process, rather than the
exit event:
// and exit handling for both
find.on('close', function (code) {
  if (code !== 0) {
    console.log('find process exited with code ' + code);
  }

  // go ahead and end grep process
  grep.stdin.end();
});
In Node 0.8, the close event is emitted
when the child process exits and all STDIO pipes are closed.
In addition to spawning a child process, you can also use
child_process.exec and child_process.execFile to run a command in a
shell and buffer the results. The only difference between child_process.exec and child_process.execFile is that execFile runs an application in a file, rather
than running a command.
The first parameter in the two methods is either the command or
the file and its location; the second parameter is options for the
command; and the third is a callback function. The callback function
takes three arguments: error, stdout, and stderr. The data is buffered to stdout if no error occurs.
If the executable file contains:
#!/usr/local/bin/node

console.log(global);
the following application prints out the buffered results:
var execfile = require('child_process').execFile,
    child;

child = execfile('./app.js', function(error, stdout, stderr) {
  if (error == null) {
    console.log('stdout: ' + stdout);
  }
});The last child process method is child_process.fork.
This variation of spawn is for
spawning Node processes.
What sets the child_process.fork
process apart from the others is that there’s an actual communication
channel established to the child process. Note, though, that each
process requires a whole new instance of V8, which takes both time and
memory.
Earlier I warned you that child processes that invoke Unix system commands won’t work with Windows, and vice versa. I know this sounds obvious, but not everyone knows that, unlike with JavaScript in browsers, Node applications can behave differently in different environments.
It wasn’t until recently that the Windows binary installation of
Node even provided access to child processes. You also need to invoke
whatever command you want to run via the Windows command interpreter,
cmd.exe.
Example 3-10
demonstrates running a Windows command. In the application, Windows
cmd.exe is used to
create a directory listing, which is then printed out to the console via
the data event handler.
var cmd = require('child_process').spawn('cmd', ['/c', 'dir\n']);

cmd.stdout.on('data', function (data) {
    console.log('stdout: ' + data);
});

cmd.stderr.on('data', function (data) {
    console.log('stderr: ' + data);
});

cmd.on('exit', function (code) {
    console.log('child process exited with code ' + code);
});
The /c flag passed as the
first argument to cmd.exe instructs it to
carry out the command and then terminate. The application doesn’t work
without this flag. You especially don’t want to pass in the /K flag, which tells
cmd.exe to execute the
application and then remain because your application won’t
terminate.
I provide more demonstrations of child processes in Chapter 9 and Chapter 12.
The DNS module provides DNS resolution using c-ares, a C library that provides asynchronous DNS requests. It’s used by Node with some of its other modules, and can be useful for applications that need to discover domains or IP addresses.
To discover the IP address given a domain, use the dns.lookup method and
print out the returned IP address:
var dns = require('dns');
dns.lookup('burningbird.net',function(err,ip) {
   if (err) throw err;
   console.log(ip);
});
The dns.reverse method
returns an array of domain names for a given IP address:
dns.reverse('173.255.206.103', function(err,domains) {
domains.forEach(function(domain) {
  console.log(domain);
  });
});
The dns.resolve method
returns an array of record types by a given type, such as A, MX, NS, and so on. In the
following code, I’m looking for the name server domains for my domain
name, burningbird.net:
var dns = require('dns');
dns.resolve('burningbird.net', 'NS', function(err,domains) {
domains.forEach(function(domain) {
  console.log(domain);
  });
});
This returns:
ns1.linode.com
ns3.linode.com
ns5.linode.com
ns4.linode.com
We used the URL module in Example 1-3 in Chapter 1. This simple module provides a way of parsing a URL and returning an object with all of the URL components. Passing in the following URL:
var url = require('url');
var urlObj = url.parse('http://examples.burningbird.net:8124/?file=main');
returns the following JavaScript object:
{ protocol: 'http:',
  slashes: true,
  host: 'examples.burningbird.net:8124',
  port: '8124',
  hostname: 'examples.burningbird.net',
  href: 'http://examples.burningbird.net:8124/?file=main',
  search: '?file=main',
  query: 'file=main',
  pathname: '/',
  path: '/?file=main' }
Each of the components can then be discretely accessed like so:
var qs = urlObj.query; // get the query string
Calling the URL.format method
performs the reverse operation:
console.log(url.format(urlObj)); // returns original URL
The URL module is often used with the Query String module. The latter module is a simple utility module that provides functionality to parse a received query string, or prepare a string for use as a query string.
To chunk out the key/value pairs in the query string, use the
querystring.parse method.
The following:
var vals = querystring.parse('file=main&file=secondary&type=html");results in a JavaScript object that allows for easy access of the individual query string values:
{ file: [ 'main', 'secondary' ], type: 'html' }Since file is given twice in the
query string, both values are grouped into an array, each of which can be
accessed individually:
console.log(vals.file[0]); // returns main
You can also convert an object into a query string, using querystring.stringify:
var qryString = querystring.stringify(vals)
The Utilities module provides several useful functions. You include this module with:
var util = require('util');You can use Utilities to test if an object is an array (util.isArray) or regular expression (util.isRegExp), and to format a string (util.format). A new experimental addition to the
module provides functionality to pump data from a readable stream to a
writable stream (util.pump):
util.pump(process.stdin, process.stdout);
However, I wouldn’t type this into REPL, as anything you type from that point on is echoed as soon as you type it—making the session a little awkward.
I make extensive use of util.inspect to get a
string representation of an object. I find it’s a great way to discover
more about an object. The first required argument is the object; the
second optional argument is whether to display the nonenumerable
properties; the third optional argument is the number of times the object
is recursed (depth); and the fourth, also optional, is whether to style
the output in ANSI colors. If you assign a value of null to the depth, it recurses indefinitely (the
default is two times)—as much as necessary to exhaustively inspect the
object. From experience, I’d caution you to be careful using null for the depth because you’re going to get a
large output.
You can use util.inspect in REPL, but
I recommend a simple application, such as the following:
var util = require('util');
var jsdom = require('jsdom');

console.log(util.inspect(jsdom, true, null, true));
When you run it, pipe the result to a file:
node inspectjsdom.js > jsdom.txt
Now you can inspect and reinspect the object interface at your
leisure. Again, if you use null for
depth, expect a large output file.
The Utilities module provides several other methods, but the one
you’re most likely to use is util.inherits. The
util.inherits function takes two
parameters, constructor and
superConstructor. The
result is that the constructor will inherit the functionality from the
superconstructor.
Example 3-11
demonstrates all the nuances associated with using util.inherits. The explanation of the code
follows.
Example 3-11 and its explanation cover some core JavaScript functionality you might already be familiar with. However, it’s important that all readers come away from this section with the same understanding of what’s happening.
var util = require('util');

// define original object
function first() {
  var self = this;
  this.name = 'first';
  this.test = function() {
    console.log(self.name);
   };
}

first.prototype.output = function() {
   console.log(this.name);
}

// inherit from first
function second() {
  second.super_.call(this);
  this.name = 'second';
}
util.inherits(second,first);

var two = new second();


function third(func) {
   this.name = 'third';
   this.callMethod = func;
}

var three = new third(two.test);

// all three should output "second"
two.output();
two.test();
three.callMethod();
The application creates three objects named first, second, and third, respectively.
The first object has two methods:
test and output. The test method is defined directly in the object,
while the output method is added later
via the prototype object. The reason I
used both techniques for defining a method on the object is to demonstrate
an important aspect of inheritance with util.inherits (well, of JavaScript, but enabled
by util.inherits).
The second object contains the
following line:
second.super_.call(this);
If we eliminate this line from the second object constructor, any call to output on the second object would succeed, but a call to
test would generate an error and force
the Node application to terminate with a message about test being undefined.
The call method chains the
constructors between the two objects, ensuring that the superconstructor
is invoked as well as the constructor. The superconstructor is the
constructor for the inherited object.
We need to invoke the superconstructor since the test method doesn’t exist until first is created. However, we didn’t need the
call method for the output method, because it’s defined directly on
the first object’s prototype object. When the second object inherits properties from the
first, it also inherits the newly added
method.
If we look under the hood of util.inherits, we see where super_ is defined:
exports.inherits = function(ctor, superCtor) {
  ctor.super_ = superCtor;
  ctor.prototype = Object.create(superCtor.prototype, {
    constructor: {
      value: ctor,
      enumerable: false,
      writable: true,
      configurable: true
    }
  });
};
super_ is assigned as a property
to the second object when util.inherits is called:
util.inherits (second, first);
The third object in the application, third, also has a name property. It doesn’t inherit from either
first or second, but does expect a function passed to it
when it’s instantiated. This function is assigned to its own callMethod property. When the code creates an
instance of this object, the two object
instance’s test method is passed to the
constructor:
var three = new third(two.test);
When three.callMethod is called,
“second” is output, not “third” as you might expect at first glance. And
that’s where the self reference in the
first object comes in.
In JavaScript, this is the object
context, which can change as a method is passed around, or passed to an
event handler. The only way you can preserve data for an object’s method
is to assign this to an object
variable—in this case, self—and then
use the variable within any functions in the object.
Running this application results in the following output:
second
second
second
Much of this is most likely familiar to you from client-side
JavaScript development, though it’s important to understand the Utilities
part in the inheritance. The next section, which provides an overview of
Node’s EventEmitter, features
functionality that is heavily dependent on the inheritance behavior just
described.
Scratch underneath the surface of many of the Node core
objects, and you’ll find EventEmitter.
Anytime you see an object emit an event, and an event handled with
on, you’re seeing
EventEmitter in action. Understanding
how EventEmitter works and how to use
it are two of the more important components of Node development.
The EventEmitter object is what
provides the asynchronous event handling to objects in Node. To
demonstrate its core functionality, we’ll try a quick test
application.
First, include the Events module:
var events = require('events');Next, create an instance of EventEmitter:
var em = new events.EventEmitter();
Use the newly created EventEmitter instance to do two essential tasks:
attach an event handler to an event, and emit the actual event. The
on event handler is
triggered when a specific event is emitted. The first parameter to the
method is the name of the event, the second a function to process the
event:
em.on('someevent', function(data) { ... });The event is emitted on the object, based on some criteria, via the
emit method:
if (somecriteria) {
   en.emit('data');
}
In Example 3-12, we
create an EventEmitter instance that
emits an event, timed, every three
seconds. In the event handler function for this event, a message with a
counter is output to the console.
var eventEmitter = require('events').EventEmitter;
var counter = 0;

var em = new eventEmitter();

setInterval(function() { em.emit('timed', counter++); }, 3000);

em.on('timed', function(data) {
  console.log('timed ' + data);
});
Running the application outputs timed event messages to the console until the application is terminated.
This is an interesting example, but not particularly helpful. What
we need is the ability to add EventEmitter functionality to our existing
objects—not use instances of EventEmitter throughout our applications.
To add this necessary EventEmitter functionality to an object, use the
util.inherits method,
described in the preceding section:
util.inherits(someobj, EventEmitter);
By using util.inherits with the
object, you can call the emit method within the
object’s methods, and code event handlers on the object instances:
someobj.prototype.somemethod = function() { this.emit('event'); };
...
someobjinstance.on('event', function() { });
Rather than attempt to decipher how EventEmitter works in the abstract sense, let’s
move on to Example 3-13,
which shows a working example of an object inheriting EventEmitter’s functionality. In the
application, a new object, inputChecker, is created. The constructor takes
two values, a person’s name and a filename. It assigns the person’s name
to an object variable, and also creates a reference to a writable stream
using the File System module’s createWriteStream method
(for more on the File System module, see the sidebar Readable and Writable Stream).
The object also has a method, check, that checks incoming data for specific
commands. One command (wr:) triggers a
write event, another (en:) an end
event. If no command is present, then an echo event is triggered.
The object instance provides event handlers for all three events. It
writes to the output file for the write event, it echoes the input for the
commandless input, and it terminates the application with an end event,
using the process.exit method.
All input comes from standard input (process.stdin).
var util = require('util');
var eventEmitter = require('events').EventEmitter;
var fs = require('fs');

function inputChecker (name, file) {
   this.name = name;
   this.writeStream = fs.createWriteStream('./' + file + '.txt',
      {'flags' : 'a',
       'encoding' : 'utf8',
       'mode' : 0666});
};

util.inherits(inputChecker,eventEmitter);

inputChecker.prototype.check = function check(input) {
  var command = input.toString().trim().substr(0,3);
  if (command == 'wr:') {
     this.emit('write',input.substr(3,input.length));
  } else if (command == 'en:') {
     this.emit('end');
  } else {
     this.emit('echo',input);
  }
};
// testing new object and event handling
var ic = new inputChecker('Shelley','output');

ic.on('write', function(data) {
   this.writeStream.write(data, 'utf8');
});

ic.on('echo', function( data) {
   console.log(this.name + ' wrote ' + data);
});

ic.on('end', function() {
   process.exit();
});

process.stdin.resume();
process.stdin.setEncoding('utf8');
process.stdin.on('data', function(input) {
    ic.check(input);
});
The EventEmitter functionality is
bolded in the example. Note that the functionality also includes the
process.stdin.on event
handler method, since process.stdin is one of
the many Node objects that inherit from EventEmitter.
We don’t have to chain the constructors from the new object to
EventEmitter, as demonstrated in the
earlier example covering util.inherits, because
the functionality we need—on and emit—consists of prototype methods, not object
instance properties.
The on method is really a
shortcut for the EventEmitter.addListener
method, which takes the same parameters. So this:
ic.addListener('echo', function( data) {
   console.log(this.name + ' wrote ' + data);
});
is exactly equivalent to:
ic.on('echo', function( data) {
   console.log(this.name + ' wrote ' + data);
});
You can listen only to the first event with:
ic.once(event, function);
When you exceed 10 listeners for an event, you’ll get a warning by
default. Use setMaxListeners, passing
in a number, to change the number of listeners. Use a value of zero
(0) for an unlimited amount of
listeners.
Many of the core Node objects, as well as third-party modules, make
use of EventEmitter. In Chapter 4, I’ll demonstrate how to convert the
code in Example 3-13 into a
module.
Node’s basic implementation is kept as streamlined as possible. Rather than incorporate every possible component of use directly into Node, developers offer additional functionality via Node’s modules.
Node’s module system is patterned after the CommonJS module system, a way of creating modules so that they’re interoperable. The core of the system is a contract that developers adhere to in order to ensure that their modules play well with others.
Among the CommonJS module system requirements implemented with Node are:
Support is included for a require function that takes the module
identifier and returns the exported API.
The module name is a string of characters, and may include forward slashes (for identification of path).
The module must specifically export that which is to be exposed outside the module.
Variables are private to the module.
In the next several sections, we’ll see how Node adheres to these requirements.
Node supports a simple module loading system: there is a one-to-one correspondence between the file and module.
To include a module within a Node application, use the require statement, passing in a string with the
identifier for the module:
var http = require ('http');You can also just include a specific object, rather than all objects, from a module:
var spawn = require('child_process').spawn;You can load core modules—i.e., those native to Node—or
modules from the node_modules folder just by providing the
module identifier, such as http for the
HTTP module. Modules not part of core, or not included in the node_modules folder, should include forward
slashes to indicate the path. As an example, Node expects to find the
module named mymodule.js in the same
directory as the Node application in the following require statement:
require ('./mymodule');Or you can use the full path:
require ('/home/myname/myapp/mymodule.js');Module files can have either a .js, .node, or .json file extension. The .node extension assumes that the file is a compiled binary, not a text file containing JavaScript.
Node core modules have higher priority than external modules. If
you’re trying to load a custom module named http, Node loads the core version of the HTTP
module. You’ll have to provide either a different module identifier, or
you’ll need to provide the full path.
Earlier I mentioned the node_modules folder. If you specify the node identifier without providing a path, and the module isn’t a core module, Node first looks for a node_modules folder local to the application, and searches for the module in this folder. If it doesn’t find the module, Node then looks in the parent subdirectory for a node_modules folder and the node, and so on.
If the module is named mymodule,
and the application is located in a subdirectory with the following
path:
/home/myname/myprojects/myapp
then Node looks for the module using the following searches, in turn:
/home/myname/myprojects/myapp/node_modules/mymodule.js
/home/myname/myprojects/node_modules/mymodule.js
/home/myname/node_modules/mymodule.js
/node_modules/mymodule.js
Node can optimize the search depending on where the file issuing the
require statement resides. For
instance, if the file making the require statement is itself a module in a
subdirectory of the node_modules
folder, Node begins the search for the required module in the topmost
node_modules folder.
There are two additional variations of require: require.resolve and
require.cache. The
require.resolve method
performs the lookup for the given module but, rather than load the module,
just returns the resolved filename. The resolve.cache object
contains a cached version of all loaded modules. When you try to load the
module again in the same context, it’s loaded from the cache. If you want
to force a new load, delete the item from the cache.
If the item’s path is:
var circle = require('./circle.js');delete it with:
delete require.cache('./circle.js');This code forces a reload of the module the next time a require is called on it.
As mentioned earlier, much of the rich functionality associated with Node comes in via third-party modules. There are router modules, modules for working with relational or document database systems, template modules, testing modules, and even modules for payment gateways.
Though there is no formal Node module developer system, developers are encouraged to upload their modules to GitHub. Following are good resources for finding Node modules:
npm registry (http://search.npmjs.org/)
Node module wiki (https://github.com/joyent/node/wiki/modules)
The node-toolbox (http://toolbox.no.de/)
Nipster! (http://eirikb.github.com/nipster/)
The modules are roughly categorized into different types such as the aforementioned routers, database, templating, payment gateway, and so on.
To use a module, you can download the source from GitHub (or wherever the source is located), and then install it manually into your application environment. Most modules provide basic installation instructions, or, at a minimum, you can deduce the installation requirements by examining the files and directories included in the module. However, there is a far easier way to install a Node module: using the Node Package Manager (npm).
The npm site is at http://npmjs.org/. You can find basic instructions on npm at http://npmjs.org/doc/README.html. Essential reading for Node module developers is the Developers section of the npm manual, found at http://npmjs.org/doc/developers.html. For a useful post explaining the differences between local and global installation, see http://blog.nodejs.org/2011/03/23/npm-1-0-global-vs-local-installation/.
Modern installations include npm, but you can double-check for its
existence by typing npm at the
command line in the same environment that you use to access Node.
To get an overview of npm commands, use the following:
$ npm help npm
Modules can be installed globally or locally. The local installation is the best approach if you’re working on a project and not everyone sharing the system needs access to this module. A local installation, which is the default, installs the module in the current location in the node_modules directory.
$ npm install modulenameAs an example, to install Connect, a very popular middleware framework, use the following:
$ npm install connect
npm not only installs Connect, it also discovers its module dependencies and installs them, too, as shown in Figure 4-1.
Once it’s installed, you can find the module in your local directory’s node_modules directory. Any dependencies are installed in that module’s node_modules directory.
If you want to install the package globally, use the -g or --global option:
$ npm -g install connect
These examples install packages that are registered at the npm site. You can also install a module that’s in a folder on the filesystem, or a tarball that’s either local or fetched via a URL:
npm install http://somecompany.com/somemodule.tgz
If the package has versions, you can install a specific version:
npm install modulename@0.1npm can also work with Git, as demonstrated in the Appendix A.
You can even install an old friend, jQuery:
npm install jquery
Now you can make use of a familiar syntax in your Node application development.
If you’re no longer using a module, you can uninstall it:
npm uninstall modulenameThe following command tells npm to check for new modules, and perform an update if any are found:
npm update
Or you can update a single module:
npm update modulenameIf you just want to check to see if any packages are outdated, use the following:
npm outdated
Again, you can run this command against a single module.
List installed packages and dependencies with list, ls, la, or ll:
npm ls
The la and ll options provide
extended descriptions. The following is the text I get running
npm ll in my Windows 7
machine:
C:\Users\Shelley>npm ls ll
npm WARN jsdom >= 0.2.0 Unmet dependency in C:\Users\Shelley\node_modules\html5
C:\Users\Shelley
├── async@0.1.15
├── colors@0.6.0-1
├── commander@0.5.2
├─┬ connect@1.8.5
│ ├── formidable@1.0.8
│ ├── mime@1.2.4
│ └── qs@0.4.1
├─┬ html5@v0.3.5
│ ├── UNMET DEPENDENCY jsdom >= 0.2.0
│ ├── opts@1.2.2
│ └─┬ tap@0.0.13
│   ├── inherits@1.0.0
│   ├── tap-assert@0.0.10
│   ├── tap-consumer@0.0.1
│   ├── tap-global-harness@0.0.1
│   ├── tap-harness@0.0.3
│   ├── tap-producer@0.0.1
│   ├── tap-results@0.0.2
│   ├─┬ tap-runner@0.0.7
│   │ ├── inherits@1.0.0
│   │ ├── slide@1.1.3
│   │ ├── tap-assert@0.0.10
│   │ ├── tap-consumer@0.0.1
│   │ ├── tap-producer@0.0.1
│   │ ├── tap-results@0.0.2
│   │ └── yamlish@0.0.3
│   ├── tap-test@0.0.2
│   └── yamlish@0.0.2
└─┬ optimist@0.3.1
  └── wordwrap@0.0.2
Note the warning about an unmet dependency for the HTML5 module. The HTML5 module requires an older version of the JSDOM library. To correct this, I installed the necessary version of the module:
npm install jsdom@0.2.0
You can also directly install all dependencies with the -d flag. For instance, in
the directory for the module, type the following:
npm install -d
If you want to install a version of the module that hasn’t yet been uploaded to the npm registry, you can install directly from the Git repository:
npm install https://github.com/visionmedia/express/tarball/master
Use caution, though, as I’ve found that when you install a not-yet-released version of a module, and you do an npm update, the npm registry version can overwrite the version you’re using.
To see which modules are installed globally, use:
npm ls -g
You can learn more about your npm installation using the config command. The
following lists the npm configuration settings:
npm config list
You can get a more in-depth look at all configuration settings with:
npm config ls -l
You can modify or remove configuration settings either by using a command line:
npm config deletekeynamenpm config setkeynamevalue
or by directly editing the configuration file:
$ npm config edit
I would strongly recommend you leave your npm configuration settings alone, unless you’re very sure of a change’s effect.
You can also search for a module using whatever terms you think might return the best selection:
npm search html5 parser
The first time you do a search, npm builds an index, which can take a few minutes. When it’s finished, though, you’ll get a list of possible modules that match the term or terms you provided. The search terms html5 and parser returned just two modules: HTML5, an HTML parser that includes support for SVG and MathML; and Fabric, an object model with support for HTML5 Canvas and an SVG-to-Canvas parser.
The npm website provides a registry of modules you can browse through, and an up-to-date listing of modules most depended on—that is, modules most used by other modules or by Node applications. In the next section, I’ll cover a sampling of these modules.
I’ll cover other npm commands later in this chapter, in the section Creating Your Own Custom Module.
Though Node.js has been active only for a few years, it’s already attracted a large body of work. When you look at the Node.js modules wiki page, you’ll find a significant number of modules. The good thing is, you can find a lot of useful modules that implement the functionality you need. The bad news is, it’s difficult to determine which module to use—in other words, which modules are “best of breed.”
Using a search tool like Google can give you a fair idea of which modules are popular. For example, it quickly became apparent when I was exploring middleware and framework modules that Connect and Express were very popular.
In addition, when you look at the GitHub registry for the item, you can see if it’s actively supported and up to date with the current Node installation. As another example, I was checking out a tool named Apricot, which does HTML parsing and is recommended in the Node documentation, but then I noticed it hadn’t been updated for some time, and when I tried to use the module, I found it didn’t work with my installation of Node (at least, not when this book was written).
Many of the modules provide example applications, and a quick test of these will let you know if you can use the module in your current environment.
As mentioned, the Node documentation site does provide a listing of recommended third-party modules, starting with the npm, which is now incorporated into the Node installation. However, the npm website and its module registry provide us with a better view of what modules are used in most applications.
At the npm registry page, you can search for modules, but you can also review a list of the “most depended on” modules, which are modules used either in other modules or in Node applications. At the time of this writing, the top modules were:
I’ll cover several of these modules in future chapters, but I want to cover three now—both because they give us a chance to better understand how Node works, and because they are especially useful. They are:
Colors
Optimist
Underscore
Colors is one of the simpler modules. You can use it to
provide different color and style effects to the console.log output, and
that’s it. However, it’s also a good demonstration of an effective
module because it is simple to use, focuses on providing one service,
and does a good job with that one service.
Testing how a module works is a great reason for using REPL. To try Colors, install it using npm like so:
$ npm install colors
Open a new REPL session and include the colors library:
> var colors = require('colors');Because the Colors module is included in the current location’s node_modules subdirectory, Node is able to find it rather quickly.
Now try something out, such as the following:
console.log('This Node kicks it!'.rainbow.underline);The result is a colorful, underlined rendering of your message. The style applies only for the one message—you’ll need to apply another style for another message.
If you’ve worked with jQuery, you recognize the chaining used to
combine effects. The example makes use of two: a font effect, underlined, and a font color, rainbow.
Try another, this time zebra
and bold:
console.log('We be Nodin'.zebra.bold);You can change the style for sections of the console message:
console.log('rainbow'.rainbow, 'zebra'.zebra);Why would something like Colors be useful? One reason is that it enables us to specify formatting for various events, such as displaying one color for errors in one module, another color or effect for warnings in a second module, and so on. To do this, you can use the Colors presets or create a custom theme:
> colors.setTheme({
....... mod1_warn: 'cyan',
....... mod1_error: 'red',
....... mod2_note: 'yellow'
....... });
> console.log("This is a helpful message".mod2_note);
This is a helpful message
> console.log("This is a bad message".mod1_error);
This is a bad messageFind more on Colors at https://github.com/Marak/colors.js.
Optimist is another module focused on solving a specific problem: parsing command options. That’s it, that’s all it does—but it does it very well.
As an example, this simple application uses the Optimist module to print command-line options to the console.
#!/usr/local/bin/node
var argv = require('optimist').argv;
console.log(argv.o + " " + argv.t);
You can run the application with short options. The following
prints the values of 1 and 2 out to the console:
./app.js -o 1 -t 2
You can also process long options:
#!/usr/local/bin/node
var argv = require('optimist').argv;
console.log(argv.one + " " + argv.two);
and test with the following, resulting in a printout of My Name:
./app2.js --one="My" --two="Name"
You can also use the Optimist module to process Boolean and unhyphenated options.
Read more about Optimist at https://github.com/substack/node-optimist.
Install the Underscore module with:
npm install underscore
According to the developers, Underscore is a utility-belt library for Node. It provides a lot of extended JavaScript functionality we’re used to with third-party libraries, such as jQuery or Prototype.js.
Underscore is so named because, traditionally, its
functionality is accessed with an underscore (_), similar to jQuery’s $. Here’s an example:
var _ = require('underscore');
_.each(['apple','cherry'], function (fruit) { console.log(fruit); });
Of course, the problem with the underscore is that this character
has a specific meaning in REPL. No worries, though—we can just use
another variable, us:
var us = require('underscore');
us.each(['apple','cherry'], function(fruit) { console.log(fruit); });
Underscore provides expanded functionality for arrays, collections, functions, objects, chaining, and general utility. Fortunately, there’s also excellent documentation for all of its functionality, so I’ll forgo detailing any of it here.
However, I do want to mention one nice capability: a controlled
way to extend Underscore with your own utility functions, via the
mixin function. We can
quickly try this method, and the others, in a REPL session:
> var us = require('underscore');
undefined
> us.mixin({
... betterWithNode: function(str) {
..... return str + ' is better with Node';
..... }
... });
> console.log(us.betterWithNode('chocolate'));
chocolate is better with NodeYou’ll see the term mixin used in several Node modules. It’s based on a pattern where properties of one object are added (“mixed in”) to another.
Of course, it makes more sense to extend Underscore from a module that we can reuse in our applications, which leads us to our next topic—creating our own custom modules.
Just as you do for your client-side JavaScript, you’ll want to split off reusable JavaScript into its own libraries. The only difference is that you need to take a couple of extra steps to convert your JavaScript library into a module for use with Node.
Let’s say you have a JavaScript library function, concatArray, that takes a string and an array of
strings, and concatenates the first string to each string in the
array:
function concatArray(str, array) {
  return array.map(function(element) {
       return str + ' ' + element;
  });
}
You want to use this function, as well as others, in your Node applications.
To convert your JavaScript library for use in Node, you’ll need to
export all of your exposed functions using the exports object, as shown
in the following code:
exports.concatArray = function(str, array) {
  return array.map(function(element) {
       return str + ' ' + element;
  });
};
To use concatArray in a Node
application, import the library using require, assigning the
library to a variable name. Once the library is assigned, you can call any
of the exposed functions in your code:
var newArray = require ('./arrayfunctions.js');

console.log(newArray.concatArray('hello', ['test1','test2']));
It’s not very complicated, as long as you remember two things:
You can split your module into separate JavaScript files, all located within a directory. Node can load the directory contents, as long as you organize the contents in one of two ways.
The first way is to provide a JSON file named package.json with information about the directory. The structure can contain other information, but the only entries relevant to Node are:
{ "name" : "mylibrary",
  "main" : "./mymodule/mylibrary.js" }
The first property, name, is the name of
the module. The second, main, indicates the
entry point for the module.
The second way is to include either an index.js or index.node file in the directory to serve as the main module entry point.
Why would you provide a directory rather than just a single
module? The most likely reason is that you’re making use of existing
JavaScript libraries, and just providing a “wrapper” file that wraps the
exposed functions with exports statements.
Another reason is that your library is so large that you want to break
it down to make it easier to modify.
Regardless of the reason, be aware that all of the exported objects must be in the one main file that Node loads.
If you want to make your package available to others, you can promote it on your website, but you’ll be missing out on a significant audience. When you’re ready to publish a module, you’re going to want to add it to the list of modules at the Node.js website, and you’ll also want to publish it to the npm registry.
Earlier I mentioned the package.json file. It’s actually based on the CommonJS module system recommendations, which you can find at http://wiki.commonjs.org/wiki/Packages/1.0#Package_Descriptor_File (though check to see if there’s a more up-to-date version).
Among the required fields for the package.json file are:
nameThe name of the package
descriptionThe package description
versionThe current version conforming to semantic version requirements
keywordsAn array of search terms
maintainersAn array of package maintainers (includes name, email, and website)
contributorsAn array of package contributors (includes name, email, and website)
bugsThe URL where bugs can be submitted
licensesAn array of licenses
repositoriesAn array of repositories where the package can be found
dependenciesPrerequisite packages and their version numbers
The other fields are optional. Still, that’s a lot of fields. Thankfully, npm makes it easier to create this file. If you type the following at the command line:
npm init
the tool will run through the required fields, prompting you for each. When it’s done, it generates a package.json file.
In Chapter 3, Example 3-13, I started an
object called inputChecker that
checks incoming data for commands and then processes the command. The
example demonstrated how to incorporate EventEmitter. Now we’re going to modify this
simple object to make it usable by other applications and
modules.
First, we’ll create a subdirectory in node_modules and name it inputcheck, and then move the existing
inputChecker code file to it. We need
to rename the file to index.js.
Next, we need to modify the code to pull out the part that implements
the new object. We’ll save it for a future test file. The last
modification we’ll do is add the exports object, resulting in the code shown in
Example 4-1.
var util = require('util');
var eventEmitter = require('events').EventEmitter;
var fs = require('fs');

exports.inputChecker = inputChecker;

function inputChecker(name, file) {
   this.name = name;
   this.writeStream = fs.createWriteStream('./' + file + '.txt',
      {'flags' : 'a',
       'encoding' : 'utf8',
       'mode' : 0666});
};

util.inherits(inputChecker,eventEmitter);
inputChecker.prototype.check = function check(input) {
  var self = this;
  var command = input.toString().trim().substr(0,3);
  if (command == 'wr:') {
     self.emit('write',input.substr(3,input.length));
  } else if (command == 'en:') {
     self.emit('end');
  } else {
     self.emit('echo',input);
  }
};
We can’t export the object function directly, because util.inherits expects
an object to exist in the file named inputChecker. We’re also modifying the
inputChecker object’s prototype later in the file. We could have
changed these code references to use exports.inputChecker, but that’s
kludgy. It’s just as easy to assign the object in a
separate statement.
To create the package.json
file, I ran npm init and answered
each of the prompts. The resulting file is shown in Example 4-2.
{
  "author": "Shelley Powers <shelleyp@burningbird.net> (http://burningbird.net)",
  "name": "inputcheck",
  "description": "Looks for commands within the string and implements the commands",
  "version": "0.0.1",
  "homepage": "http://inputcheck.burningbird.net",
  "repository": {
    "url": "
  },
  "main": "inputcheck.js",
  "engines": {
    "node": "~0.6.10"
  },
  "dependencies": {},
  "devDependencies": {},
  "optionalDependencies": {}
}
The npm init command doesn’t
prompt for dependencies, so we need to add them directly to the file.
However, the inputChecker module
isn’t dependent on any external modules, so we can leave these fields
blank in this case.
Chapter 16 has a more in-depth look at the package.json file.
At this point, we can test the new module to make sure it actually
works as a module. Example 4-3 is
the portion of the previously existing inputChecker application that tested the new
object, now pulled out into a separate test application.
var inputChecker = require('inputcheck').inputChecker;

// testing new object and event handling
var ic = new inputChecker('Shelley','output');

ic.on('write', function(data) {
   this.writeStream.write(data, 'utf8');
});

ic.addListener('echo', function( data) {
   console.log(this.name + ' wrote ' + data);
});

ic.on('end', function() {
   process.exit();
});

process.stdin.resume();
process.stdin.setEncoding('utf8');
process.stdin.on('data', function(input) {
    ic.check(input);
});
We can now move the test application into a new examples subdirectory within the module directory to be packaged with the module as an example. Good practice demands that we also provide a test directory with one or more testing applications, as well as a doc directory with documentation. For a module this small, a README file should be sufficient. Lastly, we create a gzipped tarball of the module.
Once we’ve provided all we need to provide, we can publish the module.
The folks who brought us npm also provide a really great source for Node developers: the Developer Guide. It outlines everything we need to know about how to publish our modules.
The Guide specifies some additional requirements for the package.json file. In addition to the fields
already created, we also need to add in a directories field with
a hash of folders, such as the previously mentioned test and doc:
    "directories" : {
        "doc" : ".",
        "test" : "test",
        "example" : "examples"
    }
Before publishing, the Guide recommends we test that the module can cleanly install. To test for this, type the following in the root directory for the module:
npm install . -g
At this point, we’ve tested the inputChecker module, modified the package.json package to add directories, and
confirmed that the package successfully installs.
Next, we need to add ourselves as npm users if we haven’t done so already. We do this by typing:
npm adduser
and following the prompts to add a username, a password, and an email address.
There’s one last thing to do:
npm publish
We can provide the path to the tarball or the directory. As the
Guide warns us, everything in the directory is exposed unless we use a
.npmignore list in the
package.json file to ignore
material. It’s better, though, just to remove anything that’s not needed
before publishing the module.
Once published—and once the source is also uploaded to GitHub (if that’s the repository you’re using)—the module is now officially ready for others to use. Promote the module on Twitter, Google+, Facebook, your website, and wherever else you think people would want to know about the module. This type of promotion isn’t bragging—it’s sharing.
Node might seem intimidating at times, with discussions about
asynchronous events and callbacks and new objects such as EventEmitter—not to mention all that new
server-side functionality we have to play with. If you’ve worked with any of
the modern JavaScript libraries, though, you’ve experienced much of the
functionality that goes into Node, at least when it comes to asynchronous
development.
For instance, if you’ve used a timer in JavaScript, you’ve used an
asynchronous function. If you’ve ever developed in Ajax, you’ve used an
asynchronous function. Even the plain old onclick event handler is an
asynchronous function, since we never know when the user is going to click
that mouse or tap that keyboard.
Any method that doesn’t block the control thread while waiting for
some event or result is an asynchronous function. When it comes to the
onclick handling, the
application doesn’t block all other application processing, waiting for that
user’s mouse click—just as it doesn’t block all functionality while the
timer is in effect, or while waiting for the server to return from an Ajax
call.
In this chapter, we’re going to look more closely at exactly what we mean by the term asynchronous control. In particular, we’re going to look at some asynchronous design patterns, as well as explore some of the Node modules that provide finer control over program flow when we’re working in this new environment. And since asynchronous control can add some new and interesting twists when it comes to error handling, we’re also going to take a closer look at exception handling within an asynchronous Node environment.
In the earlier days of Node, asynchronous functionality was facilitated through the use of promises, a concept that arose in the 1970s. A promise is an object that represents the result of an asynchronous action. It’s also known as a future, a delay, or simply deferred. The CommonJS design model embraced the concept of the promise.
In the earlier Node implementation, a promise was an object that
emitted exactly two events: success and
error. Its use was simple: if an
asynchronous operation succeeded, the success event was emitted; otherwise, the
error event was emitted. No other
events were emitted, and the object would emit one or the other, but not
both, and no more than once. Example 5-1 incorporates a
previously implemented promise into a function that opens and reads in a
file.
function test_and_load(filename) {
  var promise = new process.Promise();
  fs.stat(filename).addCallback(function (stat) {

    // Filter out non-files
    if (!stat.isFile()) { promise.emitSuccess(); return; }

    // Otherwise read the file in
    fs.readFile(filename).addCallback(function (data) {
      promise.emitSuccess(data);
    }).addErrback(function (error) {
      promise.emitError(error);
    });

  }).addErrback(function (error) {
    promise.emitError(error);
  });
  return promise;
}
Each object would return the promise object. The code to process a
successful result would be passed as a function to the promise object’s
addCallback method, which
had one parameter, the data. The code to process the error would be passed
as a function to the promise object’s addErrback method, which
received the error as its one and only parameter:
var File = require('file');
var promise = File.read('mydata.txt');
promise.addCallback(function (data) {
  // process data
});
promise.addErrback(function (err) {
  // deal with error
})
The promise object ensured that the proper functionality was performed whenever the event finished—either the results could be manipulated, or the error processed.
The code for Example 5-1 is one of a number of examples of possible asynchronous function techniques documented at http://groups.google.com/group/nodejs/browse_thread/thread/8dab9f0a5ad753d5 as part of the discussions about how Node would handle this concept in the future.
The promise object was pulled from Node in version 0.1.30. As Ryan Dahl noted at the time, the reasoning was:
Because many people (myself included) only want a low-level interface to file system operations that does not necessitate creating an object, while many other people want something like promises but different in one way or another. So instead of promises we’ll use last argument callbacks and consign the task of building better abstraction layers to user libraries.
Rather than the promise object, Node incorporated the last argument callbacks we’ve used in previous chapters. All asynchronous methods feature a callback function as the last argument. The first argument in this callback function is always an error object.
To demonstrate the fundamental structure of the callback
functionality, Example 5-2
is a complete Node application that creates an object with one method,
someMethod. This method takes three
arguments, the second of which must be a string, and the third being the
callback. In the method, if the second argument is missing or is not a
string, the object creates a new Error object, which is
passed to the callback function. Otherwise, whatever the result of the
method is gets passed to the callback function.
var obj =function() { };

obj.prototype.doSomething = function(arg1, arg2_) {
  var arg2 = typeof(arg2_) === 'string' ? arg2_ : null;

  var callback_ = arguments[arguments.length - 1];
  callback = (typeof(callback_) == 'function' ? callback_ : null);

  if (!arg2)
     return callback(new Error('second argument missing or not a string'));

  callback(arg1);
}
var test = new obj();

try {
   test.doSomething('test', 3.55, function(err,value) {
      if (err) throw err;

      console.log(value);
   });
} catch(err) {
   console.error(err);
}
The key elements of the callback functionality are in boldface in the code.
The first key functionality is to ensure the last argument is a
callback function. Well, we can’t determine the user’s intent, but we can
make sure the last argument is a function, and that will have to do. The
second key functionality is to create the new Node Error object if an error
occurs, and return it as the result to the callback function. The last
critical functionality is to invoke the callback function, passing in the
method’s result if no error occurs. In short, everything else is
changeable, as long as these three key functionalities are present:
With the existing code in Example 5-1, the application output is the following error message printed out to the console:
[Error: second argument missing or not a string]
Changing the method call in the code to the following:
test.doSomething('test','this',function(err,value) {results in test being printed out
to the console. Changing it then to the following:
test.doSomething('test',function(err,value) {again results in an error, this time because the second argument is missing.
If you look through the code in the lib directory of the Node installation, you’ll see the last callback pattern repeated throughout. Though the functionality may change, this pattern remains the same.
This approach is quite simple and ensures consistent results from asynchronous methods. However, it also creates its own unique challenges, as we’ll cover in the next section.
It’s not unusual to find the following in a client-side JavaScript application:
val1 = callFunctionA();
val2 = callFunctionB(val1);
val3 = callFunctionC(val2);
The functions are called, in turn, passing the results from the earlier function to each subsequent function. Since all the functions are synchronous, we don’t have to worry about the function calls getting out of sequence—no unexpected results.
Example 5-3 shows a relatively common case of this type of sequential programming. The application uses synchronous versions of Node’s File System methods to open a file and get its data, modify the data by replacing all references to “apple” with “orange,” and output the resulting string to a new file.
var fs = require('fs');

try {
   var data = fs.readFileSync('./apples.txt','utf8');
   console.log(data);
   var adjData = data.replace(/[A|a]pple/g,'orange');

   fs.writeFileSync('./oranges.txt', adjData);
} catch(err) {
  console.error(err);
}
Since problems can occur and we can’t be sure errors are handled
internally in any module function, we wrap all of the function calls in a
try block to allow for
graceful—or at least, more informative—exception handling. The following
is an example of what the error looks like when the application can’t find
the file to read:
{ [Error: ENOENT, no such file or directory './apples.txt']
  errno: 34,
  code: 'ENOENT',
  path: './apples.txt',
  syscall: 'open' }
While perhaps not very user-friendly, at least it’s a lot better than the alternative:
node.js:201
        throw e; // process.nextTick error, or 'error' event on first tick
              ^
Error: ENOENT, no such file or directory './apples.txt'
    at Object.openSync (fs.js:230:18)
    at Object.readFileSync (fs.js:120:15)
    at Object.<anonymous> (/home/examples/public_html/node/read.js:3:18)
    at Module._compile (module.js:441:26)
    at Object..js (module.js:459:10)
    at Module.load (module.js:348:31)
    at Function._load (module.js:308:12)
    at Array.0 (module.js:479:10)
    at EventEmitter._tickCallback (node.js:192:40)
In the example, we’re going to have expected results because each function call is performed in sequence.
Converting this synchronous sequential application pattern to an asynchronous implementation requires a couple of modifications. First, we have to replace all functions with their asynchronous counterparts. However, we also have to account for the fact that each function doesn’t block when called, which means we can’t guarantee the proper sequence if the functions are called independently of each other. The only way to ensure that each function is called in its proper sequence is to use nested callbacks.
Example 5-4 is an asynchronous version of the application from Example 5-3. All of the File System function calls have been replaced by their asynchronous versions, and the functions are called in the proper sequence via a nested callback.
var fs = require('fs');

try {
   fs.readFile('./apples2.txt','utf8', function(err,data) {

     if (err) throw err;

     var adjData = data.replace(/[A|a]pple/g,'orange');

     fs.writeFile('./oranges.txt', adjData, function(err) {

        if (err) throw err
     });
  });
} catch(err) {
  console.error(err);
}
In Example 5-4, the
input file is opened and read, and only when both actions are finished
does the callback function passed as the last parameter get called. In
this function, the error is checked to make sure it’s null. If not, the error is thrown for catching
in the outer exception-handling block.
Some style guides frown on throwing an error, and more complex frameworks provide error-handling objects and functions to ensure that all errors are resolved. My primary concern is that errors are handled.
If no error occurs, the data is processed and the asynchronous
writeFile method is called. Its
callback function has only one parameter, the error object. If it’s not
null, it’s thrown for handling in the outer exception block.
If an error occurred, it would look similar to the following:
/home/examples/public_html/node/read2.js:11
        if (err) throw err;
                       ^
Error: ENOENT, no such file or directory './boogabooga/oranges.txt'
If you want the stack trace of the error, you can print out the
stack property of the
Node error object:
catch(err) {
   console.log(err.stack);
}
Including another sequential function call adds another level of
callback nesting. In Example 5-5, we access a listing
of files for a directory. In each of the files, we replace a generic
domain name with a specific domain name using the string replace method, and the
result is written back to the original file. A log is
maintained of each changed file, using an open write stream.
var fs = require('fs');

var writeStream = fs.createWriteStream('./log.txt',
      {'flags' : 'a',
       'encoding' : 'utf8',
       'mode' : 0666});

try {
   // get list of files
   fs.readdir('./data/', function(err, files) {

      // for each file
      files.forEach(function(name) {

         // modify contents
         fs.readFile('./data/' + name,'utf8', function(err,data) {

            if (err) throw err;
            var adjData = data.replace(/somecompany\.com/g,'burningbird.net');

            // write to file
            fs.writeFile('./data/' + name, adjData, function(err) {

               if (err) throw err;

               // log write
               writeStream.write('changed ' + name + '\n', 'utf8', function(err) {

                  if(err) throw err;
               });
            });
         });
      });
   });
} catch(err) {
  console.error(util.inspect(err));
}
Though the application looks like it’s processing each file individually before moving on to the next, remember that each of the methods used in this application is asynchronous. If you run the application several times and check the log.txt file, you’ll see that the files are processed in a different, seemingly random order. In my data subdirectory I had five files. Running the application three times in a row resulted in the following output to log.txt (blank lines inserted for clarity):
changed data1.txt
changed data3.txt
changed data5.txt
changed data2.txt
changed data4.txt

changed data3.txt
changed data1.txt
changed data5.txt
changed data2.txt
changed data4.txt

changed data1.txt
changed data3.txt
changed data5.txt
changed data4.txt
changed data2.txt
Another issue arises if you want to check when all of the files have
been modified in order to do something. The forEach method invokes
the iterator callback functions asynchronously, so it doesn’t block.
Adding a statement following the use of forEach, like the
following:
console.log('all done');doesn’t really mean the application is all finished, just that the
forEach method didn’t
block. If you add a console.log statement at
the same time you log the changed file:
               writeStream.write('changed ' + name + '\n', 'utf8', function(err) {

                  if(err) throw err;
                  console.log('finished ' + name);
               });
and add the following after the forEach method
call:
console.log('all finished');you’ll actually get the following console output:
all done
finished data3.txt
finished data1.txt
finished data5.txt
finished data2.txt
finished data4.txt
To solve this challenge, add a counter that is incremented with each log message and then checked against the file array’s length to print out the “all done” message:
// before accessing directory
var counter = 0;
...
               writeStream.write('changed ' + name + '\n', 'utf8', function(err) {

                  if(err) throw err;
                  console.log('finished ' + name);
                  counter++;
                  if (counter >= files.length)
                    console.log('all done');

               });
You’d then get the expected result: an “all done” message displays after all the files have been updated.
The application works quite well—except if the directory we’re accessing has subdirectories as well as files. If the application encounters a subdirectory, it spits out the following error:
/home/examples/public_html/node/example5.js:20
            if (err) throw err;
                           ^
Error: EISDIR, illegal operation on a directory
Example 5-6 prevents
this type of error by using the fs.stats method to return
an object representing the data from a Unix stat command. This object
contains information about the object, including whether it’s a file or
not. The fs.stats method is, of
course, another asynchronous method, requiring yet more callback
nesting.
var fs = require('fs');

var writeStream = fs.createWriteStream('./log.txt',
      {'flags' : 'a',
       'encoding' : 'utf8',
       'mode' : 0666});

try {
   // get list of files
   fs.readdir('./data/', function(err, files) {

      // for each file
      files.forEach(function(name) {

         // check to see if object is file
         fs.stat('./data/' + name, function(err, stats) {

            if (err) throw err;

            if (stats.isFile())

               // modify contents
               fs.readFile('./data/' + name,'utf8', function(err,data) {

                  if (err) throw err;
                  var adjData = data.replace(/somecompany\.com/g,'burningbird.net');

                  // write to file
                  fs.writeFile('./data/' + name, adjData, function(err) {

                     if (err) throw err;

                     // log write
                     writeStream.write('changed ' + name + '\n', 'utf8',
                                                                 function(err) {
                        if(err) throw err;
                     });
                  });
               });
         });
      });
   });
} catch(err) {
  console.error(err);
}
Again, the application performs its purpose, and performs it well—but how difficult it is to read and maintain! I’ve heard this type of nested callback called callback spaghetti and the even more colorful pyramid of doom, both of which are apt terms.
The nested callbacks continue to push against the right side of the document, making it more difficult to ensure we have the right code in the right callback. However, we can’t break the callback nesting apart because it’s essential that the methods be called in turn:
Start the directory lookup.
Filter out subdirectories.
Read each file’s contents.
Modify the contents.
Write back to the original file.
What we’d like to do is find a way of implementing this series of method calls but without having to depend on nested callbacks. For this, we need to look at third-party modules that provide asynchronous control flow.
Another approach is to provide a named function as a callback function for each method. This way, you can flatten the pyramid, and it can simplify debugging. However, this approach doesn’t solve some of the other problems, such as determining when all processes have finished. For this, you still need the third-party libraries.
The application in Example 5-6 is an example of an asynchronous pattern, where each function is called in turn and passes its results to the next function, and the entire chain stops only if an error occurs. There are several such patterns, though some are variations of others, and not everyone uses the exact same terminology.
One Node module, Async, provides names and support for the most extensive list of asynchronous control flow patterns:
waterfallFunctions are called in turn, and results of all are passed as
an array to the last callback (also called series and
sequence by
others).
seriesFunctions are called in turn and, optionally, results are passed as an array to the last callback.
parallelFunctions are run in parallel and when completed, results are passed to the last callback (though the result array isn’t part of the pattern in some interpretations of the parallel pattern).
whilstRepeatedly calls one function, invoking the last callback only
if a preliminary test returns false or an error occurs.
queueCalls functions in parallel up to a given limit of concurrency, and new functions are queued until one of the functions finishes.
untilRepeatedly calls one function, invoking the last callback only
if a post-process test returns false or an error occurs.
autoFunctions are called based on requirements, each function receiving the results of previous callbacks.
iteratorEach function calls the next, with the ability to individually access the next iterator.
applyA continuation function with arguments already applied combined with other control flow functions.
nextTickCalls the callback in the next loop of an event loop—based on
process.nextTick in
Node.
In the listing of modules provided at the Node.js website, there is
a category titled “Control Flow/Async Goodies.” In this list is the Async
module, which provides the asynchronous control patterns I just listed.
Though not every control flow module provides the capability to handle all
possible patterns, most provide functionality for the most common
patterns: series (also called
sequence and sometimes
referred to as waterfall—as in the
preceding list—though Async lists waterfall separately from
series) and parallel. In addition, some of the modules also
reinstate the concept of promises from earlier editions of Node, while
others implement a concept called fibers, which emulate
threads.
In the next couple of sections, I’ll demonstrate two of the more popular of the actively maintained control flow modules: Step and Async. Each offers its own unique perspective on asynchronous control flow management, though both provide a very useful—and likely essential—service.
Step is a focused utility module that enables simplified control flow for serial and parallel execution. It can be installed using npm as follows:
npm install step
The Step module exports exactly one object. To use the object for serial execution, wrap your asynchronous function calls within functions that are then passed as parameters to the object. For instance, in Example 5-7, Step is used to read the contents of a file, modify the contents, and write them back to the file.
var fs = require('fs'),
    Step = require('step');

try {

   Step (
      function readData() {
          fs.readFile('./data/data1.txt', 'utf8', this);
      },
      function modify(err, text) {
         if (err) throw err;
         return text.replace(/somecompany\.com/g,'burningbird.net');
      },
      function writeData(err, text) {
          if (err) throw err;
          fs.writeFile('./data/data1.txt', text, this);
      }
    );
} catch(err) {
   console.error(err);
}
The first function in the Step sequence, readData, reads a file’s contents into a
string, which is then passed to a second function. The second function
modifies the string using replacement, and the result is passed to a
third function. In the third function, the modified string is written
back to the original file.
For more information, see the Step GitHub site at https://github.com/creationix/step.
In more detail, the first function wraps the asynchronous
fs.readFile. However,
rather than pass a callback function as the last parameter, the code
passes the this context. When the
function is finished, its data and any possible error are sent to the
next function, modify. The modify function isn’t an asynchronous
function, as all it’s doing is replacing one substring for another in
the string. It doesn’t require the this context, and just
returns the result at the end of the function.
The last function gets the newly modified string and writes it
back to the original file. Again, since it’s an asynchronous function,
it gets this in place of the
callback function. If we didn’t include this as the last
parameter to the final function, any errors that occur wouldn’t be
thrown and caught in the outer loop. If the boogabooga subdirectory didn’t exist with the
following modified code:
      function writeFile(err, text) {
          if (err) throw err;
          fs.writeFile('./boogabooga/data/data1.txt');
      }
we’d never know that the write failed.
Even though the second function isn’t asynchronous, every function
but the first in Step requires the error object as the first parameter
for consistency. It’s just null by
default in a synchronous function.
Example 5-7 performs part of the functionality of the application in Example 5-6. Could it do the rest of the functionality, especially handling modification to multiple files? The answer is yes, and no. Yes, it can do the work, but only if we throw in some kludgy code.
In Example 5-8, I
added in the readir asynchronous
function to get a list of files in a given subdirectory. The array of
files is processed with a forEach command, like
in Example 5-6, but the
end of the call to readFile isn’t a
callback function or this. In Step, the call
to create the group object signals to
reserve a parameter for a group result; the call to the group object in the
readFile asynchronous function
results in each of the callbacks being called in turn, and the results
being grouped into an array for the next function.
var fs = require('fs'),
    Step = require('step'),
    files,
    _dir = './data/';

try {

   Step (
      function readDir() {
          fs.readdir(_dir, this);
      },
      function readFile(err, results) {
          if (err) throw err;
          files = results;
          var group = this.group();
          results.forEach(function(name) {
             fs.readFile(_dir + name, 'utf8', group());
          });
      },
      function writeAll(err, data) {
         if (err) throw err;
         for (var i = 0; i < files.length; i++) {
           var adjdata = data[i].replace(/somecompany\.com/g,'burningbird.net');
           fs.writeFile(_dir + files[i], adjdata, 'utf8',this);
         }
      }
    );
} catch(err) {
   console.log(err);
}
To preserve the filenames, the readdir result is assigned to a global
variable, files. In the last Step
function, a regular for loop cycles through
the data to modify it, and then cycles through the files variable to get the filename. Both the
filename and modified data are used in the last asynchronous call to
writeFile.
One other approach we could have used if we wanted to hardcode the
change to each file is to use the Step parallel
feature. Example 5-9
performs a readFile on a couple of
different files, passing in this.parallel() as the last parameter. This
results in a parameter being passed to the next function for each readFile in the first function. The parallel function call also has to be used in
the writeFile function in
the second function, to ensure that each callback is processed in
turn.
var fs = require('fs'),
    Step = require('step'),
    files;

try {

   Step (
      function readFiles() {
         fs.readFile('./data/data1.txt', 'utf8',this.parallel());
         fs.readFile('./data/data2.txt', 'utf8',this.parallel());
         fs.readFile('./data/data3.txt', 'utf8',this.parallel());
      },
      function writeFiles(err, data1, data2, data3) {
         if (err) throw err;
         data1 = data1.replace(/somecompany\.com/g,'burningbird.net');
         data2 = data2.replace(/somecompany\.com/g,'burningbird.net');
         data3 = data3.replace(/somecompany\.com/g,'burningbird.net');

         fs.writeFile('./data/data1.txt', data1, 'utf8', this.parallel());
         fs.writeFile('./data/data2.txt', data2, 'utf8', this.parallel());
         fs.writeFile('./data/data3.txt', data3, 'utf8', this.parallel());
      }
    );
} catch(err) {
   console.log(err);
}
It works, but it’s clumsy. It would be better to reserve the use of the parallel functionality for a sequence of different asynchronous functions that can be implemented in parallel, and the data processed post-callback.
As for our earlier application, rather than trying to force Step into contortions to fit our use case, we can use another library that provides the additional flexibility we need: Async.
The Async module provides functionality for managing
collections, such as its own variation of forEach, map, and filter. It also
provides some utility functions, including ones for memoization. However, what we’re
interested in here are its facilities for handling control flow.
There is both an Async and an Async.js module, so be careful not to confuse the two. The one covered in this section is Async, by Caolan McMahon. Its GitHub site is https://github.com/caolan/async.
Install Async using npm like so:
npm install async
As mentioned earlier, Async provides control flow capability for a
variety of asynchronous patterns, including serial, parallel, and
waterfall. Like Step,
it gives us a tool to tame the wild nested callback pyramid, but its
approach is quite different. For one, we don’t insert ourselves between
each function and its callback. Instead, we incorporate the callback as
part of the process.
As an example, we’ve already identified that the pattern of the
earlier application matches with Async’s waterfall, so we’ll be using the async.waterfall method.
In Example 5-10, I used
async.waterfall to open
and read a data file using fs.readFile, perform the synchronous string
substitution, and then write the string back to the file using
fs.writeFile. Pay
particular attention to the callback function used with each step in the
application.
var fs = require('fs'),
    async = require('async');

try {
   async.waterfall([
      function readData(callback) {
         fs.readFile('./data/data1.txt', 'utf8', function(err, data){
              callback(err,data);
          });
      },
      function modify(text, callback) {
         var adjdata=text.replace(/somecompany\.com/g,'burningbird.net');
         callback(null, adjdata);
      },
      function writeData(text, callback) {
          fs.writeFile('./data/data1.txt', text, function(err) {
             callback(err,text);
          });
      }
    ], function (err, result) {
         if (err) throw err;
         console.log(result);
    });
} catch(err) {
   console.log(err);
}
The async.waterfall method
takes two parameters: an array of tasks and an optional final callback
function. Each asynchronous task function is an element of the
async.waterfall method
array, and each function requires a callback as the last of its
parameters. It is this callback function that allows us to chain the
asynchronous callback results without having to physically nest the
functions. However, as you can see in the code, each function’s callback
is handled as we would normally handle it if we were using nested
callbacks—other than the fact that we don’t have to test the errors in
each function. The callbacks look for an error object as first
parameter. If we pass an error object in the callback function, the
process is ended at this point, and the final callback routine is
called. The final callback is when we can test for an error, and throw
the error to the outer exception handling block (or otherwise
handle).
The readData function wraps our
fs.readFile call, which checks for an error,
first. If an error is found, it throws the error, ending the process. If
not, it issues a call to the callback as its last operation. This is the
trigger to tell Async to invoke the next function, passing any relevant
data. The next function isn’t asynchronous, so it does its processing,
passing null as the error object, and
the modified data. The last function, writeData, calls the asynchronous writeFile, using the
passed-in data from the previous callback and then testing for an error
in its own callback routine.
Example 5-10 uses named functions, while the Async documentation shows anonymous functions. However, named functions can simplify debugging and error handling. Both work equally well.
The processing is very similar to what we had in Example 5-4, but without the nesting (and having to test for an error in each function). It may seem more complicated than what we had in Example 5-4, and I wouldn’t necessarily recommend its use for such simple nesting, but look what it can do with a more complex nested callback. Example 5-11 duplicates the exact functionality from Example 5-6, but without the callback nesting and excessive indenting.
var fs = require('fs'),
    async = require('async'),
    _dir = './data/';

var writeStream = fs.createWriteStream('./log.txt',
      {'flags' : 'a',
       'encoding' : 'utf8',
       'mode' : 0666});
try {
   async.waterfall([
      function readDir(callback) {
         fs.readdir(_dir, function(err, files) {
            callback(err,files);
         });
      },
      function loopFiles(files, callback) {
         files.forEach(function (name) {
            callback (null, name);
         });
      },
      function checkFile(file, callback) {
         fs.stat(_dir + file, function(err, stats) {
            callback(err, stats, file);
         });
      },
      function readData(stats, file, callback) {
         if (stats.isFile())
            fs.readFile(_dir + file, 'utf8', function(err, data){
              callback(err,file,data);
          });
      },
      function modify(file, text, callback) {
         var adjdata=text.replace(/somecompany\.com/g,'burningbird.net');
         callback(null, file, adjdata);
      },
      function writeData(file, text, callback) {
          fs.writeFile(_dir + file, text, function(err) {
             callback(err,file);
          });
      },
      function logChange(file, callback) {
          writeStream.write('changed ' + file + '\n', 'utf8', function(err) {
             callback(err, file);
         });
      }
    ], function (err, result) {
         if (err) throw err;
         console.log('modified ' + result);
    });
} catch(err) {
   console.log(err);
}
Every last bit of functionality is present from Example 5-6. The fs.readdir method is used to get an array of
directory objects. The Node forEach method (not the
Async forEach) is used to access each
specific object. The fs.stats method is used
to get the stats for each object.
stats is used to check
for files, and when a file is found, it’s opened and its data accessed.
The data is then modified, and passed on to be written back to the file
via fs.writeFile. The
operation is logged in the logfile and also echoed to the
console.
Note that there is more data passed in some of the callbacks. Most
of the functions need the filename as well as the text, so this is
passed in the last several methods. Any amount of data can be passed in
the methods, as long as the first parameter is the error object (or
null, if no error object) and the
last parameter in each function is the callback function.
We don’t have to check for an error in each asynchronous task function either, because Async tests the error object in each callback, and stops processing and calls the final callback function if an error is found. And we don’t have to worry about using special processing when handling an array of items, as we did when we used Step earlier in the chapter.
The other Async control flow methods, such as async.parallel and
async.serial, perform
in a like manner, with an array of tasks as the first method parameter,
and a final optional callback as the second. How they process the
asynchronous tasks differs, though, as you would expect.
We use the async.serial method
with a Redis application in Chapter 9, in the section Building a Game Leaderboard.
The async.parallel method
calls all of the asynchronous functions at once, and when they are each
finished, calls the optional final callback. Example 5-12 uses async.parallel
to read in the contents of three files in parallel. However,
rather than an array of functions, this example uses an alternative
approach that Async supports: passing in an object with each
asynchronous task listed as a property of the object. The results are
then printed out to the console when all three tasks have
finished.
var fs = require('fs'),
    async = require('async');

try {
   async.parallel({
      data1 : function (callback) {
         fs.readFile('./data/data1.txt', 'utf8', function(err, data){
              callback(err,data);
          });
      },
      data2 : function (callback) {
         fs.readFile('./data/data2.txt', 'utf8', function(err, data){
              callback(err,data);
          });
      },
      data3 : function readData3(callback) {
         fs.readFile('./data/data3.txt', 'utf8', function(err, data){
              callback(err,data);
          });
      },

    }, function (err, result) {
         if (err) throw err;
         console.log(result);
    });
} catch(err) {
   console.log(err);
}
The results are returned as an array of objects, with each result tied to each of the properties. If the three data files in the example had the following content:
data1.txt: apples
data2.txt: oranges
data3.txt: peaches
the result of running Example 5-12 is:
{ data1: 'apples\n', data2: 'oranges\n', data3: 'peaches\n' }I’ll leave the testing of the other Async control flow methods as
a reader exercise. Just remember that when you’re working with the Async
control flow methods, all you need is to pass a callback to each
asynchronous task and to call this callback when you’re finished,
passing in an error object (or null)
and whatever data you need.
A couple of times in the chapter I mentioned people recommending certain restraints, such as using named rather than anonymous functions in Node applications. Collectively, these restraints are known as preferred Node style, though there is no one style guide or definitive set of shared preferences. In fact, there are several different recommendations for proper Node style.
One helpful Node.js style guide is Felix’s Node.js Style Guide, at http://nodeguide.com/style.html.
Here are some of the recommendations, and my own take on each:
My take: Sorry, I’m used to three spaces, and I’ll continue to use three spaces. I think it’s more important to be consistent and not to use tabs; I’m not going to split hairs on the number of spaces.
Amazing how contentious this one is. I use semicolons, but follow your own instincts.
I’m rather used to double quotes, but have managed to kick the habit (more or less). Regardless, it’s better to use double quotes than to escape a single quote in a string.
var keyword/don’t use
one var keyword.Some of the applications in this book use the
var keyword for
each variable; some don’t. Again, old habits are hard to break, but
I don’t think this is as much an issue as some people make
it.
I agree with this one.
===).Sound advice, but I repeat, old habits are hard to break. I
mean to use strict equality, but frequently use just the regular
equality (==). Don’t be bad like
me.
My bad, again. This really is sound advice, and I’m trying to improve, but most of my code still uses anonymous functions.
I do follow this religiously.
The most important rule to remember out of all of these is to use asynchronous functions whenever and wherever possible. After all, asynchronous functionality is the heart of Node.
Click a link in a web page, and you expect something to happen. That something is typically a page being loaded. However, there’s actually a lot that goes on before that web resource loads—some of which is mostly out of our control (such as packet routing), and some of which is dependent on us having software installed that understands how to respond based on the link’s contents.
Of course, when we use web servers such as Apache, and software such as Drupal, much of the mechanics of serving a file or a resource are handled behind the scenes. However, when we’re creating our own server-side applications in Node and bypassing our usual technology, we have to get more involved in ensuring that the right resource gets delivered at the right time.
This chapter focuses on the technology available to Node developers for providing the very basic routing and middleware functionality we need to ensure that resource A gets delivered to user B correctly and quickly.
We have all the functionality we need to build a simple router or to serve static files built directly into Node. But being able to do so and doing so easily are two different things.
When thinking of what’s necessary to build a simple but functional static file server, we might come up with the following set of steps:
Create an HTTP server and listen for requests.
When a request arrives, parse the request URL to determine the location for the file.
Check to make sure the file exists.
If the file doesn’t exist, respond accordingly.
If the file does exist, open the file for reading.
Prepare a response header.
Write the file to the response.
Wait for the next request.
Creating an HTTP server and reading files requires the HTTP and File
System modules. The Path module will also come in handy, because it has a
way of checking to make sure a file exists before trying to open it for
reading. In addition, we’ll want to define a global variable for the base
directory, or use the predefined __dirname (more on this
in the upcoming sidebar Why Not Use __dirname?).
The top of the application has the following code at this point:
var http = require('http'),
      path = require('path'),
       fs = require('fs'),
    base = '/home/examples/public_html';
Creating a server using the HTTP module isn’t anything new. And the
application can get the document requested by directly accessing the HTTP
request object’s url property. To
double-check the response compared to requests, we’ll also throw in a
console.log of the requested file’s
pathname. This is in addition to the console.log message that’s written when the
server is first started:
http.createServer(function (req, res) {

   pathname = base + req.url;
   console.log(pathname);


}).listen(8124);

console.log('Server running at 8124/');
Before attempting to open the file for reading and writing to the
HTTP response, the application needs to check that it exists. The
path.exists function is a
good choice at this point. If the file doesn’t exist, write a brief
message to this effect and set the status code to 404: document not found.
path.exists(pathname, function(exists) {
   if (exists) {
      // insert code to process request
   } else {
        res.writeHead(404);
        res.write('Bad request 404\n');
        res.end();
}
Now we’re getting into the meat of the new application. In examples
in previous chapters, we used fs.readFile to read in a
file. The problem with fs.readFile, though, is
that it wants to read the file completely into memory before making it
available. Documents served over the
Web can be quite large. In addition, there can be many requests for a
document at any given time. Something like fs.readFile just won’t
scale.
The path.exists method has
been deprecated in Node 0.8. Instead, use fs.exists. The examples
file referenced in the preface include applications that support both
environments.
Instead of using fs.readFile, the
application creates a read stream via the fs.createReadStream
method, using the default settings. Then it’s a simple matter to just
pipe the file contents directly to the
HTTP response object. Since the stream sends an end signal when it’s
finished, we don’t need to use the end method call with the
read stream:
         res.setHeader('Content-Type', 'test/html');

         // 200 status - found, no errors
         res.statusCode = 200;

         // create and pipe readable stream
         var file = fs.createReadStream(pathname);
         file.on("open", function() {
            file.pipe(res);
         });
         file.on("error", function(err) {
           console.log(err);
         });
The read stream has two events of interest: open and error. The open event is sent when
the stream is ready, and the error if a problem
occurs. The application calls the pipe method in the
callback function for the open event.
At this point, the static file server looks like the application in Example 6-1.
var http = require('http'),
    path = require('path'),
    fs   = require('fs'),
    base = '/home/examples/public_html';

http.createServer(function (req, res) {

   pathname = base + req.url;
   console.log(pathname);

   path.exists(pathname, function(exists) {
      if (!exists) {
        res.writeHead(404);
        res.write('Bad request 404\n');
        res.end();
      } else {
         res.setHeader('Content-Type', 'text/html');

         // 200 status - found, no errors
         res.statusCode = 200;

         // create and pipe readable stream
         var file = fs.createReadStream(pathname);
         file.on("open", function() {
            file.pipe(res);
         });
         file.on("error", function(err) {
           console.log(err);
         });
       }
    });
}).listen(8124);

console.log('Server running at 8124/');
I tested it with a simple HTML file, which has nothing more than an
img element, and the file
loaded and displayed properly:
<!DOCTYPE html>
<head>
   <title>Test</title>
   <meta charset="utf-8" />
</head>
<body>
<img src="./phoenix5a.png" />
</body>
I then tried it with another example file I had, which contained an
HTML5 video element:
<!DOCTYPE html>
<head>
   <title>Video</title>
   <meta charset="utf-8" />
</head>
<body>
   <video id="meadow" controls>
      <source src="videofile.mp4" />
      <source src="videofile.ogv" />
      <source src="videofile.webm" />
   </video>
</body>
Though the file would open and the video displayed when I tried the
page with Chrome, the video element did
not work when I tested the page with Internet Explorer 10. Looking at the
console output provided the reason why:
Server running at 8124/
/home/examples/public_html/html5media/chapter1/example2.html
/home/examples/public_html/html5media/chapter1/videofile.mp4
/home/examples/public_html/html5media/chapter1/videofile.ogv
/home/examples/public_html/html5media/chapter1/videofile.webm
Though IE10 is capable of playing the MP4 video, it tests all three
of the videos because the content type of the response header is
text/html for each.
Though other browsers will ignore the incorrect content type and display
the media correctly, IE does not—appropriately, in my opinion, because I
may not have quickly found the error in the application otherwise.
This application is a perfect example of why we have to test our server-side applications in all target browsers, even though, seemingly, we should be able to test the application with just one since the functionality we’re testing is on the server.
The application has to be modified to test for the file extension for each file and then return the appropriate MIME type in the response header. We could code this functionality ourselves, but I’d rather make use of an existing module: node-mime.
You can install node-mime using npm: npm
install mime. The GitHub site is at https://github.com/broofa/node-mime.
The node-mime module can return the proper MIME type given a filename (with or without path), and can also return file extensions given a content type. The node-mime module is added to the requirements list like so:
mime = require('mime');The returned content type is used in the response header, and also output to the console, so we can check the value as we test the application:
         // content type
         var type = mime.lookup(pathname);
         console.log(type);
         res.setHeader('Content-Type', type);
Now when we access the file with the video element in IE10, the video file works.
What doesn’t work, though, is when we access a directory instead of a file. When this happens, an error is output to the console, and the web page remains blank for the user:
{ [Error: EISDIR, illegal operation on a directory] errno: 28, code: 'EISDIR' }We not only need to check if the resource being accessed exists, but we also need to check whether it’s a file or a directory. If it’s a directory being accessed, we can either display its contents, or we can output an error—it’s the developer’s choice.
The final version of a minimal static file server, in Example 6-2, uses fs.stats to check for the existence of the
requested object and whether it’s a file. If the resource doesn’t exist,
an HTTP status of 404 is returned. If
the resource exists, but it’s a directory, an HTTP error status code of
403—forbidden—is returned. In all
cases, the request is handled properly.
var http = require('http'),
    url =  require('url'),
    fs   = require('fs'),
    mime = require('mime');
    base = '/home/examples/public_html';

http.createServer(function (req, res) {

   pathname = base + req.url;
   console.log(pathname);

   fs.stat(pathname, function(err, stats) {
      if (err) {
        res.writeHead(404);
        res.write('Bad request 404\n');
        res.end();
      } else if (stats.isFile()) {
         // content type
         var type = mime.lookup(pathname);
         console.log(type);
         res.setHeader('Content-Type', type);

         // 200 status - found, no errors
         res.statusCode = 200;

         // create and pipe readable stream
         var file = fs.createReadStream(pathname);
         file.on("open", function() {

            file.pipe(res);
         });
         file.on("error", function(err) {
           console.log(err);
         });
       } else {
        res.writeHead(403);
        res.write('Directory access is forbidden');
        res.end();
       }
    });
}).listen(8124);
console.log('Server running at 8124/');
The following is the console output for accessing one web page that contains both image and video file links:
/home/examples/public_html/html5media/chapter2/example16.html
text/html
/home/examples/public_html/html5media/chapter2/bigbuckposter.jpg
image/jpeg
/home/examples/public_html/html5media/chapter2/butterfly.png
image/png
/home/examples/public_html/favicon.ico
image/x-icon
/home/examples/public_html/html5media/chapter2/videofile.mp4
video/mp4
/home/examples/public_html/html5media/chapter2/videofile.mp4
video/mp4
Note the proper handling of the content types. Figure 6-1 shows one web page that contains a video element loaded into Chrome, and the network access displayed in the browser’s console.
You get a better feel for how the read stream works when you load a page that has a video element and begin to play it. The browser grabs the read stream output at a speed it can manage, filling its own internal buffer, and then pauses the output. If you close the server while the video content is playing, the video continues to play...up to the point where it exhausts its current video buffer. The video element then goes blank because the read stream is no longer available. It’s actually a little fascinating to see how well everything works with so little effort on our part.
Though the application works when tested with several different documents, it’s not perfect. It doesn’t handle many other types of web requests, it doesn’t handle security or caching, and it doesn’t properly handle the video requests. One web page application I tested that uses HTML video also makes use of the HTML5 video element API to output the state of the video load process. This application didn’t get the information it needs to work as designed.
Chapter 12 revisits this application and covers what additional effort is needed to create a fully functional HTML5 video server.
There are many little gotchas that can trip us when it comes to creating a static file server. Another approach is to use an existing static file server. In the next section, we’ll look at one included in the Connect middleware.
What is middleware? That’s a good question, and one that, unfortunately, doesn’t have a definitive answer.
Generally, middleware is software that exists between you, as the developer, and the underlying system. By system, we can mean either the operating system, or the underlying technology, such as we get from Node. More specifically, middleware inserts itself into the communication chain between your application and the underlying system—hence its rather descriptive name.
For instance, rather than have to provide all the functionality necessary for serving static files via a web server, you can use middleware to handle most of it. The middleware then takes care of all the tedious bits, so you can focus on those aspects of your application that are unique to your needs and requirements. However, middleware doesn’t stop with just serving up static files. Some middleware provides authorization components, proxies, routers, cookie and session management, and other necessary web technologies.
Middleware isn’t a utility library or simple set of functions. What middleware you choose defines how your application is both designed and developed. You have to be comfortable with your choice of middleware before you begin incorporating it, because you’d have a difficult time switching mid-development.
Currently, there are two major middleware applications used in Node applications: JSGI (JavaScript Gateway Interface) and Connect. JSGI is a middleware technology for JavaScript generally, not Node specifically. Its use is facilitated for Node with the JSGI-node module. Connect, on the other hand, was developed for use with Node.
The JSGI site is at http://wiki.commonjs.org/wiki/JSGI/Level0/A/Draft2. The JSGI-node GitHub site is at https://github.com/persvr/jsgi-node.
I’m covering only Connect in this book, for three reasons. One, it’s simpler to use. JSGI would require us to spend too much time trying to understand how it works in general (independent of its use with Node), whereas with Connect, we can jump right in. Two, Connect provides middleware support for Express, a very popular framework (covered in Chapter 7). Three, and perhaps most importantly, over time Connect has seemingly floated to the top as best in breed. It’s the most used middleware if the npm registry is any indication.
You will find an introduction to Connect 2.0 at http://tjholowaychuk.com/post/18418627138/connect-2-0. The Connect source is at https://github.com/senchalabs/Connect. (For more information on installation, see the sidebar Working with Alpha Modules).
You can install Connect using npm:
npm install connect
Connect is, in actuality, a framework in which you can use one or more middleware applications. The documentation for Connect is sparse. However, it is relatively simple to use once you’ve seen a couple of working examples.
In Example 6-3, I
created a simple server application using Connect, and using two of the
middleware[1] bundled with Connect: connect.logger and connect.favicon. The
logger middleware logs all requests
to a stream—in this case, the default STDIO.output stream—and
the favicon middleware
serves up the favicon.ico file. The
application includes the middleware using the use method on the
Connect request listener, which is then passed as a parameter to the
HTTP object’s createServer
method.
var connect = require('connect');
var http = require('http');

var app = connect()
   .use(connect.favicon())
   .use(connect.logger())
   .use(function(req,res) {
      res.end('Hello World\n');
   });

http.createServer(app).listen(8124);
You can use any number of middleware—either built in with Connect
or provided by a third party—by just including additional use states.
Rather than create the Connect request listener first, we can also
incorporate the Connect middleware directly into the createServer method, as
shown in Example 6-4.
Connect comes bundled with at least 20 middleware. I’m not going to cover them all in this section, but I am going to demonstrate enough of them so that you have a good understanding of how they work together.
Other examples of the Connect middleware are utilized in the Express applications created in Chapter 7.
Earlier, we created a simplified static file server from
scratch. Connect provides middleware that implements the functionality
of that server, and more. It is extremely easy to use—you just specify
the connect.static
middleware option, passing in the root directory for all requests. The
following implements most of what we created in Example 6-2, but with far
less code:
var connect = require('connect'),
    http = require('http'),
    __dirname = '/home/examples';

http.createServer(connect()
   .use(connect.logger())
   .use(connect.static(_dirname + '/public_html'), {redirect: true})
   ).listen(8124);
The connect.static
middleware takes the root path as the first parameter, and an optional
object as the second. Among the options supported in the second object
are:
maxAgeBrowser cache in milliseconds: defaults to 0
hiddenSet to true to allow transfer of hidden files; default is
false
redirectSet to true to redirect
to trailing / when the
pathname is a directory
This short Connect middleware application represents a big
difference in behavior from the earlier scratch application. The
Connect solution handles the browser cache, protects against malformed
URLs, and more properly handles HTTP HTML5 video, which the server
built from scratch could not. Its only shortcoming when compared to
the scratch server is that we have more control over error handling
with the scratch server. However, the connect.static
middleware does provide the appropriate response and status code to
the browser.
The code just shown, and the earlier examples in the section,
also demonstrate another Connect middleware: connect.logger. We’ll discuss it
next.
The logger middleware
module logs incoming requests to a stream, set to stdout by default.
You can change the stream, as well as other options including buffer
duration, format, and an immediate flag that
signals whether to write the log immediately or on response.
There are several tokens with which you can build the format string, in addition to four predefined formats you can use:
default':remote-addr - - [:date]
":method :url HTTP/:http-version" :status :res[content-length]
":referrer" ":user-agent"'
short':remote-addr - :method :url
HTTP/:http-version :status :res[content-length] - :response-time
ms'
tiny':method :url :status
:res[content-length] - :response-time ms'
devConcise output colored by response status for development use
The default format generates log entries like the following:
99.28.217.189 - - [Sat, 25 Feb 2012 02:18:22 GMT] "GET /example1.html HTTP/1.1" 304
- "-" "Mozilla/5.0 (Windows NT 6.1; WOW64) AppleWebKit/535.11 (KHTML, like Gecko)
 Chrome/17.0.963.56 Safari/535.11"
99.28.217.189 - - [Sat, 25 Feb 2012 02:18:22 GMT] "GET /phoenix5a.png HTTP/1.1" 304
 - "http://examples.burningbird.net:8124/example1.html"
"Mozilla/5.0 (Windows NT 6.1; WOW64) AppleWebKit/535.11 (KHTML, like Gecko)
Chrome/17.0.963.56 Safari/535.11"
99.28.217.189 - - [Sat, 25 Feb 2012 02:18:22 GMT] "GET /favicon.ico HTTP/1.1"
304 - "-" "Mozilla/5.0 (Windows NT 6.1; WOW64) AppleWebKit/535.11 (KHTML, like Gecko)
 Chrome/17.0.963.56 Safari/535.11"
99.28.217.189 - - [Sat, 25 Feb 2012 02:18:28 GMT]
"GET /html5media/chapter2/example16.html HTTP/1.1" 304 - "-"
"Mozilla/5.0 (Windows NT 6.1; WOW64) AppleWebKit/535.11 (KHTML, like Gecko)
Chrome/17.0.963.56 Safari/535.11"
This is very informative, but also very verbose. It’s also very
familiar, resembling the default log format we get with a server such
as Apache. You can change the format, and you can also direct the
output to a file. Example 6-5 makes use of
connect.logger, directing the log entries to
a file and setting the format to the dev predefined
format.
var connect = require('connect'),
    http = require('http'),
    fs = require('fs'),
    __dirname = '/home/examples';

var writeStream = fs.createWriteStream('./log.txt',
      {'flags' : 'a',
       'encoding' : 'utf8',
       'mode' : 0666});

http.createServer(connect()
   .use(connect.logger({format : 'dev', stream : writeStream }))
   .use(connect.static(__dirname + '/public_html'))
   ).listen(8124);
Now the logging output looks like:
GET /example1.html 304 4ms
GET /phoenix5a.png 304 1ms
GET /favicon.ico 304 1ms
GET /html5media/chapter2/example16.html 304 2ms
GET /html5media/chapter2/bigbuckposter.jpg 304 1ms
GET /html5media/chapter2/butterfly.png 304 1ms
GET /html5media/chapter2/example1.html 304 1ms
GET /html5media/chapter2/bigbuckposter.png 304 0ms
GET /html5media/chapter2/videofile.mp4 304 0ms
While not as informative, this is a handy way of checking request state and load times.
The scratch file server didn’t provide any functionality to work with HTTP cookies, nor did it handle session state. Luckily for us, both are handled with Connect middleware.
Chances are, one of your first JavaScript client applications
was to create an HTTP request cookie. The connect.parseCookie middleware provides the
functionality that allows us to access the cookie data on the server.
It parses the cookie header, populating req.cookies with the cookie/data pairs.
Example 6-6 shows a
simple web server that extracts the cookie for a key value of username and writes a somewhat creepy but
relevant message to stdout.
var connect = require('connect')
  , http = require('http');

var app = connect()
  .use(connect.logger('dev'))
  .use(connect.cookieParser())
  .use(function(req, res, next) {
     console.log('tracking ' + req.cookies.username);
     next();
   })
  .use(connect.static('/home/examples/public_html'));

http.createServer(app).listen(8124);
console.log('Server listening on port 8124');
I’ll get into the use of the anonymous function, and especially
the purpose of next, in the section
Custom Connect Middleware. Focusing for now on
connect.cookieParser,
we see that this middleware intercepts the incoming request, pulls the
cookie data out of the header, and stores the data in the request
object. The anonymous function then accesses the username data from the cookies object, outputting it to the
console.
To create an HTTP response cookie, we pair connect.parseCookie with connect.cookieSession, which provides secure
session persistence. Text is passed as a string to the connect.cookieParser
function, providing a secret key for session data. The data is added
directly to the session object. To clear the session data, set the
session object to null.
Example 6-7
creates two functions—one to clear the session data, and one to output
a tracking message—that are used as middleware for incoming requests.
They’re added as middleware in addition to logger, parseCookie, cookieSession, and static. The user is prompted for his or her
username in the client page, which is then used to set a request
cookie. On the server, the username and the number of resources the
person has accessed in the current session are persisted via an
encrypted response cookie.
var connect = require('connect')
  , http = require('http');

// clear all session data
function clearSession(req, res, next) {
  if ('/clear' == req.url) {
     req.session = null;
     res.statusCode = 302;
     res.setHeader('Location', '/');
     res.end();
  } else {
     next();
  }
}

// track user
function trackUser(req, res, next) {
  req.session.ct = req.session.ct || 0;
  req.session.username = req.session.username || req.cookies.username;
  console.log(req.cookies.username + ' requested ' +
                       req.session.ct++ + ' resources this session');
  next();
}

// cookie and session
var app = connect()
  .use(connect.logger('dev'))
  .use(connect.cookieParser('mumble'))
  .use(connect.cookieSession({key : 'tracking'}))
  .use(clearSession)
  .use(trackUser);

// static server
app.use(connect.static('/home/examples/public_html'));
// start server and listen
http.createServer(app).listen(8124);
console.log('Server listening on port 8124');
Figure 6-2 shows a web page accessed through the server application in Example 6-8. The JavaScript console is open to display both cookies. Note that the response cookie, unlike the request, is encrypted.
The number of documents the user accesses is tracked, either
until the user accesses the /clear URL (in which
case the session object is set to null) or closes the browser, ending the
session.
Example 6-7 also made use of a couple of custom middleware functions. In the next (and final) section on Connect, we’ll discuss how these work with Connect, and how to create a third-party middleware.
In Example 6-7 in the previous
section, we created two functions as Connect middleware in order to
process incoming requests before the final static server. The three
parameters passed to the functions are the HTTP request and response
objects, and next, a callback
function. These three form the signature for a Connect middleware
function.
To get a closer look at how Connect middleware works, let’s
examine one used in earlier code, connect.favicon. This
is nothing more than a simple function to either serve the default
favicon.ico or provide a custom
path:
connect()
.use (connect.favicon('someotherloc/favicon.ico'))
The reason I cover connect.favicon, other
than its usefulness, is that it’s one of the simplest middleware, and
therefore easy to reverse engineer.
The source code for connect.favicon,
especially when compared with other source codes, shows that all
exported middleware return a function with the following minimum
signature or profile:
return function(req, res, next)
The next callback, passed
as the last parameter to the function, is called if the middleware does
not process the current request, or doesn’t process it completely. The
next callback is also called if the
middleware has an error, and an error
object is returned as the parameter, as shown in Example 6-8.
module.exports = function favicon(path, options){
  var options = options || {}
    , path = path || __dirname + '/../public/favicon.ico'
    , maxAge = options.maxAge || 86400000;

  return function favicon(req, res, next){
    if ('/favicon.ico' == req.url) {
      if (icon) {
        res.writeHead(200, icon.headers);
        res.end(icon.body);
      } else {
        fs.readFile(path, function(err, buf){
          if (err) return next(err);
          icon = {
            headers: {
                'Content-Type': 'image/x-icon'
              , 'Content-Length': buf.length
              , 'ETag': '"' + utils.md5(buf) + '"'
              , 'Cache-Control': 'public, max-age=' + (maxAge / 1000)
            },
            body: buf
          };
          res.writeHead(200, icon.headers);
          res.end(icon.body);
        });
      }
    } else {
      next();
    }
  };
};
The next callback is, of
course, how the chained functions are called, in sequence. In an
incoming request, if the middleware can completely handle the request,
such as the request favicon.ico
request, no further middleware are invoked. This is why you would
include the connect.favicon
middleware before connect.logger in your
applications—to prevent requests for favicon.ico from cluttering up the
logs:
http.createServer(connect()
   .use(connect.favicon('/public_html/favicon.ico'))
   .use(connect.logger())
   .use(connect.static(_dirname + '/public_html'))
   ).listen(8124);
You’ve seen how you can create a custom Connect middleware directly in the application, and how a bundled Connect middleware looks, but how would you create a third-party middleware that’s not going to be embedded directly in the application?
To create an external Connect middleware, create the module as you
would any other module, but make sure it has all the pieces that Connect
requires—specifying the three parameters (req, res, and next), and that it calls next if it doesn’t
completely handle the request.
Example 6-9
creates a Connect middleware that checks to see if the requested file
exists and that it is a file (not a directory). If the request is a
directory, it returns a 403 status
code and a custom message. If the file doesn’t exist, it returns a
404 status code and, again, a custom
message. If neither happens, then it calls next to trigger the
Connect middleware into invoking the next function (in this case,
connect.static).
var fs = require('fs');

module.exports = function customHandler(path, missingmsg, directorymsg) {
   if (arguments.length < 3) throw new Error('missing parameter in customHandler');

   return function customHandler(req, res, next) {
      var pathname = path + req.url;
      console.log(pathname);
      fs.stat(pathname, function(err, stats) {
         if (err) {
            res.writeHead(404);
            res.write(missingmsg);
            res.end();
         } else if (!stats.isFile()) {
            res.writeHead(403);
            res.write(directorymsg);
            res.end();
         } else {
            next();
         }
      });
   }
}
The custom Connect middleware throws an error when one occurs, but
if an error occurs within the returned function, next
is called with an error object:
next(err);
The following code shows how we can use this custom middleware in an application:
var connect = require('connect'),
    http = require('http'),
    fs = require('fs'),
    custom = require('./custom'),
    base = '/home/examples/public_html';

http.createServer(connect()
   .use(connect.favicon(base + '/favicon.ico'))
   .use(connect.logger())
   .use(custom(base + '/public_html', '404 File Not Found',
          '403 Directory Access Forbidden'))
   .use(connect.static(base))
   ).listen(8124);
Connect does have an errorHandler function,
but it doesn’t serve the purpose we’re trying to achieve. Rather, its
purpose is to provide a formatted output of an exception. You’ll see it
in use with an Express application in Chapter 7.
There are several other bundled middleware, as well as a significant number of third-party middleware you can use with Connect. In addition, Connect forms the middleware layer for the Express application framework, discussed in Chapter 7. First, though, let’s take a quick look at two other types of services necessary for many Node applications: routers and proxies.
Routers accept something from one source and forward it to another. Typically what’s forwarded is a data packet, but at the application level, it can also be a resource request.
If you’ve used Drupal or WordPress, you’ve seen a router in action. Without any URL redirection, rather than your readers accessing an article with a URL like:
| http://yourplace.org/article/your-title |
they’d use:
| http://yourplace.org/node/174 |
The latter URL is an example of a router in action. The URL provides information about what the web application should do, in this case:
Access the node database (node in this case being a Drupal node).
Find and display the node identified by 174.
Another variation is:
| http://yourplace.org/user/3 |
Again, access the user database, and find and display the user identified by 3.
In Node, the primary use for a router is to extract the information we need from a URI—usually using some pattern—and to use that information to trigger the right process, passing the extracted information to the process.
There are several routers available for Node developers, including one built into Express, but I’m going to demonstrate one of the more popular: Crossroads.
The primary Crossroads site is at http://millermedeiros.github.com/crossroads.js/.
We can install the Crossroad router module with npm:
npm install crossroads
The module provides an extensive and well-documented API, but I’m going to focus only on three different methods:
addRouteDefines a new route pattern listener
parseParses a string and dispatches a match to the appropriate route
matched.addMaps a route handler to a route match
We define a route using a regular expression that can
contain curly brackets ({}) delimiting
named variables that will be passed to the route handler function. For
instance, both of the following route patterns:
{type}/{id}
node/{id}
will match:
| http://something.org/node/174 |
The difference is that a type parameter is passed
to the route handler for the first pattern, but not the second.
You can also use a colon (:) to denote optional segments. The following:
category/:type:/:id:
will match:
| category/ |
| category/tech/ |
| category/history/143 |
To trigger the route handler, you parse the request:
parse(request);
If the request matches any of the existing route handler functions, that function is called.
In Example 6-10, I created a simple application that looks for any given category, and an optional publication and publication item. It prints out to the console, the action specified in the request.
var crossroads = require('crossroads'),
    http = require('http');

crossroads.addRoute('/category/{type}/:pub:/:id:', function(type,pub,id) {
   if (!id && !pub) {
     console.log('Accessing all entries of category ' + type);
     return;
   } else if (!id) {
     console.log('Accessing all entries of category ' + type +
                  ' and pub ' + pub);
     return;
   } else {
     console.log('Accessing item ' + id + ' of pub ' + pub +
                 ' of category ' + type);
   }
});
http.createServer(function(req,res) {

  crossroads.parse(req.url);
  res.end('and that\'s all\n');
}).listen(8124);
The following requests:
http://examples.burningbird.net:8124/category/history
http://examples.burningbird.net:8124/category/history/journal
http://examples.burningbird.net:8124/category/history/journal/174
Generate the following console messages:
Accessing all entries of category history
Accessing all entries of category history and pub journal
Accessing item 174 of pub journal of category history
To match how something like Drupal works, with its combination of
type of object and identifier, Example 6-11 uses another
Crossroads method, matched.add, to map a route handler to a
specific route.
var crossroads = require('crossroads'),
    http = require('http');

var typeRoute = crossroads.addRoute('/{type}/{id}');

function onTypeAccess(type,id) {
   console.log('access ' + type + ' ' + id);
};

typeRoute.matched.add(onTypeAccess);

http.createServer(function(req,res) {

  crossroads.parse(req.url);
  res.end('processing');
}).listen(8124);
This application would match either of the following:
| /node/174 |
| /user/3 |
Routing is typically used with database access to generate the returned page content. It can also be used with middleware or framework modules in order to process incoming requests, though these applications may also provide their own routing software. I’ll demonstrate using Crossroads with Connect and a proxy in the next section.
A proxy is a way of routing requests from several different sources through one server for whatever reason: caching, security, even obscuring the originator of the request. As an example, publicly accessible proxies have been used to restrict some people’s access to certain web content by making it seem that a request originates from someplace other than its actual origin. This type of proxy is also called a forward proxy.
A reverse proxy is a way of controlling how requests are sent to a server. As an example, you may have five servers, but you don’t want people directly accessing four of them. Instead, you direct all traffic through the fifth server, which proxies the requests to the other servers. Reverse proxies can also be used for load balancing, and to improve the overall performance of a system by caching requests as they are made.
Another proxy use is to expose a local service to a cloud-based service. An example of this type of proxy is reddish-proxy, which exposes a local Redis instance to the new Reddish service at https://reddi.sh/.
In Node, the most popular proxy module is http-proxy. This module provides all of the proxy uses I could think of, and some I couldn’t. It provides forward and reverse proxying, can be used with WebSockets, supports HTTPS, and can incorporate latency. It’s used at the popular nodejitsu.com website, so, as the creators claim, it’s battle hardened.
The http-proxy GitHub page is at https://github.com/nodejitsu/node-http-proxy.
Install http-proxy using npm:
npm install http-proxy
The simplest use of http-proxy is to create a standalone proxy server that listens for incoming requests on one port, and proxies them to a web server listening on another:
var http = require('http'),
    httpProxy = require('http-proxy');

httpProxy.createServer(8124, 'localhost').listen(8000);

http.createServer(function (req, res) {
  res.writeHead(200, { 'Content-Type': 'text/plain' });
  res.write('request successfully proxied!' + '\n' + JSON.stringify(req.headers, true,
  2));
  res.end();
}).listen(8124);
All this simple application does is listen for requests on port
8000 and proxy them to the HTTP server
listening on port 8124.
The output to the browser from running this application on my system was:
request successfully proxied!
{
  "host": "examples.burningbird.net:8000",
  "connection": "keep-alive",
  "user-agent": "Mozilla/5.0 (Windows NT 6.1; WOW64) AppleWebKit/535.11
  (KHTML, like Gecko) Chrome/17.0.963.56 Safari/535.11",
  "accept": "text/html,application/xhtml+xml,application/xml;q=0.9,*/*;q=0.8",
  "accept-encoding": "gzip,deflate,sdch",
  "accept-language": "en-US,en;q=0.8",
  "accept-charset": "ISO-8859-1,utf-8;q=0.7,*;q=0.3",
  "cookie": "username=Shelley",
  "x-forwarded-for": "99.190.71.234",
  "x-forwarded-port": "54344",
  "x-forwarded-proto": "http"
}
The bits related to the use of the proxy are in bold text in the output. Notice the request cookie still hanging around from an earlier example?
You can also use http-proxy from the command line. In the bin directory, there is a command-line
application, which takes port, target, a configuration file, a flag to indicate
silencing the proxy log output, or -h
(for help). To listen for requests in port 8000 and proxy to port 8124 on the localhost, use:
./node-http-proxy --port 8000 --target localhost:8124
It can’t get much simpler than this. If you want to run the proxy in the background, attach the ampersand (&) to the end.
I’ll demonstrate some of the http-proxy capabilities with WebSockets and HTTPS later in the book, but for now, we’ll pull together the technologies demonstrated in this chapter—a static file server, the Connect middleware, the Crossroads router, and the http-proxy proxy—to create one last example, so you can try a working application that combines all these pieces.
In Example 6-12, I’m
using the http-proxy to test for a dynamic incoming request (the request
URL starts with /node/). If a match is
found, the router proxies the request to one server, which uses the
Crossroads router to parse out the relevant data. If the request isn’t for
a dynamic resource, the proxy then routes the request to a static file
server that’s utilizing several Connect middleware, including logger, favicon, and static.
var connect = require('connect'),
    http = require('http'),
    fs = require('fs'),
    crossroads = require('crossroads'),
    httpProxy = require('http-proxy'),
    base = '/home/examples/public_html';

// create the proxy that listens for all requests
httpProxy.createServer(function(req,res,proxy) {

   if (req.url.match(/^\/node\//))
      proxy.proxyRequest(req, res, {
        host: 'localhost',
        port: 8000
      });
   else
      proxy.proxyRequest(req,res, {
        host: 'localhost',
        port: 8124
      });
}).listen(9000);

// add route for request for dynamic resource
crossroads.addRoute('/node/{id}/', function(id) {
   console.log('accessed node ' + id);
});

// dynamic file server
http.createServer(function(req,res) {
   crossroads.parse(req.url);
   res.end('that\'s all!');
}).listen(8000);

// static file server
http.createServer(connect()
   .use(connect.favicon())
   .use(connect.logger('dev'))
   .use(connect.static(base))
   ).listen(8124);
Trying the server out with the following URL requests:
/node/345
/example1.html
/node/800
/html5media/chapter2/example14.html
results in the following console entries, as well as the proper response being returned to the browser:
accessed node 345
GET /example1.html 304 3ms
GET /phoenix5a.png 304 1ms
accessed node 800
GET /html5media/chapter2/example14.html 304 1ms
GET /html5media/chapter2/bigbuckposter.jpg 304 1ms
I wouldn’t say we’re halfway to our own CMS (content management system), but we’re getting the tools we need if we wanted to build one. But then, why build our own when we can use Node-enabled frameworks (covered in the next chapter)?
[1] Connect refers to the individual middleware options as just “middleware.” I follow its convention in this chapter.
Framework software provides infrastructure support that allows us to create websites and applications more quickly. It provides a skeleton on which to build, handling many of the mundane and ubiquitous aspects of development so we can focus on creating the functionality unique to our application or site. It also provides cohesiveness to our code, which can make the code easier to manage and maintain.
The terms frameworks and libraries have been used interchangeably, because both provide reusable functionality that can be utilized by developers in a variety of applications. They both offer discrete capabilities as well, but they differ in that frameworks usually also provide an infrastructure that can impact the overall design of your application.
There are some very sound frameworks in Node.js, including Connect (covered in Chapter 6), though I see Connect more as middleware than a framework. Two Node frameworks that stand out—because of support, capability, and popularity—are Express and Geddy. If you ask people about the differences between the two, they’ll say Express is more Sinatra-like, while Geddy is more like Rails. What this means in non-Ruby terms is that Geddy is MVC (Model-View-Controller)–based, while Express is, well, more RESTful (more on what that means later in the chapter).
There’s also a new kid in town, Flatiron, which previously existed as independent components but is now pulled together into a comprehensive product. Another framework popular at the node-toolbox website is Ember.js, formerly known as SproutCore 2.0. This in addition to CoreJS, which is also MVC-based.
I debated how much to cover of each in this chapter, and knew I’d have a hard time covering one framework in a single chapter, much less several, so I decided to focus on Express. Though the other frameworks are excellent, I like the openness and extensibility of Express, and it is, currently, the most popular of the frameworks.
The Geddy.js site is at http://geddyjs.org/. Flatiron can be found at http://flatironjs.org/, the Ember.js Github page is at https://github.com/emberjs/ember.js, and the primary CoreJS site is at http://echo.nextapp.com/site/corejs. The Express GitHub page is at https://github.com/visionmedia/express. You can find the Express documentation at http://expressjs.com/.
We can easily install Express with npm:
npm install express
To get a feel for Express, the best first step is to use the command-line version of the tool to generate an application. Since you’re never sure what an application will do, you’ll want to run this application in a clean directory—not a directory where you have all sorts of valuable stuff.
I named my new application site,
which is simple enough:
express site
The application generates several directories:
 create : site
   create : site/package.json
   create : site/app.js
   create : site/public
   create : site/public/javascripts
   create : site/public/images
   create : site/routes
   create : site/routes/index.js
   create : site/public/stylesheets
   create : site/public/stylesheets/style.css
   create : site/views
   create : site/views/layout.jade
   create : site/views/index.jade
It also provides a helpful message to change to the site directory
and run npm install:
npm install -d
Once the new application is installed, run the generated app.js file with node:
node app.js
It starts a server at port 3000. Accessing the application shows a web page with the words:
Express

Welcome to Express
You’ve created your first Express application. Now let’s see what we need to do to make it do something more interesting.
Example 7-1 shows the source code for the app.js file we just ran.
/*
 * Module dependencies.
 */

var express = require('express')
  , routes = require('./routes')
  , http = require('http');

var app = express();

app.configure(function(){
  app.set('views', __dirname + '/views');
  app.set('view engine', 'jade');
  app.use(express.favicon());
  app.use(express.logger('dev'));
  app.use(express.static(__dirname + '/public'));
  app.use(express.bodyParser());
  app.use(express.methodOverride());
  app.use(app.router);
});


app.configure('development', function(){
  app.use(express.errorHandler());
});

app.get('/', routes.index);

http.createServer(app).listen(3000);

console.log("Express server listening on port 3000");
From the top, the application includes three modules: Express,
Node’s HTTP, and a module just generated, routes. In the routes subdirectory, an index.js file has the following code:
/*
 * GET home page.
 */

exports.index = function(req, res){
  res.render('index', { title: 'Express' });
};
A little digging in the code shows us that the Express response
object’s render method renders a given
view with a set of options—in this case, a title of “Express.” I’ll cover
this more later in this chapter, in the section Routing.
Now let’s return to app.js.
After we’ve included all the necessary modules, we create an Express object instance, and then
configure it with a set of options via the configure method. (For more information on
configure, see the
upcoming sidebar Setting the Application Mode.) An
optional first parameter to configure is a string identifying whether
the application is of a specific environment (such as development or production). When an environment is not
provided, the application is run in every environment. A second call to
configure in app.js is specific only for the development
environment. You can call configure for every
possible environment, if you wish. The one that matches the environment is
the one that will be processed.
The second function to configure is an anonymous
function enclosing several middleware references. Some of this is familiar
(for instance, the use method) from our work
with the Connect middleware in Chapter 6; this is not
unexpected, since the same person, TJ Holowaychuk, is the primary author
of both applications. What isn’t familiar are the two app.set method
calls.
The app.set method is used to
define various settings, such as the location for application
views:
app.set('views', __dirname + '/views');and the view engine (in this case, Jade):
app.set('view engine', 'jade');What follows in app.js is a
call to the Express encapsulated favicon, logger, and static file server
middleware, which should need no further explanation:
  app.use(express.favicon());
  app.use(express.logger('dev'));
  app.use(express.static(__dirname + '/public'));
We can also call the middleware as methods when we create the server:
var app = express.createServer(
   express.logger(),
   express.bodyParts()
);
It doesn’t matter which approach you use.
The next three middleware/framework components included in the generated application are:
  app.use(express.bodyParser());
  app.use(express.methodOverride());
  app.use(app.router);
The bodyParser middleware,
like the other middleware, comes directly from Connect. All Express does
is re-export it.
I covered logger, favicon, and static in the previous chapter, but not bodyParse. This middleware parses the incoming
request body, converting it into request object properties. The methodOverride option
also comes to Express via Connect, and allows Express applications to
emulate full REST capability via a hidden form field named _method.
Full REST (Representational State Transfer) support means
support for HTTP PUT and DELETE, as well as GET and POST. We’ll discuss this more in the upcoming
section Routing and HTTP Verbs.
The last configuration item is app.router. This optional
middleware contains all the defined routes and performs the lookup for any
given route. If omitted, the first call to app.get—app.post, etc.—mounts the routes instead.
Just as with Connect, the order of middleware is important. The
favicon middleware is
called before logger, because we don’t
want favicon.ico accesses cluttering
the log. The static middleware is
included before bodyParser and methodOverride, because
neither of these is useful with the static pages—form processing occurs
dynamically in the Express application, not via a static page.
There’s more on Express/Connect in the section A Closer Look at the Express/Connect Partnership, later in the chapter.
The second call to configure, specific to
development mode, adds support for the
Express errorHandler. I’ll cover it and
other error handling techniques next.
Express provides its own error handling, as well as access
to the Connect errorHandler.
The Connect errorHandler provides a
way of handling exceptions. It’s a development tool that gives us a better
idea of what’s happening when an exception occurs. You can include it like
you’d include other middleware:
app.use(express.errorHandler());
You can direct exceptions to stderr using the
dumpExceptions
flag:
app.use(express.errorHandler({dumpExceptions : true }));You can also generate HTML for an exception using the showStack flag:
app.use(express.errorHandler({showStack : true; dumpExceptions : true}));To reiterate: this type of error handling is for development only—we definitely don’t want our users to see exceptions. We do, however, want to provide more effective handling for when pages aren’t found, or when a user tries to access a restricted subdirectory.
One approach we can use is to add a custom anonymous function as the last middleware in the middleware list. If none of the other middleware can process the request, it should fall gracefully to this last function:
app.configure(function(){
  app.use(express.favicon());
  app.use(express.logger('dev'));
  app.use(express.static(__dirname + '/public'));
  app.use(express.bodyParser());
  app.use(express.methodOverride());
  app.use(app.router);
  app.use(function(req, res, next){
    res.send('Sorry ' + req.url + ' does not exist');
  });
});
In the next chapter, we’ll fine-tune the response by using a template to generate a nice 404 page.
We can use another form of error handling to capture thrown errors
and process them accordingly. In the Express documentation, this type of
error handler is named app.error, but
it didn’t seem to exist at the time this book was written. However, the
function signature does work—a function with four parameters: error, request, response, and next.
I added a second error handler middleware function and adjusted the 404 middleware function to throw an error rather than process the error directly:
app.configure(function(){
  app.use(express.favicon());
  app.use(express.logger('dev'));
  app.use(express.static(__dirname + '/public'));
  app.use(express.bodyParser());
  app.use(express.methodOverride());
  app.use(app.router);
  app.use(function(req, res, next){
    throw new Error(req.url + ' not found');
  });
  app.use(function(err, req, res, next) {
    console.log(err);
    res.send(err.message);
  });
});
Now I can process the 404 error, as well as other errors, within the same function. And again, I can use templates to generate a more attractive page.
Throughout this chapter so far, we’ve seen the Express/Connect partnership in action. It’s through Connect that Express gets much of its basic functionality.
For instance, you can use Connect’s session support
middleware—cookieParser, cookieSession, and
session—to provide session support. You
just have to remember to use the Express version of the middleware:
  app.use(express.cookieParser('mumble'))
  app.use(express.cookieSession({key : 'tracking'}))
You can also enable static caching with the staticCache
middleware:
  app.use(express.favicon());
  app.use(express.logger('dev'));
  app.use(express.staticCache());
  app.use(express.static(__dirname + '/public'));
By default, the cache maintains a maximum of 128 objects, with a
maximum of 256 KB
each, for a total of about 32 MB. You can adjust these with the
options maxObjects and maxLength:
app.use(express.staticCache({maxObjects: 100, maxLength: 512}));Prettify a directory listing with directory:
  app.use(express.favicon());
  app.use(express.logger('dev'));
  app.use(express.staticCache({maxObjects: 100, maxLength: 512}));
  app.use(express.directory(__dirname + '/public'));
  app.use(express.static(__dirname + '/public'));
If you’re using express.directory with
routing, though, make sure that the directory middleware follows the
app.router middleware, or
it could conflict with the routing. A good rule of thumb: place express.directory after
the other middleware, but before any error handling.
The express.directory options
include whether to display hidden files (false by default), whether to display icons
(false by default), and a
filter.
You can also use third-party Connect middleware with Express. Use caution, though, when combining it with routing.
Now it’s time to return to the key component of Express: routing.
The core of all the Node frameworks—in fact, many modern frameworks—is the concept of routing. I covered a standalone routing module in Chapter 6, and demonstrated how you can use it to extract a service request from a URL.
Express routing is managed using the HTTP verbs GET, PUT, DELETE, and POST. The methods are
named accordingly, such as app.get for GET and app.post for POST. In the generated
application, shown in Example 7-1,
app.get is used to access
the application root ('/'), and is
passed a request listener—in this instance, the routes index function—to process the data
request.
The routes.index function is
simple:
exports.index = function(req, res){
  res.render('index', { title: 'Express' });
};
It makes a call to the render method on the
resource object. The render method takes the
name of file that provides the template. Since the application has already
identified the view engine:
app.set('view engine', 'jade');it’s not necessary to provide an extension for the file. However, you could also use:
res.render('index.jade', { title: 'Express' });You can find the template file in another generated directory named
views. It has two files: index.jade and layout.jade. index.jade is the file the template file
referenced in the render method, and has
the following contents:
extends layout

block content
  h1= title
  p Welcome to #{title}
The content of the document is an H1 element with the title, and a
paragraph element with a greeting to the title value. The layout.jade template provides the overall
layout for the document, including a title and link in the head element, and the body contents in the
body element:
!!!
html
  head
    title= title
    link(rel='stylesheet', href='/stylesheets/style.css')
  body
    block content
The index.jade file is what
provides the content for the body
defined in layout.jade.
I cover the use of Jade templates and CSS with Express applications in Chapter 8.
To recap what’s happening in this application:
The main Express application uses app.get to associate
a request listener function (routes.index) with an HTTP GET request.
The routes.index function
calls res.render to render
the response to the GET request.
The res.render function
invokes the application object’s render
function.
The application render function
renders the specified view, with whatever options—in this case, the title.
The rendered content is then written to the response object and back to the user’s browser.
The last step in the process is when the generated content is
written back to the response to the browser. Snooping around the source
code shows us that the render method takes a
third argument, a callback function that’s called with any error and the
generated text.
Wanting to take a closer look at the generated content, I modified
the route.index file to add in the
function and intercept the generated text. I output the text to the
console. Since I’m overriding the default functionality, I also sent the
generated text back to the browser using res.write—just like we have with other
applications in previous chapters—and then called res.end to signal the
finish:
exports.index = function(req, res){
  res.render('index', { title: 'Express' }, function(err, stuff) {
     if (!err) {
        console.log(stuff);
        res.write(stuff);
        res.end();
     }
  });
};
Just as we hoped, the application now writes the content to the
console as well as the browser. This just demonstrates that, though we’re
using an unfamiliar framework, it’s all based on Node and functionality
we’ve used previously. Of course, since this is a framework, we know there
has to be a better method than using res.write and res.end. There is, and it’s discussed in the
next section, which looks a little more closely at routing paths.
The route, or route path, given in Example 7-1 is just a simple / (forward slash)
signifying the root address. Express compiles all routes to a regular
expression object internally, so you can use strings with special
characters, or just use regular expressions directly in the path
strings.
To demonstrate, I created a bare-bones routing path application in
Example 7-2 that listens
for three different routes. If a request is made to the server for one
of these routes, the parameters from the request are returned to the
sender using the Express response object’s send method.
var express = require('express')
  , http = require('http');

var app = express();

app.configure(function(){
});

app.get(/^\/node?(?:\/(\d+)(?:\.\.(\d+))?)?/, function(req, res){
   console.log(req.params);
   res.send(req.params);
});

app.get('/content/*',function(req,res) {
   res.send(req.params);
});

app.get("/products/:id/:operation?", function(req,res) {
   console.log(req);
   res.send(req.params.operation + ' ' + req.params.id);
});

http.createServer(app).listen(3000);

console.log("Express server listening on port 3000");
We’re not doing any routing to views or handling any static
content, so we didn’t need to provide middleware in the app.configure method.
However, we do need to call the app.configure method if
we want to gracefully handle requests that don’t match any of the
routes. The application is also using the default environment (development).
The first of the app.get method calls is
using a regular expression for the path. This regular expression is
adapted from one provided in the Express Guide, and listens for any
request for a node. If the request
also provides a unique identifier or range of identifiers, this is
captured in the request object’s params array, which is sent back as a
response. The following requests:
node
nodes
 /node/566
/node/1..10
/node/50..100/something
return the following params
array values:
[null, null]
[null, null]
["566", null]
["1", "10"]
["50", "100"]
The regular expression is looking for a single identifier or a
range of identifiers, given as two values with a range indicator
(..) between them. Anything after the
identifier or range is ignored. If no identifier or range is provided,
the parameters are null.
The code to process the request doesn’t use the underlying HTTP
response object’s write and end methods to send the parameters back to the
requester; instead, it uses the Express send method. The
send method determines
the proper headers for the response (given the data type of what’s being
sent) and then sends the content using the underlying HTTP end method.
The next app.get is using a
string to define the routing path pattern. In this case, we’re looking
for any content item. This pattern
will match anything that begins with /content/. The following requests:
/content/156
/content/this_is_a_story
/content/apples/oranges
result in the following params
values:
["156"]
["this_is_a_story"]
["apples/oranges"]
The asterisk (*) is
liberal in what it accepts, and everything after content/ is returned.
The last app.get method is
looking for a product request. If a product identifier is given, it can
be accessed directly via params.id.
If an operation is given, it can be accessed directly via params.operation. Any combination of the two
values is allowed, except not providing at least
one identifier or one operation.
The following URLs:
/products/laptopJK3444445/edit
/products/fordfocus/add
/products/add
/products/tablet89/delete
/products/
result in the following returned values:
edit laptopJK3444445
add fordfocus
undefined add
delete tablet89
Cannot GET /products/
The application outputs the request object to the console. When running the application, I directed the output to an output.txt file so I could examine the request object more closely:
node app.js > output.txt
The request object is a socket, of course, and we’ll recognize
much of the object from our previous work exploring the Node HTTP
request object. What we’re mainly interested in is the route object added via Express. Following is
the output for the route object for
one of the requests:
  route:
   { path: '/products/:id/:operation?',
     method: 'get',
     callbacks: [ [Function] ],
     keys: [ [Object], [Object] ],
     regexp: /^\/products\/(?:([^\/]+?))(?:\/([^\/]+?))?\/?$/i,
     params: [ id: 'laptopJK3444445', operation: 'edit' ] },
Note the generated regular expression object, which converts my
use of the optional indicator (:) in
the path string into something meaningful for the underlying JavaScript
engine (thankfully, too, since I’m lousy at regular expressions).
Now that we have a better idea of how the routing paths work, let’s look more closely at the use of the HTTP verbs.
In the previous examples, we used app.get to process incoming requests. This
method is based on the HTTP GET
method and is useful if we’re looking for data, but not if we want to
process new incoming data or edit or delete existing data. We need to
make use of the other HTTP verbs to create an application that maintains
as well as retrieves data. In other words, we need to make our
application RESTful.
As noted earlier, REST means Representational State Transfer.
RESTful is a term used to describe any web
application that applies HTTP and REST principles:
directory-structured URLs, statelessness, data transferred in an
Internet media type (such as JSON), and the use of HTTP methods
(GET, POST, DELETE, and PUT).
Let’s say our application is managing that most infamous of products, the widget. To create a new widget, we’ll need to create a web page providing a form that gets the information about the new widget. We can generate this form with the application, and I’ll demonstrate this approach in Chapter 8, but for now we’ll use a static web page, shown in Example 7-3.
<!doctype html>
<html lang="en">
<head>
 <meta charset="utf-8" />
 <title>Widgets</title>
</head>
<body>
<form method="POST" action="/widgets/add"
enctype="application/x-www-form-urlencoded">

 <p>Widget name: <input type="text" name="widgetname" id="widgetname"
size="25" required/></p>

 <p>Widget Price: <input type="text"
pattern="^\$?([0-9]{1,3},([0-9]{3},)*[0-9]{3}|[0-9]+)(.[0-9][0-9])?$"
name="widgetprice" id="widgetprice" size="25" required/></p>

 <p>Widget Description: <br /><textarea name="widgetdesc" id="widgetdesc"
cols="20" rows="5">No Description</textarea>
 <p>

 <input type="submit" name="submit" id="submit" value="Submit"/>
 <input type="reset" name="reset" id="reset" value="Reset"/>
 </p>
 </form>
</body>
The page takes advantage of the new HTML5 attributes required and pattern to provide
validation of data. Of course, this works only with browsers that
support HTML5, but for now, I’ll assume you’re using a modern
HTML5-capable browser.
The widget form requires a widget name, price (with an associated regular expression to validate the data structure in the pattern attribute), and description. Browser-based validation should ensure we get the three values, and that the price is properly formatted as US currency.
In the Express application, we’re just going to persist new
widgets in memory, as we want to focus purely on the Express technology
at this time. As each new widget is posted to the application, it’s
added to an array of widgets via the app.post method. Each
widget can be accessed by its application-generated identifier via the
app.get method. Example 7-4 shows the entire
application.
var express = require('express')
  , http = require('http')
  , app = express();

app.configure(function(){
  app.use(express.favicon());
  app.use(express.logger('dev'));
  app.use(express.static(__dirname + '/public'));
  app.use(express.bodyParser());
  app.use(app.router);
});

app.configure('development', function(){
  app.use(express.errorHandler());
});

// in memory data store
var widgets = [
  { id : 1,
    name : 'My Special Widget',
    price : 100.00,
    descr : 'A widget beyond price'
  }
]

// add widget
app.post('/widgets/add', function(req, res) {
  var indx = widgets.length + 1;
  widgets[widgets.length] =
   { id : indx,
     name : req.body.widgetname,
     price : parseFloat(req.body.widgetprice),
     descr : req.body.widgetdesc };
  console.log('added ' + widgets[indx-1]);
  res.send('Widget ' + req.body.widgetname + ' added with id ' + indx);
});

// show widget
app.get('/widgets/:id', function(req, res) {
   var indx = parseInt(req.params.id) - 1;
   if (!widgets[indx])
      res.send('There is no widget with id of ' + req.params.id);
   else
      res.send(widgets[indx]);
});

http.createServer(app).listen(3000);

console.log("Express server listening on port 3000");
The first widget is seeded into the widget array, so we have
existing data if we want to immediately query for a widget without
adding one first. Note the conditional test in app.get to respond to a request for a
nonexistent or removed widget.
Running the application (example4.js in the examples), and accessing the application using / or /index.html (or /example3.html, in the examples) serves up the static HTML page with the form. Submitting the form generates a page displaying a message about the widget being added, as well as its identifier. We can then use the identifier to display the widget—in effect, a dump of the widget object instance:
http://whateverdomain.com:3000/widgets/2It works...but there’s a problem with this simple application.
First, it’s easy to make a typo in the widget fields. You can’t put in data formatted as anything other than currency in the price field, but you can put in the wrong price. You can also easily type in the wrong name or description. What we need is a way to update a widget, as well as a way to remove a widget we no longer need.
The application needs to incorporate support for two other RESTful
verbs: PUT and DELETE. PUT is used to update
the widget, while DELETE is used to
remove it.
To update the widget, we’ll need a form that comes prepopulated
with the widget data in order to edit it. To delete the widget, we’ll
need a form that confirms whether we truly want to delete the widget. In
an application, these are generated dynamically using a template, but
for now, since we’re focusing on the HTTP verbs, I created static web
pages that edit and then delete the already created widget, widget 1.
The form for updating widget 1
is shown in the following code. Other than being populated with the
information for widget 1, there is
just one other difference between this form and the form to add a new
widget: the addition of a hidden field named _method, shown in bold text:
<form method="POST" action="/widgets/1/update"
enctype="application/x-www-form-urlencoded">

 <p>Widget name: <input type="text" name="widgetname"
 id="widgetname" size="25" value="My Special Widget" required/></p>

 <p>Widget Price: <input type="text"
 pattern="^\$?([0-9]{1,3},([0-9]{3},)*[0-9]{3}|[0-9]+)(.[0-9][0-9])?$"
 name="widgetprice" id="widgetprice" size="25" value="100.00" required/></p>

 <p>Widget Description: <br />
 <textarea name="widgetdesc" id="widgetdesc" cols="20"
 rows="5">A widget beyond price</textarea>
 <p>

 <input type="hidden" value="put" name="_method" />

 <input type="submit" name="submit" id="submit" value="Submit"/>
 <input type="reset" name="reset" id="reset" value="Reset"/>
 </p>
 </form>
Since PUT and DELETE are not
supported in the form method
attribute, we have to add them using a hidden field with a specific
name, _method, and give them a value
of either put, for PUT, or delete for DELETE.
The form to delete the widget is simple: it contains the hidden
_method field, and a button to
confirm the deletion of widget
1:
<p>Are you sure you want to delete Widget 1?</p>
<form method="POST" action="/widgets/1/delete"
 enctype="application/x-www-form-urlencoded">

 <input type="hidden" value="delete" name="_method" />

 <p>
 <input type="submit" name="submit" id="submit" value="Delete Widget 1"/>
 </p>
</form>
To ensure that the HTTP verbs are handled properly, we need to add
another middleware, express.methodOverride,
following express.bodyParser in
the app.configure method
call. The express.methodOverride
middleware alters the HTTP method to whatever is given as value in this
hidden field:
app.configure(function(){
  app.use(express.favicon());
  app.use(express.logger('dev'));
  app.use(express.static(__dirname + '/public'));
  app.use(express.bodyParser());
  app.use(express.methodOverride());
  app.use(app.router);
});
Next, we’ll need to add functionality to process these two new
verbs. The update request replaces the widget object’s contents with the
new contents, while the delete request deletes the widget array entry
in place, deliberately leaving a null value since we do not want to reorder the
array because of the widget removal.
To complete our widget application, we’ll also add in an index page for accessing widgets without any identifier or operation. All the index page does is list all the widgets currently in the memory store.
Example 7-5 shows the complete widget application with all the new functionality shown in bold text.
var express = require('express')
  , http = require('http')
  , app = express();

app.configure(function(){
  app.use(express.favicon());
  app.use(express.logger('dev'));
  app.use(express.static(__dirname + '/public'));
  app.use(express.bodyParser());
  app.use(express.methodOverride());
  app.use(app.router);
});

app.configure('development', function(){
  app.use(express.errorHandler());
});
// in memory data store
var widgets = [
  { id : 1,
    name : 'My Special Widget',
    price : 100.00,
    descr : 'A widget beyond price'
  }
]

// index for /widgets/
app.get('/widgets', function(req, res) {
   res.send(widgets);
});

// show a specific widget
app.get('/widgets/:id', function(req, res) {
   var indx = parseInt(req.params.id) - 1;
   if (!widgets[indx])
      res.send('There is no widget with id of ' + req.params.id);
   else
      res.send(widgets[indx]);
});

// add a widget
app.post('/widgets/add', function(req, res) {
  var indx = widgets.length + 1;
  widgets[widgets.length] =
   { id : indx,
     name : req.body.widgetname,
     price : parseFloat(req.body.widgetprice),
     descr : req.body.widgetdesc };
  console.log(widgets[indx-1]);
  res.send('Widget ' + req.body.widgetname + ' added with id ' + indx);
});

// delete a widget
app.del('/widgets/:id/delete', function(req,res) {
   var indx = req.params.id - 1;
   delete widgets[indx];

   console.log('deleted ' + req.params.id);
   res.send('deleted ' + req.params.id);
});

// update/edit a widget
app.put('/widgets/:id/update', function(req,res) {
  var indx = parseInt(req.params.id) - 1;
  widgets[indx] =
   { id : indx,
     name : req.body.widgetname,
     price : parseFloat(req.body.widgetprice),
     descr : req.body.widgetdesc };
  console.log(widgets[indx]);
  res.send ('Updated ' + req.params.id);
});

http.createServer(app).listen(3000);

console.log("Express server listening on port 3000");
After running the application, I add a new widget, list the
widgets out, update widget 1’s price,
delete the widget, and then list the widgets out again. The console.log messages for this activity
are:
Express server listening on port 3000
{ id: 2,
  name: 'This is my Baby',
  price: 4.55,
  descr: 'baby widget' }
POST /widgets/add 200 4ms
GET /widgets 200 2ms
GET /edit.html 304 2ms
{ id: 0,
  name: 'My Special Widget',
  price: 200,
  descr: 'A widget beyond price' }
PUT /widgets/1/update 200 2ms
GET /del.html 304 2ms
deleted 1
DELETE /widgets/1/delete 200 3ms
GET /widgets 200 2ms
Notice the HTTP PUT and
DELETE verbs in bold text in the
output. When I list the widgets out the second time, the values returned
are:
[
  null,
  {
    "id": 2,
    "name": "This is my Baby",
    "price": 4.55,
    "descr": "baby widget"
  }
]
We now have a RESTful Express application. But we also have another problem.
If our application managed only one object, it might be OK to cram all the functionality into one file. Most applications, however, manage more than one object, and the functionality for all of those applications isn’t as simple as our little example. What we need is to convert this RESTful Express application into a RESTful MVC Express application.
Handling all the functionality your application needs in one file would work for a very tiny application, but most applications need better organization. MVC is a popular software architecture, and we want to be able to incorporate the advantages of this architecture and still be able to use Express. This effort isn’t as intimidating as it seems, because we have existing functionality we can emulate: Ruby on Rails.
Ruby on Rails has inspired much of the fundamental nature of Node, providing an underlying design we can use to incorporate support for MVC into our Express application. Express has already incorporated the use of routes (fundamental to Rails), so we’re halfway there. Now we need to provide the second component—the separation of model, view, and controller. For the controller component, we’re going to need a set of defined actions for each object we maintain.
Rails supports several different actions that map a route (verb and path) to a data action. The mapping is based on another concept, CRUD (create, read, update, and delete—the four fundamental persistent storage functions). The Rails website provides a guide that supplies an excellent table showing the mapping we need to create in our application. I extrapolated from the Rails table to create Table 7-1, which shows the mapping for maintaining widgets.
HTTP verb | Path | Action | Used for |
| /widgets |
| Displaying widgets |
| /widgets/new |
| Returning the HTML form for creating a new widget |
| /widgets |
| Creating a new widget |
| /widgets/:id |
| Displaying a specific widget |
| /widgets/:id/edit |
| Returning the HTML for editing a specific widget |
| /widgets/:id |
| Updating a specific widget |
| /widgets/:id |
| Deleting a specific widget |
We’re already there for most of the functionality—we just need to clean it up a bit.
Just a reminder: you also might have issues with existing
middleware when implementing the MVC change. For instance, the use of
the directory middleware,
which provides a pretty directory printout, conflicts with the create action, since they work on the same
route. Solution? Place the express.directory
middleware after the app.router in the
configure method call.
First, we’re going to create a controllers subdirectory and create a new file
in it named widgets.js. Then we’re
going to copy all of our apt.get and apt.put method calls into
this new file.
Next, we need to convert the method calls into the appropriate MVC format. This means converting the routing method call into a function for each, which is then exported. For instance, the function to create a new widget:
// add a widget
app.post('/widgets/add', function(req, res) {
  var indx = widgets.length + 1;
  widgets[widgets.length] =
   { id : indx,
     name : req.body.widgetname,
     price : parseFloat(req.body.widgetprice)};
  console.log(widgets[indx-1]);
  res.send('Widget ' + req.body.widgetname + ' added with id ' + indx);
});
is converted into widgets.create:
// add a widget
exports.create = function(req, res) {
  var indx = widgets.length + 1;
  widgets[widgets.length] =
   { id : indx,
     name : req.body.widgetname,
     price : parseFloat(req.body.widgetprice)},
  console.log(widgets[indx-1]);
  res.send('Widget ' + req.body.widgetname + ' added with id ' + indx);
};
Each function still receives the request and resource object. The only difference is that there isn’t a direct route-to-function mapping.
Example 7-6 shows the new widgets.js file in the controllers subdirectory. Two of the methods,
new and edit, are placeholders for now, to be addressed
in Chapter 8. We’re
still using an in-memory data store, and I simplified the widget object,
removing the description field to make the application easier for
testing.
var widgets = [
   { id : 1,
     name : "The Great Widget",
     price : 1000.00
   }
]

// index listing of widgets at /widgets/
exports.index = function(req, res) {
   res.send(widgets);
};

// display new widget form
exports.new = function(req, res) {
   res.send('displaying new widget form');
};

// add a widget
exports.create = function(req, res) {
  var indx = widgets.length + 1;
  widgets[widgets.length] =
   { id : indx,
     name : req.body.widgetname,
     price : parseFloat(req.body.widgetprice) };
  console.log(widgets[indx-1]);
  res.send('Widget ' + req.body.widgetname + ' added with id ' + indx);
};

// show a widget
exports.show = function(req, res) {
   var indx = parseInt(req.params.id) - 1;
   if (!widgets[indx])
      res.send('There is no widget with id of ' + req.params.id);
   else
      res.send(widgets[indx]);
};

// delete a widget
exports.destroy = function(req, res) {
   var indx = req.params.id - 1;
   delete widgets[indx];

   console.log('deleted ' + req.params.id);
   res.send('deleted ' + req.params.id);
};

// display edit form
exports.edit = function(req, res) {
   res.send('displaying edit form');
};


// update a widget
exports.update = function(req, res) {
  var indx = parseInt(req.params.id) - 1;
  widgets[indx] =
   { id : indx,
     name : req.body.widgetname,
     price : parseFloat(req.body.widgetprice)}
  console.log(widgets[indx]);
  res.send ('Updated ' + req.params.id);
};
Notice that edit and new are both GET methods, as their only purpose is to serve a
form. It’s the associated create and
update methods that actually change the
data: the former is served as POST, the
latter as PUT.
To map the routes to the new functions, I created a second module,
maproutecontroller, with one exported
function, mapRoute. It has two
parameters—the Express app object and a
prefix representing the mapped
controller object (in this case, widgets). It uses the prefix to access the
widgets controller object, and then
maps the methods it knows are in this object (because the object is a
controller and has a fixed set of required methods) to the appropriate
route. Example 7-7 has the
code for this new module.
exports.mapRoute = function(app, prefix) {

   prefix = '/' + prefix;

   var prefixObj = require('./controllers/' + prefix);

   // index
   app.get(prefix, prefixObj.index);

   // add
   app.get(prefix + '/new', prefixObj.new);

   // show
   app.get(prefix + '/:id', prefixObj.show);

   // create
   app.post(prefix + '/create', prefixObj.create);

   // edit
   app.get(prefix + '/:id/edit', prefixObj.edit);

   // update
   app.put(prefix + '/:id', prefixObj.update);

   // destroy
   app.del(prefix + '/:id', prefixObj.destroy);

};
The mapRoute method is a very
simple function, and should be recognizable when you compare the routes
given to those in Table 7-1.
Last, we finish the main application that pulls all these pieces together. Thankfully, it’s a lot cleaner now that we don’t have all the routing method calls. To handle a possibly growing number of objects, I use an array to contain the prefix name for each. If we add a new object, we add a new prefix to the array.
Express comes with an MVC application in the examples subdirectory. It uses a routine that accesses the controllers directory and infers the prefix names from the filenames it finds. With this approach, we don’t have to change the application file to add a new object.
Example 7-8 shows
the finished application. I added back in the original routes.index view, except I changed the title
value in the routes/index.js file
from “Express” to “Widget
Factory.”
var express = require('express')
  , routes = require('./routes')
  , map = require('./maproutecontroller')
  , http = require('http')
  , app = express();

app.configure(function(){
  app.use(express.favicon());
  app.use(express.logger('dev'));
  app.use(express.staticCache({maxObjects: 100, maxLength: 512}));
  app.use(express.static(__dirname + '/public'));
  app.use(express.bodyParser());
  app.use(express.methodOverride());
  app.use(app.router);
  app.use(express.directory(__dirname + '/public'));
  app.use(function(req, res, next){
    throw new Error(req.url + ' not found');
  });
  app.use(function(err, req, res, next) {
    console.log(err);
    res.send(err.message);
  });
});

app.configure('development', function(){
  app.use(express.errorHandler());
});

app.get('/', routes.index);
var prefixes = ['widgets'];

// map route to controller
prefixes.forEach(function(prefix) {
  map.mapRoute(app, prefix);
});

http.createServer(app).listen(3000);

console.log("Express server listening on port 3000");
Cleaner, simpler, extensible. We still don’t have the view part of the MVC, but I’ll cover that in the next chapter.
Instead of testing with a browser, we’ll test the application with cURL. This Unix utility is extremely helpful when it comes to testing a RESTful application without having to create all the forms.
To test the widgets index, use the following cURL command (based on running the application from my examples site, and on port 3000—adjust the command accordingly for your setup):
curl --request GET http://examples.burningbird.net:3000/widgets
Following the request option, specify the method (in this case,
GET), and then the request URL. You
should get back a dump of all widgets currently in the data store.
To test creating a new widget, first issue a request for the new object:
curl --request GET http://examples.burningbird.net:3000/widgets/new
A message is returned about retrieving the new widget form. Next,
test adding a new widget, passing the data for the widget in the cURL
request, and changing the method to POST:
curl --request POST http://examples.burningbird.net:3000/widgets/create
 --data 'widgetname=Smallwidget&widgetprice=10.00'
Run the index test again to make sure the new widget is displayed:
curl --request GET http://examples.burningbird.net:3000/widgets
The result should be:
[
{
"id": 1,
"name": "The Great Widget",
"price": 1000
},
{
"id": 2,
"name": "Smallwidget",
"price": 10
}Next, update the new widget, setting its price to 75.00. The method is now PUT:
curl --request PUT http://examples.burningbird.net:3000/widgets/2 --data 'widgetname=Smallwidget&widgetprice=75.00'
Once you’ve verified the data was changed, go ahead and delete the
new record, changing the HTTP method to DELETE:
curl --request DELETE http://examples.burningbird.net:3000/widgets/2
Now that we have the controller component of the MVC, we need to add the view components, which I cover in Chapter 8. Before moving on, though, read the sidebar Beyond Basic Express for some final tips.
Frameworks such as Express provide a great deal of useful functionality, but one thing they don’t provide is a way of separating the data from the presentation. You can use JavaScript to generate HTML to process the result of a query or update, but the effort can quickly become tedious—especially if you have to generate every part of the page, including sidebars, headers, and footers. Sure, you can use functions, but the work can still verge on overwhelming.
Luckily for us, as framework systems have developed, so have template systems, and the same holds true for Node and Express. In Chapter 7, we briefly used Jade, the template system installed by default with Express, to generate an index page. Express also supports other compatible template systems, including another popular choice, EJS (embedded JavaScript). Jade and EJS take a completely different approach, but both deliver the expected results.
In addition, though you can manually create CSS files for your website or application, you can also use a CSS engine that can simplify this aspect of your web design and development. Rather than having to remember to add in all of the curly braces and semicolons, you use a simplified structure that can be cleaner to maintain. One such CSS engine that works quite nicely with Express and other Node applications is Stylus.
In this chapter I’ll primarily focus on Jade, since it is installed by default with Express. However, I’m going to briefly cover EJS, so you can see two different types of template systems and how they work. I’ll also introduce the use of Stylus to manage the CSS to ensure that the pages display nicely.
Embedded JavaScript is a good name for EJS, because it best describes how it works: JavaScript embedded into HTML markup handles the melding of data and document structure. It’s a very simple template system based on Ruby’s ERB (embedded Ruby).
The EJS GitHub page can be found at https://github.com/visionmedia/ejs.
If you’ve worked with most content management systems (CMS), you’ll quickly grasp the fundamentals of EJS. The following is an example of an EJS template:
<% if (names.length) { %>
<ul>
<% names.forEach(function(name){ %>
<li><%= name %></li>
<% }) %>
</ul>
<% } %>In the code, the EJS is embedded directly into HTML, in this
example providing the data for the individual list items for an
unordered list. The angle brackets and percentage sign pairs (<%, %>) are used to delimit EJS instructions: a
conditional test ensures that an array has been provided, and then the
JavaScript processes the array, outputting the individual array
values.
EJS is based on the Ruby ERB templating system, which is why you’ll frequently see “erb-like” used to describe its format.
The values themselves are output with the equals sign (=), which is a shortcut for “print this value
here”:
<%= name %>
The value is escaped when it’s printed out. To print out an
unescaped value, use a dash (-), like
so:
<%- name %>
If for some reason you don’t want to use the standard open and
closing EJS tags (<%, %>), you can define custom ones using the
EJS object’s open and close methods:
ejs.open('<<');
ejs.close('>>');You can then use these custom tags instead of the default ones:
<h1><<=title >></h1>
Unless you have a solid reason for doing so, though, I’d stick with the default.
Though blended with HTML, EJS is JavaScript, so you have to
provide the open and closing curly braces, as well as the proper format
when using the array object’s forEach method.
For the finished product, the HTML is then rendered via an EJS function call, either returning a JavaScript function that generates a result, or generating the finished result. I’ll demonstrate this once we get EJS for Node installed. Let’s do that now.
The module that’s installed is a version of EJS capable of being used with Node. It’s not the same thing you’ll get if you go to the EJS site and directly download EJS. EJS for Node can be used with client-side JavaScript, but I’m going to focus on its use with Node applications.
Install the template system using npm:
npm install ejs
Once EJS is installed, you can use it directly in a simple Node application—you don’t have to use it with a framework like Express. As a demonstration, render HTML from a given template file as follows:
<html>
<head>
<title><%= title %></title>
</head>
<body>
<% if (names.length) { %>
<ul>
<% names.forEach(function(name){ %>
<li><%= name %></li>
<% }) %>
</ul>
<% } %>
</body>Call the EJS object’s renderFile method
directly. Doing so opens the template and uses the data provided as an
option to generate the HTML.
Example 8-1 uses
the standard HTTP server that comes with Node to listen for a request on
port 8124. When a request is received, the application calls the EJS
renderFile method,
passing in the path for the template file, as well as a names array and a document title. The last parameter is a callback
function that either provides an error (and a fairly readable error, at
that) or the resulting generated HTML. In the example, the result is
sent back via the response object if there’s no error. If there
is an error, an error message is sent in the
result, and the error object is output to the console.
var http = require('http')
, ejs = require('ejs')
;
// create http server
http.createServer(function (req, res) {
res.writeHead(200, {'content-type': 'text/html'});
// data to render
var names = ['Joe', 'Mary', 'Sue', 'Mark'];
var title = 'Testing EJS';
// render or error
ejs.renderFile(__dirname + '/views/test.ejs',
{title : 'testing', names : names},
function(err, result) {
if (!err) {
res.end(result);
} else {
res.end('An error occurred accessing page');
console.log(err);
}
});
}).listen(8124);
console.log('Server running on 8124/');One variation of the rendering method is render, which takes the
EJS template as a string and then returns the formatted HTML:
var str = fs.readFileSync(__dirname + '/views/test.ejs', 'utf8');
var html = ejs.render(str, {names : names, title: title });
res.end(html);A third rendering method, which I won’t demonstrate, is compile, which takes an
EJS template string and returns a JavaScript function that can be
invoked to render HTML each time it’s called. You can also use this
method to enable EJS for Node in client-side applications.
The use of compile is
demonstrated in Chapter 9, in the section Building a Game Leaderboard.
In addition to support for rendering EJS templates, EJS
for Node also provides a set of predefined filters, which can further
simplify the HTML generation. One filter, first, extracts out the
first value in a supplied array of values. Another filter, downcase, takes the
result of the first filter and lowercases the text:
var names = ['Joe Brown', 'Mary Smith', 'Tom Thumb', 'Cinder Ella'];
var str = '<p><%=: users | first | downcase %></p>';
var html = ejs.render(str, {users : names });The result is the following:
<p>joe brown</p>
The filters can be chained together, with the result of one being
piped to the next. The use of the filter is triggered by the colon
(:) following the equals sign
(=), which is then followed by the
data object. The following example of the use of filters takes a set of
people objects, maps a new object
consisting solely of their names, sorts the names, and then prints out a
concatenated string of the names:
var people = [
{name : 'Joe Brown', age : 32},
{name : 'Mary Smith', age : 54},
{name : 'Tom Thumb', age : 21},
{name : 'Cinder Ella', age : 16}];
var str = "<p><%=: people | map:'name' | sort | join %></p>";
var html = ejs.render(str, {people : people });Here is the result of that filter combination:
Cinder Ella, Joe Brown, Mary Smith, Tom Thumb
The filters aren’t documented in the EJS for Node documentation, and you have to be careful using them interchangeably because some of the filters want a string, not an array of objects. Table 8-1 contains a list of the filters, and a brief description of what type of data they work with and what they do.
Filter | Type of data | Purpose |
| Accepts and returns array | Returns first element of array |
| Accepts and returns array | Returns last element of array |
| Accepts and returns string | Capitalizes first character in string |
| Accepts and returns string | Lowercases all characters in string |
| Accepts and returns string | Capitalizes all characters in string |
| Accepts and returns array | Applies |
| Accepts array and property name; returns array | Creates custom sort function to sort array of objects by property |
| Accepts array; returns numeric | Returns |
| Accepts two numbers or strings; returns number | Returns |
| Accepts two numbers or strings; returns number | Returns |
| Accepts two numbers or strings; returns number | Returns |
| Accepts two numbers or strings; returns number | Returns |
| Accepts array; returns string | Applies |
| Accepts string and length; returns string | Applies |
| Accepts string and word length; returns string | Applies |
| Accepts string, pattern, and substitution; returns string | Applies |
| Accepts string and string value; returns string | Prepends value to string |
| Accepts string and string value; returns string | Appends value to string |
| Accepts array and property; returns array | Creates new array
consisting of given object properties using |
| Accepts array or string | If array, applies
|
| Accepts object and property | Returns property of given object |
| Accepts object |
The template system provides the missing piece we need to complete the views portion of the MVC (Model-View-Controller) application architecture introduced in Chapter 7.
The model portion of the MVC architecture is added in Chapter 10.
In Chapter 7, I provided a quick introduction for using a template system in Example 7-1. The example used Jade, but we can easily convert it to use EJS. How easily? Example 8-2 is an exact duplicate of the application in Example 7-1, except now using EJS rather than Jade. Exactly one line is changed, shown in bold.
var express = require('express')
, routes = require('./routes')
, http = require('http');
var app = express();
app.configure(function(){
app.set('views', __dirname + '/views');
app.set('view engine', 'ejs');
app.use(express.favicon());
app.use(express.logger('dev'));
app.use(express.static(__dirname + '/public'));
app.use(express.bodyParser());
app.use(express.methodOverride());
app.use(app.router);
});
app.configure('development', function(){
app.use(express.errorHandler());
});
app.get('/', routes.index);
http.createServer(app).listen(3000);
console.log("Express server listening on port 3000");The index.js route doesn’t
require any change at all, because it’s not using anything that’s specific
to any template system; it’s using the Express resource object’s
render method, which
works regardless of template system (as long as the system is compatible
with Express):
exports.index = function(req, res){
res.render('index', { title: 'Express' }, function(err, stuff) {
if (!err) {
console.log(stuff);
res.write(stuff);
res.end();
}
});
};In the views directory, the index.ejs file (note the extension) uses EJS for Node annotation rather than the Jade we saw in Chapter 7:
<html> <head> <title><%= title %></title> </head> <body> <h1><%= title %></title> <p>Welcome to <%= title %></p> </body>
This demonstrates the beauty of working with an application that separates the model from the controller from the view: you can swap technology in and out, such as using a different template system, without impacting the application logic or data access.
To recap what’s happening with this application:
The main Express application uses app.get to associate
a request listener function (routes.index) with an HTTP GET request.
The routes.index function
calls res.render to render
the response to the GET request.
The res.render function
invokes the application object’s render
function.
The application render function
renders the specified view, with whatever options—in this case, the
title.
The rendered content is then written to the response object, and back to the user’s browser.
In Chapter 7, we focused on the routing aspects of the application, and now we’ll focus on the view. We’ll take the application we created at the end of Chapter 7, in Example 7-6 through Example 7-8, and add in the views capability. First, though, we need to do a little restructuring of the environment to ensure that the application can grow as needed.
Though the application is the Widget Factory, widgets aren’t going to be the only objects the system maintains. We need to restructure the environment so that we can add objects as needed.
Currently, the environment is as follows:
/application directory /routes - home directory controller /controllers - object controllers /public - static files /views - template files
The routes and the controllers directories can stay as they are, but the views and the public directory need to be modified to allow for different objects. Instead of placing all widget views directly in views, we add them to a new subdirectory of views named, appropriately enough, widgets:
/application directory
/ views
/widgetsInstead of placing all widget static files directly in the public directory, we also place them in a widgets subdirectory:
/application directory
/public
/widgetsNow, we can add new objects by adding new directories, and we’ll be able to use filenames of new.html and edit.ejs for each, without worrying about overwriting existing files.
Note that this structure assumes we may have static files for our application. The next step is to figure out how to integrate the static files into the newly dynamic environment.
The first component of the application to refine is adding a new widget. This consists of two parts: displaying a form to get the new widget’s information, and storing the new widget into the existing widget data store.
We can create an EJS template for the form, though it won’t have any dynamic components—or at least, it won’t at this time with the way the page is designed. However, it makes no sense to serve something through the template system that doesn’t need the system’s capability.
We could also just change how the form is accessed—instead of accessing the form using /widgets/new, we’d access it as /widgets/new.html. However, this introduces an inconsistency into the application routing. In addition, if we add dynamic components later to the form page, then we’ll have to change the references to the new form.
A better approach is to handle the routing request and serve the static page as if it were dynamic, but without using the template system.
The Express resource object has a redirect method we
could use to redirect the request to the new.html file, but new.html is what’s going to show up in the
address bar on the browser when finished. It also returns a 302 status
code, which we don’t want. Instead, we’ll use the resource object’s
sendfile method. This
method takes as parameters a file path, possible options, and an
optional callback function with an error as its only parameter. The
widget controller is using only the first parameter.
The filepath is:
__dirname + "/../public/widgets/widget.html"
We used the relative indicator .. since the public directory is located off
the controllers directory’s parent.
However, we can’t use this path in sendfile as is, because
it generates a 403 forbidden error. Instead, we use the path module’s normalize method to
convert the path’s use of relative indicators into the equivalent
absolute path:
// display new widget form
exports.new = function(req, res) {
var filePath = require('path').normalize(__dirname +
"/../public/widgets/new.html");
res.sendfile(filePath);
};The HTML page with the form is nothing to get excited about—just a simple form, as shown in Example 8-3. However, we did add the description field back in to make the data a little more interesting.
<!doctype html>
<html lang="en">
<head>
<meta charset="utf-8" />
<title>Widgets</title>
</head>
<body>
<h1>Add Widget:</h1>
<form method="POST" action="/widgets/create"
enctype="application/x-www-form-urlencoded">
<p>Widget name: <input type="text" name="widgetname"
id="widgetname" size="25" required/></p>
<p>Widget Price: <input type="text"
pattern="^\$?([0-9]{1,3},([0-9]{3},)*[0-9]{3}|[0-9]+)(.[0-9][0-9])?$"
name="widgetprice" id="widgetprice" size="25" required/></p>
<p>Widget Description: <br />
<textarea name="widgetdesc" id="widgetdesc" cols="20"
rows="5"></textarea>
<p>
<input type="submit" name="submit" id="submit" value="Submit"/>
<input type="reset" name="reset" id="reset" value="Reset"/>
</p>
</form>
</body>The form is POSTed, of
course.
Now that the application can display the new widget form, we need to modify the widget controller to process the form posting.
Prior to adding in the new template support, we need to
make changes to the main application file to incorporate the use of the
EJS template system. I won’t repeat the app.js file completely from Example 7-8 in Chapter 7, because the only change is to the
configure method call
to include the EJS template engine and views directory:
app.configure(function(){
app.set('views', __dirname + '/views');
app.set('view engine', 'ejs');
app.use(express.favicon());
app.use(express.logger('dev'));
app.use(express.staticCache({maxObjects: 100, maxLength: 512}));
app.use(express.static(__dirname + '/public'));
app.use(express.bodyParser());
app.use(express.methodOverride());
app.use(app.router);
app.use(express.directory(__dirname + '/public'));
app.use(function(req, res, next){
throw new Error(req.url + ' not found');
});
app.use(function(err, req, res, next) {
console.log(err);
res.send(err.message);
});
});Now we’re ready to convert the widget controller so it uses templates, starting with the code to add a new widget.
The actual processing of the data in the widget controller for the new widget doesn’t change. We still pull the data from the request body, and add it to the in-memory widget store. However, now that we have access to a template system, we’re going to change how we respond to the successful addition of a new widget.
I created a new EJS template, named added.ejs, shown in Example 8-4. All it does is provide a listing of the widget’s properties, and a message consisting of the title sent with the widget object.
<head> <title><%= title %></title> </head> <body> <h1><%= title %> | <%= widget.name %></h1> <ul> <li>ID: <%= widget.id %></li> <li>Name: <%= widget.name %></li> <li>Price: <%= widget.price.toFixed(2) %></li> <li>Desc: <%= widget.desc %></li> </ul> </body>
The code to process the update is little different from that shown in Chapter 7, other than the fact that we’re now rendering a view rather than sending a message back to the user (the part that changes is in bold text):
// add a widget
exports.create = function(req, res) {
// generate widget id
var indx = widgets.length + 1;
// add widget
widgets[widgets.length] =
{ id : indx,
name : req.body.widgetname,
price : parseFloat(req.body.widgetprice),
desc : req.body.widgetdesc };
//print out to console and confirm addition to user
console.log(widgets[indx-1]);
res.render('widgets/added', {title: 'Widget Added', widget : widgets[indx-1]});
};The two options sent to the view are the page title and the widget object. Figure 8-1 shows the informative, though plain, result.
The code to process a new widget doesn’t do any validation of the data or check for authority or SQL injection hacks. Data validation, security, and authorization are covered in Chapter 15.
The next two processes to convert to templates, update and deletion, require a way of specifying which
widget to perform the action on. In addition, we also need to convert
the index display of all widgets. For all three processes, we’re going
to use a view to create both the widgets index page and a picklist,
covered next.
A picklist is nothing more than a list of choices from which one can choose. For the widget application, a picklist could be a selection or drop-down list incorporated into an update or delete page, using Ajax and client-side scripting, but we’re going to incorporate the functionality into the widget application’s index page.
Right now, the widget application index page just has a data dump of the widget data store. It’s informative, but ugly and not all that useful. To improve the result, we’re going to add a view to display all of the widgets in a table—one widget per row, with the widget properties in columns. We’re also going to add two more columns: one with a link to edit the widget, and one with a link to delete the widget. These provide the missing piece to the application: a way to edit or delete a widget without having to remember or know its identifier.
Example 8-5 has the contents of the template for this new view, named index.ejs. Since the file is located in the widgets subdirectory, we don’t have to worry that it’s the same name as the higher-level index.ejs file.
<!doctype html>
<html lang="en">
<head>
<meta charset="utf-8" />
<title><%= title %></title>
</head>
<body>
<% if (widgets.length) { %>
<table>
<caption>Widgets</caption>
<tr><th>ID</th><th>Name</th><th>Price</th><th>Description</th></tr>
<% widgets.forEach(function(widget){ %>
<tr>
<td><%= widget.id %></td>
<td><%= widget.name %></td>
<td>$<%= widget.price.toFixed(2) %></td>
<td><%= widget.desc %></td>
<td><a href="/widgets/<%= widget.id %>/edit">Edit</a></td>
<td><a href="/widgets/<%= widget.id %>">Delete</a></td>
</tr>
<% }) %>
</table>
<% } %>
</body>The controller code to trigger this new view is extremely simple: a call to render the view, sending the entire array of widgets through as data:
// index listing of widgets at /widgets/
exports.index = function(req, res) {
res.render('widgets/index', {title : 'Widgets', widgets : widgets});
};In Example 8-5, if
the object has a length property (is an
array), its element objects are traversed and their properties are
printed out as table data, in addition to the links to edit and delete
the object. Figure 8-2
shows the table after several widgets have been added to our in-memory
data store.
The link (route) to delete the object is actually the same as the link (route) to show it: /widgets/:id. We’ll add a mostly hidden form to the Show Widget page that includes a button to delete the widget if it’s no longer needed. This allows us to incorporate the necessary trigger for the deletion without having to add a new route. It also provides another level of protection to ensure that users know exactly which widget they’re deleting.
To display an individual widget is as simple as providing
a placeholder for all of its properties, embedded into whatever HTML you
want to use. In the widget application, I’m using an unordered list
(ul) for the widget
properties.
Since we’re also encompassing into the page the trigger for
deleting the object, at the bottom I’ve added a form that displays a
button reading “Delete Widget.” In the form is the hidden _method field that is used to generate the
HTTP DELETE verb that routes
to the application’s destroy method.
The entire template is shown in Example 8-6.
<!doctype html> <html lang="en"> <head> <meta charset="utf-8" /> <title><%= title %></title> </head> <body> <h1><%= widget.name %></h1> <ul> <li>ID: <%= widget.id %></li> <li>Name: <%= widget.name %></li> <li>Price: $<%= widget.price.toFixed(2) %></li> <li>Description: <%= widget.desc %></li> </ul> <form method="POST" action="/widgets/<%= widget.id %>" enctype="application/x-www-form-urlencoded"> <input type="hidden" value="delete" name="_method" /> <input type="submit" name="submit" id="submit" value="Delete Widget"/> </form> </body>
Very little modification is required in the controller code for
either the show or the destroy methods. I’ve left the destroy method as is for now. All it does is
delete the object from the in-memory store and send a message back to
this effect:
exports.destroy = function(req, res) {
var indx = req.params.id - 1;
delete widgets[indx];
console.log('deleted ' + req.params.id);
res.send('deleted ' + req.params.id);
};The show method required little
change—simply replacing the send message with a
call to render the new
view:
// show a widget
exports.show = function(req, res) {
var indx = parseInt(req.params.id) - 1;
if (!widgets[indx])
res.send('There is no widget with id of ' + req.params.id);
else
res.render('widgets/show', {title : 'Show Widget', widget : widgets[indx]});
};Figure 8-3 demonstrates what the Show Widget page looks like, complete with the Delete Widget button at the bottom.
By now, you’ve seen how simple it is to incorporate views into the application. The best thing of all about this system is that you can incorporate changes into the view templates without having to stop the application: it uses the changed template the next time the view is accessed.
One last view for the update widget, and we’re done converting the widget application to use the EJS template system.
The form to edit the widget is exactly the same as the
form to add a widget, except for the addition of one field: _method. In addition, the form is prepopulated
with the data for the widget being edited, so we need to incorporate the
template tags and appropriate values.
Example 8-7
contains the contents for the edit.ejs template file. Note the use of the
template tags with the value fields in the input elements. Also notice
the addition of the _method
field.
<!doctype html>
<html lang="en">
<head>
<meta charset="utf-8" />
<title><%= title %></title>
</head>
<body>
<h1>Edit <%= widget.name %></h1>
<form method="POST" action="/widgets/<%= widget.id %>"
enctype="application/x-www-form-urlencoded">
<p>Widget name: <input type="text" name="widgetname"
id="widgetname" size="25" value="<%=widget.name %>" required /></p>
<p>Widget Price: <input type="text"
pattern="^\$?([0-9]{1,3},([0-9]{3},)*[0-9]{3}|[0-9]+)(.[0-9][0-9])?$"
name="widgetprice" id="widgetprice" size="25" value="<%= widget.price %>" required/></p>
<p>Widget Description: <br />
<textarea name="widgetdesc" id="widgetdesc" cols="20"
rows="5"><%= widget.desc %></textarea>
<p>
<input type="hidden" value="put" name="_method" />
<input type="submit" name="submit" id="submit" value="Submit"/>
<input type="reset" name="reset" id="reset" value="Reset"/>
</p>
</form>
</body>Figure 8-4 shows the page with a widget loaded. All you need to do is edit the field values, and then click Submit to submit the changes.
The modification to the controller code is as simple as the other
modifications have been. The Edit view is accessed using res.render, and the
widget object is passed as data:
// display edit form
exports.edit = function(req, res) {
var indx = parseInt(req.params.id) - 1;
res.render('widgets/edit', {title : 'Edit Widget', widget : widgets[indx]});
};The code to process the update is very close to what we had in Chapter 7, except that instead of sending a message that the object is updated, we’re using a view. We’re not creating a new view, though. Instead, we’re using the widgets/added.ejs view we used earlier. Since both just display the object’s properties and can take a title passed in as data, we can easily repurpose the view just by changing the title:
// update a widget
exports.update = function(req, res) {
var indx = parseInt(req.params.id) - 1;
widgets[indx] =
{ id : indx + 1,
name : req.body.widgetname,
price : parseFloat(req.body.widgetprice),
desc : req.body.widgetdesc}
console.log(widgets[indx]);
res.render('widgets/added', {title: 'Widget Edited', widget : widgets[indx]})
};Again, the view used doesn’t impact what route (URL) is shown, so it doesn’t matter if we reuse a view. Being able to reuse a view can save us a lot of work as the application increases in difficulty.
You’ve had a chance to see pieces of the controller code throughout these sections as we convert it to use templates. Example 8-8 is an entire copy of the changed file, which you can compare to Example 7-6 in Chapter 7 to see how easily views incorporate into the code, and how much work they can save us.
var widgets = [
{ id : 1,
name : "The Great Widget",
price : 1000.00,
desc: "A widget of great value"
}
]
// index listing of widgets at /widgets/
exports.index = function(req, res) {
res.render('widgets/index', {title : 'Widgets', widgets : widgets});
};
// display new widget form
exports.new = function(req, res) {
var filePath = require('path').normalize(__dirname + "/../public/widgets/new.html");
res.sendfile(filePath);
};
// add a widget
exports.create = function(req, res) {
// generate widget id
var indx = widgets.length + 1;
// add widget
widgets[widgets.length] =
{ id : indx,
name : req.body.widgetname,
price : parseFloat(req.body.widgetprice),
desc : req.body.widgetdesc };
//print out to console and confirm addition to user
console.log(widgets[indx-1]);
res.render('widgets/added', {title: 'Widget Added', widget : widgets[indx-1]});
};
// show a widget
exports.show = function(req, res) {
var indx = parseInt(req.params.id) - 1;
if (!widgets[indx])
res.send('There is no widget with id of ' + req.params.id);
else
res.render('widgets/show', {title : 'Show Widget', widget : widgets[indx]});
};
// delete a widget
exports.destroy = function(req, res) {
var indx = req.params.id - 1;
delete widgets[indx];
console.log('deleted ' + req.params.id);
res.send('deleted ' + req.params.id);
};
// display edit form
exports.edit = function(req, res) {
var indx = parseInt(req.params.id) - 1;
res.render('widgets/edit', {title : 'Edit Widget', widget : widgets[indx]});
};
// update a widget
exports.update = function(req, res) {
var indx = parseInt(req.params.id) - 1;
widgets[indx] =
{ id : indx + 1,
name : req.body.widgetname,
price : parseFloat(req.body.widgetprice),
desc : req.body.widgetdesc}
console.log(widgets[indx]);
res.render('widgets/added', {title: 'Widget Edited', widget : widgets[indx]})
};This is the last time you’ll see the controller code for this chapter. Yet we’re about to make a profound change to the application: we’re going to replace the template system.
Jade is the template system installed with Express by default. It is quite different from EJS: rather than embed the template tags directly into HTML, you use a simplified version of HTML.
The Jade website is at http://jade-lang.com/.
In the Jade template system, HTML elements are given by their name, but you don’t use any angle brackets. Nesting is indicated by indentation. So, rather than:
<html> <head> <title>This is the title</title> </head> <body> <p>Say hi World</p> </body> </html>
You have:
html
head
title This is it
body
p Say Hi to the worldThe contents of both the title and the paragraph elements are just included after the element name. There are no ending tags—they’re assumed—and again, indentation triggers nesting. Another example is the following, which also makes use of both class name and identifier, as well as additional nesting:
html
head
title This is it
body
div.content
div#title
p nested dataThis generates:
<html> <head> <title>This is it</title> </head> <body> <div class="content"> <div id="title"> <p>nested data</p> </div> </div> </body> </html>
If you have large bodies of content, such as text for a paragraph,
you can use the vertical bar, or pipe (|), to concatenate the text:
p | some text | more text | and even more
This becomes:
<p>some text more text and even more</p>
Another approach is to end the paragraph element with a period
(.) indicating that the block
contains only text and allowing us to omit the vertical bar:
p. some text more text and even more
If we want to include HTML as the text, we can; it ends up being treated as HTML in the generated source:
body. <h1>A header</h1> <p>A paragraph</p>
Form elements generally have attributes, and they’re incorporated in Jade in parentheses, including setting their values (if any). The attributes need only be separated by whitespace, but I list them each on a separate line to make the template more readable.
The following Jade template:
html
head
title This is it
body
form(method="POST"
action="/widgets"
enctype="application/x-www-form-urlencoded")
input(type="text"
name="widgetname"
id="widgetname"
size="25")
input(type="text"
name="widgetprice"
id="widgetprice"
size="25")
input(type="submit"
name="submit"
id="submit"
value="Submit")<html> <head> <title>This is it</title> </head> <body> <form method="POST" action="/widgets" enctype="application/x-www-form-urlencoded"> <input type="text" name="widgetname" id="widgetname" size="25"/> <input type="text" name="widgetprice" id="widgetprice" size="25"/> <input type="submit" name="submit" id="submit" value="Submit"/> </form> </body> </html>
Now we’re going to convert the widget application so it uses Jade rather than EJS. The only change that we need to make to the widget application code is in app.js, to change the template engine:
app.set('view engine', 'jade');No other change is necessary to the application. None. Zip.
All of the templates share the same page layout. The layout is rather plain; there are no sidebars or footers, or any use of CSS. Because of the page’s plain nature, we haven’t minded duplicating the same layout markup in each view in the prior examples. However, if we start to add more to the overall page structure—such as sidebars, a header, and a footer—then having to maintain the same layout information in each file is going to get cumbersome.
The first thing we’re going to do in our conversion, then, is create a layout template that will be used by all the other templates.
Express 3.x completely changed its handling of views, including
how it implements partial views and uses layouts. You can use the Jade
templates in this section with Express 2.x if you add the following in
the configure method
call:
app.set('view options', {layout: false});Example 8-9 contains the
complete layout.jade file. It uses
the HTML5 doctype, adds a head element with title and meta elements, adds the body element, and then references a block called content. That’s how you include blocks of
content defined in other template files.
doctype 5
html(lang="en")
head
title #{title}
meta(charset="utf-8")
body
block contentNotice the use of the pound sign and curly braces (#{}) for the title. This is how we embed data passed to the
template in Jade. The use of the identifier doesn’t change from EJS,
just the syntax.
To use the new layout template, we start off each of the content templates with:
extends layout
The use of extends lets the
template engine know where to find the layout template for the page
view, while the use of block instructs the
template engine about where to place the generated content.
You don’t have to use content
for the block name, and you can use more than one block. In addition,
you can also include other template files if you want to break up the
layout template even further. I modified layout.jade to include a header rather than
the markup directly in the layout file:
doctype 5
html(lang="en")
include header
body
block contentI then defined the header content in a file named header.jade, with the following:
head
title #{title}
meta(charset="utf-8")There are two things to note in the new layout.jade and header.jade code.
First, the include directive is
relative. If you split the views into the following subdirectory
structure:
/views
/widgets
layout.jade
/standard
header.jadeyou’d use the following to include the header template in the layout file:
include standard/header
The file doesn’t have to be Jade, either—it could be HTML, in which case you’ll need to use the file extension:
include standard/header.html
Second, do not use indentation in the header.jade file. The indentation comes in from the parent file and doesn’t need to be duplicated in the included template file. In fact, if you do so, your template will generate an error.
Now that we’ve defined the layout template, it’s time to convert the EJS views into Jade.
Now is also the time you might consider swapping the static Add Widget form file for a dynamic one so that it can also take advantage of the new layout template.
The first view to convert from EJS to Jade is the added.ejs template, which provides feedback for the successful addition of a new widget. The template file is named added.jade (the name must be the same, though the extension different, to work with the existing controller code), and it makes use of the newly defined layout.jade file, as shown in Example 8-10.
extends layout
block content
h1 #{title} | #{widget.name}
ul
li id: #{widget.id}
li Name: #{widget.name}
li Price: $#{widget.price.toFixed()}
li Desc: #{widget.desc}Notice how we can still use the toFixed method to format the price
output.
The block is named content, so
it integrates with the expectations of the block name set in the
layout.jade file. The simplified
HTML for an h1 header and an
unordered list is integrated with the data passed from the controller—in
this case, the widget object.
Running the widget application and adding a new widget generates the same HTML as generated with the EJS: a header and a list of widget properties for the newly added widget—all without our changing any of the controller code.
The next template to convert is the index template that lists all of the widgets in a table, with options to edit or delete the widget as table columns. We’re going to try something a little different with this template. We’re going to separate the table row generation for each widget from the overall table generation.
First, we’ll create the row.jade template. It assumes that the data
is an object named widget, with the
properties accessible off the object:
tr
td #{widget.id}
td #{widget.name}
td $#{widget.price.toFixed(2)}
td #{widget.desc}
td
a(href='/widgets/#{widget.id}/edit') Edit
td
a(href='/widgets/#{widget.id}') DeleteEach link must be included on a separate line; otherwise, we lose the nesting indication with the indentation.
The main index.jade file
that references the newly created row template is shown in Example 8-11. This template
introduces two new Jade constructs: a conditional test and an
iteration. The conditional is used to test for the length property on
the widgets
object, assuring us we’re dealing with an array. The iteration
construct uses an abbreviated form of the Array.forEach method, where the array is
traversed and each instance is assigned to the new variable, widget.
extends layout
block content
table
caption Widgets
if widgets.length
tr
th ID
th Name
th Price
th Description
th
th
each widget in widgets
include rowThis is a whole lot less work than having to manually enter all
those angle brackets, especially with the table headers (th). The results of the Jade template are
identical to those from the EJS template: an HTML table with widgets
in each row, and the ability to edit or delete each widget.
The next two conversions are working with forms.
First, we’ll convert the edit template into one using Jade. The only really tricky part of the conversion is handling all the various attributes. Though you can separate them by a space, I find it helps to list each on a separate line. This way, you can see that you’ve properly included all the attributes and can easily double-check their values. Example 8-12 contains the rather long template for the Edit Widget form.
extends layout
block content
h1 Edit #{widget.name}
form(method="POST"
action="/widgets/#{widget.id}"
enctype="application/x-www-form-urlencoded")
p Widget Name:
input(type="text"
name="widgetname"
id="widgetname"
size="25"
value="#{widget.name}"
required)
p Widget Price:
input(type="text"
name="widgetprice"
id="widgetprice"
size="25"
value="#{widget.price}"
pattern="="^\$?([0-9]{1,3},([0-9]{3},)*[0-9]{3}|[0-9]+)(.[0-9][0-9])?$"
required)
p Widget Description:
br
textarea(name="widgetdesc"
id="widgetdesc"
cols="20"
rows="5") #{widget.desc}
p
input(type="hidden"
name="_method"
id="_method"
value="put")
input(type="submit"
name="submit"
id="submit"
value="Submit")
input(type="reset"
name="reset"
id="reset"
value="reset")During the conversion of the Show Widget page, I noticed that the top of the page is basically a repeat of what is displayed in the added.jade template from Example 8-10: an unordered list with all of the widget’s properties. Another opportunity to simplify!
I created a new template, widget.jade, that just displays the widget information as an unordered list:
ul
li id: #{widget.id}
li Name: #{widget.name}
li Price: $#{widget.price.toFixed(2)}
li Desc: #{widget.desc}I then modified the added.jade file from Example 8-10 to use this new template:
extends layout
block content
h1 #{title} | #{widget.name}
include widgetThe new Show Widget template also makes use of the new widget.jade template, as demonstrated in Example 8-13.
extends layout
block content
h1 #{widget.name}
include widget
form(method="POST"
action="/widgets/#{widget.id}"
enctype="application/x-www-form-urlencoded")
input(type="hidden"
name="_method"
id="_method"
value="delete")
input(type="submit"
name="submit"
id="submit"
value="Delete Widget")You can see how modularizing the templates makes each template that much cleaner, and thus easier to maintain.
With the newly modularized template, we can now show and delete a specific widget...and that leads to a quirk where the Jade template differs from the EJS template.
In the widget application, when widgets are deleted, they are
deleted in place. This means the array element is basically set to null, so that the widget location in the
array is maintained relative to its identifier. This in-place
maintenance doesn’t cause a problem when we add and delete widgets and
display them in the index page in EJS, but it
does cause a problem with Jade: we get an error
about missing properties, because it doesn’t filter out null array elements like the EJS template
processing does.
This is trivially easy to fix. As shown in Example 8-11, just add another
conditional test to the Jade markup in the index.jade file to make sure the widget
object exists (i.e., is not null):
extends layout
block content
table
caption Widgets
if widgets.length
tr
th ID
th Name
th Price
th Description
th
th
each widget in widgets
if widget
include rowAnd now, all of the template views have been converted to Jade, and the application is complete. (Well, until we add in the data portion in Chapter 10.)
But while the application is complete, it’s not very attractive. Of course, it’s easy enough to add a stylesheet into the header to modify the presentation of all the elements, but we’ll also briefly take a look at another approach: using Stylus.
It’s a simple matter to include a stylesheet into any of the template files. In the Jade template file, we can add one to the header.jade file:
head
title #{title}
meta(charset="utf-8")
link(type="text/css"
rel="stylesheet"
href="/stylesheets/main.css"
media="all")The stylesheet is now immediately available to all of our application views because they all use the layout template, which uses this header.
Now you can definitely see the value of converting the static new.html file into a template view: making the change to the header doesn’t impact it, and it has to be manually edited.
If you’ve grown fond of the syntax for Jade, though, you can use a variation of this syntax for CSS by incorporating the use of Stylus into your application.
To use Stylus, first install it with npm:
npm install stylus
Stylus is not like the Jade template system. It doesn’t create dynamic CSS views. What it does is generate static stylesheets from a Stylus template the first time the template is accessed, or each time the template is modified.
Read more about Stylus at http://learnboost.github.com/stylus/docs/js.html.
To incorporate Stylus into the widget application, we have to
include the module within the main application file’s (app.js) require section. Then we
have to include the Stylus middleware along with the others in the
configure method call,
passing in an option with the source for the Stylus templates, and the
destination where the compiled stylesheets are to be placed. Example 8-14 shows the newly
modified app.js file with these
changes in bold text.
var express = require('express')
, routes = require('./routes')
, map = require('./maproutecontroller')
, http = require('http')
, stylus = require('stylus')
, app = express();
app.configure(function(){
app.set('views', __dirname + '/views');
app.set('view engine', 'jade');
app.use(express.favicon());
app.use(express.logger('dev'));
app.use(express.staticCache({maxObjects: 100, maxLength: 512}));
app.use(stylus.middleware({
src: __dirname + '/views'
, dest: __dirname + '/public'
}));
app.use(express.static(__dirname + '/public'));
app.use(express.bodyParser());
app.use(express.methodOverride());
app.use(app.router);
app.use(express.directory(__dirname + '/public'));
app.use(function(req, res, next){
throw new Error(req.url + ' not found');
});
app.use(function(err, req, res, next) {
console.log(err);
res.send(err.message);
});
});
app.configure('development', function(){
app.use(express.errorHandler());
});
app.get('/', routes.index);
var prefixes = ['widgets'];
// map route to controller
prefixes.forEach(function(prefix) {
map.mapRoute(app, prefix);
});
http.createServer(app).listen(3000);
console.log("Express server listening on port 3000");The first time you access the widget application after making this change, you may notice a very brief hesitation. The reason is that the Stylus module is generating the stylesheet—an event that happens when a new or modified stylesheet template is added and the application is restarted. After the stylesheet has been generated, though, it’s the generated copy that’s served up—it isn’t recompiled with every page access.
You will need to restart your Express application if you make changes to the stylesheet template.
The Stylus stylesheet templates all have the same extension: .styl. The source directory is set to views, but it expects the stylesheet templates to be in a stylesheets directory under views. When it generates the static stylesheets, it places them in a stylesheets directory under the destination directory (in this case, /public).
After working with Jade, you should find the Stylus syntax very familiar. Again, each element that is being styled is listed, followed by the indented stylesheet setting. The syntax strips away the need for curly braces, colons, and semicolons.
For example, to change the background color for the web page to yellow, and the text color to red, use the following for the Stylus template:
body background-color yellow color red
If you want elements to share settings, list them on the same line with a comma between them, just like you would with CSS:
p, tr background-color yellow color red
Or you can list the elements on separate lines:
p tr background-color yellow color red
If you want to use a pseudoclass, such as :hover or :visited, use the following syntax:
textarea
input
background-color #fff
&:hover
background-color cyanThe ampersand (&) represents
the parent selector. All combined, the following Stylus template:
Combined, the following:
p, tr
background-color yellow
color red
textarea
input
background-color #fff
&:hover
background-color cyangenerates the following static CSS file:
p,
tr {
background-color: #ff0;
color: #f00;
}
textarea,
input {
background-color: #fff;
}
textarea:hover,
input:hover {
background-color: #0ff;
}There’s more to working with Stylus, but I’ll leave that to you as an off-book exercise. The Stylus website provides a good set of documentation for the syntax. Before leaving this chapter, though, we’ll create a Stylus stylesheet that enhances the presentation of the widget application.
Specifically, we’ll add a border and spacing to the HTML table element in the index widget listing page. We’re also going to change the font for the headers and remove the bullet indicators for the unordered list. These are small changes, but they’ll be a start in refining the appearance of the widget application.
The new stylesheet template is shown in Example 8-15. It’s not terribly big and doesn’t use any involved CSS. It’s basic stuff, but it does improve—smooth out a bit—the overall appearance of the application.
body margin 50px table width 90% border-collapse collapse table, td, th, caption border 1px solid black td padding 20px caption font-size larger background-color yellow padding 10px h1 font 1.5em Georgia, serif ul list-style-type none form margin 20px padding 20px
Figure 8-5 shows the index page after several widgets have been added. Again, it’s nothing fancy, but the data content is a lot easier to read with the new stylesheet.
When it comes to data, there’s relational databases and Everything Else, otherwise known as NoSQL. In the NoSQL category, a type of structured data is based on key/value pairs, typically stored in memory for extremely fast access. The three most popular in-memory key/value stores are Memcached, Cassandra, and Redis. Happily for Node developers, there is Node support for all three stores.
Memcached is primarily used as a way of caching data queries for quick access in memory. It’s also quite good with distributed computing, but has limited support for more complex data. It’s useful for applications that do a lot of queries, but less so for applications doing a lot of data writing and reading. Redis is the superior data store for the latter type of application. In addition, Redis can be persisted, and it provides more flexibility than Memcached—especially in its support for different types of data. However, unlike Memcached, Redis works only on a single machine.
The same factors also come into play when comparing Redis and Cassandra. Like Memcached, Cassandra has support for clusters. However, also like Memcached, it has limited data structure support. It’s good for ad hoc queries—a use that does not favor Redis. However, Redis is simple to use, uncomplicated, and typically faster than Cassandra. For these reasons, and others, Redis has gained a greater following among Node developers, which is why I picked it over Memcached and Cassandra to cover in this chapter on key/value in-memory data stores.
I’m going to take a break from the more tutorial style of technology coverage in the previous chapters and demonstrate Node and Redis by implementing three use cases that typify the functionality these two technologies can provide:
Building a game leaderboard
Creating a message queue
Tracking web page statistics
These applications also make use of modules and technologies covered in earlier chapters, such as the Jade template system (covered in Chapter 8), the Async module (covered in Chapter 5), and Express (covered in Chapter 7 and Chapter 8).
The Redis site is at http://redis.io/. Read more on Memcached at http://memcached.org/, and on Apache Cassandra at http://cassandra.apache.org/.
There are several modules supporting Redis, including Redback, which provides a higher-level interface, but in this chapter we’ll focus on just one: node_redis, or just redis (the convention we’ll use), by Matt Ranney. I like redis because it provides a simple and elegant interface to directly access Redis commands, so you can leverage what you know about the data store with minimal intervention.
The redis GitHub page is at https://github.com/mranney/node_redis.
You can install the redis module using npm:
npm install redis
I also recommend using the hiredis library, as it’s nonblocking and improves performance. Install it using the following:
npm install hiredis redis
To use redis in your Node applications, you first include the module:
var redis = require('redis');Then you’ll need to create a Redis client. The method used is
createClient:
var client = redis.createClient();
The createClient method can
take three optional parameters: port, host, and options
(outlined shortly). By default, the host is set to 127.0.0.1, and the port is set to 6379. The port is the one used by default for a
Redis server, so these default settings should be fine if the Redis server
is hosted on the same machine as the Node application.
The third parameter is an object that supports the following options:
parserThe Redis protocol reply parser; set by default to hiredis. You can also use javascript.
return_buffersDefaults to false. If
true, all replies are sent as
Node buffer objects rather than strings.
detect_buffersDefaults to false. If
true, replies are sent as buffer
objects if any input to the original commands were buffers.
socket_nodelayDefaults to true; specifies
whether to call setNoDelay on TCP
stream.
no_ready_checkDefaults to false. Set to
true inhibits the “ready check”
sent to server to check if it is ready for more commands.
Use the default settings until you’re more comfortable with Node and Redis.
Once you have a client connection to the Redis data store, you can
send commands to the server until you call the client.quit method call,
which closes the connection to the Redis server. If you want to force a
closure, you can use the client.end method
instead. However, the latter method doesn’t wait for all replies to be
parsed. The client.end method is a
good one to call if your application is stuck or you want to start
over.
Issuing Redis commands through the client connection is a fairly intuitive process. All commands are exposed as methods on the client object, and command arguments are passed as parameters. Since this is Node, the last parameter is a callback function, which returns an error and whatever data or reply is given in response to the Redis command.
In the following code, the client.hset method is
used to set a hash property:
client.hset("hashid", "propname", "propvalue", function(err, reply) {
// do something with error or reply
});The hset command sets a
value, so there’s no return data, only the Redis acknowledgment. If you
call a method that gets multiple values, such as client.hvals, the second parameter in the
callback function will be an array—either an array of single strings, or
an array of objects:
client.hvals(obj.member, function (err, replies) {
if (err) {
return console.error("error response - " + err);
}
console.log(replies.length + " replies:");
replies.forEach(function (reply, i) {
console.log(" " + i + ": " + reply);
});
});Because the Node callback is so ubiquitous, and because so many of
the Redis commands are operations that just reply with a confirmation of
success, the redis module provides a redis.print method you
can pass as the last parameter:
client.set("somekey", "somevalue", redis.print);The redis.print method prints
either the error or the reply to the console and returns.
Now that you have an idea how the redis module works, it’s time to try it out with actual applications.
One possible use for Redis is to create a game leaderboard. A leaderboard is a scorekeeping device for digital games on computers and handheld devices such as smartphones and tablets. A widely used one is OpenFeint, which allows game players to create an online profile and then store scores for various games. Players can compete among friends, or compete for the top score for any given game.
This is the type of application that can be served by a hybrid data solution. The profiles could be stored in a relational data store, but the scores themselves could be stored in a data store like Redis. The data needs for the scores are simple, and the score data is accessed and modified frequently, and by large numbers of users. One game developer for Facebook estimated it had 10,000 concurrent users, with 200,000 requests per minute during peak game times. However, the system to handle the requests doesn’t have to be Herculean in nature, because the data isn’t complex, and transactional enforcement really isn’t a necessity there. Frankly, a relational or document database is overkill. A key/value data store like Redis is ideal.
The Redis hash and the sorted set are the most appropriate data structures for this type of application. The hash is ideal because the information about each score is more than just one or two fields. Typically, you’ll store a member ID, perhaps the player’s name (to limit having to go back to the relational or document store that often), perhaps the game name if the system provides leaderboards for more than one game, the last date played, the score, and any other relevant information.
The sorted set is the best data structure for tracking just the scores and username, and being able to quickly access the highest 10 or 100 scores.
To create the application that updates the Redis database, I converted the TCP client/server application I created in Chapter 3 to send data from the TCP client to the server, which then updates Redis. It wouldn’t be unusual for a gaming application to store the data via TCP socket rather than HTTP or other means.
The TCP client takes whatever we type at the command line and sends it to the server. The code is exactly the same as that shown in Example 3-3, so I won’t repeat it. When I run the TCP client, unlike previous testing, instead of just sending through plain-text messages, I send JSON representing the information being stored in the Redis database. An example is the following:
{"member" : 400, "first_name" : "Ada", "last_name" : "Lovelace", "score" : 53455,
"date" : "10/10/1840"}The server is modified to convert the data string it receives into a JavaScript object, and to access the individual members to store into a hash. The member identifier and score are also added to a sorted set, with the game score used as the set score. Example 9-1 shows the modified TCP server application.
var net = require('net');
var redis = require('redis');
var server = net.createServer(function(conn) {
console.log('connected');
// create Redis client
var client = redis.createClient();
client.on('error', function(err) {
console.log('Error ' + err);
});
// fifth database is game score database
client.select(5);
conn.on('data', function(data) {
console.log(data + ' from ' + conn.remoteAddress + ' ' +
conn.remotePort);
try {
var obj = JSON.parse(data);
// add or overwrite score
client.hset(obj.member, "first_name", obj.first_name, redis.print);
client.hset(obj.member, "last_name", obj.last_name, redis.print);
client.hset(obj.member, "score", obj.score, redis.print);
client.hset(obj.member, "date", obj.date, redis.print);
// add to scores for Zowie!
client.zadd("Zowie!", parseInt(obj.score), obj.member);
} catch(err) {
console.log(err);
}
});
conn.on('close', function() {
console.log('client closed connection');
client.quit();
});
}).listen(8124);
console.log('listening on port 8124');The Redis connection is established when the server is created, and closed when the server is closed. Another approach is to create a static client connection that persists across requests, but this has disadvantages. For more on when to create the Redis client, see the upcoming sidebar When to Create the Redis Client. The object conversion and persistence of the data to Redis is enclosed in exception handling to prevent the server from failing if we fat-finger the input.
As mentioned earlier, two different data stores are being updated: the individual’s score information (including name, score, and date) is stored in a hash, and the member ID and score are stored in a sorted set. The member ID is used as the key in the hash, while the game score is used as the score for the member ID in the sorted set. The critical component to making the application work is the member ID appearing in both data stores.
The next part of the application is a way of displaying the top five
score holders of our fictional game (named Zowie! in
this exercise). In a sorted set, you can retrieve a range of data by score
using the Redis zrange command. However,
this function returns the range of values sorted from lowest to highest,
which is the opposite of what we want. What we want is to return the five
highest scores, sorted by highest number first. The Redis command to use
is zrevrange.
To display the top five game players, this time we’ll create an HTTP server that will return the results as a simple table list. To ensure a relatively decent display, we’re going to use the Jade template system, but instead of using it with the Express framework—since the gaming application isn’t based on Express—we’ll just use Jade by itself.
To use Jade outside of express, you read in the primary template
file and then call the compile method, passing
in the template file string and options. The only option I’m providing is
filename, because in the template file
I’m using the include directive, and
this requires filename. I’m actually
using the template filename and location, but you’ll want to use any
filename that returns a directory location relative to the files included
in the Jade template.
As for the template itself, Example 9-2 has the contents of
the Jade file. Note that I’m using the include directive to
embed the CSS directly in the file. Since I’m not utilizing a static file
server in this application, the application can’t serve up the CSS file if
I just embed a link to the CSS file. Also note the use of the pipe (|)
with the style opening and ending
tags, which are in HTML rather than Jade syntax. That’s because Jade does
not process the include file if it’s listed within a style tag.
doctype 5
html(lang="en")
head
title Zowie! Top Scores
meta(charset="utf-8")
| <style type="text/css">
include main.css
| </style>
body
table
caption Zowie! Top Scorers!
tr
th Score
th Name
th Date
if scores.length
each score in scores
if score
tr
td #{score.score}
td #{score.first_name} #{score.last_name}
td #{score.date}To render the template, the application reads in the template file (using a synchronous file read, since this occurs only once, when the application is first started) and then uses it to compile a template function:
var layout = require('fs').readFileSync(__dirname + '/score.jade', 'utf8');
var fn = jade.compile(layout, {filename: __dirname + '/score.jade'});The compiled Jade function can then be used anytime you want to render the HTML from the template, passing in whatever data the template is expecting:
var str = fn({scores : result});
res.end(str);This will all make more sense when we see the complete server application, but for now, let’s return to the Redis part of the application.
The top scores application is using two Redis calls: zrevrange to get a range of scores, and
hgetall to get all the
hash fields for each member listed in the top scores. And this is where
things get a little tricky.
You can easily combine results from multiple tables when you’re using a relational database, but the same doesn’t hold true when you’re accessing data from a key/value data store such as Redis. It’s doable, but since this is a Node application, we have the extra complexity of each Redis call being asynchronous.
This is where a library such as Async comes in handy. I covered
Async in Chapter 5, and
demonstrated a couple of the Async methods (waterfall and parallel). One method I didn’t demonstrate was
series, which is the
ideal function for our use here. The Redis functions need to be called in
order, so the data is returned in order, but each interim step doesn’t
need the data from previous steps. The Async parallel functionality
would run all the calls at once, which is fine, but then the results from
each are returned in a random order—not guaranteed to return highest score
first. The waterfall functionality
isn’t necessary, because again, each step doesn’t need data from the
previous step. The Async series functionality
ensures that each Redis hgetall call is made in
sequence and the data is returned in sequence, but takes into account that
each functional step doesn’t care about the others.
So we now have a way for the Redis commands to get called in order
and ensure the data is returned in proper sequence, but the code to do so
is clumsy: we have to add a separate step in the Async series for each
hgetall Redis call and
return the result once for each score returned. Working with 5 values
isn’t a problem, but what if we want to return 10? Or 100? Having to
manually code each Redis call into the Async series is going to become
more than tedious—the code is error prone and difficult to
maintain.
What the scores application does is loop through the array of values
returned from the zrevrange Redis call,
passing each value as a parameter to a function named makeCallbackFunc. All this helper function does
is return a callback function that invokes Redis hgetall, using the
parameter to get the data for a specific member, and then call the
callback function as the last line of its callback—an Async requirement
for being able to chain results. The callback function returned from
makeCallbackFunc is pushed onto an
array, and it’s this array that gets sent as a parameter to the Async
series method.
Additionally, since the redis module returns the hgetall result as an
object, and the Async series function inserts
each object into an array as it finishes, when all of this functionality
is complete we can just take the final result and pass it into the
template engine to generate the text to return to the server.
Example 9-3 is the complete code for the top scores server application. Though it sounds like a lot of work, there isn’t that much code, thanks to the elegance and usability of both the Redis and Async modules.
var http = require('http');
var async = require('async');
var redis = require('redis');
var jade = require('jade');
// set up Jade template
var layout = require('fs').readFileSync(__dirname + '/score.jade', 'utf8');
var fn = jade.compile(layout, {filename: __dirname + '/score.jade'});
// start Redis client
var client = redis.createClient();
// select fifth database
client.select(5);
// helper function
function makeCallbackFunc(member) {
return function(callback) {
client.hgetall(member, function(err, obj) {
callback(err,obj);
});
};
}
http.createServer(function(req,res) {
// first filter out icon request
if (req.url === '/favicon.ico') {
res.writeHead(200, {'Content-Type': 'image/x-icon'} );
res.end();
return;
}
// get scores, reverse order, top five only
client.zrevrange('Zowie!',0,4, function(err,result) {
var scores;
if (err) {
console.log(err);
res.end('Top scores not currently available, please check back');
return;
}
// create array of callback functions for Async.series call
var callFunctions = new Array();
// process results with makeCallbackFunc, push newly returned
// callback into array
for (var i = 0; i < result.length; i++) {
callFunctions.push(makeCallbackFunc(result[i]));
}
// using Async series to process each callback in turn and return
// end result as array of objects
async.series(
callFunctions,
function (err, result) {
if (err) {
console.log(err);
res.end('Scores not available');
return;
}
// pass object array to template engine
var str = fn({scores : result});
res.end(str);
});
});
}).listen(3000);
console.log('Server running on 3000/');Before the HTTP server is created, we set up the Jade template
function and also establish a running client to the Redis data store. When
a new request is made of the server, we filter out all requests for the
favicon.ico file (no need to call
Redis for a favicon.ico request), and
then access the top five scores using zrevrange. Once the application has the scores,
it uses the Async series method to process
the Redis hash requests one at a time and in sequence so it can get an
ordered result back. This resulting array is passed to the Jade template
engine.
Figure 9-1 shows the application after I’ve added in several different scores for different folks.
A message queue is an application that takes as input some form of communication, which is then stored into a queue. The messages are stored until they’re retrieved by the message receiver, when they are popped off the queue and sent to the receiver (either one at a time, or in bulk). The communication is asynchronous, because the application that stores the messages doesn’t require that the receiver be connected, and the receiver doesn’t require that the message-storing application be connected.
Redis is an ideal storage medium for this type of application. As the messages are received by the application that stores them, they’re pushed on to the end of the message queue. When the messages are retrieved by the application that receives them, they’re popped off the front of the message queue.
For the message queue demonstration, I created a Node application to
access the web logfiles for several different subdomains. The application
uses a Node child process and the Unix tail
-f command to access recent entries for the different logfiles.
From these log entries, the application uses two regular expression
objects: one to extract the resource accessed, and the second to test
whether the resource is an image file. If the accessed resource is an
image file, the application sends the resource URL in a TCP message to the
message queue application.
All the message queue application does is listen for incoming messages on port 3000, and stores whatever is sent into a Redis data store.
The third part of the demonstration application is a web server that
listens for requests on port 8124. With each request, it accesses the
Redis database and pops off the front entry in the image data store,
returning it via the response object. If the Redis database returns a
null for the image resource, it prints
out a message that the application has reached the end of the message
queue.
The first part of the application, which processes the web log
entries, is shown in Example 9-4. The Unix tail command is a way of
displaying the last few lines of a text file (or piped data). When used
with the -f flag, the utility displays
a few lines of the file and then sits, listening for new file entries.
When one occurs, it returns the new line. The tail -f command can be used on several different
files at the same time, and manages the content by labeling where the data
comes from each time it comes from a different source. The application
isn’t concerned about which access log is generating the latest tail
response—it just wants the log entry.
Once the application has the log entry, it performs a couple of regular expression matches on the data to look for image resource access (files with a .jpg, .gif, .svg, or .png extension). If a pattern match is found, the application sends the resource URL to the message queue application (a TCP server).
var spawn = require('child_process').spawn;
var net = require('net');
var client = new net.Socket();
client.setEncoding('utf8');
// connect to TCP server
client.connect ('3000','examples.burningbird.net', function() {
console.log('connected to server');
});
// start child process
var logs = spawn('tail', ['-f',
'/home/main/logs/access.log',
'/home/tech/logs/access.log',
'/home/shelleypowers/logs/access.log',
'/home/green/logs/access.log',
'/home/puppies/logs/access.log']);
// process child process data
logs.stdout.setEncoding('utf8');
logs.stdout.on('data', function(data) {
// resource URL
var re = /GET\s(\S+)\sHTTP/g;
// graphics test
var re2 = /\.gif|\.png|\.jpg|\.svg/;
// extract URL, test for graphics
// store in Redis if found
var parts = re.exec(data);
console.log(parts[1]);
var tst = re2.test(parts[1]);
if (tst) {
client.write(parts[1]);
}
});
logs.stderr.on('data', function(data) {
console.log('stderr: ' + data);
});
logs.on('exit', function(code) {
console.log('child process exited with code ' + code);
client.end();
});Typical console log entries for this application are given in the following block of code, with the entries of interest (the image file accesses) in bold:
/robots.txt /weblog /writings/fiction?page=10 /images/kite.jpg /node/145 /culture/book-reviews/silkworm /feed/atom/ /images/visitmologo.jpg /images/canvas.png /sites/default/files/paws.png /feeds/atom.xml
Example 9-5 contains
the code for the message queue. It’s a simple application that starts a
TCP server and listens for incoming messages. When it receives a message,
it extracts the data from the message and stores it in the Redis database.
The application uses the Redis rpush command to push the
data on the end of the images list (bolded in the code).
var net = require('net');
var redis = require('redis');
var server = net.createServer(function(conn) {
console.log('connected');
// create Redis client
var client = redis.createClient();
client.on('error', function(err) {
console.log('Error ' + err);
});
// sixth database is image queue
client.select(6);
// listen for incoming data
conn.on('data', function(data) {
console.log(data + ' from ' + conn.remoteAddress + ' ' +
conn.remotePort);
// store data
client.rpush('images',data);
});
}).listen(3000);
server.on('close', function(err) {
client.quit();
});
console.log('listening on port 3000');The message queue application console log entries would typically look like the following:
listening on port 3000 connected /images/venus.png from 173.255.206.103 39519 /images/kite.jpg from 173.255.206.103 39519 /images/visitmologo.jpg from 173.255.206.103 39519 /images/canvas.png from 173.255.206.103 39519 /sites/default/files/paws.png from 173.255.206.103 39519
The last piece of the message queue demonstration application is the
HTTP server that listens on port 8124 for requests, shown in Example 9-6. As the HTTP server
receives each request, it accesses the Redis database, pops off the next
entry in the images list, and prints out the entry in the response. If
there are no more entries in the list (i.e., if Redis returns null as a reply), it prints out a message that
the message queue is empty.
var redis = require("redis"),
http = require('http');
var messageServer = http.createServer();
// listen for incoming request
messageServer.on('request', function (req, res) {
// first filter out icon request
if (req.url === '/favicon.ico') {
res.writeHead(200, {'Content-Type': 'image/x-icon'} );
res.end();
return;
}
// create Redis client
var client = redis.createClient();
client.on('error', function (err) {
console.log('Error ' + err);
});
// set database to 1
client.select(6);
client.lpop('images', function(err, reply) {
if(err) {
return console.error('error response ' + err);
}
// if data
if (reply) {
res.write(reply + '\n');
} else {
res.write('End of queue\n');
}
res.end();
});
client.quit();
});
messageServer.listen(8124);
console.log('listening on 8124');Accessing the HTTP server application with a web browser returns a URL for the image resource on each request (browser refresh) until the message queue is empty.
The creator of Redis originally intended to use the technology to create a statistics application. It’s an ideal use for Redis: a simple data store, quickly and frequently written, and providing the ability to summarize an activity.
In this section, we’re going to use Redis to add statistics for the widget application we started in earlier chapters. The statistics are limited to two collections: a set of all IP addresses that have accessed pages from the widget application, and the number of times different resources have been accessed. To create this functionality, we make use of a Redis set and the ability to increment numeric strings. Our application also uses the Redis transaction control, multi, to get the two separate data collections at the same time.
The first step of the application is to add new middleware that
records access information to the Redis database. The middleware function
uses a Redis set and the sadd method to add each
IP address, because a set ensures that an existing value isn’t recorded
twice. We’re collecting a set of IP addresses for visitors, but we’re not
keeping track of each time the visitor accesses a resource. The function
is also using one of the Redis incremental functions, but not incr, which increments a
string; instead, it uses hincrby, because the
resource URL and its associated access counter are stored as a
hash.
Example 9-7 displays the code for
the middleware, located in a file named stats.js. The second Redis database is used for
the application, the IPs are stored in a set identified by ip, and the URL/access counter hash is stored in
a hash identified by myurls.
var redis = require('redis');
module.exports = function getStats() {
return function getStats(req, res, next) {
// create Redis client
var client = redis.createClient();
client.on('error', function (err) {
console.log('Error ' + err);
});
// set database to 2
client.select(2);
// add IP to set
client.sadd('ip',req.socket.remoteAddress);
// increment resource count
client.hincrby('myurls',req.url, 1);
client.quit();
next();
}
}The statistics interface is accessed at the top-level domain, so we’ll add the code for the router to the index.js file in the routes subdirectory.
First, we need to add the route to the main application file, just after the route for the top-level index:
app.get('/', routes.index);
app.get('/stats',routes.stats);The controller code for the statistic application makes use of the
Redis transaction control, accessible via the multi function call. Two sets of data are
accessed: the set of unique IP addresses, returned by smembers, and the URL/count hash, returned with
hgetall. Both functions
are invoked, in sequence, when the exec method is called,
and both sets of returned data are appended as array elements in the
exec function’s callback
method, as shown in Example 9-8. Once the data is
retrieved, it’s passed in a render call to a new
view, named stats. The new
functionality for the index.js file
appears in bold text.
var redis = require('redis'); // home page exports.index = function(req, res){ res.render('index', { title: 'Express' }); }; // stats exports.stats = function(req, res){ var client = redis.createClient(); client.select(2); // Redis transaction to gather data client.multi() .smembers('ip') .hgetall('myurls') .exec(function(err, results) { var ips = results[0]; var urls = results[1]; res.render('stats',{ title: 'Stats', ips : ips, urls : urls}); client.quit(); }); };
I mentioned that multi and
exec are Redis
transaction control commands. These aren’t the same type of transaction
controls you’re probably used to with a relational database. All the
multi command does is
collect a set of Redis commands that are then processed sequentially when
the exec command is given.
This type of functionality is useful in the Node world because it provides
a way of getting multiple collections of data that are all returned at the
exact same time—no need for nested callback functions or having to use
something like Step or Async to get all the data at once.
Having said that, don’t let the fact that the Redis commands are seemingly chained together fool you into thinking that the data from one command is then available in the next, as can happen with JavaScript functions that are chained together. Each Redis command is processed in isolation, and the data is just added as an array element in the result, and everything is returned at once.
There’s no locking the data down during the transaction, either, as you’d also expect with a relational database transaction. So any changes to the Redis database during the query can impact the results.
The last piece of the application is the view, created as a Jade
template. The template is very simple: the IP addresses displayed in an
unordered list, and the URL/counter statistics displayed in a table. The
Jade for...in syntax is used
to loop through the IP array, while the each...in syntax is used
to access the property names and values of the object that’s returned with
the Redis hgetall. The template is
shown in Example 9-9.
extends layout
block content
h1= title
h2 Visitor IP Addresses
ul
for ip in ips
li=ip
table
caption Page Visits
each val, key in urls
tr
td #{key}
td #{val}Figure 9-2 shows the statistics page after several widget application resource pages have been accessed from a couple of different IP addresses.
We don’t have to first create the hash when using hincrby. If the hash key
doesn’t exist, Redis creates it automatically and sets the value to
0 before the value is incremented. The
only time the functionality fails is if the field already exists and the
value in the field isn’t a numeric string (i.e., can’t be
incremented).
Another approach to incrementing a counter for each resource is to use Redis strings, and set the resource URL to be the key:
client.incr(url);
However, this approach means we would have to get all the keys (the
URLs), and then get the counters for each URL. We can’t necessarily
accomplish all of this using multi, and
because of the asynchronous nature of accessing the data, we’d end up
having to use nested callbacks or some other approach to pull all this
data together.
There’s no need to go through all of that extra effort when we have
built-in functionality via the Redis hash and the hincrby
command.
Chapter 9 covered one popular NoSQL database structure (key/value pairs via Redis), and this chapter covers another: document-centric data stores via MongoDB.
Where MongoDB differs from relational database systems, such as MySQL, is in its support for storing structured data as documents, rather than implementing the more traditional tables. These documents are encoded as BSON, a binary form of JSON, which probably explains its popularity among JavaScript developers. Instead of a table row, you have a BSON document; instead of a table, you have a collection.
MongoDB isn’t the only document-centric database. Other popular versions of this type of data store are CouchDB by Apache, SimpleDB by Amazon, RavenDB, and even the venerable Lotus Notes. There is some Node support of varying degrees for most modern document data stores, but MongoDB and CouchDB have the most. I decided to cover MongoDB rather CouchDB for the same reasons I picked Express over other frameworks: I feel it’s easier for a person with no exposure to the secondary technology (in this case, the data store) to be able to grasp the Node examples without having to focus overmuch on the non-Node technology. With MongoDB, we can query the data directly, whereas with CouchDB, we work with the concept of views. This higher level of abstraction does require more up-front time. In my opinion, you can hit the ground running faster with MongoDB than CouchDB.
There are several modules that work with MongoDB, but I’m going to focus on two: the MongoDB Native Node.js Driver (a driver written in JavaScript), and Mongoose, an object modeling tool providing ORM (object-relational mapping) support.
Though I won’t get into too many details in this chapter about how MongoDB works, you should be able to follow the examples even if you have not worked with the database system previously. There’s more on MongoDB, including installation help, at http://www.mongodb.org/.
The MongoDB Native Node.js Driver module is a native MongoDB driver for Node. Using it to issue MongoDB instructions is little different from issuing these same instructions into the MongoDB client interface.
The node-mongodb-native GitHub page is at https://github.com/mongodb/node-mongodb-native, and documentation is at http://mongodb.github.com/node-mongodb-native/.
After you have installed MongoDB (following the instructions outlined at the MongoDB website) and started a database, install the MongoDB Native Node.js Driver with npm:
npm install mongodb
Before trying out any of the examples in the next several sections, make sure MongoDB is installed locally, and is running.
If you’re already using MongoDB, make sure to back up your data before trying out the examples in this chapter.
To use the MongoDB driver, you first have to require the module:
var mongodb = require('mongodb');To establish a connection to MongoDB, use the mongodb.Server object
constructor:
var server = new mongodb.Server('localhost',:27017, {auto_reconnect: true});All communication with the MongoDB occurs over TCP. The server
constructor accepts the host and
port as the first two parameters—in this case, the default localhost and port
27017. The third parameter is a set
of options. In the code, the auto_reconnect option is set to
true, which means the driver attempts
to reestablish a connection if it’s lost. Another option is poolSize, which
determines how many TCP connections are maintained in parallel.
MongoDB uses one thread per connection, which is why the database creators recommend that developers use connection pooling.
Once you have a connection to MongoDB, you can create a database
or connect to an existing one. To create a database, use the mongodb.Db object constructor:
var db = new mongdb.Db('mydb', server);The first parameter is the database name, and the second is the MongoDB server connection. A third parameter is an object with a set of options. The default option values are sufficient for the work we’re doing in this chapter, and the MongoDB driver documentation covers the different values, so I’ll skip repeating them in this chapter.
If you’ve not worked with MongoDB in the past, you may notice that the code doesn’t have to provide username and password authentication. By default, MongoDB runs without authentication. When authentication isn’t enabled, the database has to run in a trusted environment. This means that MongoDB allows connections only from trusted hosts, typically only the localhost address.
MongoDB collections are fundamentally equivalent to relational database tables, but without anything that even closely resembles a relational database table.
When you define a MongoDB collection, you can specify if you want a collection object to actually be created at that time, or only after the first row is added. Using the MongoDB driver, the following code demonstrates the difference between the two; the first statement doesn’t create the actual collection, and the second does:
db.collection('mycollection', function(err, collection{});
db.createCollection('mycollection', function(err, collection{});You can pass an optional second parameter to both methods,
{safe : true}, which instructs the
driver to issue an error if the collection does not exist when used with
db.collection, and an error if the
collection already exists if used with db.createCollection:
db.collection('mycollection', {safe : true}, function (err, collection{});
db.createCollection('mycollection', {safe : true}, function(err, collection{});If you use db.createCollection
on an existing collection, you’ll just get access to the collection—the
driver won’t overwrite it. Both methods return a collection object in
the callback function, which you can then use to add, modify, or
retrieve document data.
If you want to completely drop the collection, use db.dropCollection:
db.dropCollection('mycollection', function(err, result){});Note that all of these methods are asynchronous, and are dependent on nested callbacks if you want to process the commands sequentially. This is demonstrated more fully in the next section, where we’ll add data to a collection.
Before getting into the mechanics of adding data to a collection, and looking at fully operational examples, I want to take a moment to discuss data types. More specifically, I want to repeat what the MongoDB driver mentions about data types, because the use of JavaScript has led to some interesting negotiations between the driver and the MongoDB.
Table 10-1 shows the conversions between the data types supported by MongoDB and their JavaScript equivalents. Note that most conversions occur cleanly—no potentially unexpected effects. Some, though, do require some behind-the-scenes finagling that you should be aware of. Additionally, some data types are provided by the MongoDB Native Node.js Driver, but don’t have an equivalent value in MongoDB. The driver converts the data we provide into data the MongoDB can accept.
MongoDB type | JavaScript type | Notes/examples |
JSON |
|
|
|
| utf8 encoded. |
|
|
|
|
| MongoDB supports 32- and
64-bit numbers; JavaScript numbers are 64-bit floats. The
MongoDB driver attempts to fit the value into 32 bits; if it
fails, it promotes to 64 bits; if this fails, it promotes to the
|
|
| The |
|
| |
|
| Special class representing a float value. |
|
| |
Regular expression |
| |
|
| |
|
| |
Object |
| Special class that holds a MongoDB document identifier. |
Binary data |
| Class to store binary data. |
| Class to store the JavaScript function and score for the method to run in. | |
| Class to store reference to another document. | |
| Specify a symbol (not specific to JavaScript, for languages that use symbols). |
Once you have a reference to a collection, you can add documents to it. The data is structured as JSON, so you can create a JSON object and then insert it directly into the collection.
To demonstrate all of the code to this point, in addition to
adding data to a collection, Example 10-1 creates a first
collection (named Widgets) in MongoDB
and then adds two documents. Since you might want to run the example a
couple of times, it first removes the collection documents using the
remove method. The remove method takes three optional
parameters:
Selector for the document(s); if none is provided, all documents are removed
An optional safe mode indicator, safe
{true | {w:n, wtimeout:n} | {fsync:true},
default:false}
A callback function (required if safe mode indicator is set to
true)
In the example, the application is using a safe remove, passing in
null for the first parameter (as a
parameter placeholder, ensuring that all documents are removed) and
providing a callback function. Once the documents are removed, the
application inserts two new documents, with the second insert using safe
mode. The application prints to the console the result of the second
insert.
The insert method also
takes three parameters: the document or documents being inserted, an
options parameter, and the callback function. You can insert multiple
documents by enclosing them in an array. The options for insert are:
safe {true | {w:n, wtimeout:n} |
{fsync:true}, default:false}
keepGoingSet to true to have
application continue if one of the documents generates an
error
serializeFunctionsSerialize functions on the document
The method calls are asynchronous, which means there’s no guarantee that the first document is inserted before the second. However, it shouldn’t be a problem with the widget application—at least not in this example. Later in the chapter, we’ll look more closely at some of the challenges of working asynchronously with database applications.
var mongodb = require('mongodb');
var server = new mongodb.Server('localhost', 27017, {auto_reconnect: true});
var db = new mongodb.Db('exampleDb', server);
// open database connection
db.open(function(err, db) {
if(!err) {
// access or create widgets collection
db.collection('widgets', function(err, collection) {
// remove all widgets documents
collection.remove(null,{safe : true}, function(err, result) {
if (!err) {
console.log('result of remove ' + result);
// create two records
var widget1 = {title : 'First Great widget',
desc : 'greatest widget of all',
price : 14.99};
var widget2 = {title : 'Second Great widget',
desc : 'second greatest widget of all',
price : 29.99};
collection.insert(widget1);
collection.insert(widget2, {safe : true}, function(err, result) {
if(err) {
console.log(err);
} else {
console.log(result);
//close database
db.close();
}
});
}
});
});
}
});The output to the console after the second insert is a variation on:
[ { title: 'Second Great widget',
desc: 'second greatest widget of all',
price: 29.99,
_id: 4fc108e2f6b7a3e252000002 } ]The MongoDB generates a unique system identifier for each document. You can access documents with this identifier at a future time, but you’re better off adding a more meaningful identifier—one that can be determined easily by context of use—for each document.
As mentioned earlier, we can insert multiple documents at the same
time by providing an array of documents rather than a single document.
The following code demonstrates how both widget records can be inserted
in the same command. The code also incorporates an application
identifier with the id field:
// create two records
var widget1 = {id: 1, title : 'First Great widget',
desc : 'greatest widget of all',
price : 14.99};
var widget2 = {id: 2, title : 'Second Great widget',
desc : 'second greatest widget of all',
price : 29.99};
collection.insert([widget1,widget2], {safe : true},
function(err, result) {
if(err) {
console.log(err);
} else {
console.log(result);
// close database
db.close();
}
});If you do batch your document inserts, you’ll need to set the
keepGoing option to
true to be able to keep inserting
documents even if one of the insertions fails. By default, the
application stops if an insert fails.
There are four methods of finding data in the MongoDB Native Node.js Driver:
findReturns a cursor with all the documents returned by the query
findOneReturns a cursor with the first document found that matches the query
findAndRemoveFinds a document and then removes it
findAndModifyFinds a document and then performs an action (such as
remove or upsert)
In this section, I’ll demonstrate collection.find and
collection.findOne, and
reserve the other two methods for the next section, Using Updates, Upserts, and Find and Remove.
Both collection.find and
collection.findOne
support three arguments: the query, options, and a callback. The options
object and the callback are optional, and the list of possible options
to use with both methods is quite extensive. Table 10-2 shows all the options, their default setting,
and a description of each.
The options allow for a great deal of flexibility with queries, though most queries will most likely need only a few of them. I’ll cover some of the options in the examples, but I recommend you try the others with your example MongoDB installation.
The simplest query for all documents in the collection is to use
the find method without any
parameters. You immediately convert the results to an array using
toArray, passing in a callback
function that takes an error and an array of documents. Example 10-2 shows the
application that performs this functionality.
var mongodb = require('mongodb');
var server = new mongodb.Server('localhost', 27017, {auto_reconnect: true});
var db = new mongodb.Db('exampleDb', server);
// open database connection
db.open(function(err, db) {
if(!err) {
// access or create widgets collection
db.collection('widgets', function(err, collection) {
// remove all widgets documents
collection.remove(null,{safe : true}, function(err, result) {
if (!err) {
// create four records
var widget1 = {id: 1, title : 'First Great widget',
desc : 'greatest widget of all',
price : 14.99, type: 'A'};
var widget2 = {id: 2, title : 'Second Great widget',
desc : 'second greatest widget of all',
price : 29.99, type: 'A'};
var widget3 = {id: 3, title: 'third widget', desc: 'third widget',
price : 45.00, type: 'B'};
var widget4 = {id: 4, title: 'fourth widget', desc: 'fourth widget',
price: 60.00, type: 'B'};
collection.insert([widget1,widget2,widget3,widget4], {safe : true},
function(err, result) {
if(err) {
console.log(err);
} else {
// return all documents
collection.find().toArray(function(err, docs) {
console.log(docs);
//close database
db.close();
});
}
});
}
});
});
}
});The result printed out to the console shows all four newly added documents, with their system-generated identifiers:
[ { id: 1,
title: 'First Great widget',
desc: 'greatest widget of all',
price: 14.99,
type: 'A',
_id: 4fc109ab0481b9f652000001 },
{ id: 2,
title: 'Second Great widget',
desc: 'second greatest widget of all',
price: 29.99,
type: 'A',
_id: 4fc109ab0481b9f652000002 },
{ id: 3,
title: 'third widget',
desc: 'third widget',
price: 45,
type: 'B',
_id: 4fc109ab0481b9f652000003 },
{ id: 4,
title: 'fourth widget',
desc: 'fourth widget',
price: 60,
type: 'B',
_id: 4fc109ab0481b9f652000004 } ]Rather than return all of the documents, we can provide a
selector. In the following code, we’re querying all documents that have
a type of A, and returning all the
fields but the type field:
// return all documents
collection.find({type:'A'},{fields:{type:0}}).toArray(function(err, docs) {
if(err) {
console.log(err);
} else {
console.log(docs);
//close database
db.close();
}
});The result of this query is:
[ { id: 1,
title: 'First Great widget',
desc: 'greatest widget of all',
price: 14.99,
_id: 4f7ba035c4d2204c49000001 },
{ id: 2,
title: 'Second Great widget',
desc: 'second greatest widget of all',
price: 29.99,
_id: 4f7ba035c4d2204c49000002 } ]We can also access only one document using findOne. The result of
this query does not have to be converted to an array, and can be
accessed directly. In the following, the document with an ID of 1 is queried, and only the title is
returned:
// return one document
collection.findOne({id:1},{fields:{title:1}}, function(err, doc) {
if (err) {
console.log(err);
} else {
console.log(doc);
//close database
db.close();
}
});The result from this query is:
{ title: 'First Great widget', _id: 4f7ba0fcbfede06649000001 }The system-generated identifier is always returned with the query results.
Even if I modified the query to return all documents with a type
of A (there are two), only one is
returned with the collection.findOne
method. Changing the limit in the options
object won’t make a difference: the method always returns one document
if the query is successful.
The MongoDB Native Node.js Driver supports several different methods that either modify or remove an existing document—or both, in the case of one method:
The basic difference between update/remove and findAndModify/findAndRemove is that the latter set of
methods returns the affected document.
The functionality to use these methods is not very different from what we saw with the inserts. You’ll have to open a database connection, get a reference to the collection you’re interested in, and then perform the operations.
If the MongoDB currently contains the following document:
{ id : 4,
title: 'fourth widget',
desc: 'fourth widget'.
price: 60.00,
type: 'B'}and you want to modify the title, you can use the update method to do so, as shown in Example 10-3. You can supply all of the
fields, and MongoDB does a replacement of the document, but you’re
better off using one of the MongoDB modifiers, such as $set. The $set modifier instructs
the database to just modify whatever fields are passed as properties to
the modifier.
var mongodb = require('mongodb');
var server = new mongodb.Server('localhost', 27017, {auto_reconnect: true});
var db = new mongodb.Db('exampleDb', server);
// open database connection
db.open(function(err, db) {
if(!err) {
// access or create widgets collection
db.collection('widgets',function(err, collection) {
//update
collection.update({id:4},
{$set : {title: 'Super Bad Widget'}},
{safe: true}, function(err, result) {
if (err) {
console.log(err);
} else {
console.log(result);
// query for updated record
collection.findOne({id:4}, function(err, doc) {
if(!err) {
console.log(doc);
//close database
db.close();
}
});
}
});
});
}
});The resulting document now displays the modified fields.
There are additional modifiers that provide other atomic data updates of interest:
$incIncrements a field’s value by a specified amount
$setSets a field, as demonstrated
$unsetDeletes a field
$pushAppends a value to the array if the field is an array (converts it to an array if it wasn’t)
$pushAllAppends several values to an array
$addToSetAdds to an array only if the field is an array
$pullRemoves a value from an array
$pullAllRemoves several values from an array
$renameRenames a field
$bitPerforms a bitwise operation
So why don’t we just remove the document and insert a new one, rather than use a modifier? Because although we had to provide all of the user-defined fields, we don’t have to provide the system-generated identifier. This value remains constant with the update. If the system-generated identifier is stored as a field in another document, say a parent document, removing the document will leave the reference to the original document orphaned in the parent.
Though I don’t cover the concept of trees (complex parent/child data structures) in this chapter, the MongoDB website has documentation on them.
More importantly, the use of modifiers ensures that the action is performed in place, providing some assurance that one person’s update won’t overwrite another’s.
Though we used none in the example, the update method takes four options:
If you’re unsure whether a document already exists in the
database, set the upsert option to
true.
Example 10-3 did a find on the
modified record to ensure that the changes took effect. A better
approach would be to use findAndModify. The parameters are close to
what’s used with the update, with the addition of a sort array as the
second parameter. If multiple documents are returned, updates are
performed in sort order:
//update
collection.findAndModify({id:4}, [[ti]],
{$set : {title: 'Super Widget', desc: 'A really great widget'}},
{new: true}, function(err, doc) {
if (err) {
console.log(err);
} else {
console.log(doc);DB
}
db.close();
});You can use the findAndModify
method to remove a document if you use the remove option. If you
do, no document is returned in the callback function. You can also use
the remove and the findAndRemove methods to remove the document.
Earlier examples have used remove,
without a selector, to remove all the documents before doing an insert.
To remove an individual document, provide a selector:
collection.remove({id:4},
{safe: true}, function(err, result) {
if (err) {
console.log(err);
} else {
console.log(result);
}The result is the number of documents removed (in this case,
1). To see the document being
removed, use findAndRemove:
collection.findAndRemove({id:3}, [['id',1]],
function(err, doc) {
if (err) {
console.log(err);
} else {
console.log(doc);
}I’ve covered the basic CRUD (create, read, update, delete) operations you can perform from a Node application with the Native driver, but there are considerably more capabilities, including working with capped collections, indexes, and the other MongoDB modifiers; sharding (partitioning data across machines); and more. The Native driver documentation covers all of these and provides good examples.
The examples demonstrate some of the challenges associated with handling data access in an asynchronous environment, discussed more fully in the sidebar Challenges of Asynchronous Data Access.
The MongoDB Native Node.js Driver provides a binding to the MongoDB, but doesn’t provide a higher-level abstraction. For this, you’ll need to use an ODM (object-document mapping) like Mongoose.
The Mongoose website is at http://mongoosejs.com/.
To use Mongoose, install it with npm:
npm install mongoose
Instead of issuing commands directly against a MongoDB database, you
define objects using the Mongoose Schema object, and then sync it with the
database using the Mongoose model object:
var Widget = new Schema({
sn : {type: String, require: true, trim: true, unique: true},
name : {type: String, required: true, trim: true},
desc : String,
price : Number
});
var widget = mongoose.model('Widget', Widget);When we define the object, we provide information that controls what
happens to that document field at a later time. In the code just provided,
we define a Widget object with four
explicit fields: three of type String,
and one of type Number. The sn and name
fields are both required and trimmed, and the sn field must be unique in the document database.
The collection isn’t made at this point, and won’t be until at least
one document is created. When we do create it, though, it’s named widgets—the widget object name is lowercased and
pluralized.
Anytime you need to access the collection, you make the same call to
the mongoose.model.
This code is the first step in adding the final component to the Model-View-Controller (MVC) widget implementation started in earlier chapters. In the next couple of sections, we’ll finish the conversion from an in-memory data store to MongoDB. First, though, we need to do a little refactoring on the widget application.
Refactoring is the process of restructuring existing code in such a way as to clean up the cruft behind the scenes with minimal or no impact on the user interface. Since we’re converting the widget application over to a MongoDB database, now is a good time to see what other changes we want to make.
Currently, the filesystem structure for the widget application is:
/application directory
/routes - home directory controller
/controllers - object controllers
/public - static files
/widgets
/views - template files
/widgetsThe routes subdirectory provides top-level (non-business-object) functionality. The name isn’t very meaningful, so I renamed it to main. This necessitated some minor modifications to the primary app.js file as follows:
// top level
app.get('/', main.index);
app.get('/stats', main.stats);Next, I added a new subdirectory named models. The MongoDB model definitions are stored in this subdirectory, as the controller code is in the controllers subdirectory. The directory structure now looks like the following:
/application directory
/main - home directory controller
/controllers - object controllers
/public - static files
/widgets
/views - template files
/widgetsThe next change to the application is related to the structure of the data. Currently, the application’s primary key is an ID field, system-generated but accessible by the user via the routing system. To show a widget, you’d use a URL like the following:
| http://localhost:3000/widgets/1 |
This isn’t an uncommon approach. Drupal, a popular content management system (CMS), uses this approach for accessing Drupal nodes (stories) and users, unless a person uses a URL redirection module:
| http://burningbird.net/node/78 |
The problem is that MongoDB generates an identifier for each object, and uses a format that makes it unattractive for routing. There is a workaround—which requires creating a third collection that contains an identifier, and then using it to take the place of the identifier—but the approach is ugly, counter to MongoDB’s underlying structure, and not especially doable with Mongoose.
The widget title field is
unique, but has spaces and characters that make it unattractive as a
routing URL. Instead, we define a new field, sn, which is the new serial number for the
product. When a new widget object is created, the user assigns whatever
serial number she wants for the product, and the serial number is used
when we access the widget at a later time. If the widget serial number
is 1A1A, for example, it’s accessed
with:
| http://localhost:3000/widgets/1A1A |
The new data structure, from an application point of view, is:
sn: string title: string desc: string price: number
This modification necessitates some changes to the user interface,
but they’re worthwhile. The Jade templates also need to be changed, but
the change is minor: basically replacing references to id with references to sn, and adding a field for serial number to
any form.
Rather than duplicate all the code again to show minor changes, I’ve made the examples available at O’Reilly’s catalog page for this book (http://oreilly.com/catalog/9781449323073); you’ll find all of the new widget application files in the chap12 subdirectory.
The more significant change is to the controller code in the widget.js file. The changes to this file, and others related to adding a MongoDB backend, are covered in the next section.
The first necessary change is to add a connection to the MongoDB database. It’s added to the primary app.js file, so the connection persists for the life of the application.
First, Mongoose is included into the file:
var mongoose = require('mongoose');Then the database connection is made:
// MongoDB
mongoose.connect('mongodb://127.0.0.1/WidgetDB');
mongoose.connection.on('open', function() {
console.log('Connected to Mongoose');
});Notice the URI for the MongoDB. The specific database is passed as the last part of the URI.
This change and the aforementioned change converting routes to main are all the changes necessary for app.js.
The next change is to maproutecontroller.js. The routes that
reference id must be changed to now
reference sn. The modified routes are
shown in the following code block:
// show app.get(prefix + '/:sn', prefixObj.show); // edit app.get(prefix + '/:sn/edit', prefixObj.edit); // update app.put(prefix + '/:sn', prefixObj.update); // destroy app.del(prefix + '/:sn', prefixObj.destroy);
If we don’t make this change, the controller code expects sn as a parameter but gets id instead.
The next code is an addition, not a modification. In the models subdirectory, a new file is created, named widgets.js. This is where the widget model is defined. To make the model accessible outside the file, it’s exported, as shown in Example 10-4.
var mongoose = require('mongoose');
var Schema = mongoose.Schema
,ObjectId = Schema.ObjectId;
// create Widget model
var Widget = new Schema({
sn : {type: String, require: true, trim: true, unique: true},
name : {type: String, required: true, trim: true},
desc : String,
price : Number
});
module.exports = mongoose.model('Widget', Widget);The last change is to the widget controller code. We’re swapping
out the in-memory data store for MongoDB, using a Mongoose model. Though
the change is significant from a processing perspective, the code
modification isn’t very extensive—just a few tweaks, having as much to
do with changing id to sn as anything else. Example 10-5 contains the
complete code for the widget controller code.
var Widget = require('../models/widget.js');
// index listing of widgets at /widgets/
exports.index = function(req, res) {
Widget.find({}, function(err, docs) {
console.log(docs);
res.render('widgets/index', {title : 'Widgets', widgets : docs});
});
};
// display new widget form
exports.new = function(req, res) {
console.log(req.url);
var filePath = require('path').normalize(__dirname +
"/../public/widgets/new.html");
res.sendfile(filePath);
};
// add a widget
exports.create = function(req, res) {
var widget = {
sn : req.body.widgetsn,
name : req.body.widgetname,
price : parseFloat(req.body.widgetprice),
desc: req.body.widgetdesc};
var widgetObj = new Widget(widget);
widgetObj.save(function(err, data) {
if (err) {
res.send(err);
} else {
console.log(data);
res.render('widgets/added', {title: 'Widget Added', widget: widget});
}
});
};
// show a widget
exports.show = function(req, res) {
var sn = req.params.sn;
Widget.findOne({sn : sn}, function(err, doc) {
if (err)
res.send('There is no widget with sn of ' + sn);
else
res.render('widgets/show', {title : 'Show Widget', widget : doc});
});
};
// delete a widget
exports.destroy = function(req, res) {
var sn = req.params.sn;
Widget.remove({sn : sn}, function(err) {
if (err) {
res.send('There is no widget with sn of ' + sn);
} else {
console.log('deleted ' + sn);
res.send('deleted ' + sn);
}
});
};
// display edit form
exports.edit = function(req, res) {
var sn = req.params.sn;
Widget.findOne({sn : sn}, function(err, doc) {
console.log(doc);
if(err)
res.send('There is no widget with sn of ' + sn);
else
res.render('widgets/edit', {title : 'Edit Widget', widget : doc});
});
};
// update a widget
exports.update = function(req, res) {
var sn = req.params.sn;
var widget = {
sn : req.body.widgetsn,
name : req.body.widgetname,
price : parseFloat(req.body.widgetprice),
desc : req.body.widgetdesc};
Widget.update({sn : sn}, widget, function(err) {
if (err)
res.send('Problem occured with update' + err)
else
res.render('widgets/added', {title: 'Widget Edited', widget : widget})
});
};Now the widget application’s data is persisted to a database, rather than disappearing every time the application is shut down. And the entire application is set up in such a way that we can add support for new data entities with minimal impact on the stable components of the application.
In traditional web development, relational databases are the most popular means of data storage. Node, perhaps because of the type of applications it attracts, or perhaps because it attracts uses that fit outside the traditional development box, doesn’t follow this pattern: there is a lot more support for data applications such as Redis and MongoDB than there is for relational databases.
There are some relational database modules you can use in your Node applications, but they may not be as complete as you’re used to with database bindings in languages such as PHP and Python. In my opinion, the Node modules for relational databases are not yet production ready.
On the positive side, though, the modules that do support relational databases are quite simple to use. In this chapter I’m going to demonstrate two different approaches to integrating a relational database, MySQL, into Node applications. One approach uses mysql (node-mysql), a popular JavaScript MySQL client. The other approach uses db-mysql, which is part of the new node-db initiative to create a common framework for database engines from Node applications. The db-mysql module is written in C++.
Neither of the modules mentioned currently supports transactions, but mysql-series has added this type of functionality to node-mysql. I’ll provide a quick demonstration on this, and also offer a brief introduction to Sequelize, an ORM (object-relational mapping) library that works with MySQL.
There are a variety of relational databases, including SQL Server, Oracle, and SQLite. I’m focusing on MySQL because there are installations available for Windows and Unix environments, it’s free for noncommercial use, and it’s the most commonly used database with applications most of us have used. It’s also the relational database with the most support in Node.
The test database used in the chapter is named nodetest2, and it contains one table with the following structure:
id - int(11), primary key, not null, autoincrement title - varchar(255), unique key, not null text - text, nulls allowed created - datetime, nulls allowed
The db-mysql Node module is a native module, and requires installation of the MySQL client libraries on your system. Check with http://nodejsdb.org/db-mysql/ for installation and setup instructions.
Once your environment is set up, you can install db-mysql with npm:
npm install db-mysql
The db-mysql module provides two classes to interact with the MySQL
database. The first is the database
class, which you use to connect and disconnect from the
database and do a query. The query
class is what’s returned from the database query method. You can use
the query class to create a query
either through chained methods representing each component of the query,
or directly using a query string; db-mysql is very flexible.
Results, including any error, are passed in the last callback
function for any method. You can use nested callbacks to chain actions
together, or use the EventEmitter event
handling in order to process both errors and database command
results.
When creating the database connection to a MySQL database, you can pass several options that influence the created database. You’ll need to provide, at minimum, a hostname or a port or a socket, and a user, password, and database name:
var db = new mysql.Database({
hostname: 'localhost',
user: 'username',
password: 'userpass',
database: 'databasenm'
});The options are detailed in the db-mysql documentation, as well as in the MySQL documentation.
To demonstrate db-mysql’s flexibility, the application in
Example 11-1 connects to a
database and runs the same query twice: the first using the query class chained methods, the second using
a string query. The first query processes the result in a nested
callback function, while the second listens for the success and error
events and responds accordingly.
In both cases, the result is returned in the rows object, which returns an array of objects
representing each row of data.
var mysql = require('db-mysql');
// define database connection
var db = new mysql.Database({
hostname: 'localhost',
user: 'username',
password: 'userpass',
database: 'databasenm'
});
// connect
db.connect();
db.on('error', function(error) {
console.log("CONNECTION ERROR: " + error);
});
// database connected
db.on('ready', function(server) {
// query using chained methods and nested callback
this.query()
.select('*')
.from('nodetest2')
.where('id = 1')
.execute(function(error, rows, columns) {
if (error) {
return console.log('ERROR: ' + error);
}
console.log(rows);
console.log(columns);
});
// query using direct query string and event
var qry = this.query();
qry.execute('select * from nodetest2 where id = 1');
qry.on('success', function(rows, columns) {
console.log(rows); // print out returned rows
console.log(columns); // print out returns columns
});
qry.on('error', function(error) {
console.log('Error: ' + error);
});
});The database object emits a
ready event once the
database is connected, or error if there’s a
problem with making the connection. The server object passed as a parameter for the
callback function to the ready event contains
the following properties:
hostnameThe database hostname
userThe user used for the database connection
databaseThe database connected to
versionServer software version
The first query in the examples makes use of the query class chained methods that form each
component of the query. The chained methods you can use for a SQL query
are:
selectContains the query’s selection criteria—such as a list of
column names or asterisk (*)
for all columns—or the select string
fromContains an array of table names, or the string used in the
from statement
joinA join clause consisting of an options object looking for a type of
join, a table to join with, an
alias for table (if any), joining conditions (if any), and whether
to escape the table and alias names (defaults to true)
whereConditional statement, which may contain placeholders and
other chained methods representing the and and or conditions
orderAppends an ORDER BY
clause
limitAppends a LIMIT
clause
addAdds a generic clause, such as a UNION
The chained methods provide a more database-neutral approach to
performing the same SQL statements. Right now, the Node.js database drivers support MySQL (db-mysql), and
Drizzle (db-drizzle). The chained methods handle any variations between
the two. The chained methods also automatically handle any escaping of
the data in the SQL statement that’s necessary for safe usage.
Otherwise, if using a straight query, you’ll have to use the query.escape method to
properly escape the SQL.
The query object emits a
success event if the
query is successful, or an error. It also emits an
each event for each row
returned from the query. If the success event is for a
query that returns rows, the callback function gets both a rows and a columns object. Each row is an array, with
each array element containing an object made up of column name/value
pairs. The columns object represents
the columns that are part of the result, and each column object contains
the column name and type. If the test table in the example has a
table with columns of id, title, text, and created, the rows object would look like:
{ id: 1,
title: 'this is a nice title',
text: 'this is a nice text',
created: Mon, 16 Aug 2010 09:00:23 GMT }The columns object would look
like:
[ { name: 'id', type: 2 },
{ name: 'title', type: 0 },
{ name: 'text', type: 1 },
{ name: 'created', type: 6 } ]If the success event is for a query that performs an update, delete, or insert, the success event callback function receives a result object as a parameter. I’ll cover this object in more detail in the next section.
Though the queries are each handled using different approaches,
both have to be implemented within the database’s success event callback
function. Since db-mysql is Node functionality, the methods are
asynchronous. If you tried to do one of the queries outside of the
database connect callback function, it wouldn’t succeed because the
database connection won’t be established at that point.
As noted, the db-mysql module provides two different ways to update the data in the relational database: a direct query, or using chained methods. We’ll first look at just using a direct query.
When using a direct query, you can use the same SQL you’d use in a MySQL client:
qry.execute('update nodetest2 set title = "This is a better title" where id = 1');Or you can make use of placeholders:
qry.execute('update nodetest2 set title = ? where id = ?',
["This was a better title", 1]);Placeholders can be used either with a direct query string
or with the chained methods. Placeholders are a way of creating the
query string ahead of time and then just passing in whatever values are
needed. The placeholders are represented by question marks (?) in the string, and each value is given as
an array element in the second parameter to the method.
The result of the operation being performed on the database is
reflected in the parameter returned in the callback for the success
event. In Example 11-2, a
new row is inserted into the test database. Note that it makes use of
the MySQL NOW function to set the
created field with the current date
and time. When using a MySQL function, you’ll need to place it directly
into the query string—you can’t use a placeholder.
var mysql = require('db-mysql');
// define database connection
var db = new mysql.Database({
hostname: 'localhost',
user: 'username',
password: 'userpass',
database: 'databasenm'
});
// connect
db.connect();
db.on('error', function(error) {
console.log("CONNECTION ERROR: " + error);
});
// database connected
db.on('ready', function(server) {
// query using direct query string and event
var qry = this.query();
qry.execute('insert into nodetest2 (title, text, created) values(?,?,NOW())',
['Third Entry','Third entry in series']);
qry.on('success', function(result) {
console.log(result);
});
qry.on('error', function(error) {
console.log('Error: ' + error);
});
});If the operation is successful, the following result is returned as a parameter in the callback function:
{ id: 3, affected: 1, warning: 0 }The id is the generated
identifier for the table row; the affected property shows the number of rows
affected by the change (1), and the
warning displays how many warnings
the query generated for the rows (in this case, 0).
Database table row updates and deletions are handled in the same
manner: either use the exact syntax you’d use in a MySQL client, or use
placeholders. Example 11-3 adds a new record
to the test database, updates the title, and then deletes the same
record. You’ll notice I created a different query object for each query. Though you can
run the same query multiple times, each query does have its own
arguments—including the number of arguments it expects each time the
query is run. I used four replacement values in the insert, but if I tried
to use only two in the update, I’d get an
error. The application also makes use of nested callbacks rather than
event capturing.
var mysql = require('db-mysql');
// define database connection
var db = new mysql.Database({
hostname: 'localhost',
user: 'username',
password: 'password',
database: 'databasenm'
});
// connect
db.connect();
db.on('error', function(error) {
console.log("CONNECTION ERROR: " + error);
});
// database connected
db.on('ready', function(server) {
// query using direct query string and nested callbacks
var qry = this.query();
qry.execute('insert into nodetest2 (title, text,created) values(?,?,NOW())',
['Fourth Entry','Fourth entry in series'], function(err,result) {
if (err) {
console.log(err);
} else {
console.log(result);
var qry2 = db.query();
qry2.execute('update nodetest2 set title = ? where id = ?',
['Better title',4], function(err,result) {
if(err) {
console.log(err);
} else {
console.log(result);
var qry3 = db.query();
qry3.execute('delete from nodetest2 where id = ?',[4],
function(err, result) {
if(err) {
console.log(err);
} else {
console.log(result);
}
});
}
});
}
});
});One thing you might notice from the example is there’s no way to roll back previous SQL statements if an error occurs in any of them. At this time, there is no transaction management in db-mysql. If you need to ensure database consistency, you’ll have to provide it yourself in your application. You can do this by checking for an error after each SQL statement is executed, and then reversing previous successful operation(s) if a failure occurs. It’s not an ideal situation, and you’ll have to be careful about the use of any autoincrementing.
The db-mysql methods to insert, update, and delete a
record are insert, update, and delete, respectively.
Both the update and delete chained methods
can also make use of the where method, which can
in turn make use of the conditional chained methods of and and or.
The update method can also
use another chained method, set, to set values for
the SQL statement.
Example 11-4
duplicates the functionality from Example 11-3, but uses chained
methods for the insert and update methods. It does
not use the chained method for the delete, because at the
time this book was written, the delete method did not
work correctly.
var mysql = require('db-mysql');
// define database connection
var db = new mysql.Database({
hostname: 'localhost',
user: 'username',
password: 'password',
database: 'databasenm'
});
// connect
db.connect();
db.on('error', function(error) {
console.log("CONNECTION ERROR: " + error);
});
// database connected
db.on('ready', function(server) {
// query using direct query string and nested callbacks
var qry = this.query();
qry.insert('nodetest2',['title','text','created'],
['Fourth Entry', 'Fourth entry in series', 'NOW()'])
.execute(function(err,result) {
if (err) {
console.log(err);
} else {
console.log(result);
var qry2 = db.query();
qry2.update('nodetest2')
.set({title: 'Better title'})
.where('id = ?',[4])
.execute(function(err, result) {
if(err) {
console.log(err);
} else {
console.log(result);
}
});
}
});
});I’m not overfond of the chained methods, though I think they’re handy if you’re bringing in data from an application, or if your application may support multiple databases.
Unlike with db-mysql, you don’t need to install specialized MySQL client software to work with node-mysql. You just need to install the module, and you’re good to go:
npm install mysql
The native driver is quite simple to use. You create a client
connection to the MySQL database, select the database to use, and use this
same client to do all database operations via the query method. A callback
function can be passed as the last parameter in the query method, and
provides information related to the last operation. If no callback
function is used, you can listen for events to determine when processes
are finished.
As just stated, the node-mysql API is extremely simple:
create the client, set the database, and send SQL statements as queries
on the client. The callback functions are optional, and there is some
minimal event support. When you’re using a callback, the parameters are
typically an error and a result, though in the case of a SELECT query, the callback also has a fields parameter.
Example 11-5 demonstrates how to use node-mysql to connect to the widget database, create a new record, update it, and delete it. This example, as simple as it is, demonstrates all the functionality that node-mysql supports.
var mysql = require('mysql');
var client = mysql.createClient({
user: 'username',
password: 'password'
});
client.query('USE databasenm');
// create
client.query('INSERT INTO nodetest2 ' +
'SET title = ?, text = ?, created = NOW()',
['A seventh item', 'This is a seventh item'], function(err, result) {
if (err) {
console.log(err);
} else {
var id = result.insertId;
console.log(result.insertId);
// update
client.query('UPDATE nodetest2 SET ' +
'title = ? WHERE ID = ?', ['New title', id], function (err, result) {
if (err) {
console.log(err);
} else {
console.log(result.affectedRows);
// delete
client.query('DELETE FROM nodetest2 WHERE id = ?',
[id], function(err, result) {
if(err) {
console.log(err);
} else {
console.log(result.affectedRows);
// named function rather than nested callback
getData();
}
});
}
});
}
});
// retrieve data
function getData() {
client.query('SELECT * FROM nodetest2 ORDER BY id', function(err, result,fields) {
if(err) {
console.log(err);
} else {
console.log(result);
console.log(fields);
}
client.end();
});
}The query results are what we’d expect: an array of objects, each representing one row from the table. The following is an example of the output, representing the first returned row:
[ { id: 1,
title: 'This was a better title',
text: 'this is a nice text',
created: Mon, 16 Aug 2010 15:00:23 GMT },
... ]The fields parameter also
matches our expectations, though the format can differ from other
modules. Rather than an array of objects, what’s returned is an object
where each table field is an object property, and its value is an object
representing information about the field. I won’t duplicate the entire
output, but the following is the information returned for the first
field, id:
{ id:
{ length: 53,
received: 53,
number: 2,
type: 4,
catalog: 'def',
db: 'nodetest2',
table: 'nodetest2',
originalTable: 'nodetest2',
name: 'id',
originalName: 'id',
charsetNumber: 63,
fieldLength: 11,
fieldType: 3,
flags: 16899,
decimals: 0 }, ...The module doesn’t support multiple SQL statements concatenated onto each other, and it doesn’t support transactions. The only way to get a close approximation to transaction support is with mysql-queues, discussed next.
The mysql-queues module wraps the node-mysql module and provides support for multiple queries as well as database transaction support. Its use may be a little odd, especially since it provides asynchronous support without seeming to do so.
Typically, to ensure that asynchronous functions have finished,
you’d use nested callbacks, named functions, or a module like Async. In
Example 11-6, though,
mysql-queues controls the flow of execution, ensuring that the SQL
statements that are queued—via the use of the
queue—are finished before the final SELECT is processed. The SQL statements are
completed in order: insert, update, and then the
final retrieve.
var mysql = require('mysql');
var queues = require('mysql-queues');
// connect to database
var client = mysql.createClient({
user: 'username',
password: 'password'
});
client.query('USE databasenm');
//associated queues with query
// using debug
queues(client, true);
// create queue
q = client.createQueue();
// do insert
q.query('INSERT INTO nodetest2 (title, text, created) ' +
'values(?,?,NOW())',
['Title for 8', 'Text for 8']);
// update
q.query('UPDATE nodetest2 SET title = ? WHERE title = ?',
['New Title for 8','Title for 8']);
q.execute();
// select won't work until previous queries finished
client.query('SELECT * FROM nodetest2 ORDER BY ID', function(err, result, fields) {
if (err) {
console.log(err);
} else {
// should show all records, including newest
console.log(result);
client.end();
}
});If you want transactional support, you’ll need to start a
transaction rather than a queue. And you’ll need to use a rollback when an error
occurs, as well as a commit when you’re
finished with the transaction. Again, once you call execute on the
transaction, any queries following
the method call are queued until the transaction is finished.
Example 11-7
contains the same application as in Example 11-6, but this time
using a transaction.
var mysql = require('mysql');
var queues = require('mysql-queues');
// connect to database
var client = mysql.createClient({
user: 'username',
password: 'password'
});
client.query('USE databasenm');
//associated queues with query
// using debug
queues(client, true);
// create transaction
var trans = client.startTransaction();
// do insert
trans.query('INSERT INTO nodetest2 (title, text, created) ' +
'values(?,?,NOW())',
['Title for 8', 'Text for 8'], function(err,info) {
if (err) {
trans.rollback();
} else {
console.log(info);
// update
trans.query('UPDATE nodetest2 SET title = ? WHERE title = ?',
['Better Title for 8','Title for 8'], function(err,info) {
if(err) {
trans.rollback();
} else {
console.log(info);
trans.commit();
}
});
}
});
trans.execute();
// select won't work until transaction finished
client.query('SELECT * FROM nodetest2 ORDER BY ID', function(err, result, fields) {
if (err) {
console.log(err);
} else {
// should show all records, including newest
console.log(result);
client.end();
}
});The mysql-queues adds two important components to the node-mysql module:
Support for multiple queries without having to use a nested callback
Transaction support
If you’re going to use node-mysql, I strongly recommend you incorporate the use of mysql-queues.
The modules in the previous sections provide a database binding for MySQL, but they don’t provide a higher level of abstraction. The Sequelize module does just that with an ORM, though it doesn’t currently support transactions.
To use Sequelize, you define the model, which is a mapping between the database table(s) and JavaScript objects. In our previous examples, we worked with a simple table, nodetest2, with the following structure:
id - int(11), primary key, not null title - varchar(255), unique key, not null text - text, nulls allowed, created - datetime, nulls allowed
You create the model for this database table using the appropriate database and flags for each field:
// define model
var Nodetest2 = sequelize.define('nodetest2',
{id : {type: Sequelize.INTEGER, primaryKey: true},
title : {type: Sequelize.STRING, allowNull: false, unique: true},
text : Sequelize.TEXT,
created : Sequelize.DATE
});The supported data types and their mappings are:
Sequelize.STRING =>
VARCHAR(255)
Sequelize.TEXT =>
TEXT
Sequelize.INTEGER =>
INTEGER
Sequelize.DATE =>
DATETIME
Sequelize.FLOAT =>
FLOAT
Sequelize.BOOLEAN =>
TINYINT(1)
The options you can use to further refine the fields are:
The likelihood is that your application and database are new, so once you define the model, you need to sync it with the database to create the database table:
// sync
Nodetest2.sync().error(function(err) {
console.log(err);
});When you do so, and examine the table in the database, you’ll find that the table and the model are different because of changes Sequelize makes to the table. For one, it’s now called nodetest2s, and for another, there are two new table fields:
id - int(11), primary key, autoincrement title - varchar(255), unique key, nulls not allowed text - text, nulls allowed created - datetime, nulls allowed createdAt - datetime, nulls not allowed updatedAt - datetime, nulls not allowed
These are changes that Sequelize makes, and there’s no way to
prevent it from making them. You’ll want to adjust your expectations
accordingly. For starters, you’ll want to drop the column created, since you no longer need it. You can
do this using Sequelize by deleting the field from the class and then
running the sync again:
// define model
var Nodetest2 = sequelize.define('nodetest2',
{id : {type: Sequelize.INTEGER, primaryKey: true},
title : {type: Sequelize.STRING, allowNull: false, unique: true},
text : Sequelize.TEXT,
});
// sync
Nodetest2.sync().error(function(err) {
console.log(err);
});Now you have a JavaScript object representing the model that also maps to a relational database table. Next, you need to add some data to the table.
The differences between using a MySQL database binding and
using an ORM continue. You don’t insert a database row when using an
ORM; rather, you build a new object instance and save it. The same is
true when you update: you don’t update via SQL; you either modify a
property directly or you use updateAttributes, passing in an object with
the changed properties. You also don’t delete a row from a database; you
access an object instance and then destroy it.
To demonstrate how all these work together, Example 11-8 creates the model, syncs with the database (which creates the table if it doesn’t already exist), and then creates a new instance and saves it. After the new instance is created, it’s updated twice. All the objects are retrieved and the contents displayed before the recently added object instance is destroyed.
var Sequelize = require('sequelize');
var sequelize = new Sequelize('databasenm',
'username', 'password',
{ logging: false});
// define model
var Nodetest2 = sequelize.define('nodetest2',
{id : {type: Sequelize.INTEGER, primaryKey: true},
title : {type: Sequelize.STRING, allowNull: false, unique: true},
text : Sequelize.TEXT,
});
// sync
Nodetest2.sync().error(function(err) {
console.log(err);
});
var test = Nodetest2.build(
{ title: 'New object',
text: 'Newest object in the data store'});
// save record
test.save().success(function() {
// first update
Nodetest2.find({where : {title: 'New object'}}).success(function(test) {
test.title = 'New object title';
test.save().error(function(err) {
console.log(err);
});
test.save().success(function() {
// second update
Nodetest2.find(
{where : {title: 'New object title'}}).success(function(test) {
test.updateAttributes(
{title: 'An even better title'}).success(function() {});
test.save().success(function() {
// find all
Nodetest2.findAll().success(function(tests) {
console.log(tests);
// find new object and destroy
Nodetest2.find({ where: {title: 'An even better title'}}).
success(function(test) {
test.destroy().on('success', function(info) {
console.log(info);
});
});
});
});
})
});
});
});When printing out the results of the findAll, you might be surprised at how much
data you’re getting back. Yes, you can access the properties directly
from the returned value, first by accessing the array entry, and then
accessing the value:
tests[0].id; // returns identifier
But the other data associated with this new object completes the demonstrations showing that you’re not in the world of relational database bindings anymore. Here’s an example of one returned object:
[ { attributes: [ 'id', 'title', 'text', 'createdAt', 'updatedAt' ],
validators: {},
__factory:
{ options: [Object],
name: 'nodetest2',
tableName: 'nodetest2s',
rawAttributes: [Object],
daoFactoryManager: [Object],
associations: {},
validate: {},
autoIncrementField: 'id' },
__options:
{ underscored: false,
hasPrimaryKeys: false,
timestamps: true,
paranoid: false,
instanceMethods: {},
classMethods: {},
validate: {},
freezeTableName: false,
id: 'INTEGER NOT NULL auto_increment PRIMARY KEY',
title: 'VARCHAR(255) NOT NULL UNIQUE',
text: 'TEXT',
createdAt: 'DATETIME NOT NULL',
updatedAt: 'DATETIME NOT NULL' },
id: 14,
title: 'A second object',
text: 'second',
createdAt: Sun, 08 Apr 2012 20:58:54 GMT,
updatedAt: Sun, 08 Apr 2012 20:58:54 GMT,
isNewRecord: false },...Sequelize’s asynchronous nature is definitely obvious from Example 10-8. Normally, the issue of nested callbacks won’t be a problem because you won’t be performing so many operations in a row—except if you’re adding several new object instances. In that case, you can run into problems with the nested callbacks.
Luckily, Sequelize provides a simple way of chaining queries so
that you can do something such as creating many new object instances and
saving them all at once. The module provides a chainer helper where you can add
EventEmitter tasks (such as a query),
one after the other, and they won’t be executed until you call run. Then the results of all operations are
returned, either as a success or an error.
Example 11-9
demonstrates the chainer helper by adding three new object instances and
then running a findAll on the
database when the instances have been successfully saved.
var Sequelize = require('sequelize');
var sequelize = new Sequelize('databasenm',
'username', 'password',
{ logging: false});
// define model
var Nodetest2 = sequelize.define('nodetest2',
{id : {type: Sequelize.INTEGER, primaryKey: true},
title : {type: Sequelize.STRING, allowNull: false, unique: true},
text : Sequelize.TEXT,
});
// sync
Nodetest2.sync().error(function(err) {
console.log(err);
});
var chainer = new Sequelize.Utils.QueryChainer;
chainer.add(Nodetest2.create({title: 'A second object',text: 'second'}))
.add(Nodetest2.create({title: 'A third object', text: 'third'}));
chainer.run()
.error(function(errors) {
console.log(errors);
})
.success(function() {
Nodetest2.findAll().success(function(tests) {
console.log(tests);
});
});This is much simpler, and much easier to read, too. Plus the approach makes it simpler to work with a user interface or an MVC application.
There is much more about Sequelize at the module’s documentation website, including how to deal with associated objects (relations between tables).
When working with an ORM, you’ll need to keep in mind that
it makes certain assumptions about the data structure. One is that if
the model object is named something like Widget, the database table is widgets. Another is an assumption that the
table contains information about when a row is added or updated.
However, many ORMs also know that both assumptions may not be met by an
existing database system being converted from using a straight database
binding to using an ORM.
One real issue with Sequelize is that it pluralizes the table
names, no matter what you do. So if you define a model for the table, it
wants to pluralize the model name for the table name. Even when you
provide a table name, Sequelize wants to pluralize it. This isn’t an
issue when you don’t have the database table, because a call to sync automatically creates the table. This
is an issue if you’re using an existing relational
database—enough of an issue that I strongly recommend against using the
module with anything other than a brand-new application.
Node provides numerous opportunities to work with several different graphics applications and libraries. Since it’s a server technology, your applications can make use of any server-based graphics software, such as ImageMagick or GD. However, since it’s also based on the same JavaScript engine that runs the Chrome browser, you can work with client-side graphics applications, such as Canvas and WebGL, too.
Node also has some support for serving up audio and video files via the new HTML5 media capabilities present in all modern browsers. Though we have limited capabilities with working directly with video and audio, we can serve files of both types, as we’ve seen in previous chapters. We can also make use of server-based technologies, such as FFmpeg.
No chapter on web graphics would be complete without mentioning PDFs at least once. Happily for those of us who make use of PDF documents in our websites, we have access to a very nice PDF generation Node module, as well as access to various helpful PDF tools and libraries installed on the server.
I’m not going to exhaustively cover every form of graphics or media implementation and management capability from Node. For one, I’m not familiar with all of them, and for another, some of the support is still very primitive, or the technologies can be extremely resource intensive. Instead, I’ll focus on more stable technologies that make sense for a Node application: basic photo manipulation with ImageMagick, HTML5 video, working with and creating PDFs, and creating/streaming images created with Canvas.
Operating systems, versions of HTML, and development technologies may come and go, but one constant is the ubiquitous PDF. Regardless of the type of application or service you’re creating, there’s a good chance you’ll need to provide PDF documents. And as Doctor Who would say, PDFs are cool.
You have a couple of options for working with PDFs from a Node application. One approach is to use a Node child process to access an operating system tool, such as the PDF Toolkit or wkhtmltopdf directly on Linux. Another approach is to use a module, such as the popular PDFKit. Or you can use always use both.
Though there are few command-line tools to manipulate PDFs in the Windows world, there are several available for Linux and OS X. Fortunately, two I’ve worked with, PDF Toolkit and wkhtmltopdf, can be installed and accessed in all three environments.
The wkhtmltopdf utility is a way of converting HTML into a PDF file using the WebKit rendering engine. It’s a particularly handy way of taking a snapshot of a website, graphics and all. Some sites provide the ability to generate a PDF of content, but frequently do so by stripping out all the graphics. The wkhtmltopdf tool preserves the appearance of the page.
There are installation versions of this utility for OS X and Windows, and you can also download the source code for building in a Unix environment. If you’re running the application on your server, you’ll need to do some tweaks first, because of its X Windows dependency.
To work with wkhtmltopdf in my system (Ubuntu), I had to install supporting libraries:
apt-get install openssl build-essential xorg libssl-dev
Then I had to install a tool (xvfb) that allows wkhtmltopdf to run headless in a virtual X server (bypassing the X Windows dependency):
apt-get install xvfb
Next, I created a shell script, named wkhtmltopdf.sh, to wrap the wkhtmltopdf in xvfb. It contains one line:
xvfb-run -a -s "-screen 0 640x480x16" wkhtmltopdf $*
I then moved the shell script to /usr/bin, and changed permissions with
chmod a+x. Now I’m ready to access
wkhtmltopdf from my Node applications.
The wkhtmltopdf tool supports a large number of options, but I’m going to demonstrate how to use the tool simply from a Node application. On the command line, the following takes a URL to a remote web page and then generates a PDF using all default settings (using the shell script version):
wkhtmltopdf.sh http://remoteweb.com/page1.html page1.pdf
To implement this in Node, we need to use a child process. For extensibility, the application should also take the name of the input URL, as well as the output file. The entire application is in Example 12-1.
var spawn = require('child_process').spawn;
// command line arguments
var url = process.argv[2];
var output = process.argv[3];
if (url && output) {
var wkhtmltopdf = spawn('wkhtmltopdf.sh', [url, output]);
wkhtmltopdf.stdout.setEncoding('utf8');
wkhtmltopdf.stdout.on('data', function (data) {
console.log(data);
});
wkhtmltopdf.stderr.on('data', function (data) {
console.log('stderr: ' + data);
});
wkhtmltopdf.on('exit', function (code) {
console.log('child process exited with code ' + code);
});
} else {
console.log('You need to provide a URL and output file name');
}You typically wouldn’t use wkhtmltopdf in a Node application by itself, but it can be a handy addition to any website or application that wants to provide a way to create a persistent PDF of a web page.
PDF Toolkit, or pdftk, provides functionality to split apart (burst) a PDF document or merge several documents into one. It can also be used to fill a PDF form, apply a watermark, rotate a PDF document, apply or remove compression, or uncompress a PDF stream for editing. There are installers for both Mac and Windows, and simple-to-follow instructions for installing in most flavors of Unix.
PDF Toolkit can be accessed via Node child processes. As an
example, the following code creates a child process that invokes PDF
Toolkit’s dump_data comment to
discover information about a PDF, such as how many pages it
contains:
var spawn = require('child_process').spawn;
var pdftk = spawn('pdftk', [__dirname + '/pdfs/datasheet-node.pdf', 'dump_data']);
pdftk.stdout.on('data', function (data) {
// convert results to an object
var array = data.toString().split('\n');
var obj = {};
array.forEach(function(line) {
var tmp = line.split(':');
obj[tmp[0]] = tmp[1];
});
// print out number of pages
console.log(obj['NumberOfPages']);
});
pdftk.stderr.on('data', function (data) {
console.log('stderr: ' + data);
});
pdftk.on('exit', function (code) {
console.log('child process exited with code ' + code);
});The PDF Toolkit data_dump
returns results similar to the following:
stdout: InfoKey: Creator InfoValue: PrintServer150� InfoKey: Title InfoValue: � InfoKey: Producer InfoValue: Corel PDF Engine Version 15.0.0.431 InfoKey: ModDate InfoValue: D:20110914223152Z InfoKey: CreationDate InfoValue: D:20110914223152Z PdfID0: 7fbe73224e44cb152328ed693290b51a PdfID1: 7fbe73224e44cb152328ed693290b51a NumberOfPages: 3
The format is easily converted into an object for simpler access of the individual properties.
PDF Toolkit is a reasonably responsive tool, but you’ll want to use caution when holding up a web response waiting for it to finish. To demonstrate how to access PDF Toolkit from a Node web application, and how to deal with the expected lag time that working with a computationally expensive graphics application can cause, we’ll build a simple PDF uploader.
PDF Toolkit’s ability to burst a PDF or merge several PDFs into one is functionality that can be helpful at a website that allows users to upload and download PDF documents, and then provides individual access of each PDF page. Think of Google Docs, or a website such as Scribd, which allows PDF sharing.
The components to this type of application are:
A form to select which PDF tool to upload
A web service to receive the PDF document and then initiate the PDF processing
A child process wrapper around PDF Toolkit to burst the PDF document into separate pages
A response to the user providing links to the uploaded document and access to the individual pages
The component that bursts the PDF must first create a location for the pages and then determine what the pages will be named before it can perform the splitting action. This will require accessing the Node File System module to create the directory for the split files. Since larger files can take some time, rather than hold the web response waiting for PDF Toolkit to finish, the application sends an email to the user with URLs for the newly uploaded files. This requires the use of a module we’ve not used in previous chapters, Emailjs. This module provides basic email functionality.
You can install the Emailjs module via npm:
npm install emailjs
The form to upload the PDF is basic, needing little explanation.
It uses a file input field in addition to a field for the person’s
name and email address, and sets the method to POST and the action to the web service.
Since we’re uploading a file, the enctype field must be set to multipart/form-data.
The finished form page can be seen in
Example 12-2.
<!doctype html>
<html lang="en">
<head>
<meta charset="utf-8" />
<title>Upload PDF</title>
<script>
window.onload=function() {
document.getElementById('upload').onsubmit=function() {
document.getElementById('submit').disabled=true;
};
}
</script>
</head>
<body>
<form id="upload" method="POST" action="http://localhost:8124"
enctype="multipart/form-data">
<p><label for="username">User Name:</label>
<input id="username" name="username" type="text" size="20" required /></p>
<p><label for="email">Email:</label>
<input id="email" name="email" type="text" size="20" required /></p>
<p><label for="pdffile">PDF File:</label>
<input type="file" name="pdffile" id="pdffile" required /></p>
<p>
<p>
<input type="submit" name="submit" id="submit" value="Submit"/>
</p>
</form>
</body>We have a chance to brush up on our client-side JavaScript
skills by disabling the submit button when the form is submitted. The
form makes use of the HTML5 required attribute,
which ensures that the proper data is provided.
The web service application that processes both the request for the form and the PDF upload uses the Connect middleware, this time without the Express framework.
In the service, the Connect static middleware is used to serve
up static files, and the directory middleware is used to pretty-print
a directory listing when a directory is accessed. The only other
functionality that’s needed is the process to parse out both the PDF
file and the form data from the upload. The application uses the
Connect parseBody method,
which is capable of processing any type of posted data:
connect()
.use(connect.bodyParser({uploadDir: __dirname + '/pdfs'}))
.use(connect.static(__dirname + '/public'))
.use(connect.directory(__dirname + '/public'))
.listen(8124);The data is then made available to a custom middleware named
upload, which handles both the data
and the PDF—invoking a custom module to process the PDF file. The
bodyParser middleware
makes the username and email available on the request.body object, and the uploaded file
on the request.files object. If a
file is uploaded, it’s uploaded as an object named pdffile because that’s the name of the file
upload field. You’ll need an additional test on the file type to ensure that the file uploaded is a
PDF.
Example 12-3 has the complete code for the PDF service application.
var connect = require('connect');
var pdfprocess = require('./pdfprocess');
// if POST
// upload file, kick off PDF burst, respond with ack
function upload(req, res, next){
if ('POST' != req.method) return next();
res.setHeader('Content-Type', 'text/html');
if (req.files.pdffile && req.files.pdffile.type === 'application/pdf') {
res.write('<p>Thanks ' + req.body.username +
' for uploading ' + req.files.pdffile.name + '</p>');
res.end("<p>You'll receive an email with file links when processed.</p>");
// post upload processing
pdfprocess.processFile(req.body.username, req.body.email,
req.files.pdffile.path, req.files.pdffile.name);
} else {
res.end('The file you uploaded was not a PDF');
}
}
// in order
// static files
// POST - upload file
// otherwise, directory listing
connect()
.use(connect.bodyParser({uploadDir: __dirname + '/pdfs'}))
.use(connect.static(__dirname + '/public'))
.use(upload)
.use(connect.directory(__dirname + '/public'))
.listen(8124);
console.log('Server started on port 8124');The custom module pdfprocess is where the application performs the following steps to process the PDF file:
A directory is created for the user under the public pdfs subdirectory if none exists.
A timestamp value is used with the file to create a unique name for the current uploaded PDF.
The timestamp is used with the PDF filename to create a new subdirectory for the PDFs under the user’s subdirectory.
The PDF is moved from the temporary upload directory to this new directory, and renamed the original PDF filename.
The PDF Toolkit burst operation is performed on this file, with all the individual PDFs placed in the pdfs directory.
An email is sent to the user providing a URL/link where he can access the new directory containing the original uploaded PDF and the individual PDF pages.
The filesystem functionality is provided by the Node File System
module, the email functionality is handled by Emailjs, and the PDF
Toolkit functionality is managed in a child process. There is no data
returned from this child process, so the only events captured are
child process exit and error events. Example 12-4 contains the
code for this final piece of the application.
var fs = require('fs');
var spawn = require('child_process').spawn;
var emailjs = require('emailjs');
module.exports.processFile = function(username, email, path, filename) {
// first, create user directory if doesn't exist
fs.mkdir(__dirname + '/public/users/' + username, function(err) {
// next create file directory if doesn't exist
var dt = Date.now();
// url for message later
var url = 'http://examples.burningbird.net:8124/users/' +
username + '/' + dt + filename;
// directory for file
var dir = __dirname + '/public/users/' + username + '/' +
dt + filename;
fs.mkdir(dir, function(err) {
if (err)
return console.log(err);
// now, rename file to new location
var newfile = dir + '/' + filename;
fs.rename(path, newfile, function(err) {
if (err)
return console.log(err);
//burst pdf
var pdftk = spawn('pdftk', [newfile, 'burst', 'output',
dir + '/page_%02d.pdf' ]);
pdftk.on('exit', function (code) {
console.log('child process ended with ' + code);
if (code != 0)
return;
console.log('sending email');
// send email
var server = emailjs.server.connect({
user : 'gmail.account.name',
password : 'gmail.account.passwod',
host : 'smtp.gmail.com',
port : 587,
tls : true
});
var headers = {
text : 'You can find your split PDF at ' + url,
from : 'youremail',
to : email,
subject: 'split pdf'
};
var message = emailjs.message.create(headers);
message.attach({data:"<p>You can find your split PDF at " +
"<a href='" + url + "'>" + url + "</a></p>",
alternative: true});
server.send(message, function(err, message) {
console.log(err || message);
});
pdftk.kill();
});
pdftk.stderr.on('data', function (data) {
console.log('stderr: ' + data);
});
});
});
});
};The actual child process call to PDF Toolkit is in bold text in the code. The command-line syntax used is the following:
pdftk filename.pdf burst output /home/location/page_%02d.pdfThe filename is given first, then the operation, and then an
output directive. The operation is, as mentioned earlier, the burst
operation, which splits the PDF into separate pages. The output directive instructs PDF Toolkit to
place the newly split PDF pages in a specific directory, and provides
formatting for the page names—the first page would be page_01.pdf, the second page_02.pdf, and so on. I could have used
Node’s process.chdir to change the
process to the directory, but it really wasn’t necessary since I can
make the PDF Toolkit operation place the files in a specified
directory.
The email is sent using the Gmail SMTP server, which utilizes TLS (transport layer security), over port 587 and with a given Gmail username and password. You could, of course, use your own SMTP server. The message is sent both in plain text and with a given HTML-formatted attachment (for those folks who use an email reader capable of processing HTML).
The end result of the application is a link sent to the user
that takes her to the directory where she’ll find the uploaded PDF and
the split pages. The Connect directory middleware
ensures that the contents of the directory are attractively displayed.
Figure 12-1 shows the
results of uploading one very large PDF file on global warming.
With this approach—providing acknowledgment to the user in an email—the user doesn’t have to wait around for (and the Node service isn’t hung up waiting on) the PDF processing.
If using a child process and command-line tools isn’t for you, or if you need to be able to create a PDF as well as manipulate existing PDFs, there are Node modules that provide PDF capability. Chief among them is PDFKit.
PDFKit is written in CoffeeScript, but you don’t have to know CoffeeScript to use the module because the API is exposed to JavaScript. The module provides functionality to create a PDF document, add pages to it, incorporate text and graphics, and embed images. Future additions to the module should add other functionality, such as PDF outlines, gradients, tables, and other nice features.
Install PDFKit using npm like so:
npm install pdfkit
In your application, you start by creating a new PDF document:
var doc = new PDFDocument();
You can then add a font, a new web page, and graphics, all with the exposed API. The API methods can all be chained to simplify development.
To demonstrate how to use the module from JavaScript, I converted one of the CoffeeScript examples from the module developer into JavaScript. From the top, after the PDF document is created, a TrueType font is added to the document, the font size is set to 25 pixels, and text is drawn at (x,y) coordinates of 100, 100:
doc.font('fonts/GoodDog-webfont.ttf')
.fontSize(25)
.text('Some text with an embedded font!', 100, 100);The application then adds a new PDF page, again changes the font size to 25 pixels, and draws new text at 100, 100:
doc.addPage()
.fontSize(25)
.text('Here is some vector graphics...', 100, 100);The document coordinate system is saved, and the vector graphics functionality is used to draw a red triangle:
doc.save()
.moveTo(100, 150)
.lineTo(100, 250)
.lineTo(200, 250)
.fill("#FF3300");The next section of code scales the coordinate system to 0.6, translates the origin, draws a path in the shape of a star, fills it with red, and then restores the document back to the original coordinate system and scale:
doc.scale(0.6)
.translate(470, −380)
.path('M 250,75 L 323,301 131,161 369,161 177,301 z')
.fill('red', 'even-odd')
.restore();If you’ve worked with other vector graphics systems, such as Canvas, much of this should seem familiar. If you haven’t, then you might want to check out the Canvas examples later in the book and then return to this example.
Another page is added, the fill color is changed to blue, and a link is added to the page. The document is then written out to a file named output.pdf:
doc.addPage()
.fillColor("blue")
.text('Here is a link!', 100, 100)
.underline(100, 100, 160, 27, {color: "#0000FF"})
.link(100, 100, 160, 27, 'http://google.com/');
doc.write('output.pdf');It’s tedious to create a PDF document manually. However, we can easily program the PDFKit API to take content from a data store and generate a PDF on the fly. We could also use PDFKit to generate a PDF document of web page content on demand, or to provide a persistent snapshot of data.
Be aware, though, that many of the module’s methods are not asynchronous. You’ll most likely be blocking as you’re building the PDF, so plan accordingly.
ImageMagick is a powerful command-line graphics tool available in the Mac, Windows, and Unix environments. It can be used to crop or resize an image, access image metadata, animate a sequence of images, and add any number of special effects. It’s also very resource intensive, and depending on the size of the image and what you’re doing with it, can take a noticeable amount of time.
There are ImageMagick Node modules. One of the first is imagemagick, which provides a wrapper for ImageMagick functionality. However, it hasn’t been updated for some time. Another module is gm, which provides a set of predefined functions that work with ImageMagick in the background. You may find, though, that it’s just as simple to work with ImageMagick directly. All you need to work with ImageMagick directly from a Node application is for ImageMagick to be installed, and a Node child process.
ImageMagick provides several different tools you can use to perform different functions:
animateAnimates a sequence over an X server
compareProvides a mathematical and visual annotation of differences between an image and a reconstruction of the image after modification
compositeOverlaps two images
conjureExecutes scripts written in the Magick Scripting Language (MSL)
convertConverts an image using any number of possible conversions such as cropping, resizing, or adding an effect
displayDisplays an image on an X server
identifyDescribes the format and other characteristics of an image file or several image files
importCreates a screenshot of any visible window on an X server and saves to a file
mogrifyModifies an image in place (resizes, crops, dithers, etc.) and saves the effects in the existing image
montageCreates a composite image from several
streamStreams an image to storage, one pixel at a time
Several of the tools are related to an X server and make little
sense from a Node application perspective. However, the convert, mogrify, montage, identify, and stream tools can have interesting uses in a Node
application. In this section and the next, we’ll focus on one: convert.
Though we’re focusing on convert, be aware that everything in this
section also applies to mogrify,
except that mogrify overwrites the
original file.
The convert tool is the
ImageMagick workhorse. With it, you can perform some pretty amazing
transformations on an image and then save the results to a separate file.
You can provide an adaptive blur, sharpen the image, annotate the image
with text, position it on a backdrop, crop it, resize it, and even replace
every pixel in the image with its color complement. There is little you
can’t do to an image with ImageMagick. Of course, not every operation is
equal, especially if you’re concerned about how long it will take. Some of
the image conversions occur quickly, while others can take considerable
time.
To demonstrate how to use convert
from a Node application, the small, self-contained application in Example 12-5 specifies an image
filename on the command line and scales that image so it fits into a space
no more than 150 pixels wide. The image is also transformed into a PNG,
regardless of its original type.
The command-line version of this process is:
convert photo.jpg -resize '150' photo.jpg.png
We’ll need to capture four command arguments in the array for the
child process: the original photo, the -resize flag, the value for the -resize flag, and the name of the new
image.
var spawn = require('child_process').spawn;
// get photo
var photo = process.argv[2];
// conversion array
var opts = [
photo,
'-resize',
'150',
photo + ".png"];
// convert
var im = spawn('convert', opts);
im.stderr.on('data', function (data) {
console.log('stderr: ' + data);
});
im.on('exit', function (code) {
if (code === 0)
console.log('photo has been converted and is accessible at '
+ photo + '.png');
});The ImageMagick convert
tool processes the image silently, so there is no child process data event to process. The only events we’re
interested in are the error and the exit, when the image
processing is finished.
Where an application like ImageMagick can get tricky is when you’re interested in doing a much more involved process. One of the more popular effects people have applied to images using ImageMagick is the Polaroid effect: rotating the image slightly around its center and adding a border and a shadow to make the image look like a Polaroid photo. The effect is now so popular that there’s a predefined setting for it, but prior to this new setting, we had to use a command similar to the following (from the ImageMagick usage examples):
convert thumbnail.gif \
-bordercolor white -border 6 \
-bordercolor grey60 -border 1 \
-background none -rotate 6 \
-background black \( +clone -shadow 60x4+4+4 \) +swap \
-background none -flatten \
polaroid.pngThis is a lot of arguments, and the arguments are in a format you may not have seen previously. So how does this get converted into a child process arguments array?
Minutely.
What looks like a single argument on the command line (\(+clone -shadow 60x4+4+4 \)) is anything but to
the Node child process. Example 12-6 is a variation of
the conversion tool in Example 12-5, except now a
Polaroid effect is being applied rather than the image being scaled. Pay
particular attention to the line in bold text.
var spawn = require('child_process').spawn;
// get photo
var photo = process.argv[2];
// conversion array
var opts = [
photo,
"-bordercolor", "snow",
"-border", "6",
"-background","grey60",
"-background", "none",
"-rotate", "6",
"-background", "black",
"(", "+clone", "-shadow", "60x4+4+4", ")",
"+swap",
"-background", "none",
"-flatten",
photo + ".png"];
var im = spawn('convert', opts);The bolded code in the example demonstrates how what appears to be a single argument on the command line becomes five arguments to the child process. The end result of running the application is shown in Figure 12-2.
It’s unlikely that you’ll use the Node application with an ImageMagick child process directly on the command line. After all, you can just run ImageMagick’s tools directly. However, you can use the combined child process/ImageMagick tool to run several different conversions on a single image, or to provide services from a website (such as allowing a person to resize a photo to use as an avatar, or add annotations to uploaded images at a shared resource site).
The key to creating a web application that uses ImageMagick is the same as with the PDF demonstration applications from earlier in the chapter: if the process is going to be slow (especially with a larger number of concurrent users), you need to consider providing functionality that allows the individual to upload the image file and then provide a link to the finished project (either at a site, or via email) rather than block, waiting for everything to finish.
We can adapt the code in Example 12-3 and Example 12-4 to apply the Polaroid effect to any uploaded image. In particular, we can convert Example 12-3 into a module that can be applied for the same pattern of use: a file process that creates a new subdirectory for an uploaded file, runs a process, and deposits the resulting files in the same directory.
In Chapter 6, we created a simple HTTP server that served static files and provided some basic directory and 404 handling. One of the web pages we tested with the server included an embedded HTML5 video. The web page also had a custom toolbar that allowed the user to click anywhere on a timeline to start the video at an intermediate position.
The HTML5 video application worked with the Connect module’s static web server, but not the homemade web server. The reason is that the homemade web server didn’t handle the concept of HTTP ranges. HTTP servers such as Apache and IIS have support for ranges, as does the Connect model; our static server did not.
In this section, we’ll add support for ranges to the minimal web server we created back in Example 6-2.
Support for ranges extends beyond serving HTML5 video. Ranges can also be used to download larger files.
Ranges are an HTTP header that provides a start and end position for loading a resource, such as a video file. Here are the steps we need to take to add support for HTTP ranges:
Signal willingness to accept range requests with response header
Accept-Ranges: bytes.
Look for a range request in the request header.
If a range request is found, parse out the start and end values.
Validate that the start and end values are numbers, and that neither exceeds the length of the resource being accessed.
If no end value is provided, set it to the resource length; if
no start value is provided, set it to zero (0).
Create a Content-Range
response header consisting of start, end, and resource length
values.
Create a Content-Length
response header with a value calculated from subtracting the start
value from the end value.
Change the status code from 200 to 206
(Partial).
Pass an object consisting of the start and end values to the
createReadStream
method.
When a web client accesses a resource from a web server, the web server can signal to the client that it supports ranges, and provide a range unit, with the following header:
Accept-Ranges: bytes
The first modification necessary for the minimal web server is to add the new header:
res.setHeader('Accept-Ranges','bytes');The client will then send through range requests of the following format:
bytes=startnum-endnum
Where the
startnum/endnum
values are the starting and end numbers for the range. Several of these
requests can be sent during playback. For example, the following are
actual range requests sent from the web page with the HTML5 video after
starting the video and then clicking around on the timeline during
playback:
bytes=0- bytes=7751445-53195861 bytes=18414853-53195861 bytes=15596601-18415615 bytes=29172188-53195861 bytes=39327650-53195861 bytes=4987620-7751679 bytes=17251881-18415615 bytes=17845749-18415615 bytes=24307069-29172735 bytes=33073712-39327743 bytes=52468462-53195861 bytes=35020844-39327743 bytes=42247622-52468735
The next addition to the minimal web server is to check to see if a range request has been sent, and if so, to parse out the start and end values. The code to check for a range request is:
if (req.headers.range) {...}To parse the range start and end values, I created a function,
processRange, that splits the string on
the dash (-) and then extracts the
numbers out of the two returned strings. The function also double-checks
to ensure that a start value is provided and is a number, and isn’t beyond
the file length (returning a status code 416, Requested Range Not
Satisfiable, if it is). It also checks to ensure that the end value is a
number, and sets it to the video length if the value isn’t provided. An
object containing both start and
end is returned by the function:
function processRange(res,ranges,len) {
var start, end;
// extract start and stop range
var rangearray = ranges.split('-');
start = parseInt(rangearray[0].substr(6));
end = parseInt(rangearray[1]);
if (isNaN(start)) start = 0;
if (isNaN(end)) end = len −1;
// start beyond end of file length
if (start > len - 1) {
res.setHeader('Content-Range', 'bytes */' + len);
res.writeHead(416);
res.end();
}
// end can't be beyond file length
if (end > len - 1)
end = len - 1;
return {start:start, end:end};
}The next component of the functionality is to prepare a Content-Range response
header, providing the start and end values for the range, as well as the
length of the resource, in the following format:
Content-Range bytes 44040192-44062881/44062882
The content length (Content-Length) response is also prepared,
calculated as the end value minus the start value. In addition, the HTTP
status code is set to 206, for Partial Content.
Last, the start and end values are also sent as an option to the
createReadStream method
call. This ensures that the stream is properly repositioned for
streaming.
Example 12-7 pulls all of these pieces together into a modified minimal web server that can now serve HTML5 video (or other resource) ranges.
var http = require('http'),
url = require('url'),
fs = require('fs'),
mime = require('mime');
function processRange(res,ranges,len) {
var start, end;
// extract start and stop range
var rangearray = ranges.split('-');
start = parseInt(rangearray[0].substr(6));
end = parseInt(rangearray[1]);
if (isNaN(start)) start = 0;
if (isNaN(end)) end = len −1;
// start beyond end of file length
if (start > len - 1) {
res.setHeader('Content-Range', 'bytes */' + len);
res.writeHead(416);
res.end();
}
// end can't be beyond file length
if (end > len - 1)
end = len - 1;
return {start:start, end:end};
}
http.createServer(function (req, res) {
pathname = __dirname + '/public' + req.url;
fs.stat(pathname, function(err, stats) {
if (err) {
res.writeHead(404);
res.write('Bad request 404\n');
res.end();
} else if (stats.isFile()) {
var opt={};
// assume no range
res.statusCode = 200;
var len = stats.size;
// we have a Range request
if (req.headers.range) {
opt = processRange(res,req.headers.range,len);
// adjust length
len = opt.end - opt.start + 1;
// change status code to partial
res.statusCode = 206;
// set header
var ctstr = 'bytes ' + opt.start + '-' +
opt.end + '/' + stats.size;
res.setHeader('Content-Range', ctstr);
}
console.log('len ' + len);
res.setHeader('Content-Length', len);
// content type
var type = mime.lookup(pathname);
res.setHeader('Content-Type', type);
res.setHeader('Accept-Ranges','bytes');
// create and pipe readable stream
var file = fs.createReadStream(pathname,opt);
file.on("open", function() {
file.pipe(res);
});
file.on("error", function(err) {
console.log(err);
});
} else {
res.writeHead(403);
res.write('Directory access is forbidden');
res.end();
}
});
}).listen(8124);
console.log('Server running at 8124/');Modifying the minimal web server demonstrates that HTTP and other network functionality isn’t necessarily complicated—just tedious. The key is to break down each task into separate tasks, and then add code to manage each subtask one at a time (testing after each).
Now the web page (included in the examples) that allows the user to click around on a timeline works correctly.
The canvas element has
become a favorite of game developers, graphic artists, and statisticians
because of the capability it provides for creating dynamic and interactive
graphics in client web pages. The canvas element is also
supported in a Node environment via modules, such as the one covered in
this section: node-canvas, or just plain canvas (we’ll use “node-canvas”
here). The node-canvas module is based on Cairo, a cross-platform vector
graphics library that’s long been popular with developers.
To use node-canvas, install it via npm:
npm install canvas
All of the standard Canvas functionality you have in a client page
is available via the node-canvas module. You create a Canvas object and then a context, do all your
drawing in the context, and then either display the result or save the
result in a file as a JPEG or PNG.
Be aware that some of the functionality in Canvas, such as working with an image, requires a version of Cairo greater than 1.10.
There are also a couple of additional methods available on the
server that you wouldn’t have on the client. These allow us to stream a
Canvas object to a file (either as a
PNG or JPEG), persisting the results for later access (or serving in a web
page). You can also convert the Canvas
object to a data URI and include an img element in a
generated HTML web page, or read an image from an external source (such as
a file or a Redis database) and use it directly in the Canvas object.
Jumping right in to demonstrate how to use the node-canvas module,
Example 12-8 creates a
canvas drawing and then streams it to a
PNG file for later access. The example uses a rotated graphic image from
an example at the Mozilla Developer Network, and adds a border and shadow
to it. Once finished, it’s streamed to a PNG file for later access. Most
of the functionality could be used in a client application as well as the
Node application. The only real Node-specific component is persisting the
graphic as a file in the end.
var Canvas = require('canvas');
var fs = require('fs');
// new canvas and context
var canvas = new Canvas(350,350);
var ctx = canvas.getContext('2d');
// create filled rectangle with shadow
// save context for later restore
ctx.save();
ctx.shadowOffsetX = 10;
ctx.shadowOffsetY = 10;
ctx.shadowBlur = 5;
ctx.shadowColor='rgba(0,0,0,0.4)';
ctx.fillStyle = '#fff';
ctx.fillRect(30,30,300,300);
// done with shadow
ctx.restore();
ctx.strokeRect(30,30,300,300);
// MDN example: pretty graphic, inserted offset into
// previously created square
ctx.translate(125,125);
for (i=1;i<6;i++){
ctx.save();
ctx.fillStyle = 'rgb('+(51*i)+','+(255-51*i)+',255)';
for (j=0;j<i*6;j++){
ctx.rotate(Math.PI*2/(i*6));
ctx.beginPath();
ctx.arc(0,i*12.5,5,0,Math.PI*2,true);
ctx.fill();
}
ctx.restore();
}
// stream to PNG file
var out = fs.createWriteStream(__dirname + '/shadow.png');
var stream = canvas.createPNGStream();
stream.on('data', function(chunk){
out.write(chunk);
});
stream.on('end', function(){
console.log('saved png');
});Once you’ve run the Node application, access the shadow.png file from your favorite browser. Figure 12-3 shows the generated image.
You’re not going to use the Canvas object in a Node application as you would
a canvas element in a web page. One of
the examples included with node-canvas is a dynamic clock that requires
constant HTTP refreshes. If you want an active clock in the client, you
should use the canvas element in the
client.
Where canvas makes sense on the
server is as a way of providing a graphical representation of a server
activity, such as a database query, data in a Redis database, a logfile,
or other data that originates on the server. By generating the graphic on
the server, you not only can persist the graphic for multiple accesses,
but you can also limit how much data flows to the client by being able to
process a graphic on the server, rather than having to send the data to
the client and then create the graphic.
Using canvas in a Node
application also makes sense if you’re generating game components that may
need to adapt to user actions, particularly if the graphics need to be
persisted for later access.
In this chapter, we’re working in both the client and server environments, because both are necessary when it comes to WebSockets and Socket.IO.
WebSockets is a relatively new web technology that enables bidirectional, real-time communication directly from within a client to a server application, and back again. The communication occurs over TCP (Transmission Control Protocol), via sockets. The Socket.IO libraries provide the support necessary to implement this technology. Not only does Socket.IO provide a module to use in your Node application, but it also provides a client-side JavaScript library to enable the client end of the communication channel. For an added bonus, it also works as an Express middleware.
In this chapter I’ll introduce WebSockets more fully by demonstrating how Socket.IO works, both in the client and in the server.
Before jumping into using Socket.IO, I want to provide a quick overview of WebSockets. To do that, I also need to explain bidirectional full-duplex communication.
The term full duplex describes any form of data transmission that allows communication in both directions. The term bidirectional means that both endpoints of a transmission can communicate, as opposed to unidirectional communication, when one end of a data transmission is a sender and all other endpoints are receivers. WebSockets provides the capability for a web client, such as a browser, to open up bidirectional full-duplex communication with a server application. And it does so without having to use HTTP, which adds unnecessary overhead to the communication process.
WebSockets is standardized as part of a specification called the WebSockets API at the World Wide Web Consortium (W3C). The technology has had a bumpy start, because no sooner had some browsers begun implementing WebSockets in 2009 than serious security concerns led those same browsers to either pull their implementation, or enable WebSockets only as an option.
The WebSockets protocol was revamped to address the security concerns, and Firefox, Chrome, and Internet Explorer support the new protocol. At this time, Safari and Opera support only the older versions of the technology, but you must enable WebSockets in the configuration settings. In addition, most mobile browers have only limited support, or support only the older WebSockets specification.
Socket.IO addresses the issue of uneven support for WebSockets by using several different mechanisms to enable the bidirectional communication. It attempts to use the following, in order:
WebSockets
Adobe Flash Socket
Ajax long polling
Ajax multipart streaming
Forever iFrame for IE
JSONP Polling
The key point to take away from this list is that Socket.IO supports bidirectional communication in most, if not all, browsers in use today—desktop and mobile.
Before we jump into code that implements the WebSockets application, you’ll need to install Socket.IO on your server. Use npm to install the module and supporting JavaScript library:
npm install socket.io
A Socket.IO application requires two different components: a server and a client application. In the examples in this section, the server application is a Node application, and the client application is a JavaScript block in an HTML web page. Both are adaptions of example code provided at the Socket.IO website.
The client/server application demonstrated in this section sets up a communication between client and server, sending a text string back and forth that’s published to the web page. The client always echoes the recent string to the server, which modifies the string and sends it back to the client.
The client application creates a new WebSockets connection, using
the Socket.IO client-side library, and listens for any events labeled
news. When an event is received, the
application takes the text sent with the event and outputs it to the web
page. It also echoes the text back to the server via an echo event. Example 13-1 shows the complete
code for the client web page.
<!doctype html>
<html lang="en">
<head>
<meta charset="utf-8">
<title>bi-directional communication</title>
<script src="/socket.io/socket.io.js"></script>
<script>
var socket = io.connect('http://localhost:8124');
socket.on('news', function (data) {
var html = '<p>' + data.news + '</p>';
document.getElementById("output").innerHTML=html;
socket.emit('echo', { back: data.news });
});
</script>
</head>
<body>
<div id="output"></div>
</body>
</html>The server application uses HTTP to listen for incoming requests,
and serves up only one file: the client HTML file. When a new socket
connection is made, it emits a message to the client with the text of
Counting... to an event labeled
news.
When the server gets an echo
event, it takes the text sent with the event and appends a counter value to it. The counter is maintained
in the application and incremented every time the echo event is transmitted. When the counter
gets to 50, the server no longer transmits the data back to the client.
Example 13-2 contains all
the code for the server application.
var app = require('http').createServer(handler)
, io = require('socket.io').listen(app)
, fs = require('fs')
var counter;
app.listen(8124);
function handler (req, res) {
fs.readFile(__dirname + '/index.html',
function (err, data) {
if (err) {
res.writeHead(500);
return res.end('Error loading index.html');
}
counter = 1;
res.writeHead(200);
res.end(data);
});
}
io.sockets.on('connection', function (socket) {
socket.emit('news', { news: 'world' });
socket.on('echo', function (data) {
if (counter <= 50) {
counter++;
data.back+=counter;
socket.emit('news', {news: data.back});
}
});
});After the client application is loaded into the server, you can watch the counter update until it reaches the target end value. The web page doesn’t have to be reloaded, and the user doesn’t have to do anything special for the application to execute. The application exhibits the same behavior in all modern browsers, though the underlying technology that implements the effect differs by browser.
Both news and echo are custom events. The only socket events
Socket.IO supports out of the box are connection, passed during the initial
connection, and the following events on the server socket:
messageEmitted whenever a message sent using socket.send is received
disconnectEmitted when either the client or server disconnects
And the following events on the client socket:
connectEmitted when the socket connection is made
connectingEmitted when the socket connection is being attempted
disconnectEmitted when the socket is disconnected
connect_failedEmitted when the connection fails
errorEmitted when an error occurs
messageEmitted when message sent with socket.send is received
reconnect_failedEmitted when Socket.IO fails to reestablish the connection if it is dropped
reconnectEmitted when a connection is reestablished after being dropped
reconnectingEmitted when attempting a reconnection after the connection is dropped
If you want WebSockets behavior, rather than use the emit method, you can use the send method and listen for the message. For
instance, on the server, the application can use send to send the message to the client, and
then listen for a response via the message event:
io.sockets.on('connection', function (socket) {
socket.send("All the news that's fit to print");
socket.on('message', function(msg) {
console.log(msg);
});
});On the client, the application can also listen for the message event, and use send to communicate back:
socket.on('message', function (data) {
var html = '<p>' + data + '</p>';
document.getElementById("output").innerHTML=html;
socket.send('OK, got the data');
});This example uses send to
manually acknowledge receipt of the message. If we want an automatic
acknowledgment that the client received the event, we can pass a
callback function in as the last parameter of the emit method:
io.sockets.on('connection', function (socket) {
socket.emit('news', { news: "All the news that's fit to print" },
function(data) {
console.log(data);
});
});In the client, we can then pass a message back using this callback function:
socket.on('news', function (data, fn) {
var html = '<p>' + data.news + '</p>';
document.getElementById("output").innerHTML=html;
fn('Got it! Thanks!');
});The socket passed as a parameter to the connection event handler is the unique connection between the server and the client, and persists as long as the connection persists. If the connection terminates, Socket.IO attempts to reconnect.
The application works...to a point. Where it fails is in not taking into account Node’s asynchronous nature. In the application, the counter used is one that’s global to the application. If only one customer accesses the application at a time, it works fine. However, if two users access the application at the same time, you get odd results: one browser may end up with fewer numbers than the other, and neither is likely to get an expected result. Add in more concurrent users, and the results are worse.
What we need is a way of attaching data so it persists beyond events to the socket itself. Luckily, we have such a way—just by adding the data directly to the socket object that’s created with each new connection. Example 13-3 is a modification of the code from Example 13-2, where the counter is now attached to the socket object directly, rather than floating about as a global variable. The changed code is bolded in the text.
var app = require('http').createServer(handler)
, io = require('socket.io').listen(app)
, fs = require('fs')
app.listen(8124);
function handler (req, res) {
fs.readFile(__dirname + '/index.html',
function (err, data) {
if (err) {
res.writeHead(500);
return res.end('Error loading index.html');
}
res.writeHead(200);
res.end(data);
});
}
io.sockets.on('connection', function (socket) {
socket.counter = 1;
socket.emit('news', { news: 'Counting...' });
socket.on('echo', function (data) {
if (socket.counter <= 50) {
data.back+=socket.counter;
socket.counter++;
socket.emit('news', {news: data.back});
}
});
});Now you can have several concurrent users, and they each get the exact same communication. The socket object exists until the socket connection is closed and can’t be reestablished.
For Socket.IO to work, the client side of the application
must have access to the Socket.IO client-side JavaScript library. This
library is included in the page with the following script element:
<script src="/socket.io/socket.io.js"></script>
You may be wondering if you have to specifically place this code in the top level of your web server—you don’t.
In the server application, when the HTTP web server was created,
it was passed to the Socket.IO’s listen event:
var app = require('http').createServer(handler)
, io = require('socket.io').listen(app)What happens is that Socket.IO intercepts requests sent to the web server and listens for requests for:
/socket.io/socket.io.js
Socket.IO does a clever bit of behind-the-scenes finagling that determines what’s returned in the response. If the client supports WebSockets, the JavaScript file returned is one that uses WebSockets to implement the client connection. If the client doesn’t support WebSockets, but does support Forever iFrame (IE9), it returns that particular JavaScript client code, and so on.
Socket.IO comes with several default settings that we
usually won’t need to change. In the examples in the preceding section, I
didn’t alter any of the default settings. If I wanted to, though, I could
by using Socket.IO’s configure method, which
operates in a manner similar to what we’ve used with Express and Connect.
You can even specify different configurations based on which environment
the application is running.
Socket.IO contains a wiki page (at https://github.com/learnboost/socket.io/wiki/) that lists all of the options, and I don’t want to repeat the rather extensive list here. Instead, I want to demonstrate a couple that you may want to consider modifying as you’re learning to work with Socket.IO.
You can change the allowable transports by setting the transports option. By
default, the allowable transports, in order of priority, are:
websocket
htmlfile
xhr-polling
jsonp-polling
Another transport option is Flash Socket, which is not enabled by default. If we add the following to Example 13-3, then when we access the application with Opera and IE, the application uses Flash Socket (rather than Ajax long polling and Forever iFrame, respectively):
io.configure('development', function() {
io.set('transports', [
'websocket',
'flashsocket',
'htmlfile',
'xhr-polling',
'jsonp-polling']);
});You can also define different configurations for different
environments, such as production and development:
io.configure('production', function() {
io.set('transports', [
'websocket',
'jsonp-polling']);
});
io.configure('development', function() {
io.set('transports', [
'websocket',
'flashsocket',
'htmlfile',
'xhr-polling',
'jsonp-polling']);
});Another option controls the amount of detail output to the logger
(you’ll notice the logger output as debug statements to the console on the
server). If you want to turn off the logger output, you can set the
log level option to 1:
io.configure('development', function() {
io.set('log level', 1);
});Some of the options—such as store, which determines where client data is
persisted—have requirements other than just having an option in a
configuration method call. However, other than setting log level and transports, you should find the default settings
sufficient as you’re learning to work with Socket.IO.
Every technology has its own version of Hello, World—the first application people typically create when learning the technology—and the one for WebSockets and Socket.IO seems to be a chat client. The Socket.IO GitHub site provides a chat client (as well as an IRC, or Internet relay chat, client); searching on “Socket.IO and chat” lists several nice examples.
In this section, I’ll demonstrate the code for a very simple chat client. It has no bells and whistles, and uses only Socket.IO (and no other library on the client or server), but it demonstrates how nicely Socket.IO facilitates an application that would be quite difficult to implement otherwise.
The application makes use of a couple of new methods to handle
communication. In the earlier examples, the applications used either
send or emit to send a
communication between client and server. This type of communication is
restricted to the socket, and is visible only to the user receiving the
message, no matter how many other people are connected to the
server.
To broadcast to every person connected to the server, you can use
the emit method on the
Socket.IO framework object:
io.sockets.emit();
Now anyone who has a socket connection to the server gets the message.
You can also broadcast a message to everyone but a specific
individual by issuing a broadcast.emit on the
socket of the person you don’t want to see the message:
socket.broadcast.emit();
In the simple chat application, when a new client connects, the client application prompts for a name and then broadcasts to other connected clients that this person has now entered the chat room. The client application also provides a text field and button to send messages, and provides a place where new messages from all participants are printed. Example 13-4 shows the client application code.
<!doctype html>
<html lang="en">
<head>
<meta charset="utf-8">
<title>bi-directional communication</title>
<script src="/socket.io/socket.io.js"></script>
<script>
var socket = io.connect('http://localhost:8124');
socket.on('connect', function() {
socket.emit('addme', prompt('Who are you?'));
});
socket.on('chat',function(username, data) {
var p = document.createElement('p');
p.innerHTML = username + ': ' + data;
document.getElementById('output').appendChild(p);
});
window.addEventListener('load',function() {
document.getElementById('sendtext').addEventListener('click',
function() {
var text = document.getElementById('data').value;
socket.emit('sendchat', text);
}, false);
}, false);
</script>
</head>
<body>
<div id="output"></div>
<div id="send">
<input type="text" id="data" size="100" /><br />
<input type="button" id="sendtext" value="Send Text" />
</div>
</body>
</html>Other than the addition of basic JavaScript functionality to capture the click event on the button, and the prompt to get the person’s name, the functionality isn’t much different than earlier examples.
In the server, the new person’s username is attached as data to the socket. The server acknowledges the person directly, and then broadcasts the person’s name to other chat room participants. When the server receives any new chat message, it attaches the username to the message so everyone can see who sent it. Finally, when a client disconnects from the chat room, another message is broadcast to all connected users indicating that the person is no longer participating. Example 13-5 has the complete code for the server application.
var app = require('http').createServer(handler)
, io = require('socket.io').listen(app)
, fs = require('fs');
app.listen(8124);
function handler (req, res) {
fs.readFile(__dirname + '/chat.html',
function (err, data) {
if (err) {
res.writeHead(500);
return res.end('Error loading chat.html');
}
res.writeHead(200);
res.end(data);
});
}
io.sockets.on('connection', function (socket) {
socket.on('addme',function(username) {
socket.username = username;
socket.emit('chat', 'SERVER', 'You have connected');
socket.broadcast.emit('chat', 'SERVER', username + ' is on deck');
});
socket.on('sendchat', function(data) {
io.sockets.emit('chat', socket.username, data);
});
socket.on('disconnect', function() {
io.sockets.emit('chat', 'SERVER', socket.username + ' has left the building');
});
});Figure 13-1 shows the results of the application when I tested it from four different browsers (Chrome, Firefox, Opera, and IE).
An additional modification to the application might add a list of people currently connected so newcomers could see who is in the room when they enter. This could be a global array, since it, unlike the username, is accessible by all clients. I’ll leave this last bit of code to you as an off-book exercise.
The examples up to this point used Node’s HTTP as the web server. You can also easily incorporate Express into a Socket.IO application (or Socket.IO into an Express application). The key thing to remember is that Socket.IO must be able to listen for requests before they’re processed by Express.
Example 13-6 converts the server component of the chat application from the last section into using Express to handle all web service requests. The line in the code that’s essential to the integration of Socket.IO and Express is in bold. The actual communication components are not changed at all from the code in Example 13-5.
var express = require('express'),
sio = require('socket.io'),
http = require('http'),
app = express();
var server = http.createServer(app);
app.configure(function () {
app.use(express.static(__dirname + '/public'));
app.use(app.router);
});
app.get('/', function (req, res) {
res.send('hello');
});
var io = sio.listen(server);
server.listen(8124);
io.sockets.on('connection', function (socket) {
socket.on('addme',function(username) {
socket.username = username;
socket.emit('chat', 'SERVER', 'You have connected');
socket.broadcast.emit('chat', 'SERVER', username + ' is on deck');
});
socket.on('sendchat', function(data) {
io.sockets.emit('chat', socket.username, data);
});
socket.on('disconnect', function() {
io.sockets.emit('chat', 'SERVER', socket.username + ' has left the building');
});
});As the Express application is passed to the HTTP server, the HTTP server is in turn passed to Socket.IO. All three modules work together to ensure that all requests—whether web service or chat—are handled properly.
Though the chat client is a static page, it would be a simple matter to incorporate a template. The only issues are ensuring the integrity of the scripting block where the client application code resides, and remembering to include a link to the Socket.IO library.
In previous chapters, the only debugging aid used in the examples was printing information to the console. For smaller and less complex applications that are still in development, this is sufficient. However, as your application grows and gets more complicated, you’ll need to use other, more sophisticated tools for debugging.
You’re also going to want to incorporate more formal testing, including the use of test-creation tools that can be used by others to test your module or application in their environments.
Frankly, console.log will
always remain my debugger of choice, but its usefulness does degrade as
your application increases in size and complexity. Once you’ve moved
beyond a simple application, you’re going to want to consider using more
sophisticated debugging tools. We’ll go over some options in the sections
that follow.
The V8 engine comes with a built-in debugger we can use with our Node applications, and Node provides a client that makes it simple to use. We start by adding debugger statements into our code anywhere we want a breakpoint:
// create the proxy that listens for all requests
httpProxy.createServer(function(req,res,proxy) {
debugger;
if (req.url.match(/^\/node\//))
proxy.proxyRequest(req, res, {
host: 'localhost',
port: 8000
});
else
proxy.proxyRequest(req,res, {
host: 'localhost',
port: 8124
});
}).listen(9000);We then run the application in debug mode:
node debug debugger.js
In debug mode, the application stops at the beginning of the file.
To go to the first breakpoint, type cont, or its abbreviation, c. This causes the debugger to stop at the
first breakpoint; the application then sits, waiting for input from the
user (such as a web request):
< debugger listening on port 5858
connecting... ok
break in app2.js:1
1 var connect = require('connect'),
2 http = require('http'),
3 fs = require('fs'),
debug> cont (--> note it is just waiting at this point for a web request)
break in app2.js:11
9 httpProxy.createServer(function(req,res,proxy) {
10
11 debugger;
12 if (req.url.match(/^\/node\//))
13 proxy.proxyRequest(req, res, {
debug>You have several options at this point. You can step through the
code using the next (n) command, step into a function using
step (s), or step out of a function using out (o). In the following code, the debugger stops
at the breakpoint, and the next few lines are stepped over with
next until line 13,
which has a function call. I use step at this point to
step into the function. I can then traverse the function code using
next, and return to the
application using out:
debug> cont break in app2.js:11 9 httpProxy.createServer(function(req,res,proxy) { 10 11 debugger; 12 if (req.url.match(/^\/node\//)) 13 proxy.proxyRequest(req, res, { debug> next break in app2.js:12 10 11 debugger; 12 if (req.url.match(/^\/node\//)) 13 proxy.proxyRequest(req, res, { 14 host: 'localhost', debug> next break in app2.js:13 11 debugger; 12 if (req.url.match(/^\/node\//)) 13 proxy.proxyRequest(req, res, { 14 host: 'localhost', 15 port: 8000 debug> step break in /home/examples/public_html/node/node_modules/http-proxy/lib/ node-http-proxy/routing-proxy.js:144 142 // 143 RoutingProxy.prototype.proxyRequest = function (req, res, options) { 144 options = options || {}; 145 146 // debug> next break in /home/examples/public_html/node/node_modules/http-proxy/lib/ node-http-proxy/routing-proxy.js:152 150 // arguments are supplied to `proxyRequest`. 151 // 152 if (this.proxyTable && !options.host) { 153 location = this.proxyTable.getProxyLocation(req); 154 debug> out break in app2.js:22 20 port: 8124 21 }); 22 }).listen(9000); 23 24 // add route for request for dynamic resource
You can also set a new breakpoint, either on the current line
setBreakpoint (sb), or the first line in a named function or
script file:
break in app2.js:22
20 port: 8124
21 });
22 }).listen(9000);
23
24 // add route for request for dynamic resource
debug> sb()
17 else
18 proxy.proxyRequest(req,res, {
19 host: 'localhost',
20 port: 8124
21 });
*22 }).listen(9000);
23
24 // add route for request for dynamic resource
25 crossroads.addRoute('/node/{id}/', function(id) {
26 debugger;
27 });Clear a breakpoint with clearBreakpoint
(cb).
You can add an expression to a watch list and list out current watches, in addition to using REPL to examine variables:
break in app2.js:11
9 httpProxy.createServer(function(req,res,proxy) {
10
11 debugger;
12 if (req.url.match(/^\/node\//))
13 proxy.proxyRequest(req, res, {
debug> repl
Press Ctrl + C to leave debug repl
> req.url
'/node/174'
debug>The backtrace command is
helpful for printing a backtrace (a list of
currently active function calls) of the current execution frame:
debug> backtrace
#0 app2.js:22:1
#1 exports.createServer.handler node-http-proxy.js:174:39Anytime you want to see which commands are available to you, type
help:
debug> help Commands: run (r), cont (c), next (n), step (s), out (o), backtrace (bt), setBreakpoint (sb), clearBreakpoint (cb), watch, unwatch, watchers, repl, restart, kill, list, scripts, breakpoints, version
The built-in debugger is very helpful, but sometimes you want a
little bit more. You have other options, including accessing the V8
debugger directly by using the --debug command-line flag:
node --debug app.js
This starts up a TCP connection to the debugger, and you enter the V8 debug commands at the prompt. This is an interesting option, but does require a great deal of understanding of how the V8 debugger works (and what the commands are).
Another option is to use debugging via a WebKit browser—through an application such as Node Inspector, covered next.
Node Inspector requires a little more setup to begin debugging, but the extra effort is worth it.
First, install Node Inspector globally using npm:
npm install -g node-inspector
To use the functionality, you’ll first need to start the application using the V8 debugger flag:
node --debug app.js
Then you’ll need to start the Node Inspector, in either the background or foreground:
node-inspector
When you start the application, you’ll get the following message:
node-inspector info - socket.io started visit http://0.0.0.0:8080/debug?port=5858 to start debugging
Using a WebKit-based browser (Safari or Chrome), access the debugging page. My example is running on my server, so I use the following URL:
| http://examples.burningbird.net:8080/debug?port=5858 |
In the browser, the client-side debugger (part of the developer toolset) opens, and stops at the first breakpoint. Now you can use the tools you’re probably already familiar with from your client-side JavaScript development efforts, such as stepping over a couple of lines of code and examining an object’s properties, as shown in Figure 14-1.
Node Inspector is, by far, a superior approach to debugging the server application. Using the command line is OK, but being able to see all the code at once, and to use a toolset we’re familiar with, more than compensates for the little extra effort necessary to enable the Node Inspector setup.
Unit testing is a way of isolating specific components of an application for testing. Many of the tests that are provided in the tests subdirectory of Node modules are unit tests. The tests in the test subdirectory of the Node installation are all unit tests.
You can run a module’s test scripts using npm. In the module subdirectory, type:
npm test
This command runs a module test script if one is provided. When I ran the test script in the subdirectory for node-redis (covered in Chapter 9), the resulting output displayed successful test results, such as the portion displayed here:
Connected to 127.0.0.1:6379, Redis server version 2.4.11 Using reply parser hiredis - flushdb: 1 ms - multi_1: 3 ms - multi_2: 9 ms - multi_3: 2 ms - multi_4: 1 ms - multi_5: 0 ms - multi_6: 7 ms - eval_1:Skipping EVAL_1 because server version isn't new enough. 0 ms - watch_multi: 0 ms
Many of these unit tests are built using the Assert module, which we’ll go over next.
Assertion tests evaluate expressions,
the end result of which is a value of either true or false. If you’re testing the return from a
function call, you might first test that the return is an array (first
assertion). If the array contents should be a certain length, you
perform a conditional test on the length (second assertion), and so on.
There’s one Node built-in module that facilitates this form of assertion
testing: Assert.
You include the Assert module in an application with the following:
var assert = require('assert');To see how to use Assert, let’s look at how existing modules use it. The following test is in the test.js script found with the node-redis installation:
var name = "FLUSHDB";
client.select(test_db_num, require_string("OK", name));The test uses a function, require_string, which returns a function that
uses the Assert module methods assert.equal and
assert.stringEqual:
function require_string(str, label) {
return function (err, results) {
assert.strictEqual(null, err, "result sent back unexpected error: " + err);
assert.equal(str, results, label + " " + str + " does not match " + results);
return true;
};
}The first test, assert.stringEqual,
fails if the err object returned in
the Redis test isn’t null. The second
test using assert.equal fails if
results are not equal to the expected string. Only if both tests are
successful (i.e., neither test fails) does the code fall through to the
return true statement.
What is actually tested is whether the Redis select command succeeds. If an error occurs,
the error is output. If the result of the selection isn’t what’s
expected (a return value of OK), a
message is output to that effect, including the test label where the
test failed.
The Node application also makes use of the Assert module in its
module unit tests. For instance, there’s a test application called
test-util.js that tests the
Utilities module. The following code is the section that tests the
isArray method:
// isArray
assert.equal(true, util.isArray([]));
assert.equal(true, util.isArray(Array()));
assert.equal(true, util.isArray(new Array()));
assert.equal(true, util.isArray(new Array(5)));
assert.equal(true, util.isArray(new Array('with', 'some', 'entries')));
assert.equal(true, util.isArray(context('Array')()));
assert.equal(false, util.isArray({}));
assert.equal(false, util.isArray({ push: function() {} }));
assert.equal(false, util.isArray(/regexp/));
assert.equal(false, util.isArray(new Error));
assert.equal(false, util.isArray(Object.create(Array.prototype)));Both the assert.equal and the
assert.strictEqual
methods have two mandatory parameters: an expected response and an
expression that evaluates to a response. In the earlier Redis test, the
assert.strictEqual test
expects a result of null for the
err argument. If this expectation
fails, the test fails. In the assert.equal
isArray test in the Node source, if the expression evaluates
to true, and the expected response is
true, the assert.equal method succeeds and produces no
output—the result is silent.
If, however, the expression evaluates to a response other than
what’s expected, the assert.equal
method responds with an exception. If I take the first statement in the
isArray test in the Node source and
modify it to:
assert.equal(false, util.isArray([]));
then the result is:
node.js:201
throw e; // process.nextTick error, or 'error' event on first tick
^
AssertionError: false == true
at Object.<anonymous> (/home/examples/public_html/node/chap14/testassert.js:5:8)
at Module._compile (module.js:441:26)
at Object..js (module.js:459:10)
at Module.load (module.js:348:31)
at Function._load (module.js:308:12)
at Array.0 (module.js:479:10)
at EventEmitter._tickCallback (node.js:192:40)The assert.equal and assert.strictEqual
methods also have a third optional parameter, a message that’s displayed
rather than the default in case of a failure:
assert.equal(false, util.isArray([]), 'Test 1Ab failed');
This can be a useful way of identifying exactly which test failed if you’re running several in a test script. You can see the use of a message (a label) in the node-redis test code:
assert.equal(str, results, label + " " + str + " does not match " + results);
The message is what’s displayed when you catch the exception and print out the message.
The following Assert module methods all take the same three parameters, though how the test value and expression relate to each other varies, as the name of the test implies:
assert.equalFails if the expression results and given value are not equal
assert.strictEqualFails if the expression results and given value are not strictly equal
assert.notEqualFails if the expression results and given value are equal
assert.notStrictEqualFails if the expression results and given value are strictly equal
assert.deepEqualFails if the expression results and given value are not equal
assert.notDeepEqualFails if the expression results and given value are equal
The latter two methods, assert.deepEqual and
assert.notDeepEqual,
work with complex objects, such as arrays or objects. The following
succeeds with assert.deepEqual:
assert.deepEqual([1,2,3],[1,2,3]);
but would not succeed with assert.equal.
The remaining assert methods
take differing parameters. Calling assert as a method, passing in a value and a
message, is equivalent to calling assert.isEqual, passing
in true as the first parameter, an
expression, and a message. The following:
var val = 3; assert(val == 3, 'Equal');
is equivalent to:
assert.equal(true, val == 3, 'Equal');
Another variation of the exact same method is assert.ok:
assert.ok(val == 3, 'Equal');
The assert.fail method
throws an exception. It takes four parameters: a value, an expression, a
message, and an operator, which is used to separate the value and
expression in the message when an exception is thrown. In the following
code snippet:
try {
var val = 3;
assert.fail(3, 4, 'Fails Not Equal', '==');
} catch(e) {
console.log(e);
}the console message is:
{ name: 'AssertionError',
message: 'Fails Not Equal',
actual: 3,
expected: 4,
operator: '==' }The assert.ifError function
takes a value and throws an exception only if the value resolves to
anything but false. As the Node
documentation states, it’s a good test for the error object as the first
argument in a callback function:
assert.ifError(err); //throws only if true value
The last assert methods are
assert.throws and assert.doesNotThrow. The first expects an
exception to get thrown; the second doesn’t. Both methods take a code
block as the first required parameter, and an optional error and message
as the second and third parameters. The error object can be a
constructor, regular expression, or validation function. In the
following code snippet, the error message is printed out because the
error regular expression as the second parameter doesn’t match the error
message:
assert.throws(
function() {
throw new Error("Wrong value");
},
/something/
)
} catch(e) {
console.log(e.message);
}You can create sophisticated tests using the Assert module. The one major limitation with the module, though, is the fact that you have to do a lot of wrapping of the tests so that the entire testing script doesn’t fail if one test fails. That’s where using a higher-level unit testing framework, such as Nodeunit (discussed next), comes in handy.
Nodeunit provides a way to script several tests. Once scripted, each test is run serially, and the results are reported in a coordinated fashion. To use Nodeunit, you’re going to want to install it globally with npm:
npm install nodeunit -g
Nodeunit provides a way to easily run a series of tests without
having to wrap everything in try/catch blocks. It supports all of the
Assert module tests, and provides a couple of methods of its own in
order to control the tests. Tests are organized as test cases, each of
which is exported as an object method in the test script. Each test case
gets a control object, typically named test. The first method call in the test case
is to the test element’s expect method, to tell
Nodeunit how many tests to expect in the test case. The last method call
in the test case is to the test
element’s done method, to tell
Nodeunit the test case is finished. Everything in between composes the
actual test unit:
module.exports = {
'Test 1' : function(test) {
test.expect(3); // three tests
... // the tests
test.done();
},
'Test 2' : function (test) {
test.expect(1); // only one test
... // the test
test.done();
}
};To run the tests, type nodeunit, followed by the name of the test
script:
nodeunit thetest.jsExample 14-1 has a
small but complete testing script with six assertions (tests). It
consists of two test units, labeled Test
1 and Test 2. The first
test unit runs four separate tests, while the second test unit runs two.
The expect method call
reflects the number of tests being run in the unit.
var util = require('util');
module.exports = {
'Test 1' : function(test) {
test.expect(4);
test.equal(true, util.isArray([]));
test.equal(true, util.isArray(new Array(3)));
test.equal(true, util.isArray([1,2,3]));
test.notEqual(true, (1 > 2));
test.done();
},
'Test 2' : function(test) {
test.expect(2);
test.deepEqual([1,2,3], [1,2,3]);
test.ok('str' === 'str', 'equal');
test.done();
}
};The result of running the Example 14-1 test script with Nodeunit is:
example1.js ✔ Test 1 ✔ Test 2 OK: 6 assertions (3ms)
Symbols in front of the tests indicate success or failure: a check for success, and an x for failure. None of the tests in this script fails, so there’s no error script or stack trace output.
In addition to Nodeunit, covered in the preceding section, there are several other testing frameworks available for Node developers. Some of the tools are simpler to use than others, and each has its own advantages and disadvantages. Next, I’ll briefly cover three frameworks: Mocha, Jasmine, and Vows.
npm install mocha -g
Mocha is considered the successor to another popular testing framework, Espresso.
Mocha works in both browsers and Node applications. It allows
for asynchronous testing via the done function, though the function can be
omitted for synchronous testing. Mocha can be used with any assertion
library.
The following is an example of a Mocha test, which makes use of the should.js assertion library:
should = require('should')
describe('MyTest', function() {
describe('First', function() {
it('sample test', function() {
"Hello".should.equal("Hello");
});
});
});You need to install the should.js library before running the test:
npm install should
Then run the test with the following command line:
mocha testcase.js
✔ 1 test complete (2ms)
Jasmine is a behavior-driven development (BDD) framework that can be used with many different technologies, including Node with the node-jasmine module. The node-jasmine module can be installed with npm:
npm install jasmine-node -g
Note the module name: jasmine-node, rather than the format of
node-modulename (or the shortened form,
modulename) that you’ve seen so far in
the book.
The jasmine-node GitHub repository includes examples in the
specs subdirectory. As with most
other testing frameworks, the Jasmine Node module also accepts a
done function as a callback in order to
allow asynchronous testing.
There are some environmental requirements to using jasmine-node. First, the tests must be in a specs subdirectory. The jasmine-node module is a command-line application, and you’ll be able to specify the root directory, but it does expect the tests to be in specs.
Next, the tests must be named in a specific format. If the test is written in JavaScript, the test filename must end in .spec.js. If the test is written in CoffeeScript, the name of the file must end in .spec.coffee. You can use subdirectories in the specs directory. When you run jasmine-node, it runs all tests in all directories.
To demonstrate, I created a simple test script that uses Zombie (discussed later) to make a request against a web server and access the page contents. I named the file tst.spec.js and placed it in the specs directory in my development environment:
var zombie = require('zombie');
describe('jasmine-node', function(){
it("should respond with Hello, World!", function(done) {
zombie.visit("http://examples.burningbird.net:8124",
function(error, browser, status){
expect(browser.text()).toEqual("Hello, World!\n");
done();
});
});
});The web server is from Chapter 1, and all it does is return the “Hello, World!” message. Note the use of the newline character—the test will fail if you don’t include it.
I ran the test with the following command line:
jasmine-node --test-dir /home/examples/public_html/node
The result was the following output:
Finished in 0.133 seconds 1 test, 1 assertion, 0 failures
A successful test.
Jasmine uses path.existsSync, which is deprecated in
favor of js.existsSync in Node
0.8. Again, hopefully a fix will be in soon.
If the script had been in CoffeeScript, I would have added the
--coffee parameter:
jasmine-node --test-dir /home/examples/public_html/node --coffee
Vows is another BDD testing framework, and has one advantage over others: more comprehensive documentation. Testing is composed of testing suites, themselves made up of batches of sequentially executed tests. A batch consists of one or more contexts, executed in parallel, and each consisting of a topic, which is when we finally get to the executable code. The test within the code is known as a vow. Where Vows prides itself on being different from the other testing frameworks is by providing a clear separation between that which is being tested (topic) and the test (vow).
I know those are some strange uses of familiar words, so let’s look at a simple example to get a better idea of how a Vows test works. First, though, we have to install Vows:
npm install vows
To try out Vows, I’m using the simple circle module I created earlier in the book, now edited to set precision:
var PI = Math.PI;
exports.area = function (r) {
return (PI * r * r).toFixed(4);
};
exports.circumference = function (r) {
return (2 * PI * r).toFixed(4);
};I needed to change the precision on the result because I’m going to be doing an equality assertion test on the results in the Vows application.
In the Vows test application, the circle object is the topic, and the area and circumference methods are the vows. Both are encapsulated as a Vows context. The suite is the overall test application, and the batch is the test instance (circle and two methods). Example 14-2 shows the entire test.
var vows = require('vows'),
assert = require('assert');
var circle = require('./circle');
var suite = vows.describe('Test Circle');
suite.addBatch({
'An instance of Circle': {
topic: circle,
'should be able to calculate circumference': function (topic) {
assert.equal (topic.circumference(3.0), 18.8496);
},
'should be able to calculate area': function(topic) {
assert.equal (topic.area(3.0), 28.2743);
}
}
}).run();Running the application with Node runs the test because of the
addition of the run method at the
end of the addBatch method:
node example2.js
The results should be two successful tests:
·· ✓ OK » 2 honored (0.003s)
The topic is always an asynchronous function or a value. Instead
of using circle as the topic, I
could have directly referenced the object methods as topics—with a
little help from function closures:
var vows = require('vows'),
assert = require('assert');
var circle = require('./circle');
var suite = vows.describe('Test Circle');
suite.addBatch({
'Testing Circle Circumference': {
topic: function() { return circle.circumference;},
'should be able to calculate circumference': function (topic) {
assert.equal (topic(3.0), 18.8496);
},
},
'Testing Circle Area': {
topic: function() { return circle.area;},
'should be able to calculate area': function(topic) {
assert.equal (topic(3.0), 28.2743);
}
}
}).run();In this version of the example, each context is the object given
a title: Testing Circle
Circumference and Testing Circle
Area. Within each context, there’s one topic and one
vow.
You can incorporate multiple batches, each with multiple contexts, which can in turn have multiple topics and multiple vows.
Acceptance testing differs from unit testing in that the former’s primary purpose is to determine if the application meets user requirements. Unit tests ensure that the application is robust, while acceptance tests ensure that the application is useful.
Acceptance testing can be accomplished through the use of predefined scripts that users actually design and implement in a coordinated setting. Acceptance testing can also be automated—again through the use of scripts, but scripts that are implemented by tools rather than people. These tools don’t completely satisfy all aspects of acceptance testing because they can’t measure subjective perspectives (“This web page form is awkward to use”), nor can they pinpoint those difficult-to-find bugs that users always seem to drive out, but they can make sure program requirements are met.
If you want a higher level of sophistication in your testing, using actual browsers rather than emulators, and you’re willing to pay for a subscription to a testing service, then you might want to check out Selenium, Sauce Labs, and the Node module Soda.
Selenium emerged out of a desire to automate testing tools. It consists of a core library, a Selenium remote control (RC), and a Selenium integrated development environment (IDE). The Selenium IDE is a Firefox plug-in, while the RC is a Java .jar file. The first version of Selenium (Selenium 1) is based in JavaScript, which was also one of the problems with the tool suite: whatever limitations JavaScript had, Selenium shared. Another effort to provide an automated test suite is WebDriver, a project that came about because of an interest in working around Selenium’s limitations. Work is currently under way for Selenium 2 (Selenium WebDriver), which is a merge of Selenium 1 and WebDriver.
Sauce Labs provides a host for Selenium 1 testing. It offers a way of testing your application with various web browsers in various environments, such as Opera on Linux, or IE9 on Windows 7. It does have two major limitations: no Mac OS X support, and no mobile test environment. However, it is a way of testing an application with multiple versions of browsers, such as IE, which is difficult (if not impossible) if you have only one machine.
Sauce Labs provides various subscription plans, including a basic, free subscription plan for trying out the service. The basic plan allows for two concurrent users, and provides 200 OnDemand minutes a month and 45 Scout minutes a month—more than sufficient for a developer trying things out. The site is geared toward Ruby developers, but there is a Node module, Soda, that you can use.
Soda provides a Node wrapper for Selenium testing. An example of using Soda, included in the module documentation, is the following:
var soda = require('soda');
var browser = soda.createClient({
host: 'localhost'
, port: 4444
, url: 'http://www.google.com'
, browser: 'firefox'
});
browser.on('command', function(cmd, args){
console.log(' \x1b[33m%s\x1b[0m: %s', cmd, args.join(', '));
});
browser
.chain
.session()
.open('/')
.type('q', 'Hello World')
.end(function(err){
browser.testComplete(function() {
console.log('done');
if(err) throw err;
});
});The code is actually quite intuitive. First, you create a browser
object, specifying which browser to open, the name of the host and port,
and what website is being accessed. Start a new browser session, load a
web page ('/'), and type a phrase
into an input field with a given identifier of q. When finished, print done to the console.log, and throw any error that
occurs.
To run a Soda application, you’ll need to ensure that Java is installed. Then, copy the Selenium RC Java .jar file to your system and run it:
java -jar selenium.jar
The application expects Firefox to be installed, since this is the browser specified in the application. While I didn’t have it on my Linux box, I did on my Windows laptop and was able to easily get the application running. It’s rather fascinating but a little disconcerting to see windows pop up and suddenly disappear as the Selenium RC does its thing.
Another approach is to use Sauce Labs as a remote testing environment, specifying which browser to use for a given test. You’ll need to create an account first, and then find your account username and application programming interface (API) key. The username is displayed in the top toolbar, and you can find the API key under the Account tab, after clicking the “View my API Key” link. This is also where you can track your remaining OnDemand and Scout minutes (the testing applications we’re creating use OnDemand minutes).
To try the remote testing out, I created a simple test for a login
form that we’ll build in Chapter 15. The
login form has two text fields and two buttons. The text field values
are username and password, and one of the buttons has a value
of Submit. The test script is testing
failure, not success, so the testing script (scenario) would be:
Access web application (http://examples.burningbird.net:3000).
Open login (/login).
Type Sally into the
username field.
Type badpassword into
the password field.
The page should display “Invalid Password.”
These are the steps encoded into Example 14-3.
var soda = require('soda');
var browser = soda.createSauceClient({
'url': 'http://examples.burningbird.net:3000/'
, 'username': 'your username'
, 'access-key': 'your access key'
, 'os': 'Linux'
, 'browser': 'firefox'
, 'browser-version': '3.'
, 'max-duration': 300 // 5 minutes
});
// Log commands as they are fired
browser.on('command', function(cmd, args){
console.log(' \x1b[33m%s\x1b[0m: %s', cmd, args.join(', '));
});
browser
.chain
.session()
.setTimeout(8000)
.open('/login')
.waitForPageToLoad(5000)
.type('username', 'Sally')
.type('password', 'badpassword')
.clickAndWait('//input[@value="Submit"]')
.assertTextPresent('Invalid password')
.end(function(err){
browser.setContext('sauce:job-info={"passed": ' + (err === null) + '}', function(){
browser.testComplete(function(){
console.log(browser.jobUrl);
console.log(browser.videoUrl);
console.log(browser.logUrl);
if (err) throw err;
});
});
});In the test application, a browser object is created with a given
browser, browser version, and operating system—in this case, Firefox 3.x
on Linux. Note also the different browser client: soda.createSauceClient, not soda.createClient. In the browser object, I’m
restricting testing time to no more than five minutes; the site accessed
is http://examples.burningbird.net:3000; and we’ve
just covered where to get the username and API key.
As each command is issued, it’s logged. We want to have a log so we can check responses and look for failures and abnormalities:
// Log commands as they are fired
browser.on('command', function(cmd, args){
console.log(' \x1b[33m%s\x1b[0m: %s', cmd, args.join(', '));
});Last is the actual test. Typically, the tests would have to be
nested callbacks (since this is an asynchronous environment), but Soda
provides a chain
getter that greatly simplifies adding tasks. The
very first task is to start a new session, and then each separate item
in the testing script is encoded. In the end, the application prints out
the URLs for the job, log, and video of the test.
The output from running the application is:
setTimeout: 8000
open: /login
waitForPageToLoad: 5000
type: username, Sally
type: password, badpassword
clickAndWait: //input[@value="Submit"]
assertTextPresent: Invalid password
setContext: sauce:job-info={"passed": true}
testComplete:
https://saucelabs.com/jobs/d709199180674dc68ec6338f8b86f5d6
https://saucelabs.com/rest/shelleyjust/jobs/d709199180674dc68ec6338f8b86f5d6/
results/video.flv
https://saucelabs.com/rest/shelleyjust/jobs/d709199180674dc68ec6338f8b86f5d6/
results/selenium-server.logYou can access the results directly, or you can log into Sauce Labs and see the results of all your tests, as shown in Figure 14-2.
As mentioned earlier, Soda is a Selenium wrapper, so there’s little documentation of the Selenium commands in the module. You’ll need to find these at the Selenium website and extrapolate how they’d work with Soda.
Access the Selenium website at http://seleniumhq.org/.
Rather than using any specific browser, you can do acceptance testing with Node modules that emulate a browser. Both Tobi and Zombie provide this capability. The primary advantage to these modules is that you can run the applications in an environment that doesn’t have a browser installed. In this section, I’ll briefly demonstrate how you can use Zombie for acceptance testing.
First, install Zombie using npm:
npm install zombie
Zombie resembles Soda in that you create a browser and then run tests that emulate the actions of a user at a browser. It even supports chained methods to circumvent the issues with nested callbacks.
I converted the test case against the login form in Example 14-3 to Zombie, except this time the test uses the proper password and tests for success rather than failure (the user is redirected to the /admin page). Example 14-4 has the code for this acceptance test.
var Browser = require('zombie');
var assert = require('assert');
var browser = new Browser();
browser.visit('http://examples.burningbird.net:3000/login', function() {
browser.
fill('username', 'Sally').
fill('password', 'apple').
pressButton('Submit', function() {
assert.equal(browser.location.pathname, '/admin');
});
});The test is silent, since the assert at the end is successful—the browser
location is /admin, which is the page that
should open if the login works, signaling a successful test.
A robust application that meets all the user’s needs is going to have a short life if its performance is atrocious. We need the ability to performance test our Node applications, especially when we make tweaks as part of the process to improve performance. We can’t just tweak the application, put it out for production use, and let our users drive out performance issues.
Performance testing consists of benchmark testing and load testing. Benchmark testing, also known as comparison testing, is running multiple versions or variations of an application and then determining which is better. It’s an effective tool to use when you’re tweaking an application to improve its efficiency and scalability. You create a standardized test, run it against the variations, and then analyze the results.
Load testing, on the other hand, is basically stress testing your application. You’re trying to see at what point your application begins to fail or bog down because of too many demands on resources, or too many concurrent users. You basically want to drive the application until it fails. Failure is a success with load testing.
There are existing tools that handle both kinds of performance testing, and a popular one is ApacheBench. It’s popular because it’s available by default on any server where Apache is installed—and few servers don’t have Apache installed. It’s also an easy-to-use, powerful little testing tool. When I was trying to determine whether it’s better to create a static database connection for reuse or to create a connection and discard it with each use, I used ApacheBench to run tests.
ApacheBench works against web applications, which means you provide a URL rather than an application name. If we prefer a Node solution, or an application that can run applications (not just query websites), there’s another combination command-line tool/module: Nodeload. Nodeload can interact with a stats module, output graphics of results, and provide real-time monitoring. It also supports distributed load testing.
In the next couple of sections, the test applications are working with Redis, so if you haven’t read Chapter 9, you may want to do that now.
ApacheBench is commonly called ab, and I’ll use that name from this point forward. ab is a command-line tool that allows us to specify the number of times an application is run, and by how many concurrent users. If we want to emulate 20 concurrent users accessing a web application a total of 100 times, we’d use a command like the following:
ab -n 100 -c 20 http://somewebsite.com/It’s important to provide the final slash, as ab expects a full URL, including path.
ab provides a rather rich output of information. An example is the following output (excluding the tool identification) from one test:
Concurrency Level: 10 Time taken for tests: 20.769 seconds Complete requests: 15000 Failed requests: 0 Write errors: 0 Total transferred: 915000 bytes HTML transferred: 345000 bytes Requests per second: 722.22 [#/sec] (mean) Time per request: 13.846 [ms] (mean) Time per request: 1.385 [ms] (mean, across all concurrent requests) Transfer rate: 43.02 [Kbytes/sec] received Connection Times (ms) min mean[+/-sd] median max Connect: 0 0 0.1 0 4 Processing: 1 14 15.7 12 283 Waiting: 1 14 15.7 12 283 Total: 1 14 15.7 12 283 Percentage of the requests served within a certain time (ms) 50% 12 66% 14 75% 15 80% 16 90% 18 95% 20 98% 24 99% 40 100% 283 (longest request)
The test ran 15,000 times, with 10 concurrent users.
The lines we’re most interested in (in bold text) are those having to do with how long each test took, and the cumulative distribution at the end of the test (based on percentages). According to this output, the average time per request (the first value with this label) is 13.846 milliseconds. This is how long the average user could expect to wait for a response. The second line has to do with throughput, and is probably not as useful as the first.
The cumulative distribution provides a good look into the percentage of requests handled within a certain time frame. Again, this indicates what we can expect for an average user: response times between 12 and 283 milliseconds, with the vast majority of responses handled in 20 milliseconds or less.
The last value we’re looking at is the requests per second—in this case, 722.22. This value can somewhat predict how well the application will scale, because it gives us an idea of the maximum requests per second—that is, the upper boundaries of application access. However, you’ll need to run the test at different times, and under different ancillary loads, especially if you’re running the test on a system that serves other uses.
The application tested consists of a web server listening for requests. Each request triggers a query to a Redis data store. The application creates a persistent connection to the Redis data store that it maintains throughout the lifetime of the Node application. The test application is shown in Example 14-5.
var redis = require("redis"),
http = require('http');
// create Redis client
var client = redis.createClient();
client.on('error', function (err) {
console.log('Error ' + err);
});
// set database to 1
client.select(1);
var scoreServer = http.createServer();
// listen for incoming request
scoreServer.on('request', function (req, res) {
console.time('test');
req.addListener("end", function() {
var obj = {
member : 2366,
game : 'debiggame',
first_name : 'Sally',
last_name : 'Smith',
email : 'sally@smith.com',
score : 50000 };
// add or overwrite score
client.hset(obj.member, "game", obj.game, redis.print);
client.hset(obj.member, "first_name", obj.first_name, redis.print);
client.hset(obj.member, "last_name", obj.last_name, redis.print);
client.hset(obj.member, "email", obj.email, redis.print);
client.hset(obj.member, "score", obj.score, redis.print);
client.hvals(obj.member, function (err, replies) {
if (err) {
return console.error("error response - " + err);
}
console.log(replies.length + " replies:");
replies.forEach(function (reply, i) {
console.log(" " + i + ": " + reply);
});
});
res.end(obj.member + ' set score of ' + obj.score);
console.timeEnd('test');
});
});
scoreServer.listen(8124);
// HTTP server closes, close client connection
scoreServer.on('close', function() {
client.quit();
});
console.log('listening on 8124');I was curious about performance if I changed one parameter in the application: from maintaining a persistent connection to Redis to grabbing a connection when the web service was accessed, and releasing it as soon as the request was finished. That led to the second version of the application, shown in Example 14-6. The changes from the first are in bold text.
var redis = require("redis"),
http = require('http');
var scoreServer = http.createServer();
// listen for incoming request
scoreServer.on('request', function (req, res) {
console.time('test');
// create Redis client
var client = redis.createClient();
client.on('error', function (err) {
console.log('Error ' + err);
});
// set database to 1
client.select(1);
req.addListener("end", function() {
var obj = {
member : 2366,
game : 'debiggame',
first_name : 'Sally',
last_name : 'Smith',
email : 'sally@smith.com',
score : 50000 };
// add or overwrite score
client.hset(obj.member, "game", obj.game, redis.print);
client.hset(obj.member, "first_name", obj.first_name, redis.print);
client.hset(obj.member, "last_name", obj.last_name, redis.print);
client.hset(obj.member, "email", obj.email, redis.print);
client.hset(obj.member, "score", obj.score, redis.print);
client.hvals(obj.member, function (err, replies) {
if (err) {
return console.error("error response - " + err);
}
console.log(replies.length + " replies:");
replies.forEach(function (reply, i) {
console.log(" " + i + ": " + reply);
});
});
res.end(obj.member + ' set score of ' + obj.score);
client.quit();
console.timeEnd('test');
});
});
scoreServer.listen(8124);
console.log('listening on 8124');I ran the ab test against this second application, and the relevant test results are as follows:
Requests per second: 515.40 [#/sec] (mean) Time per request: 19.402 [ms] (mean) ... Percentage of the requests served within a certain time (ms) 50% 18 66% 20 75% 21 80% 22 90% 24 95% 27 98% 33 99% 40 100% 341 (longest request)
The tests give us a fairly good indication that maintaining a persistent connection enhances performance. This is further borne out, in rather dramatic fashion, with a second test.
When I ran the test 100,000 times, with 1,000 concurrent users, the Node application that maintained a persistent connection to Redis finished the test, while the other option actually failed; too many concurrent users backed up at Redis, and it started rejecting connections. Exactly 67,985 tests completed before the application went toes up.
Nodeload provides a command-line tool that performs the same type of testing as ab, but with the addition of some nice graphics of the results. It also provides a module you can use to develop your own performance testing applications.
Another application also goes by the name Nodeload, and is responsible for building and delivering Git repositories as .zip files. To ensure that you’re accessing the correct Nodeload, install it with the following:
npm install nodeload -g
When Nodeload is installed globally, you can access the command-line version (nl.js) of the module application anywhere. The command-line arguments it takes are similar to what we’ve used with ab:
nl.js -c 10 -n 10000 -i 2 http://examples.burningbird.net:8124
The application accesses the website 10,000 times,
emulating 10 concurrent users. The -i
flag alters how frequently the statistics are reported (every 2 seconds
rather than the default 10 seconds). Here is the complete set of
flags:
-n --numberNumber of requests to make
-c --concurrencyNumber of concurrent users
-t --time-limitTime limit for the test
-m --methodHTTP method to use
-d --dataData to send with PUT or
POST request
-r
--request-generatorPath to module for getRequest function (if a custom one is
provided)
-q --quietSuppress display of progress
-h --helpHelp
What’s fun about Nodeload is the live graphics that are displayed while the test is running. If you access port 8000 of the test server (http://localhost:8000 or via domain), you can see a graphic display of the results as they are happening. Figure 14-3 shows a snapshot of the display during one test.
The graphics file is also persisted for later access, as is a logfile of the test results. At the end of the test, summary results are given that are very close to ab in nature. An example of one output is the following:
Server: examples.burningbird.net:8124 HTTP Method: GET Document Path: / Concurrency Level: 100 Number of requests: 10000 Body bytes transferred: 969977 Elapsed time (s): 19.59 Requests per second: 510.41 Mean time per request (ms): 192.74 Time per request standard deviation: 47.75 Percentages of requests served within a certain time (ms) Min: 23 Avg: 192.7 50%: 191 95%: 261 99%: 372 Max: 452
If you want to provide your own custom test, you can use the Nodeload module to develop a testing application. The module provides live monitoring, graphics capability, statistics, as well as distributed testing capability.
Before leaving this chapter, I want to introduce one more module: Nodemon. Though not technically related to either testing or debugging, it is a handy development tool.
First, install it with npm:
npm install nodemon
Nodemon wraps your application. Instead of using Node to start the application, use Nodemon:
nodemon app.js
Nodemon sits quietly monitoring the directory (and any contained directories) where you ran the application, checking for file changes. If it finds a change, it restarts the application so that it picks up the recent changes.
You can pass parameters to the application:
nodemon app.js param1 param2
You can also use the module with CoffeeScript:
nodemon someapp.coffee
If you want Nodemon to monitor some directory other than the current
one, use the --watch flag:
nodemon --watch dir1 --watch libs app.js
There are other flags, documented with the module. The module can be found at https://github.com/remy/nodemon/.
Chapter 16 demonstrates how to use Nodemon with Forever, which restarts your application if it shuts down for some reason.
Security in web applications goes beyond ensuring that people don’t have access to the application server. Security can be complex, and even a little intimidating. Luckily, when it comes to Node applications, most of the components we need for security have already been created. We just need to plug them in, in the right place and at the right time.
In this chapter, I break down security into four major components: encryption, authentication and authorization, attack prevention, and sandboxing:
Ensures that data transmitted over the Internet is safe, even if it is intercepted midroute. The only receiver that can actually decrypt the data is the system that has the proper credentials (typically a key). Encryption is also used for data that must be stored confidentially.
Consist of the logins we get whenever we need to access protected areas of an application. Not only do these logins ensure that a person has access to a section of an application (authorization), they also ensure the person is who she says she is (authentication).
Ensures that someone who is submitting data via a form isn’t trying to tack on text that can attack the server or the database you’re using.
Barricades script so it doesn’t have access to the system resources—it operates only within a limited context.
We send a lot of data over the Internet. Most of it isn’t anything essential: Twitter updates, web page history, comments on a blog post. Much of the data, though, is private, including credit card data, confidential email messages, or login information to our servers. The only way to ensure that these types of data transmissions are kept private, and aren’t hacked in any way during transit, is to use encryption with the communication.
Secure, tamper-resistant communication between a client and a server occurs over SSL (Secure Sockets Layer), and its upgrade, TLS (Transport Layer Security). TSL/SSL provides the underlying encryption for HTTPS, which I cover in the next section. However, before we can develop for HTTPS, we have to do some environment setup.
A TSL/SSL connection requires a handshake between client and server. During the handshake, the client (typically a browser) lets the server know what kind of security functions it supports. The server picks a function and then sends through an SSL certificate, which includes a public key. The client confirms the certificate and generates a random number using the server’s key, sending it back to the server. The server then uses its private key to decrypt the number, which in turn is used to enable the secure communication.
For all this to work, you’ll need to generate both the public and private key, as well as the certificate. For a production system, the certificate would be signed by a trusted authority, such as our domain registrars, but for development purposes you can make use of a self-signed certificate. Doing so generates a rather significant warning in the browser, but since the development site isn’t being accessed by users, there won’t be an issue.
The tool used to generate the necessary files is OpenSSL. If you’re using Linux, it should already be installed. There’s a binary installation for Windows, and Apple is pursuing its own Crypto library. In this section, I’m just covering setting up a Linux environment.
To start, type the following at the command line:
openssl genrsa -des3 -out site.key 1024
The command generates the private key, encrypted with Triple-DES and stored in PEM (privacy-enhanced mail) format, making it ASCII readable.
You’ll be prompted for a password, and you’ll need it for the next task, creating a certificate-signing request (CSR).
When generating the CSR, you’ll be prompted for the password you
just created. You’ll also be asked a lot of questions, including the
country designation (such as US for United States), your state or
province, city name, company name and organization, and email address.
The question of most importance is the one asking for the Common Name.
This is asking for the hostname of the site—for example,
burningbird.net or
yourcompany.com. Provide the hostname where the
application is being served. In my example code, I created a certificate
for examples.burningbird.net.
openssl req -new -key site.key -out site.csr
The private key wants a passphrase. The problem is, every time you start up the server, you’ll have to provide this passphrase, which is an issue in a production system. In the next step, you’ll remove the passphrase from the key. First, rename the key:
mv site.key site.key.org
Then type:
openssl rsa -in site.key.org -out site.key
If you do remove the passphrase, make sure your server is secure by ensuring that the file is readable only by root.
The next task is to generate the self-signed certificate. The following command creates one that’s good only for 365 days:
openssl x509 -req -days 365 -in site.csr -signkey site.key -out final.crt
Now you have all the components you need in order to use TLS/SSL and HTTPS.
Web pages that ask for user login or credit card information had better be served as HTTPS, or we should give the site a pass. HTTPS is a variation of the HTTP protocol, except that it’s also combined with SSL to ensure that the website is who and what we think it is, that the data is encrypted during transit, and the data arrives intact and without any tampering.
Adding support for HTTPS is similar to adding support for HTTP,
with the addition of an options
object that provides the public encryption key, and the signed
certificate. The default port for an HTTPS server differs, too: HTTP is
served via port 80 by default, while HTTPS is served via port
443.
Example 15-1 demonstrates a very basic HTTPS server. It does little beyond sending a variation of our traditional Hello, World message to the browser.
var fs = require("fs"),
https = require("https");
var privateKey = fs.readFileSync('site.key').toString();
var certificate = fs.readFileSync('final.crt').toString();
var options = {
key: privateKey,
cert: certificate
};
https.createServer(options, function(req,res) {
res.writeHead(200);
res.end("Hello Secure World\n");
}).listen(443);The public key and certificate are opened, and their contents are
read synchronously. The data is
attached to the options object,
passed as the first parameter in the https.createServer method. The callback
function for the same method is the one we’re used to, with the server
request and response object passed as parameters.
Accessing the page demonstrates what happens when we use a self-signed certificate, as shown in Figure 15-1. It’s easy to see why a self-signed certificate should be used only during testing.
The browser address bar demonstrates another way that the browser signals that the site’s certificate can’t be trusted, as shown in Figure 15-2. Rather than displaying a lock indicating that the site is being accessed via HTTPS, it displays a lock with a red x showing that the certificate can’t be trusted. Clicking the icon opens an information window with more details about the certificate.
Encrypting communication isn’t the only time we use encryption in a web application. We also use it to store user passwords and other sensitive data.
Node provides a module used for encryption: Crypto. According to the module’s documentation:
The crypto module requires OpenSSL to be available on the underlying platform. It offers a way of encapsulating secure credentials to be used as part of a secure HTTPS net or http connection.
It also offers a set of wrappers for OpenSSL’s
hash,hmac,cipher,decipher,sign, andverifymethods.
The functionality we’re interested in is the module’s OpenSSL hash support.
One of the most common tasks a web application has to support is also one of the most vulnerable: storing a user’s login information, including password. It probably only took five minutes after the first username and password were stored in plain text in a web application database before someone came along, cracked the site, got the login information, and had his merry way with it.
You do not store passwords in plain text. Luckily, you don’t need to store passwords in plain text with Node’s Crypto module.
You can use the Crypto module’s createHash method to
encrypt the password. An example is the following, which creates the
hash using the sha1 algorithm, uses the hash to encode a password, and
then extracts the digest of the encrypted data to store in the
database:
var hashpassword = crypto.createHash('sha1')
.update(password)
.digest('hex');The digest encoding is set to hexadecimal. By default, encoding is binary, and base64 can also be used.
Many applications use a hash for this purpose. However, there’s a problem with storing plain hashed passwords in a database, a problem that goes by the innocuous name of rainbow table.
Put simply, a rainbow table is basically a table of precomputed hash values for every possible combination of characters. So, even if you have a password that you’re sure can’t be cracked—and let’s be honest, most of us rarely do—chances are, the sequence of characters has a place somewhere in a rainbow table, which makes it much simpler to determine what your password is.
The way around the rainbow table is with salt (no, not the crystalline variety), a unique generated value that is concatenated to the password before encryption. It can be a single value that is used with all the passwords and stored securely on the server. A better option, though, is to generate a unique salt for each user password, and then store it with the password. True, the salt can also be stolen at the same time as the password, but it would still require the person attempting to crack the password to generate a rainbow table specifically for the one and only password—adding immensely to the complexity of cracking any individual password.
Example 15-2 is a simple application that takes a username and a password passed as command-line arguments, encrypts the password, and then stores both as a new user in a MySQL database table. The table is created with the following SQL:
CREATE TABLE user (userid INT NOT NULL AUTO_INCREMENT, PRIMARY KEY(userid), username VARCHAR(400) NOT NULL, password VARCHAR(400) NOT NULL);
The salt consists of a date value multiplied by a random number and rounded. It’s concatenated to the password before the resulting string is encrypted. All the user data is then inserted into the MySQL user table.
var mysql = require('mysql'),
crypto = require('crypto');
var client = mysql.createClient({
user: 'username',
password: 'password'
});
client.query('USE databasenm');
var username = process.argv[2];
var password = process.argv[3];
var salt = Math.round((new Date().valueOf() * Math.random())) + '';
var hashpassword = crypto.createHash('sha512')
.update(salt + password)
.digest('hex');
// create user record
client.query('INSERT INTO user ' +
'SET username = ?, password = ?, salt = ?',
[username, hashpassword, salt], function(err, result) {
if (err) console.log(err);
client.end();
});The application to test a username and password, shown in Example 15-3, queries the database for the password and salt based on the username. It uses the salt to, again, encrypt the password. Once the password has been encrypted, it’s compared to the password stored in the database. If the two don’t match, the user isn’t validated. If they match, then the user’s in.
var mysql = require('mysql'),
crypto = require('crypto');
var client = mysql.createClient({
user: 'username',
password: 'password'
});
client.query('USE databasenm');
var username = process.argv[2];
var password = process.argv[3];
client.query('SELECT password, salt FROM user WHERE username = ?',
[username], function(err, result, fields) {
if (err) return console.log(err);
var newhash = crypto.createHash('sha512')
.update(result[0].salt + password)
.digest('hex');
if (result[0].password === newhash) {
console.log("OK, you're cool");
} else {
console.log("Your password is wrong. Try again.");
}
client.end();
});Trying out the applications, we first pass in a username of
Michael, with a password of applef*rk13*:
node password.js Michael apple*frk13*
We then check the same username and password:
node check.js Michael apple*frk13*
and get back the expected result:
OK, you're cool
Trying it again, but with a different password:
node check.js Michael badstuff
we get back the expected result again:
Your password is wrong. Try again
Of course, we don’t expect our users to log in via the command line. Neither do we always use a local password system to authenticate people. We’ll go over the authentication process next.
Are you the person you say you are? Do you have the authority to do this action? Can this action cause harm? Answering these questions is the work of two different technical components: authentication and authorization.
Authentication is concerned with ensuring that you are who you say you are. When Twitter attaches a verification flag to an account, it’s signaling that the person flagged is the genuine article. Authorization, on the other hand, is related to ensuring that you have access only to what you need to access. Of a dozen users at a Drupal site, half may have only the ability to post comments, five others can post articles and comments, but only one has control over everything. The site may not care who user Big Daddy is, only that he can post comments but not delete posts.
It’s not unusual for both authorization and authentication to be combined into the same function. Typically, when attempting to do some action, you’re challenged to provide some means of authenticating who you are. You’re probably going to be asked to provide a username and a password. Then, once you’ve proved who you are, your actions are further limited by the application: the person identified by your username can access only certain pages or perform only certain operations.
Sometimes the authentication is done through a third party. An example of third-party authentication is the use of OpenID. Rather than have your users create a username and password at your site, you authenticate them with OpenID and then give them application access.
Other times, both authentication and authorization occur at a third-party site. For instance, if an application wants to access a Twitter or Facebook account, either to post messages or to get information, the users have to authenticate with these sites, and then your application has to be authorized for the access. This authorization occurs via another strategy, OAuth.
The functionality for all of these scenarios can be met with the Passport module and one or more Passport strategies.
Passport isn’t the only module that provides authentication and authorization, but I found it to be the easiest to use.
Let’s take a closer look at our three different types of authorization/authentication strategies.
When you’re accessing the administrative section of a content management system (CMS) such as Drupal or an online site such as Amazon, you’re using basic credential verification. You’re supplying a username and a password, both of which are verified by the site before you’re given access. This is still the most widely implemented authorization/authentication strategy. And for the most part, it’s an effective one.
Earlier in the chapter, I demonstrated how user passwords can be protected in the database. Even if the user system is compromised, the data thieves won’t have access to your password in plain text. Of course, they could crack your password, but if you used a combination of letters, symbols, and numbers in a relatively meaningless way, it would take a lot of time and CPU power to crack the password.
OAuth is a way of accessing data, such as a person’s Twitter account data, without the person having to give direct access to the account password. It’s a way of authorizing data access without the person’s credentials having to be stored in various locations—which increases the likelihood of the person’s credentials eventually being compromised. It also gives the user greater control, because she can usually rescind the authorization from her primary account at any time.
OAuth is involved almost exclusively with authorization—of data access. OpenID is different in that its primary focus is on authentication, though authorization does come along for the ride.
OpenID is not as widely used as OAuth, and is used primarily in comment systems and in user registration at various media sites. One of the problems with comment systems is that individuals may say they’re a person, but there’s no way to verify they are who they say they are. With OpenID, a person can sign into a comment system or register as a user, and the OpenID system ensures that the person authenticates, at least within the OpenID system.
OpenID is also a way of registering at different locations without having to create a different username and password with each. You just provide your OpenID, it’s verified, the information the system needs is pulled from the OpenID provider, and you’re done.
None of these three strategies precludes the use of the other two. Many applications incorporate support for all three: local credential verification for administrative tasks, OAuth to share data or post to sites such as Facebook and Twitter, and OpenID to allow user registration and comments.
There are several modules that can provide all forms of authentication and authorization, but I’m going to focus on one: Passport. Passport is middleware that works with both Connect and Express to provide both authentication and authorization. You can install it with npm:
npm install passport
Passport utilizes strategies that are installed independently from the framework. All Passport strategies have the same basic requirements:
The strategy must be installed.
The strategy must be configured in the application.
As part of the configuration, the strategy incorporates a callback function, used to verify the user’s credentials.
All strategies require additional work depending on the authority vetting the credentials: Facebook and Twitter require an account and account key, while the local strategy requires a database with usernames and passwords.
All strategies require a local data store that maps the authority’s username with an application username.
Passport-provided functionality is used to persist the user login session.
In this chapter, we’re looking at two Passport strategies: local authentication/authorization, and authentication through Twitter using OAuth.
We can install the local Passport strategy module (passport-local) with npm:
npm install passport-local
Passport is middleware, and must be instantiated like middleware within the Express application. After including both the passport and passport-local modules, like so:
var express = require('express');
var passport = require('passport');
var localStrategy = require('passport-local').Strategy;initiate the Passport middleware as follows:
var app = express();
app.configure(function(){
...
app.use(passport.initialize());
app.use(passport.session());
...
});Then configure the local strategy. The format for configuring the
local strategy is the same as that for configuring all other strategies:
a new instance of the strategy is passed to Passport via the use method, similar to the approach utilized
by Express:
passport.use(new localStrategy( function (user, password, done) { ... }The passport-local module expects that the username and password
are passed to the web application via a posted form, and that the values
are contained in fields named username and password. If you want to use two other field
names, pass them as an option when creating the new strategy
instance:
var options =
{ usernameField : 'appuser',
passwordField : 'userpass'
};
passport.use(new localStrategy(options, function(user, password, done) { ... }The callback function passed to the strategy construction is called after the username and password have been extracted from the request body. The function performs the actual authentication, returning:
Whenever a user tries to access a protected site, Passport is
queried to see if he is authorized. In the following code, when the user
tries to access the restricted admin page, a function named ensureAuthenticated is called to determine
whether he is authorized:
app.get('/admin', ensureAuthenticated, function(req, res){
res.render('admin', { title: 'authenticate', user: req.user });
});The ensureAuthenticated
function checks the result of the req.isAuthenticated
method that Passport has added as an extension to the request object. If
the response is false, the user is
redirected to the login page:
function ensureAuthenticated(req, res, next) {
if (req.isAuthenticated()) { return next(); }
res.redirect('/login')
}To persist the login for the session, Passport provides two
methods, serializeUser and
deserializeUser. We
have to provide the functionality in the callback function that is
passed to these two methods. Basically, passport.serializeUser
serializes the user’s identifier, while passport.deserializeUser uses this identifier
to find the user in whatever data store we’re using, and return an
object with all the user information:
passport.serializeUser(function(user, done) {
done(null, user.id);
});
passport.deserializeUser(function(id, done) {
...
});Serialization to the session isn’t a requirement for Passport. If
you don’t want to serialize the user, don’t include the passport.session
middleware:
app.use(passport.session());
If you do decide to serialize the user to the session (and you should; otherwise, you’ll have a very annoyed user, as he’ll keep getting login requests), you must ensure that the Passport middleware is included after the Express session middleware:
app.use(express.cookieParser('keyboard cat'));
app.use(express.session());
app.use(passport.initialize());
app.use(passport.session());If you don’t maintain the proper order, the user never authenticates.
The last chunk of functionality is handling what happens when the person doesn’t validate. During the authentication, if a user’s username isn’t found in the data store, an error message is generated. If the username is found, but the password doesn’t match what’s stored, an error is generated. We need to communicate these error messages back to the user.
Passport uses the Express 2.x req.flash method to
queue error messages for display back to the user. I didn’t cover
req.flash in earlier
chapters because the functionality was deprecated in Express 3.x.
However, to ensure that Passport works with Express 2.x and 3.x, the
Passport developer created a new module, connect-flash, that adds this
functionality back in.
The connect-flash module can be installed with npm:
npm install connect-flash
used in the application:
var flash = require('connect-flash');and then integrated as middleware with Express:
app.use(flash());
Now, in the POST login route,
if the user doesn’t authenticate, he’s redirected to the login form and
given a notification that an error occurred:
app.post('/login',
passport.authenticate('local', { failureRedirect: '/login', failureFlash: true }),
function(req, res) {
res.redirect('/admin');
});The error message(s) generated via the authentication process can
be passed on to the views engine via req.flash when the
login form is rendered:
app.get('/login', function(req, res){
var username = req.user ? req.user.username : '';
res.render('login', { title: 'authenticate', username: username,
message: req.flash('error') });
});The views engine can then display the error message in addition to the login form elements, as this Jade template demonstrates:
extends layout block content h1 Login if message p= message form(method="POST" action="/login" enctype="application/x-www-form-urlencoded") p Username: input(type="text" name="username" id="username" size="25" value="#{username}" required) p Password: input(type="password" name="password" id="password" size="25" required) input(type="submit" name="submit" id="submit" value="Submit") input(type="reset" name="reset" id="reset" value="reset")
To demonstrate all of these pieces, I incorporated the command-line authentication application from Example 15-3 into an Express application, shown in Example 15-4, with authentication provided by Passport. The only routes the application supports are the login route for the login form display and authentication, and access to a restricted admin page and the top-level index page.
The MySQL code from Example 15-3 is incorporated directly into the authentication routine (though normally this would be split out in a more formal application). Additional MySQL access code is used to find the user information given an identifier, when the user is deserialized.
// modules
var express = require('express')
, flash = require('connect-flash')
, passport = require('passport')
, LocalStrategy = require('passport-local').Strategy
, http = require('http');
var mysql = require('mysql')
, crypto = require('crypto');
// check user authentication
function ensureAuthenticated(req, res, next) {
if (req.isAuthenticated()) { return next(); }
res.redirect('/login')
}
// serialize user to session
passport.serializeUser(function(user, done) {
done(null, user.id);
});
// find user in MySQL database
passport.deserializeUser(function(id, done) {
var client = mysql.createClient({
user : 'username',
password: 'password'
});
client.query('USE databasenm');
client.query('SELECT username, password FROM user WHERE userid = ?',
[id], function(err, result, fields) {
var user = {
id : id,
username : result[0].username,
password : result[0].password};
done(err, user);
client.end();
});
});
// configure local strategy
// authenticate user against MySQL user entry
passport.use(new LocalStrategy(
function(username, password, done) {
var client = mysql.createClient({
user : 'username',
password: 'password'
});
client.query('USE nodetest2');
client.query('SELECT userid, password, salt FROM user WHERE username = ?',
[username], function(err, result, fields) {
// database error
if (err) {
return done(err);
// username not found
} else if (result.length == 0) {
return done(null, false, {message: 'Unknown user ' + username});
// check password
} else {
var newhash = crypto.createHash('sha512')
.update(result[0].salt + password)
.digest('hex');
// if passwords match
if (result[0].password === newhash) {
var user = {id : result[0].userid,
username : username,
password : newhash };
return done(null, user);
// else if passwords don't match
} else {
return done(null, false, {message: 'Invalid password'});
}
}
client.end();
});
}));
var app = express();
app.configure(function(){
app.set('views', __dirname + '/views');
app.set('view engine', 'jade');
app.use(express.favicon());
app.use(express.logger('dev'));
app.use(express.bodyParser());
app.use(express.methodOverride());
app.use(express.cookieParser('keyboard cat'));
app.use(express.session());
app.use(passport.initialize());
app.use(passport.session());
app.use(flash());
app.use(app.router);
app.use(express.static(__dirname + '/public'));
});
app.get('/', function(req, res){
res.render('index', { title: 'authenticate', user: req.user });
});
app.get('/admin', ensureAuthenticated, function(req, res){
res.render('admin', { title: 'authenticate', user: req.user });
});
app.get('/login', function(req, res){
var username = req.user ? req.user.username : '';
res.render('login', { title: 'authenticate', username: username,
message: req.flash('error') });
});
app.post('/login',
passport.authenticate('local', { failureRedirect: '/login', failureFlash: true }),
function(req, res) {
res.redirect('/admin');
});
http.createServer(app).listen(3000);
console.log("Express server listening on port 3000");Example 15-4 is a longer example than I normally like to include in a book, but stubbing in the data source portions of the example wouldn’t give you a real feel for how the Passport component works with the password hashing component, discussed earlier.
Let’s take a closer look at the authentication method. Once the
application has queried for the user record given the username, it
invokes the callback function with the database error, if an error
occurs. If an error does not occur, but the username isn’t found, the
application invokes the callback function with the username set to
false to signal that the username
wasn’t found, and provides an appropriate message. If the user is found,
but the passwords don’t match, the same thing happens: a value of
false is returned for the user and a
message is generated.
Only when no database error occurred, the user exists in the user table, and the passwords match is a user object created and returned via the callback function:
// database error
if (err) {
return done(err);
// username not found
} else if (result.length == 0) {
return done(null, false, {message: 'Unknown user ' + username});
// check password
} else {
var newhash = crypto.createHash('sha512')
.update(result[0].salt + password)
.digest('hex');
// if passwords match
if (result[0].password === newhash) {
var user = {id : result[0].userid,
username : username,
password : newhash };
return done(null, user);
// else if passwords don't match
} else {
return done(null, false, {message: 'Invalid password'});
}
}This user object is then serialized to the session, and the user is given access to the admin page. He’ll continue to have access without challenge to the admin page as long as the session is alive.
Rather than store usernames and passwords locally and perform our own authentication, we can use another service, such as Twitter. This is also a way to integrate a site more closely with Twitter (or Facebook, Google+, or another third-party site).
Passport authentication using Twitter is supported through the passport-twitter module. It can be installed with npm:
npm install passport-twitter
To use OAuth to authenticate a user through Twitter, you need to set up a developer’s account at Twitter, and get a consumer key and a consumer secret. These are used in the application to form part of the OAuth request.
Once you have your consumer key and secret, use these, in addition to the callback URL, to create the Twitter strategy:
passport.use(new TwitterStrategy(
{ consumerKey: TWITTER_CONSUMER_KEY,
consumerSecret: TWITTER_CONSUMER_SECRET,
callbackURL: "http://examples.burningbird.net:3000/auth/twitter/callback"},
function(token, tokenSecret,profile,done) {
findUser(profile.id, function(err,user) {
console.log(user);
if (err) return done(err);
if (user) return done(null, user);
createUser(profile, token, tokenSecret, function(err, user) {
return done(err,user);
});
})
})
);Though Twitter provides authentication, you’re still most likely
going to need a way to store information about the user. In the Twitter
strategy code block, notice that the callback function passed lists
several parameters: token, tokenSecret, profile, and then the
last callback function. Twitter provides the token and tokenSecret parameters
when it responds to the request for authentication. The token and tokenSecret values can
then be used to interact with the individual’s Twitter account—for
example, to republish recent tweets, tweet to her account, or discover
information about her lists and followers. The Twitter API exposes all
the information the user herself sees when she interacts with Twitter
directly.
The profile object, though, is the object we’re interested in here. It contains a wealth of information about the person: her Twitter screen name, full name, description, location, avatar image, number of followers, number of people followed, number of tweets, and so on. It’s this data that we’re going to mine in order to store some relevant information about the user in our local database. We’re not storing a password; OAuth doesn’t expose the individual’s authentication information. Rather, we’re just storing information we may want to use in our web applications to personalize the individual’s experience at our sites.
When the person first authenticates, the application does a lookup
on her Twitter identifier in the local database. If the identifier is
found, an object is returned with the information stored about the
person locally. If it’s not found, a new database record is created for
the person. Two functions are created for this process: findUser and createUser. The findUser function is also used when Passport
deserializes the user from the session:
passport.deserializeUser(function(id, done) {
findUser(id, function(err, user) {
done(err,user);
});
});There is no longer a login page, because Twitter provides the login form. In the application, the only login provided is a link to authenticate via Twitter:
extends layout
block content
h1= title
p
a(href='/auth/twitter') Login with TwitterIf the person isn’t logged into Twitter, she’s presented a login page like the one shown in Figure 15-3.
Once the user is logged in, the web page is then redirected to the application, which then displays the administrative page for the user. Now, however, the page is personalized with data drawn directly from Twitter, including the person’s display name and avatar:
extends layout
block content
h1 #{title} Administration
p Welcome to #{user.name}
p
img(src='#{user.img}',alt='avatar')This data is some of what’s stored when the person first authenticates. If you look into your Twitter account settings page and then click through to the Apps, you’ll see the application among those listed, as shown in Figure 15-4.
Example 15-5 has the complete application code for authenticating the user via Twitter and storing her data in a MySQL database. You can, of course, also store the data in MongoDB, or even Redis, if you persist your Redis data. The Crypto module is no longer needed, because we’re no longer storing passwords—a distinct advantage to authenticating via a third-party service.
var express = require('express')
, flash = require('connect-flash')
, passport = require('passport')
, TwitterStrategy = require('passport-twitter').Strategy
, http = require('http');
var mysql = require('mysql');
var TWITTER_CONSUMER_KEY = "yourkey";
var TWITTER_CONSUMER_SECRET = "yoursecret";
var client = mysql.createClient({
user : 'username',
password : 'password'
});
client.query('USE nodetest2');
function findUser(id, callback) {
var user;
client.query('SELECT * FROM twitteruser WHERE id = ?',
[id], function(err, result, fields) {
if (err) return callback(err);
user = result[0];
console.log(user);
return callback(null,user);
});
};
function createUser(profile, token, tokenSecret, callback) {
var qryString = 'INSERT INTO twitteruser ' +
'(id, name, screenname, location, description,' +
'url, img, token, tokensecret)' +
' values (?,?,?,?,?,?,?,?,?)';
client.query(qryString, [
profile.id,
profile.displayName,
profile.username,
profile._json.location,
profile._json.description,
profile._json.url,
profile._json.profile_image_url,
token,
tokenSecret], function(err, result) {
if (err) return callback(err);
var user = {
id : profile.id,
name : profile.displayName,
screenname : profile.screen_name,
location : profile._json.location,
description: profile._json.description,
url : profile._json.url,
img : profile._json.profile_image_url,
token : token,
tokensecret : tokenSecret};
console.log(user);
return callback(null,user);
});
};
function ensureAuthenticated(req, res, next) {
if (req.isAuthenticated()) { return next(); }
res.redirect('/auth/twitter')
}
passport.serializeUser(function(user, done) {
done(null, user.id);
});
passport.deserializeUser(function(id, done) {
findUser(id, function(err, user) {
done(err,user);
});
});
passport.use(new TwitterStrategy(
{ consumerKey: TWITTER_CONSUMER_KEY,
consumerSecret: TWITTER_CONSUMER_SECRET,
callbackURL: "http://examples.burningbird.net:3000/auth/twitter/callback"},
function(token, tokenSecret,profile,done) {
findUser(profile.id, function(err,user) {
console.log(user);
if (err) return done(err);
if (user) return done(null, user);
createUser(profile, token, tokenSecret, function(err, user) {
return done(err,user);
});
})
})
);
var app = express();
app.configure(function(){
app.set('views', __dirname + '/views');
app.set('view engine', 'jade');
app.use(express.favicon());
app.use(express.logger('dev'));
app.use(express.bodyParser());
app.use(express.methodOverride());
app.use(express.cookieParser('keyboard cat'));
app.use(express.session());
app.use(passport.initialize());
app.use(passport.session());
app.use(flash());
app.use(app.router);
app.use(express.static(__dirname + '/public'));
});
app.get('/', function(req, res){
res.render('index', { title: 'authenticate', user: req.user });
});
app.get('/admin', ensureAuthenticated, function(req, res){
res.render('admin', { title: 'authenticate', user: req.user });
});
app.get('/auth', function(req,res) {
res.render('auth', { title: 'authenticate' });
});
app.get('/auth/twitter',
passport.authenticate('twitter'),
function(req, res){
});
app.get('/auth/twitter/callback',
passport.authenticate('twitter', { failureRedirect: '/login' }),
function(req, res) {
res.redirect('/admin');
});
http.createServer(app).listen(3000);
console.log("Express server listening on port 3000");You can use the same steps you took with the Twitter Passport strategy with other OAuth services. As an example, you can use the exact same code to authenticate the user with Facebook that you used with the Twitter application. The only difference is that you have to supply a Facebook key and secret, rather than the one Twitter provides. Because of the similarity in code and processing, many applications today let you authenticate with a variety of OAuth services.
Passport does its best to reformat the data returned by the different services so that the functionality to process the profile has to change very little. However, you’ll need to investigate the profile returned by each service in order to determine what’s consistently provided before deciding what you do, and don’t, want to store.
Then there’s the issue of the user revoking application access in the service. Of course, the only time this impacts the web application is if the person decides to authenticate with the same application using another service—in which case, her new information is stored, and the application continues on its merry way. The only negative consequence is a now-defunct database record containing the previous authentication information for the person, and it wouldn’t be that much extra work to modify the application to generate an application-specific identifier for her, and update the record if she changes authentication servers. I’ll leave this for an off-book exercise. Now it’s time to look at another aspect of application security: cleaning form data.
As a JavaScript developer, you quickly learned about the
hazards of accepting input from the user and passing it directly to an
eval statement call. As a
web developer, you also learned about the hazards of taking text from
users and appending it directly as a where clause in a SQL statement.
Node applications have all the vulnerability of client-side JavaScript applications, as well as the additional vulnerabilities associated with server-side applications that use database systems, especially relational database systems.
To ensure that your applications are safe, you need to provide good authorization and authentication systems, as described in the last section. But you also need to protect your application against injection attacks and other attempts to use openings in your system to gain access to your important, and confidential, data.
Earlier, the login form accepted text directly from the user and
pasted it into a SQL query. This isn’t the wisest thing to do, because the
person could attach text that can cause harm in a SQL database. For
instance, if the text is forming the data in a WHERE clause, and is appended directly to a
WHERE clause string:
var whereString = "WHERE name = " + name;
and the name string contains the following:
'johnsmith; drop table users'
You could have a problem.
The same occurs when processing text or JSON from the user or source
in a JavaScript eval statement—the
incoming string could be more harmful than helpful.
Both types of vulnerabilities demand that we scrub input before using it in circumstances that can cause harm. Both also require that we make use of tools and techniques to ensure the safest possible applications.
One simple rule can make a difference in your JavaScript
applications, regardless of whether they’re Node or not: don’t use
eval. The eval function is the least restrictive, most
permissive component of JavaScript, and we should view its use with fear
and trepidation.
In most cases, we don’t need to use eval. The one instance where we might be
tempted to use it is when we’re converting a JSON string into an object.
However, a simple approach to protect against a JavaScript injection
attack when converting a string into an object is to use JSON.parse, rather than
eval, to process incoming JSON. An
eval statement isn’t discriminatory
about what’s included in the text, while JSON.parse validates that the JSON is
only JSON:
var someObj = JSON.parse(jsonString);
Since Node is using the V8 engine, we know that we have access to the JSON object, so we don’t have to worry about cross-browser workarounds.
A second simple rule for developing web applications is to minimize the opportunities for writing free text in a web form. Provide drop-down selections and checkboxes or radio buttons rather than open text fields. You’ll not only ensure safer data, but you’ll most likely ensure more consistent and reliable data, too.
Years ago, I was cleaning up a database table where all the data came from a form that the client (aeronautical engineers) used. All the inputs in the form were open text. One field required part identifiers, if this data was applicable. The “if applicable” part was the application’s downfall.
The engineers decided to use the field for “notes and whatever,” because the form didn’t have such a field designated. I ended up finding data ranging from part identifiers to a reminder from one engineer about a lunch reservation with a vendor. It was entertaining reading, but not particularly helpful to the company. And it was extremely difficult to clean, because part numbers from different vendors weren’t similar enough that we could use regular expressions to clean up the data.
This is an example of unintentional harm. An example of intentional harm was described in the last section, where a SQL statement to drop a database table was attached to the user’s login name.
If you must require free text from a user for fields, such as his username when he’s logging into a system, then you’re going to want to scrub the data before using it in a data update or query.
If you must support text input fields, scrub the data
before you use it. The node-mysql module provides a method, client.escape, that escapes the incoming text
and protects against potential SQL injection attacks. You can also
disable potentially destructive functionality. In Chapter 10’s discussion on
MongoDB, I mentioned how you can flag that a JavaScript function should
be serialized when stored.
You can also use a validation tool that not only ensures that incoming data is safe, but also that it’s consistent. One such validation tool that stands out is node-validator.
Install node-validator using npm:
npm install node-validator
The module exports two objects, check and sanitize:
var check = require('validator').check,
sanitize = require('validator').sanitize;You can check that the incoming data is of a format consistent with its use, such as checking to ensure that incoming text is an email:
try {
check(email).isEmail();
} catch (err) {
console.log(err.message); // Invalid email
}The node-validator application throws an error whenever the data
doesn’t check out. If you want a better error message, you can provide
it as an optional second parameter in the check method:
try {
check(email, "Please enter a proper email").isEmail();
} catch (err) {
console.log(err.message); // Please enter a proper email
}The sanitize filter ensures
that the string is sanitized according to whatever method you
use:
var newstr = sanitize(str).xss(); // prevent XSS attack
Example 15-6 uses both objects to check and sanitize three different strings.
var check = require('validator').check,
sanitize = require('validator').sanitize;
var email = 'shelleyp@burningbird.net';
var email2 = 'this is a test';
var str = '<SCRIPT SRC=http://ha.ckers.org/xss.js></SCRIPT>';
try {
check(email).isEmail();
check(email2).isEmail();
} catch (err) {
console.log(err.message);
}
var newstr = sanitize(str).xss();
console.log(newstr);The result of running this application is:
Invalid email [removed][removed]
There’s also Express middleware support for node-validator: express-validator. When you include this in your Express application:
var expressValidator = require('express-validator');
...
app.use(expressValidator);You can access the check, sanitize, and other
provided methods directly on the request object:
app.get('/somepage', function (req, rest) {
...
req.check('zip', 'Please enter zip code').isInt(6);
req.sanitize('newdata').xss();
...
});The vm Node module provides a way to safely sandbox JavaScript. It provides access to a new V8 virtual machine in which you can run JavaScript passed as a parameter.
There are a couple of approaches to using vm. The first is using
vm.createScript with the script passed
as a parameter to the method. The vm module compiles it and returns a
script object representing the script:
var vm = require('vm');
var script_obj = vm.createScript(js_text);You can then run the script in a separate context, passing in any data it might need as an optional object:
script_obj.runInNewContext(sandbox);
Example 15-7 has a small but complete example of using vm to compile a JavaScript statement, utilizing two sandbox object properties, and creating a third.
var vm = require('vm');
var util = require('util');
var obj = { name: 'Shelley', domain: 'burningbird.net'};
// compile script
var script_obj = vm.createScript("var str = 'My name is ' + name + ' at ' + domain",
'test.vm');
// run in new context
script_obj.runInNewContext(obj);
// inspect sandbox object
console.log(util.inspect(obj));Running the application returns the following output:
{ name: 'Shelley',
domain: 'burningbird.net',
str: 'My name is Shelley at burningbird.net' }The object passed to the new context is the point of connection
between the calling application and the sandboxed script. The script has
no other access to the parent context. If you tried to use a global
object, such as console, in your
sandboxed JavaScript, you’d get an error.
To demonstrate, Example 15-8 modifies the Example 15-7 to load a script in
from a file and run it. The script being loaded is nothing but a slight
variation of what we had in the preceding example, with the addition of a
console.log request:
var str = 'My name is ' + name + ' from ' + domain; console.log(str):
The vm.createScript can’t read in
the file directly. The second (optional) parameter isn’t an actual file,
but a name used as a label in a stack trace—it’s for debugging purposes
only. We’ll need to use the filesystem’s readFile to read in the
script file contents.
var vm = require('vm');
var util = require('util');
var fs = require('fs');
fs.readFile('suspicious.js', 'utf8', function(err, data) {
if (err) return console.log(err);
try {
console.log(data);
var obj = { name: 'Shelley', domain: 'burningbird.net'};
// compile script
var script_obj = vm.createScript(data, 'test.vm');
// run in new context
script_obj.runInNewContext(obj);
// inspect sandbox object
console.log(util.inspect(obj));
} catch(e) {
console.log(e);
}
});Running the application returns the following:
[SyntaxError: Unexpected token :]
The error occurs—and rightly so—because there is no console object within the virtual machine; it’s a V8 virtual machine, not a Node virtual machine. We’ve seen how we can implement any process with child processes in a Node application. We certainly don’t want to expose that kind of power to sandboxed code.
We can run the script within a V8 context, which means it has access
to the global object. Example 15-9 re-creates the
application from Example 15-8, except this time
the runInContext method is
used, with a context object passed to the method. The context object is
seeded with the object that has the parameters the script is expecting.
Printing out the inspection results on the object after the script
execution, though, shows that the newly defined property, str, is no longer present. We need to inspect
the context to see the object as it exists both in the current context and
the sandbox context.
var vm = require('vm');
var util = require('util');
var fs = require('fs');
fs.readFile('suspicious.js', 'utf8', function(err, data) {
if (err) return console.log(err);
try {
var obj = { name: 'Shelley', domain: 'burningbird.net' };
// compile script
var script_obj = vm.createScript(data, 'test.vm');
// create context
var ctx = vm.createContext(obj);
// run in new context
script_obj.runInContext(ctx);
// inspect object
console.log(util.inspect(obj));
// inspect context
console.log(util.inspect(ctx));
} catch(e) {
console.log(e);
}
});The examples used a precompiled script block, which is handy if you’re going to
run the script multiple times. If you want to run it just once, though,
you can access both the runInContext and
runInThisContext methods
directly off the virtual machine. The difference is that you have to pass
in the script as the first parameter:
var obj = { name: 'Shelley', domain: 'burningbird.net' };
// create context
var ctx = vm.createContext(obj);
// run in new context
vm.runInContext(data,ctx,'test.vm');
// inspect context
console.log(util.inspect(ctx));Again, within a supplied context, the sandbox script does have
access to a global object defined via createContext, seeded with any data the
sandboxed code needs. And any resulting data can be pulled from this
context after the script is run.
At some point in time, you’re going to want to take your Node application from development and testing to production. Depending on what your application does and what services it provides (or needs), the process can be simple, or it can be very complex.
I’m going to briefly touch on the possible combinations and issues related to production deployment of a Node application. Some require only minimal effort on your part, such as installing Forever to ensure that your Node application runs, well, forever. Others, though, such as deploying your application to a cloud server, can take considerable time and advance planning.
Taking your application from development to production isn’t overly complicated, but you do need to prepare for the move, and make sure that your application is staged in such a way as to maximize its performance and minimize any potential downtimes.
Deploying a Node application has several prerequisites:
Your application must be well tested by users as well as developers.
You need to be able to deploy your application safely, and ensure well-coordinated changes and fixes.
Your application must be secure.
You need to ensure that your application restarts if some event causes a failure.
You may need to integrate your Node applications with other servers, such as Apache.
You must monitor your application’s performance, and be ready to adjust application parameters if the performance begins to degrade.
You need to take the fullest advantage of your server’s resources.
Chapter 14 covered unit, acceptance, and performance testing, and Chapter 15 covered security. Here, we’ll look at implementing the other necessary components of deploying a Node application to production on your own server.
Each Node module has a package.json file that contains information about the module, as well as code dependencies the module might have. I briefly touched on the package.json file with the discussion of modules in Chapter 4. Now I want to take a closer look at this file, especially as you can use it to deploy your application.
As its name implies, package.json must be proper JSON. You can
jump-start the package.json process
by running npm init and answering the
questions. When I ran npm init in
Chapter 4, I didn’t provide any
dependencies, but most Node applications will have them.
As a case in point, the widget application we built over several chapters in the book is an example of an application, albeit a small one, that we might consider deploying. What would its package.json look like?
I’m not covering all the possible data values in package.json, only those meaningful for a Node application.
To start, we need to provide the application’s basic information, including its name, version, and primary author:
{
"name": "WidgetFactory",
"preferGlobal": "false",
"version": "1.0.0",
"author": "Shelley Powers <shelley.just@gmail.com> (http://burningbird.net)",
"description": "World's best Widget Factory",Note that the name property
value cannot have any whitespace.
The author values could also be split out, as follows:
"author": { "name": "Shelley Powers",
"email": "shelley.just@gmail.com",
"url": "http://burningbird.net"},though it is simpler to use the single value format.
If there are other contributors to the application, you can list
them out in an array with the contributors keyword, with each person
identified in the same manner as the author.
If the Widget Factory had a binary application, you could list it
with the bin property. An example of
the use of bin is in the Nodeload
(covered in Chapter 14)
package.json:
"bin": {
"nodeload.js": "./nodeload.js",
"nl.js": "./nl.js"
},What this setting tells me is that when the module is installed
globally, I can run the Nodeload application just by typing nl.js.
The widget application doesn’t have a command-line tool. It also
doesn’t have any scripts. The scripts
keyword identifies any scripts that are run during the package life
cycle. There are several events that can happen during the life cycle,
including preinstall, install, publish, start, test, update, and so on, and
scripts can be run with each.
If you issue the following npm command in a Node application or module directory:
npm test
the script test.js is run:
"scripts": {
"test": "node ./test.js"
},You should include any unit test script for the widget application
in scripts, in addition to any other
script necessary for installation (such as scripts to set up the
environment for the application). Though the Widget Factory doesn’t have
a start script yet, your application should, especially if it is going
to be hosted in a cloud service (discussed later in the chapter).
If you don’t provide a script for some values, npm provides defaults. For the start script, the default is to run the application with Node:
node server.js
if the application has a server.js file in the root of the package.
The repository property
provides information about the tool used to manage the source code
control for the application, and the url property provides the location of the
source, if it is published online:
"repository": {
"type": "git",
"url": "https://github.com/yourname/yourapp.git"
},The repository property isn’t
essential unless you’re publishing your application source (though you
can restrict source access to a specific group of people). One of the
advantages of providing this information is that users can access your
documentation with npm docs:
npm docs packagenameOn my Ubuntu system, I first set the browser configuration option to Lynx:
npm config set browser lynx
Then I opened the docs for Passport, the authentication module covered in Chapter 15:
npm docs passport
The repository setting helps
npm find the documentation.
One of the more important designations in the package.json file is what version of Node
your application can run in. You specify this with the engine property. In the case of the Widget
Factory, it’s been tested in stable release 0.6.x and 0.8.2, which means
it should work with future versions of 0.8, too. Being ever hopeful, I
set the engine option to:
"engines": {
"node": ">= 0.6.0 < 0.9.0"
},The widget application has several different dependencies, for
both production and development environments. These are listed
individually—the former in devDependencies, the latter in dependencies. Each module dependency is listed
as the property, and the version needed as the value:
"dependencies": {
"express": "3.0",
"jade": "*",
"stylus": "*",
"redis": "*",
"mongoose": "*"
},
"devDependencies": {
"nodeunit": "*"
}If there are any operating system or CPU dependencies, we can also list these:
"cpu" : ["x64", "ia32"], "os": ["darwin","linux"]
There are some publishing values, including private, to ensure that the application isn’t
accidentally published:
"private": true,
And publishConfig is used for
setting npm configuration values.
By the time we’re done, the Widget Factory package.json file looks like Example 16-1.
{
"name": "WidgetFactory",
"version": "1.0.0",
"author": "Shelley Powers <shelley.just@gmail.com> (http://burningbird.net)",
"description": "World's best Widget Factory",
"engines": {
"node": ">= 0.6.0"
},
"dependencies": {
"express": "3.0",
"jade": "*",
"stylus": "*",
"redis": "*",
"mongoose": "*"
},
"devDependencies": {
"nodeunit": "*"
},
"private": true
}We can test the package.json
file by copying the Widget Factory’s code to a new location and then
typing npm install -d to see if all the dependencies are
installed and the application
runs.
You do the best you can with your application. You test it thoroughly, and you add error handling so that errors are managed gracefully. Still, there can be gotchas that come along—things you didn’t plan for that can take your application down. If this happens, you need to have a way to ensure that your application can start again, even if you’re not around to restart it.
Forever is just such a tool—it ensures that your application restarts if it crashes. It’s also a way of starting your application as a daemon that persists beyond the current terminal session. Forever can be used from the command line or incorporated as part of the application. If you use it from the command line, you’ll want to install it globally:
npm install forever -g
Rather than start an application with Node directly, start it with Forever:
forever start -a -l forever.log -o out.log -e err.log httpserver.js
The preceding command starts a script, httpserver.js, and specifies the names for the Forever log, the output log, and the error log. It also instructs the application to append the log entries if the logfiles already exist.
If something happens to the script to cause it to crash, Forever restarts it. Forever also ensures that a Node application continues running, even if you terminate the terminal window used to start the application.
Forever has both options and actions. The start value in the command line just shown is
an example of an action. All available actions are:
startStarts a script
stopStops a script
stopallStops all scripts
restartRestarts the script
restartallRestarts all running Forever scripts
cleanlogsDeletes all log entries
logsLists all logfiles for all Forever processes
listLists all running scripts
configLists user configurations
set
<key>
<val>Sets configuration key value
clear
<key>Clears configuration key value
logs
<script|index>Tails the logs for <script|index>
columns add
<col>Adds a column to the Forever list output
columns rm
<col>Removes a column from the Forever list output
columns set
<cols>Sets all columns for the Forever list output
An example of the list output
is the following, after httpserver.js is started as a Forever
daemon:
info: Forever processes running data: uid command script forever pid logfile uptime data: [0] ZRYB node httpserver.js 2854 2855 /home/examples/.forever/forever.log 0:0:9:38.72
There are also a significant number of options, including the
logfile settings just demonstrated, as well as running the script
(-s or --silent), turning on Forever’s verbosity (-v or --verbose), setting the script’s source
directory (--sourceDir), and others,
all of which you can find just by typing:
forever --help
You can incorporate the use of Forever directly in your code, as demonstrated in the documentation for the application:
var forever = require('forever');
var child = new (forever.Monitor)('your-filename.js', {
max: 3,
silent: true,
options: []
});
child.on('exit', this.callback);
child.start();Additionally, you can use Forever with Nodemon (introduced in
Chapter 14), not only to
restart the application if it unexpectedly fails, but also to ensure
that the application is refreshed if the source is updated. You simply
wrap Nodemon within Forever and specify the --exitcrash option to
ensure that if the application crashes, Nodemon exits cleanly, passing
control to Forever:
forever nodemon --exitcrash httpserver.js
If the application does crash, Forever starts Nodemon, which in turn starts the Node script, ensuring that not only is the running script refreshed if the source is changed, but also that an unexpected failure doesn’t take your application permanently offline.
If you want your application to start when your system is
rebooted, you need to set it up as a daemon. Among the examples provided
for Forever is one labeled initd-example. This example is the basis of a
script that starts your application with Forever when the system is
rebooted. You’ll need to modify the script to suit your environment and
also move it to /etc/init.d, but
once you’ve done so, even if the system is restarted, your application
restarts without your intervention.
All the examples in this book start as a port other than 80, the default web service port. Some start at port 3000, others at port 8124. In my system, I have to use another port because Apache processes web requests on port 80. People are not going to want to have to specify a port, though, when they access a website. What we need is a way for Node applications to coexist with another web service, be it Apache, Nginx, or another web server.
If the system is running Apache, and you aren’t able to change the Apache port, you can use an .htaccess file to rewrite the web requests for Node, redirecting the applications to the proper port without the user being aware of the redirection:
<IfModule mod_rewrite.c>
RewriteEngine on
# Redirect a whole subdirectory:
RewriteRule ^node/(.+) http://examples.burningbird.net:8124/$1 [P]
</IfModule>If you have the proper permissions, you can also create a subdomain specifically for your Node application and have Apache proxy all requests to the Node application. This is an approach used in other environments of this type, such as running Apache and Tomcat together:
<VirtualHost someipaddress:80>
ServerAdmin admin@server.com
ServerName examples.burningbird.net
ServerAlias www.examples.burningbird.net
ProxyRequests off
<Proxy *>
Order deny,allow
Allow from all
</Proxy>
<Location />
ProxyPass http://localhost:8124/
ProxyPassReverse http://localhost:8124/
</Location>
</VirtualHost>These will work, and the performance should be more than acceptable if you don’t expect your Node application to be accessed frequently. The problem with both approaches, though, is that all requests are channeled through Apache, which spins off a process to handle each. The whole point of Node is to avoid this costly overhead. If you expect your Node application to get heavy use, another approach—but one that’s dependent on your having root control of your system—is to modify the Apache ports.conf file and change which port Apache listens to, from:
Listen 80
to whatever your preferred port is, such as 78:
Listen 78
Then use a Node proxy, like http-proxy, to listen for and proxy requests to the appropriate port. As an example, if Apache is to handle all requests to subdirectory public, and Node handles all requests to node, you could create a standalone proxy server that takes incoming requests and routes them accordingly:
var httpProxy = require('http-proxy');
var options = {
router: {
'burningbird.net/public_html' : '127.0.0.1:78',
'burningbird.net/node' : '127.0.0.1:3000'
}
};
var proxyServer = httpProxy.createServer(options);
proxyServer.listen(80);The user never sees any of the port magic that is happening behind the scenes. The http-proxy module also works with WebSocket requests, as well as HTTPS.
Why continue to use Apache? Because applications such as Drupal and others use .htaccess files to control access to their contents. In addition, several subdomains at my site use .htpasswd to password-protect the contents. These are all examples of Apache constructs that have no equivalence in Node server applications.
We have a long-established history with Apache. Tossing it aside in favor of Node applications is more complicated than just creating a static server using Express.
There are additional steps you can take to boost the performance of your Node application, depending on your system’s resources. Most are not trivial, and all are beyond the scope of this book.
If your system is multicore, and you’re willing to use experimental technology, you can use Node clustering. The Node.js documentation contains an example of clustering, whereby each process is spawned on a different CPU, though all are listening for incoming requests on the same port.
In some future version of Node, we’ll be able to automatically
take advantage of a multicore environment just by passing a parameter of
--balance when starting
the application.
You can also take advantage of a distributed computing architecture, utilizing a module such as hook.io.
There are tricks and techniques to improve your Node application’s performance. Most will take a considerable amount of work. Instead, you can host your application on a cloud service and take advantage of whatever performance improvements the host provides. We’ll go over that option next.
An increasingly popular choice for running an application is deploying the application to a cloud service rather than hosting it on your own servers. The reasons for doing so are many and include:
Enhanced security (it’s like having your own personal security team)
24-hour monitoring (so you can go to bed)
Immediate scalability (if your application suddenly peaks in popularity, your server doesn’t crash)
Cost (it frequently can be cheaper to host in a cloud service rather than your own server)
Deployment tools (clouds provide tools that can simplify Node app deployment)
Being cool (the only reason on this list not to deploy your Node application to a cloud service)
Of course, there are disadvantages, too. One is the necessary limitations on what you can do with your application. For instance, if your application wants to use a tool like ImageMagick, most clouds won’t have this installed or allow you to install it. In addition, if your application is based in Node 6.x (or 8.x, or whatever), the cloud service may only be set up for another version (such as 4.x).
It can also be cumbersome to set up your application on a cloud. Some cloud services provide tools so that deployment basically consists of typing in a location and pushing a button. Others, though, can require a great deal of preparation—preparation, I should add, that may or may not be well documented.
In this last section, I’m going to briefly introduce some of the more commonly used cloud services that provide hosting for Node applications, and touch on any aspect that makes one unique from the others.
If your environment is Windows-based, and you’ve used Windows functionality previously (such as developing applications with .NET), then you’re definitely going to want to explore hosting a Node application in Windows Azure. To make it simpler to post Node applications to Azure, you can use the Cloud9 IDE (integrated development environment) in order to post a project.
Cloud9 is a web-based IDE that can, among other things, interface with your GitHub account. When you open the application, you’re presented with the project management interface, as shown in Figure 16-1.
From the project management page, clicking on a project opens it into a separate page, where you can select any of the project files for editing, as shown in Figure 16-2. You can clone an existing project in GitHub directly from the IDE.
You can add and edit files, and then run the application directly in the IDE. Cloud9 also supports debugging.
The Cloud9 IDE is free to start working with an application, but you’ll need to sign up for premium service if you want to deploy. It supports a variety of languages, though it’s primarily focused on HTML and Node applications. It also supports multiple repositories, including GitHub, Bitbucket, Mercurial repositories, Git repositories, and FTP servers.
The Cloud9 IDE interface simplifies moving an application to Azure (and other services—more on this a little later). If you have an Azure account, moving a Node application to Azure is as simple as clicking the Deploy button and providing information in the dialogs that open. Be forewarned: you should be familiar with Azure first. There is a 90-day free trial to try out the service before committing.
How much Azure costs is dependent on the number of compute instances, the size of the SQL Server database instance, the blob storage amount, and bandwidth. The service also provides a decent set of documents to get you started, including a nice tutorial on creating an Express application on Azure.
I mentioned a few paragraphs back that Cloud9 IDE can deploy to multiple clouds. It supports three at this time:
Windows Azure
Heroku
Joyent
I’ll introduce you to the Joyent Development SmartMachine and Heroku next.
Joyent SmartMachines are virtual machines, running either Linux or Windows, that come prebuilt and optimized for running a Node application. The folks at Joyent also provide a Node.js Development SmartMachine that lets Node developers host an application in a cloud service without any charge. If you’re ready to go to production, then you can upgrade to the production environment.
Joyent provides a detailed how-to on getting started with a Node.js Development SmartMachine. It includes the following steps:
Create a Joyent cloud account.
Create an SSH (secure shell) key if you don’t already have one.
Update the ~/.ssh/config file to reflect the unique port number for your machine.
Deploy the application to the SmartMachine with Git.
Ensure that the application has a package.json file, and identify a start script.
Again, the Node.js Development SmartMachine is for development purposes only.
So, what does the Joyent Development SmartMachine provide? Well, for a start, no upfront cost. This is actually a smart move—it gives developers a chance to try cloud hosting without significant cost.
Joyent also provides for simplified Git deployment to multiple machines at the same time, as well as npm support to manage application dependencies.
I like cloud services where you don’t have to pay anything in order to try them out, and a Heroku account is both free and instant. If you decide to use the service for your production system, it’s configurable, just like Azure. The cloud server also has very good documentation, and tools you can install in your development environment to simplify deploying the application to Heroku (if you’re not using Cloud9 IDE).
The cloud service comes with prepackaged add-ons you can add to your account, including support for one of my favorite data stores, Redis. The concept of the add-on in Heroku is very well managed, and many of the add-ons are also free while you’re trying them out.
The Heroku documentation, as mentioned, is some of the best among
the cloud servers, and the development tools really simplify deployment.
You create the application, write the package.json file listing out dependencies,
declare a process type via a simple Procfile (which usually has
something like web: node app.js), and
then start the application with one of the tools supplied as part of the
Heroku toolkit.
To deploy, commit the application to Git, and then deploy the application using Git. Simple.
Amazon Elastic Compute Cloud, or EC2, has some history behind it now, which makes it an attractive option. It also doesn’t impose a lot of requirements on the Node developer looking to host an application in this cloud service.
Setting up on Amazon EC2 is little different than setting up on a more traditional VPN (virtual private network). You specify your preferred operating system, update it with the necessary software to run Node, deploy the application using Git, and then use a tool like Forever to ensure that the application persists.
The Amazon EC2 service has a website that can make it simple to set up the instance. It doesn’t provide a free service like Joyent does, but the charges are reasonable—about 0.02 an hour while you’re trying out the service.
If your application is using MongoDB, the MongoDB website provides very detailed Amazon EC2 setup instructions.
Nodejitsu is currently in beta, and is offering beta accounts. Like many of the other excellent cloud services, it lets you try out the service for free.
Like Heroku, Nodejitsu provides a tool, jitsu, to simplify the deployment process. You install it using npm. Log into Nodejitsu with jitsu, and deploy simply by typing:
jitsu deploy
The tool gets what it needs from the package.json file and asks a couple of minor questions, and then you’re good to go.
Nodejitsu also provides its own web-based IDE, though I haven’t had a chance to try it out. It does seem to be much simpler than Cloud9 IDE.
Git is a version control system, similar to CVS (Concurrent Versioning System) or Subversion. Where Git differs from the other, more conventional version control systems is how it maintains the source as you make modifications. A version control system like CVS stores version changes as differences from a base file. Git, on the other hand, stores snapshots of the code at a specific point in time. If a file isn’t changed, Git just links to the previous snapshot.
To begin using Git, you first need to install it on your system. There are binaries for Windows and Mac OS X, as well as source code for various flavors of Unix. Installing it on my Linux (Ubuntu 10.04) server required only one command:
sudo apt-get install git
All dependencies are automatically downloaded and installed.
The commands from this point on assume you’re using a Unix-based terminal to enter them. There is a graphical interface for Git on Windows. You’ll need to follow the documentation that comes with the interface to set up your system, but the general procedures are the same in all environments.
Once Git is installed, it needs to be configured. You’ll need to provide a Git username (typically, your first and last name) and an email address. These form the two components of the commit author, used to mark your edits:
git config --global user.name "your name" git config --global user.email "your email"
Since you’re going to be working with GitHub, the hosting service that houses most (if not all) Node modules, you’re also going to need to set up a GitHub account. You can use whatever GitHub username you want—it doesn’t have to match the username you just specified. You’ll also need to generate an SSH (secure shell) key to provide GitHub, following the documentation outlined in the GitHub help documentation.
Most Git tutorials start you out by creating a simple repository (or repo to use common terminology) of your own work. Since we’re interested mainly in Git with Node, we’ll start out by cloning an existing repository rather than creating our own. Before you can clone the source, though, you must first fork (obtain a working snapshot) the repository at the GitHub website by clicking the Fork button located on the upper-right side of the repository’s main GitHub web page, as shown in Figure A-1.
Then you can access the forked repository in your profile. You’ll also
access the Git URL in the newly forked
repository web page. For instance, when I forked the node-canvas module (covered in Chapter 12), the URL was
git@github.com:shelleyp/node-canvas.git. The command to clone
the forked repository is git clone
URL:
git clone git@github.com:shelleyp/node-canvas.git
You can also clone over HTTP, though the GitHub folks don’t recommend it. However, it is a good approach to use if you want a read-only copy of the repository source because you want examples and other material that may not be included when you install the module with npm (or if you want to access a copy of the module in work that hasn’t yet been pushed out to npm).
Access the HTTP read-only URL from each repository’s web page, such as the following for node-canvas:
git clone https://github.com/username/node-whatever.git
You can also install a module by specifying a Git URL:
npm install git://github.com/username/node-whatever.git
Now you have a copy of the node-canvas repository (or whatever
repository you want to access). You can make changes in any of the source
files if you wish. You add new or changed files by issuing the command
git add, and then commit those changes by
issuing git commit (using the –m flag to provide a brief comment about the
change made):
git addsomefile.js git commit -m 'note about what this change is'
If you want to see if the file is staged and ready to commit, you can
type the git status command:
git status
If you want to submit the changes to be included back as part of the original repository, you’ll issue a pull request. To do so, open the forked repository on which you want to issue the request in your browser, and look for the button labeled Pull Request, as shown in Figure A-2.
Clicking the Pull Request link opens up a Pull Request preview pane, where you can enter your name and a description of the change, as well as preview exactly what’s going to be committed. You can change the commit range and destination repository at this time.
Once satisfied, send the request. This puts the item in the Pull Request queue for the repository owner to merge. The repository owner can review the change; have a discussion about the change; and, if he decides to merge the request, do a fetch and merge of the change, a patch and apply, or an automerge.
GitHub has documentation on how to merge in changes, as well as other aspects of using Git with the hosting site.
If you create your own Node module and want to share it with others, you’ll want to create a repository. You can do this through GitHub, too, by clicking the New Repository button from your main GitHub web page and providing information about the module, including whether it is private or public.
Initialize an empty repository using the git
init command:
mkdir ~/mybeautiful-module cd ~/mybeautiful-module git init
Provide a README for the repository, using your favorite text editor. This is the file that is displayed when a user clicks Read More in a module page at GitHub. Once the file is created, add it and commit it:
git add README git commit -m 'readme commit'
To connect your repository to GitHub, you’ll need to establish a remote repository for the module and push the commits to it:
git remote add origin git@github.com:username/MyBeautiful-Module.git
git push -u origin masterOnce you’ve pushed your new module to GitHub, you can begin the fun of promoting it by ensuring that it gets listed in the Node module listings as well as the npm registry.
This is a quick run-through of the documentation that you can find at the GitHub website, under the Help link.
A link in an index entry is displayed as the section title in which that entry appears. Because some sections have multiple index markers, it is not unusual for an entry to have several links to the same section. Clicking on any link will take you directly to the place in the text in which the marker appears.
Shelley Powers has been working with, and writing about, web technologies--from the first release of JavaScript to the latest graphics and design tools--for more than 12 years. Her recent O'Reilly books have covered the semantic web, Ajax, JavaScript, and web graphics. She's an avid amateur photographer and web development aficionado, who enjoys applying her latest experiments on her many web sites.
The animal on the cover of Learning Node is a hamster rat (Beamys). There are two species of hamster rats: the greater hamster rat (Beamys major) and the lesser hamster rat (Beamys hindei).
The hamster rat inhabits the African forests from Kenya to Tanzania. This large rodent prefers to make its home in moist environments: along riverbanks and in thickly-forested areas. It thrives in coastal or mountainous regions, although deforestation threatens its natural habitat. Hamster rats live in multichambered burrows and are excellent climbers.
This rodent has a very distinct appearance: it can be 7 to 12 inches long and weigh up to a third of a pound. It has a short head and gray fur overall, with a white belly and a mottled black and white tail. The hamster rat, like other rodents, has a variable diet; it possesses cheek pouches for food storage.
The cover image is from Shaw’s Zoology. The cover font is Adobe ITC Garamond. The text font is Linotype Birka; the heading font is Adobe Myriad Condensed; and the code font is LucasFont’s TheSansMonoCondensed.
| Revision History | |
| 2012-08-24 | First release |
Copyright © 2012 Shelley Powers
O’Reilly books may be purchased for educational, business, or sales promotional use. Online editions are also available for most titles (http://my.safaribooksonline.com). For more information, contact our corporate/institutional sales department: 800-998-9938 or corporate@oreilly.com.
Nutshell Handbook, the Nutshell Handbook logo, and the O’Reilly logo are registered trademarks of O’Reilly Media, Inc. Learning Node, the image of a hamster rat, and related trade dress are trademarks of O’Reilly Media, Inc.
Many of the designations used by manufacturers and sellers to distinguish their products are claimed as trademarks. Where those designations appear in this book, and O’Reilly Media, Inc., was aware of a trademark claim, the designations have been printed in caps or initial caps.
1005 Gravenstein Highway North
Sebastopol, CA 95472
Beijing • Cambridge • Farnham • Köln • Sebastopol • Tokyo
Supplemental files and examples for this book can be found at http://examples.oreilly.com/0636920024606/. Please use a standard desktop web browser to access these files, as they may not be accessible from all ereader devices.
All code files or examples referenced in the book will be available online. For physical books that ship with an accompanying disc, whenever possible, we’ve posted all CD/DVD content. Note that while we provide as much of the media content as we are able via free download, we are sometimes limited by licensing restrictions. Please direct any questions or concerns to booktech@oreilly.com.
You picked the perfect time to learn Node.
The technology evolving around Node is still young and vibrant, with interesting new variations and twists popping up on a regular basis. At the same time, the technology has reached a level of maturity that assures you your time learning Node will be well spent: installation has never been easier, even on Windows; the “best of breed” modules are beginning to surface from the seeming hundreds available for use; the infrastructure is becoming robust enough for production use.
There are two important things to keep in mind when you work with Node. The first is that it is based in JavaScript, more or less the same JavaScript you’re used to working with in client-side development. True, you can use another language variation, such as CoffeeScript, but JavaScript is the lingua franca of the technology.
The second important thing to remember is that Node isn’t your ordinary JavaScript. This is server-side technology, which means some of the functionality—and safeguards—you’ve come to expect in your browser environment just won’t be there, and all sorts of new and potentially very unfamiliar capabilities will.
Of course, if Node were like JavaScript in the browser, what fun would that be?
If you explore the source code for Node, you’ll find the source code for Google’s V8, the JavaScript (technically, ECMAScript) engine that’s also at the core of Google’s Chrome browser. One advantage to Node.js, then, is that you can develop Node applications for just one implementation of JavaScript—not half a dozen different browsers and browser versions.
Node is designed to be used for applications that are heavy on input/output (I/O), but light on computation. More importantly, it provides this functionality directly out of the box. You don’t have to worry about the application blocking any further processing while waiting for a file to finish loading or a database to finish updating, because most of the functionality is asynchronous I/O by default. And you don’t have to worry about working with threads, because Node is implemented on a single thread.
Asynchronous I/O means that applications don’t wait for an input/output process to finish before going on to the next step in the application code. Chapter 1 goes into more detail on the asynchronous nature of Node.
Most importantly, Node is written in a language that many traditional web developers are familiar with: JavaScript. You may be learning how to use new technologies, such as working with WebSockets or developing to a framework like Express, but at least you won’t have to learn a new language along with the concepts. This language familiarity makes it a lot easier to just focus on the new material.
One of the challenges associated with working with Node is that there is an assumption that most people coming into Node development have come from a Ruby or Python environment, or have worked with Rails. I don’t have this assumption, so I won’t explain a Node component by saying it’s “just like Sinatra.”
This book’s only assumption is that you, the reader, have worked
with JavaScript and are comfortable with it. You don’t have to be an
expert, but you should know what I’m talking about when I mention
closures, and have worked with Ajax and are familiar
with event handling in the client environment. In addition, you’ll get
more from this book if you have done some traditional web development and
are familiar with concepts such as HTTP methods (GET and POST), web sessions, cookies, and so on. You’ll
also need to be familiar with working either with the Console in Windows,
or the Unix command line in Mac OS X or Linux.
You’ll also enjoy the book more if you’re interested in some of the new technologies such as WebSockets, or working with frameworks to create applications. I cover these as a way of introducing you to how Node can be used in real-world applications.
Most importantly, as you progress through the book, keep an open mind. Be prepared to hit an occasional alpha/beta wall and run into the gotchas that plague a dynamic technology. Above all, meet the prospect of learning Node with anticipation, because it really can be a lot of fun.
You don’t have to read this book’s chapters in order, but there are paths through the book that are dependent on what you’re after and how much experience you have with Node.
If you’ve never worked with Node, then you’re going to want to start with Chapter 1 and read through at least Chapter 5. These chapters cover getting both Node and the package manager (npm) installed, how to use them, creating your first applications, and utilizing modules. Chapter 5 also covers some of the style issues associated with Node, including how to deal with Node’s unique approach to asynchronous development.
If you have had some exposure to Node, have worked with both the built-in Node modules and a few external ones, and have also used REPL (read-eval-print loop—the interactive console), you could comfortably skip Chapter 1–Chapter 4, but I still recommend starting no later than Chapter 5.
I incorporate the use of the Express framework, which also utilizes the Connect middleware, throughout the book. If you’ve not worked with Express, you’re going to want to go through Chapter 6–Chapter 8, which cover the concepts of routing, proxies, web servers, and middleware, and introduce Express. In particular, if you’re curious about using Express in a Model-View-Controller (MVC) framework, definitely read Chapter 7 and Chapter 8.
After these foundation chapters, you can skip around a bit. For instance, if you’re primarily working with key/value pairs, you’ll want to read the Redis discussion in Chapter 9; if you’re interested in document-centric data, check out Chapter 10, which introduces how to use MongoDB with Node. Of course, if you’re going to work only with a relational database, you can go directly to Chapter 11 and skip the Redis and MongoDB chapters, though do check them out sometime—they might provide a new viewpoint to working with data.
After those three data chapters, we get into specialized application use. Chapter 12 focuses purely on graphics and media access, including how to provide media for the new HTML5 video element, as well as working with PDF documents and Canvas. Chapter 13 covers the very popular Sockets.io module, especially for working with the new web socket functionality.
After the split into two different specialized uses of Node in Chapter 12 and Chapter 13, we come back together again at the end of the book. After you’ve had some time to work with the examples in the other chapters, you’re going to want to spend some in Chapter 14, learning in-depth practices for Node debugging and testing.
Chapter 15 is probably one of the tougher chapters, and also one of the more important. It covers issues of security and authority. I don’t recommend that it be one of the first chapters you read, but it is essential that you spend time in this chapter before you roll a Node application out for general use.
Chapter 16 is the final chapter, and you can safely leave it for last, regardless of your interest and experience. It focuses on how to prepare your application for production use, including how to deploy your Node application not only on your own system, but also in one of the cloud servers that are popping up to host Node applications. I’ll also cover how to deploy a Node application to your server, including how to ensure it plays well with another web server such as Apache, and how to ensure your application survives a crash and restarts when the system is rebooted.
Node is heavily connected with the Git source control technique, and most (if not all) Node modules are hosted on GitHub. The Appendix A provides a Git/GitHub survival guide for those who haven’t worked with either.
I mentioned earlier that you don’t have to follow the chapters in order, but I recommend that you do. Many of the chapters work off effort in previous chapters, and you may miss out on important points if you skip around. In addition, though there are numerous standalone examples all throughout the book, I do use one relatively simple Express application called Widget Factory that begins life in Chapter 7 and is touched on, here and there, in most of the rest of the chapters. I believe you’ll have a better time with the book if you start at the beginning and then lightly skim the sections that you know, rather than skip a chapter altogether.
As the king says in Alice in Wonderland, “Begin at the beginning and go on till you come to the end: then stop.”
The examples in this book were created in various releases of Node 0.6.x. Most were tested in a Linux environment, but should work, as is, in any Node environment.
Node 0.8.x released just as this book went to production. The examples in the chapters do work with Node 0.8.x for the most part; I have indicated the instances where you’ll need to make a code change to ensure that the application works with the newest Node release.
You can find the examples as a compressed file at the O’Reilly web page for this book (http://oreil.ly/Learning_node). Once you’ve downloaded and uncompressed it, and you have Node installed, you can install all the dependency libraries for the examples by changing to the examples directory and typing:
npm install -d
I’ll cover more on using the Node package manager (npm) in Chapter 4.
The following typographical conventions are used in this book:
Indicates menu titles, menu options, menu buttons, and keyboard accelerators (such as Alt and Ctrl).
Indicates new terms, URLs, email addresses, filenames, file extensions, pathnames, directories, and Unix utilities.
Constant widthIndicates commands, options, switches, variables, attributes, keys, functions, types, classes, namespaces, methods, modules, properties, parameters, values, objects, events, event handlers, XML tags, HTML tags, macros, the contents of files, or the output from commands.
Constant width
boldShows commands or other text that should be typed literally by the user.
Constant width italicShows text that should be replaced with user-supplied values.
This icon signifies a tip, suggestion, or general note.
This icon indicates a warning or caution.
This book is here to help you get your job done. In general, you may use the code in this book in your programs and documentation. You do not need to contact us for permission unless you’re reproducing a significant portion of the code. For example, writing a program that uses several chunks of code from this book does not require permission. Selling or distributing a CD-ROM of examples from O’Reilly books does require permission. Answering a question by citing this book and quoting example code does not require permission. Incorporating a significant amount of example code from this book into your product’s documentation does require permission.
We appreciate, but do not require, attribution. An attribution usually includes the title, author, publisher, and ISBN. For example: “Learning Node by Shelley Powers (O’Reilly). Copyright 2012 Shelley Powers, 978-1-449-32307-3.”
If you feel your use of code examples falls outside fair use or the permission given above, feel free to contact us at permissions@oreilly.com.
Safari Books Online (www.safaribooksonline.com) is an on-demand digital library that delivers expert content in both book and video form from the world’s leading authors in technology and business.
Technology professionals, software developers, web designers, and business and creative professionals use Safari Books Online as their primary resource for research, problem solving, learning, and certification training.
Safari Books Online offers a range of product mixes and pricing programs for organizations, government agencies, and individuals. Subscribers have access to thousands of books, training videos, and prepublication manuscripts in one fully searchable database from publishers like O’Reilly Media, Prentice Hall Professional, Addison-Wesley Professional, Microsoft Press, Sams, Que, Peachpit Press, Focal Press, Cisco Press, John Wiley & Sons, Syngress, Morgan Kaufmann, IBM Redbooks, Packt, Adobe Press, FT Press, Apress, Manning, New Riders, McGraw-Hill, Jones & Bartlett, Course Technology, and dozens more. For more information about Safari Books Online, please visit us online.
Please address comments and questions concerning this book to the publisher:
| O’Reilly Media, Inc. |
| 1005 Gravenstein Highway North |
| Sebastopol, CA 95472 |
| 800-998-9938 (in the United States or Canada) |
| 707-829-0515 (international or local) |
| 707-829-0104 (fax) |
We have a web page for this book, where we list errata, examples, and any additional information. You can access this page at http://oreil.ly/Learning_node.
To comment or ask technical questions about this book, please send email to bookquestions@oreilly.com.
For more information about our books, courses, conferences, and news, see our website at http://www.oreilly.com.
Find us on Facebook: http://facebook.com/oreilly
Follow us on Twitter: http://twitter.com/oreillymedia
Watch us on YouTube: http://www.youtube.com/oreillymedia
Thanks, as always, to friends and family who help keep me sane when I work on a book. Special thanks to my editor, Simon St. Laurent, who listened to me vent more than once.
My thanks also to the production crew who helped take this book from an idea to the work you’re now holding: Rachel Steely, Rachel Monaghan, Kiel Van Horn, Aaron Hazelton, and Rebecca Demarest.
When you work with Node, you’re the recipient of a great deal of generosity, starting with the creator of Node.js, Ryan Dahl, and including the creator of npm, Isaac Schlueter, who is also now the Node.js gatekeeper.
Others who provided extremely useful code and modules in this book are Bert Belder, TJ Holowaychuk, Jeremy Ashkenas, Mikeal Rogers, Guillermo Rauch, Jared Hanson, Felix Geisendörfer, Steve Sanderson, Matt Ranney, Caolan McMahon, Remy Sharp, Chris O’Hara, Mariano Iglesias, Marco Aurélio, Damián Suárez, Jeremy Ashkenas, Nathan Rajlich, Christian Amor Kvalheim, and Gianni Chiappetta. My apologies for any module developers I have inadvertently omitted.
And what would Node be without the good people who provide tutorials, how-tos, and helpful guides? Thanks to Tim Caswell, Felix Geisendörfer, Mikato Takada, Geo Paul, Manuel Kiessling, Scott Hanselman, Peter Krumins, Tom Hughes-Croucher, Ben Nadel, and the entire crew of Nodejitsu and Joyent.
Node.js is a server-side technology that’s based on Google’s V8 JavaScript engine. It’s a highly scalable system that uses asynchronous, event-driven I/O (input/output), rather than threads or separate processes. It’s ideal for web applications that are frequently accessed but computationally simple.
If you’re using a traditional web server, such as Apache, each time a web resource is requested, Apache creates a separate thread or invokes a new process in order to handle the request. Even though Apache responds quickly to requests, and cleans up after the request has been satisfied, this approach can still tie up a lot of resources. A popular web application is going to have serious performance issues.
Node, on the other hand, doesn’t create a new thread or process for every request. Instead, it listens for specific events, and when the event happens, responds accordingly. Node doesn’t block any other request while waiting for the event functionality to complete, and events are handled—first come, first served—in a relatively uncomplicated event loop.
Node applications are created with JavaScript (or an alternative language that compiles to JavaScript). The JavaScript is the same as you’d use in your client-side applications. However, unlike JavaScript in a browser, with Node you have to set up a development environment.
Node can be installed in a Unix/Linux, Mac OS, or Windows environment. This chapter will walk you through setting up a development environment for Node in Windows 7 and Linux (Ubuntu). Installation on a Mac should be similar to installation on Linux. I’ll also cover any requirements or preparation you need to take before installing the application.
Once your development environment is operational, I’ll demonstrate a basic Node application and walk you through the important bit—the event loop I mentioned earlier.
There is more than one way to install Node in most environments. Which approach you use is dependent on your existing development environment, your comfort level working with source code, or how you plan to use Node in your existing applications.
Package installers are provided for both Windows and Mac OS, but you can install Node by grabbing a copy of the source and compiling the application. You can also use Git to clone (check out) the Node repo (repository) in all three environments.
In this section I’m going to demonstrate how to get Node working in a Linux system (an Ubuntu 10.04 VPS, or virtual private server), by retrieving and compiling the source directly. I’ll also demonstrate how to install Node so that you can use it with Microsoft’s WebMatrix on a Windows 7 PC.
Download source and basic package installers for Node from http://nodejs.org/#download. There’s a wiki page providing some basic instruction for installing Node in various environments at https://github.com/joyent/node/wiki/Installing-Node-via-package-manager. I also encourage you to search for the newest tutorials for installing Node in your environment, as Node is very dynamic.
Before installing Node in Linux, you need to prepare your environment. As noted in the documentation provided in the Node wiki, first make sure Python is installed, and then install libssl-dev if you plan to use SSL/TLS (Secure Sockets Layer/Transport Layer Security). Depending on your Linux installation, Python may already be installed. If not, you can use your systems package installer to install the most stable version of Python available for your system, as long as it’s version 2.6 or 2.7 (required for the most recent version of Node).
This book assumes only that you have previous experience with JavaScript and traditional web development. Given that, I’m erring on the side of caution and being verbose in descriptions of what you need to do to install Node.
For both Ubuntu and Debian, you’ll also need to install other libraries. Using the Advanced Packaging Tool (APT) available in most Debian GNU/Linux systems, you can ensure the libraries you need are installed with the following commands:
sudo apt-get update sudo apt-get upgrade sudo apt-get install build-essential openssl libssl-dev pkg-config
The update command just ensures
the package index on your system is up to date, and the upgrade command upgrades any existing outdated
packages. The third command line is the one that installs all of the
necessary packages. Any existing package dependencies are pulled in by
the package manager.
Once your system is prepared, download the Node
tarball (the compressed, archived file of the
source) to your system. I use wget to
access tarballs, though you can also use curl. At the time I’m writing this, the most
recent source for Node is version 0.8.2:
wget http://nodejs.org/dist/v0.8.2/node-v0.8.2.tar.gz
Once you’ve downloaded it, unzip and untar the file:
tar -zxf node-v0.8.2.tar.gz
You now have a directory labeled node-v0.6.18. Change into the directory and issue the following commands to compile and install Node:
./configure make sudo make install
If you’ve not used the make
utility in Unix before, these three commands set up the
makefile based on your system environment and
installation, run a preliminary make
to check for dependencies, and then perform a final make with installation. After processing these
commands, Node should now be installed and accessible globally via the
command line.
The fun challenge of programming is that no two systems are alike. This sequence of actions should be successful in most Linux environments, but the operative word here is should.
Notice in the last command that you had to use sudo to install Node. You need root privileges
to install Node this way (see the upcoming note). However, you can
install Node locally by using the following, which installs Node in a
given local subdirectory:
mkdir ~/working
./configure --prefix=~/working
make
make install
echo 'export PATH=~/working/bin:${PATH}' >> ~/.bashrc
. ~/.bashrcSo, as you can see here, setting the prefix configuration
option to a specified path in your home directory installs Node locally.
You’ll need to remember to update your PATH environmental
variable accordingly.
To use sudo, you have to be
granted root, or superuser, privileges, and your
username must be listed in a special file located at /etc/sudoers.
Although you can install Node locally, if you’re thinking of using this approach to use Node in your shared hosting environment, think again. Installing Node is just one part of using Node in an environment. You also need privileges to compile an application, as well as run applications off of certain ports (such as port 80). Most shared hosting environments will not allow you to install your own version of Node.
Unless there’s a compelling reason, I recommend installing Node
using sudo.
At one time there was a security concern about running the Node package manager (npm), covered in Chapter 4, with root privilege. However, those security issues have since been addressed.
You can install Node in Windows using a very basic installation sequence as outlined in the wiki installation page provided earlier. However, chances are that if you’re going to use Node in a Windows environment, you’re going to use it as part of a Windows web development infrastructure.
There are two different Windows infrastructures you can use Node with at this time. One is the new Windows Azure cloud platform, which allows developers to host applications in a remote service (called a cloud). Microsoft provides instructions for installing the Windows Azure SDK for Node, so I won’t be covering that process in this chapter (though I will examine and demonstrate the SDK later in the book).
You can find the Windows Azure SDK for Node and installation instructions at https://www.windowsazure.com/en-us/develop/nodejs/.
The other approach to using Node on Windows—in this case, Windows 7—is by integrating Node into Microsoft’s WebMatrix, a tool for web developers integrating open source technologies. Here are the steps we’ll need to take to get Node up and running with WebMatrix in Windows 7:
You install WebMatrix using the Microsoft Web Platform Installer, as shown in Figure 1-1. The tool also installs IIS Express, which is a developer version of Microsoft’s web server. Download WebMatrix from http://www.microsoft.com/web/webmatrix/.
Once the WebMatrix installation is finished, install the latest
version of Node using the installer provided at the primary Node site
(http://nodejs.org/#download). Installation is
one-click, and once you’re finished you can open a Command window and
type node to check for yourself
that the application is operational, as shown in Figure 1-2.
For Node to work with IIS in Windows, install iisnode, a native IIS 7.x module created and maintained by Tomasz Janczuk. As with Node, installation is a snap using the prebuilt installation package, available at https://github.com/tjanczuk/iisnode. There are x86 and x64 installations, but for x64, you’ll need to install both.
During the iisnode installation, a window may pop up telling you that you’re missing the Microsoft Visual C++ 2010 Redistributable Package, as shown in Figure 1-3. If so, you’ll need to install this package, making sure you get the one that matches the version of iisnode you’re installing—either the x86 package (available at http://www.microsoft.com/download/en/details.aspx?id=5555) or the x64 package (available at http://www.microsoft.com/download/en/details.aspx?id=14632), or both. Once you’ve installed the requisite package, run the iisnode installation again.
If you want to install the iisnode samples, open a Command window with administrator privileges, go to the directory where iisnode is installed—either Program Files for 64-bit, or Program Files (x86)—and run the setupsamples.bat file.
To complete the WebMatrix/Node setup, download and install the Node templates for WebMatrix, created by Steve Sanderson and found at https://github.com/SteveSanderson/Node-Site-Templates-for-WebMatrix.
You can test that everything works by running WebMatrix, and in the opening pages, select the “Site from Template” option. In the page that opens, shown in Figure 1-4, you’ll see two Node template options: one for Express (introduced in Chapter 7) and one for creating a basic, empty site configured for Node. Choose the latter option, giving the site a name of First Node Site, or whatever you want to use.
Figure 1-5 shows WebMatrix once the site has been generated. Click the Run button, located in the top left of the page, and a browser page should open with the ubiquitous “Hello, world!” message displayed.
If you’re running the Windows Firewall, the first time you run a Node application, you may get a warning like that shown in Figure 1-6. You need to let the Firewall know this application is acceptable by checking the “Private networks” option and then the “Allow access” button. You want to restrict communication to just your private network on your development machine.
If you look at the generated files for your new WebMatrix Node project, you’ll see one named app.js. This is the Node file, and it contains the following code:
var http = require('http');
http.createServer(function (req, res) {
res.writeHead(200, { 'Content-Type': 'text/html' });
res.end('Hello, world!');
}).listen(process.env.PORT || 8080);What this all means, I’ll get into in the second part of this chapter. The important item to take away from this code right now is that we can run this same application in any operating system where Node is installed and get the exact same functionality: a service that returns a simple message to the user.
Node stable releases are even numbered, such as the current 0.8.x, while the development releases are odd numbered (currently 0.9.x). I recommend sticking with stable releases only—at least until you have some experience with Node.
Updating your Node installation isn’t complicated. If you used the
package installer, using it for the new version should just override the
old installation. If you’re working directly with the source, you can
always uninstall the old source and install the new if you’re concerned
about potential clutter or file corruption. In the Node source
directory, just issue the uninstall
make option:
make uninstall
Download the new source, compile it, and install it, and you’re ready to go again.
The challenge with updating Node is determining whether a specific environment, module, or other application works with the new version. In most cases, you shouldn’t have version troubles. However, if you do, there is an application you can use to “switch” Node versions. The application is the Node Version Manager (Nvm).
You can download Nvm from GitHub, at https://github.com/creationix/nvm. Like Node, Nvm must be compiled and installed on your system.
To install a specific version of Node, install it with Nvm:
nvm install v0.4.1
To switch to a specific version, use the following:
nvm run v0.4.1
To see which versions are available, use:
nvm ls
Now that you have Node installed, it’s time to jump into your first application.
As is typical for testing out any new development environment, language, or tool, the first application we’ll create is “Hello, World”—a simple application that prints out a greeting to whomever accesses it.
Example 1-1 shows all the text needed to create Hello, World in Node.
// load http module
var http = require('http');
// create http server
http.createServer(function (req, res) {
// content header
res.writeHead(200, {'content-type': 'text/plain'});
// write message and signal communication is complete
res.end("Hello, World!\n");
}).listen(8124);
console.log('Server running on 8124');The code is saved in a file named helloworld.js. As server-side functionality goes, this Node application is neither too verbose, nor too cryptic; one can intuit what’s happening, even without knowing Node. Best of all, it’s familiar since it’s written in a language we know well: JavaScript.
To run the application, from the command line in Linux, the Terminal window in Mac OS, or the Command window in Windows, type:
node helloworld.js
The following is printed to the command line once the program has successfully started:
Server running at 8124
Now, access the site using any browser. If the application is running on your local machine, you’ll use localhost:8124. If it’s running remotely, use the URL of the remote site, with the 8124 port. A web page with the words “Hello, World!” is displayed. You’ve now created your first complete and working Node application.
If you’re installing Node in a Fedora system, be aware that Node is renamed due to name conflicts with existing functionality. There’s more on this at http://nodejs.tchol.org/.
Since we didn’t use an ampersand (&) following the
node command—telling
the application to run in the background—the application starts and
doesn’t return you to the command line. You can continue accessing the
application, and the same words get displayed. The application continues
until you type Ctrl-C to cancel it, or otherwise kill the
process.
If you want to run the application in the background within a Linux system, use the following:
node helloworld.js &
However, you’ll then have to find the process identifier using
ps -ef, and manually kill the right
process—in this case, the one with the process identifier 3747—using
kill:
ps -ef | grep node kill 3747
Exiting the terminal window will also kill the process.
In Chapter 16, I cover how to create a persistent Node application installation.
You won’t be able to start another Node application listening at the same port: you can run only one Node application against one port at a time. If you’re running Apache at port 80, you won’t be able to run the Node application at this port, either. You must use a different port for each application.
You can also add helloworld.js as a new file to the existing WebMatrix website you created earlier, if you’re using WebMatrix. Just open the site, choose the “New File...” option from the menu bar, and add the text shown in Example 1-1 to the file. Then click the Run button.
I’ll get more in depth on the anatomy of Node applications in the next couple of chapters, but for now, let’s take a closer look at the Hello, World application.
Returning to the text in Example 1-1, the first line of code is:
var http = require('http');Most Node functionality is provided through external applications and libraries called modules. This line of JavaScript loads the HTTP module, assigning it to a local variable. The HTTP module provides basic HTTP functionality, enabling network access of the application.
The next line of code is:
http.createServer(function (req, res) { ...In this line of code, a new server is created with createServer, and an
anonymous function is passed as the parameter to the function call. This
anonymous function is the requestListener
function, and has two parameters: a server request (http.ServerRequest) and a server response
(http.ServerResponse).
Within the anonymous function, we have the following line:
res.writeHead(200, {'content-Type': 'text/plain'});The http.ServerResponse
object has a method, writeHead, that sends a
response header with the response status code (200), as well as provides
the content-type of the
response. You can also include other response header information within
the headers object, such as
content-length or
connection:
{ 'content-length': '123',
'content-type': 'text/plain',
'connection': 'keep-alive',
'accept': '*/*' }A second, optional parameter to writeHead is a
reasonPhrase, which is
a textual description of the status code.
Following the code to create the header is the command to write the “Hello, World!” message:
res.end("Hello, World!\n");The http.ServerResponse.end
method signals that the communication is finished; all headers and the
response body have been sent. This method must be
used with every http.ServerResponse
object.
The end method has two
parameters:
A chunk of data, which can be either a string or a buffer.
If the chunk of data is a string, the second parameter specifies the encoding.
Both parameters are optional, and the second parameter is required
only if the encoding of the string is anything other than utf8, which is the default.
Instead of passing the text in the end function, I could have used another
method, write:
res.write("Hello, World!\n");and then:
res.end();
The anonymous function and the createServer function
are both finished on the next line in the code:
}).listen(8124);
The http.Server.listen method
chained at the end of the createServer method
listens for incoming connections on a given port—in this case, port
8124. Optional parameters are a hostname and a callback function. If a hostname
isn’t provided, the server accepts connections to web addresses, such as
http://oreilly.com or http://examples.burningbird.net.
More on the callback function later in this chapter.
The listen method is asynchronous, which means the
application doesn’t block program execution, waiting for the connection
to be established. Whatever code following the listen call is processed, and the listen callback function is invoked when the
listening event is
fired—when the port connection is established.
The last line of code is:
console.log('Server running on 8124/');The console object is one
of the objects from the browser world that is incorporated into Node.
It’s a familiar construct for most JavaScript developers, and provides a
way to output text to the command line (or development environment),
rather than to the client.
The fundamental design behind Node is that an application is executed on a single thread (or process), and all events are handled asynchronously.
Consider how the typical web server, such as Apache, works. Apache has two different approaches to how it handles incoming requests. The first is to assign each request to a separate process until the request is satisfied; the second is to spawn a separate thread for each request.
The first approach (known as the prefork multiprocessing model, or prefork MPM) can create as many child processes as specified in an Apache configuration file. The advantage to creating a separate process is that applications accessed via the request, such as a PHP application, don’t have to be thread-safe. The disadvantage is that each process is memory intensive and doesn’t scale very well.
The second approach (known as the worker MPM), implements a hybrid process-thread approach. Each incoming request is handled via a new thread. It’s more efficient from a memory perspective, but also requires that all applications be thread-safe. Though the popular web language PHP is now thread-safe, there’s no guarantee that the many different libraries used with it are also thread-safe.
Regardless of the approach used, both types respond to requests in parallel. If five people access a web application at the exact same time, and the server is set up accordingly, the web server handles all five requests simultaneously.
Node does things differently. When you start a Node application, it’s created on a single thread of execution. It sits there, waiting for an application to come along and make a request. When Node gets a request, no other request can be processed until it’s finished processing the code for the current one.
You might be thinking that this doesn’t sound very efficient, and it wouldn’t be except for one thing: Node operates asynchronously, via an event loop and callback functions. An event loop is nothing more than functionality that basically polls for specific events and invokes event handlers at the proper time. In Node, a callback function is this event handler.
Unlike with other single-threaded applications, when you make a request to a Node application and it must, in turn, make some request of resources (such as a database request or file access), Node initiates the request, but doesn’t wait around until the request receives a response. Instead, it attaches a callback function to the request. When whatever has been requested is ready (or finished), an event is emitted to that effect, triggering the associated callback function to do something with either the results of the requested action or the resources requested.
If five people access a Node application at the exact same time, and the application needs to access a resource from a file, Node attaches a callback function to a response event for each request. As the resource becomes available for each, the callback function is called, and each person’s request is satisfied in turn. In the meantime, the Node application can be handling other requests, either for the same applications or a different application.
Though the application doesn’t process the requests in parallel, depending on how busy it is and how it’s designed, most people usually won’t perceive any delay in the response. Best of all, the application is very frugal with memory and other limited resources.
To demonstrate Node’s asynchronous nature, Example 1-2 modifies the Hello, World application from earlier in the chapter. Instead of just typing out “Hello, World!” it actually opens up the previously created helloworld.js and outputs the contents to the client.
// load http module
var http = require('http');
var fs = require('fs');
// create http server
http.createServer(function (req, res) {
// open and read in helloworld.js
fs.readFile('helloworld.js', 'utf8', function(err, data) {
res.writeHead(200, {'Content-Type': 'text/plain'});
if (err)
res.write('Could not find or open file for reading\n');
else
// if no error, write JS file to client
res.write(data);
res.end();
});
}).listen(8124, function() { console.log('bound to port 8124');});
console.log('Server running on 8124/');A new module, File System (fs), is used in this example. The File System
module wraps standard POSIX file functionality, including opening up and
accessing the contents from a file. The method used is readFile. In Example 1-2, it’s passed the
name of the file to open, the encoding, and an anonymous
function.
The two instances of asynchronous behavior I want to point out in
Example 1-2 are the
callback function that’s attached to the readFile method, and
the callback function attached to the listen method.
As discussed earlier, the listen method tells the
HTTP server object to begin listening for connections on the given port.
Node doesn’t block, waiting for the connection to be established, so if
we need to do something once the connection is established, we provide a
callback function, as shown in Example 1-2.
When the connection is established, a listening event is
emitted, which then invokes the callback function, outputting a message
to the console.
The second, more important callback instance is the one attached
to readFile. Accessing a
file is a time-consuming operation, relatively speaking, and a
single-threaded application
accessed by multiple clients that blocked on file access would soon bog
down and be unusable.
Instead, the file is opened and the contents are read
asynchronously. Only when the contents have been read into the data
buffer—or an error occurs during the process—is the callback function
passed to the readFile method called.
It’s passed the error (if any), and the data if no error occurs.
In the callback function, the error is checked, and if there is no error, the data is then written out to the response back to the client.
Most people who have developed with JavaScript have done so in client applications, meant to be run by one person at a time in a browser. Using JavaScript in the server may seem odd. Creating a JavaScript application accessed by multiple people at the same time may seem even odder.
Our job is made easier because of the Node event loop and being able to put our trust in asynchronous function calls. However, we’re no longer in Kansas, Dorothy—we are developing for a different environment.
To demonstrate the differences in this new environment, I created two new applications: one as a service, and one to test the new service. Example 1-3 shows the code for the service application.
In the code, a function is called, synchronously, to write out numbers from 1 to 100. Then a file is opened, similar to what happened in Example 1-2, but this time the name of the file is passed in as a query string parameter. In addition, the file is opened only after a timer event.
var http = require('http');
var fs = require('fs');
// write out numbers
function writeNumbers(res) {
var counter = 0;
// increment global, write to client
for (var i = 0; i<100; i++) {
counter++;
res.write(counter.toString() + '\n');
}
}
// create http server
http.createServer(function (req, res) {
var query = require('url').parse(req.url).query;
var app = require('querystring').parse(query).file + ".txt";
// content header
res.writeHead(200, {'Content-Type': 'text/plain'});
// write out numbers
writeNumbers(res);
// timer to open file and read contents
setTimeout(function() {
console.log('opening ' + app);
// open and read in file contents
fs.readFile(app, 'utf8', function(err, data) {
if (err)
res.write('Could not find or open file for reading\n');
else {
res.write(data);
}
// response is done
res.end();
});
},2000);
}).listen(8124);
console.log('Server running at 8124');The loop to print out the numbers is used to delay the
application, similar to what could happen if you performed a
computationally intensive process and then blocked until the process was
finished. The setTimeout function is
another asynchronous function, which in turn invokes a second
asynchronous function: readFile. The
application combines both asynchronous and synchronous processes.
Create a text file named main.txt, containing any text you want.
Running the application and accessing the page from Chrome with a query
string of file=main generates the
following console output:
Server running at 8124/ opening main.txt opening undefined.txt
The first two lines are expected. The first is the result of
running console.log at the end of the
application, and the second is a printout of the file being opened. But
what’s undefined.txt in the third
line?
When processing a web request from a browser, be aware that browsers may send more than one request. For instance, a browser may also send a second request, looking for a favicon.ico. Because of this, when you’re processing the query string, you must check to see if the data you need is being provided, and ignore requests without the data.
The browser sending multiple requests can impact your application if you’re expecting values via a query string. You must adjust your application accordingly. And yes, you’ll still need to test your application with several different browsers.
So far, all we’ve done is test our Node applications from a browser. This isn’t really putting much stress on the asynchronous nature of the Node application.
Example 1-4 contains the code for a very simple test application. All it does is use the HTTP module to request the example server several times in a loop. The requests aren’t asynchronous. However, we’ll also be accessing the service using the browser as we run the test program. Both, combined, asynchronously test the application.
I’ll cover creating asynchronous testing applications in Chapter 14.
var http = require('http');
//The url we want, plus the path and options we need
var options = {
host: 'localhost',
port: 8124,
path: '/?file=secondary',
method: 'GET'
};
var processPublicTimeline = function(response) {
// finished? ok, write the data to a file
console.log('finished request');
};
for (var i = 0; i < 2000; i++) {
// make the request, and then end it, to close the connection
http.request(options, processPublicTimeline).end();
}Create the second text file, named secondary.txt. Put whatever you wish in it, but make the contents obviously different from main.txt.
After making sure the Node application is running, start the test application:
node test.js
As the test application is running, access the application using your browser. If you look at the console messages being output by the application, you’ll see it process both your manual and the test application’s automated requests. Yet the results are consistent with what we would expect, a web page with:
The numbers 1 through 100 printed out
The contents of the text file—in this case, main.txt
Now, let’s mix things up a bit. In Example 1-3, make the counter global rather than local to the loop
function, and start the application again. Then run the test program and
access the page in the browser.
The results have definitely changed. Rather than the numbers starting at 1 and going to 100, they start at numbers like 2,601 and 26,301. They still print out the next sequential 99 numbers, but the starting value is different.
The reason is, of course, the use of the global counter. Since you’re accessing the same
application in the browser manually as the test program is doing
automatically, you’re both updating counter. Both the manual and automated
application requests are processed, in turn, so there’s no contention
for the shared data (a major problem with thread safety in a
multithreaded environment), but if you’re expecting a consistent
beginning value, you might be surprised.
Now change the application again, but this time remove the
var keyword in front of
the app variable—“accidentally”
making it a global variable. We all have, from time to time, forgotten
the var keyword with our
client-side JavaScript applications. The only time we get bit by this
mistake is if any libraries we’re using are using the same variable
name.
Run the test application and access the Node service in your
browser a couple of times. Chances are, you’ll end up with the text from
the secondary.txt file in your
browser window, rather than the requested main.txt file. The reason is that in the time
between when you processed the query for the filename and when you
actually opened the file, the automatic application modified the
app variable. The test application is
able to do so because you made an asynchronous function request,
basically ceding program control to another request while your request
was still mid-process.
By now you have a working Node installation—possibly even more than one.
You’ve also had a chance to create a couple of Node applications and
test out the differences between synchronous and asynchronous code (and
what happens if you accidentally forget the var keyword).
Node isn’t all asynchronous function calls. Some objects may provide both synchronous and asynchronous versions of the same function. However, Node works best when you use asynchronous coding as much as possible.
The Node event loop and callback functions have two major benefits.
First, the application can easily scale, since a single thread of execution doesn’t have an enormous amount of overhead. If we were to create a PHP application similar to the Node application in Example 1-3, the user would see the same page—but your system would definitely notice the difference. If you ran the PHP application in Apache with the default prefork MPM, each time the application was requested, it would have to be handled in a separate child process. Chances are, unless you have a significantly loaded system, you’ll only be able to run—at most—a couple of hundred child processes in parallel. More than that number of requests means that a client needs to wait for a response.
A second benefit to Node is that you minimize resource usage, but without having to resort to multithreaded development. In other words, you don’t have to create a thread-safe application. If you’ve ever developed a thread-safe application previously, you’re probably feeling profoundly glad at this statement.
However, as was demonstrated in the last example application, you
aren’t developing JavaScript applications for single users to run in the
browser, either. When you work with asynchronous applications, you need to
make sure that you don’t build in dependencies on one asynchronous
function call finishing ahead of another, because there are no
guarantees—not unless you call the second function call within the code of
the first. In addition, global variables are extremely hazardous in Node,
as is forgetting the var keyword.
Still, these are issues we can work with—especially considering the benefits of Node’s low resource requirements and not having to worry about threads.
While you’re exploring the use of Node and figuring out the code for your custom module or Node application, you don’t have to type JavaScript into a file and run it with Node to test your code. Node also comes with an interactive component known as REPL, or read-eval-print loop, which is the subject of this chapter.
REPL (pronounced “repple”) supports a simplified Emacs style of line editing and a small set of basic commands. Whatever you type into REPL is processed no differently than if you had typed the JavaScript into a file and run the file using Node. You can actually use REPL to code your entire application—literally testing the application on the fly.
In this chapter, I’ll also cover some interesting quirks of REPL, along with some ways you can work around them. These workarounds include replacing the underlying mechanism that persists commands, as well as using some command-line editing.
Lastly, if the built-in REPL doesn’t provide exactly what you need for an interactive environment, there’s also an API to create your own custom REPL, which I’ll demonstrate in the latter part of the chapter.
You’ll find a handy guide for using REPL at http://docs.nodejitsu.com/articles/REPL/how-to-use-nodejs-repl. The Nodejitsu site also provides a nice tutorial on how to create a custom REPL at http://docs.nodejitsu.com/articles/REPL/how-to-create-a-custom-repl.
To begin REPL, simply type node without providing any Node application
file, like so:
$ node
REPL then provides a command-line prompt—an angle bracket (>)—by default. Anything you type from this point on is processed by the underlying V8 JavaScript engine.
REPL is very simple to use. Just start typing in your JavaScript, like you’d add it to a file:
> a = 2; 2
The tool prints out the result of whatever expression you just
typed. In this session excerpt, the value of the expression is 2. In the following, the expression result is an
array with three elements:
> b = ['a','b','c']; [ 'a', 'b', 'c' ]
To access the last expression, use the underscore/underline
character (_). In the following, a is
set to 2, and the resulting expression
is incremented by 1, and then 1 again:
> a = 2; 2 > _ ++; 3 > _ ++; 4
You can even access properties or call methods on the underscored expression:
> ['apple','orange','lime'] [ 'apple', 'orange', 'lime' ] > _.length 3 > 3 + 4 7 > _.toString(); '7'
You can use the var keyword with REPL in
order to access an expression or value at a later time, but you might get
an unexpected result. For instance, the following line in REPL:
var a = 2;
doesn’t return the value 2, it
returns a value of undefined. The
reason is that the result of the expression is undefined, since variable
assignment doesn’t return a result when evaluated.
Consider the following instead, which is what’s happening, more or less, under the hood in REPL:
console.log(eval('a = 2'));
console.log(eval('var a = 2'));Typing the preceding lines into a file and running that file using Node returns:
2 undefined
There is no result from the second call to eval, and hence the value returned is undefined. Remember, REPL is a read-eval-print
loop, with emphasis on the eval.
Still, you can use the variable in REPL, just as you would in a Node application:
> var a = 2; undefined > a++; 2 > a++; 3
The latter two command lines do have results, which are printed out by REPL.
I’ll demonstrate how to create your own custom REPL—one that
doesn’t output undefined—in the
section Custom REPL.
To end the REPL session, either press Ctrl-C twice, or Ctrl-D once. We’ll cover other ways to end the session later, in REPL Commands.
Here’s a typical demonstration of REPL:
> 3 > 2 > 1; false
This code snippet is a good example of how REPL can be useful. At
first glance, we might expect the expression we typed to evaluate to
true, since 3 is greater than 2, which
is greater than 1. However, in JavaScript, expressions are evaluated left
to right, and each expression’s result is returned for the next
evaluation.
A better way of looking at what’s happening with the preceding code snippet is this REPL session:
> 3 > 2 > 1; false > 3 > 2; true > true > 1; false
Now the result makes more sense. What’s happening is that the
expression 3 > 2 is evaluated, returning true. But then the value of true is compared to the numeric 1. JavaScript
provides automatic data type conversion, after which true and 1 are equivalent values. Hence,
true is not greater than 1, and the
result is false.
REPL’s helpfulness is in enabling us to discover these little
interesting quirks in JavaScript. Hopefully, after testing our code in
REPL, we don’t have unexpected side effects in our applications (such as
expecting a result of true but getting
a result of false).
You can type the same JavaScript into REPL just like you’d
type it into a file, including require statements to
import modules. A session to try out the Query String (qs) module is repeated in the following
text:
$ node
> qs = require('querystring');
{ unescapeBuffer: [Function],
unescape: [Function],
escape: [Function],
encode: [Function],
stringify: [Function],
decode: [Function],
parse: [Function] }
> val = qs.parse('file=main&file=secondary&test=one').file;
[ 'main', 'secondary' ]Since you didn’t use the var keyword, the
expression result is printed out—in this instance, the interface for the
querystring object. How’s
that for a bonus? Not only are you getting access to the object, but
you’re also learning more about the object’s interface while you’re at it.
However, if you want to forgo the potentially lengthy output of text, use
the var keyword:
> var qs = require('querystring');You’ll be able to access the querystring object with
the qs variable with either
approach.
In addition to being able to incorporate external modules, REPL gracefully handles multiline expressions, providing a textual indicator of code that’s nested following an opening curly brace ({):
> var test = function (x, y) {
... var val = x * y;
... return val;
... };
undefined
> test(3,4);
12REPL provides repeating dots to indicate that everything that’s being typed follows an open curly brace and hence the command isn’t finished yet. It does the same for an open parenthesis, too:
> test(4, ... 5); 20
Increasing levels of nesting generates more dots; this is necessary in an interactive environment, where you might lose track of where you are, as you type:
> var test = function (x, y) {
... var test2 = function (x, y) {
..... return x * y;
..... }
... return test2(x,y);
... }
undefined
> test(3,4);
12
>You can type in, or copy and paste in, an entire Node application and run it from REPL:
> var http = require('http');
undefined
> http.createServer(function (req, res) {
...
... // content header
... res.writeHead(200, {'Content-Type': 'text/plain'});
...
... res.end("Hello person\n");
... }).listen(8124);
{ connections: 0,
allowHalfOpen: true,
_handle:
{ writeQueueSize: 0,
onconnection: [Function: onconnection],
socket: [Circular] },
_events:
{ request: [Function],
connection: [Function: connectionListener] },
httpAllowHalfOpen: false }
>
undefined
> console.log('Server running at http://127.0.0.1:8124/');
Server running at http://127.0.0.1:8124/
UndefinedYou can access this application from a browser no differently than if you had typed the text into a file and run it using Node. And again, the responses back from REPL can provide an interesting look at the code, as shown in the boldfaced text.
In fact, my favorite use of REPL is to get a quick look at objects.
For instance, the Node core object global is sparsely
documented at the Node.js website. To get a better look, I opened up a
REPL session and passed the object to the console.log method like
so:
> console.log(global)
I could have done the following, which has the same result:
> gl = global;
I’m not replicating what was displayed in REPL; I’ll leave that for
you to try on your own installation, since the interface for global is so large. The
important point to take away from this exercise is that we can, at any
time, quickly and easily get a quick look at an object’s interface. It’s a
handy way of remembering what a method is called, or what properties are
available.
There’s more on global in Chapter 3.
You can use the up and down arrow keys to traverse through the commands you’ve typed into REPL. This can be a handy way of reviewing what you’ve done, as well as a way of editing what you’ve done, though in a somewhat limited capacity.
Consider the following session in REPL:
> var myFruit = function(fruitArray,pickOne) {
... return fruitArray[pickOne - 1];
... }
undefined
> fruit = ['apples','oranges','limes','cherries'];
[ 'apples',
'oranges',
'limes',
'cherries' ]
> myFruit(fruit,2);
'oranges'
> myFruit(fruit,0);
undefined
> var myFruit = function(fruitArray,pickOne) {
... if (pickOne <= 0) return 'invalid number';
... return fruitArray[pickOne - 1];
... };
undefined
> myFruit(fruit,0);
'invalid number'
> myFruit(fruit,1);
'apples'Though it’s not demonstrated in this printout, when I modified the
function to check the input value, I actually arrowed up through the
content to the beginning function declaration, and then hit Enter to
restart the function. I added the new line, and then again used the arrow
keys to repeat previously typed entries until the function was finished. I
also used the up arrow key to repeat the function call that resulted in an
undefined result.
It seems like a lot of work just to avoid retyping something so simple, but consider working with regular expressions, such as the following:
> var ssRe = /^\d{3}-\d{2}-\d{4}$/;
undefined
> ssRe.test('555-55-5555');
true
> var decRe = /^\s*(\+|-)?((\d+(\.\d+)?)|(\.\d+))\s*$/;
undefined
> decRe.test(56.5);
trueI’m absolutely useless when it comes to regular expressions, and have to tweak them several times before they’re just right. Using REPL to test regular expressions is very attractive. However, retyping long regular expressions would be a monstrous amount of work.
Luckily, all we have to do with REPL is arrow up to find the line where the regular expression was created, tweak it, hit Enter, and continue with the next test.
In addition to the arrow keys, you can also use the Tab key to
autocomplete text. As an example, type
va at the command line and then
press Tab; REPL will autocomplete var. You can also
use the Tab key to autocomplete any global or local variable. Table 2-1
offers a quick summary of keyboard commands that work with REPL.
Keyboard entry | What it does |
Ctrl-C | Terminates current command. Pressing Ctrl-C twice forces an exit. |
Ctrl-D | Exits REPL. |
Tab | Autocompletes global or local variable. |
Up arrow | Traverses up through command history. |
Down arrow | Traverses down through command history. |
Underscore (_) | References result of last expression. |
If you’re concerned about spending a lot of time coding in REPL with
nothing to show for it when you’re done, no worries: you can save the
results of the current context with the .save command. It and the
other REPL commands are covered in the next section.
REPL has a simple interface with a small set of useful
commands. In the preceding section, I mentioned .save. The .save command saves
your inputs in the current object context into a file. Unless you
specifically created a new object context or used the .clear command, the
context should comprise all of the input in the current REPL
session:
> .save ./dir/session/save.js
Only your inputs are saved, as if you had typed them directly into a file using a text editor.
Here is the complete list of REPL commands and their purposes:
.breakIf you get lost during a multiline entry, typing .break will start
you over again. You’ll lose the multiline content, though.
.clearResets the context object and clears any multiline expression. This command basically starts you over again.
.exitExits REPL.
.helpDisplays all available REPL commands.
.saveSaves the current REPL session to a file.
.loadLoads a file into the current session (.load /path/to/file.js).
If you’re working on an application using REPL as an editor,
here’s a hint: save your work often using .save. Though current
commands are persisted to history, trying to recreate your code from
history would be a painful exercise.
Speaking of persistence and history, now let’s go over how to customize both with REPL.
The Node.js website documentation for REPL mentions
setting up an environmental variable so you can use REPL with rlwrap. What is rlwrap, and why would you use it with
REPL?
The rlwrap utility is a wrapper
that adds GNU readline library
functionality to command lines that allow increased flexibility with
keyboard input. It intercepts keyboard input and provides additional
functionality, such as enhanced line editing, as well as a persistent
history of commands.
You’ll need to install rlwrap
and readline to use this facility
with REPL, though most flavors of Unix provide an easy package
installation. For instance, in my own Ubuntu system, installing rlwrap was this simple:
apt-get install rlwrap
Mac users should use the appropriate installer for these applications. Windows users have to use a Unix environmental emulator, such as Cygwin.
Here’s a quick and visual demonstration of using REPL with
rlwrap to change the REPL prompt to
purple:
env NODE_NO_READLINE=1 rlwrap -ppurple node
If I always want my REPL prompt to be purple, I can add an alias to my bashrc file:
alias node="env NODE_NO_READLINE=1 rlwrap -ppurple node"
To change both the prompt and the color, I’d use the following:
env NODE_NO_READLINE=1 rlwrap -ppurple -S "::>" node
Now my prompt would be:
::>
in purple.
The especially useful component of rlwrap is its ability to persist history
across REPL sessions. By default, we have access to command-line history
only within a REPL session. By using rlwrap, the next time we access REPL, not only
will we have access to a history of commands within the current session,
but also a history of commands in past sessions (and other command-line
entries). In the following session output, the commands shown were not
typed in, but were instead pulled from history with the up arrow
key:
# env NODE_NO_READLINE=1 rlwrap -ppurple -S "::>" node ::>e = ['a','b']; [ 'a', 'b' ] ::>3 > 2 > 1; false
As helpful as rlwrap is, we still end
up with undefined every time we type
in an expression that doesn’t return a value. However, we can adjust
this, and other functionality, just by creating our own custom REPL,
discussed next.
Node provides us access to creating our own custom REPL.
To do so, first we need to include the REPL module (repl):
var repl = require("repl");To create a new REPL, we call the start method on the
repl object. The syntax
for this method is:
repl.start([prompt], [stream], [eval], [useGlobal], [ignoreUndefined]);
All of the parameters are optional. If not provided, default values will be used for each as follows:
I find the undefined expression
result in REPL to be unedifying, so I created my own REPL. It took
exactly two lines of code (not including the comment):
repl = require("repl");
// start REPL with ignoreUndefined set to true
repl.start("node via stdin> ", null, null, null, true);I ran the file, repl.js, using Node:
node repl.js
Then I used the custom REPL just like I use the built-in version,
except now I have a different prompt and no longer get the annoying
undefined after the first variable
assignment. I do still get the
other responses that aren’t undefined:
node via stdin> var ct = 0; node via stdin> ct++; 0 node via stdin> console.log(ct); 1 node via stdin> ++ct; 2 node via stdin> console.log(ct); 2
In my code, I wanted the defaults for all but prompt and ignoreUndefined. Setting the other parameters
to null triggers Node to use the
default values for each.
You can replace the eval function with your
custom REPL. The only requirement is that it has a specific
format:
function eval(cmd, callback) {
callback(null, result);
}The stream option is
interesting. You can run multiple versions of REPL, taking input from
both the standard input (the default), as well as sockets. The
documentation for REPL at the Node.js site provides an example of a REPL
listening in on a TCP socket, using code similar to the
following:
var repl = require("repl"),
net = require("net");
// start REPL with ignoreUndefined set to true
repl.start("node via stdin> ", null, null, null, true);
net.createServer(function (socket) {
repl.start("node via TCP socket> ", socket);
}).listen(8124);When you run the application, you get the standard input
prompt where the Node application is running. However, you can also
access REPL via TCP. I used PuTTY as a Telnet client to access this
TCP-enabled version of REPL. It does work...to a point. I had to issue a
.clear first, the
formatting is off, and when I tried to use the underscore to reference
the last expression, Node didn’t know what I was talking about, as shown
in Figure 2-1.
I also tried with the Windows 7 Telnet client, and the response was even worse. However, using my Linux Telnet client worked without a hitch.
The problem here, as you might expect, is Telnet client settings.
However, I didn’t pursue it further, because running REPL from an
exposed Telnet socket is not something I plan to implement, and not
something I would recommend, either—at least, not without heavy
security. It’s like using eval() in
your client-side code, and not scrubbing the text your users send you to
run—but worse.
You could keep a running REPL and communicate via a Unix socket with something like the GNU Netcat utility:
nc -U /tmp/node-repl-sock
You can type in commands no differently than typing them in using
stdin. Be aware, though, if you’re using either a TCP
or Unix socket, that any console.log commands
are printed out to the server console, not to the client:
console.log(someVariable); // actually printed out to server
An application option that I consider to be more useful is to
create a REPL application that preloads modules. In the application in
Example 2-1, after the
REPL is started, the http, os, and util modules are loaded
and assigned to context properties.
var repl = require('repl');
var context = repl.start(">>", null, null, null, true).context;
// preload in modules
context.http = require('http');
context.util = require('util');
context.os = require('os');Running the application with Node brings up the REPL prompt, where we can then access the modules:
>>os.hostname();
'einstein'
>>util.log('message');
5 Feb 11:33:15 - message
>>If you want to run the REPL application like an executable in Linux, add the following line as the first line in the application:
#!/usr/local/bin/node
Modify the file to be an executable and run it:
# chmod u+x replcontext.js # ./replcontext.js >>
Node’s REPL is a handy interactive tool that can make our development tasks a little easier. REPL allows us not only to try out JavaScript before including it in our files, but also to actually create our applications interactively and then save the results when we’re finished.
Another useful REPL feature is that it enables us to create a custom
REPL so that we can eliminate the unhelpful undefined responses, preload modules, change the
prompt or the eval routine we use, and
more.
I also strongly recommend that you look into using REPL with
rlwrap in order to
persist commands across sessions. This could end up being a major time
saver. Plus, who among us doesn’t like additional editing
capability?
As you explore REPL further, there’s one very important thing to keep in mind from this chapter:
Stuff happens. Save often.
If you’ll be spending a lot of time developing in REPL, even with
the use of rlwrap to persist
history, you’re going to want to frequently save your work. Working in
REPL is no different than working in other editing environments, so I’ll
repeat: stuff happens—save often.
Chapter 1 provided a first look at a Node application with the traditional (and always entertaining) Hello, World application. The examples in the chapter made use of a couple of modules from what is known as the Node core: the API providing much of the functionality necessary for building Node applications.
In this chapter, I’m going to provide more detail on the Node core system. It’s not an exhaustive overview, since the API is quite large and dynamic in nature. Instead, we’ll focus on key elements of the API, and take a closer look at those that we’ll use in later chapters and/or are complex enough to need a more in-depth review.
Topics covered in this chapter include:
Node global objects, such as global, process, and Buffer
The timer methods, such as setTimeout
A quick overview of socket and stream modules and functionality
The Utilities object,
especially the part it plays in Node inheritance
The EventEmitter object and
events
Node.js documentation for the current stable release is available at http://nodejs.org/api/.
There are several objects available to all Node applications without the user having to incorporate any module. The Node.js website groups these items under the descriptive label of globals.
We’ve been using one global, require, to include modules into our
applications. We’ve also made extensive use of another global, console, to log messages to the console. Other
globals are essential to the underlying implementation of Node, but aren’t
necessarily anything we’d access or
need to know about directly. Some, though, are important enough for us to
take a closer look at, because they help define key aspects of how Node
works.
In particular, we’re going to explore:
The global object—that is,
the global namespace
The process object, which
provides essential functionality, such as wrappers for the three
STDIO (Standard IO) streams, and functionality to
transform a synchronous function into an asynchronous callback
The Buffer class, a global
object that provides raw data storage and manipulation
Child processes
Modules useful for domain resolution and URL processing
global is the global
namespace object. In some ways, it’s similar to
windows in a browser environment, in
that it provides access to global properties and methods and doesn’t
have to be explicitly referenced by name.
From REPL, you can print out the global object to the console like so:
> console.log(global)
What prints out is the interface for all of the other global objects, as well as a good deal of information about the system in which you’re running.
I mentioned that global is like
the windows object in a browser, but
there are key differences—and not just the methods and properties
available. The windows object in a
browser is truly global in nature. If you define a global variable in
client-side JavaScript, it’s accessible by the web page and by every
single library. However, if you create a variable at the top-level scope
in a Node module (a variable outside a function), it only becomes global
to the module, not to all of the modules.
You can actually see what happens to the global object when you define a module/global
variable in REPL. First, define the top-level variable:
> var test = "This really isn't global, as we know global";
Then print out global:
> console.log(global);
You should see your variable, as a new property of global, at the bottom. For another interesting
perspective, assign global to a
variable, but don’t use the var
keyword:
gl = global;
The global object interface is
printed out to the console, and at the bottom you’ll see the local
variable assigned as a circular reference:
> gl = global; ... gl: [Circular], _: [Circular] }
Any other global object or method, including require, is part of the global object’s interface.
When Node developers discuss context, they’re really referring to
the global object. In Example 2-1 in Chapter 2, the code accessed the context object when creating a custom REPL
object. The context object is a global object. When an application creates a
custom REPL, it exists within a new context, which in this case means it
has its own global object. The way to
override this and use the existing global object is to create a custom REPL and
set the useGlobal flag to
true, rather than the default of
false.
Modules exist in their own global namespace, which means that if you define a top-level variable in one module, it is not available in other modules. More importantly, it means that only what is explicitly exported from the module becomes part of whatever application includes the module. In fact, you can’t access a top-level module variable in an application or other module, even if you deliberately try.
To demonstrate, the following code contains a very simple module
that has a top-level variable named globalValue, and functions to set and return
the value. In the function that returns the value, the global object is printed out using a
console.log method
call.
var globalValue;
exports.setGlobal = function(val) {
globalValue = val;
};
exports.returnGlobal = function() {
console.log(global);
return globalValue;
};We might expect that in the printout of the global object we’ll see globalValue, as we do when we set a variable
in our applications. This doesn’t happen, though.
Start a REPL session and issue a require call to include the new module:
> var mod1 = require('./mod1.js');Set the value and then ask for the value back:
> mod1.setGlobal(34); > var val = mod1.returnGlobal();
The console.log method
prints out the global object before
returning its globally defined value. We can see at the bottom the new
variable holding a reference to the imported module, but val is undefined because the variable hasn’t yet been
set. In addition, the output includes no reference to that module’s own
top-level globalValue:
mod1: { setGlobal: [Function], returnGlobal: [Function] },
_: undefined,
val: undefined }If we ran the command again, then the outer application variable
would be set, but we still wouldn’t see globalValue:
mod1: { setGlobal: [Function], returnGlobal: [Function] },
_: undefined,
val: 34 }The only access we have to the module data is by whatever means the module provides. For JavaScript developers, this means no more unexpected and harmful data collisions because of accidental or intentional global variables in libraries.
Each Node application is an instance of a Node process object, and as such, comes with
certain built-in functionality.
Many of the process object’s
methods and properties provide identification or information about the
application and its environment. The process.execPath method
returns the execution path for the Node application; process.version
provides the Node version; and process.platform
identifies the server platform:
console.log(process.execPath); console.log(process.version); console.log(process.platform);
This code returns the following in my system (at the time of this writing):
/usr/local/bin/node v0.6.9 linux
The process object also wraps
the STDIO streams stdin, stdout, and stderr. Both stdin and stdout are
asynchronous, and are readable and writable, respectively. stderr, however, is a
synchronous, blocking stream.
To demonstrate how to read and write data from stdin and stdout, in Example 3-1 the Node
application listens for data in stdin, and repeats the
data to stdout. The stdin stream is paused
by default, so we have to issue a resume call before
sending data.
process.stdin.resume();
process.stdin.on('data', function (chunk) {
process.stdout.write('data: ' + chunk);
});Run the application using Node, and then start typing into the terminal. Every time you type something and press Enter, what you typed is reflected back to you.
Another useful process method is
memoryUsage, which
tells us how much memory the Node application is using. This could be
helpful for performance tuning, or just to satisfy your general
curiosity about the application. The response has the following
structure:
{ rss: 7450624, heapTotal: 2783520, heapUsed: 1375720 }The heapTotal and
heapUsed properties
refer to the V8 engine’s memory usage.
The last process method I’m
going to cover is process.nextTick. This
method attaches a callback function that’s fired during the next tick
(loop) in the Node event loop.
You would use process.nextTick if you
wanted to delay a function for some reason, but you wanted to delay it
asynchronously. A good example would be if you’re creating a new
function that has a callback function as a parameter and you want to
ensure that the callback is truly asynchronous. The following code is a
demonstration:
function asynchFunction = function (data, callback) {
process.nextTick(function() {
callback(val);
});
);If we just called the callback function, then the action would be synchronous. Now, the callback function won’t be called until the next tick in the event loop, rather than right away.
You could use setTimeout with a zero
(0) millisecond delay instead of
process.nextTick:
setTimeout(function() {
callback(val);
}, 0);However, setTimeout isn’t as
efficient as process.nextTick. When
they were tested against each other, process.nextTick was
called far more quickly than setTimeout with a
zero-millisecond delay. You might also use process.nextTick if
you’re running an application that has a function performing some
computationally complex, and time-consuming, operation. You could break
the process into sections, each called via process.nextTick, to
allow other requests to the Node application to be processed without
waiting for the time-consuming process to finish.
Of course, the converse of this is that you don’t want to break up a process that you need to ensure executes sequentially, because you may end up with unexpected results.
The Buffer class, also
a global object, is a way of handling binary data in Node. In the
section Servers, Streams, and Sockets later
in the chapter, I’ll cover the fact that streams are often binary data
rather than strings. To convert the binary data to a string, the data
encoding for the stream socket is changed using setEncoding.
As a demonstration, you can create a new buffer with the following:
var buf = new Buffer(string);
If the buffer holds a string, you can pass in an optional second parameter with the encoding. Possible encodings are:
asciiSeven-bit ASCII
utf8Multibyte encoded Unicode characters
usc2Two bytes, little-endian-encoded Unicode characters
base64Base64 encoding
hexEncodes each byte as two hexadecimal characters
You can also write a string to an existing buffer, providing an
optional offset, length, and encoding:
buf.write(string); // offset defaults to 0, length defaults to
buffer.length - offset, encoding is utf8Data sent between sockets is transmitted as a buffer (in binary
format) by default. To send a string instead, you either need to call
setEncoding directly on
the socket, or specify the encoding in the function that writes to the
socket. By default, the TCP (Transmission Control Protocol) socket.write method
sets the second parameter to utf8,
but the socket returned in the connectionListener
callback to the TCP createServer function
sends the data as a buffer, not a string.
The timer functions in client-side JavaScript are part of
the global windows object. They’re not
part of JavaScript, but have become such a ubiquitous part of JavaScript
development that the Node developers incorporated them into the Node core
API.
The timer functions operate in Node just like they operate in the browser. In fact, they operate in Node exactly the same as they would in Chrome, since Node is based on Chrome’s V8 JavaScript engine.
The Node setTimeout function takes
a callback function as first parameter, the delay time (in milliseconds)
as second parameter, and an optional list of arguments:
// timer to open file and read contents to HTTP response object
function on_OpenAndReadFile(filename, res) {
console.log('opening ' + filename);
// open and read in file contents
fs.readFile(filename, 'utf8', function(err, data) {
if (err)
res.write('Could not find or open file for reading\n');
else {
res.write(data);
}
// reponse is done
res.end();
}
setTimeout(openAndReadFile, 2000, filename, res);In the code, the callback function on_OpenAndReadFile opens and reads a file to the
HTTP response when the function is called after approximately 2,000
milliseconds have passed.
As the Node documentation carefully notes, there’s no guarantee
that the callback function will be invoked in exactly
n milliseconds (whatever
n is). This is no different than the use of
setTimeout in a
browser—we don’t have absolute control over the environment, and factors
could slightly delay the timer.
The function clearTimeout clears a
preset setTimeout. If you need
to have a repeating timer, you can use setInterval to call a
function every n
milliseconds—n being the second parameter
passed to the function. Clear the interval with clearInterval.
Much of the Node core API has to do with creating services that listen to specific types of communications. In the examples in Chapter 1, we used the HTTP module to create an HTTP web server. Other methods can create a TCP server, a TLS (Transport Layer Security) server, and a UDP (User Datagram Protocol)/datagram socket. I’ll cover TLS in Chapter 15, but in this section I want to introduce the TCP and UDP Node core functionality. First, though, I’ll offer a brief introduction to the terms used in this section.
A socket is an endpoint in a communication, and a network socket is an endpoint in a communication between applications running on two different computers on the network. The data flows between the sockets in what’s known as a stream. The data in the stream can be transmitted as binary data in a buffer, or in Unicode as a string. Both types of data are transmitted as packets: parts of the data split off into specifically sized pieces. There is a special kind of packet, a finish packet (FIN), that is sent by a socket to signal that the transmission is done. How the communication is managed, and how reliable the stream is, depends on the type of socket created.
We can create a basic TCP server and client with the Node Net module. TCP forms the basis for most Internet applications, such as web service and email. It provides a way of reliably transmitting data between client and server sockets.
Creating the TCP server is a little different than creating the
HTTP server in Example 1-1
in Chapter 1. We create
the server, passing in a callback function. The TCP server differs from
the HTTP server in that, rather than passing a requestListener, the TCP callback function’s
sole argument is an instance of a socket listening for incoming
connections.
Example 3-2 contains the code to create a TCP server. Once the server socket is created, it listens for two events: when data is received, and when the client closes the connection.
var net = require('net');
var server = net.createServer(function(conn) {
console.log('connected');
conn.on('data', function (data) {
console.log(data + ' from ' + conn.remoteAddress + ' ' +
conn.remotePort);
conn.write('Repeating: ' + data);
});
conn.on('close', function() {
console.log('client closed connection');
});
}).listen(8124);
console.log('listening on port 8124');There is an optional parameter for createServer: allowHalfOpen. Setting
this parameter to true instructs the
socket not to send a FIN when it receives a FIN packet from the client.
Doing this keeps the socket open for writing (not reading). To close the
socket, you’d then need to explicitly use the end method. By default,
allowHalfOpen is
false.
Notice how a callback function is attached to the two events via
the on method. Many objects
in Node that emit events provide a way to attach a function as an event
listener by using the on method. This method
takes the name of the event as first parameter, and the function
listener as the second.
Node objects that inherit from a special object, the EventEmitter, expose
the on method event
handling, as discussed later in this chapter.
The TCP client is just as simple to create as the server, as shown
in Example 3-3. The call
to the setEncoding method on
the client changes the encoding for the received data. As discussed
earlier in the section Buffer, data is transmitted as
a buffer, but we can use setEncoding to read it
as a utf8 string. The socket’s
write method is used to
transmit the data. It also attaches listener functions to two events:
data, for received
data, and close, in case the
server closes the connection.
var net = require('net');
var client = new net.Socket();
client.setEncoding('utf8');
// connect to server
client.connect ('8124','localhost', function () {
console.log('connected to server');
client.write('Who needs a browser to communicate?');
});
// prepare for input from terminal
process.stdin.resume();
// when receive data, send to server
process.stdin.on('data', function (data) {
client.write(data);
});
// when receive data back, print to console
client.on('data',function(data) {
console.log(data);
});
// when server closed
client.on('close',function() {
console.log('connection is closed');
});The data being transmitted between the two sockets is typed in at
the terminal, and transmitted when you press Enter. The client
application first sends the string you just typed, which the TCP server
writes out to the console. The server repeats the message back to the
client, which in turn writes the message out to the console. The server
also prints out the IP address and port for the client using the
socket’s remoteAddress and
remotePort properties.
Following is the console output for the server after several strings
were sent from the client (with the IP address edited out for
security):
Hey, hey, hey, hey-now. from #ipaddress 57251 Don't be mean, we don't have to be mean. from #ipaddress 57251 Cuz remember, no matter where you go, from #ipaddress 57251 there you are. from #ipaddress 57251
The connection between the client and server is maintained until
you kill one or the other using Ctrl-C. Whichever socket is still open
receives a close event that’s
printed out to the console. The server can also serve more than one
connection from more than one client, since all the relevant functions
are asynchronous.
As I mentioned earlier, TCP is the underlying transport mechanism for much of the functionality we use on the Internet today, including HTTP, which we’ll cover next.
You had a chance to work with the HTTP module in Chapter 1. We created servers using the
createServer method,
passing in the function that will act as the requestListener.
Requests are processed as they come, asynchronously.
In a network, TCP is the transportation layer and HTTP is the
application layer. If you scratch around in the modules included with
Node, you’ll see that when you create an HTTP server, you’re inheriting
functionality from the TCP-based net.Server.
For the HTTP server, the requestListener is a
socket, while the http.ServerRequest
object is a readable stream and the http.ServerResponse is
a writable stream. HTTP adds another level of complexity because of the
chunked transfer encoding it supports. The chunked
transfer encoding allows transfer of data when the exact size of the
response isn’t known until it’s fully processed. Instead, a zero-sized
chunk is sent to indicate the end of a query. This type of encoding is
useful when you’re processing a request such as a large database query
output to an HTML table: writing the data can begin before the rest of
the query data has been received.
More on streams in the upcoming section titled, appropriately enough, Streams, Pipes, and Readline.
The TCP examples earlier in this chapter, and the HTTP examples in Chapter 1, were both coded to work with network sockets. However, all of the server/socket modules can also connect to a Unix socket, rather than a specific network port. Unlike a network socket, a Unix or IPC (interprocess communication) socket enables communication between processes within the same system.
To demonstrate Unix socket communication, I duplicated Example 1-3’s code, but
instead of binding to a port, the new server binds to a Unix socket, as
shown in Example 3-4. The
application also makes use of readFileSync, the
synchronous version of the function to open a file and read its
contents.
// create server
// and callback function
var http = require('http');
var fs = require('fs');
http.createServer(function (req, res) {
var query = require('url').parse(req.url).query;
console.log(query);
file = require('querystring').parse(query).file;
// content header
res.writeHead(200, {'Content-Type': 'text/plain'});
// increment global, write to client
for (var i = 0; i<100; i++) {
res.write(i + '\n');
}
// open and read in file contents
var data = fs.readFileSync(file, 'utf8');
res.write(data);
res.end();
}).listen('/tmp/node-server-sock');The client is based on a code sample provided in the Node core
documentation for the http.request object at
the Node.js site. The http.request object, by
default, makes use of http.globalAgent, which
supports pooled sockets. The size of this pool is five sockets by
default, but you can adjust it by changing the agent.maxSockets
value.
The client accepts the chunked data returned from the server, printing out to the console. It also triggers a response on the server with a couple of minor writes, as shown in Example 3-5.
var http = require('http');
var options = {
method: 'GET',
socketPath: '/tmp/node-server-sock',
path: "/?file=main.txt"
};
var req = http.request(options, function(res) {
console.log('STATUS: ' + res.statusCode);
console.log('HEADERS: ' + JSON.stringify(res.headers));
res.setEncoding('utf8');
res.on('data', function (chunk) {
console.log('chunk o\' data: ' + chunk);
});
});
req.on('error', function(e) {
console.log('problem with request: ' + e.message);
});
// write data to request body
req.write('data\n');
req.write('data\n');
req.end();I didn’t use the asynchronous file read function with the
http.request object
because the connection is already closed when the asynchronous function
is called and no file contents are returned.
Before leaving this section on the HTTP module, be aware that much of the behavior you’ve come to expect with Apache or other web servers isn’t built into a Node HTTP server. For instance, if you password-protect your website, Apache will pop up a window asking for your username and password; a Node HTTP server will not. If you want this functionality, you’re going to have to code for it.
Chapter 15 covers the SSL version of HTTP, HTTPS, along with Crypto and TLS/SSL.
TCP requires a dedicated connection between the two endpoints of the communication. UDP is a connectionless protocol, which means there’s no guarantee of a connection between the two endpoints. For this reason, UDP is less reliable and robust than TCP. On the other hand, UDP is generally faster than TCP, which makes it more popular for real-time uses, as well as technologies such as VoIP (Voice over Internet Protocol), where the TCP connection requirements could adversely impact the quality of the signal.
Node core supports both types of sockets. In the last couple of sections, I demonstrated the TCP functionality. Now, it’s UDP’s turn.
The UDP module identifier is dgram:
require ('dgram');To create a UDP socket, use the createSocket method,
passing in the type of socket—either udp4 or udp6. You can also pass in a callback function
to listen for events. Unlike messages sent with TCP, messages sent using
UDP must be sent as buffers, not strings.
Example 3-6
contains the code for a demonstration UDP client. In it, data is
accessed via process.stdin, and then
sent, as is, via the UDP socket. Note that we don’t have to set the
encoding for the string, since the UDP socket accepts only a buffer, and
the process.stdin data
is a buffer. We do, however, have to convert the
buffer to a string, using the buffer’s toString method, in
order to get a meaningful string for the console.log method call that echoes the
input.
var dgram = require('dgram');
var client = dgram.createSocket("udp4");
// prepare for input from terminal
process.stdin.resume();
process.stdin.on('data', function (data) {
console.log(data.toString('utf8'));
client.send(data, 0, data.length, 8124, "examples.burningbird.net",
function (err, bytes) {
if (err)
console.log('error: ' + err);
else
console.log('successful');
});
});The UDP server, shown in Example 3-7, is even simpler
than the client. All the server application does is create the socket,
bind it to a specific port (8124), and listen for the message event. When a
message arrives, the application prints it out using console.log, along with the IP address
and port of the sender. Note especially that no encoding is necessary to
print out the message—it’s automatically converted from a buffer to a
string.
We didn’t have to bind the socket to a port. However, without the binding, the socket would attempt to listen in on every port.
var dgram = require('dgram');
var server = dgram.createSocket("udp4");
server.on ("message", function(msg, rinfo) {
console.log("Message: " + msg + " from " + rinfo.address + ":"
+ rinfo.port);
});
server.bind(8124);I didn’t call the close method on either
the client or the server after sending/receiving the message. However,
no connection is being maintained between the client and server—just the
sockets capable of sending a message and receiving
communication.
The communication stream between the sockets discussed in
the previous sections is an implementation of the underlying abstract
stream interface. Streams can be
readable, writable, or both, and all streams are instances of EventEmitter, discussed
in the upcoming section Events and EventEmitter.
It’s important to take away from this section that all of these
communication streams, including process.stdin and
process.stdout, are
implementations of the abstract stream interface. Because of this underlying
interface, there is basic functionality available in all streams in
Node:
You can change the encoding for the stream data with
setEncoding.
You can check whether the stream is readable, writable, or both.
You can capture stream events, such as data received or connection closed, and attach callback functions for each.
You can pause and resume the stream.
You can pipe data from a readable stream to a writable stream.
The last capability is one we haven’t covered yet. A simple way to demonstrate a pipe is to open a REPL session and type in the following:
> process.stdin.resume(); > process.stdin.pipe(process.stdout);
...and then enjoy the fact that everything you type from that point on is echoed back to you.
If you want to keep the output stream open for continued data,
pass an option, { end: false }, to
the output stream:
process.stdin.pipe(process.stdout, { end : false });There is one additional object that provides a specific
functionality to readable streams: readline. You include
the Readline module with code like the following:
var readline = require('readline');The Readline module allows line-by-line reading of a stream. Be
aware, though, that once you include this module, the Node program
doesn’t terminate until you close the interface and the stdin stream. The Node
site documentation contains an example of how to begin and terminate a
Readline interface, which I adapted in Example 3-8. The application
asks a question as soon as you run it, and then outputs the answer. It
also listens for any “command,” which is really any line that terminates
with \n. If the command is
.leave, it leaves the
application; otherwise, it just repeats the command and prompts the user
for more. A Ctrl-C or Ctrl-D key combination also causes the application
to terminate.
var readline = require('readline');
// create a new interface
var interface = readline.createInterface(process.stdin, process.stdout, null);
// ask question
interface.question(">>What is the meaning of life? ", function(answer) {
console.log("About the meaning of life, you said " + answer);
interface.setPrompt(">>");
interface.prompt();
});
// function to close interface
function closeInterface() {
console.log('Leaving interface...');
process.exit();
}
// listen for .leave
interface.on('line', function(cmd) {
if (cmd.trim() == '.leave') {
closeInterface();
return;
} else {
console.log("repeating command: " + cmd);
}
interface.setPrompt(">>");
interface.prompt();
});
interface.on('close', function() {
closeInterface();
});Here’s an example session:
>>What is the meaning of life? === About the meaning of life, you said === >>This could be a command repeating command: This could be a command >>We could add eval in here and actually run this thing repeating command: We could add eval in here and actually run this thing >>And now you know where REPL comes from repeating command: And now you know where REPL comes from >>And that using rlwrap replaces this Readline functionality repeating command: And that using rlwrap replaces this Readline functionality >>Time to go repeating command: Time to go >>.leave Leaving interface...
This should look familiar. Remember from Chapter 2 that we can use rlwrap to override the
command-line functionality for REPL. We use the following to trigger its
use:
env NODE_NO_READLINE=1 rlwrap node
And now we know what the flag is triggering—it’s instructing REPL
not to use Node’s Readline module for command-line processing, but to
use rlwrap instead.
This is a quick introduction to the Node stream modules. Now it’s time to change course, and check out Node’s child processes.
Operating systems provide access to a great deal of functionality, but much of it is only accessible via the command line. It would be nice to be able to access this functionality from a Node application. That’s where child processes come in.
Node enables us to run a system command within a new child process, and listen in on its input/output. This includes being able to pass arguments to the command, and even pipe the results of one command to another. The next several sections explore this functionality in more detail.
All but the last example demonstrated in this section use Unix commands. They work on a Linux system, and should work in a Mac. They won’t, however, work in a Windows Command window.
There are four different techniques you can use to create
a child process. The most common one is using the spawn method. This
launches a command in a new process, passing in any arguments. In the
following, we create a child process to call the Unix pwd command to print
the current directory. The command takes no arguments:
var spawn = require('child_process').spawn,
pwd = spawn('pwd');
pwd.stdout.on('data', function (data) {
console.log('stdout: ' + data);
});
pwd.stderr.on('data', function (data) {
console.log('stderr: ' + data);
});
pwd.on('exit', function (code) {
console.log('child process exited with code ' + code);
});Notice the events that are captured on the child process’s
stdout and stderr. If no error
occurs, any output from the command is transmitted to the child
process’s stdout, triggering a
data event on the
process. If an error occurs, such as in the following where we’re
passing an invalid option to the command:
var spawn = require('child_process').spawn,
pwd = spawn('pwd', ['-g']);Then the error gets sent to stderr, which prints
out the error to the console:
stderr: pwd: invalid option -- 'g' Try `pwd --help' for more information. child process exited with code 1
The process exited with a code of 1, which signifies that an error occurred. The
exit code varies depending on the operating system and error. When no
error occurs, the child process exits with a code of 0.
The earlier code demonstrated sending output to the child
process’s stdout and stderr, but what about
stdin? The Node documentation for
child processes includes an example of directing data to stdin. It’s used to
emulate a Unix pipe (|) whereby the result of one command is immediately
directed as input to another command. I adapted the example in order to
demonstrate one of my favorite uses of the Unix pipe—being able to look
through all subdirectories, starting in the local directory, for a file
with a specific word (in this case, test) in its
name:
find . -ls | grep test
Example 3-9
implements this functionality as child processes. Note that the first
command, which performs the find, takes two
arguments, while the second one takes just one: a term passed in via
user input from stdin. Also note that,
unlike the example in the Node documentation, the grep child process’s
stdout encoding is
changed via setEncoding. Otherwise,
when the data is printed out, it would be printed out as a
buffer.
var spawn = require('child_process').spawn,
find = spawn('find',['.','-ls']),
grep = spawn('grep',['test']);
grep.stdout.setEncoding('utf8');
// direct results of find to grep
find.stdout.on('data', function(data) {
grep.stdin.write(data);
});
// now run grep and output results
grep.stdout.on('data', function (data) {
console.log(data);
});
// error handling for both
find.stderr.on('data', function (data) {
console.log('grep stderr: ' + data);
});
grep.stderr.on('data', function (data) {
console.log('grep stderr: ' + data);
});
// and exit handling for both
find.on('exit', function (code) {
if (code !== 0) {
console.log('find process exited with code ' + code);
}
// go ahead and end grep process
grep.stdin.end();
});
grep.on('exit', function (code) {
if (code !== 0) {
console.log('grep process exited with code ' + code);
}
});When you run the application, you’ll get a listing of all files in the current directory and any subdirectories that contain test in their filename.
All of the example applications up to this point work the same in Node 0.8 as in Node 0.6. Example 3-9 is an exception because of a change in the underlying API.
In Node 0.6, the exit event would not be
emitted until the child process exits and all STDIO pipes are closed. In
Node 0.8, the event is emitted as soon as the child process finishes.
This causes the application to crash, because the grep child process’s STDIO pipe is closed when
it tries to process its data. For the application to work in Node 0.8,
the application needs to listen for the close event on the
find child process, rather than the
exit event:
// and exit handling for both
find.on('close', function (code) {
if (code !== 0) {
console.log('find process exited with code ' + code);
}
// go ahead and end grep process
grep.stdin.end();
});In Node 0.8, the close event is emitted
when the child process exits and all STDIO pipes are closed.
In addition to spawning a child process, you can also use
child_process.exec and child_process.execFile to run a command in a
shell and buffer the results. The only difference between child_process.exec and child_process.execFile is that execFile runs an application in a file, rather
than running a command.
The first parameter in the two methods is either the command or
the file and its location; the second parameter is options for the
command; and the third is a callback function. The callback function
takes three arguments: error, stdout, and stderr. The data is buffered to stdout if no error occurs.
If the executable file contains:
#!/usr/local/bin/node console.log(global);
the following application prints out the buffered results:
var execfile = require('child_process').execFile,
child;
child = execfile('./app.js', function(error, stdout, stderr) {
if (error == null) {
console.log('stdout: ' + stdout);
}
});The last child process method is child_process.fork.
This variation of spawn is for
spawning Node processes.
What sets the child_process.fork
process apart from the others is that there’s an actual communication
channel established to the child process. Note, though, that each
process requires a whole new instance of V8, which takes both time and
memory.
Earlier I warned you that child processes that invoke Unix system commands won’t work with Windows, and vice versa. I know this sounds obvious, but not everyone knows that, unlike with JavaScript in browsers, Node applications can behave differently in different environments.
It wasn’t until recently that the Windows binary installation of
Node even provided access to child processes. You also need to invoke
whatever command you want to run via the Windows command interpreter,
cmd.exe.
Example 3-10
demonstrates running a Windows command. In the application, Windows
cmd.exe is used to
create a directory listing, which is then printed out to the console via
the data event handler.
var cmd = require('child_process').spawn('cmd', ['/c', 'dir\n']);
cmd.stdout.on('data', function (data) {
console.log('stdout: ' + data);
});
cmd.stderr.on('data', function (data) {
console.log('stderr: ' + data);
});
cmd.on('exit', function (code) {
console.log('child process exited with code ' + code);
});The /c flag passed as the
first argument to cmd.exe instructs it to
carry out the command and then terminate. The application doesn’t work
without this flag. You especially don’t want to pass in the /K flag, which tells
cmd.exe to execute the
application and then remain because your application won’t
terminate.
I provide more demonstrations of child processes in Chapter 9 and Chapter 12.
The DNS module provides DNS resolution using c-ares, a C library that provides asynchronous DNS requests. It’s used by Node with some of its other modules, and can be useful for applications that need to discover domains or IP addresses.
To discover the IP address given a domain, use the dns.lookup method and
print out the returned IP address:
var dns = require('dns');
dns.lookup('burningbird.net',function(err,ip) {
if (err) throw err;
console.log(ip);
});The dns.reverse method
returns an array of domain names for a given IP address:
dns.reverse('173.255.206.103', function(err,domains) {
domains.forEach(function(domain) {
console.log(domain);
});
});The dns.resolve method
returns an array of record types by a given type, such as A, MX, NS, and so on. In the
following code, I’m looking for the name server domains for my domain
name, burningbird.net:
var dns = require('dns');
dns.resolve('burningbird.net', 'NS', function(err,domains) {
domains.forEach(function(domain) {
console.log(domain);
});
});This returns:
ns1.linode.com ns3.linode.com ns5.linode.com ns4.linode.com
We used the URL module in Example 1-3 in Chapter 1. This simple module provides a way of parsing a URL and returning an object with all of the URL components. Passing in the following URL:
var url = require('url');
var urlObj = url.parse('http://examples.burningbird.net:8124/?file=main');returns the following JavaScript object:
{ protocol: 'http:',
slashes: true,
host: 'examples.burningbird.net:8124',
port: '8124',
hostname: 'examples.burningbird.net',
href: 'http://examples.burningbird.net:8124/?file=main',
search: '?file=main',
query: 'file=main',
pathname: '/',
path: '/?file=main' }Each of the components can then be discretely accessed like so:
var qs = urlObj.query; // get the query string
Calling the URL.format method
performs the reverse operation:
console.log(url.format(urlObj)); // returns original URL
The URL module is often used with the Query String module. The latter module is a simple utility module that provides functionality to parse a received query string, or prepare a string for use as a query string.
To chunk out the key/value pairs in the query string, use the
querystring.parse method.
The following:
var vals = querystring.parse('file=main&file=secondary&type=html");results in a JavaScript object that allows for easy access of the individual query string values:
{ file: [ 'main', 'secondary' ], type: 'html' }Since file is given twice in the
query string, both values are grouped into an array, each of which can be
accessed individually:
console.log(vals.file[0]); // returns main
You can also convert an object into a query string, using querystring.stringify:
var qryString = querystring.stringify(vals)
The Utilities module provides several useful functions. You include this module with:
var util = require('util');You can use Utilities to test if an object is an array (util.isArray) or regular expression (util.isRegExp), and to format a string (util.format). A new experimental addition to the
module provides functionality to pump data from a readable stream to a
writable stream (util.pump):
util.pump(process.stdin, process.stdout);
However, I wouldn’t type this into REPL, as anything you type from that point on is echoed as soon as you type it—making the session a little awkward.
I make extensive use of util.inspect to get a
string representation of an object. I find it’s a great way to discover
more about an object. The first required argument is the object; the
second optional argument is whether to display the nonenumerable
properties; the third optional argument is the number of times the object
is recursed (depth); and the fourth, also optional, is whether to style
the output in ANSI colors. If you assign a value of null to the depth, it recurses indefinitely (the
default is two times)—as much as necessary to exhaustively inspect the
object. From experience, I’d caution you to be careful using null for the depth because you’re going to get a
large output.
You can use util.inspect in REPL, but
I recommend a simple application, such as the following:
var util = require('util');
var jsdom = require('jsdom');
console.log(util.inspect(jsdom, true, null, true));When you run it, pipe the result to a file:
node inspectjsdom.js > jsdom.txt
Now you can inspect and reinspect the object interface at your
leisure. Again, if you use null for
depth, expect a large output file.
The Utilities module provides several other methods, but the one
you’re most likely to use is util.inherits. The
util.inherits function takes two
parameters, constructor and
superConstructor. The
result is that the constructor will inherit the functionality from the
superconstructor.
Example 3-11
demonstrates all the nuances associated with using util.inherits. The explanation of the code
follows.
Example 3-11 and its explanation cover some core JavaScript functionality you might already be familiar with. However, it’s important that all readers come away from this section with the same understanding of what’s happening.
var util = require('util');
// define original object
function first() {
var self = this;
this.name = 'first';
this.test = function() {
console.log(self.name);
};
}
first.prototype.output = function() {
console.log(this.name);
}
// inherit from first
function second() {
second.super_.call(this);
this.name = 'second';
}
util.inherits(second,first);
var two = new second();
function third(func) {
this.name = 'third';
this.callMethod = func;
}
var three = new third(two.test);
// all three should output "second"
two.output();
two.test();
three.callMethod();The application creates three objects named first, second, and third, respectively.
The first object has two methods:
test and output. The test method is defined directly in the object,
while the output method is added later
via the prototype object. The reason I
used both techniques for defining a method on the object is to demonstrate
an important aspect of inheritance with util.inherits (well, of JavaScript, but enabled
by util.inherits).
The second object contains the
following line:
second.super_.call(this);
If we eliminate this line from the second object constructor, any call to output on the second object would succeed, but a call to
test would generate an error and force
the Node application to terminate with a message about test being undefined.
The call method chains the
constructors between the two objects, ensuring that the superconstructor
is invoked as well as the constructor. The superconstructor is the
constructor for the inherited object.
We need to invoke the superconstructor since the test method doesn’t exist until first is created. However, we didn’t need the
call method for the output method, because it’s defined directly on
the first object’s prototype object. When the second object inherits properties from the
first, it also inherits the newly added
method.
If we look under the hood of util.inherits, we see where super_ is defined:
exports.inherits = function(ctor, superCtor) {
ctor.super_ = superCtor;
ctor.prototype = Object.create(superCtor.prototype, {
constructor: {
value: ctor,
enumerable: false,
writable: true,
configurable: true
}
});
};super_ is assigned as a property
to the second object when util.inherits is called:
util.inherits (second, first);
The third object in the application, third, also has a name property. It doesn’t inherit from either
first or second, but does expect a function passed to it
when it’s instantiated. This function is assigned to its own callMethod property. When the code creates an
instance of this object, the two object
instance’s test method is passed to the
constructor:
var three = new third(two.test);
When three.callMethod is called,
“second” is output, not “third” as you might expect at first glance. And
that’s where the self reference in the
first object comes in.
In JavaScript, this is the object
context, which can change as a method is passed around, or passed to an
event handler. The only way you can preserve data for an object’s method
is to assign this to an object
variable—in this case, self—and then
use the variable within any functions in the object.
Running this application results in the following output:
second second second
Much of this is most likely familiar to you from client-side
JavaScript development, though it’s important to understand the Utilities
part in the inheritance. The next section, which provides an overview of
Node’s EventEmitter, features
functionality that is heavily dependent on the inheritance behavior just
described.
Scratch underneath the surface of many of the Node core
objects, and you’ll find EventEmitter.
Anytime you see an object emit an event, and an event handled with
on, you’re seeing
EventEmitter in action. Understanding
how EventEmitter works and how to use
it are two of the more important components of Node development.
The EventEmitter object is what
provides the asynchronous event handling to objects in Node. To
demonstrate its core functionality, we’ll try a quick test
application.
First, include the Events module:
var events = require('events');Next, create an instance of EventEmitter:
var em = new events.EventEmitter();
Use the newly created EventEmitter instance to do two essential tasks:
attach an event handler to an event, and emit the actual event. The
on event handler is
triggered when a specific event is emitted. The first parameter to the
method is the name of the event, the second a function to process the
event:
em.on('someevent', function(data) { ... });The event is emitted on the object, based on some criteria, via the
emit method:
if (somecriteria) {
en.emit('data');
}In Example 3-12, we
create an EventEmitter instance that
emits an event, timed, every three
seconds. In the event handler function for this event, a message with a
counter is output to the console.
var eventEmitter = require('events').EventEmitter;
var counter = 0;
var em = new eventEmitter();
setInterval(function() { em.emit('timed', counter++); }, 3000);
em.on('timed', function(data) {
console.log('timed ' + data);
});Running the application outputs timed event messages to the console until the application is terminated.
This is an interesting example, but not particularly helpful. What
we need is the ability to add EventEmitter functionality to our existing
objects—not use instances of EventEmitter throughout our applications.
To add this necessary EventEmitter functionality to an object, use the
util.inherits method,
described in the preceding section:
util.inherits(someobj, EventEmitter);
By using util.inherits with the
object, you can call the emit method within the
object’s methods, and code event handlers on the object instances:
someobj.prototype.somemethod = function() { this.emit('event'); };
...
someobjinstance.on('event', function() { });Rather than attempt to decipher how EventEmitter works in the abstract sense, let’s
move on to Example 3-13,
which shows a working example of an object inheriting EventEmitter’s functionality. In the
application, a new object, inputChecker, is created. The constructor takes
two values, a person’s name and a filename. It assigns the person’s name
to an object variable, and also creates a reference to a writable stream
using the File System module’s createWriteStream method
(for more on the File System module, see the sidebar Readable and Writable Stream).
The object also has a method, check, that checks incoming data for specific
commands. One command (wr:) triggers a
write event, another (en:) an end
event. If no command is present, then an echo event is triggered.
The object instance provides event handlers for all three events. It
writes to the output file for the write event, it echoes the input for the
commandless input, and it terminates the application with an end event,
using the process.exit method.
All input comes from standard input (process.stdin).
var util = require('util');
var eventEmitter = require('events').EventEmitter;
var fs = require('fs');
function inputChecker (name, file) {
this.name = name;
this.writeStream = fs.createWriteStream('./' + file + '.txt',
{'flags' : 'a',
'encoding' : 'utf8',
'mode' : 0666});
};
util.inherits(inputChecker,eventEmitter);
inputChecker.prototype.check = function check(input) {
var command = input.toString().trim().substr(0,3);
if (command == 'wr:') {
this.emit('write',input.substr(3,input.length));
} else if (command == 'en:') {
this.emit('end');
} else {
this.emit('echo',input);
}
};
// testing new object and event handling
var ic = new inputChecker('Shelley','output');
ic.on('write', function(data) {
this.writeStream.write(data, 'utf8');
});
ic.on('echo', function( data) {
console.log(this.name + ' wrote ' + data);
});
ic.on('end', function() {
process.exit();
});
process.stdin.resume();
process.stdin.setEncoding('utf8');
process.stdin.on('data', function(input) {
ic.check(input);
});The EventEmitter functionality is
bolded in the example. Note that the functionality also includes the
process.stdin.on event
handler method, since process.stdin is one of
the many Node objects that inherit from EventEmitter.
We don’t have to chain the constructors from the new object to
EventEmitter, as demonstrated in the
earlier example covering util.inherits, because
the functionality we need—on and emit—consists of prototype methods, not object
instance properties.
The on method is really a
shortcut for the EventEmitter.addListener
method, which takes the same parameters. So this:
ic.addListener('echo', function( data) {
console.log(this.name + ' wrote ' + data);
});is exactly equivalent to:
ic.on('echo', function( data) {
console.log(this.name + ' wrote ' + data);
});You can listen only to the first event with:
ic.once(event, function);
When you exceed 10 listeners for an event, you’ll get a warning by
default. Use setMaxListeners, passing
in a number, to change the number of listeners. Use a value of zero
(0) for an unlimited amount of
listeners.
Many of the core Node objects, as well as third-party modules, make
use of EventEmitter. In Chapter 4, I’ll demonstrate how to convert the
code in Example 3-13 into a
module.
Node’s basic implementation is kept as streamlined as possible. Rather than incorporate every possible component of use directly into Node, developers offer additional functionality via Node’s modules.
Node’s module system is patterned after the CommonJS module system, a way of creating modules so that they’re interoperable. The core of the system is a contract that developers adhere to in order to ensure that their modules play well with others.
Among the CommonJS module system requirements implemented with Node are:
Support is included for a require function that takes the module
identifier and returns the exported API.
The module name is a string of characters, and may include forward slashes (for identification of path).
The module must specifically export that which is to be exposed outside the module.
Variables are private to the module.
In the next several sections, we’ll see how Node adheres to these requirements.
Node supports a simple module loading system: there is a one-to-one correspondence between the file and module.
To include a module within a Node application, use the require statement, passing in a string with the
identifier for the module:
var http = require ('http');You can also just include a specific object, rather than all objects, from a module:
var spawn = require('child_process').spawn;You can load core modules—i.e., those native to Node—or
modules from the node_modules folder just by providing the
module identifier, such as http for the
HTTP module. Modules not part of core, or not included in the node_modules folder, should include forward
slashes to indicate the path. As an example, Node expects to find the
module named mymodule.js in the same
directory as the Node application in the following require statement:
require ('./mymodule');Or you can use the full path:
require ('/home/myname/myapp/mymodule.js');Module files can have either a .js, .node, or .json file extension. The .node extension assumes that the file is a compiled binary, not a text file containing JavaScript.
Node core modules have higher priority than external modules. If
you’re trying to load a custom module named http, Node loads the core version of the HTTP
module. You’ll have to provide either a different module identifier, or
you’ll need to provide the full path.
Earlier I mentioned the node_modules folder. If you specify the node identifier without providing a path, and the module isn’t a core module, Node first looks for a node_modules folder local to the application, and searches for the module in this folder. If it doesn’t find the module, Node then looks in the parent subdirectory for a node_modules folder and the node, and so on.
If the module is named mymodule,
and the application is located in a subdirectory with the following
path:
/home/myname/myprojects/myapp
then Node looks for the module using the following searches, in turn:
/home/myname/myprojects/myapp/node_modules/mymodule.js
/home/myname/myprojects/node_modules/mymodule.js
/home/myname/node_modules/mymodule.js
/node_modules/mymodule.js
Node can optimize the search depending on where the file issuing the
require statement resides. For
instance, if the file making the require statement is itself a module in a
subdirectory of the node_modules
folder, Node begins the search for the required module in the topmost
node_modules folder.
There are two additional variations of require: require.resolve and
require.cache. The
require.resolve method
performs the lookup for the given module but, rather than load the module,
just returns the resolved filename. The resolve.cache object
contains a cached version of all loaded modules. When you try to load the
module again in the same context, it’s loaded from the cache. If you want
to force a new load, delete the item from the cache.
If the item’s path is:
var circle = require('./circle.js');delete it with:
delete require.cache('./circle.js');This code forces a reload of the module the next time a require is called on it.
As mentioned earlier, much of the rich functionality associated with Node comes in via third-party modules. There are router modules, modules for working with relational or document database systems, template modules, testing modules, and even modules for payment gateways.
Though there is no formal Node module developer system, developers are encouraged to upload their modules to GitHub. Following are good resources for finding Node modules:
npm registry (http://search.npmjs.org/)
Node module wiki (https://github.com/joyent/node/wiki/modules)
The node-toolbox (http://toolbox.no.de/)
Nipster! (http://eirikb.github.com/nipster/)
The modules are roughly categorized into different types such as the aforementioned routers, database, templating, payment gateway, and so on.
To use a module, you can download the source from GitHub (or wherever the source is located), and then install it manually into your application environment. Most modules provide basic installation instructions, or, at a minimum, you can deduce the installation requirements by examining the files and directories included in the module. However, there is a far easier way to install a Node module: using the Node Package Manager (npm).
The npm site is at http://npmjs.org/. You can find basic instructions on npm at http://npmjs.org/doc/README.html. Essential reading for Node module developers is the Developers section of the npm manual, found at http://npmjs.org/doc/developers.html. For a useful post explaining the differences between local and global installation, see http://blog.nodejs.org/2011/03/23/npm-1-0-global-vs-local-installation/.
Modern installations include npm, but you can double-check for its
existence by typing npm at the
command line in the same environment that you use to access Node.
To get an overview of npm commands, use the following:
$ npm help npm
Modules can be installed globally or locally. The local installation is the best approach if you’re working on a project and not everyone sharing the system needs access to this module. A local installation, which is the default, installs the module in the current location in the node_modules directory.
$ npm install modulenameAs an example, to install Connect, a very popular middleware framework, use the following:
$ npm install connect
npm not only installs Connect, it also discovers its module dependencies and installs them, too, as shown in Figure 4-1.
Once it’s installed, you can find the module in your local directory’s node_modules directory. Any dependencies are installed in that module’s node_modules directory.
If you want to install the package globally, use the -g or --global option:
$ npm -g install connect
These examples install packages that are registered at the npm site. You can also install a module that’s in a folder on the filesystem, or a tarball that’s either local or fetched via a URL:
npm install http://somecompany.com/somemodule.tgz
If the package has versions, you can install a specific version:
npm install modulename@0.1npm can also work with Git, as demonstrated in the Appendix A.
You can even install an old friend, jQuery:
npm install jquery
Now you can make use of a familiar syntax in your Node application development.
If you’re no longer using a module, you can uninstall it:
npm uninstall modulenameThe following command tells npm to check for new modules, and perform an update if any are found:
npm update
Or you can update a single module:
npm update modulenameIf you just want to check to see if any packages are outdated, use the following:
npm outdated
Again, you can run this command against a single module.
List installed packages and dependencies with list, ls, la, or ll:
npm ls
The la and ll options provide
extended descriptions. The following is the text I get running
npm ll in my Windows 7
machine:
C:\Users\Shelley>npm ls ll npm WARN jsdom >= 0.2.0 Unmet dependency in C:\Users\Shelley\node_modules\html5 C:\Users\Shelley ├── async@0.1.15 ├── colors@0.6.0-1 ├── commander@0.5.2 ├─┬ connect@1.8.5 │ ├── formidable@1.0.8 │ ├── mime@1.2.4 │ └── qs@0.4.1 ├─┬ html5@v0.3.5 │ ├── UNMET DEPENDENCY jsdom >= 0.2.0 │ ├── opts@1.2.2 │ └─┬ tap@0.0.13 │ ├── inherits@1.0.0 │ ├── tap-assert@0.0.10 │ ├── tap-consumer@0.0.1 │ ├── tap-global-harness@0.0.1 │ ├── tap-harness@0.0.3 │ ├── tap-producer@0.0.1 │ ├── tap-results@0.0.2 │ ├─┬ tap-runner@0.0.7 │ │ ├── inherits@1.0.0 │ │ ├── slide@1.1.3 │ │ ├── tap-assert@0.0.10 │ │ ├── tap-consumer@0.0.1 │ │ ├── tap-producer@0.0.1 │ │ ├── tap-results@0.0.2 │ │ └── yamlish@0.0.3 │ ├── tap-test@0.0.2 │ └── yamlish@0.0.2 └─┬ optimist@0.3.1 └── wordwrap@0.0.2
Note the warning about an unmet dependency for the HTML5 module. The HTML5 module requires an older version of the JSDOM library. To correct this, I installed the necessary version of the module:
npm install jsdom@0.2.0
You can also directly install all dependencies with the -d flag. For instance, in
the directory for the module, type the following:
npm install -d
If you want to install a version of the module that hasn’t yet been uploaded to the npm registry, you can install directly from the Git repository:
npm install https://github.com/visionmedia/express/tarball/master
Use caution, though, as I’ve found that when you install a not-yet-released version of a module, and you do an npm update, the npm registry version can overwrite the version you’re using.
To see which modules are installed globally, use:
npm ls -g
You can learn more about your npm installation using the config command. The
following lists the npm configuration settings:
npm config list
You can get a more in-depth look at all configuration settings with:
npm config ls -l
You can modify or remove configuration settings either by using a command line:
npm config deletekeynamenpm config setkeynamevalue
or by directly editing the configuration file:
$ npm config edit
I would strongly recommend you leave your npm configuration settings alone, unless you’re very sure of a change’s effect.
You can also search for a module using whatever terms you think might return the best selection:
npm search html5 parser
The first time you do a search, npm builds an index, which can take a few minutes. When it’s finished, though, you’ll get a list of possible modules that match the term or terms you provided. The search terms html5 and parser returned just two modules: HTML5, an HTML parser that includes support for SVG and MathML; and Fabric, an object model with support for HTML5 Canvas and an SVG-to-Canvas parser.
The npm website provides a registry of modules you can browse through, and an up-to-date listing of modules most depended on—that is, modules most used by other modules or by Node applications. In the next section, I’ll cover a sampling of these modules.
I’ll cover other npm commands later in this chapter, in the section Creating Your Own Custom Module.
Though Node.js has been active only for a few years, it’s already attracted a large body of work. When you look at the Node.js modules wiki page, you’ll find a significant number of modules. The good thing is, you can find a lot of useful modules that implement the functionality you need. The bad news is, it’s difficult to determine which module to use—in other words, which modules are “best of breed.”
Using a search tool like Google can give you a fair idea of which modules are popular. For example, it quickly became apparent when I was exploring middleware and framework modules that Connect and Express were very popular.
In addition, when you look at the GitHub registry for the item, you can see if it’s actively supported and up to date with the current Node installation. As another example, I was checking out a tool named Apricot, which does HTML parsing and is recommended in the Node documentation, but then I noticed it hadn’t been updated for some time, and when I tried to use the module, I found it didn’t work with my installation of Node (at least, not when this book was written).
Many of the modules provide example applications, and a quick test of these will let you know if you can use the module in your current environment.
As mentioned, the Node documentation site does provide a listing of recommended third-party modules, starting with the npm, which is now incorporated into the Node installation. However, the npm website and its module registry provide us with a better view of what modules are used in most applications.
At the npm registry page, you can search for modules, but you can also review a list of the “most depended on” modules, which are modules used either in other modules or in Node applications. At the time of this writing, the top modules were:
I’ll cover several of these modules in future chapters, but I want to cover three now—both because they give us a chance to better understand how Node works, and because they are especially useful. They are:
Colors
Optimist
Underscore
Colors is one of the simpler modules. You can use it to
provide different color and style effects to the console.log output, and
that’s it. However, it’s also a good demonstration of an effective
module because it is simple to use, focuses on providing one service,
and does a good job with that one service.
Testing how a module works is a great reason for using REPL. To try Colors, install it using npm like so:
$ npm install colors
Open a new REPL session and include the colors library:
> var colors = require('colors');Because the Colors module is included in the current location’s node_modules subdirectory, Node is able to find it rather quickly.
Now try something out, such as the following:
console.log('This Node kicks it!'.rainbow.underline);The result is a colorful, underlined rendering of your message. The style applies only for the one message—you’ll need to apply another style for another message.
If you’ve worked with jQuery, you recognize the chaining used to
combine effects. The example makes use of two: a font effect, underlined, and a font color, rainbow.
Try another, this time zebra
and bold:
console.log('We be Nodin'.zebra.bold);You can change the style for sections of the console message:
console.log('rainbow'.rainbow, 'zebra'.zebra);Why would something like Colors be useful? One reason is that it enables us to specify formatting for various events, such as displaying one color for errors in one module, another color or effect for warnings in a second module, and so on. To do this, you can use the Colors presets or create a custom theme:
> colors.setTheme({
....... mod1_warn: 'cyan',
....... mod1_error: 'red',
....... mod2_note: 'yellow'
....... });
> console.log("This is a helpful message".mod2_note);
This is a helpful message
> console.log("This is a bad message".mod1_error);
This is a bad messageFind more on Colors at https://github.com/Marak/colors.js.
Optimist is another module focused on solving a specific problem: parsing command options. That’s it, that’s all it does—but it does it very well.
As an example, this simple application uses the Optimist module to print command-line options to the console.
#!/usr/local/bin/node
var argv = require('optimist').argv;
console.log(argv.o + " " + argv.t);You can run the application with short options. The following
prints the values of 1 and 2 out to the console:
./app.js -o 1 -t 2
You can also process long options:
#!/usr/local/bin/node
var argv = require('optimist').argv;
console.log(argv.one + " " + argv.two);and test with the following, resulting in a printout of My Name:
./app2.js --one="My" --two="Name"
You can also use the Optimist module to process Boolean and unhyphenated options.
Read more about Optimist at https://github.com/substack/node-optimist.
Install the Underscore module with:
npm install underscore
According to the developers, Underscore is a utility-belt library for Node. It provides a lot of extended JavaScript functionality we’re used to with third-party libraries, such as jQuery or Prototype.js.
Underscore is so named because, traditionally, its
functionality is accessed with an underscore (_), similar to jQuery’s $. Here’s an example:
var _ = require('underscore');
_.each(['apple','cherry'], function (fruit) { console.log(fruit); });Of course, the problem with the underscore is that this character
has a specific meaning in REPL. No worries, though—we can just use
another variable, us:
var us = require('underscore');
us.each(['apple','cherry'], function(fruit) { console.log(fruit); });Underscore provides expanded functionality for arrays, collections, functions, objects, chaining, and general utility. Fortunately, there’s also excellent documentation for all of its functionality, so I’ll forgo detailing any of it here.
However, I do want to mention one nice capability: a controlled
way to extend Underscore with your own utility functions, via the
mixin function. We can
quickly try this method, and the others, in a REPL session:
> var us = require('underscore');
undefined
> us.mixin({
... betterWithNode: function(str) {
..... return str + ' is better with Node';
..... }
... });
> console.log(us.betterWithNode('chocolate'));
chocolate is better with NodeYou’ll see the term mixin used in several Node modules. It’s based on a pattern where properties of one object are added (“mixed in”) to another.
Of course, it makes more sense to extend Underscore from a module that we can reuse in our applications, which leads us to our next topic—creating our own custom modules.
Just as you do for your client-side JavaScript, you’ll want to split off reusable JavaScript into its own libraries. The only difference is that you need to take a couple of extra steps to convert your JavaScript library into a module for use with Node.
Let’s say you have a JavaScript library function, concatArray, that takes a string and an array of
strings, and concatenates the first string to each string in the
array:
function concatArray(str, array) {
return array.map(function(element) {
return str + ' ' + element;
});
}You want to use this function, as well as others, in your Node applications.
To convert your JavaScript library for use in Node, you’ll need to
export all of your exposed functions using the exports object, as shown
in the following code:
exports.concatArray = function(str, array) {
return array.map(function(element) {
return str + ' ' + element;
});
};To use concatArray in a Node
application, import the library using require, assigning the
library to a variable name. Once the library is assigned, you can call any
of the exposed functions in your code:
var newArray = require ('./arrayfunctions.js');
console.log(newArray.concatArray('hello', ['test1','test2']));It’s not very complicated, as long as you remember two things:
You can split your module into separate JavaScript files, all located within a directory. Node can load the directory contents, as long as you organize the contents in one of two ways.
The first way is to provide a JSON file named package.json with information about the directory. The structure can contain other information, but the only entries relevant to Node are:
{ "name" : "mylibrary",
"main" : "./mymodule/mylibrary.js" }The first property, name, is the name of
the module. The second, main, indicates the
entry point for the module.
The second way is to include either an index.js or index.node file in the directory to serve as the main module entry point.
Why would you provide a directory rather than just a single
module? The most likely reason is that you’re making use of existing
JavaScript libraries, and just providing a “wrapper” file that wraps the
exposed functions with exports statements.
Another reason is that your library is so large that you want to break
it down to make it easier to modify.
Regardless of the reason, be aware that all of the exported objects must be in the one main file that Node loads.
If you want to make your package available to others, you can promote it on your website, but you’ll be missing out on a significant audience. When you’re ready to publish a module, you’re going to want to add it to the list of modules at the Node.js website, and you’ll also want to publish it to the npm registry.
Earlier I mentioned the package.json file. It’s actually based on the CommonJS module system recommendations, which you can find at http://wiki.commonjs.org/wiki/Packages/1.0#Package_Descriptor_File (though check to see if there’s a more up-to-date version).
Among the required fields for the package.json file are:
nameThe name of the package
descriptionThe package description
versionThe current version conforming to semantic version requirements
keywordsAn array of search terms
maintainersAn array of package maintainers (includes name, email, and website)
contributorsAn array of package contributors (includes name, email, and website)
bugsThe URL where bugs can be submitted
licensesAn array of licenses
repositoriesAn array of repositories where the package can be found
dependenciesPrerequisite packages and their version numbers
The other fields are optional. Still, that’s a lot of fields. Thankfully, npm makes it easier to create this file. If you type the following at the command line:
npm init
the tool will run through the required fields, prompting you for each. When it’s done, it generates a package.json file.
In Chapter 3, Example 3-13, I started an
object called inputChecker that
checks incoming data for commands and then processes the command. The
example demonstrated how to incorporate EventEmitter. Now we’re going to modify this
simple object to make it usable by other applications and
modules.
First, we’ll create a subdirectory in node_modules and name it inputcheck, and then move the existing
inputChecker code file to it. We need
to rename the file to index.js.
Next, we need to modify the code to pull out the part that implements
the new object. We’ll save it for a future test file. The last
modification we’ll do is add the exports object, resulting in the code shown in
Example 4-1.
var util = require('util');
var eventEmitter = require('events').EventEmitter;
var fs = require('fs');
exports.inputChecker = inputChecker;
function inputChecker(name, file) {
this.name = name;
this.writeStream = fs.createWriteStream('./' + file + '.txt',
{'flags' : 'a',
'encoding' : 'utf8',
'mode' : 0666});
};
util.inherits(inputChecker,eventEmitter);
inputChecker.prototype.check = function check(input) {
var self = this;
var command = input.toString().trim().substr(0,3);
if (command == 'wr:') {
self.emit('write',input.substr(3,input.length));
} else if (command == 'en:') {
self.emit('end');
} else {
self.emit('echo',input);
}
};We can’t export the object function directly, because util.inherits expects
an object to exist in the file named inputChecker. We’re also modifying the
inputChecker object’s prototype later in the file. We could have
changed these code references to use exports.inputChecker, but that’s
kludgy. It’s just as easy to assign the object in a
separate statement.
To create the package.json
file, I ran npm init and answered
each of the prompts. The resulting file is shown in Example 4-2.
{
"author": "Shelley Powers <shelleyp@burningbird.net> (http://burningbird.net)",
"name": "inputcheck",
"description": "Looks for commands within the string and implements the commands",
"version": "0.0.1",
"homepage": "http://inputcheck.burningbird.net",
"repository": {
"url": "
},
"main": "inputcheck.js",
"engines": {
"node": "~0.6.10"
},
"dependencies": {},
"devDependencies": {},
"optionalDependencies": {}
}The npm init command doesn’t
prompt for dependencies, so we need to add them directly to the file.
However, the inputChecker module
isn’t dependent on any external modules, so we can leave these fields
blank in this case.
Chapter 16 has a more in-depth look at the package.json file.
At this point, we can test the new module to make sure it actually
works as a module. Example 4-3 is
the portion of the previously existing inputChecker application that tested the new
object, now pulled out into a separate test application.
var inputChecker = require('inputcheck').inputChecker;
// testing new object and event handling
var ic = new inputChecker('Shelley','output');
ic.on('write', function(data) {
this.writeStream.write(data, 'utf8');
});
ic.addListener('echo', function( data) {
console.log(this.name + ' wrote ' + data);
});
ic.on('end', function() {
process.exit();
});
process.stdin.resume();
process.stdin.setEncoding('utf8');
process.stdin.on('data', function(input) {
ic.check(input);
});We can now move the test application into a new examples subdirectory within the module directory to be packaged with the module as an example. Good practice demands that we also provide a test directory with one or more testing applications, as well as a doc directory with documentation. For a module this small, a README file should be sufficient. Lastly, we create a gzipped tarball of the module.
Once we’ve provided all we need to provide, we can publish the module.
The folks who brought us npm also provide a really great source for Node developers: the Developer Guide. It outlines everything we need to know about how to publish our modules.
The Guide specifies some additional requirements for the package.json file. In addition to the fields
already created, we also need to add in a directories field with
a hash of folders, such as the previously mentioned test and doc:
"directories" : {
"doc" : ".",
"test" : "test",
"example" : "examples"
}Before publishing, the Guide recommends we test that the module can cleanly install. To test for this, type the following in the root directory for the module:
npm install . -g
At this point, we’ve tested the inputChecker module, modified the package.json package to add directories, and
confirmed that the package successfully installs.
Next, we need to add ourselves as npm users if we haven’t done so already. We do this by typing:
npm adduser
and following the prompts to add a username, a password, and an email address.
There’s one last thing to do:
npm publish
We can provide the path to the tarball or the directory. As the
Guide warns us, everything in the directory is exposed unless we use a
.npmignore list in the
package.json file to ignore
material. It’s better, though, just to remove anything that’s not needed
before publishing the module.
Once published—and once the source is also uploaded to GitHub (if that’s the repository you’re using)—the module is now officially ready for others to use. Promote the module on Twitter, Google+, Facebook, your website, and wherever else you think people would want to know about the module. This type of promotion isn’t bragging—it’s sharing.
Node might seem intimidating at times, with discussions about
asynchronous events and callbacks and new objects such as EventEmitter—not to mention all that new
server-side functionality we have to play with. If you’ve worked with any of
the modern JavaScript libraries, though, you’ve experienced much of the
functionality that goes into Node, at least when it comes to asynchronous
development.
For instance, if you’ve used a timer in JavaScript, you’ve used an
asynchronous function. If you’ve ever developed in Ajax, you’ve used an
asynchronous function. Even the plain old onclick event handler is an
asynchronous function, since we never know when the user is going to click
that mouse or tap that keyboard.
Any method that doesn’t block the control thread while waiting for
some event or result is an asynchronous function. When it comes to the
onclick handling, the
application doesn’t block all other application processing, waiting for that
user’s mouse click—just as it doesn’t block all functionality while the
timer is in effect, or while waiting for the server to return from an Ajax
call.
In this chapter, we’re going to look more closely at exactly what we mean by the term asynchronous control. In particular, we’re going to look at some asynchronous design patterns, as well as explore some of the Node modules that provide finer control over program flow when we’re working in this new environment. And since asynchronous control can add some new and interesting twists when it comes to error handling, we’re also going to take a closer look at exception handling within an asynchronous Node environment.
In the earlier days of Node, asynchronous functionality was facilitated through the use of promises, a concept that arose in the 1970s. A promise is an object that represents the result of an asynchronous action. It’s also known as a future, a delay, or simply deferred. The CommonJS design model embraced the concept of the promise.
In the earlier Node implementation, a promise was an object that
emitted exactly two events: success and
error. Its use was simple: if an
asynchronous operation succeeded, the success event was emitted; otherwise, the
error event was emitted. No other
events were emitted, and the object would emit one or the other, but not
both, and no more than once. Example 5-1 incorporates a
previously implemented promise into a function that opens and reads in a
file.
function test_and_load(filename) {
var promise = new process.Promise();
fs.stat(filename).addCallback(function (stat) {
// Filter out non-files
if (!stat.isFile()) { promise.emitSuccess(); return; }
// Otherwise read the file in
fs.readFile(filename).addCallback(function (data) {
promise.emitSuccess(data);
}).addErrback(function (error) {
promise.emitError(error);
});
}).addErrback(function (error) {
promise.emitError(error);
});
return promise;
}Each object would return the promise object. The code to process a
successful result would be passed as a function to the promise object’s
addCallback method, which
had one parameter, the data. The code to process the error would be passed
as a function to the promise object’s addErrback method, which
received the error as its one and only parameter:
var File = require('file');
var promise = File.read('mydata.txt');
promise.addCallback(function (data) {
// process data
});
promise.addErrback(function (err) {
// deal with error
})The promise object ensured that the proper functionality was performed whenever the event finished—either the results could be manipulated, or the error processed.
The code for Example 5-1 is one of a number of examples of possible asynchronous function techniques documented at http://groups.google.com/group/nodejs/browse_thread/thread/8dab9f0a5ad753d5 as part of the discussions about how Node would handle this concept in the future.
The promise object was pulled from Node in version 0.1.30. As Ryan Dahl noted at the time, the reasoning was:
Because many people (myself included) only want a low-level interface to file system operations that does not necessitate creating an object, while many other people want something like promises but different in one way or another. So instead of promises we’ll use last argument callbacks and consign the task of building better abstraction layers to user libraries.
Rather than the promise object, Node incorporated the last argument callbacks we’ve used in previous chapters. All asynchronous methods feature a callback function as the last argument. The first argument in this callback function is always an error object.
To demonstrate the fundamental structure of the callback
functionality, Example 5-2
is a complete Node application that creates an object with one method,
someMethod. This method takes three
arguments, the second of which must be a string, and the third being the
callback. In the method, if the second argument is missing or is not a
string, the object creates a new Error object, which is
passed to the callback function. Otherwise, whatever the result of the
method is gets passed to the callback function.
var obj =function() { };
obj.prototype.doSomething = function(arg1, arg2_) {
var arg2 = typeof(arg2_) === 'string' ? arg2_ : null;
var callback_ = arguments[arguments.length - 1];
callback = (typeof(callback_) == 'function' ? callback_ : null);
if (!arg2)
return callback(new Error('second argument missing or not a string'));
callback(arg1);
}
var test = new obj();
try {
test.doSomething('test', 3.55, function(err,value) {
if (err) throw err;
console.log(value);
});
} catch(err) {
console.error(err);
}The key elements of the callback functionality are in boldface in the code.
The first key functionality is to ensure the last argument is a
callback function. Well, we can’t determine the user’s intent, but we can
make sure the last argument is a function, and that will have to do. The
second key functionality is to create the new Node Error object if an error
occurs, and return it as the result to the callback function. The last
critical functionality is to invoke the callback function, passing in the
method’s result if no error occurs. In short, everything else is
changeable, as long as these three key functionalities are present:
With the existing code in Example 5-1, the application output is the following error message printed out to the console:
[Error: second argument missing or not a string]
Changing the method call in the code to the following:
test.doSomething('test','this',function(err,value) {results in test being printed out
to the console. Changing it then to the following:
test.doSomething('test',function(err,value) {again results in an error, this time because the second argument is missing.
If you look through the code in the lib directory of the Node installation, you’ll see the last callback pattern repeated throughout. Though the functionality may change, this pattern remains the same.
This approach is quite simple and ensures consistent results from asynchronous methods. However, it also creates its own unique challenges, as we’ll cover in the next section.
It’s not unusual to find the following in a client-side JavaScript application:
val1 = callFunctionA(); val2 = callFunctionB(val1); val3 = callFunctionC(val2);
The functions are called, in turn, passing the results from the earlier function to each subsequent function. Since all the functions are synchronous, we don’t have to worry about the function calls getting out of sequence—no unexpected results.
Example 5-3 shows a relatively common case of this type of sequential programming. The application uses synchronous versions of Node’s File System methods to open a file and get its data, modify the data by replacing all references to “apple” with “orange,” and output the resulting string to a new file.
var fs = require('fs');
try {
var data = fs.readFileSync('./apples.txt','utf8');
console.log(data);
var adjData = data.replace(/[A|a]pple/g,'orange');
fs.writeFileSync('./oranges.txt', adjData);
} catch(err) {
console.error(err);
}Since problems can occur and we can’t be sure errors are handled
internally in any module function, we wrap all of the function calls in a
try block to allow for
graceful—or at least, more informative—exception handling. The following
is an example of what the error looks like when the application can’t find
the file to read:
{ [Error: ENOENT, no such file or directory './apples.txt']
errno: 34,
code: 'ENOENT',
path: './apples.txt',
syscall: 'open' }While perhaps not very user-friendly, at least it’s a lot better than the alternative:
node.js:201
throw e; // process.nextTick error, or 'error' event on first tick
^
Error: ENOENT, no such file or directory './apples.txt'
at Object.openSync (fs.js:230:18)
at Object.readFileSync (fs.js:120:15)
at Object.<anonymous> (/home/examples/public_html/node/read.js:3:18)
at Module._compile (module.js:441:26)
at Object..js (module.js:459:10)
at Module.load (module.js:348:31)
at Function._load (module.js:308:12)
at Array.0 (module.js:479:10)
at EventEmitter._tickCallback (node.js:192:40)In the example, we’re going to have expected results because each function call is performed in sequence.
Converting this synchronous sequential application pattern to an asynchronous implementation requires a couple of modifications. First, we have to replace all functions with their asynchronous counterparts. However, we also have to account for the fact that each function doesn’t block when called, which means we can’t guarantee the proper sequence if the functions are called independently of each other. The only way to ensure that each function is called in its proper sequence is to use nested callbacks.
Example 5-4 is an asynchronous version of the application from Example 5-3. All of the File System function calls have been replaced by their asynchronous versions, and the functions are called in the proper sequence via a nested callback.
var fs = require('fs');
try {
fs.readFile('./apples2.txt','utf8', function(err,data) {
if (err) throw err;
var adjData = data.replace(/[A|a]pple/g,'orange');
fs.writeFile('./oranges.txt', adjData, function(err) {
if (err) throw err
});
});
} catch(err) {
console.error(err);
}In Example 5-4, the
input file is opened and read, and only when both actions are finished
does the callback function passed as the last parameter get called. In
this function, the error is checked to make sure it’s null. If not, the error is thrown for catching
in the outer exception-handling block.
Some style guides frown on throwing an error, and more complex frameworks provide error-handling objects and functions to ensure that all errors are resolved. My primary concern is that errors are handled.
If no error occurs, the data is processed and the asynchronous
writeFile method is called. Its
callback function has only one parameter, the error object. If it’s not
null, it’s thrown for handling in the outer exception block.
If an error occurred, it would look similar to the following:
/home/examples/public_html/node/read2.js:11
if (err) throw err;
^
Error: ENOENT, no such file or directory './boogabooga/oranges.txt'If you want the stack trace of the error, you can print out the
stack property of the
Node error object:
catch(err) {
console.log(err.stack);
}Including another sequential function call adds another level of
callback nesting. In Example 5-5, we access a listing
of files for a directory. In each of the files, we replace a generic
domain name with a specific domain name using the string replace method, and the
result is written back to the original file. A log is
maintained of each changed file, using an open write stream.
var fs = require('fs');
var writeStream = fs.createWriteStream('./log.txt',
{'flags' : 'a',
'encoding' : 'utf8',
'mode' : 0666});
try {
// get list of files
fs.readdir('./data/', function(err, files) {
// for each file
files.forEach(function(name) {
// modify contents
fs.readFile('./data/' + name,'utf8', function(err,data) {
if (err) throw err;
var adjData = data.replace(/somecompany\.com/g,'burningbird.net');
// write to file
fs.writeFile('./data/' + name, adjData, function(err) {
if (err) throw err;
// log write
writeStream.write('changed ' + name + '\n', 'utf8', function(err) {
if(err) throw err;
});
});
});
});
});
} catch(err) {
console.error(util.inspect(err));
}Though the application looks like it’s processing each file individually before moving on to the next, remember that each of the methods used in this application is asynchronous. If you run the application several times and check the log.txt file, you’ll see that the files are processed in a different, seemingly random order. In my data subdirectory I had five files. Running the application three times in a row resulted in the following output to log.txt (blank lines inserted for clarity):
changed data1.txt changed data3.txt changed data5.txt changed data2.txt changed data4.txt changed data3.txt changed data1.txt changed data5.txt changed data2.txt changed data4.txt changed data1.txt changed data3.txt changed data5.txt changed data4.txt changed data2.txt
Another issue arises if you want to check when all of the files have
been modified in order to do something. The forEach method invokes
the iterator callback functions asynchronously, so it doesn’t block.
Adding a statement following the use of forEach, like the
following:
console.log('all done');doesn’t really mean the application is all finished, just that the
forEach method didn’t
block. If you add a console.log statement at
the same time you log the changed file:
writeStream.write('changed ' + name + '\n', 'utf8', function(err) {
if(err) throw err;
console.log('finished ' + name);
});and add the following after the forEach method
call:
console.log('all finished');you’ll actually get the following console output:
all done finished data3.txt finished data1.txt finished data5.txt finished data2.txt finished data4.txt
To solve this challenge, add a counter that is incremented with each log message and then checked against the file array’s length to print out the “all done” message:
// before accessing directory
var counter = 0;
...
writeStream.write('changed ' + name + '\n', 'utf8', function(err) {
if(err) throw err;
console.log('finished ' + name);
counter++;
if (counter >= files.length)
console.log('all done');
});You’d then get the expected result: an “all done” message displays after all the files have been updated.
The application works quite well—except if the directory we’re accessing has subdirectories as well as files. If the application encounters a subdirectory, it spits out the following error:
/home/examples/public_html/node/example5.js:20
if (err) throw err;
^
Error: EISDIR, illegal operation on a directoryExample 5-6 prevents
this type of error by using the fs.stats method to return
an object representing the data from a Unix stat command. This object
contains information about the object, including whether it’s a file or
not. The fs.stats method is, of
course, another asynchronous method, requiring yet more callback
nesting.
var fs = require('fs');
var writeStream = fs.createWriteStream('./log.txt',
{'flags' : 'a',
'encoding' : 'utf8',
'mode' : 0666});
try {
// get list of files
fs.readdir('./data/', function(err, files) {
// for each file
files.forEach(function(name) {
// check to see if object is file
fs.stat('./data/' + name, function(err, stats) {
if (err) throw err;
if (stats.isFile())
// modify contents
fs.readFile('./data/' + name,'utf8', function(err,data) {
if (err) throw err;
var adjData = data.replace(/somecompany\.com/g,'burningbird.net');
// write to file
fs.writeFile('./data/' + name, adjData, function(err) {
if (err) throw err;
// log write
writeStream.write('changed ' + name + '\n', 'utf8',
function(err) {
if(err) throw err;
});
});
});
});
});
});
} catch(err) {
console.error(err);
}Again, the application performs its purpose, and performs it well—but how difficult it is to read and maintain! I’ve heard this type of nested callback called callback spaghetti and the even more colorful pyramid of doom, both of which are apt terms.
The nested callbacks continue to push against the right side of the document, making it more difficult to ensure we have the right code in the right callback. However, we can’t break the callback nesting apart because it’s essential that the methods be called in turn:
Start the directory lookup.
Filter out subdirectories.
Read each file’s contents.
Modify the contents.
Write back to the original file.
What we’d like to do is find a way of implementing this series of method calls but without having to depend on nested callbacks. For this, we need to look at third-party modules that provide asynchronous control flow.
Another approach is to provide a named function as a callback function for each method. This way, you can flatten the pyramid, and it can simplify debugging. However, this approach doesn’t solve some of the other problems, such as determining when all processes have finished. For this, you still need the third-party libraries.
The application in Example 5-6 is an example of an asynchronous pattern, where each function is called in turn and passes its results to the next function, and the entire chain stops only if an error occurs. There are several such patterns, though some are variations of others, and not everyone uses the exact same terminology.
One Node module, Async, provides names and support for the most extensive list of asynchronous control flow patterns:
waterfallFunctions are called in turn, and results of all are passed as
an array to the last callback (also called series and
sequence by
others).
seriesFunctions are called in turn and, optionally, results are passed as an array to the last callback.
parallelFunctions are run in parallel and when completed, results are passed to the last callback (though the result array isn’t part of the pattern in some interpretations of the parallel pattern).
whilstRepeatedly calls one function, invoking the last callback only
if a preliminary test returns false or an error occurs.
queueCalls functions in parallel up to a given limit of concurrency, and new functions are queued until one of the functions finishes.
untilRepeatedly calls one function, invoking the last callback only
if a post-process test returns false or an error occurs.
autoFunctions are called based on requirements, each function receiving the results of previous callbacks.
iteratorEach function calls the next, with the ability to individually access the next iterator.
applyA continuation function with arguments already applied combined with other control flow functions.
nextTickCalls the callback in the next loop of an event loop—based on
process.nextTick in
Node.
In the listing of modules provided at the Node.js website, there is
a category titled “Control Flow/Async Goodies.” In this list is the Async
module, which provides the asynchronous control patterns I just listed.
Though not every control flow module provides the capability to handle all
possible patterns, most provide functionality for the most common
patterns: series (also called
sequence and sometimes
referred to as waterfall—as in the
preceding list—though Async lists waterfall separately from
series) and parallel. In addition, some of the modules also
reinstate the concept of promises from earlier editions of Node, while
others implement a concept called fibers, which emulate
threads.
In the next couple of sections, I’ll demonstrate two of the more popular of the actively maintained control flow modules: Step and Async. Each offers its own unique perspective on asynchronous control flow management, though both provide a very useful—and likely essential—service.
Step is a focused utility module that enables simplified control flow for serial and parallel execution. It can be installed using npm as follows:
npm install step
The Step module exports exactly one object. To use the object for serial execution, wrap your asynchronous function calls within functions that are then passed as parameters to the object. For instance, in Example 5-7, Step is used to read the contents of a file, modify the contents, and write them back to the file.
var fs = require('fs'),
Step = require('step');
try {
Step (
function readData() {
fs.readFile('./data/data1.txt', 'utf8', this);
},
function modify(err, text) {
if (err) throw err;
return text.replace(/somecompany\.com/g,'burningbird.net');
},
function writeData(err, text) {
if (err) throw err;
fs.writeFile('./data/data1.txt', text, this);
}
);
} catch(err) {
console.error(err);
}The first function in the Step sequence, readData, reads a file’s contents into a
string, which is then passed to a second function. The second function
modifies the string using replacement, and the result is passed to a
third function. In the third function, the modified string is written
back to the original file.
For more information, see the Step GitHub site at https://github.com/creationix/step.
In more detail, the first function wraps the asynchronous
fs.readFile. However,
rather than pass a callback function as the last parameter, the code
passes the this context. When the
function is finished, its data and any possible error are sent to the
next function, modify. The modify function isn’t an asynchronous
function, as all it’s doing is replacing one substring for another in
the string. It doesn’t require the this context, and just
returns the result at the end of the function.
The last function gets the newly modified string and writes it
back to the original file. Again, since it’s an asynchronous function,
it gets this in place of the
callback function. If we didn’t include this as the last
parameter to the final function, any errors that occur wouldn’t be
thrown and caught in the outer loop. If the boogabooga subdirectory didn’t exist with the
following modified code:
function writeFile(err, text) {
if (err) throw err;
fs.writeFile('./boogabooga/data/data1.txt');
}we’d never know that the write failed.
Even though the second function isn’t asynchronous, every function
but the first in Step requires the error object as the first parameter
for consistency. It’s just null by
default in a synchronous function.
Example 5-7 performs part of the functionality of the application in Example 5-6. Could it do the rest of the functionality, especially handling modification to multiple files? The answer is yes, and no. Yes, it can do the work, but only if we throw in some kludgy code.
In Example 5-8, I
added in the readir asynchronous
function to get a list of files in a given subdirectory. The array of
files is processed with a forEach command, like
in Example 5-6, but the
end of the call to readFile isn’t a
callback function or this. In Step, the call
to create the group object signals to
reserve a parameter for a group result; the call to the group object in the
readFile asynchronous function
results in each of the callbacks being called in turn, and the results
being grouped into an array for the next function.
var fs = require('fs'),
Step = require('step'),
files,
_dir = './data/';
try {
Step (
function readDir() {
fs.readdir(_dir, this);
},
function readFile(err, results) {
if (err) throw err;
files = results;
var group = this.group();
results.forEach(function(name) {
fs.readFile(_dir + name, 'utf8', group());
});
},
function writeAll(err, data) {
if (err) throw err;
for (var i = 0; i < files.length; i++) {
var adjdata = data[i].replace(/somecompany\.com/g,'burningbird.net');
fs.writeFile(_dir + files[i], adjdata, 'utf8',this);
}
}
);
} catch(err) {
console.log(err);
}To preserve the filenames, the readdir result is assigned to a global
variable, files. In the last Step
function, a regular for loop cycles through
the data to modify it, and then cycles through the files variable to get the filename. Both the
filename and modified data are used in the last asynchronous call to
writeFile.
One other approach we could have used if we wanted to hardcode the
change to each file is to use the Step parallel
feature. Example 5-9
performs a readFile on a couple of
different files, passing in this.parallel() as the last parameter. This
results in a parameter being passed to the next function for each readFile in the first function. The parallel function call also has to be used in
the writeFile function in
the second function, to ensure that each callback is processed in
turn.
var fs = require('fs'),
Step = require('step'),
files;
try {
Step (
function readFiles() {
fs.readFile('./data/data1.txt', 'utf8',this.parallel());
fs.readFile('./data/data2.txt', 'utf8',this.parallel());
fs.readFile('./data/data3.txt', 'utf8',this.parallel());
},
function writeFiles(err, data1, data2, data3) {
if (err) throw err;
data1 = data1.replace(/somecompany\.com/g,'burningbird.net');
data2 = data2.replace(/somecompany\.com/g,'burningbird.net');
data3 = data3.replace(/somecompany\.com/g,'burningbird.net');
fs.writeFile('./data/data1.txt', data1, 'utf8', this.parallel());
fs.writeFile('./data/data2.txt', data2, 'utf8', this.parallel());
fs.writeFile('./data/data3.txt', data3, 'utf8', this.parallel());
}
);
} catch(err) {
console.log(err);
}It works, but it’s clumsy. It would be better to reserve the use of the parallel functionality for a sequence of different asynchronous functions that can be implemented in parallel, and the data processed post-callback.
As for our earlier application, rather than trying to force Step into contortions to fit our use case, we can use another library that provides the additional flexibility we need: Async.
The Async module provides functionality for managing
collections, such as its own variation of forEach, map, and filter. It also
provides some utility functions, including ones for memoization. However, what we’re
interested in here are its facilities for handling control flow.
There is both an Async and an Async.js module, so be careful not to confuse the two. The one covered in this section is Async, by Caolan McMahon. Its GitHub site is https://github.com/caolan/async.
Install Async using npm like so:
npm install async
As mentioned earlier, Async provides control flow capability for a
variety of asynchronous patterns, including serial, parallel, and
waterfall. Like Step,
it gives us a tool to tame the wild nested callback pyramid, but its
approach is quite different. For one, we don’t insert ourselves between
each function and its callback. Instead, we incorporate the callback as
part of the process.
As an example, we’ve already identified that the pattern of the
earlier application matches with Async’s waterfall, so we’ll be using the async.waterfall method.
In Example 5-10, I used
async.waterfall to open
and read a data file using fs.readFile, perform the synchronous string
substitution, and then write the string back to the file using
fs.writeFile. Pay
particular attention to the callback function used with each step in the
application.
var fs = require('fs'),
async = require('async');
try {
async.waterfall([
function readData(callback) {
fs.readFile('./data/data1.txt', 'utf8', function(err, data){
callback(err,data);
});
},
function modify(text, callback) {
var adjdata=text.replace(/somecompany\.com/g,'burningbird.net');
callback(null, adjdata);
},
function writeData(text, callback) {
fs.writeFile('./data/data1.txt', text, function(err) {
callback(err,text);
});
}
], function (err, result) {
if (err) throw err;
console.log(result);
});
} catch(err) {
console.log(err);
}The async.waterfall method
takes two parameters: an array of tasks and an optional final callback
function. Each asynchronous task function is an element of the
async.waterfall method
array, and each function requires a callback as the last of its
parameters. It is this callback function that allows us to chain the
asynchronous callback results without having to physically nest the
functions. However, as you can see in the code, each function’s callback
is handled as we would normally handle it if we were using nested
callbacks—other than the fact that we don’t have to test the errors in
each function. The callbacks look for an error object as first
parameter. If we pass an error object in the callback function, the
process is ended at this point, and the final callback routine is
called. The final callback is when we can test for an error, and throw
the error to the outer exception handling block (or otherwise
handle).
The readData function wraps our
fs.readFile call, which checks for an error,
first. If an error is found, it throws the error, ending the process. If
not, it issues a call to the callback as its last operation. This is the
trigger to tell Async to invoke the next function, passing any relevant
data. The next function isn’t asynchronous, so it does its processing,
passing null as the error object, and
the modified data. The last function, writeData, calls the asynchronous writeFile, using the
passed-in data from the previous callback and then testing for an error
in its own callback routine.
Example 5-10 uses named functions, while the Async documentation shows anonymous functions. However, named functions can simplify debugging and error handling. Both work equally well.
The processing is very similar to what we had in Example 5-4, but without the nesting (and having to test for an error in each function). It may seem more complicated than what we had in Example 5-4, and I wouldn’t necessarily recommend its use for such simple nesting, but look what it can do with a more complex nested callback. Example 5-11 duplicates the exact functionality from Example 5-6, but without the callback nesting and excessive indenting.
var fs = require('fs'),
async = require('async'),
_dir = './data/';
var writeStream = fs.createWriteStream('./log.txt',
{'flags' : 'a',
'encoding' : 'utf8',
'mode' : 0666});
try {
async.waterfall([
function readDir(callback) {
fs.readdir(_dir, function(err, files) {
callback(err,files);
});
},
function loopFiles(files, callback) {
files.forEach(function (name) {
callback (null, name);
});
},
function checkFile(file, callback) {
fs.stat(_dir + file, function(err, stats) {
callback(err, stats, file);
});
},
function readData(stats, file, callback) {
if (stats.isFile())
fs.readFile(_dir + file, 'utf8', function(err, data){
callback(err,file,data);
});
},
function modify(file, text, callback) {
var adjdata=text.replace(/somecompany\.com/g,'burningbird.net');
callback(null, file, adjdata);
},
function writeData(file, text, callback) {
fs.writeFile(_dir + file, text, function(err) {
callback(err,file);
});
},
function logChange(file, callback) {
writeStream.write('changed ' + file + '\n', 'utf8', function(err) {
callback(err, file);
});
}
], function (err, result) {
if (err) throw err;
console.log('modified ' + result);
});
} catch(err) {
console.log(err);
}Every last bit of functionality is present from Example 5-6. The fs.readdir method is used to get an array of
directory objects. The Node forEach method (not the
Async forEach) is used to access each
specific object. The fs.stats method is used
to get the stats for each object.
stats is used to check
for files, and when a file is found, it’s opened and its data accessed.
The data is then modified, and passed on to be written back to the file
via fs.writeFile. The
operation is logged in the logfile and also echoed to the
console.
Note that there is more data passed in some of the callbacks. Most
of the functions need the filename as well as the text, so this is
passed in the last several methods. Any amount of data can be passed in
the methods, as long as the first parameter is the error object (or
null, if no error object) and the
last parameter in each function is the callback function.
We don’t have to check for an error in each asynchronous task function either, because Async tests the error object in each callback, and stops processing and calls the final callback function if an error is found. And we don’t have to worry about using special processing when handling an array of items, as we did when we used Step earlier in the chapter.
The other Async control flow methods, such as async.parallel and
async.serial, perform
in a like manner, with an array of tasks as the first method parameter,
and a final optional callback as the second. How they process the
asynchronous tasks differs, though, as you would expect.
We use the async.serial method
with a Redis application in Chapter 9, in the section Building a Game Leaderboard.
The async.parallel method
calls all of the asynchronous functions at once, and when they are each
finished, calls the optional final callback. Example 5-12 uses async.parallel
to read in the contents of three files in parallel. However,
rather than an array of functions, this example uses an alternative
approach that Async supports: passing in an object with each
asynchronous task listed as a property of the object. The results are
then printed out to the console when all three tasks have
finished.
var fs = require('fs'),
async = require('async');
try {
async.parallel({
data1 : function (callback) {
fs.readFile('./data/data1.txt', 'utf8', function(err, data){
callback(err,data);
});
},
data2 : function (callback) {
fs.readFile('./data/data2.txt', 'utf8', function(err, data){
callback(err,data);
});
},
data3 : function readData3(callback) {
fs.readFile('./data/data3.txt', 'utf8', function(err, data){
callback(err,data);
});
},
}, function (err, result) {
if (err) throw err;
console.log(result);
});
} catch(err) {
console.log(err);
}The results are returned as an array of objects, with each result tied to each of the properties. If the three data files in the example had the following content:
data1.txt: apples
data2.txt: oranges
data3.txt: peaches
the result of running Example 5-12 is:
{ data1: 'apples\n', data2: 'oranges\n', data3: 'peaches\n' }I’ll leave the testing of the other Async control flow methods as
a reader exercise. Just remember that when you’re working with the Async
control flow methods, all you need is to pass a callback to each
asynchronous task and to call this callback when you’re finished,
passing in an error object (or null)
and whatever data you need.
A couple of times in the chapter I mentioned people recommending certain restraints, such as using named rather than anonymous functions in Node applications. Collectively, these restraints are known as preferred Node style, though there is no one style guide or definitive set of shared preferences. In fact, there are several different recommendations for proper Node style.
One helpful Node.js style guide is Felix’s Node.js Style Guide, at http://nodeguide.com/style.html.
Here are some of the recommendations, and my own take on each:
My take: Sorry, I’m used to three spaces, and I’ll continue to use three spaces. I think it’s more important to be consistent and not to use tabs; I’m not going to split hairs on the number of spaces.
Amazing how contentious this one is. I use semicolons, but follow your own instincts.
I’m rather used to double quotes, but have managed to kick the habit (more or less). Regardless, it’s better to use double quotes than to escape a single quote in a string.
var keyword/don’t use
one var keyword.Some of the applications in this book use the
var keyword for
each variable; some don’t. Again, old habits are hard to break, but
I don’t think this is as much an issue as some people make
it.
I agree with this one.
===).Sound advice, but I repeat, old habits are hard to break. I
mean to use strict equality, but frequently use just the regular
equality (==). Don’t be bad like
me.
My bad, again. This really is sound advice, and I’m trying to improve, but most of my code still uses anonymous functions.
I do follow this religiously.
The most important rule to remember out of all of these is to use asynchronous functions whenever and wherever possible. After all, asynchronous functionality is the heart of Node.
Click a link in a web page, and you expect something to happen. That something is typically a page being loaded. However, there’s actually a lot that goes on before that web resource loads—some of which is mostly out of our control (such as packet routing), and some of which is dependent on us having software installed that understands how to respond based on the link’s contents.
Of course, when we use web servers such as Apache, and software such as Drupal, much of the mechanics of serving a file or a resource are handled behind the scenes. However, when we’re creating our own server-side applications in Node and bypassing our usual technology, we have to get more involved in ensuring that the right resource gets delivered at the right time.
This chapter focuses on the technology available to Node developers for providing the very basic routing and middleware functionality we need to ensure that resource A gets delivered to user B correctly and quickly.
We have all the functionality we need to build a simple router or to serve static files built directly into Node. But being able to do so and doing so easily are two different things.
When thinking of what’s necessary to build a simple but functional static file server, we might come up with the following set of steps:
Create an HTTP server and listen for requests.
When a request arrives, parse the request URL to determine the location for the file.
Check to make sure the file exists.
If the file doesn’t exist, respond accordingly.
If the file does exist, open the file for reading.
Prepare a response header.
Write the file to the response.
Wait for the next request.
Creating an HTTP server and reading files requires the HTTP and File
System modules. The Path module will also come in handy, because it has a
way of checking to make sure a file exists before trying to open it for
reading. In addition, we’ll want to define a global variable for the base
directory, or use the predefined __dirname (more on this
in the upcoming sidebar Why Not Use __dirname?).
The top of the application has the following code at this point:
var http = require('http'),
path = require('path'),
fs = require('fs'),
base = '/home/examples/public_html';Creating a server using the HTTP module isn’t anything new. And the
application can get the document requested by directly accessing the HTTP
request object’s url property. To
double-check the response compared to requests, we’ll also throw in a
console.log of the requested file’s
pathname. This is in addition to the console.log message that’s written when the
server is first started:
http.createServer(function (req, res) {
pathname = base + req.url;
console.log(pathname);
}).listen(8124);
console.log('Server running at 8124/');Before attempting to open the file for reading and writing to the
HTTP response, the application needs to check that it exists. The
path.exists function is a
good choice at this point. If the file doesn’t exist, write a brief
message to this effect and set the status code to 404: document not found.
path.exists(pathname, function(exists) {
if (exists) {
// insert code to process request
} else {
res.writeHead(404);
res.write('Bad request 404\n');
res.end();
}Now we’re getting into the meat of the new application. In examples
in previous chapters, we used fs.readFile to read in a
file. The problem with fs.readFile, though, is
that it wants to read the file completely into memory before making it
available. Documents served over the
Web can be quite large. In addition, there can be many requests for a
document at any given time. Something like fs.readFile just won’t
scale.
The path.exists method has
been deprecated in Node 0.8. Instead, use fs.exists. The examples
file referenced in the preface include applications that support both
environments.
Instead of using fs.readFile, the
application creates a read stream via the fs.createReadStream
method, using the default settings. Then it’s a simple matter to just
pipe the file contents directly to the
HTTP response object. Since the stream sends an end signal when it’s
finished, we don’t need to use the end method call with the
read stream:
res.setHeader('Content-Type', 'test/html');
// 200 status - found, no errors
res.statusCode = 200;
// create and pipe readable stream
var file = fs.createReadStream(pathname);
file.on("open", function() {
file.pipe(res);
});
file.on("error", function(err) {
console.log(err);
});The read stream has two events of interest: open and error. The open event is sent when
the stream is ready, and the error if a problem
occurs. The application calls the pipe method in the
callback function for the open event.
At this point, the static file server looks like the application in Example 6-1.
var http = require('http'),
path = require('path'),
fs = require('fs'),
base = '/home/examples/public_html';
http.createServer(function (req, res) {
pathname = base + req.url;
console.log(pathname);
path.exists(pathname, function(exists) {
if (!exists) {
res.writeHead(404);
res.write('Bad request 404\n');
res.end();
} else {
res.setHeader('Content-Type', 'text/html');
// 200 status - found, no errors
res.statusCode = 200;
// create and pipe readable stream
var file = fs.createReadStream(pathname);
file.on("open", function() {
file.pipe(res);
});
file.on("error", function(err) {
console.log(err);
});
}
});
}).listen(8124);
console.log('Server running at 8124/');I tested it with a simple HTML file, which has nothing more than an
img element, and the file
loaded and displayed properly:
<!DOCTYPE html> <head> <title>Test</title> <meta charset="utf-8" /> </head> <body> <img src="./phoenix5a.png" /> </body>
I then tried it with another example file I had, which contained an
HTML5 video element:
<!DOCTYPE html>
<head>
<title>Video</title>
<meta charset="utf-8" />
</head>
<body>
<video id="meadow" controls>
<source src="videofile.mp4" />
<source src="videofile.ogv" />
<source src="videofile.webm" />
</video>
</body>Though the file would open and the video displayed when I tried the
page with Chrome, the video element did
not work when I tested the page with Internet Explorer 10. Looking at the
console output provided the reason why:
Server running at 8124/ /home/examples/public_html/html5media/chapter1/example2.html /home/examples/public_html/html5media/chapter1/videofile.mp4 /home/examples/public_html/html5media/chapter1/videofile.ogv /home/examples/public_html/html5media/chapter1/videofile.webm
Though IE10 is capable of playing the MP4 video, it tests all three
of the videos because the content type of the response header is
text/html for each.
Though other browsers will ignore the incorrect content type and display
the media correctly, IE does not—appropriately, in my opinion, because I
may not have quickly found the error in the application otherwise.
This application is a perfect example of why we have to test our server-side applications in all target browsers, even though, seemingly, we should be able to test the application with just one since the functionality we’re testing is on the server.
The application has to be modified to test for the file extension for each file and then return the appropriate MIME type in the response header. We could code this functionality ourselves, but I’d rather make use of an existing module: node-mime.
You can install node-mime using npm: npm
install mime. The GitHub site is at https://github.com/broofa/node-mime.
The node-mime module can return the proper MIME type given a filename (with or without path), and can also return file extensions given a content type. The node-mime module is added to the requirements list like so:
mime = require('mime');The returned content type is used in the response header, and also output to the console, so we can check the value as we test the application:
// content type
var type = mime.lookup(pathname);
console.log(type);
res.setHeader('Content-Type', type);Now when we access the file with the video element in IE10, the video file works.
What doesn’t work, though, is when we access a directory instead of a file. When this happens, an error is output to the console, and the web page remains blank for the user:
{ [Error: EISDIR, illegal operation on a directory] errno: 28, code: 'EISDIR' }We not only need to check if the resource being accessed exists, but we also need to check whether it’s a file or a directory. If it’s a directory being accessed, we can either display its contents, or we can output an error—it’s the developer’s choice.
The final version of a minimal static file server, in Example 6-2, uses fs.stats to check for the existence of the
requested object and whether it’s a file. If the resource doesn’t exist,
an HTTP status of 404 is returned. If
the resource exists, but it’s a directory, an HTTP error status code of
403—forbidden—is returned. In all
cases, the request is handled properly.
var http = require('http'),
url = require('url'),
fs = require('fs'),
mime = require('mime');
base = '/home/examples/public_html';
http.createServer(function (req, res) {
pathname = base + req.url;
console.log(pathname);
fs.stat(pathname, function(err, stats) {
if (err) {
res.writeHead(404);
res.write('Bad request 404\n');
res.end();
} else if (stats.isFile()) {
// content type
var type = mime.lookup(pathname);
console.log(type);
res.setHeader('Content-Type', type);
// 200 status - found, no errors
res.statusCode = 200;
// create and pipe readable stream
var file = fs.createReadStream(pathname);
file.on("open", function() {
file.pipe(res);
});
file.on("error", function(err) {
console.log(err);
});
} else {
res.writeHead(403);
res.write('Directory access is forbidden');
res.end();
}
});
}).listen(8124);
console.log('Server running at 8124/');The following is the console output for accessing one web page that contains both image and video file links:
/home/examples/public_html/html5media/chapter2/example16.html text/html /home/examples/public_html/html5media/chapter2/bigbuckposter.jpg image/jpeg /home/examples/public_html/html5media/chapter2/butterfly.png image/png /home/examples/public_html/favicon.ico image/x-icon /home/examples/public_html/html5media/chapter2/videofile.mp4 video/mp4 /home/examples/public_html/html5media/chapter2/videofile.mp4 video/mp4
Note the proper handling of the content types. Figure 6-1 shows one web page that contains a video element loaded into Chrome, and the network access displayed in the browser’s console.
You get a better feel for how the read stream works when you load a page that has a video element and begin to play it. The browser grabs the read stream output at a speed it can manage, filling its own internal buffer, and then pauses the output. If you close the server while the video content is playing, the video continues to play...up to the point where it exhausts its current video buffer. The video element then goes blank because the read stream is no longer available. It’s actually a little fascinating to see how well everything works with so little effort on our part.
Though the application works when tested with several different documents, it’s not perfect. It doesn’t handle many other types of web requests, it doesn’t handle security or caching, and it doesn’t properly handle the video requests. One web page application I tested that uses HTML video also makes use of the HTML5 video element API to output the state of the video load process. This application didn’t get the information it needs to work as designed.
Chapter 12 revisits this application and covers what additional effort is needed to create a fully functional HTML5 video server.
There are many little gotchas that can trip us when it comes to creating a static file server. Another approach is to use an existing static file server. In the next section, we’ll look at one included in the Connect middleware.
What is middleware? That’s a good question, and one that, unfortunately, doesn’t have a definitive answer.
Generally, middleware is software that exists between you, as the developer, and the underlying system. By system, we can mean either the operating system, or the underlying technology, such as we get from Node. More specifically, middleware inserts itself into the communication chain between your application and the underlying system—hence its rather descriptive name.
For instance, rather than have to provide all the functionality necessary for serving static files via a web server, you can use middleware to handle most of it. The middleware then takes care of all the tedious bits, so you can focus on those aspects of your application that are unique to your needs and requirements. However, middleware doesn’t stop with just serving up static files. Some middleware provides authorization components, proxies, routers, cookie and session management, and other necessary web technologies.
Middleware isn’t a utility library or simple set of functions. What middleware you choose defines how your application is both designed and developed. You have to be comfortable with your choice of middleware before you begin incorporating it, because you’d have a difficult time switching mid-development.
Currently, there are two major middleware applications used in Node applications: JSGI (JavaScript Gateway Interface) and Connect. JSGI is a middleware technology for JavaScript generally, not Node specifically. Its use is facilitated for Node with the JSGI-node module. Connect, on the other hand, was developed for use with Node.
The JSGI site is at http://wiki.commonjs.org/wiki/JSGI/Level0/A/Draft2. The JSGI-node GitHub site is at https://github.com/persvr/jsgi-node.
I’m covering only Connect in this book, for three reasons. One, it’s simpler to use. JSGI would require us to spend too much time trying to understand how it works in general (independent of its use with Node), whereas with Connect, we can jump right in. Two, Connect provides middleware support for Express, a very popular framework (covered in Chapter 7). Three, and perhaps most importantly, over time Connect has seemingly floated to the top as best in breed. It’s the most used middleware if the npm registry is any indication.
You will find an introduction to Connect 2.0 at http://tjholowaychuk.com/post/18418627138/connect-2-0. The Connect source is at https://github.com/senchalabs/Connect. (For more information on installation, see the sidebar Working with Alpha Modules).
You can install Connect using npm:
npm install connect
Connect is, in actuality, a framework in which you can use one or more middleware applications. The documentation for Connect is sparse. However, it is relatively simple to use once you’ve seen a couple of working examples.
In Example 6-3, I
created a simple server application using Connect, and using two of the
middleware[1] bundled with Connect: connect.logger and connect.favicon. The
logger middleware logs all requests
to a stream—in this case, the default STDIO.output stream—and
the favicon middleware
serves up the favicon.ico file. The
application includes the middleware using the use method on the
Connect request listener, which is then passed as a parameter to the
HTTP object’s createServer
method.
var connect = require('connect');
var http = require('http');
var app = connect()
.use(connect.favicon())
.use(connect.logger())
.use(function(req,res) {
res.end('Hello World\n');
});
http.createServer(app).listen(8124);You can use any number of middleware—either built in with Connect
or provided by a third party—by just including additional use states.
Rather than create the Connect request listener first, we can also
incorporate the Connect middleware directly into the createServer method, as
shown in Example 6-4.
Connect comes bundled with at least 20 middleware. I’m not going to cover them all in this section, but I am going to demonstrate enough of them so that you have a good understanding of how they work together.
Other examples of the Connect middleware are utilized in the Express applications created in Chapter 7.
Earlier, we created a simplified static file server from
scratch. Connect provides middleware that implements the functionality
of that server, and more. It is extremely easy to use—you just specify
the connect.static
middleware option, passing in the root directory for all requests. The
following implements most of what we created in Example 6-2, but with far
less code:
var connect = require('connect'),
http = require('http'),
__dirname = '/home/examples';
http.createServer(connect()
.use(connect.logger())
.use(connect.static(_dirname + '/public_html'), {redirect: true})
).listen(8124);The connect.static
middleware takes the root path as the first parameter, and an optional
object as the second. Among the options supported in the second object
are:
maxAgeBrowser cache in milliseconds: defaults to 0
hiddenSet to true to allow transfer of hidden files; default is
false
redirectSet to true to redirect
to trailing / when the
pathname is a directory
This short Connect middleware application represents a big
difference in behavior from the earlier scratch application. The
Connect solution handles the browser cache, protects against malformed
URLs, and more properly handles HTTP HTML5 video, which the server
built from scratch could not. Its only shortcoming when compared to
the scratch server is that we have more control over error handling
with the scratch server. However, the connect.static
middleware does provide the appropriate response and status code to
the browser.
The code just shown, and the earlier examples in the section,
also demonstrate another Connect middleware: connect.logger. We’ll discuss it
next.
The logger middleware
module logs incoming requests to a stream, set to stdout by default.
You can change the stream, as well as other options including buffer
duration, format, and an immediate flag that
signals whether to write the log immediately or on response.
There are several tokens with which you can build the format string, in addition to four predefined formats you can use:
default':remote-addr - - [:date]
":method :url HTTP/:http-version" :status :res[content-length]
":referrer" ":user-agent"'
short':remote-addr - :method :url
HTTP/:http-version :status :res[content-length] - :response-time
ms'
tiny':method :url :status
:res[content-length] - :response-time ms'
devConcise output colored by response status for development use
The default format generates log entries like the following:
99.28.217.189 - - [Sat, 25 Feb 2012 02:18:22 GMT] "GET /example1.html HTTP/1.1" 304 - "-" "Mozilla/5.0 (Windows NT 6.1; WOW64) AppleWebKit/535.11 (KHTML, like Gecko) Chrome/17.0.963.56 Safari/535.11" 99.28.217.189 - - [Sat, 25 Feb 2012 02:18:22 GMT] "GET /phoenix5a.png HTTP/1.1" 304 - "http://examples.burningbird.net:8124/example1.html" "Mozilla/5.0 (Windows NT 6.1; WOW64) AppleWebKit/535.11 (KHTML, like Gecko) Chrome/17.0.963.56 Safari/535.11" 99.28.217.189 - - [Sat, 25 Feb 2012 02:18:22 GMT] "GET /favicon.ico HTTP/1.1" 304 - "-" "Mozilla/5.0 (Windows NT 6.1; WOW64) AppleWebKit/535.11 (KHTML, like Gecko) Chrome/17.0.963.56 Safari/535.11" 99.28.217.189 - - [Sat, 25 Feb 2012 02:18:28 GMT] "GET /html5media/chapter2/example16.html HTTP/1.1" 304 - "-" "Mozilla/5.0 (Windows NT 6.1; WOW64) AppleWebKit/535.11 (KHTML, like Gecko) Chrome/17.0.963.56 Safari/535.11"
This is very informative, but also very verbose. It’s also very
familiar, resembling the default log format we get with a server such
as Apache. You can change the format, and you can also direct the
output to a file. Example 6-5 makes use of
connect.logger, directing the log entries to
a file and setting the format to the dev predefined
format.
var connect = require('connect'),
http = require('http'),
fs = require('fs'),
__dirname = '/home/examples';
var writeStream = fs.createWriteStream('./log.txt',
{'flags' : 'a',
'encoding' : 'utf8',
'mode' : 0666});
http.createServer(connect()
.use(connect.logger({format : 'dev', stream : writeStream }))
.use(connect.static(__dirname + '/public_html'))
).listen(8124);Now the logging output looks like:
GET /example1.html 304 4ms GET /phoenix5a.png 304 1ms GET /favicon.ico 304 1ms GET /html5media/chapter2/example16.html 304 2ms GET /html5media/chapter2/bigbuckposter.jpg 304 1ms GET /html5media/chapter2/butterfly.png 304 1ms GET /html5media/chapter2/example1.html 304 1ms GET /html5media/chapter2/bigbuckposter.png 304 0ms GET /html5media/chapter2/videofile.mp4 304 0ms
While not as informative, this is a handy way of checking request state and load times.
The scratch file server didn’t provide any functionality to work with HTTP cookies, nor did it handle session state. Luckily for us, both are handled with Connect middleware.
Chances are, one of your first JavaScript client applications
was to create an HTTP request cookie. The connect.parseCookie middleware provides the
functionality that allows us to access the cookie data on the server.
It parses the cookie header, populating req.cookies with the cookie/data pairs.
Example 6-6 shows a
simple web server that extracts the cookie for a key value of username and writes a somewhat creepy but
relevant message to stdout.
var connect = require('connect')
, http = require('http');
var app = connect()
.use(connect.logger('dev'))
.use(connect.cookieParser())
.use(function(req, res, next) {
console.log('tracking ' + req.cookies.username);
next();
})
.use(connect.static('/home/examples/public_html'));
http.createServer(app).listen(8124);
console.log('Server listening on port 8124');I’ll get into the use of the anonymous function, and especially
the purpose of next, in the section
Custom Connect Middleware. Focusing for now on
connect.cookieParser,
we see that this middleware intercepts the incoming request, pulls the
cookie data out of the header, and stores the data in the request
object. The anonymous function then accesses the username data from the cookies object, outputting it to the
console.
To create an HTTP response cookie, we pair connect.parseCookie with connect.cookieSession, which provides secure
session persistence. Text is passed as a string to the connect.cookieParser
function, providing a secret key for session data. The data is added
directly to the session object. To clear the session data, set the
session object to null.
Example 6-7
creates two functions—one to clear the session data, and one to output
a tracking message—that are used as middleware for incoming requests.
They’re added as middleware in addition to logger, parseCookie, cookieSession, and static. The user is prompted for his or her
username in the client page, which is then used to set a request
cookie. On the server, the username and the number of resources the
person has accessed in the current session are persisted via an
encrypted response cookie.
var connect = require('connect')
, http = require('http');
// clear all session data
function clearSession(req, res, next) {
if ('/clear' == req.url) {
req.session = null;
res.statusCode = 302;
res.setHeader('Location', '/');
res.end();
} else {
next();
}
}
// track user
function trackUser(req, res, next) {
req.session.ct = req.session.ct || 0;
req.session.username = req.session.username || req.cookies.username;
console.log(req.cookies.username + ' requested ' +
req.session.ct++ + ' resources this session');
next();
}
// cookie and session
var app = connect()
.use(connect.logger('dev'))
.use(connect.cookieParser('mumble'))
.use(connect.cookieSession({key : 'tracking'}))
.use(clearSession)
.use(trackUser);
// static server
app.use(connect.static('/home/examples/public_html'));
// start server and listen
http.createServer(app).listen(8124);
console.log('Server listening on port 8124');Figure 6-2 shows a web page accessed through the server application in Example 6-8. The JavaScript console is open to display both cookies. Note that the response cookie, unlike the request, is encrypted.
The number of documents the user accesses is tracked, either
until the user accesses the /clear URL (in which
case the session object is set to null) or closes the browser, ending the
session.
Example 6-7 also made use of a couple of custom middleware functions. In the next (and final) section on Connect, we’ll discuss how these work with Connect, and how to create a third-party middleware.
In Example 6-7 in the previous
section, we created two functions as Connect middleware in order to
process incoming requests before the final static server. The three
parameters passed to the functions are the HTTP request and response
objects, and next, a callback
function. These three form the signature for a Connect middleware
function.
To get a closer look at how Connect middleware works, let’s
examine one used in earlier code, connect.favicon. This
is nothing more than a simple function to either serve the default
favicon.ico or provide a custom
path:
connect()
.use (connect.favicon('someotherloc/favicon.ico'))The reason I cover connect.favicon, other
than its usefulness, is that it’s one of the simplest middleware, and
therefore easy to reverse engineer.
The source code for connect.favicon,
especially when compared with other source codes, shows that all
exported middleware return a function with the following minimum
signature or profile:
return function(req, res, next)
The next callback, passed
as the last parameter to the function, is called if the middleware does
not process the current request, or doesn’t process it completely. The
next callback is also called if the
middleware has an error, and an error
object is returned as the parameter, as shown in Example 6-8.
module.exports = function favicon(path, options){
var options = options || {}
, path = path || __dirname + '/../public/favicon.ico'
, maxAge = options.maxAge || 86400000;
return function favicon(req, res, next){
if ('/favicon.ico' == req.url) {
if (icon) {
res.writeHead(200, icon.headers);
res.end(icon.body);
} else {
fs.readFile(path, function(err, buf){
if (err) return next(err);
icon = {
headers: {
'Content-Type': 'image/x-icon'
, 'Content-Length': buf.length
, 'ETag': '"' + utils.md5(buf) + '"'
, 'Cache-Control': 'public, max-age=' + (maxAge / 1000)
},
body: buf
};
res.writeHead(200, icon.headers);
res.end(icon.body);
});
}
} else {
next();
}
};
};The next callback is, of
course, how the chained functions are called, in sequence. In an
incoming request, if the middleware can completely handle the request,
such as the request favicon.ico
request, no further middleware are invoked. This is why you would
include the connect.favicon
middleware before connect.logger in your
applications—to prevent requests for favicon.ico from cluttering up the
logs:
http.createServer(connect()
.use(connect.favicon('/public_html/favicon.ico'))
.use(connect.logger())
.use(connect.static(_dirname + '/public_html'))
).listen(8124);You’ve seen how you can create a custom Connect middleware directly in the application, and how a bundled Connect middleware looks, but how would you create a third-party middleware that’s not going to be embedded directly in the application?
To create an external Connect middleware, create the module as you
would any other module, but make sure it has all the pieces that Connect
requires—specifying the three parameters (req, res, and next), and that it calls next if it doesn’t
completely handle the request.
Example 6-9
creates a Connect middleware that checks to see if the requested file
exists and that it is a file (not a directory). If the request is a
directory, it returns a 403 status
code and a custom message. If the file doesn’t exist, it returns a
404 status code and, again, a custom
message. If neither happens, then it calls next to trigger the
Connect middleware into invoking the next function (in this case,
connect.static).
var fs = require('fs');
module.exports = function customHandler(path, missingmsg, directorymsg) {
if (arguments.length < 3) throw new Error('missing parameter in customHandler');
return function customHandler(req, res, next) {
var pathname = path + req.url;
console.log(pathname);
fs.stat(pathname, function(err, stats) {
if (err) {
res.writeHead(404);
res.write(missingmsg);
res.end();
} else if (!stats.isFile()) {
res.writeHead(403);
res.write(directorymsg);
res.end();
} else {
next();
}
});
}
}The custom Connect middleware throws an error when one occurs, but
if an error occurs within the returned function, next
is called with an error object:
next(err);
The following code shows how we can use this custom middleware in an application:
var connect = require('connect'),
http = require('http'),
fs = require('fs'),
custom = require('./custom'),
base = '/home/examples/public_html';
http.createServer(connect()
.use(connect.favicon(base + '/favicon.ico'))
.use(connect.logger())
.use(custom(base + '/public_html', '404 File Not Found',
'403 Directory Access Forbidden'))
.use(connect.static(base))
).listen(8124);Connect does have an errorHandler function,
but it doesn’t serve the purpose we’re trying to achieve. Rather, its
purpose is to provide a formatted output of an exception. You’ll see it
in use with an Express application in Chapter 7.
There are several other bundled middleware, as well as a significant number of third-party middleware you can use with Connect. In addition, Connect forms the middleware layer for the Express application framework, discussed in Chapter 7. First, though, let’s take a quick look at two other types of services necessary for many Node applications: routers and proxies.
Routers accept something from one source and forward it to another. Typically what’s forwarded is a data packet, but at the application level, it can also be a resource request.
If you’ve used Drupal or WordPress, you’ve seen a router in action. Without any URL redirection, rather than your readers accessing an article with a URL like:
| http://yourplace.org/article/your-title |
they’d use:
| http://yourplace.org/node/174 |
The latter URL is an example of a router in action. The URL provides information about what the web application should do, in this case:
Access the node database (node in this case being a Drupal node).
Find and display the node identified by 174.
Another variation is:
| http://yourplace.org/user/3 |
Again, access the user database, and find and display the user identified by 3.
In Node, the primary use for a router is to extract the information we need from a URI—usually using some pattern—and to use that information to trigger the right process, passing the extracted information to the process.
There are several routers available for Node developers, including one built into Express, but I’m going to demonstrate one of the more popular: Crossroads.
The primary Crossroads site is at http://millermedeiros.github.com/crossroads.js/.
We can install the Crossroad router module with npm:
npm install crossroads
The module provides an extensive and well-documented API, but I’m going to focus only on three different methods:
addRouteDefines a new route pattern listener
parseParses a string and dispatches a match to the appropriate route
matched.addMaps a route handler to a route match
We define a route using a regular expression that can
contain curly brackets ({}) delimiting
named variables that will be passed to the route handler function. For
instance, both of the following route patterns:
{type}/{id}
node/{id}will match:
| http://something.org/node/174 |
The difference is that a type parameter is passed
to the route handler for the first pattern, but not the second.
You can also use a colon (:) to denote optional segments. The following:
category/:type:/:id:
will match:
| category/ |
| category/tech/ |
| category/history/143 |
To trigger the route handler, you parse the request:
parse(request);
If the request matches any of the existing route handler functions, that function is called.
In Example 6-10, I created a simple application that looks for any given category, and an optional publication and publication item. It prints out to the console, the action specified in the request.
var crossroads = require('crossroads'),
http = require('http');
crossroads.addRoute('/category/{type}/:pub:/:id:', function(type,pub,id) {
if (!id && !pub) {
console.log('Accessing all entries of category ' + type);
return;
} else if (!id) {
console.log('Accessing all entries of category ' + type +
' and pub ' + pub);
return;
} else {
console.log('Accessing item ' + id + ' of pub ' + pub +
' of category ' + type);
}
});
http.createServer(function(req,res) {
crossroads.parse(req.url);
res.end('and that\'s all\n');
}).listen(8124);The following requests:
http://examples.burningbird.net:8124/category/history http://examples.burningbird.net:8124/category/history/journal http://examples.burningbird.net:8124/category/history/journal/174
Generate the following console messages:
Accessing all entries of category history Accessing all entries of category history and pub journal Accessing item 174 of pub journal of category history
To match how something like Drupal works, with its combination of
type of object and identifier, Example 6-11 uses another
Crossroads method, matched.add, to map a route handler to a
specific route.
var crossroads = require('crossroads'),
http = require('http');
var typeRoute = crossroads.addRoute('/{type}/{id}');
function onTypeAccess(type,id) {
console.log('access ' + type + ' ' + id);
};
typeRoute.matched.add(onTypeAccess);
http.createServer(function(req,res) {
crossroads.parse(req.url);
res.end('processing');
}).listen(8124);This application would match either of the following:
| /node/174 |
| /user/3 |
Routing is typically used with database access to generate the returned page content. It can also be used with middleware or framework modules in order to process incoming requests, though these applications may also provide their own routing software. I’ll demonstrate using Crossroads with Connect and a proxy in the next section.
A proxy is a way of routing requests from several different sources through one server for whatever reason: caching, security, even obscuring the originator of the request. As an example, publicly accessible proxies have been used to restrict some people’s access to certain web content by making it seem that a request originates from someplace other than its actual origin. This type of proxy is also called a forward proxy.
A reverse proxy is a way of controlling how requests are sent to a server. As an example, you may have five servers, but you don’t want people directly accessing four of them. Instead, you direct all traffic through the fifth server, which proxies the requests to the other servers. Reverse proxies can also be used for load balancing, and to improve the overall performance of a system by caching requests as they are made.
Another proxy use is to expose a local service to a cloud-based service. An example of this type of proxy is reddish-proxy, which exposes a local Redis instance to the new Reddish service at https://reddi.sh/.
In Node, the most popular proxy module is http-proxy. This module provides all of the proxy uses I could think of, and some I couldn’t. It provides forward and reverse proxying, can be used with WebSockets, supports HTTPS, and can incorporate latency. It’s used at the popular nodejitsu.com website, so, as the creators claim, it’s battle hardened.
The http-proxy GitHub page is at https://github.com/nodejitsu/node-http-proxy.
Install http-proxy using npm:
npm install http-proxy
The simplest use of http-proxy is to create a standalone proxy server that listens for incoming requests on one port, and proxies them to a web server listening on another:
var http = require('http'),
httpProxy = require('http-proxy');
httpProxy.createServer(8124, 'localhost').listen(8000);
http.createServer(function (req, res) {
res.writeHead(200, { 'Content-Type': 'text/plain' });
res.write('request successfully proxied!' + '\n' + JSON.stringify(req.headers, true,
2));
res.end();
}).listen(8124);All this simple application does is listen for requests on port
8000 and proxy them to the HTTP server
listening on port 8124.
The output to the browser from running this application on my system was:
request successfully proxied!
{
"host": "examples.burningbird.net:8000",
"connection": "keep-alive",
"user-agent": "Mozilla/5.0 (Windows NT 6.1; WOW64) AppleWebKit/535.11
(KHTML, like Gecko) Chrome/17.0.963.56 Safari/535.11",
"accept": "text/html,application/xhtml+xml,application/xml;q=0.9,*/*;q=0.8",
"accept-encoding": "gzip,deflate,sdch",
"accept-language": "en-US,en;q=0.8",
"accept-charset": "ISO-8859-1,utf-8;q=0.7,*;q=0.3",
"cookie": "username=Shelley",
"x-forwarded-for": "99.190.71.234",
"x-forwarded-port": "54344",
"x-forwarded-proto": "http"
}The bits related to the use of the proxy are in bold text in the output. Notice the request cookie still hanging around from an earlier example?
You can also use http-proxy from the command line. In the bin directory, there is a command-line
application, which takes port, target, a configuration file, a flag to indicate
silencing the proxy log output, or -h
(for help). To listen for requests in port 8000 and proxy to port 8124 on the localhost, use:
./node-http-proxy --port 8000 --target localhost:8124
It can’t get much simpler than this. If you want to run the proxy in the background, attach the ampersand (&) to the end.
I’ll demonstrate some of the http-proxy capabilities with WebSockets and HTTPS later in the book, but for now, we’ll pull together the technologies demonstrated in this chapter—a static file server, the Connect middleware, the Crossroads router, and the http-proxy proxy—to create one last example, so you can try a working application that combines all these pieces.
In Example 6-12, I’m
using the http-proxy to test for a dynamic incoming request (the request
URL starts with /node/). If a match is
found, the router proxies the request to one server, which uses the
Crossroads router to parse out the relevant data. If the request isn’t for
a dynamic resource, the proxy then routes the request to a static file
server that’s utilizing several Connect middleware, including logger, favicon, and static.
var connect = require('connect'),
http = require('http'),
fs = require('fs'),
crossroads = require('crossroads'),
httpProxy = require('http-proxy'),
base = '/home/examples/public_html';
// create the proxy that listens for all requests
httpProxy.createServer(function(req,res,proxy) {
if (req.url.match(/^\/node\//))
proxy.proxyRequest(req, res, {
host: 'localhost',
port: 8000
});
else
proxy.proxyRequest(req,res, {
host: 'localhost',
port: 8124
});
}).listen(9000);
// add route for request for dynamic resource
crossroads.addRoute('/node/{id}/', function(id) {
console.log('accessed node ' + id);
});
// dynamic file server
http.createServer(function(req,res) {
crossroads.parse(req.url);
res.end('that\'s all!');
}).listen(8000);
// static file server
http.createServer(connect()
.use(connect.favicon())
.use(connect.logger('dev'))
.use(connect.static(base))
).listen(8124);Trying the server out with the following URL requests:
/node/345 /example1.html /node/800 /html5media/chapter2/example14.html
results in the following console entries, as well as the proper response being returned to the browser:
accessed node 345 GET /example1.html 304 3ms GET /phoenix5a.png 304 1ms accessed node 800 GET /html5media/chapter2/example14.html 304 1ms GET /html5media/chapter2/bigbuckposter.jpg 304 1ms
I wouldn’t say we’re halfway to our own CMS (content management system), but we’re getting the tools we need if we wanted to build one. But then, why build our own when we can use Node-enabled frameworks (covered in the next chapter)?
[1] Connect refers to the individual middleware options as just “middleware.” I follow its convention in this chapter.
Framework software provides infrastructure support that allows us to create websites and applications more quickly. It provides a skeleton on which to build, handling many of the mundane and ubiquitous aspects of development so we can focus on creating the functionality unique to our application or site. It also provides cohesiveness to our code, which can make the code easier to manage and maintain.
The terms frameworks and libraries have been used interchangeably, because both provide reusable functionality that can be utilized by developers in a variety of applications. They both offer discrete capabilities as well, but they differ in that frameworks usually also provide an infrastructure that can impact the overall design of your application.
There are some very sound frameworks in Node.js, including Connect (covered in Chapter 6), though I see Connect more as middleware than a framework. Two Node frameworks that stand out—because of support, capability, and popularity—are Express and Geddy. If you ask people about the differences between the two, they’ll say Express is more Sinatra-like, while Geddy is more like Rails. What this means in non-Ruby terms is that Geddy is MVC (Model-View-Controller)–based, while Express is, well, more RESTful (more on what that means later in the chapter).
There’s also a new kid in town, Flatiron, which previously existed as independent components but is now pulled together into a comprehensive product. Another framework popular at the node-toolbox website is Ember.js, formerly known as SproutCore 2.0. This in addition to CoreJS, which is also MVC-based.
I debated how much to cover of each in this chapter, and knew I’d have a hard time covering one framework in a single chapter, much less several, so I decided to focus on Express. Though the other frameworks are excellent, I like the openness and extensibility of Express, and it is, currently, the most popular of the frameworks.
The Geddy.js site is at http://geddyjs.org/. Flatiron can be found at http://flatironjs.org/, the Ember.js Github page is at https://github.com/emberjs/ember.js, and the primary CoreJS site is at http://echo.nextapp.com/site/corejs. The Express GitHub page is at https://github.com/visionmedia/express. You can find the Express documentation at http://expressjs.com/.
We can easily install Express with npm:
npm install express
To get a feel for Express, the best first step is to use the command-line version of the tool to generate an application. Since you’re never sure what an application will do, you’ll want to run this application in a clean directory—not a directory where you have all sorts of valuable stuff.
I named my new application site,
which is simple enough:
express site
The application generates several directories:
create : site create : site/package.json create : site/app.js create : site/public create : site/public/javascripts create : site/public/images create : site/routes create : site/routes/index.js create : site/public/stylesheets create : site/public/stylesheets/style.css create : site/views create : site/views/layout.jade create : site/views/index.jade
It also provides a helpful message to change to the site directory
and run npm install:
npm install -d
Once the new application is installed, run the generated app.js file with node:
node app.js
It starts a server at port 3000. Accessing the application shows a web page with the words:
Express Welcome to Express
You’ve created your first Express application. Now let’s see what we need to do to make it do something more interesting.
Example 7-1 shows the source code for the app.js file we just ran.
/*
* Module dependencies.
*/
var express = require('express')
, routes = require('./routes')
, http = require('http');
var app = express();
app.configure(function(){
app.set('views', __dirname + '/views');
app.set('view engine', 'jade');
app.use(express.favicon());
app.use(express.logger('dev'));
app.use(express.static(__dirname + '/public'));
app.use(express.bodyParser());
app.use(express.methodOverride());
app.use(app.router);
});
app.configure('development', function(){
app.use(express.errorHandler());
});
app.get('/', routes.index);
http.createServer(app).listen(3000);
console.log("Express server listening on port 3000");From the top, the application includes three modules: Express,
Node’s HTTP, and a module just generated, routes. In the routes subdirectory, an index.js file has the following code:
/*
* GET home page.
*/
exports.index = function(req, res){
res.render('index', { title: 'Express' });
};A little digging in the code shows us that the Express response
object’s render method renders a given
view with a set of options—in this case, a title of “Express.” I’ll cover
this more later in this chapter, in the section Routing.
Now let’s return to app.js.
After we’ve included all the necessary modules, we create an Express object instance, and then
configure it with a set of options via the configure method. (For more information on
configure, see the
upcoming sidebar Setting the Application Mode.) An
optional first parameter to configure is a string identifying whether
the application is of a specific environment (such as development or production). When an environment is not
provided, the application is run in every environment. A second call to
configure in app.js is specific only for the development
environment. You can call configure for every
possible environment, if you wish. The one that matches the environment is
the one that will be processed.
The second function to configure is an anonymous
function enclosing several middleware references. Some of this is familiar
(for instance, the use method) from our work
with the Connect middleware in Chapter 6; this is not
unexpected, since the same person, TJ Holowaychuk, is the primary author
of both applications. What isn’t familiar are the two app.set method
calls.
The app.set method is used to
define various settings, such as the location for application
views:
app.set('views', __dirname + '/views');and the view engine (in this case, Jade):
app.set('view engine', 'jade');What follows in app.js is a
call to the Express encapsulated favicon, logger, and static file server
middleware, which should need no further explanation:
app.use(express.favicon());
app.use(express.logger('dev'));
app.use(express.static(__dirname + '/public'));We can also call the middleware as methods when we create the server:
var app = express.createServer( express.logger(), express.bodyParts() );
It doesn’t matter which approach you use.
The next three middleware/framework components included in the generated application are:
app.use(express.bodyParser()); app.use(express.methodOverride()); app.use(app.router);
The bodyParser middleware,
like the other middleware, comes directly from Connect. All Express does
is re-export it.
I covered logger, favicon, and static in the previous chapter, but not bodyParse. This middleware parses the incoming
request body, converting it into request object properties. The methodOverride option
also comes to Express via Connect, and allows Express applications to
emulate full REST capability via a hidden form field named _method.
Full REST (Representational State Transfer) support means
support for HTTP PUT and DELETE, as well as GET and POST. We’ll discuss this more in the upcoming
section Routing and HTTP Verbs.
The last configuration item is app.router. This optional
middleware contains all the defined routes and performs the lookup for any
given route. If omitted, the first call to app.get—app.post, etc.—mounts the routes instead.
Just as with Connect, the order of middleware is important. The
favicon middleware is
called before logger, because we don’t
want favicon.ico accesses cluttering
the log. The static middleware is
included before bodyParser and methodOverride, because
neither of these is useful with the static pages—form processing occurs
dynamically in the Express application, not via a static page.
There’s more on Express/Connect in the section A Closer Look at the Express/Connect Partnership, later in the chapter.
The second call to configure, specific to
development mode, adds support for the
Express errorHandler. I’ll cover it and
other error handling techniques next.
Express provides its own error handling, as well as access
to the Connect errorHandler.
The Connect errorHandler provides a
way of handling exceptions. It’s a development tool that gives us a better
idea of what’s happening when an exception occurs. You can include it like
you’d include other middleware:
app.use(express.errorHandler());
You can direct exceptions to stderr using the
dumpExceptions
flag:
app.use(express.errorHandler({dumpExceptions : true }));You can also generate HTML for an exception using the showStack flag:
app.use(express.errorHandler({showStack : true; dumpExceptions : true}));To reiterate: this type of error handling is for development only—we definitely don’t want our users to see exceptions. We do, however, want to provide more effective handling for when pages aren’t found, or when a user tries to access a restricted subdirectory.
One approach we can use is to add a custom anonymous function as the last middleware in the middleware list. If none of the other middleware can process the request, it should fall gracefully to this last function:
app.configure(function(){
app.use(express.favicon());
app.use(express.logger('dev'));
app.use(express.static(__dirname + '/public'));
app.use(express.bodyParser());
app.use(express.methodOverride());
app.use(app.router);
app.use(function(req, res, next){
res.send('Sorry ' + req.url + ' does not exist');
});
});In the next chapter, we’ll fine-tune the response by using a template to generate a nice 404 page.
We can use another form of error handling to capture thrown errors
and process them accordingly. In the Express documentation, this type of
error handler is named app.error, but
it didn’t seem to exist at the time this book was written. However, the
function signature does work—a function with four parameters: error, request, response, and next.
I added a second error handler middleware function and adjusted the 404 middleware function to throw an error rather than process the error directly:
app.configure(function(){
app.use(express.favicon());
app.use(express.logger('dev'));
app.use(express.static(__dirname + '/public'));
app.use(express.bodyParser());
app.use(express.methodOverride());
app.use(app.router);
app.use(function(req, res, next){
throw new Error(req.url + ' not found');
});
app.use(function(err, req, res, next) {
console.log(err);
res.send(err.message);
});
});Now I can process the 404 error, as well as other errors, within the same function. And again, I can use templates to generate a more attractive page.
Throughout this chapter so far, we’ve seen the Express/Connect partnership in action. It’s through Connect that Express gets much of its basic functionality.
For instance, you can use Connect’s session support
middleware—cookieParser, cookieSession, and
session—to provide session support. You
just have to remember to use the Express version of the middleware:
app.use(express.cookieParser('mumble'))
app.use(express.cookieSession({key : 'tracking'}))You can also enable static caching with the staticCache
middleware:
app.use(express.favicon());
app.use(express.logger('dev'));
app.use(express.staticCache());
app.use(express.static(__dirname + '/public'));By default, the cache maintains a maximum of 128 objects, with a
maximum of 256 KB
each, for a total of about 32 MB. You can adjust these with the
options maxObjects and maxLength:
app.use(express.staticCache({maxObjects: 100, maxLength: 512}));Prettify a directory listing with directory:
app.use(express.favicon());
app.use(express.logger('dev'));
app.use(express.staticCache({maxObjects: 100, maxLength: 512}));
app.use(express.directory(__dirname + '/public'));
app.use(express.static(__dirname + '/public'));If you’re using express.directory with
routing, though, make sure that the directory middleware follows the
app.router middleware, or
it could conflict with the routing. A good rule of thumb: place express.directory after
the other middleware, but before any error handling.
The express.directory options
include whether to display hidden files (false by default), whether to display icons
(false by default), and a
filter.
You can also use third-party Connect middleware with Express. Use caution, though, when combining it with routing.
Now it’s time to return to the key component of Express: routing.
The core of all the Node frameworks—in fact, many modern frameworks—is the concept of routing. I covered a standalone routing module in Chapter 6, and demonstrated how you can use it to extract a service request from a URL.
Express routing is managed using the HTTP verbs GET, PUT, DELETE, and POST. The methods are
named accordingly, such as app.get for GET and app.post for POST. In the generated
application, shown in Example 7-1,
app.get is used to access
the application root ('/'), and is
passed a request listener—in this instance, the routes index function—to process the data
request.
The routes.index function is
simple:
exports.index = function(req, res){
res.render('index', { title: 'Express' });
};It makes a call to the render method on the
resource object. The render method takes the
name of file that provides the template. Since the application has already
identified the view engine:
app.set('view engine', 'jade');it’s not necessary to provide an extension for the file. However, you could also use:
res.render('index.jade', { title: 'Express' });You can find the template file in another generated directory named
views. It has two files: index.jade and layout.jade. index.jade is the file the template file
referenced in the render method, and has
the following contents:
extends layout
block content
h1= title
p Welcome to #{title}The content of the document is an H1 element with the title, and a
paragraph element with a greeting to the title value. The layout.jade template provides the overall
layout for the document, including a title and link in the head element, and the body contents in the
body element:
!!!
html
head
title= title
link(rel='stylesheet', href='/stylesheets/style.css')
body
block contentThe index.jade file is what
provides the content for the body
defined in layout.jade.
I cover the use of Jade templates and CSS with Express applications in Chapter 8.
To recap what’s happening in this application:
The main Express application uses app.get to associate
a request listener function (routes.index) with an HTTP GET request.
The routes.index function
calls res.render to render
the response to the GET request.
The res.render function
invokes the application object’s render
function.
The application render function
renders the specified view, with whatever options—in this case, the title.
The rendered content is then written to the response object and back to the user’s browser.
The last step in the process is when the generated content is
written back to the response to the browser. Snooping around the source
code shows us that the render method takes a
third argument, a callback function that’s called with any error and the
generated text.
Wanting to take a closer look at the generated content, I modified
the route.index file to add in the
function and intercept the generated text. I output the text to the
console. Since I’m overriding the default functionality, I also sent the
generated text back to the browser using res.write—just like we have with other
applications in previous chapters—and then called res.end to signal the
finish:
exports.index = function(req, res){
res.render('index', { title: 'Express' }, function(err, stuff) {
if (!err) {
console.log(stuff);
res.write(stuff);
res.end();
}
});
};Just as we hoped, the application now writes the content to the
console as well as the browser. This just demonstrates that, though we’re
using an unfamiliar framework, it’s all based on Node and functionality
we’ve used previously. Of course, since this is a framework, we know there
has to be a better method than using res.write and res.end. There is, and it’s discussed in the
next section, which looks a little more closely at routing paths.
The route, or route path, given in Example 7-1 is just a simple / (forward slash)
signifying the root address. Express compiles all routes to a regular
expression object internally, so you can use strings with special
characters, or just use regular expressions directly in the path
strings.
To demonstrate, I created a bare-bones routing path application in
Example 7-2 that listens
for three different routes. If a request is made to the server for one
of these routes, the parameters from the request are returned to the
sender using the Express response object’s send method.
var express = require('express')
, http = require('http');
var app = express();
app.configure(function(){
});
app.get(/^\/node?(?:\/(\d+)(?:\.\.(\d+))?)?/, function(req, res){
console.log(req.params);
res.send(req.params);
});
app.get('/content/*',function(req,res) {
res.send(req.params);
});
app.get("/products/:id/:operation?", function(req,res) {
console.log(req);
res.send(req.params.operation + ' ' + req.params.id);
});
http.createServer(app).listen(3000);
console.log("Express server listening on port 3000");We’re not doing any routing to views or handling any static
content, so we didn’t need to provide middleware in the app.configure method.
However, we do need to call the app.configure method if
we want to gracefully handle requests that don’t match any of the
routes. The application is also using the default environment (development).
The first of the app.get method calls is
using a regular expression for the path. This regular expression is
adapted from one provided in the Express Guide, and listens for any
request for a node. If the request
also provides a unique identifier or range of identifiers, this is
captured in the request object’s params array, which is sent back as a
response. The following requests:
node nodes /node/566 /node/1..10 /node/50..100/something
return the following params
array values:
[null, null] [null, null] ["566", null] ["1", "10"] ["50", "100"]
The regular expression is looking for a single identifier or a
range of identifiers, given as two values with a range indicator
(..) between them. Anything after the
identifier or range is ignored. If no identifier or range is provided,
the parameters are null.
The code to process the request doesn’t use the underlying HTTP
response object’s write and end methods to send the parameters back to the
requester; instead, it uses the Express send method. The
send method determines
the proper headers for the response (given the data type of what’s being
sent) and then sends the content using the underlying HTTP end method.
The next app.get is using a
string to define the routing path pattern. In this case, we’re looking
for any content item. This pattern
will match anything that begins with /content/. The following requests:
/content/156 /content/this_is_a_story /content/apples/oranges
result in the following params
values:
["156"] ["this_is_a_story"] ["apples/oranges"]
The asterisk (*) is
liberal in what it accepts, and everything after content/ is returned.
The last app.get method is
looking for a product request. If a product identifier is given, it can
be accessed directly via params.id.
If an operation is given, it can be accessed directly via params.operation. Any combination of the two
values is allowed, except not providing at least
one identifier or one operation.
The following URLs:
/products/laptopJK3444445/edit /products/fordfocus/add /products/add /products/tablet89/delete /products/
result in the following returned values:
edit laptopJK3444445 add fordfocus undefined add delete tablet89 Cannot GET /products/
The application outputs the request object to the console. When running the application, I directed the output to an output.txt file so I could examine the request object more closely:
node app.js > output.txt
The request object is a socket, of course, and we’ll recognize
much of the object from our previous work exploring the Node HTTP
request object. What we’re mainly interested in is the route object added via Express. Following is
the output for the route object for
one of the requests:
route:
{ path: '/products/:id/:operation?',
method: 'get',
callbacks: [ [Function] ],
keys: [ [Object], [Object] ],
regexp: /^\/products\/(?:([^\/]+?))(?:\/([^\/]+?))?\/?$/i,
params: [ id: 'laptopJK3444445', operation: 'edit' ] },Note the generated regular expression object, which converts my
use of the optional indicator (:) in
the path string into something meaningful for the underlying JavaScript
engine (thankfully, too, since I’m lousy at regular expressions).
Now that we have a better idea of how the routing paths work, let’s look more closely at the use of the HTTP verbs.
In the previous examples, we used app.get to process incoming requests. This
method is based on the HTTP GET
method and is useful if we’re looking for data, but not if we want to
process new incoming data or edit or delete existing data. We need to
make use of the other HTTP verbs to create an application that maintains
as well as retrieves data. In other words, we need to make our
application RESTful.
As noted earlier, REST means Representational State Transfer.
RESTful is a term used to describe any web
application that applies HTTP and REST principles:
directory-structured URLs, statelessness, data transferred in an
Internet media type (such as JSON), and the use of HTTP methods
(GET, POST, DELETE, and PUT).
Let’s say our application is managing that most infamous of products, the widget. To create a new widget, we’ll need to create a web page providing a form that gets the information about the new widget. We can generate this form with the application, and I’ll demonstrate this approach in Chapter 8, but for now we’ll use a static web page, shown in Example 7-3.
<!doctype html>
<html lang="en">
<head>
<meta charset="utf-8" />
<title>Widgets</title>
</head>
<body>
<form method="POST" action="/widgets/add"
enctype="application/x-www-form-urlencoded">
<p>Widget name: <input type="text" name="widgetname" id="widgetname"
size="25" required/></p>
<p>Widget Price: <input type="text"
pattern="^\$?([0-9]{1,3},([0-9]{3},)*[0-9]{3}|[0-9]+)(.[0-9][0-9])?$"
name="widgetprice" id="widgetprice" size="25" required/></p>
<p>Widget Description: <br /><textarea name="widgetdesc" id="widgetdesc"
cols="20" rows="5">No Description</textarea>
<p>
<input type="submit" name="submit" id="submit" value="Submit"/>
<input type="reset" name="reset" id="reset" value="Reset"/>
</p>
</form>
</body>The page takes advantage of the new HTML5 attributes required and pattern to provide
validation of data. Of course, this works only with browsers that
support HTML5, but for now, I’ll assume you’re using a modern
HTML5-capable browser.
The widget form requires a widget name, price (with an associated regular expression to validate the data structure in the pattern attribute), and description. Browser-based validation should ensure we get the three values, and that the price is properly formatted as US currency.
In the Express application, we’re just going to persist new
widgets in memory, as we want to focus purely on the Express technology
at this time. As each new widget is posted to the application, it’s
added to an array of widgets via the app.post method. Each
widget can be accessed by its application-generated identifier via the
app.get method. Example 7-4 shows the entire
application.
var express = require('express')
, http = require('http')
, app = express();
app.configure(function(){
app.use(express.favicon());
app.use(express.logger('dev'));
app.use(express.static(__dirname + '/public'));
app.use(express.bodyParser());
app.use(app.router);
});
app.configure('development', function(){
app.use(express.errorHandler());
});
// in memory data store
var widgets = [
{ id : 1,
name : 'My Special Widget',
price : 100.00,
descr : 'A widget beyond price'
}
]
// add widget
app.post('/widgets/add', function(req, res) {
var indx = widgets.length + 1;
widgets[widgets.length] =
{ id : indx,
name : req.body.widgetname,
price : parseFloat(req.body.widgetprice),
descr : req.body.widgetdesc };
console.log('added ' + widgets[indx-1]);
res.send('Widget ' + req.body.widgetname + ' added with id ' + indx);
});
// show widget
app.get('/widgets/:id', function(req, res) {
var indx = parseInt(req.params.id) - 1;
if (!widgets[indx])
res.send('There is no widget with id of ' + req.params.id);
else
res.send(widgets[indx]);
});
http.createServer(app).listen(3000);
console.log("Express server listening on port 3000");The first widget is seeded into the widget array, so we have
existing data if we want to immediately query for a widget without
adding one first. Note the conditional test in app.get to respond to a request for a
nonexistent or removed widget.
Running the application (example4.js in the examples), and accessing the application using / or /index.html (or /example3.html, in the examples) serves up the static HTML page with the form. Submitting the form generates a page displaying a message about the widget being added, as well as its identifier. We can then use the identifier to display the widget—in effect, a dump of the widget object instance:
http://whateverdomain.com:3000/widgets/2It works...but there’s a problem with this simple application.
First, it’s easy to make a typo in the widget fields. You can’t put in data formatted as anything other than currency in the price field, but you can put in the wrong price. You can also easily type in the wrong name or description. What we need is a way to update a widget, as well as a way to remove a widget we no longer need.
The application needs to incorporate support for two other RESTful
verbs: PUT and DELETE. PUT is used to update
the widget, while DELETE is used to
remove it.
To update the widget, we’ll need a form that comes prepopulated
with the widget data in order to edit it. To delete the widget, we’ll
need a form that confirms whether we truly want to delete the widget. In
an application, these are generated dynamically using a template, but
for now, since we’re focusing on the HTTP verbs, I created static web
pages that edit and then delete the already created widget, widget 1.
The form for updating widget 1
is shown in the following code. Other than being populated with the
information for widget 1, there is
just one other difference between this form and the form to add a new
widget: the addition of a hidden field named _method, shown in bold text:
<form method="POST" action="/widgets/1/update"
enctype="application/x-www-form-urlencoded">
<p>Widget name: <input type="text" name="widgetname"
id="widgetname" size="25" value="My Special Widget" required/></p>
<p>Widget Price: <input type="text"
pattern="^\$?([0-9]{1,3},([0-9]{3},)*[0-9]{3}|[0-9]+)(.[0-9][0-9])?$"
name="widgetprice" id="widgetprice" size="25" value="100.00" required/></p>
<p>Widget Description: <br />
<textarea name="widgetdesc" id="widgetdesc" cols="20"
rows="5">A widget beyond price</textarea>
<p>
<input type="hidden" value="put" name="_method" />
<input type="submit" name="submit" id="submit" value="Submit"/>
<input type="reset" name="reset" id="reset" value="Reset"/>
</p>
</form>Since PUT and DELETE are not
supported in the form method
attribute, we have to add them using a hidden field with a specific
name, _method, and give them a value
of either put, for PUT, or delete for DELETE.
The form to delete the widget is simple: it contains the hidden
_method field, and a button to
confirm the deletion of widget
1:
<p>Are you sure you want to delete Widget 1?</p> <form method="POST" action="/widgets/1/delete" enctype="application/x-www-form-urlencoded"> <input type="hidden" value="delete" name="_method" /> <p> <input type="submit" name="submit" id="submit" value="Delete Widget 1"/> </p> </form>
To ensure that the HTTP verbs are handled properly, we need to add
another middleware, express.methodOverride,
following express.bodyParser in
the app.configure method
call. The express.methodOverride
middleware alters the HTTP method to whatever is given as value in this
hidden field:
app.configure(function(){
app.use(express.favicon());
app.use(express.logger('dev'));
app.use(express.static(__dirname + '/public'));
app.use(express.bodyParser());
app.use(express.methodOverride());
app.use(app.router);
});Next, we’ll need to add functionality to process these two new
verbs. The update request replaces the widget object’s contents with the
new contents, while the delete request deletes the widget array entry
in place, deliberately leaving a null value since we do not want to reorder the
array because of the widget removal.
To complete our widget application, we’ll also add in an index page for accessing widgets without any identifier or operation. All the index page does is list all the widgets currently in the memory store.
Example 7-5 shows the complete widget application with all the new functionality shown in bold text.
var express = require('express')
, http = require('http')
, app = express();
app.configure(function(){
app.use(express.favicon());
app.use(express.logger('dev'));
app.use(express.static(__dirname + '/public'));
app.use(express.bodyParser());
app.use(express.methodOverride());
app.use(app.router);
});
app.configure('development', function(){
app.use(express.errorHandler());
});
// in memory data store
var widgets = [
{ id : 1,
name : 'My Special Widget',
price : 100.00,
descr : 'A widget beyond price'
}
]
// index for /widgets/
app.get('/widgets', function(req, res) {
res.send(widgets);
});
// show a specific widget
app.get('/widgets/:id', function(req, res) {
var indx = parseInt(req.params.id) - 1;
if (!widgets[indx])
res.send('There is no widget with id of ' + req.params.id);
else
res.send(widgets[indx]);
});
// add a widget
app.post('/widgets/add', function(req, res) {
var indx = widgets.length + 1;
widgets[widgets.length] =
{ id : indx,
name : req.body.widgetname,
price : parseFloat(req.body.widgetprice),
descr : req.body.widgetdesc };
console.log(widgets[indx-1]);
res.send('Widget ' + req.body.widgetname + ' added with id ' + indx);
});
// delete a widget
app.del('/widgets/:id/delete', function(req,res) {
var indx = req.params.id - 1;
delete widgets[indx];
console.log('deleted ' + req.params.id);
res.send('deleted ' + req.params.id);
});
// update/edit a widget
app.put('/widgets/:id/update', function(req,res) {
var indx = parseInt(req.params.id) - 1;
widgets[indx] =
{ id : indx,
name : req.body.widgetname,
price : parseFloat(req.body.widgetprice),
descr : req.body.widgetdesc };
console.log(widgets[indx]);
res.send ('Updated ' + req.params.id);
});
http.createServer(app).listen(3000);
console.log("Express server listening on port 3000");After running the application, I add a new widget, list the
widgets out, update widget 1’s price,
delete the widget, and then list the widgets out again. The console.log messages for this activity
are:
Express server listening on port 3000
{ id: 2,
name: 'This is my Baby',
price: 4.55,
descr: 'baby widget' }
POST /widgets/add 200 4ms
GET /widgets 200 2ms
GET /edit.html 304 2ms
{ id: 0,
name: 'My Special Widget',
price: 200,
descr: 'A widget beyond price' }
PUT /widgets/1/update 200 2ms
GET /del.html 304 2ms
deleted 1
DELETE /widgets/1/delete 200 3ms
GET /widgets 200 2msNotice the HTTP PUT and
DELETE verbs in bold text in the
output. When I list the widgets out the second time, the values returned
are:
[
null,
{
"id": 2,
"name": "This is my Baby",
"price": 4.55,
"descr": "baby widget"
}
]We now have a RESTful Express application. But we also have another problem.
If our application managed only one object, it might be OK to cram all the functionality into one file. Most applications, however, manage more than one object, and the functionality for all of those applications isn’t as simple as our little example. What we need is to convert this RESTful Express application into a RESTful MVC Express application.
Handling all the functionality your application needs in one file would work for a very tiny application, but most applications need better organization. MVC is a popular software architecture, and we want to be able to incorporate the advantages of this architecture and still be able to use Express. This effort isn’t as intimidating as it seems, because we have existing functionality we can emulate: Ruby on Rails.
Ruby on Rails has inspired much of the fundamental nature of Node, providing an underlying design we can use to incorporate support for MVC into our Express application. Express has already incorporated the use of routes (fundamental to Rails), so we’re halfway there. Now we need to provide the second component—the separation of model, view, and controller. For the controller component, we’re going to need a set of defined actions for each object we maintain.
Rails supports several different actions that map a route (verb and path) to a data action. The mapping is based on another concept, CRUD (create, read, update, and delete—the four fundamental persistent storage functions). The Rails website provides a guide that supplies an excellent table showing the mapping we need to create in our application. I extrapolated from the Rails table to create Table 7-1, which shows the mapping for maintaining widgets.
HTTP verb | Path | Action | Used for |
| /widgets |
| Displaying widgets |
| /widgets/new |
| Returning the HTML form for creating a new widget |
| /widgets |
| Creating a new widget |
| /widgets/:id |
| Displaying a specific widget |
| /widgets/:id/edit |
| Returning the HTML for editing a specific widget |
| /widgets/:id |
| Updating a specific widget |
| /widgets/:id |
| Deleting a specific widget |
We’re already there for most of the functionality—we just need to clean it up a bit.
Just a reminder: you also might have issues with existing
middleware when implementing the MVC change. For instance, the use of
the directory middleware,
which provides a pretty directory printout, conflicts with the create action, since they work on the same
route. Solution? Place the express.directory
middleware after the app.router in the
configure method call.
First, we’re going to create a controllers subdirectory and create a new file
in it named widgets.js. Then we’re
going to copy all of our apt.get and apt.put method calls into
this new file.
Next, we need to convert the method calls into the appropriate MVC format. This means converting the routing method call into a function for each, which is then exported. For instance, the function to create a new widget:
// add a widget
app.post('/widgets/add', function(req, res) {
var indx = widgets.length + 1;
widgets[widgets.length] =
{ id : indx,
name : req.body.widgetname,
price : parseFloat(req.body.widgetprice)};
console.log(widgets[indx-1]);
res.send('Widget ' + req.body.widgetname + ' added with id ' + indx);
});is converted into widgets.create:
// add a widget
exports.create = function(req, res) {
var indx = widgets.length + 1;
widgets[widgets.length] =
{ id : indx,
name : req.body.widgetname,
price : parseFloat(req.body.widgetprice)},
console.log(widgets[indx-1]);
res.send('Widget ' + req.body.widgetname + ' added with id ' + indx);
};Each function still receives the request and resource object. The only difference is that there isn’t a direct route-to-function mapping.
Example 7-6 shows the new widgets.js file in the controllers subdirectory. Two of the methods,
new and edit, are placeholders for now, to be addressed
in Chapter 8. We’re
still using an in-memory data store, and I simplified the widget object,
removing the description field to make the application easier for
testing.
var widgets = [
{ id : 1,
name : "The Great Widget",
price : 1000.00
}
]
// index listing of widgets at /widgets/
exports.index = function(req, res) {
res.send(widgets);
};
// display new widget form
exports.new = function(req, res) {
res.send('displaying new widget form');
};
// add a widget
exports.create = function(req, res) {
var indx = widgets.length + 1;
widgets[widgets.length] =
{ id : indx,
name : req.body.widgetname,
price : parseFloat(req.body.widgetprice) };
console.log(widgets[indx-1]);
res.send('Widget ' + req.body.widgetname + ' added with id ' + indx);
};
// show a widget
exports.show = function(req, res) {
var indx = parseInt(req.params.id) - 1;
if (!widgets[indx])
res.send('There is no widget with id of ' + req.params.id);
else
res.send(widgets[indx]);
};
// delete a widget
exports.destroy = function(req, res) {
var indx = req.params.id - 1;
delete widgets[indx];
console.log('deleted ' + req.params.id);
res.send('deleted ' + req.params.id);
};
// display edit form
exports.edit = function(req, res) {
res.send('displaying edit form');
};
// update a widget
exports.update = function(req, res) {
var indx = parseInt(req.params.id) - 1;
widgets[indx] =
{ id : indx,
name : req.body.widgetname,
price : parseFloat(req.body.widgetprice)}
console.log(widgets[indx]);
res.send ('Updated ' + req.params.id);
};Notice that edit and new are both GET methods, as their only purpose is to serve a
form. It’s the associated create and
update methods that actually change the
data: the former is served as POST, the
latter as PUT.
To map the routes to the new functions, I created a second module,
maproutecontroller, with one exported
function, mapRoute. It has two
parameters—the Express app object and a
prefix representing the mapped
controller object (in this case, widgets). It uses the prefix to access the
widgets controller object, and then
maps the methods it knows are in this object (because the object is a
controller and has a fixed set of required methods) to the appropriate
route. Example 7-7 has the
code for this new module.
exports.mapRoute = function(app, prefix) {
prefix = '/' + prefix;
var prefixObj = require('./controllers/' + prefix);
// index
app.get(prefix, prefixObj.index);
// add
app.get(prefix + '/new', prefixObj.new);
// show
app.get(prefix + '/:id', prefixObj.show);
// create
app.post(prefix + '/create', prefixObj.create);
// edit
app.get(prefix + '/:id/edit', prefixObj.edit);
// update
app.put(prefix + '/:id', prefixObj.update);
// destroy
app.del(prefix + '/:id', prefixObj.destroy);
};The mapRoute method is a very
simple function, and should be recognizable when you compare the routes
given to those in Table 7-1.
Last, we finish the main application that pulls all these pieces together. Thankfully, it’s a lot cleaner now that we don’t have all the routing method calls. To handle a possibly growing number of objects, I use an array to contain the prefix name for each. If we add a new object, we add a new prefix to the array.
Express comes with an MVC application in the examples subdirectory. It uses a routine that accesses the controllers directory and infers the prefix names from the filenames it finds. With this approach, we don’t have to change the application file to add a new object.
Example 7-8 shows
the finished application. I added back in the original routes.index view, except I changed the title
value in the routes/index.js file
from “Express” to “Widget
Factory.”
var express = require('express')
, routes = require('./routes')
, map = require('./maproutecontroller')
, http = require('http')
, app = express();
app.configure(function(){
app.use(express.favicon());
app.use(express.logger('dev'));
app.use(express.staticCache({maxObjects: 100, maxLength: 512}));
app.use(express.static(__dirname + '/public'));
app.use(express.bodyParser());
app.use(express.methodOverride());
app.use(app.router);
app.use(express.directory(__dirname + '/public'));
app.use(function(req, res, next){
throw new Error(req.url + ' not found');
});
app.use(function(err, req, res, next) {
console.log(err);
res.send(err.message);
});
});
app.configure('development', function(){
app.use(express.errorHandler());
});
app.get('/', routes.index);
var prefixes = ['widgets'];
// map route to controller
prefixes.forEach(function(prefix) {
map.mapRoute(app, prefix);
});
http.createServer(app).listen(3000);
console.log("Express server listening on port 3000");Cleaner, simpler, extensible. We still don’t have the view part of the MVC, but I’ll cover that in the next chapter.
Instead of testing with a browser, we’ll test the application with cURL. This Unix utility is extremely helpful when it comes to testing a RESTful application without having to create all the forms.
To test the widgets index, use the following cURL command (based on running the application from my examples site, and on port 3000—adjust the command accordingly for your setup):
curl --request GET http://examples.burningbird.net:3000/widgets
Following the request option, specify the method (in this case,
GET), and then the request URL. You
should get back a dump of all widgets currently in the data store.
To test creating a new widget, first issue a request for the new object:
curl --request GET http://examples.burningbird.net:3000/widgets/new
A message is returned about retrieving the new widget form. Next,
test adding a new widget, passing the data for the widget in the cURL
request, and changing the method to POST:
curl --request POST http://examples.burningbird.net:3000/widgets/create --data 'widgetname=Smallwidget&widgetprice=10.00'
Run the index test again to make sure the new widget is displayed:
curl --request GET http://examples.burningbird.net:3000/widgets
The result should be:
[
{
"id": 1,
"name": "The Great Widget",
"price": 1000
},
{
"id": 2,
"name": "Smallwidget",
"price": 10
}Next, update the new widget, setting its price to 75.00. The method is now PUT:
curl --request PUT http://examples.burningbird.net:3000/widgets/2 --data 'widgetname=Smallwidget&widgetprice=75.00'
Once you’ve verified the data was changed, go ahead and delete the
new record, changing the HTTP method to DELETE:
curl --request DELETE http://examples.burningbird.net:3000/widgets/2
Now that we have the controller component of the MVC, we need to add the view components, which I cover in Chapter 8. Before moving on, though, read the sidebar Beyond Basic Express for some final tips.
Frameworks such as Express provide a great deal of useful functionality, but one thing they don’t provide is a way of separating the data from the presentation. You can use JavaScript to generate HTML to process the result of a query or update, but the effort can quickly become tedious—especially if you have to generate every part of the page, including sidebars, headers, and footers. Sure, you can use functions, but the work can still verge on overwhelming.
Luckily for us, as framework systems have developed, so have template systems, and the same holds true for Node and Express. In Chapter 7, we briefly used Jade, the template system installed by default with Express, to generate an index page. Express also supports other compatible template systems, including another popular choice, EJS (embedded JavaScript). Jade and EJS take a completely different approach, but both deliver the expected results.
In addition, though you can manually create CSS files for your website or application, you can also use a CSS engine that can simplify this aspect of your web design and development. Rather than having to remember to add in all of the curly braces and semicolons, you use a simplified structure that can be cleaner to maintain. One such CSS engine that works quite nicely with Express and other Node applications is Stylus.
In this chapter I’ll primarily focus on Jade, since it is installed by default with Express. However, I’m going to briefly cover EJS, so you can see two different types of template systems and how they work. I’ll also introduce the use of Stylus to manage the CSS to ensure that the pages display nicely.
Embedded JavaScript is a good name for EJS, because it best describes how it works: JavaScript embedded into HTML markup handles the melding of data and document structure. It’s a very simple template system based on Ruby’s ERB (embedded Ruby).
The EJS GitHub page can be found at https://github.com/visionmedia/ejs.
If you’ve worked with most content management systems (CMS), you’ll quickly grasp the fundamentals of EJS. The following is an example of an EJS template:
<% if (names.length) { %>
<ul>
<% names.forEach(function(name){ %>
<li><%= name %></li>
<% }) %>
</ul>
<% } %>In the code, the EJS is embedded directly into HTML, in this
example providing the data for the individual list items for an
unordered list. The angle brackets and percentage sign pairs (<%, %>) are used to delimit EJS instructions: a
conditional test ensures that an array has been provided, and then the
JavaScript processes the array, outputting the individual array
values.
EJS is based on the Ruby ERB templating system, which is why you’ll frequently see “erb-like” used to describe its format.
The values themselves are output with the equals sign (=), which is a shortcut for “print this value
here”:
<%= name %>
The value is escaped when it’s printed out. To print out an
unescaped value, use a dash (-), like
so:
<%- name %>
If for some reason you don’t want to use the standard open and
closing EJS tags (<%, %>), you can define custom ones using the
EJS object’s open and close methods:
ejs.open('<<');
ejs.close('>>');You can then use these custom tags instead of the default ones:
<h1><<=title >></h1>
Unless you have a solid reason for doing so, though, I’d stick with the default.
Though blended with HTML, EJS is JavaScript, so you have to
provide the open and closing curly braces, as well as the proper format
when using the array object’s forEach method.
For the finished product, the HTML is then rendered via an EJS function call, either returning a JavaScript function that generates a result, or generating the finished result. I’ll demonstrate this once we get EJS for Node installed. Let’s do that now.
The module that’s installed is a version of EJS capable of being used with Node. It’s not the same thing you’ll get if you go to the EJS site and directly download EJS. EJS for Node can be used with client-side JavaScript, but I’m going to focus on its use with Node applications.
Install the template system using npm:
npm install ejs
Once EJS is installed, you can use it directly in a simple Node application—you don’t have to use it with a framework like Express. As a demonstration, render HTML from a given template file as follows:
<html>
<head>
<title><%= title %></title>
</head>
<body>
<% if (names.length) { %>
<ul>
<% names.forEach(function(name){ %>
<li><%= name %></li>
<% }) %>
</ul>
<% } %>
</body>Call the EJS object’s renderFile method
directly. Doing so opens the template and uses the data provided as an
option to generate the HTML.
Example 8-1 uses
the standard HTTP server that comes with Node to listen for a request on
port 8124. When a request is received, the application calls the EJS
renderFile method,
passing in the path for the template file, as well as a names array and a document title. The last parameter is a callback
function that either provides an error (and a fairly readable error, at
that) or the resulting generated HTML. In the example, the result is
sent back via the response object if there’s no error. If there
is an error, an error message is sent in the
result, and the error object is output to the console.
var http = require('http')
, ejs = require('ejs')
;
// create http server
http.createServer(function (req, res) {
res.writeHead(200, {'content-type': 'text/html'});
// data to render
var names = ['Joe', 'Mary', 'Sue', 'Mark'];
var title = 'Testing EJS';
// render or error
ejs.renderFile(__dirname + '/views/test.ejs',
{title : 'testing', names : names},
function(err, result) {
if (!err) {
res.end(result);
} else {
res.end('An error occurred accessing page');
console.log(err);
}
});
}).listen(8124);
console.log('Server running on 8124/');One variation of the rendering method is render, which takes the
EJS template as a string and then returns the formatted HTML:
var str = fs.readFileSync(__dirname + '/views/test.ejs', 'utf8');
var html = ejs.render(str, {names : names, title: title });
res.end(html);A third rendering method, which I won’t demonstrate, is compile, which takes an
EJS template string and returns a JavaScript function that can be
invoked to render HTML each time it’s called. You can also use this
method to enable EJS for Node in client-side applications.
The use of compile is
demonstrated in Chapter 9, in the section Building a Game Leaderboard.
In addition to support for rendering EJS templates, EJS
for Node also provides a set of predefined filters, which can further
simplify the HTML generation. One filter, first, extracts out the
first value in a supplied array of values. Another filter, downcase, takes the
result of the first filter and lowercases the text:
var names = ['Joe Brown', 'Mary Smith', 'Tom Thumb', 'Cinder Ella'];
var str = '<p><%=: users | first | downcase %></p>';
var html = ejs.render(str, {users : names });The result is the following:
<p>joe brown</p>
The filters can be chained together, with the result of one being
piped to the next. The use of the filter is triggered by the colon
(:) following the equals sign
(=), which is then followed by the
data object. The following example of the use of filters takes a set of
people objects, maps a new object
consisting solely of their names, sorts the names, and then prints out a
concatenated string of the names:
var people = [
{name : 'Joe Brown', age : 32},
{name : 'Mary Smith', age : 54},
{name : 'Tom Thumb', age : 21},
{name : 'Cinder Ella', age : 16}];
var str = "<p><%=: people | map:'name' | sort | join %></p>";
var html = ejs.render(str, {people : people });Here is the result of that filter combination:
Cinder Ella, Joe Brown, Mary Smith, Tom Thumb
The filters aren’t documented in the EJS for Node documentation, and you have to be careful using them interchangeably because some of the filters want a string, not an array of objects. Table 8-1 contains a list of the filters, and a brief description of what type of data they work with and what they do.
Filter | Type of data | Purpose |
| Accepts and returns array | Returns first element of array |
| Accepts and returns array | Returns last element of array |
| Accepts and returns string | Capitalizes first character in string |
| Accepts and returns string | Lowercases all characters in string |
| Accepts and returns string | Capitalizes all characters in string |
| Accepts and returns array | Applies |
| Accepts array and property name; returns array | Creates custom sort function to sort array of objects by property |
| Accepts array; returns numeric | Returns |
| Accepts two numbers or strings; returns number | Returns |
| Accepts two numbers or strings; returns number | Returns |
| Accepts two numbers or strings; returns number | Returns |
| Accepts two numbers or strings; returns number | Returns |
| Accepts array; returns string | Applies |
| Accepts string and length; returns string | Applies |
| Accepts string and word length; returns string | Applies |
| Accepts string, pattern, and substitution; returns string | Applies |
| Accepts string and string value; returns string | Prepends value to string |
| Accepts string and string value; returns string | Appends value to string |
| Accepts array and property; returns array | Creates new array
consisting of given object properties using |
| Accepts array or string | If array, applies
|
| Accepts object and property | Returns property of given object |
| Accepts object |
The template system provides the missing piece we need to complete the views portion of the MVC (Model-View-Controller) application architecture introduced in Chapter 7.
The model portion of the MVC architecture is added in Chapter 10.
In Chapter 7, I provided a quick introduction for using a template system in Example 7-1. The example used Jade, but we can easily convert it to use EJS. How easily? Example 8-2 is an exact duplicate of the application in Example 7-1, except now using EJS rather than Jade. Exactly one line is changed, shown in bold.
var express = require('express')
, routes = require('./routes')
, http = require('http');
var app = express();
app.configure(function(){
app.set('views', __dirname + '/views');
app.set('view engine', 'ejs');
app.use(express.favicon());
app.use(express.logger('dev'));
app.use(express.static(__dirname + '/public'));
app.use(express.bodyParser());
app.use(express.methodOverride());
app.use(app.router);
});
app.configure('development', function(){
app.use(express.errorHandler());
});
app.get('/', routes.index);
http.createServer(app).listen(3000);
console.log("Express server listening on port 3000");The index.js route doesn’t
require any change at all, because it’s not using anything that’s specific
to any template system; it’s using the Express resource object’s
render method, which
works regardless of template system (as long as the system is compatible
with Express):
exports.index = function(req, res){
res.render('index', { title: 'Express' }, function(err, stuff) {
if (!err) {
console.log(stuff);
res.write(stuff);
res.end();
}
});
};In the views directory, the index.ejs file (note the extension) uses EJS for Node annotation rather than the Jade we saw in Chapter 7:
<html> <head> <title><%= title %></title> </head> <body> <h1><%= title %></title> <p>Welcome to <%= title %></p> </body>
This demonstrates the beauty of working with an application that separates the model from the controller from the view: you can swap technology in and out, such as using a different template system, without impacting the application logic or data access.
To recap what’s happening with this application:
The main Express application uses app.get to associate
a request listener function (routes.index) with an HTTP GET request.
The routes.index function
calls res.render to render
the response to the GET request.
The res.render function
invokes the application object’s render
function.
The application render function
renders the specified view, with whatever options—in this case, the
title.
The rendered content is then written to the response object, and back to the user’s browser.
In Chapter 7, we focused on the routing aspects of the application, and now we’ll focus on the view. We’ll take the application we created at the end of Chapter 7, in Example 7-6 through Example 7-8, and add in the views capability. First, though, we need to do a little restructuring of the environment to ensure that the application can grow as needed.
Though the application is the Widget Factory, widgets aren’t going to be the only objects the system maintains. We need to restructure the environment so that we can add objects as needed.
Currently, the environment is as follows:
/application directory /routes - home directory controller /controllers - object controllers /public - static files /views - template files
The routes and the controllers directories can stay as they are, but the views and the public directory need to be modified to allow for different objects. Instead of placing all widget views directly in views, we add them to a new subdirectory of views named, appropriately enough, widgets:
/application directory
/ views
/widgetsInstead of placing all widget static files directly in the public directory, we also place them in a widgets subdirectory:
/application directory
/public
/widgetsNow, we can add new objects by adding new directories, and we’ll be able to use filenames of new.html and edit.ejs for each, without worrying about overwriting existing files.
Note that this structure assumes we may have static files for our application. The next step is to figure out how to integrate the static files into the newly dynamic environment.
The first component of the application to refine is adding a new widget. This consists of two parts: displaying a form to get the new widget’s information, and storing the new widget into the existing widget data store.
We can create an EJS template for the form, though it won’t have any dynamic components—or at least, it won’t at this time with the way the page is designed. However, it makes no sense to serve something through the template system that doesn’t need the system’s capability.
We could also just change how the form is accessed—instead of accessing the form using /widgets/new, we’d access it as /widgets/new.html. However, this introduces an inconsistency into the application routing. In addition, if we add dynamic components later to the form page, then we’ll have to change the references to the new form.
A better approach is to handle the routing request and serve the static page as if it were dynamic, but without using the template system.
The Express resource object has a redirect method we
could use to redirect the request to the new.html file, but new.html is what’s going to show up in the
address bar on the browser when finished. It also returns a 302 status
code, which we don’t want. Instead, we’ll use the resource object’s
sendfile method. This
method takes as parameters a file path, possible options, and an
optional callback function with an error as its only parameter. The
widget controller is using only the first parameter.
The filepath is:
__dirname + "/../public/widgets/widget.html"
We used the relative indicator .. since the public directory is located off
the controllers directory’s parent.
However, we can’t use this path in sendfile as is, because
it generates a 403 forbidden error. Instead, we use the path module’s normalize method to
convert the path’s use of relative indicators into the equivalent
absolute path:
// display new widget form
exports.new = function(req, res) {
var filePath = require('path').normalize(__dirname +
"/../public/widgets/new.html");
res.sendfile(filePath);
};The HTML page with the form is nothing to get excited about—just a simple form, as shown in Example 8-3. However, we did add the description field back in to make the data a little more interesting.
<!doctype html>
<html lang="en">
<head>
<meta charset="utf-8" />
<title>Widgets</title>
</head>
<body>
<h1>Add Widget:</h1>
<form method="POST" action="/widgets/create"
enctype="application/x-www-form-urlencoded">
<p>Widget name: <input type="text" name="widgetname"
id="widgetname" size="25" required/></p>
<p>Widget Price: <input type="text"
pattern="^\$?([0-9]{1,3},([0-9]{3},)*[0-9]{3}|[0-9]+)(.[0-9][0-9])?$"
name="widgetprice" id="widgetprice" size="25" required/></p>
<p>Widget Description: <br />
<textarea name="widgetdesc" id="widgetdesc" cols="20"
rows="5"></textarea>
<p>
<input type="submit" name="submit" id="submit" value="Submit"/>
<input type="reset" name="reset" id="reset" value="Reset"/>
</p>
</form>
</body>The form is POSTed, of
course.
Now that the application can display the new widget form, we need to modify the widget controller to process the form posting.
Prior to adding in the new template support, we need to
make changes to the main application file to incorporate the use of the
EJS template system. I won’t repeat the app.js file completely from Example 7-8 in Chapter 7, because the only change is to the
configure method call
to include the EJS template engine and views directory:
app.configure(function(){
app.set('views', __dirname + '/views');
app.set('view engine', 'ejs');
app.use(express.favicon());
app.use(express.logger('dev'));
app.use(express.staticCache({maxObjects: 100, maxLength: 512}));
app.use(express.static(__dirname + '/public'));
app.use(express.bodyParser());
app.use(express.methodOverride());
app.use(app.router);
app.use(express.directory(__dirname + '/public'));
app.use(function(req, res, next){
throw new Error(req.url + ' not found');
});
app.use(function(err, req, res, next) {
console.log(err);
res.send(err.message);
});
});Now we’re ready to convert the widget controller so it uses templates, starting with the code to add a new widget.
The actual processing of the data in the widget controller for the new widget doesn’t change. We still pull the data from the request body, and add it to the in-memory widget store. However, now that we have access to a template system, we’re going to change how we respond to the successful addition of a new widget.
I created a new EJS template, named added.ejs, shown in Example 8-4. All it does is provide a listing of the widget’s properties, and a message consisting of the title sent with the widget object.
<head> <title><%= title %></title> </head> <body> <h1><%= title %> | <%= widget.name %></h1> <ul> <li>ID: <%= widget.id %></li> <li>Name: <%= widget.name %></li> <li>Price: <%= widget.price.toFixed(2) %></li> <li>Desc: <%= widget.desc %></li> </ul> </body>
The code to process the update is little different from that shown in Chapter 7, other than the fact that we’re now rendering a view rather than sending a message back to the user (the part that changes is in bold text):
// add a widget
exports.create = function(req, res) {
// generate widget id
var indx = widgets.length + 1;
// add widget
widgets[widgets.length] =
{ id : indx,
name : req.body.widgetname,
price : parseFloat(req.body.widgetprice),
desc : req.body.widgetdesc };
//print out to console and confirm addition to user
console.log(widgets[indx-1]);
res.render('widgets/added', {title: 'Widget Added', widget : widgets[indx-1]});
};The two options sent to the view are the page title and the widget object. Figure 8-1 shows the informative, though plain, result.
The code to process a new widget doesn’t do any validation of the data or check for authority or SQL injection hacks. Data validation, security, and authorization are covered in Chapter 15.
The next two processes to convert to templates, update and deletion, require a way of specifying which
widget to perform the action on. In addition, we also need to convert
the index display of all widgets. For all three processes, we’re going
to use a view to create both the widgets index page and a picklist,
covered next.
A picklist is nothing more than a list of choices from which one can choose. For the widget application, a picklist could be a selection or drop-down list incorporated into an update or delete page, using Ajax and client-side scripting, but we’re going to incorporate the functionality into the widget application’s index page.
Right now, the widget application index page just has a data dump of the widget data store. It’s informative, but ugly and not all that useful. To improve the result, we’re going to add a view to display all of the widgets in a table—one widget per row, with the widget properties in columns. We’re also going to add two more columns: one with a link to edit the widget, and one with a link to delete the widget. These provide the missing piece to the application: a way to edit or delete a widget without having to remember or know its identifier.
Example 8-5 has the contents of the template for this new view, named index.ejs. Since the file is located in the widgets subdirectory, we don’t have to worry that it’s the same name as the higher-level index.ejs file.
<!doctype html>
<html lang="en">
<head>
<meta charset="utf-8" />
<title><%= title %></title>
</head>
<body>
<% if (widgets.length) { %>
<table>
<caption>Widgets</caption>
<tr><th>ID</th><th>Name</th><th>Price</th><th>Description</th></tr>
<% widgets.forEach(function(widget){ %>
<tr>
<td><%= widget.id %></td>
<td><%= widget.name %></td>
<td>$<%= widget.price.toFixed(2) %></td>
<td><%= widget.desc %></td>
<td><a href="/widgets/<%= widget.id %>/edit">Edit</a></td>
<td><a href="/widgets/<%= widget.id %>">Delete</a></td>
</tr>
<% }) %>
</table>
<% } %>
</body>The controller code to trigger this new view is extremely simple: a call to render the view, sending the entire array of widgets through as data:
// index listing of widgets at /widgets/
exports.index = function(req, res) {
res.render('widgets/index', {title : 'Widgets', widgets : widgets});
};In Example 8-5, if
the object has a length property (is an
array), its element objects are traversed and their properties are
printed out as table data, in addition to the links to edit and delete
the object. Figure 8-2
shows the table after several widgets have been added to our in-memory
data store.
The link (route) to delete the object is actually the same as the link (route) to show it: /widgets/:id. We’ll add a mostly hidden form to the Show Widget page that includes a button to delete the widget if it’s no longer needed. This allows us to incorporate the necessary trigger for the deletion without having to add a new route. It also provides another level of protection to ensure that users know exactly which widget they’re deleting.
To display an individual widget is as simple as providing
a placeholder for all of its properties, embedded into whatever HTML you
want to use. In the widget application, I’m using an unordered list
(ul) for the widget
properties.
Since we’re also encompassing into the page the trigger for
deleting the object, at the bottom I’ve added a form that displays a
button reading “Delete Widget.” In the form is the hidden _method field that is used to generate the
HTTP DELETE verb that routes
to the application’s destroy method.
The entire template is shown in Example 8-6.
<!doctype html> <html lang="en"> <head> <meta charset="utf-8" /> <title><%= title %></title> </head> <body> <h1><%= widget.name %></h1> <ul> <li>ID: <%= widget.id %></li> <li>Name: <%= widget.name %></li> <li>Price: $<%= widget.price.toFixed(2) %></li> <li>Description: <%= widget.desc %></li> </ul> <form method="POST" action="/widgets/<%= widget.id %>" enctype="application/x-www-form-urlencoded"> <input type="hidden" value="delete" name="_method" /> <input type="submit" name="submit" id="submit" value="Delete Widget"/> </form> </body>
Very little modification is required in the controller code for
either the show or the destroy methods. I’ve left the destroy method as is for now. All it does is
delete the object from the in-memory store and send a message back to
this effect:
exports.destroy = function(req, res) {
var indx = req.params.id - 1;
delete widgets[indx];
console.log('deleted ' + req.params.id);
res.send('deleted ' + req.params.id);
};The show method required little
change—simply replacing the send message with a
call to render the new
view:
// show a widget
exports.show = function(req, res) {
var indx = parseInt(req.params.id) - 1;
if (!widgets[indx])
res.send('There is no widget with id of ' + req.params.id);
else
res.render('widgets/show', {title : 'Show Widget', widget : widgets[indx]});
};Figure 8-3 demonstrates what the Show Widget page looks like, complete with the Delete Widget button at the bottom.
By now, you’ve seen how simple it is to incorporate views into the application. The best thing of all about this system is that you can incorporate changes into the view templates without having to stop the application: it uses the changed template the next time the view is accessed.
One last view for the update widget, and we’re done converting the widget application to use the EJS template system.
The form to edit the widget is exactly the same as the
form to add a widget, except for the addition of one field: _method. In addition, the form is prepopulated
with the data for the widget being edited, so we need to incorporate the
template tags and appropriate values.
Example 8-7
contains the contents for the edit.ejs template file. Note the use of the
template tags with the value fields in the input elements. Also notice
the addition of the _method
field.
<!doctype html>
<html lang="en">
<head>
<meta charset="utf-8" />
<title><%= title %></title>
</head>
<body>
<h1>Edit <%= widget.name %></h1>
<form method="POST" action="/widgets/<%= widget.id %>"
enctype="application/x-www-form-urlencoded">
<p>Widget name: <input type="text" name="widgetname"
id="widgetname" size="25" value="<%=widget.name %>" required /></p>
<p>Widget Price: <input type="text"
pattern="^\$?([0-9]{1,3},([0-9]{3},)*[0-9]{3}|[0-9]+)(.[0-9][0-9])?$"
name="widgetprice" id="widgetprice" size="25" value="<%= widget.price %>" required/></p>
<p>Widget Description: <br />
<textarea name="widgetdesc" id="widgetdesc" cols="20"
rows="5"><%= widget.desc %></textarea>
<p>
<input type="hidden" value="put" name="_method" />
<input type="submit" name="submit" id="submit" value="Submit"/>
<input type="reset" name="reset" id="reset" value="Reset"/>
</p>
</form>
</body>Figure 8-4 shows the page with a widget loaded. All you need to do is edit the field values, and then click Submit to submit the changes.
The modification to the controller code is as simple as the other
modifications have been. The Edit view is accessed using res.render, and the
widget object is passed as data:
// display edit form
exports.edit = function(req, res) {
var indx = parseInt(req.params.id) - 1;
res.render('widgets/edit', {title : 'Edit Widget', widget : widgets[indx]});
};The code to process the update is very close to what we had in Chapter 7, except that instead of sending a message that the object is updated, we’re using a view. We’re not creating a new view, though. Instead, we’re using the widgets/added.ejs view we used earlier. Since both just display the object’s properties and can take a title passed in as data, we can easily repurpose the view just by changing the title:
// update a widget
exports.update = function(req, res) {
var indx = parseInt(req.params.id) - 1;
widgets[indx] =
{ id : indx + 1,
name : req.body.widgetname,
price : parseFloat(req.body.widgetprice),
desc : req.body.widgetdesc}
console.log(widgets[indx]);
res.render('widgets/added', {title: 'Widget Edited', widget : widgets[indx]})
};Again, the view used doesn’t impact what route (URL) is shown, so it doesn’t matter if we reuse a view. Being able to reuse a view can save us a lot of work as the application increases in difficulty.
You’ve had a chance to see pieces of the controller code throughout these sections as we convert it to use templates. Example 8-8 is an entire copy of the changed file, which you can compare to Example 7-6 in Chapter 7 to see how easily views incorporate into the code, and how much work they can save us.
var widgets = [
{ id : 1,
name : "The Great Widget",
price : 1000.00,
desc: "A widget of great value"
}
]
// index listing of widgets at /widgets/
exports.index = function(req, res) {
res.render('widgets/index', {title : 'Widgets', widgets : widgets});
};
// display new widget form
exports.new = function(req, res) {
var filePath = require('path').normalize(__dirname + "/../public/widgets/new.html");
res.sendfile(filePath);
};
// add a widget
exports.create = function(req, res) {
// generate widget id
var indx = widgets.length + 1;
// add widget
widgets[widgets.length] =
{ id : indx,
name : req.body.widgetname,
price : parseFloat(req.body.widgetprice),
desc : req.body.widgetdesc };
//print out to console and confirm addition to user
console.log(widgets[indx-1]);
res.render('widgets/added', {title: 'Widget Added', widget : widgets[indx-1]});
};
// show a widget
exports.show = function(req, res) {
var indx = parseInt(req.params.id) - 1;
if (!widgets[indx])
res.send('There is no widget with id of ' + req.params.id);
else
res.render('widgets/show', {title : 'Show Widget', widget : widgets[indx]});
};
// delete a widget
exports.destroy = function(req, res) {
var indx = req.params.id - 1;
delete widgets[indx];
console.log('deleted ' + req.params.id);
res.send('deleted ' + req.params.id);
};
// display edit form
exports.edit = function(req, res) {
var indx = parseInt(req.params.id) - 1;
res.render('widgets/edit', {title : 'Edit Widget', widget : widgets[indx]});
};
// update a widget
exports.update = function(req, res) {
var indx = parseInt(req.params.id) - 1;
widgets[indx] =
{ id : indx + 1,
name : req.body.widgetname,
price : parseFloat(req.body.widgetprice),
desc : req.body.widgetdesc}
console.log(widgets[indx]);
res.render('widgets/added', {title: 'Widget Edited', widget : widgets[indx]})
};This is the last time you’ll see the controller code for this chapter. Yet we’re about to make a profound change to the application: we’re going to replace the template system.
Jade is the template system installed with Express by default. It is quite different from EJS: rather than embed the template tags directly into HTML, you use a simplified version of HTML.
The Jade website is at http://jade-lang.com/.
In the Jade template system, HTML elements are given by their name, but you don’t use any angle brackets. Nesting is indicated by indentation. So, rather than:
<html> <head> <title>This is the title</title> </head> <body> <p>Say hi World</p> </body> </html>
You have:
html
head
title This is it
body
p Say Hi to the worldThe contents of both the title and the paragraph elements are just included after the element name. There are no ending tags—they’re assumed—and again, indentation triggers nesting. Another example is the following, which also makes use of both class name and identifier, as well as additional nesting:
html
head
title This is it
body
div.content
div#title
p nested dataThis generates:
<html> <head> <title>This is it</title> </head> <body> <div class="content"> <div id="title"> <p>nested data</p> </div> </div> </body> </html>
If you have large bodies of content, such as text for a paragraph,
you can use the vertical bar, or pipe (|), to concatenate the text:
p | some text | more text | and even more
This becomes:
<p>some text more text and even more</p>
Another approach is to end the paragraph element with a period
(.) indicating that the block
contains only text and allowing us to omit the vertical bar:
p. some text more text and even more
If we want to include HTML as the text, we can; it ends up being treated as HTML in the generated source:
body. <h1>A header</h1> <p>A paragraph</p>
Form elements generally have attributes, and they’re incorporated in Jade in parentheses, including setting their values (if any). The attributes need only be separated by whitespace, but I list them each on a separate line to make the template more readable.
The following Jade template:
html
head
title This is it
body
form(method="POST"
action="/widgets"
enctype="application/x-www-form-urlencoded")
input(type="text"
name="widgetname"
id="widgetname"
size="25")
input(type="text"
name="widgetprice"
id="widgetprice"
size="25")
input(type="submit"
name="submit"
id="submit"
value="Submit")<html> <head> <title>This is it</title> </head> <body> <form method="POST" action="/widgets" enctype="application/x-www-form-urlencoded"> <input type="text" name="widgetname" id="widgetname" size="25"/> <input type="text" name="widgetprice" id="widgetprice" size="25"/> <input type="submit" name="submit" id="submit" value="Submit"/> </form> </body> </html>
Now we’re going to convert the widget application so it uses Jade rather than EJS. The only change that we need to make to the widget application code is in app.js, to change the template engine:
app.set('view engine', 'jade');No other change is necessary to the application. None. Zip.
All of the templates share the same page layout. The layout is rather plain; there are no sidebars or footers, or any use of CSS. Because of the page’s plain nature, we haven’t minded duplicating the same layout markup in each view in the prior examples. However, if we start to add more to the overall page structure—such as sidebars, a header, and a footer—then having to maintain the same layout information in each file is going to get cumbersome.
The first thing we’re going to do in our conversion, then, is create a layout template that will be used by all the other templates.
Express 3.x completely changed its handling of views, including
how it implements partial views and uses layouts. You can use the Jade
templates in this section with Express 2.x if you add the following in
the configure method
call:
app.set('view options', {layout: false});Example 8-9 contains the
complete layout.jade file. It uses
the HTML5 doctype, adds a head element with title and meta elements, adds the body element, and then references a block called content. That’s how you include blocks of
content defined in other template files.
doctype 5
html(lang="en")
head
title #{title}
meta(charset="utf-8")
body
block contentNotice the use of the pound sign and curly braces (#{}) for the title. This is how we embed data passed to the
template in Jade. The use of the identifier doesn’t change from EJS,
just the syntax.
To use the new layout template, we start off each of the content templates with:
extends layout
The use of extends lets the
template engine know where to find the layout template for the page
view, while the use of block instructs the
template engine about where to place the generated content.
You don’t have to use content
for the block name, and you can use more than one block. In addition,
you can also include other template files if you want to break up the
layout template even further. I modified layout.jade to include a header rather than
the markup directly in the layout file:
doctype 5
html(lang="en")
include header
body
block contentI then defined the header content in a file named header.jade, with the following:
head
title #{title}
meta(charset="utf-8")There are two things to note in the new layout.jade and header.jade code.
First, the include directive is
relative. If you split the views into the following subdirectory
structure:
/views
/widgets
layout.jade
/standard
header.jadeyou’d use the following to include the header template in the layout file:
include standard/header
The file doesn’t have to be Jade, either—it could be HTML, in which case you’ll need to use the file extension:
include standard/header.html
Second, do not use indentation in the header.jade file. The indentation comes in from the parent file and doesn’t need to be duplicated in the included template file. In fact, if you do so, your template will generate an error.
Now that we’ve defined the layout template, it’s time to convert the EJS views into Jade.
Now is also the time you might consider swapping the static Add Widget form file for a dynamic one so that it can also take advantage of the new layout template.
The first view to convert from EJS to Jade is the added.ejs template, which provides feedback for the successful addition of a new widget. The template file is named added.jade (the name must be the same, though the extension different, to work with the existing controller code), and it makes use of the newly defined layout.jade file, as shown in Example 8-10.
extends layout
block content
h1 #{title} | #{widget.name}
ul
li id: #{widget.id}
li Name: #{widget.name}
li Price: $#{widget.price.toFixed()}
li Desc: #{widget.desc}Notice how we can still use the toFixed method to format the price
output.
The block is named content, so
it integrates with the expectations of the block name set in the
layout.jade file. The simplified
HTML for an h1 header and an
unordered list is integrated with the data passed from the controller—in
this case, the widget object.
Running the widget application and adding a new widget generates the same HTML as generated with the EJS: a header and a list of widget properties for the newly added widget—all without our changing any of the controller code.
The next template to convert is the index template that lists all of the widgets in a table, with options to edit or delete the widget as table columns. We’re going to try something a little different with this template. We’re going to separate the table row generation for each widget from the overall table generation.
First, we’ll create the row.jade template. It assumes that the data
is an object named widget, with the
properties accessible off the object:
tr
td #{widget.id}
td #{widget.name}
td $#{widget.price.toFixed(2)}
td #{widget.desc}
td
a(href='/widgets/#{widget.id}/edit') Edit
td
a(href='/widgets/#{widget.id}') DeleteEach link must be included on a separate line; otherwise, we lose the nesting indication with the indentation.
The main index.jade file
that references the newly created row template is shown in Example 8-11. This template
introduces two new Jade constructs: a conditional test and an
iteration. The conditional is used to test for the length property on
the widgets
object, assuring us we’re dealing with an array. The iteration
construct uses an abbreviated form of the Array.forEach method, where the array is
traversed and each instance is assigned to the new variable, widget.
extends layout
block content
table
caption Widgets
if widgets.length
tr
th ID
th Name
th Price
th Description
th
th
each widget in widgets
include rowThis is a whole lot less work than having to manually enter all
those angle brackets, especially with the table headers (th). The results of the Jade template are
identical to those from the EJS template: an HTML table with widgets
in each row, and the ability to edit or delete each widget.
The next two conversions are working with forms.
First, we’ll convert the edit template into one using Jade. The only really tricky part of the conversion is handling all the various attributes. Though you can separate them by a space, I find it helps to list each on a separate line. This way, you can see that you’ve properly included all the attributes and can easily double-check their values. Example 8-12 contains the rather long template for the Edit Widget form.
extends layout
block content
h1 Edit #{widget.name}
form(method="POST"
action="/widgets/#{widget.id}"
enctype="application/x-www-form-urlencoded")
p Widget Name:
input(type="text"
name="widgetname"
id="widgetname"
size="25"
value="#{widget.name}"
required)
p Widget Price:
input(type="text"
name="widgetprice"
id="widgetprice"
size="25"
value="#{widget.price}"
pattern="="^\$?([0-9]{1,3},([0-9]{3},)*[0-9]{3}|[0-9]+)(.[0-9][0-9])?$"
required)
p Widget Description:
br
textarea(name="widgetdesc"
id="widgetdesc"
cols="20"
rows="5") #{widget.desc}
p
input(type="hidden"
name="_method"
id="_method"
value="put")
input(type="submit"
name="submit"
id="submit"
value="Submit")
input(type="reset"
name="reset"
id="reset"
value="reset")During the conversion of the Show Widget page, I noticed that the top of the page is basically a repeat of what is displayed in the added.jade template from Example 8-10: an unordered list with all of the widget’s properties. Another opportunity to simplify!
I created a new template, widget.jade, that just displays the widget information as an unordered list:
ul
li id: #{widget.id}
li Name: #{widget.name}
li Price: $#{widget.price.toFixed(2)}
li Desc: #{widget.desc}I then modified the added.jade file from Example 8-10 to use this new template:
extends layout
block content
h1 #{title} | #{widget.name}
include widgetThe new Show Widget template also makes use of the new widget.jade template, as demonstrated in Example 8-13.
extends layout
block content
h1 #{widget.name}
include widget
form(method="POST"
action="/widgets/#{widget.id}"
enctype="application/x-www-form-urlencoded")
input(type="hidden"
name="_method"
id="_method"
value="delete")
input(type="submit"
name="submit"
id="submit"
value="Delete Widget")You can see how modularizing the templates makes each template that much cleaner, and thus easier to maintain.
With the newly modularized template, we can now show and delete a specific widget...and that leads to a quirk where the Jade template differs from the EJS template.
In the widget application, when widgets are deleted, they are
deleted in place. This means the array element is basically set to null, so that the widget location in the
array is maintained relative to its identifier. This in-place
maintenance doesn’t cause a problem when we add and delete widgets and
display them in the index page in EJS, but it
does cause a problem with Jade: we get an error
about missing properties, because it doesn’t filter out null array elements like the EJS template
processing does.
This is trivially easy to fix. As shown in Example 8-11, just add another
conditional test to the Jade markup in the index.jade file to make sure the widget
object exists (i.e., is not null):
extends layout
block content
table
caption Widgets
if widgets.length
tr
th ID
th Name
th Price
th Description
th
th
each widget in widgets
if widget
include rowAnd now, all of the template views have been converted to Jade, and the application is complete. (Well, until we add in the data portion in Chapter 10.)
But while the application is complete, it’s not very attractive. Of course, it’s easy enough to add a stylesheet into the header to modify the presentation of all the elements, but we’ll also briefly take a look at another approach: using Stylus.
It’s a simple matter to include a stylesheet into any of the template files. In the Jade template file, we can add one to the header.jade file:
head
title #{title}
meta(charset="utf-8")
link(type="text/css"
rel="stylesheet"
href="/stylesheets/main.css"
media="all")The stylesheet is now immediately available to all of our application views because they all use the layout template, which uses this header.
Now you can definitely see the value of converting the static new.html file into a template view: making the change to the header doesn’t impact it, and it has to be manually edited.
If you’ve grown fond of the syntax for Jade, though, you can use a variation of this syntax for CSS by incorporating the use of Stylus into your application.
To use Stylus, first install it with npm:
npm install stylus
Stylus is not like the Jade template system. It doesn’t create dynamic CSS views. What it does is generate static stylesheets from a Stylus template the first time the template is accessed, or each time the template is modified.
Read more about Stylus at http://learnboost.github.com/stylus/docs/js.html.
To incorporate Stylus into the widget application, we have to
include the module within the main application file’s (app.js) require section. Then we
have to include the Stylus middleware along with the others in the
configure method call,
passing in an option with the source for the Stylus templates, and the
destination where the compiled stylesheets are to be placed. Example 8-14 shows the newly
modified app.js file with these
changes in bold text.
var express = require('express')
, routes = require('./routes')
, map = require('./maproutecontroller')
, http = require('http')
, stylus = require('stylus')
, app = express();
app.configure(function(){
app.set('views', __dirname + '/views');
app.set('view engine', 'jade');
app.use(express.favicon());
app.use(express.logger('dev'));
app.use(express.staticCache({maxObjects: 100, maxLength: 512}));
app.use(stylus.middleware({
src: __dirname + '/views'
, dest: __dirname + '/public'
}));
app.use(express.static(__dirname + '/public'));
app.use(express.bodyParser());
app.use(express.methodOverride());
app.use(app.router);
app.use(express.directory(__dirname + '/public'));
app.use(function(req, res, next){
throw new Error(req.url + ' not found');
});
app.use(function(err, req, res, next) {
console.log(err);
res.send(err.message);
});
});
app.configure('development', function(){
app.use(express.errorHandler());
});
app.get('/', routes.index);
var prefixes = ['widgets'];
// map route to controller
prefixes.forEach(function(prefix) {
map.mapRoute(app, prefix);
});
http.createServer(app).listen(3000);
console.log("Express server listening on port 3000");The first time you access the widget application after making this change, you may notice a very brief hesitation. The reason is that the Stylus module is generating the stylesheet—an event that happens when a new or modified stylesheet template is added and the application is restarted. After the stylesheet has been generated, though, it’s the generated copy that’s served up—it isn’t recompiled with every page access.
You will need to restart your Express application if you make changes to the stylesheet template.
The Stylus stylesheet templates all have the same extension: .styl. The source directory is set to views, but it expects the stylesheet templates to be in a stylesheets directory under views. When it generates the static stylesheets, it places them in a stylesheets directory under the destination directory (in this case, /public).
After working with Jade, you should find the Stylus syntax very familiar. Again, each element that is being styled is listed, followed by the indented stylesheet setting. The syntax strips away the need for curly braces, colons, and semicolons.
For example, to change the background color for the web page to yellow, and the text color to red, use the following for the Stylus template:
body background-color yellow color red
If you want elements to share settings, list them on the same line with a comma between them, just like you would with CSS:
p, tr background-color yellow color red
Or you can list the elements on separate lines:
p tr background-color yellow color red
If you want to use a pseudoclass, such as :hover or :visited, use the following syntax:
textarea
input
background-color #fff
&:hover
background-color cyanThe ampersand (&) represents
the parent selector. All combined, the following Stylus template:
Combined, the following:
p, tr
background-color yellow
color red
textarea
input
background-color #fff
&:hover
background-color cyangenerates the following static CSS file:
p,
tr {
background-color: #ff0;
color: #f00;
}
textarea,
input {
background-color: #fff;
}
textarea:hover,
input:hover {
background-color: #0ff;
}There’s more to working with Stylus, but I’ll leave that to you as an off-book exercise. The Stylus website provides a good set of documentation for the syntax. Before leaving this chapter, though, we’ll create a Stylus stylesheet that enhances the presentation of the widget application.
Specifically, we’ll add a border and spacing to the HTML table element in the index widget listing page. We’re also going to change the font for the headers and remove the bullet indicators for the unordered list. These are small changes, but they’ll be a start in refining the appearance of the widget application.
The new stylesheet template is shown in Example 8-15. It’s not terribly big and doesn’t use any involved CSS. It’s basic stuff, but it does improve—smooth out a bit—the overall appearance of the application.
body margin 50px table width 90% border-collapse collapse table, td, th, caption border 1px solid black td padding 20px caption font-size larger background-color yellow padding 10px h1 font 1.5em Georgia, serif ul list-style-type none form margin 20px padding 20px
Figure 8-5 shows the index page after several widgets have been added. Again, it’s nothing fancy, but the data content is a lot easier to read with the new stylesheet.
When it comes to data, there’s relational databases and Everything Else, otherwise known as NoSQL. In the NoSQL category, a type of structured data is based on key/value pairs, typically stored in memory for extremely fast access. The three most popular in-memory key/value stores are Memcached, Cassandra, and Redis. Happily for Node developers, there is Node support for all three stores.
Memcached is primarily used as a way of caching data queries for quick access in memory. It’s also quite good with distributed computing, but has limited support for more complex data. It’s useful for applications that do a lot of queries, but less so for applications doing a lot of data writing and reading. Redis is the superior data store for the latter type of application. In addition, Redis can be persisted, and it provides more flexibility than Memcached—especially in its support for different types of data. However, unlike Memcached, Redis works only on a single machine.
The same factors also come into play when comparing Redis and Cassandra. Like Memcached, Cassandra has support for clusters. However, also like Memcached, it has limited data structure support. It’s good for ad hoc queries—a use that does not favor Redis. However, Redis is simple to use, uncomplicated, and typically faster than Cassandra. For these reasons, and others, Redis has gained a greater following among Node developers, which is why I picked it over Memcached and Cassandra to cover in this chapter on key/value in-memory data stores.
I’m going to take a break from the more tutorial style of technology coverage in the previous chapters and demonstrate Node and Redis by implementing three use cases that typify the functionality these two technologies can provide:
Building a game leaderboard
Creating a message queue
Tracking web page statistics
These applications also make use of modules and technologies covered in earlier chapters, such as the Jade template system (covered in Chapter 8), the Async module (covered in Chapter 5), and Express (covered in Chapter 7 and Chapter 8).
The Redis site is at http://redis.io/. Read more on Memcached at http://memcached.org/, and on Apache Cassandra at http://cassandra.apache.org/.
There are several modules supporting Redis, including Redback, which provides a higher-level interface, but in this chapter we’ll focus on just one: node_redis, or just redis (the convention we’ll use), by Matt Ranney. I like redis because it provides a simple and elegant interface to directly access Redis commands, so you can leverage what you know about the data store with minimal intervention.
The redis GitHub page is at https://github.com/mranney/node_redis.
You can install the redis module using npm:
npm install redis
I also recommend using the hiredis library, as it’s nonblocking and improves performance. Install it using the following:
npm install hiredis redis
To use redis in your Node applications, you first include the module:
var redis = require('redis');Then you’ll need to create a Redis client. The method used is
createClient:
var client = redis.createClient();
The createClient method can
take three optional parameters: port, host, and options
(outlined shortly). By default, the host is set to 127.0.0.1, and the port is set to 6379. The port is the one used by default for a
Redis server, so these default settings should be fine if the Redis server
is hosted on the same machine as the Node application.
The third parameter is an object that supports the following options:
parserThe Redis protocol reply parser; set by default to hiredis. You can also use javascript.
return_buffersDefaults to false. If
true, all replies are sent as
Node buffer objects rather than strings.
detect_buffersDefaults to false. If
true, replies are sent as buffer
objects if any input to the original commands were buffers.
socket_nodelayDefaults to true; specifies
whether to call setNoDelay on TCP
stream.
no_ready_checkDefaults to false. Set to
true inhibits the “ready check”
sent to server to check if it is ready for more commands.
Use the default settings until you’re more comfortable with Node and Redis.
Once you have a client connection to the Redis data store, you can
send commands to the server until you call the client.quit method call,
which closes the connection to the Redis server. If you want to force a
closure, you can use the client.end method
instead. However, the latter method doesn’t wait for all replies to be
parsed. The client.end method is a
good one to call if your application is stuck or you want to start
over.
Issuing Redis commands through the client connection is a fairly intuitive process. All commands are exposed as methods on the client object, and command arguments are passed as parameters. Since this is Node, the last parameter is a callback function, which returns an error and whatever data or reply is given in response to the Redis command.
In the following code, the client.hset method is
used to set a hash property:
client.hset("hashid", "propname", "propvalue", function(err, reply) {
// do something with error or reply
});The hset command sets a
value, so there’s no return data, only the Redis acknowledgment. If you
call a method that gets multiple values, such as client.hvals, the second parameter in the
callback function will be an array—either an array of single strings, or
an array of objects:
client.hvals(obj.member, function (err, replies) {
if (err) {
return console.error("error response - " + err);
}
console.log(replies.length + " replies:");
replies.forEach(function (reply, i) {
console.log(" " + i + ": " + reply);
});
});Because the Node callback is so ubiquitous, and because so many of
the Redis commands are operations that just reply with a confirmation of
success, the redis module provides a redis.print method you
can pass as the last parameter:
client.set("somekey", "somevalue", redis.print);The redis.print method prints
either the error or the reply to the console and returns.
Now that you have an idea how the redis module works, it’s time to try it out with actual applications.
One possible use for Redis is to create a game leaderboard. A leaderboard is a scorekeeping device for digital games on computers and handheld devices such as smartphones and tablets. A widely used one is OpenFeint, which allows game players to create an online profile and then store scores for various games. Players can compete among friends, or compete for the top score for any given game.
This is the type of application that can be served by a hybrid data solution. The profiles could be stored in a relational data store, but the scores themselves could be stored in a data store like Redis. The data needs for the scores are simple, and the score data is accessed and modified frequently, and by large numbers of users. One game developer for Facebook estimated it had 10,000 concurrent users, with 200,000 requests per minute during peak game times. However, the system to handle the requests doesn’t have to be Herculean in nature, because the data isn’t complex, and transactional enforcement really isn’t a necessity there. Frankly, a relational or document database is overkill. A key/value data store like Redis is ideal.
The Redis hash and the sorted set are the most appropriate data structures for this type of application. The hash is ideal because the information about each score is more than just one or two fields. Typically, you’ll store a member ID, perhaps the player’s name (to limit having to go back to the relational or document store that often), perhaps the game name if the system provides leaderboards for more than one game, the last date played, the score, and any other relevant information.
The sorted set is the best data structure for tracking just the scores and username, and being able to quickly access the highest 10 or 100 scores.
To create the application that updates the Redis database, I converted the TCP client/server application I created in Chapter 3 to send data from the TCP client to the server, which then updates Redis. It wouldn’t be unusual for a gaming application to store the data via TCP socket rather than HTTP or other means.
The TCP client takes whatever we type at the command line and sends it to the server. The code is exactly the same as that shown in Example 3-3, so I won’t repeat it. When I run the TCP client, unlike previous testing, instead of just sending through plain-text messages, I send JSON representing the information being stored in the Redis database. An example is the following:
{"member" : 400, "first_name" : "Ada", "last_name" : "Lovelace", "score" : 53455,
"date" : "10/10/1840"}The server is modified to convert the data string it receives into a JavaScript object, and to access the individual members to store into a hash. The member identifier and score are also added to a sorted set, with the game score used as the set score. Example 9-1 shows the modified TCP server application.
var net = require('net');
var redis = require('redis');
var server = net.createServer(function(conn) {
console.log('connected');
// create Redis client
var client = redis.createClient();
client.on('error', function(err) {
console.log('Error ' + err);
});
// fifth database is game score database
client.select(5);
conn.on('data', function(data) {
console.log(data + ' from ' + conn.remoteAddress + ' ' +
conn.remotePort);
try {
var obj = JSON.parse(data);
// add or overwrite score
client.hset(obj.member, "first_name", obj.first_name, redis.print);
client.hset(obj.member, "last_name", obj.last_name, redis.print);
client.hset(obj.member, "score", obj.score, redis.print);
client.hset(obj.member, "date", obj.date, redis.print);
// add to scores for Zowie!
client.zadd("Zowie!", parseInt(obj.score), obj.member);
} catch(err) {
console.log(err);
}
});
conn.on('close', function() {
console.log('client closed connection');
client.quit();
});
}).listen(8124);
console.log('listening on port 8124');The Redis connection is established when the server is created, and closed when the server is closed. Another approach is to create a static client connection that persists across requests, but this has disadvantages. For more on when to create the Redis client, see the upcoming sidebar When to Create the Redis Client. The object conversion and persistence of the data to Redis is enclosed in exception handling to prevent the server from failing if we fat-finger the input.
As mentioned earlier, two different data stores are being updated: the individual’s score information (including name, score, and date) is stored in a hash, and the member ID and score are stored in a sorted set. The member ID is used as the key in the hash, while the game score is used as the score for the member ID in the sorted set. The critical component to making the application work is the member ID appearing in both data stores.
The next part of the application is a way of displaying the top five
score holders of our fictional game (named Zowie! in
this exercise). In a sorted set, you can retrieve a range of data by score
using the Redis zrange command. However,
this function returns the range of values sorted from lowest to highest,
which is the opposite of what we want. What we want is to return the five
highest scores, sorted by highest number first. The Redis command to use
is zrevrange.
To display the top five game players, this time we’ll create an HTTP server that will return the results as a simple table list. To ensure a relatively decent display, we’re going to use the Jade template system, but instead of using it with the Express framework—since the gaming application isn’t based on Express—we’ll just use Jade by itself.
To use Jade outside of express, you read in the primary template
file and then call the compile method, passing
in the template file string and options. The only option I’m providing is
filename, because in the template file
I’m using the include directive, and
this requires filename. I’m actually
using the template filename and location, but you’ll want to use any
filename that returns a directory location relative to the files included
in the Jade template.
As for the template itself, Example 9-2 has the contents of
the Jade file. Note that I’m using the include directive to
embed the CSS directly in the file. Since I’m not utilizing a static file
server in this application, the application can’t serve up the CSS file if
I just embed a link to the CSS file. Also note the use of the pipe (|)
with the style opening and ending
tags, which are in HTML rather than Jade syntax. That’s because Jade does
not process the include file if it’s listed within a style tag.
doctype 5
html(lang="en")
head
title Zowie! Top Scores
meta(charset="utf-8")
| <style type="text/css">
include main.css
| </style>
body
table
caption Zowie! Top Scorers!
tr
th Score
th Name
th Date
if scores.length
each score in scores
if score
tr
td #{score.score}
td #{score.first_name} #{score.last_name}
td #{score.date}To render the template, the application reads in the template file (using a synchronous file read, since this occurs only once, when the application is first started) and then uses it to compile a template function:
var layout = require('fs').readFileSync(__dirname + '/score.jade', 'utf8');
var fn = jade.compile(layout, {filename: __dirname + '/score.jade'});The compiled Jade function can then be used anytime you want to render the HTML from the template, passing in whatever data the template is expecting:
var str = fn({scores : result});
res.end(str);This will all make more sense when we see the complete server application, but for now, let’s return to the Redis part of the application.
The top scores application is using two Redis calls: zrevrange to get a range of scores, and
hgetall to get all the
hash fields for each member listed in the top scores. And this is where
things get a little tricky.
You can easily combine results from multiple tables when you’re using a relational database, but the same doesn’t hold true when you’re accessing data from a key/value data store such as Redis. It’s doable, but since this is a Node application, we have the extra complexity of each Redis call being asynchronous.
This is where a library such as Async comes in handy. I covered
Async in Chapter 5, and
demonstrated a couple of the Async methods (waterfall and parallel). One method I didn’t demonstrate was
series, which is the
ideal function for our use here. The Redis functions need to be called in
order, so the data is returned in order, but each interim step doesn’t
need the data from previous steps. The Async parallel functionality
would run all the calls at once, which is fine, but then the results from
each are returned in a random order—not guaranteed to return highest score
first. The waterfall functionality
isn’t necessary, because again, each step doesn’t need data from the
previous step. The Async series functionality
ensures that each Redis hgetall call is made in
sequence and the data is returned in sequence, but takes into account that
each functional step doesn’t care about the others.
So we now have a way for the Redis commands to get called in order
and ensure the data is returned in proper sequence, but the code to do so
is clumsy: we have to add a separate step in the Async series for each
hgetall Redis call and
return the result once for each score returned. Working with 5 values
isn’t a problem, but what if we want to return 10? Or 100? Having to
manually code each Redis call into the Async series is going to become
more than tedious—the code is error prone and difficult to
maintain.
What the scores application does is loop through the array of values
returned from the zrevrange Redis call,
passing each value as a parameter to a function named makeCallbackFunc. All this helper function does
is return a callback function that invokes Redis hgetall, using the
parameter to get the data for a specific member, and then call the
callback function as the last line of its callback—an Async requirement
for being able to chain results. The callback function returned from
makeCallbackFunc is pushed onto an
array, and it’s this array that gets sent as a parameter to the Async
series method.
Additionally, since the redis module returns the hgetall result as an
object, and the Async series function inserts
each object into an array as it finishes, when all of this functionality
is complete we can just take the final result and pass it into the
template engine to generate the text to return to the server.
Example 9-3 is the complete code for the top scores server application. Though it sounds like a lot of work, there isn’t that much code, thanks to the elegance and usability of both the Redis and Async modules.
var http = require('http');
var async = require('async');
var redis = require('redis');
var jade = require('jade');
// set up Jade template
var layout = require('fs').readFileSync(__dirname + '/score.jade', 'utf8');
var fn = jade.compile(layout, {filename: __dirname + '/score.jade'});
// start Redis client
var client = redis.createClient();
// select fifth database
client.select(5);
// helper function
function makeCallbackFunc(member) {
return function(callback) {
client.hgetall(member, function(err, obj) {
callback(err,obj);
});
};
}
http.createServer(function(req,res) {
// first filter out icon request
if (req.url === '/favicon.ico') {
res.writeHead(200, {'Content-Type': 'image/x-icon'} );
res.end();
return;
}
// get scores, reverse order, top five only
client.zrevrange('Zowie!',0,4, function(err,result) {
var scores;
if (err) {
console.log(err);
res.end('Top scores not currently available, please check back');
return;
}
// create array of callback functions for Async.series call
var callFunctions = new Array();
// process results with makeCallbackFunc, push newly returned
// callback into array
for (var i = 0; i < result.length; i++) {
callFunctions.push(makeCallbackFunc(result[i]));
}
// using Async series to process each callback in turn and return
// end result as array of objects
async.series(
callFunctions,
function (err, result) {
if (err) {
console.log(err);
res.end('Scores not available');
return;
}
// pass object array to template engine
var str = fn({scores : result});
res.end(str);
});
});
}).listen(3000);
console.log('Server running on 3000/');Before the HTTP server is created, we set up the Jade template
function and also establish a running client to the Redis data store. When
a new request is made of the server, we filter out all requests for the
favicon.ico file (no need to call
Redis for a favicon.ico request), and
then access the top five scores using zrevrange. Once the application has the scores,
it uses the Async series method to process
the Redis hash requests one at a time and in sequence so it can get an
ordered result back. This resulting array is passed to the Jade template
engine.
Figure 9-1 shows the application after I’ve added in several different scores for different folks.
A message queue is an application that takes as input some form of communication, which is then stored into a queue. The messages are stored until they’re retrieved by the message receiver, when they are popped off the queue and sent to the receiver (either one at a time, or in bulk). The communication is asynchronous, because the application that stores the messages doesn’t require that the receiver be connected, and the receiver doesn’t require that the message-storing application be connected.
Redis is an ideal storage medium for this type of application. As the messages are received by the application that stores them, they’re pushed on to the end of the message queue. When the messages are retrieved by the application that receives them, they’re popped off the front of the message queue.
For the message queue demonstration, I created a Node application to
access the web logfiles for several different subdomains. The application
uses a Node child process and the Unix tail
-f command to access recent entries for the different logfiles.
From these log entries, the application uses two regular expression
objects: one to extract the resource accessed, and the second to test
whether the resource is an image file. If the accessed resource is an
image file, the application sends the resource URL in a TCP message to the
message queue application.
All the message queue application does is listen for incoming messages on port 3000, and stores whatever is sent into a Redis data store.
The third part of the demonstration application is a web server that
listens for requests on port 8124. With each request, it accesses the
Redis database and pops off the front entry in the image data store,
returning it via the response object. If the Redis database returns a
null for the image resource, it prints
out a message that the application has reached the end of the message
queue.
The first part of the application, which processes the web log
entries, is shown in Example 9-4. The Unix tail command is a way of
displaying the last few lines of a text file (or piped data). When used
with the -f flag, the utility displays
a few lines of the file and then sits, listening for new file entries.
When one occurs, it returns the new line. The tail -f command can be used on several different
files at the same time, and manages the content by labeling where the data
comes from each time it comes from a different source. The application
isn’t concerned about which access log is generating the latest tail
response—it just wants the log entry.
Once the application has the log entry, it performs a couple of regular expression matches on the data to look for image resource access (files with a .jpg, .gif, .svg, or .png extension). If a pattern match is found, the application sends the resource URL to the message queue application (a TCP server).
var spawn = require('child_process').spawn;
var net = require('net');
var client = new net.Socket();
client.setEncoding('utf8');
// connect to TCP server
client.connect ('3000','examples.burningbird.net', function() {
console.log('connected to server');
});
// start child process
var logs = spawn('tail', ['-f',
'/home/main/logs/access.log',
'/home/tech/logs/access.log',
'/home/shelleypowers/logs/access.log',
'/home/green/logs/access.log',
'/home/puppies/logs/access.log']);
// process child process data
logs.stdout.setEncoding('utf8');
logs.stdout.on('data', function(data) {
// resource URL
var re = /GET\s(\S+)\sHTTP/g;
// graphics test
var re2 = /\.gif|\.png|\.jpg|\.svg/;
// extract URL, test for graphics
// store in Redis if found
var parts = re.exec(data);
console.log(parts[1]);
var tst = re2.test(parts[1]);
if (tst) {
client.write(parts[1]);
}
});
logs.stderr.on('data', function(data) {
console.log('stderr: ' + data);
});
logs.on('exit', function(code) {
console.log('child process exited with code ' + code);
client.end();
});Typical console log entries for this application are given in the following block of code, with the entries of interest (the image file accesses) in bold:
/robots.txt /weblog /writings/fiction?page=10 /images/kite.jpg /node/145 /culture/book-reviews/silkworm /feed/atom/ /images/visitmologo.jpg /images/canvas.png /sites/default/files/paws.png /feeds/atom.xml
Example 9-5 contains
the code for the message queue. It’s a simple application that starts a
TCP server and listens for incoming messages. When it receives a message,
it extracts the data from the message and stores it in the Redis database.
The application uses the Redis rpush command to push the
data on the end of the images list (bolded in the code).
var net = require('net');
var redis = require('redis');
var server = net.createServer(function(conn) {
console.log('connected');
// create Redis client
var client = redis.createClient();
client.on('error', function(err) {
console.log('Error ' + err);
});
// sixth database is image queue
client.select(6);
// listen for incoming data
conn.on('data', function(data) {
console.log(data + ' from ' + conn.remoteAddress + ' ' +
conn.remotePort);
// store data
client.rpush('images',data);
});
}).listen(3000);
server.on('close', function(err) {
client.quit();
});
console.log('listening on port 3000');The message queue application console log entries would typically look like the following:
listening on port 3000 connected /images/venus.png from 173.255.206.103 39519 /images/kite.jpg from 173.255.206.103 39519 /images/visitmologo.jpg from 173.255.206.103 39519 /images/canvas.png from 173.255.206.103 39519 /sites/default/files/paws.png from 173.255.206.103 39519
The last piece of the message queue demonstration application is the
HTTP server that listens on port 8124 for requests, shown in Example 9-6. As the HTTP server
receives each request, it accesses the Redis database, pops off the next
entry in the images list, and prints out the entry in the response. If
there are no more entries in the list (i.e., if Redis returns null as a reply), it prints out a message that
the message queue is empty.
var redis = require("redis"),
http = require('http');
var messageServer = http.createServer();
// listen for incoming request
messageServer.on('request', function (req, res) {
// first filter out icon request
if (req.url === '/favicon.ico') {
res.writeHead(200, {'Content-Type': 'image/x-icon'} );
res.end();
return;
}
// create Redis client
var client = redis.createClient();
client.on('error', function (err) {
console.log('Error ' + err);
});
// set database to 1
client.select(6);
client.lpop('images', function(err, reply) {
if(err) {
return console.error('error response ' + err);
}
// if data
if (reply) {
res.write(reply + '\n');
} else {
res.write('End of queue\n');
}
res.end();
});
client.quit();
});
messageServer.listen(8124);
console.log('listening on 8124');Accessing the HTTP server application with a web browser returns a URL for the image resource on each request (browser refresh) until the message queue is empty.
The creator of Redis originally intended to use the technology to create a statistics application. It’s an ideal use for Redis: a simple data store, quickly and frequently written, and providing the ability to summarize an activity.
In this section, we’re going to use Redis to add statistics for the widget application we started in earlier chapters. The statistics are limited to two collections: a set of all IP addresses that have accessed pages from the widget application, and the number of times different resources have been accessed. To create this functionality, we make use of a Redis set and the ability to increment numeric strings. Our application also uses the Redis transaction control, multi, to get the two separate data collections at the same time.
The first step of the application is to add new middleware that
records access information to the Redis database. The middleware function
uses a Redis set and the sadd method to add each
IP address, because a set ensures that an existing value isn’t recorded
twice. We’re collecting a set of IP addresses for visitors, but we’re not
keeping track of each time the visitor accesses a resource. The function
is also using one of the Redis incremental functions, but not incr, which increments a
string; instead, it uses hincrby, because the
resource URL and its associated access counter are stored as a
hash.
Example 9-7 displays the code for
the middleware, located in a file named stats.js. The second Redis database is used for
the application, the IPs are stored in a set identified by ip, and the URL/access counter hash is stored in
a hash identified by myurls.
var redis = require('redis');
module.exports = function getStats() {
return function getStats(req, res, next) {
// create Redis client
var client = redis.createClient();
client.on('error', function (err) {
console.log('Error ' + err);
});
// set database to 2
client.select(2);
// add IP to set
client.sadd('ip',req.socket.remoteAddress);
// increment resource count
client.hincrby('myurls',req.url, 1);
client.quit();
next();
}
}The statistics interface is accessed at the top-level domain, so we’ll add the code for the router to the index.js file in the routes subdirectory.
First, we need to add the route to the main application file, just after the route for the top-level index:
app.get('/', routes.index);
app.get('/stats',routes.stats);The controller code for the statistic application makes use of the
Redis transaction control, accessible via the multi function call. Two sets of data are
accessed: the set of unique IP addresses, returned by smembers, and the URL/count hash, returned with
hgetall. Both functions
are invoked, in sequence, when the exec method is called,
and both sets of returned data are appended as array elements in the
exec function’s callback
method, as shown in Example 9-8. Once the data is
retrieved, it’s passed in a render call to a new
view, named stats. The new
functionality for the index.js file
appears in bold text.
var redis = require('redis'); // home page exports.index = function(req, res){ res.render('index', { title: 'Express' }); }; // stats exports.stats = function(req, res){ var client = redis.createClient(); client.select(2); // Redis transaction to gather data client.multi() .smembers('ip') .hgetall('myurls') .exec(function(err, results) { var ips = results[0]; var urls = results[1]; res.render('stats',{ title: 'Stats', ips : ips, urls : urls}); client.quit(); }); };
I mentioned that multi and
exec are Redis
transaction control commands. These aren’t the same type of transaction
controls you’re probably used to with a relational database. All the
multi command does is
collect a set of Redis commands that are then processed sequentially when
the exec command is given.
This type of functionality is useful in the Node world because it provides
a way of getting multiple collections of data that are all returned at the
exact same time—no need for nested callback functions or having to use
something like Step or Async to get all the data at once.
Having said that, don’t let the fact that the Redis commands are seemingly chained together fool you into thinking that the data from one command is then available in the next, as can happen with JavaScript functions that are chained together. Each Redis command is processed in isolation, and the data is just added as an array element in the result, and everything is returned at once.
There’s no locking the data down during the transaction, either, as you’d also expect with a relational database transaction. So any changes to the Redis database during the query can impact the results.
The last piece of the application is the view, created as a Jade
template. The template is very simple: the IP addresses displayed in an
unordered list, and the URL/counter statistics displayed in a table. The
Jade for...in syntax is used
to loop through the IP array, while the each...in syntax is used
to access the property names and values of the object that’s returned with
the Redis hgetall. The template is
shown in Example 9-9.
extends layout
block content
h1= title
h2 Visitor IP Addresses
ul
for ip in ips
li=ip
table
caption Page Visits
each val, key in urls
tr
td #{key}
td #{val}Figure 9-2 shows the statistics page after several widget application resource pages have been accessed from a couple of different IP addresses.
We don’t have to first create the hash when using hincrby. If the hash key
doesn’t exist, Redis creates it automatically and sets the value to
0 before the value is incremented. The
only time the functionality fails is if the field already exists and the
value in the field isn’t a numeric string (i.e., can’t be
incremented).
Another approach to incrementing a counter for each resource is to use Redis strings, and set the resource URL to be the key:
client.incr(url);
However, this approach means we would have to get all the keys (the
URLs), and then get the counters for each URL. We can’t necessarily
accomplish all of this using multi, and
because of the asynchronous nature of accessing the data, we’d end up
having to use nested callbacks or some other approach to pull all this
data together.
There’s no need to go through all of that extra effort when we have
built-in functionality via the Redis hash and the hincrby
command.
Chapter 9 covered one popular NoSQL database structure (key/value pairs via Redis), and this chapter covers another: document-centric data stores via MongoDB.
Where MongoDB differs from relational database systems, such as MySQL, is in its support for storing structured data as documents, rather than implementing the more traditional tables. These documents are encoded as BSON, a binary form of JSON, which probably explains its popularity among JavaScript developers. Instead of a table row, you have a BSON document; instead of a table, you have a collection.
MongoDB isn’t the only document-centric database. Other popular versions of this type of data store are CouchDB by Apache, SimpleDB by Amazon, RavenDB, and even the venerable Lotus Notes. There is some Node support of varying degrees for most modern document data stores, but MongoDB and CouchDB have the most. I decided to cover MongoDB rather CouchDB for the same reasons I picked Express over other frameworks: I feel it’s easier for a person with no exposure to the secondary technology (in this case, the data store) to be able to grasp the Node examples without having to focus overmuch on the non-Node technology. With MongoDB, we can query the data directly, whereas with CouchDB, we work with the concept of views. This higher level of abstraction does require more up-front time. In my opinion, you can hit the ground running faster with MongoDB than CouchDB.
There are several modules that work with MongoDB, but I’m going to focus on two: the MongoDB Native Node.js Driver (a driver written in JavaScript), and Mongoose, an object modeling tool providing ORM (object-relational mapping) support.
Though I won’t get into too many details in this chapter about how MongoDB works, you should be able to follow the examples even if you have not worked with the database system previously. There’s more on MongoDB, including installation help, at http://www.mongodb.org/.
The MongoDB Native Node.js Driver module is a native MongoDB driver for Node. Using it to issue MongoDB instructions is little different from issuing these same instructions into the MongoDB client interface.
The node-mongodb-native GitHub page is at https://github.com/mongodb/node-mongodb-native, and documentation is at http://mongodb.github.com/node-mongodb-native/.
After you have installed MongoDB (following the instructions outlined at the MongoDB website) and started a database, install the MongoDB Native Node.js Driver with npm:
npm install mongodb
Before trying out any of the examples in the next several sections, make sure MongoDB is installed locally, and is running.
If you’re already using MongoDB, make sure to back up your data before trying out the examples in this chapter.
To use the MongoDB driver, you first have to require the module:
var mongodb = require('mongodb');To establish a connection to MongoDB, use the mongodb.Server object
constructor:
var server = new mongodb.Server('localhost',:27017, {auto_reconnect: true});All communication with the MongoDB occurs over TCP. The server
constructor accepts the host and
port as the first two parameters—in this case, the default localhost and port
27017. The third parameter is a set
of options. In the code, the auto_reconnect option is set to
true, which means the driver attempts
to reestablish a connection if it’s lost. Another option is poolSize, which
determines how many TCP connections are maintained in parallel.
MongoDB uses one thread per connection, which is why the database creators recommend that developers use connection pooling.
Once you have a connection to MongoDB, you can create a database
or connect to an existing one. To create a database, use the mongodb.Db object constructor:
var db = new mongdb.Db('mydb', server);The first parameter is the database name, and the second is the MongoDB server connection. A third parameter is an object with a set of options. The default option values are sufficient for the work we’re doing in this chapter, and the MongoDB driver documentation covers the different values, so I’ll skip repeating them in this chapter.
If you’ve not worked with MongoDB in the past, you may notice that the code doesn’t have to provide username and password authentication. By default, MongoDB runs without authentication. When authentication isn’t enabled, the database has to run in a trusted environment. This means that MongoDB allows connections only from trusted hosts, typically only the localhost address.
MongoDB collections are fundamentally equivalent to relational database tables, but without anything that even closely resembles a relational database table.
When you define a MongoDB collection, you can specify if you want a collection object to actually be created at that time, or only after the first row is added. Using the MongoDB driver, the following code demonstrates the difference between the two; the first statement doesn’t create the actual collection, and the second does:
db.collection('mycollection', function(err, collection{});
db.createCollection('mycollection', function(err, collection{});You can pass an optional second parameter to both methods,
{safe : true}, which instructs the
driver to issue an error if the collection does not exist when used with
db.collection, and an error if the
collection already exists if used with db.createCollection:
db.collection('mycollection', {safe : true}, function (err, collection{});
db.createCollection('mycollection', {safe : true}, function(err, collection{});If you use db.createCollection
on an existing collection, you’ll just get access to the collection—the
driver won’t overwrite it. Both methods return a collection object in
the callback function, which you can then use to add, modify, or
retrieve document data.
If you want to completely drop the collection, use db.dropCollection:
db.dropCollection('mycollection', function(err, result){});Note that all of these methods are asynchronous, and are dependent on nested callbacks if you want to process the commands sequentially. This is demonstrated more fully in the next section, where we’ll add data to a collection.
Before getting into the mechanics of adding data to a collection, and looking at fully operational examples, I want to take a moment to discuss data types. More specifically, I want to repeat what the MongoDB driver mentions about data types, because the use of JavaScript has led to some interesting negotiations between the driver and the MongoDB.
Table 10-1 shows the conversions between the data types supported by MongoDB and their JavaScript equivalents. Note that most conversions occur cleanly—no potentially unexpected effects. Some, though, do require some behind-the-scenes finagling that you should be aware of. Additionally, some data types are provided by the MongoDB Native Node.js Driver, but don’t have an equivalent value in MongoDB. The driver converts the data we provide into data the MongoDB can accept.
MongoDB type | JavaScript type | Notes/examples |
JSON |
|
|
|
| utf8 encoded. |
|
|
|
|
| MongoDB supports 32- and
64-bit numbers; JavaScript numbers are 64-bit floats. The
MongoDB driver attempts to fit the value into 32 bits; if it
fails, it promotes to 64 bits; if this fails, it promotes to the
|
|
| The |
|
| |
|
| Special class representing a float value. |
|
| |
Regular expression |
| |
|
| |
|
| |
Object |
| Special class that holds a MongoDB document identifier. |
Binary data |
| Class to store binary data. |
| Class to store the JavaScript function and score for the method to run in. | |
| Class to store reference to another document. | |
| Specify a symbol (not specific to JavaScript, for languages that use symbols). |
Once you have a reference to a collection, you can add documents to it. The data is structured as JSON, so you can create a JSON object and then insert it directly into the collection.
To demonstrate all of the code to this point, in addition to
adding data to a collection, Example 10-1 creates a first
collection (named Widgets) in MongoDB
and then adds two documents. Since you might want to run the example a
couple of times, it first removes the collection documents using the
remove method. The remove method takes three optional
parameters:
Selector for the document(s); if none is provided, all documents are removed
An optional safe mode indicator, safe
{true | {w:n, wtimeout:n} | {fsync:true},
default:false}
A callback function (required if safe mode indicator is set to
true)
In the example, the application is using a safe remove, passing in
null for the first parameter (as a
parameter placeholder, ensuring that all documents are removed) and
providing a callback function. Once the documents are removed, the
application inserts two new documents, with the second insert using safe
mode. The application prints to the console the result of the second
insert.
The insert method also
takes three parameters: the document or documents being inserted, an
options parameter, and the callback function. You can insert multiple
documents by enclosing them in an array. The options for insert are:
safe {true | {w:n, wtimeout:n} |
{fsync:true}, default:false}
keepGoingSet to true to have
application continue if one of the documents generates an
error
serializeFunctionsSerialize functions on the document
The method calls are asynchronous, which means there’s no guarantee that the first document is inserted before the second. However, it shouldn’t be a problem with the widget application—at least not in this example. Later in the chapter, we’ll look more closely at some of the challenges of working asynchronously with database applications.
var mongodb = require('mongodb');
var server = new mongodb.Server('localhost', 27017, {auto_reconnect: true});
var db = new mongodb.Db('exampleDb', server);
// open database connection
db.open(function(err, db) {
if(!err) {
// access or create widgets collection
db.collection('widgets', function(err, collection) {
// remove all widgets documents
collection.remove(null,{safe : true}, function(err, result) {
if (!err) {
console.log('result of remove ' + result);
// create two records
var widget1 = {title : 'First Great widget',
desc : 'greatest widget of all',
price : 14.99};
var widget2 = {title : 'Second Great widget',
desc : 'second greatest widget of all',
price : 29.99};
collection.insert(widget1);
collection.insert(widget2, {safe : true}, function(err, result) {
if(err) {
console.log(err);
} else {
console.log(result);
//close database
db.close();
}
});
}
});
});
}
});The output to the console after the second insert is a variation on:
[ { title: 'Second Great widget',
desc: 'second greatest widget of all',
price: 29.99,
_id: 4fc108e2f6b7a3e252000002 } ]The MongoDB generates a unique system identifier for each document. You can access documents with this identifier at a future time, but you’re better off adding a more meaningful identifier—one that can be determined easily by context of use—for each document.
As mentioned earlier, we can insert multiple documents at the same
time by providing an array of documents rather than a single document.
The following code demonstrates how both widget records can be inserted
in the same command. The code also incorporates an application
identifier with the id field:
// create two records
var widget1 = {id: 1, title : 'First Great widget',
desc : 'greatest widget of all',
price : 14.99};
var widget2 = {id: 2, title : 'Second Great widget',
desc : 'second greatest widget of all',
price : 29.99};
collection.insert([widget1,widget2], {safe : true},
function(err, result) {
if(err) {
console.log(err);
} else {
console.log(result);
// close database
db.close();
}
});If you do batch your document inserts, you’ll need to set the
keepGoing option to
true to be able to keep inserting
documents even if one of the insertions fails. By default, the
application stops if an insert fails.
There are four methods of finding data in the MongoDB Native Node.js Driver:
findReturns a cursor with all the documents returned by the query
findOneReturns a cursor with the first document found that matches the query
findAndRemoveFinds a document and then removes it
findAndModifyFinds a document and then performs an action (such as
remove or upsert)
In this section, I’ll demonstrate collection.find and
collection.findOne, and
reserve the other two methods for the next section, Using Updates, Upserts, and Find and Remove.
Both collection.find and
collection.findOne
support three arguments: the query, options, and a callback. The options
object and the callback are optional, and the list of possible options
to use with both methods is quite extensive. Table 10-2 shows all the options, their default setting,
and a description of each.
The options allow for a great deal of flexibility with queries, though most queries will most likely need only a few of them. I’ll cover some of the options in the examples, but I recommend you try the others with your example MongoDB installation.
The simplest query for all documents in the collection is to use
the find method without any
parameters. You immediately convert the results to an array using
toArray, passing in a callback
function that takes an error and an array of documents. Example 10-2 shows the
application that performs this functionality.
var mongodb = require('mongodb');
var server = new mongodb.Server('localhost', 27017, {auto_reconnect: true});
var db = new mongodb.Db('exampleDb', server);
// open database connection
db.open(function(err, db) {
if(!err) {
// access or create widgets collection
db.collection('widgets', function(err, collection) {
// remove all widgets documents
collection.remove(null,{safe : true}, function(err, result) {
if (!err) {
// create four records
var widget1 = {id: 1, title : 'First Great widget',
desc : 'greatest widget of all',
price : 14.99, type: 'A'};
var widget2 = {id: 2, title : 'Second Great widget',
desc : 'second greatest widget of all',
price : 29.99, type: 'A'};
var widget3 = {id: 3, title: 'third widget', desc: 'third widget',
price : 45.00, type: 'B'};
var widget4 = {id: 4, title: 'fourth widget', desc: 'fourth widget',
price: 60.00, type: 'B'};
collection.insert([widget1,widget2,widget3,widget4], {safe : true},
function(err, result) {
if(err) {
console.log(err);
} else {
// return all documents
collection.find().toArray(function(err, docs) {
console.log(docs);
//close database
db.close();
});
}
});
}
});
});
}
});The result printed out to the console shows all four newly added documents, with their system-generated identifiers:
[ { id: 1,
title: 'First Great widget',
desc: 'greatest widget of all',
price: 14.99,
type: 'A',
_id: 4fc109ab0481b9f652000001 },
{ id: 2,
title: 'Second Great widget',
desc: 'second greatest widget of all',
price: 29.99,
type: 'A',
_id: 4fc109ab0481b9f652000002 },
{ id: 3,
title: 'third widget',
desc: 'third widget',
price: 45,
type: 'B',
_id: 4fc109ab0481b9f652000003 },
{ id: 4,
title: 'fourth widget',
desc: 'fourth widget',
price: 60,
type: 'B',
_id: 4fc109ab0481b9f652000004 } ]Rather than return all of the documents, we can provide a
selector. In the following code, we’re querying all documents that have
a type of A, and returning all the
fields but the type field:
// return all documents
collection.find({type:'A'},{fields:{type:0}}).toArray(function(err, docs) {
if(err) {
console.log(err);
} else {
console.log(docs);
//close database
db.close();
}
});The result of this query is:
[ { id: 1,
title: 'First Great widget',
desc: 'greatest widget of all',
price: 14.99,
_id: 4f7ba035c4d2204c49000001 },
{ id: 2,
title: 'Second Great widget',
desc: 'second greatest widget of all',
price: 29.99,
_id: 4f7ba035c4d2204c49000002 } ]We can also access only one document using findOne. The result of
this query does not have to be converted to an array, and can be
accessed directly. In the following, the document with an ID of 1 is queried, and only the title is
returned:
// return one document
collection.findOne({id:1},{fields:{title:1}}, function(err, doc) {
if (err) {
console.log(err);
} else {
console.log(doc);
//close database
db.close();
}
});The result from this query is:
{ title: 'First Great widget', _id: 4f7ba0fcbfede06649000001 }The system-generated identifier is always returned with the query results.
Even if I modified the query to return all documents with a type
of A (there are two), only one is
returned with the collection.findOne
method. Changing the limit in the options
object won’t make a difference: the method always returns one document
if the query is successful.
The MongoDB Native Node.js Driver supports several different methods that either modify or remove an existing document—or both, in the case of one method:
The basic difference between update/remove and findAndModify/findAndRemove is that the latter set of
methods returns the affected document.
The functionality to use these methods is not very different from what we saw with the inserts. You’ll have to open a database connection, get a reference to the collection you’re interested in, and then perform the operations.
If the MongoDB currently contains the following document:
{ id : 4,
title: 'fourth widget',
desc: 'fourth widget'.
price: 60.00,
type: 'B'}and you want to modify the title, you can use the update method to do so, as shown in Example 10-3. You can supply all of the
fields, and MongoDB does a replacement of the document, but you’re
better off using one of the MongoDB modifiers, such as $set. The $set modifier instructs
the database to just modify whatever fields are passed as properties to
the modifier.
var mongodb = require('mongodb');
var server = new mongodb.Server('localhost', 27017, {auto_reconnect: true});
var db = new mongodb.Db('exampleDb', server);
// open database connection
db.open(function(err, db) {
if(!err) {
// access or create widgets collection
db.collection('widgets',function(err, collection) {
//update
collection.update({id:4},
{$set : {title: 'Super Bad Widget'}},
{safe: true}, function(err, result) {
if (err) {
console.log(err);
} else {
console.log(result);
// query for updated record
collection.findOne({id:4}, function(err, doc) {
if(!err) {
console.log(doc);
//close database
db.close();
}
});
}
});
});
}
});The resulting document now displays the modified fields.
There are additional modifiers that provide other atomic data updates of interest:
$incIncrements a field’s value by a specified amount
$setSets a field, as demonstrated
$unsetDeletes a field
$pushAppends a value to the array if the field is an array (converts it to an array if it wasn’t)
$pushAllAppends several values to an array
$addToSetAdds to an array only if the field is an array
$pullRemoves a value from an array
$pullAllRemoves several values from an array
$renameRenames a field
$bitPerforms a bitwise operation
So why don’t we just remove the document and insert a new one, rather than use a modifier? Because although we had to provide all of the user-defined fields, we don’t have to provide the system-generated identifier. This value remains constant with the update. If the system-generated identifier is stored as a field in another document, say a parent document, removing the document will leave the reference to the original document orphaned in the parent.
Though I don’t cover the concept of trees (complex parent/child data structures) in this chapter, the MongoDB website has documentation on them.
More importantly, the use of modifiers ensures that the action is performed in place, providing some assurance that one person’s update won’t overwrite another’s.
Though we used none in the example, the update method takes four options:
If you’re unsure whether a document already exists in the
database, set the upsert option to
true.
Example 10-3 did a find on the
modified record to ensure that the changes took effect. A better
approach would be to use findAndModify. The parameters are close to
what’s used with the update, with the addition of a sort array as the
second parameter. If multiple documents are returned, updates are
performed in sort order:
//update
collection.findAndModify({id:4}, [[ti]],
{$set : {title: 'Super Widget', desc: 'A really great widget'}},
{new: true}, function(err, doc) {
if (err) {
console.log(err);
} else {
console.log(doc);DB
}
db.close();
});You can use the findAndModify
method to remove a document if you use the remove option. If you
do, no document is returned in the callback function. You can also use
the remove and the findAndRemove methods to remove the document.
Earlier examples have used remove,
without a selector, to remove all the documents before doing an insert.
To remove an individual document, provide a selector:
collection.remove({id:4},
{safe: true}, function(err, result) {
if (err) {
console.log(err);
} else {
console.log(result);
}The result is the number of documents removed (in this case,
1). To see the document being
removed, use findAndRemove:
collection.findAndRemove({id:3}, [['id',1]],
function(err, doc) {
if (err) {
console.log(err);
} else {
console.log(doc);
}I’ve covered the basic CRUD (create, read, update, delete) operations you can perform from a Node application with the Native driver, but there are considerably more capabilities, including working with capped collections, indexes, and the other MongoDB modifiers; sharding (partitioning data across machines); and more. The Native driver documentation covers all of these and provides good examples.
The examples demonstrate some of the challenges associated with handling data access in an asynchronous environment, discussed more fully in the sidebar Challenges of Asynchronous Data Access.
The MongoDB Native Node.js Driver provides a binding to the MongoDB, but doesn’t provide a higher-level abstraction. For this, you’ll need to use an ODM (object-document mapping) like Mongoose.
The Mongoose website is at http://mongoosejs.com/.
To use Mongoose, install it with npm:
npm install mongoose
Instead of issuing commands directly against a MongoDB database, you
define objects using the Mongoose Schema object, and then sync it with the
database using the Mongoose model object:
var Widget = new Schema({
sn : {type: String, require: true, trim: true, unique: true},
name : {type: String, required: true, trim: true},
desc : String,
price : Number
});
var widget = mongoose.model('Widget', Widget);When we define the object, we provide information that controls what
happens to that document field at a later time. In the code just provided,
we define a Widget object with four
explicit fields: three of type String,
and one of type Number. The sn and name
fields are both required and trimmed, and the sn field must be unique in the document database.
The collection isn’t made at this point, and won’t be until at least
one document is created. When we do create it, though, it’s named widgets—the widget object name is lowercased and
pluralized.
Anytime you need to access the collection, you make the same call to
the mongoose.model.
This code is the first step in adding the final component to the Model-View-Controller (MVC) widget implementation started in earlier chapters. In the next couple of sections, we’ll finish the conversion from an in-memory data store to MongoDB. First, though, we need to do a little refactoring on the widget application.
Refactoring is the process of restructuring existing code in such a way as to clean up the cruft behind the scenes with minimal or no impact on the user interface. Since we’re converting the widget application over to a MongoDB database, now is a good time to see what other changes we want to make.
Currently, the filesystem structure for the widget application is:
/application directory
/routes - home directory controller
/controllers - object controllers
/public - static files
/widgets
/views - template files
/widgetsThe routes subdirectory provides top-level (non-business-object) functionality. The name isn’t very meaningful, so I renamed it to main. This necessitated some minor modifications to the primary app.js file as follows:
// top level
app.get('/', main.index);
app.get('/stats', main.stats);Next, I added a new subdirectory named models. The MongoDB model definitions are stored in this subdirectory, as the controller code is in the controllers subdirectory. The directory structure now looks like the following:
/application directory
/main - home directory controller
/controllers - object controllers
/public - static files
/widgets
/views - template files
/widgetsThe next change to the application is related to the structure of the data. Currently, the application’s primary key is an ID field, system-generated but accessible by the user via the routing system. To show a widget, you’d use a URL like the following:
| http://localhost:3000/widgets/1 |
This isn’t an uncommon approach. Drupal, a popular content management system (CMS), uses this approach for accessing Drupal nodes (stories) and users, unless a person uses a URL redirection module:
| http://burningbird.net/node/78 |
The problem is that MongoDB generates an identifier for each object, and uses a format that makes it unattractive for routing. There is a workaround—which requires creating a third collection that contains an identifier, and then using it to take the place of the identifier—but the approach is ugly, counter to MongoDB’s underlying structure, and not especially doable with Mongoose.
The widget title field is
unique, but has spaces and characters that make it unattractive as a
routing URL. Instead, we define a new field, sn, which is the new serial number for the
product. When a new widget object is created, the user assigns whatever
serial number she wants for the product, and the serial number is used
when we access the widget at a later time. If the widget serial number
is 1A1A, for example, it’s accessed
with:
| http://localhost:3000/widgets/1A1A |
The new data structure, from an application point of view, is:
sn: string title: string desc: string price: number
This modification necessitates some changes to the user interface,
but they’re worthwhile. The Jade templates also need to be changed, but
the change is minor: basically replacing references to id with references to sn, and adding a field for serial number to
any form.
Rather than duplicate all the code again to show minor changes, I’ve made the examples available at O’Reilly’s catalog page for this book (http://oreilly.com/catalog/9781449323073); you’ll find all of the new widget application files in the chap12 subdirectory.
The more significant change is to the controller code in the widget.js file. The changes to this file, and others related to adding a MongoDB backend, are covered in the next section.
The first necessary change is to add a connection to the MongoDB database. It’s added to the primary app.js file, so the connection persists for the life of the application.
First, Mongoose is included into the file:
var mongoose = require('mongoose');Then the database connection is made:
// MongoDB
mongoose.connect('mongodb://127.0.0.1/WidgetDB');
mongoose.connection.on('open', function() {
console.log('Connected to Mongoose');
});Notice the URI for the MongoDB. The specific database is passed as the last part of the URI.
This change and the aforementioned change converting routes to main are all the changes necessary for app.js.
The next change is to maproutecontroller.js. The routes that
reference id must be changed to now
reference sn. The modified routes are
shown in the following code block:
// show app.get(prefix + '/:sn', prefixObj.show); // edit app.get(prefix + '/:sn/edit', prefixObj.edit); // update app.put(prefix + '/:sn', prefixObj.update); // destroy app.del(prefix + '/:sn', prefixObj.destroy);
If we don’t make this change, the controller code expects sn as a parameter but gets id instead.
The next code is an addition, not a modification. In the models subdirectory, a new file is created, named widgets.js. This is where the widget model is defined. To make the model accessible outside the file, it’s exported, as shown in Example 10-4.
var mongoose = require('mongoose');
var Schema = mongoose.Schema
,ObjectId = Schema.ObjectId;
// create Widget model
var Widget = new Schema({
sn : {type: String, require: true, trim: true, unique: true},
name : {type: String, required: true, trim: true},
desc : String,
price : Number
});
module.exports = mongoose.model('Widget', Widget);The last change is to the widget controller code. We’re swapping
out the in-memory data store for MongoDB, using a Mongoose model. Though
the change is significant from a processing perspective, the code
modification isn’t very extensive—just a few tweaks, having as much to
do with changing id to sn as anything else. Example 10-5 contains the
complete code for the widget controller code.
var Widget = require('../models/widget.js');
// index listing of widgets at /widgets/
exports.index = function(req, res) {
Widget.find({}, function(err, docs) {
console.log(docs);
res.render('widgets/index', {title : 'Widgets', widgets : docs});
});
};
// display new widget form
exports.new = function(req, res) {
console.log(req.url);
var filePath = require('path').normalize(__dirname +
"/../public/widgets/new.html");
res.sendfile(filePath);
};
// add a widget
exports.create = function(req, res) {
var widget = {
sn : req.body.widgetsn,
name : req.body.widgetname,
price : parseFloat(req.body.widgetprice),
desc: req.body.widgetdesc};
var widgetObj = new Widget(widget);
widgetObj.save(function(err, data) {
if (err) {
res.send(err);
} else {
console.log(data);
res.render('widgets/added', {title: 'Widget Added', widget: widget});
}
});
};
// show a widget
exports.show = function(req, res) {
var sn = req.params.sn;
Widget.findOne({sn : sn}, function(err, doc) {
if (err)
res.send('There is no widget with sn of ' + sn);
else
res.render('widgets/show', {title : 'Show Widget', widget : doc});
});
};
// delete a widget
exports.destroy = function(req, res) {
var sn = req.params.sn;
Widget.remove({sn : sn}, function(err) {
if (err) {
res.send('There is no widget with sn of ' + sn);
} else {
console.log('deleted ' + sn);
res.send('deleted ' + sn);
}
});
};
// display edit form
exports.edit = function(req, res) {
var sn = req.params.sn;
Widget.findOne({sn : sn}, function(err, doc) {
console.log(doc);
if(err)
res.send('There is no widget with sn of ' + sn);
else
res.render('widgets/edit', {title : 'Edit Widget', widget : doc});
});
};
// update a widget
exports.update = function(req, res) {
var sn = req.params.sn;
var widget = {
sn : req.body.widgetsn,
name : req.body.widgetname,
price : parseFloat(req.body.widgetprice),
desc : req.body.widgetdesc};
Widget.update({sn : sn}, widget, function(err) {
if (err)
res.send('Problem occured with update' + err)
else
res.render('widgets/added', {title: 'Widget Edited', widget : widget})
});
};Now the widget application’s data is persisted to a database, rather than disappearing every time the application is shut down. And the entire application is set up in such a way that we can add support for new data entities with minimal impact on the stable components of the application.
In traditional web development, relational databases are the most popular means of data storage. Node, perhaps because of the type of applications it attracts, or perhaps because it attracts uses that fit outside the traditional development box, doesn’t follow this pattern: there is a lot more support for data applications such as Redis and MongoDB than there is for relational databases.
There are some relational database modules you can use in your Node applications, but they may not be as complete as you’re used to with database bindings in languages such as PHP and Python. In my opinion, the Node modules for relational databases are not yet production ready.
On the positive side, though, the modules that do support relational databases are quite simple to use. In this chapter I’m going to demonstrate two different approaches to integrating a relational database, MySQL, into Node applications. One approach uses mysql (node-mysql), a popular JavaScript MySQL client. The other approach uses db-mysql, which is part of the new node-db initiative to create a common framework for database engines from Node applications. The db-mysql module is written in C++.
Neither of the modules mentioned currently supports transactions, but mysql-series has added this type of functionality to node-mysql. I’ll provide a quick demonstration on this, and also offer a brief introduction to Sequelize, an ORM (object-relational mapping) library that works with MySQL.
There are a variety of relational databases, including SQL Server, Oracle, and SQLite. I’m focusing on MySQL because there are installations available for Windows and Unix environments, it’s free for noncommercial use, and it’s the most commonly used database with applications most of us have used. It’s also the relational database with the most support in Node.
The test database used in the chapter is named nodetest2, and it contains one table with the following structure:
id - int(11), primary key, not null, autoincrement title - varchar(255), unique key, not null text - text, nulls allowed created - datetime, nulls allowed
The db-mysql Node module is a native module, and requires installation of the MySQL client libraries on your system. Check with http://nodejsdb.org/db-mysql/ for installation and setup instructions.
Once your environment is set up, you can install db-mysql with npm:
npm install db-mysql
The db-mysql module provides two classes to interact with the MySQL
database. The first is the database
class, which you use to connect and disconnect from the
database and do a query. The query
class is what’s returned from the database query method. You can use
the query class to create a query
either through chained methods representing each component of the query,
or directly using a query string; db-mysql is very flexible.
Results, including any error, are passed in the last callback
function for any method. You can use nested callbacks to chain actions
together, or use the EventEmitter event
handling in order to process both errors and database command
results.
When creating the database connection to a MySQL database, you can pass several options that influence the created database. You’ll need to provide, at minimum, a hostname or a port or a socket, and a user, password, and database name:
var db = new mysql.Database({
hostname: 'localhost',
user: 'username',
password: 'userpass',
database: 'databasenm'
});The options are detailed in the db-mysql documentation, as well as in the MySQL documentation.
To demonstrate db-mysql’s flexibility, the application in
Example 11-1 connects to a
database and runs the same query twice: the first using the query class chained methods, the second using
a string query. The first query processes the result in a nested
callback function, while the second listens for the success and error
events and responds accordingly.
In both cases, the result is returned in the rows object, which returns an array of objects
representing each row of data.
var mysql = require('db-mysql');
// define database connection
var db = new mysql.Database({
hostname: 'localhost',
user: 'username',
password: 'userpass',
database: 'databasenm'
});
// connect
db.connect();
db.on('error', function(error) {
console.log("CONNECTION ERROR: " + error);
});
// database connected
db.on('ready', function(server) {
// query using chained methods and nested callback
this.query()
.select('*')
.from('nodetest2')
.where('id = 1')
.execute(function(error, rows, columns) {
if (error) {
return console.log('ERROR: ' + error);
}
console.log(rows);
console.log(columns);
});
// query using direct query string and event
var qry = this.query();
qry.execute('select * from nodetest2 where id = 1');
qry.on('success', function(rows, columns) {
console.log(rows); // print out returned rows
console.log(columns); // print out returns columns
});
qry.on('error', function(error) {
console.log('Error: ' + error);
});
});The database object emits a
ready event once the
database is connected, or error if there’s a
problem with making the connection. The server object passed as a parameter for the
callback function to the ready event contains
the following properties:
hostnameThe database hostname
userThe user used for the database connection
databaseThe database connected to
versionServer software version
The first query in the examples makes use of the query class chained methods that form each
component of the query. The chained methods you can use for a SQL query
are:
selectContains the query’s selection criteria—such as a list of
column names or asterisk (*)
for all columns—or the select string
fromContains an array of table names, or the string used in the
from statement
joinA join clause consisting of an options object looking for a type of
join, a table to join with, an
alias for table (if any), joining conditions (if any), and whether
to escape the table and alias names (defaults to true)
whereConditional statement, which may contain placeholders and
other chained methods representing the and and or conditions
orderAppends an ORDER BY
clause
limitAppends a LIMIT
clause
addAdds a generic clause, such as a UNION
The chained methods provide a more database-neutral approach to
performing the same SQL statements. Right now, the Node.js database drivers support MySQL (db-mysql), and
Drizzle (db-drizzle). The chained methods handle any variations between
the two. The chained methods also automatically handle any escaping of
the data in the SQL statement that’s necessary for safe usage.
Otherwise, if using a straight query, you’ll have to use the query.escape method to
properly escape the SQL.
The query object emits a
success event if the
query is successful, or an error. It also emits an
each event for each row
returned from the query. If the success event is for a
query that returns rows, the callback function gets both a rows and a columns object. Each row is an array, with
each array element containing an object made up of column name/value
pairs. The columns object represents
the columns that are part of the result, and each column object contains
the column name and type. If the test table in the example has a
table with columns of id, title, text, and created, the rows object would look like:
{ id: 1,
title: 'this is a nice title',
text: 'this is a nice text',
created: Mon, 16 Aug 2010 09:00:23 GMT }The columns object would look
like:
[ { name: 'id', type: 2 },
{ name: 'title', type: 0 },
{ name: 'text', type: 1 },
{ name: 'created', type: 6 } ]If the success event is for a query that performs an update, delete, or insert, the success event callback function receives a result object as a parameter. I’ll cover this object in more detail in the next section.
Though the queries are each handled using different approaches,
both have to be implemented within the database’s success event callback
function. Since db-mysql is Node functionality, the methods are
asynchronous. If you tried to do one of the queries outside of the
database connect callback function, it wouldn’t succeed because the
database connection won’t be established at that point.
As noted, the db-mysql module provides two different ways to update the data in the relational database: a direct query, or using chained methods. We’ll first look at just using a direct query.
When using a direct query, you can use the same SQL you’d use in a MySQL client:
qry.execute('update nodetest2 set title = "This is a better title" where id = 1');Or you can make use of placeholders:
qry.execute('update nodetest2 set title = ? where id = ?',
["This was a better title", 1]);Placeholders can be used either with a direct query string
or with the chained methods. Placeholders are a way of creating the
query string ahead of time and then just passing in whatever values are
needed. The placeholders are represented by question marks (?) in the string, and each value is given as
an array element in the second parameter to the method.
The result of the operation being performed on the database is
reflected in the parameter returned in the callback for the success
event. In Example 11-2, a
new row is inserted into the test database. Note that it makes use of
the MySQL NOW function to set the
created field with the current date
and time. When using a MySQL function, you’ll need to place it directly
into the query string—you can’t use a placeholder.
var mysql = require('db-mysql');
// define database connection
var db = new mysql.Database({
hostname: 'localhost',
user: 'username',
password: 'userpass',
database: 'databasenm'
});
// connect
db.connect();
db.on('error', function(error) {
console.log("CONNECTION ERROR: " + error);
});
// database connected
db.on('ready', function(server) {
// query using direct query string and event
var qry = this.query();
qry.execute('insert into nodetest2 (title, text, created) values(?,?,NOW())',
['Third Entry','Third entry in series']);
qry.on('success', function(result) {
console.log(result);
});
qry.on('error', function(error) {
console.log('Error: ' + error);
});
});If the operation is successful, the following result is returned as a parameter in the callback function:
{ id: 3, affected: 1, warning: 0 }The id is the generated
identifier for the table row; the affected property shows the number of rows
affected by the change (1), and the
warning displays how many warnings
the query generated for the rows (in this case, 0).
Database table row updates and deletions are handled in the same
manner: either use the exact syntax you’d use in a MySQL client, or use
placeholders. Example 11-3 adds a new record
to the test database, updates the title, and then deletes the same
record. You’ll notice I created a different query object for each query. Though you can
run the same query multiple times, each query does have its own
arguments—including the number of arguments it expects each time the
query is run. I used four replacement values in the insert, but if I tried
to use only two in the update, I’d get an
error. The application also makes use of nested callbacks rather than
event capturing.
var mysql = require('db-mysql');
// define database connection
var db = new mysql.Database({
hostname: 'localhost',
user: 'username',
password: 'password',
database: 'databasenm'
});
// connect
db.connect();
db.on('error', function(error) {
console.log("CONNECTION ERROR: " + error);
});
// database connected
db.on('ready', function(server) {
// query using direct query string and nested callbacks
var qry = this.query();
qry.execute('insert into nodetest2 (title, text,created) values(?,?,NOW())',
['Fourth Entry','Fourth entry in series'], function(err,result) {
if (err) {
console.log(err);
} else {
console.log(result);
var qry2 = db.query();
qry2.execute('update nodetest2 set title = ? where id = ?',
['Better title',4], function(err,result) {
if(err) {
console.log(err);
} else {
console.log(result);
var qry3 = db.query();
qry3.execute('delete from nodetest2 where id = ?',[4],
function(err, result) {
if(err) {
console.log(err);
} else {
console.log(result);
}
});
}
});
}
});
});One thing you might notice from the example is there’s no way to roll back previous SQL statements if an error occurs in any of them. At this time, there is no transaction management in db-mysql. If you need to ensure database consistency, you’ll have to provide it yourself in your application. You can do this by checking for an error after each SQL statement is executed, and then reversing previous successful operation(s) if a failure occurs. It’s not an ideal situation, and you’ll have to be careful about the use of any autoincrementing.
The db-mysql methods to insert, update, and delete a
record are insert, update, and delete, respectively.
Both the update and delete chained methods
can also make use of the where method, which can
in turn make use of the conditional chained methods of and and or.
The update method can also
use another chained method, set, to set values for
the SQL statement.
Example 11-4
duplicates the functionality from Example 11-3, but uses chained
methods for the insert and update methods. It does
not use the chained method for the delete, because at the
time this book was written, the delete method did not
work correctly.
var mysql = require('db-mysql');
// define database connection
var db = new mysql.Database({
hostname: 'localhost',
user: 'username',
password: 'password',
database: 'databasenm'
});
// connect
db.connect();
db.on('error', function(error) {
console.log("CONNECTION ERROR: " + error);
});
// database connected
db.on('ready', function(server) {
// query using direct query string and nested callbacks
var qry = this.query();
qry.insert('nodetest2',['title','text','created'],
['Fourth Entry', 'Fourth entry in series', 'NOW()'])
.execute(function(err,result) {
if (err) {
console.log(err);
} else {
console.log(result);
var qry2 = db.query();
qry2.update('nodetest2')
.set({title: 'Better title'})
.where('id = ?',[4])
.execute(function(err, result) {
if(err) {
console.log(err);
} else {
console.log(result);
}
});
}
});
});I’m not overfond of the chained methods, though I think they’re handy if you’re bringing in data from an application, or if your application may support multiple databases.
Unlike with db-mysql, you don’t need to install specialized MySQL client software to work with node-mysql. You just need to install the module, and you’re good to go:
npm install mysql
The native driver is quite simple to use. You create a client
connection to the MySQL database, select the database to use, and use this
same client to do all database operations via the query method. A callback
function can be passed as the last parameter in the query method, and
provides information related to the last operation. If no callback
function is used, you can listen for events to determine when processes
are finished.
As just stated, the node-mysql API is extremely simple:
create the client, set the database, and send SQL statements as queries
on the client. The callback functions are optional, and there is some
minimal event support. When you’re using a callback, the parameters are
typically an error and a result, though in the case of a SELECT query, the callback also has a fields parameter.
Example 11-5 demonstrates how to use node-mysql to connect to the widget database, create a new record, update it, and delete it. This example, as simple as it is, demonstrates all the functionality that node-mysql supports.
var mysql = require('mysql');
var client = mysql.createClient({
user: 'username',
password: 'password'
});
client.query('USE databasenm');
// create
client.query('INSERT INTO nodetest2 ' +
'SET title = ?, text = ?, created = NOW()',
['A seventh item', 'This is a seventh item'], function(err, result) {
if (err) {
console.log(err);
} else {
var id = result.insertId;
console.log(result.insertId);
// update
client.query('UPDATE nodetest2 SET ' +
'title = ? WHERE ID = ?', ['New title', id], function (err, result) {
if (err) {
console.log(err);
} else {
console.log(result.affectedRows);
// delete
client.query('DELETE FROM nodetest2 WHERE id = ?',
[id], function(err, result) {
if(err) {
console.log(err);
} else {
console.log(result.affectedRows);
// named function rather than nested callback
getData();
}
});
}
});
}
});
// retrieve data
function getData() {
client.query('SELECT * FROM nodetest2 ORDER BY id', function(err, result,fields) {
if(err) {
console.log(err);
} else {
console.log(result);
console.log(fields);
}
client.end();
});
}The query results are what we’d expect: an array of objects, each representing one row from the table. The following is an example of the output, representing the first returned row:
[ { id: 1,
title: 'This was a better title',
text: 'this is a nice text',
created: Mon, 16 Aug 2010 15:00:23 GMT },
... ]The fields parameter also
matches our expectations, though the format can differ from other
modules. Rather than an array of objects, what’s returned is an object
where each table field is an object property, and its value is an object
representing information about the field. I won’t duplicate the entire
output, but the following is the information returned for the first
field, id:
{ id:
{ length: 53,
received: 53,
number: 2,
type: 4,
catalog: 'def',
db: 'nodetest2',
table: 'nodetest2',
originalTable: 'nodetest2',
name: 'id',
originalName: 'id',
charsetNumber: 63,
fieldLength: 11,
fieldType: 3,
flags: 16899,
decimals: 0 }, ...The module doesn’t support multiple SQL statements concatenated onto each other, and it doesn’t support transactions. The only way to get a close approximation to transaction support is with mysql-queues, discussed next.
The mysql-queues module wraps the node-mysql module and provides support for multiple queries as well as database transaction support. Its use may be a little odd, especially since it provides asynchronous support without seeming to do so.
Typically, to ensure that asynchronous functions have finished,
you’d use nested callbacks, named functions, or a module like Async. In
Example 11-6, though,
mysql-queues controls the flow of execution, ensuring that the SQL
statements that are queued—via the use of the
queue—are finished before the final SELECT is processed. The SQL statements are
completed in order: insert, update, and then the
final retrieve.
var mysql = require('mysql');
var queues = require('mysql-queues');
// connect to database
var client = mysql.createClient({
user: 'username',
password: 'password'
});
client.query('USE databasenm');
//associated queues with query
// using debug
queues(client, true);
// create queue
q = client.createQueue();
// do insert
q.query('INSERT INTO nodetest2 (title, text, created) ' +
'values(?,?,NOW())',
['Title for 8', 'Text for 8']);
// update
q.query('UPDATE nodetest2 SET title = ? WHERE title = ?',
['New Title for 8','Title for 8']);
q.execute();
// select won't work until previous queries finished
client.query('SELECT * FROM nodetest2 ORDER BY ID', function(err, result, fields) {
if (err) {
console.log(err);
} else {
// should show all records, including newest
console.log(result);
client.end();
}
});If you want transactional support, you’ll need to start a
transaction rather than a queue. And you’ll need to use a rollback when an error
occurs, as well as a commit when you’re
finished with the transaction. Again, once you call execute on the
transaction, any queries following
the method call are queued until the transaction is finished.
Example 11-7
contains the same application as in Example 11-6, but this time
using a transaction.
var mysql = require('mysql');
var queues = require('mysql-queues');
// connect to database
var client = mysql.createClient({
user: 'username',
password: 'password'
});
client.query('USE databasenm');
//associated queues with query
// using debug
queues(client, true);
// create transaction
var trans = client.startTransaction();
// do insert
trans.query('INSERT INTO nodetest2 (title, text, created) ' +
'values(?,?,NOW())',
['Title for 8', 'Text for 8'], function(err,info) {
if (err) {
trans.rollback();
} else {
console.log(info);
// update
trans.query('UPDATE nodetest2 SET title = ? WHERE title = ?',
['Better Title for 8','Title for 8'], function(err,info) {
if(err) {
trans.rollback();
} else {
console.log(info);
trans.commit();
}
});
}
});
trans.execute();
// select won't work until transaction finished
client.query('SELECT * FROM nodetest2 ORDER BY ID', function(err, result, fields) {
if (err) {
console.log(err);
} else {
// should show all records, including newest
console.log(result);
client.end();
}
});The mysql-queues adds two important components to the node-mysql module:
Support for multiple queries without having to use a nested callback
Transaction support
If you’re going to use node-mysql, I strongly recommend you incorporate the use of mysql-queues.
The modules in the previous sections provide a database binding for MySQL, but they don’t provide a higher level of abstraction. The Sequelize module does just that with an ORM, though it doesn’t currently support transactions.
To use Sequelize, you define the model, which is a mapping between the database table(s) and JavaScript objects. In our previous examples, we worked with a simple table, nodetest2, with the following structure:
id - int(11), primary key, not null title - varchar(255), unique key, not null text - text, nulls allowed, created - datetime, nulls allowed
You create the model for this database table using the appropriate database and flags for each field:
// define model
var Nodetest2 = sequelize.define('nodetest2',
{id : {type: Sequelize.INTEGER, primaryKey: true},
title : {type: Sequelize.STRING, allowNull: false, unique: true},
text : Sequelize.TEXT,
created : Sequelize.DATE
});The supported data types and their mappings are:
Sequelize.STRING =>
VARCHAR(255)
Sequelize.TEXT =>
TEXT
Sequelize.INTEGER =>
INTEGER
Sequelize.DATE =>
DATETIME
Sequelize.FLOAT =>
FLOAT
Sequelize.BOOLEAN =>
TINYINT(1)
The options you can use to further refine the fields are:
The likelihood is that your application and database are new, so once you define the model, you need to sync it with the database to create the database table:
// sync
Nodetest2.sync().error(function(err) {
console.log(err);
});When you do so, and examine the table in the database, you’ll find that the table and the model are different because of changes Sequelize makes to the table. For one, it’s now called nodetest2s, and for another, there are two new table fields:
id - int(11), primary key, autoincrement title - varchar(255), unique key, nulls not allowed text - text, nulls allowed created - datetime, nulls allowed createdAt - datetime, nulls not allowed updatedAt - datetime, nulls not allowed
These are changes that Sequelize makes, and there’s no way to
prevent it from making them. You’ll want to adjust your expectations
accordingly. For starters, you’ll want to drop the column created, since you no longer need it. You can
do this using Sequelize by deleting the field from the class and then
running the sync again:
// define model
var Nodetest2 = sequelize.define('nodetest2',
{id : {type: Sequelize.INTEGER, primaryKey: true},
title : {type: Sequelize.STRING, allowNull: false, unique: true},
text : Sequelize.TEXT,
});
// sync
Nodetest2.sync().error(function(err) {
console.log(err);
});Now you have a JavaScript object representing the model that also maps to a relational database table. Next, you need to add some data to the table.
The differences between using a MySQL database binding and
using an ORM continue. You don’t insert a database row when using an
ORM; rather, you build a new object instance and save it. The same is
true when you update: you don’t update via SQL; you either modify a
property directly or you use updateAttributes, passing in an object with
the changed properties. You also don’t delete a row from a database; you
access an object instance and then destroy it.
To demonstrate how all these work together, Example 11-8 creates the model, syncs with the database (which creates the table if it doesn’t already exist), and then creates a new instance and saves it. After the new instance is created, it’s updated twice. All the objects are retrieved and the contents displayed before the recently added object instance is destroyed.
var Sequelize = require('sequelize');
var sequelize = new Sequelize('databasenm',
'username', 'password',
{ logging: false});
// define model
var Nodetest2 = sequelize.define('nodetest2',
{id : {type: Sequelize.INTEGER, primaryKey: true},
title : {type: Sequelize.STRING, allowNull: false, unique: true},
text : Sequelize.TEXT,
});
// sync
Nodetest2.sync().error(function(err) {
console.log(err);
});
var test = Nodetest2.build(
{ title: 'New object',
text: 'Newest object in the data store'});
// save record
test.save().success(function() {
// first update
Nodetest2.find({where : {title: 'New object'}}).success(function(test) {
test.title = 'New object title';
test.save().error(function(err) {
console.log(err);
});
test.save().success(function() {
// second update
Nodetest2.find(
{where : {title: 'New object title'}}).success(function(test) {
test.updateAttributes(
{title: 'An even better title'}).success(function() {});
test.save().success(function() {
// find all
Nodetest2.findAll().success(function(tests) {
console.log(tests);
// find new object and destroy
Nodetest2.find({ where: {title: 'An even better title'}}).
success(function(test) {
test.destroy().on('success', function(info) {
console.log(info);
});
});
});
});
})
});
});
});When printing out the results of the findAll, you might be surprised at how much
data you’re getting back. Yes, you can access the properties directly
from the returned value, first by accessing the array entry, and then
accessing the value:
tests[0].id; // returns identifier
But the other data associated with this new object completes the demonstrations showing that you’re not in the world of relational database bindings anymore. Here’s an example of one returned object:
[ { attributes: [ 'id', 'title', 'text', 'createdAt', 'updatedAt' ],
validators: {},
__factory:
{ options: [Object],
name: 'nodetest2',
tableName: 'nodetest2s',
rawAttributes: [Object],
daoFactoryManager: [Object],
associations: {},
validate: {},
autoIncrementField: 'id' },
__options:
{ underscored: false,
hasPrimaryKeys: false,
timestamps: true,
paranoid: false,
instanceMethods: {},
classMethods: {},
validate: {},
freezeTableName: false,
id: 'INTEGER NOT NULL auto_increment PRIMARY KEY',
title: 'VARCHAR(255) NOT NULL UNIQUE',
text: 'TEXT',
createdAt: 'DATETIME NOT NULL',
updatedAt: 'DATETIME NOT NULL' },
id: 14,
title: 'A second object',
text: 'second',
createdAt: Sun, 08 Apr 2012 20:58:54 GMT,
updatedAt: Sun, 08 Apr 2012 20:58:54 GMT,
isNewRecord: false },...Sequelize’s asynchronous nature is definitely obvious from Example 10-8. Normally, the issue of nested callbacks won’t be a problem because you won’t be performing so many operations in a row—except if you’re adding several new object instances. In that case, you can run into problems with the nested callbacks.
Luckily, Sequelize provides a simple way of chaining queries so
that you can do something such as creating many new object instances and
saving them all at once. The module provides a chainer helper where you can add
EventEmitter tasks (such as a query),
one after the other, and they won’t be executed until you call run. Then the results of all operations are
returned, either as a success or an error.
Example 11-9
demonstrates the chainer helper by adding three new object instances and
then running a findAll on the
database when the instances have been successfully saved.
var Sequelize = require('sequelize');
var sequelize = new Sequelize('databasenm',
'username', 'password',
{ logging: false});
// define model
var Nodetest2 = sequelize.define('nodetest2',
{id : {type: Sequelize.INTEGER, primaryKey: true},
title : {type: Sequelize.STRING, allowNull: false, unique: true},
text : Sequelize.TEXT,
});
// sync
Nodetest2.sync().error(function(err) {
console.log(err);
});
var chainer = new Sequelize.Utils.QueryChainer;
chainer.add(Nodetest2.create({title: 'A second object',text: 'second'}))
.add(Nodetest2.create({title: 'A third object', text: 'third'}));
chainer.run()
.error(function(errors) {
console.log(errors);
})
.success(function() {
Nodetest2.findAll().success(function(tests) {
console.log(tests);
});
});This is much simpler, and much easier to read, too. Plus the approach makes it simpler to work with a user interface or an MVC application.
There is much more about Sequelize at the module’s documentation website, including how to deal with associated objects (relations between tables).
When working with an ORM, you’ll need to keep in mind that
it makes certain assumptions about the data structure. One is that if
the model object is named something like Widget, the database table is widgets. Another is an assumption that the
table contains information about when a row is added or updated.
However, many ORMs also know that both assumptions may not be met by an
existing database system being converted from using a straight database
binding to using an ORM.
One real issue with Sequelize is that it pluralizes the table
names, no matter what you do. So if you define a model for the table, it
wants to pluralize the model name for the table name. Even when you
provide a table name, Sequelize wants to pluralize it. This isn’t an
issue when you don’t have the database table, because a call to sync automatically creates the table. This
is an issue if you’re using an existing relational
database—enough of an issue that I strongly recommend against using the
module with anything other than a brand-new application.
Node provides numerous opportunities to work with several different graphics applications and libraries. Since it’s a server technology, your applications can make use of any server-based graphics software, such as ImageMagick or GD. However, since it’s also based on the same JavaScript engine that runs the Chrome browser, you can work with client-side graphics applications, such as Canvas and WebGL, too.
Node also has some support for serving up audio and video files via the new HTML5 media capabilities present in all modern browsers. Though we have limited capabilities with working directly with video and audio, we can serve files of both types, as we’ve seen in previous chapters. We can also make use of server-based technologies, such as FFmpeg.
No chapter on web graphics would be complete without mentioning PDFs at least once. Happily for those of us who make use of PDF documents in our websites, we have access to a very nice PDF generation Node module, as well as access to various helpful PDF tools and libraries installed on the server.
I’m not going to exhaustively cover every form of graphics or media implementation and management capability from Node. For one, I’m not familiar with all of them, and for another, some of the support is still very primitive, or the technologies can be extremely resource intensive. Instead, I’ll focus on more stable technologies that make sense for a Node application: basic photo manipulation with ImageMagick, HTML5 video, working with and creating PDFs, and creating/streaming images created with Canvas.
Operating systems, versions of HTML, and development technologies may come and go, but one constant is the ubiquitous PDF. Regardless of the type of application or service you’re creating, there’s a good chance you’ll need to provide PDF documents. And as Doctor Who would say, PDFs are cool.
You have a couple of options for working with PDFs from a Node application. One approach is to use a Node child process to access an operating system tool, such as the PDF Toolkit or wkhtmltopdf directly on Linux. Another approach is to use a module, such as the popular PDFKit. Or you can use always use both.
Though there are few command-line tools to manipulate PDFs in the Windows world, there are several available for Linux and OS X. Fortunately, two I’ve worked with, PDF Toolkit and wkhtmltopdf, can be installed and accessed in all three environments.
The wkhtmltopdf utility is a way of converting HTML into a PDF file using the WebKit rendering engine. It’s a particularly handy way of taking a snapshot of a website, graphics and all. Some sites provide the ability to generate a PDF of content, but frequently do so by stripping out all the graphics. The wkhtmltopdf tool preserves the appearance of the page.
There are installation versions of this utility for OS X and Windows, and you can also download the source code for building in a Unix environment. If you’re running the application on your server, you’ll need to do some tweaks first, because of its X Windows dependency.
To work with wkhtmltopdf in my system (Ubuntu), I had to install supporting libraries:
apt-get install openssl build-essential xorg libssl-dev
Then I had to install a tool (xvfb) that allows wkhtmltopdf to run headless in a virtual X server (bypassing the X Windows dependency):
apt-get install xvfb
Next, I created a shell script, named wkhtmltopdf.sh, to wrap the wkhtmltopdf in xvfb. It contains one line:
xvfb-run -a -s "-screen 0 640x480x16" wkhtmltopdf $*
I then moved the shell script to /usr/bin, and changed permissions with
chmod a+x. Now I’m ready to access
wkhtmltopdf from my Node applications.
The wkhtmltopdf tool supports a large number of options, but I’m going to demonstrate how to use the tool simply from a Node application. On the command line, the following takes a URL to a remote web page and then generates a PDF using all default settings (using the shell script version):
wkhtmltopdf.sh http://remoteweb.com/page1.html page1.pdf
To implement this in Node, we need to use a child process. For extensibility, the application should also take the name of the input URL, as well as the output file. The entire application is in Example 12-1.
var spawn = require('child_process').spawn;
// command line arguments
var url = process.argv[2];
var output = process.argv[3];
if (url && output) {
var wkhtmltopdf = spawn('wkhtmltopdf.sh', [url, output]);
wkhtmltopdf.stdout.setEncoding('utf8');
wkhtmltopdf.stdout.on('data', function (data) {
console.log(data);
});
wkhtmltopdf.stderr.on('data', function (data) {
console.log('stderr: ' + data);
});
wkhtmltopdf.on('exit', function (code) {
console.log('child process exited with code ' + code);
});
} else {
console.log('You need to provide a URL and output file name');
}You typically wouldn’t use wkhtmltopdf in a Node application by itself, but it can be a handy addition to any website or application that wants to provide a way to create a persistent PDF of a web page.
PDF Toolkit, or pdftk, provides functionality to split apart (burst) a PDF document or merge several documents into one. It can also be used to fill a PDF form, apply a watermark, rotate a PDF document, apply or remove compression, or uncompress a PDF stream for editing. There are installers for both Mac and Windows, and simple-to-follow instructions for installing in most flavors of Unix.
PDF Toolkit can be accessed via Node child processes. As an
example, the following code creates a child process that invokes PDF
Toolkit’s dump_data comment to
discover information about a PDF, such as how many pages it
contains:
var spawn = require('child_process').spawn;
var pdftk = spawn('pdftk', [__dirname + '/pdfs/datasheet-node.pdf', 'dump_data']);
pdftk.stdout.on('data', function (data) {
// convert results to an object
var array = data.toString().split('\n');
var obj = {};
array.forEach(function(line) {
var tmp = line.split(':');
obj[tmp[0]] = tmp[1];
});
// print out number of pages
console.log(obj['NumberOfPages']);
});
pdftk.stderr.on('data', function (data) {
console.log('stderr: ' + data);
});
pdftk.on('exit', function (code) {
console.log('child process exited with code ' + code);
});The PDF Toolkit data_dump
returns results similar to the following:
stdout: InfoKey: Creator InfoValue: PrintServer150� InfoKey: Title InfoValue: � InfoKey: Producer InfoValue: Corel PDF Engine Version 15.0.0.431 InfoKey: ModDate InfoValue: D:20110914223152Z InfoKey: CreationDate InfoValue: D:20110914223152Z PdfID0: 7fbe73224e44cb152328ed693290b51a PdfID1: 7fbe73224e44cb152328ed693290b51a NumberOfPages: 3
The format is easily converted into an object for simpler access of the individual properties.
PDF Toolkit is a reasonably responsive tool, but you’ll want to use caution when holding up a web response waiting for it to finish. To demonstrate how to access PDF Toolkit from a Node web application, and how to deal with the expected lag time that working with a computationally expensive graphics application can cause, we’ll build a simple PDF uploader.
PDF Toolkit’s ability to burst a PDF or merge several PDFs into one is functionality that can be helpful at a website that allows users to upload and download PDF documents, and then provides individual access of each PDF page. Think of Google Docs, or a website such as Scribd, which allows PDF sharing.
The components to this type of application are:
A form to select which PDF tool to upload
A web service to receive the PDF document and then initiate the PDF processing
A child process wrapper around PDF Toolkit to burst the PDF document into separate pages
A response to the user providing links to the uploaded document and access to the individual pages
The component that bursts the PDF must first create a location for the pages and then determine what the pages will be named before it can perform the splitting action. This will require accessing the Node File System module to create the directory for the split files. Since larger files can take some time, rather than hold the web response waiting for PDF Toolkit to finish, the application sends an email to the user with URLs for the newly uploaded files. This requires the use of a module we’ve not used in previous chapters, Emailjs. This module provides basic email functionality.
You can install the Emailjs module via npm:
npm install emailjs
The form to upload the PDF is basic, needing little explanation.
It uses a file input field in addition to a field for the person’s
name and email address, and sets the method to POST and the action to the web service.
Since we’re uploading a file, the enctype field must be set to multipart/form-data.
The finished form page can be seen in
Example 12-2.
<!doctype html>
<html lang="en">
<head>
<meta charset="utf-8" />
<title>Upload PDF</title>
<script>
window.onload=function() {
document.getElementById('upload').onsubmit=function() {
document.getElementById('submit').disabled=true;
};
}
</script>
</head>
<body>
<form id="upload" method="POST" action="http://localhost:8124"
enctype="multipart/form-data">
<p><label for="username">User Name:</label>
<input id="username" name="username" type="text" size="20" required /></p>
<p><label for="email">Email:</label>
<input id="email" name="email" type="text" size="20" required /></p>
<p><label for="pdffile">PDF File:</label>
<input type="file" name="pdffile" id="pdffile" required /></p>
<p>
<p>
<input type="submit" name="submit" id="submit" value="Submit"/>
</p>
</form>
</body>We have a chance to brush up on our client-side JavaScript
skills by disabling the submit button when the form is submitted. The
form makes use of the HTML5 required attribute,
which ensures that the proper data is provided.
The web service application that processes both the request for the form and the PDF upload uses the Connect middleware, this time without the Express framework.
In the service, the Connect static middleware is used to serve
up static files, and the directory middleware is used to pretty-print
a directory listing when a directory is accessed. The only other
functionality that’s needed is the process to parse out both the PDF
file and the form data from the upload. The application uses the
Connect parseBody method,
which is capable of processing any type of posted data:
connect()
.use(connect.bodyParser({uploadDir: __dirname + '/pdfs'}))
.use(connect.static(__dirname + '/public'))
.use(connect.directory(__dirname + '/public'))
.listen(8124);The data is then made available to a custom middleware named
upload, which handles both the data
and the PDF—invoking a custom module to process the PDF file. The
bodyParser middleware
makes the username and email available on the request.body object, and the uploaded file
on the request.files object. If a
file is uploaded, it’s uploaded as an object named pdffile because that’s the name of the file
upload field. You’ll need an additional test on the file type to ensure that the file uploaded is a
PDF.
Example 12-3 has the complete code for the PDF service application.
var connect = require('connect');
var pdfprocess = require('./pdfprocess');
// if POST
// upload file, kick off PDF burst, respond with ack
function upload(req, res, next){
if ('POST' != req.method) return next();
res.setHeader('Content-Type', 'text/html');
if (req.files.pdffile && req.files.pdffile.type === 'application/pdf') {
res.write('<p>Thanks ' + req.body.username +
' for uploading ' + req.files.pdffile.name + '</p>');
res.end("<p>You'll receive an email with file links when processed.</p>");
// post upload processing
pdfprocess.processFile(req.body.username, req.body.email,
req.files.pdffile.path, req.files.pdffile.name);
} else {
res.end('The file you uploaded was not a PDF');
}
}
// in order
// static files
// POST - upload file
// otherwise, directory listing
connect()
.use(connect.bodyParser({uploadDir: __dirname + '/pdfs'}))
.use(connect.static(__dirname + '/public'))
.use(upload)
.use(connect.directory(__dirname + '/public'))
.listen(8124);
console.log('Server started on port 8124');The custom module pdfprocess is where the application performs the following steps to process the PDF file:
A directory is created for the user under the public pdfs subdirectory if none exists.
A timestamp value is used with the file to create a unique name for the current uploaded PDF.
The timestamp is used with the PDF filename to create a new subdirectory for the PDFs under the user’s subdirectory.
The PDF is moved from the temporary upload directory to this new directory, and renamed the original PDF filename.
The PDF Toolkit burst operation is performed on this file, with all the individual PDFs placed in the pdfs directory.
An email is sent to the user providing a URL/link where he can access the new directory containing the original uploaded PDF and the individual PDF pages.
The filesystem functionality is provided by the Node File System
module, the email functionality is handled by Emailjs, and the PDF
Toolkit functionality is managed in a child process. There is no data
returned from this child process, so the only events captured are
child process exit and error events. Example 12-4 contains the
code for this final piece of the application.
var fs = require('fs');
var spawn = require('child_process').spawn;
var emailjs = require('emailjs');
module.exports.processFile = function(username, email, path, filename) {
// first, create user directory if doesn't exist
fs.mkdir(__dirname + '/public/users/' + username, function(err) {
// next create file directory if doesn't exist
var dt = Date.now();
// url for message later
var url = 'http://examples.burningbird.net:8124/users/' +
username + '/' + dt + filename;
// directory for file
var dir = __dirname + '/public/users/' + username + '/' +
dt + filename;
fs.mkdir(dir, function(err) {
if (err)
return console.log(err);
// now, rename file to new location
var newfile = dir + '/' + filename;
fs.rename(path, newfile, function(err) {
if (err)
return console.log(err);
//burst pdf
var pdftk = spawn('pdftk', [newfile, 'burst', 'output',
dir + '/page_%02d.pdf' ]);
pdftk.on('exit', function (code) {
console.log('child process ended with ' + code);
if (code != 0)
return;
console.log('sending email');
// send email
var server = emailjs.server.connect({
user : 'gmail.account.name',
password : 'gmail.account.passwod',
host : 'smtp.gmail.com',
port : 587,
tls : true
});
var headers = {
text : 'You can find your split PDF at ' + url,
from : 'youremail',
to : email,
subject: 'split pdf'
};
var message = emailjs.message.create(headers);
message.attach({data:"<p>You can find your split PDF at " +
"<a href='" + url + "'>" + url + "</a></p>",
alternative: true});
server.send(message, function(err, message) {
console.log(err || message);
});
pdftk.kill();
});
pdftk.stderr.on('data', function (data) {
console.log('stderr: ' + data);
});
});
});
});
};The actual child process call to PDF Toolkit is in bold text in the code. The command-line syntax used is the following:
pdftk filename.pdf burst output /home/location/page_%02d.pdfThe filename is given first, then the operation, and then an
output directive. The operation is, as mentioned earlier, the burst
operation, which splits the PDF into separate pages. The output directive instructs PDF Toolkit to
place the newly split PDF pages in a specific directory, and provides
formatting for the page names—the first page would be page_01.pdf, the second page_02.pdf, and so on. I could have used
Node’s process.chdir to change the
process to the directory, but it really wasn’t necessary since I can
make the PDF Toolkit operation place the files in a specified
directory.
The email is sent using the Gmail SMTP server, which utilizes TLS (transport layer security), over port 587 and with a given Gmail username and password. You could, of course, use your own SMTP server. The message is sent both in plain text and with a given HTML-formatted attachment (for those folks who use an email reader capable of processing HTML).
The end result of the application is a link sent to the user
that takes her to the directory where she’ll find the uploaded PDF and
the split pages. The Connect directory middleware
ensures that the contents of the directory are attractively displayed.
Figure 12-1 shows the
results of uploading one very large PDF file on global warming.
With this approach—providing acknowledgment to the user in an email—the user doesn’t have to wait around for (and the Node service isn’t hung up waiting on) the PDF processing.
If using a child process and command-line tools isn’t for you, or if you need to be able to create a PDF as well as manipulate existing PDFs, there are Node modules that provide PDF capability. Chief among them is PDFKit.
PDFKit is written in CoffeeScript, but you don’t have to know CoffeeScript to use the module because the API is exposed to JavaScript. The module provides functionality to create a PDF document, add pages to it, incorporate text and graphics, and embed images. Future additions to the module should add other functionality, such as PDF outlines, gradients, tables, and other nice features.
Install PDFKit using npm like so:
npm install pdfkit
In your application, you start by creating a new PDF document:
var doc = new PDFDocument();
You can then add a font, a new web page, and graphics, all with the exposed API. The API methods can all be chained to simplify development.
To demonstrate how to use the module from JavaScript, I converted one of the CoffeeScript examples from the module developer into JavaScript. From the top, after the PDF document is created, a TrueType font is added to the document, the font size is set to 25 pixels, and text is drawn at (x,y) coordinates of 100, 100:
doc.font('fonts/GoodDog-webfont.ttf')
.fontSize(25)
.text('Some text with an embedded font!', 100, 100);The application then adds a new PDF page, again changes the font size to 25 pixels, and draws new text at 100, 100:
doc.addPage()
.fontSize(25)
.text('Here is some vector graphics...', 100, 100);The document coordinate system is saved, and the vector graphics functionality is used to draw a red triangle:
doc.save()
.moveTo(100, 150)
.lineTo(100, 250)
.lineTo(200, 250)
.fill("#FF3300");The next section of code scales the coordinate system to 0.6, translates the origin, draws a path in the shape of a star, fills it with red, and then restores the document back to the original coordinate system and scale:
doc.scale(0.6)
.translate(470, −380)
.path('M 250,75 L 323,301 131,161 369,161 177,301 z')
.fill('red', 'even-odd')
.restore();If you’ve worked with other vector graphics systems, such as Canvas, much of this should seem familiar. If you haven’t, then you might want to check out the Canvas examples later in the book and then return to this example.
Another page is added, the fill color is changed to blue, and a link is added to the page. The document is then written out to a file named output.pdf:
doc.addPage()
.fillColor("blue")
.text('Here is a link!', 100, 100)
.underline(100, 100, 160, 27, {color: "#0000FF"})
.link(100, 100, 160, 27, 'http://google.com/');
doc.write('output.pdf');It’s tedious to create a PDF document manually. However, we can easily program the PDFKit API to take content from a data store and generate a PDF on the fly. We could also use PDFKit to generate a PDF document of web page content on demand, or to provide a persistent snapshot of data.
Be aware, though, that many of the module’s methods are not asynchronous. You’ll most likely be blocking as you’re building the PDF, so plan accordingly.
ImageMagick is a powerful command-line graphics tool available in the Mac, Windows, and Unix environments. It can be used to crop or resize an image, access image metadata, animate a sequence of images, and add any number of special effects. It’s also very resource intensive, and depending on the size of the image and what you’re doing with it, can take a noticeable amount of time.
There are ImageMagick Node modules. One of the first is imagemagick, which provides a wrapper for ImageMagick functionality. However, it hasn’t been updated for some time. Another module is gm, which provides a set of predefined functions that work with ImageMagick in the background. You may find, though, that it’s just as simple to work with ImageMagick directly. All you need to work with ImageMagick directly from a Node application is for ImageMagick to be installed, and a Node child process.
ImageMagick provides several different tools you can use to perform different functions:
animateAnimates a sequence over an X server
compareProvides a mathematical and visual annotation of differences between an image and a reconstruction of the image after modification
compositeOverlaps two images
conjureExecutes scripts written in the Magick Scripting Language (MSL)
convertConverts an image using any number of possible conversions such as cropping, resizing, or adding an effect
displayDisplays an image on an X server
identifyDescribes the format and other characteristics of an image file or several image files
importCreates a screenshot of any visible window on an X server and saves to a file
mogrifyModifies an image in place (resizes, crops, dithers, etc.) and saves the effects in the existing image
montageCreates a composite image from several
streamStreams an image to storage, one pixel at a time
Several of the tools are related to an X server and make little
sense from a Node application perspective. However, the convert, mogrify, montage, identify, and stream tools can have interesting uses in a Node
application. In this section and the next, we’ll focus on one: convert.
Though we’re focusing on convert, be aware that everything in this
section also applies to mogrify,
except that mogrify overwrites the
original file.
The convert tool is the
ImageMagick workhorse. With it, you can perform some pretty amazing
transformations on an image and then save the results to a separate file.
You can provide an adaptive blur, sharpen the image, annotate the image
with text, position it on a backdrop, crop it, resize it, and even replace
every pixel in the image with its color complement. There is little you
can’t do to an image with ImageMagick. Of course, not every operation is
equal, especially if you’re concerned about how long it will take. Some of
the image conversions occur quickly, while others can take considerable
time.
To demonstrate how to use convert
from a Node application, the small, self-contained application in Example 12-5 specifies an image
filename on the command line and scales that image so it fits into a space
no more than 150 pixels wide. The image is also transformed into a PNG,
regardless of its original type.
The command-line version of this process is:
convert photo.jpg -resize '150' photo.jpg.png
We’ll need to capture four command arguments in the array for the
child process: the original photo, the -resize flag, the value for the -resize flag, and the name of the new
image.
var spawn = require('child_process').spawn;
// get photo
var photo = process.argv[2];
// conversion array
var opts = [
photo,
'-resize',
'150',
photo + ".png"];
// convert
var im = spawn('convert', opts);
im.stderr.on('data', function (data) {
console.log('stderr: ' + data);
});
im.on('exit', function (code) {
if (code === 0)
console.log('photo has been converted and is accessible at '
+ photo + '.png');
});The ImageMagick convert
tool processes the image silently, so there is no child process data event to process. The only events we’re
interested in are the error and the exit, when the image
processing is finished.
Where an application like ImageMagick can get tricky is when you’re interested in doing a much more involved process. One of the more popular effects people have applied to images using ImageMagick is the Polaroid effect: rotating the image slightly around its center and adding a border and a shadow to make the image look like a Polaroid photo. The effect is now so popular that there’s a predefined setting for it, but prior to this new setting, we had to use a command similar to the following (from the ImageMagick usage examples):
convert thumbnail.gif \
-bordercolor white -border 6 \
-bordercolor grey60 -border 1 \
-background none -rotate 6 \
-background black \( +clone -shadow 60x4+4+4 \) +swap \
-background none -flatten \
polaroid.pngThis is a lot of arguments, and the arguments are in a format you may not have seen previously. So how does this get converted into a child process arguments array?
Minutely.
What looks like a single argument on the command line (\(+clone -shadow 60x4+4+4 \)) is anything but to
the Node child process. Example 12-6 is a variation of
the conversion tool in Example 12-5, except now a
Polaroid effect is being applied rather than the image being scaled. Pay
particular attention to the line in bold text.
var spawn = require('child_process').spawn;
// get photo
var photo = process.argv[2];
// conversion array
var opts = [
photo,
"-bordercolor", "snow",
"-border", "6",
"-background","grey60",
"-background", "none",
"-rotate", "6",
"-background", "black",
"(", "+clone", "-shadow", "60x4+4+4", ")",
"+swap",
"-background", "none",
"-flatten",
photo + ".png"];
var im = spawn('convert', opts);The bolded code in the example demonstrates how what appears to be a single argument on the command line becomes five arguments to the child process. The end result of running the application is shown in Figure 12-2.
It’s unlikely that you’ll use the Node application with an ImageMagick child process directly on the command line. After all, you can just run ImageMagick’s tools directly. However, you can use the combined child process/ImageMagick tool to run several different conversions on a single image, or to provide services from a website (such as allowing a person to resize a photo to use as an avatar, or add annotations to uploaded images at a shared resource site).
The key to creating a web application that uses ImageMagick is the same as with the PDF demonstration applications from earlier in the chapter: if the process is going to be slow (especially with a larger number of concurrent users), you need to consider providing functionality that allows the individual to upload the image file and then provide a link to the finished project (either at a site, or via email) rather than block, waiting for everything to finish.
We can adapt the code in Example 12-3 and Example 12-4 to apply the Polaroid effect to any uploaded image. In particular, we can convert Example 12-3 into a module that can be applied for the same pattern of use: a file process that creates a new subdirectory for an uploaded file, runs a process, and deposits the resulting files in the same directory.
In Chapter 6, we created a simple HTTP server that served static files and provided some basic directory and 404 handling. One of the web pages we tested with the server included an embedded HTML5 video. The web page also had a custom toolbar that allowed the user to click anywhere on a timeline to start the video at an intermediate position.
The HTML5 video application worked with the Connect module’s static web server, but not the homemade web server. The reason is that the homemade web server didn’t handle the concept of HTTP ranges. HTTP servers such as Apache and IIS have support for ranges, as does the Connect model; our static server did not.
In this section, we’ll add support for ranges to the minimal web server we created back in Example 6-2.
Support for ranges extends beyond serving HTML5 video. Ranges can also be used to download larger files.
Ranges are an HTTP header that provides a start and end position for loading a resource, such as a video file. Here are the steps we need to take to add support for HTTP ranges:
Signal willingness to accept range requests with response header
Accept-Ranges: bytes.
Look for a range request in the request header.
If a range request is found, parse out the start and end values.
Validate that the start and end values are numbers, and that neither exceeds the length of the resource being accessed.
If no end value is provided, set it to the resource length; if
no start value is provided, set it to zero (0).
Create a Content-Range
response header consisting of start, end, and resource length
values.
Create a Content-Length
response header with a value calculated from subtracting the start
value from the end value.
Change the status code from 200 to 206
(Partial).
Pass an object consisting of the start and end values to the
createReadStream
method.
When a web client accesses a resource from a web server, the web server can signal to the client that it supports ranges, and provide a range unit, with the following header:
Accept-Ranges: bytes
The first modification necessary for the minimal web server is to add the new header:
res.setHeader('Accept-Ranges','bytes');The client will then send through range requests of the following format:
bytes=startnum-endnum
Where the
startnum/endnum
values are the starting and end numbers for the range. Several of these
requests can be sent during playback. For example, the following are
actual range requests sent from the web page with the HTML5 video after
starting the video and then clicking around on the timeline during
playback:
bytes=0- bytes=7751445-53195861 bytes=18414853-53195861 bytes=15596601-18415615 bytes=29172188-53195861 bytes=39327650-53195861 bytes=4987620-7751679 bytes=17251881-18415615 bytes=17845749-18415615 bytes=24307069-29172735 bytes=33073712-39327743 bytes=52468462-53195861 bytes=35020844-39327743 bytes=42247622-52468735
The next addition to the minimal web server is to check to see if a range request has been sent, and if so, to parse out the start and end values. The code to check for a range request is:
if (req.headers.range) {...}To parse the range start and end values, I created a function,
processRange, that splits the string on
the dash (-) and then extracts the
numbers out of the two returned strings. The function also double-checks
to ensure that a start value is provided and is a number, and isn’t beyond
the file length (returning a status code 416, Requested Range Not
Satisfiable, if it is). It also checks to ensure that the end value is a
number, and sets it to the video length if the value isn’t provided. An
object containing both start and
end is returned by the function:
function processRange(res,ranges,len) {
var start, end;
// extract start and stop range
var rangearray = ranges.split('-');
start = parseInt(rangearray[0].substr(6));
end = parseInt(rangearray[1]);
if (isNaN(start)) start = 0;
if (isNaN(end)) end = len −1;
// start beyond end of file length
if (start > len - 1) {
res.setHeader('Content-Range', 'bytes */' + len);
res.writeHead(416);
res.end();
}
// end can't be beyond file length
if (end > len - 1)
end = len - 1;
return {start:start, end:end};
}The next component of the functionality is to prepare a Content-Range response
header, providing the start and end values for the range, as well as the
length of the resource, in the following format:
Content-Range bytes 44040192-44062881/44062882
The content length (Content-Length) response is also prepared,
calculated as the end value minus the start value. In addition, the HTTP
status code is set to 206, for Partial Content.
Last, the start and end values are also sent as an option to the
createReadStream method
call. This ensures that the stream is properly repositioned for
streaming.
Example 12-7 pulls all of these pieces together into a modified minimal web server that can now serve HTML5 video (or other resource) ranges.
var http = require('http'),
url = require('url'),
fs = require('fs'),
mime = require('mime');
function processRange(res,ranges,len) {
var start, end;
// extract start and stop range
var rangearray = ranges.split('-');
start = parseInt(rangearray[0].substr(6));
end = parseInt(rangearray[1]);
if (isNaN(start)) start = 0;
if (isNaN(end)) end = len −1;
// start beyond end of file length
if (start > len - 1) {
res.setHeader('Content-Range', 'bytes */' + len);
res.writeHead(416);
res.end();
}
// end can't be beyond file length
if (end > len - 1)
end = len - 1;
return {start:start, end:end};
}
http.createServer(function (req, res) {
pathname = __dirname + '/public' + req.url;
fs.stat(pathname, function(err, stats) {
if (err) {
res.writeHead(404);
res.write('Bad request 404\n');
res.end();
} else if (stats.isFile()) {
var opt={};
// assume no range
res.statusCode = 200;
var len = stats.size;
// we have a Range request
if (req.headers.range) {
opt = processRange(res,req.headers.range,len);
// adjust length
len = opt.end - opt.start + 1;
// change status code to partial
res.statusCode = 206;
// set header
var ctstr = 'bytes ' + opt.start + '-' +
opt.end + '/' + stats.size;
res.setHeader('Content-Range', ctstr);
}
console.log('len ' + len);
res.setHeader('Content-Length', len);
// content type
var type = mime.lookup(pathname);
res.setHeader('Content-Type', type);
res.setHeader('Accept-Ranges','bytes');
// create and pipe readable stream
var file = fs.createReadStream(pathname,opt);
file.on("open", function() {
file.pipe(res);
});
file.on("error", function(err) {
console.log(err);
});
} else {
res.writeHead(403);
res.write('Directory access is forbidden');
res.end();
}
});
}).listen(8124);
console.log('Server running at 8124/');Modifying the minimal web server demonstrates that HTTP and other network functionality isn’t necessarily complicated—just tedious. The key is to break down each task into separate tasks, and then add code to manage each subtask one at a time (testing after each).
Now the web page (included in the examples) that allows the user to click around on a timeline works correctly.
The canvas element has
become a favorite of game developers, graphic artists, and statisticians
because of the capability it provides for creating dynamic and interactive
graphics in client web pages. The canvas element is also
supported in a Node environment via modules, such as the one covered in
this section: node-canvas, or just plain canvas (we’ll use “node-canvas”
here). The node-canvas module is based on Cairo, a cross-platform vector
graphics library that’s long been popular with developers.
To use node-canvas, install it via npm:
npm install canvas
All of the standard Canvas functionality you have in a client page
is available via the node-canvas module. You create a Canvas object and then a context, do all your
drawing in the context, and then either display the result or save the
result in a file as a JPEG or PNG.
Be aware that some of the functionality in Canvas, such as working with an image, requires a version of Cairo greater than 1.10.
There are also a couple of additional methods available on the
server that you wouldn’t have on the client. These allow us to stream a
Canvas object to a file (either as a
PNG or JPEG), persisting the results for later access (or serving in a web
page). You can also convert the Canvas
object to a data URI and include an img element in a
generated HTML web page, or read an image from an external source (such as
a file or a Redis database) and use it directly in the Canvas object.
Jumping right in to demonstrate how to use the node-canvas module,
Example 12-8 creates a
canvas drawing and then streams it to a
PNG file for later access. The example uses a rotated graphic image from
an example at the Mozilla Developer Network, and adds a border and shadow
to it. Once finished, it’s streamed to a PNG file for later access. Most
of the functionality could be used in a client application as well as the
Node application. The only real Node-specific component is persisting the
graphic as a file in the end.
var Canvas = require('canvas');
var fs = require('fs');
// new canvas and context
var canvas = new Canvas(350,350);
var ctx = canvas.getContext('2d');
// create filled rectangle with shadow
// save context for later restore
ctx.save();
ctx.shadowOffsetX = 10;
ctx.shadowOffsetY = 10;
ctx.shadowBlur = 5;
ctx.shadowColor='rgba(0,0,0,0.4)';
ctx.fillStyle = '#fff';
ctx.fillRect(30,30,300,300);
// done with shadow
ctx.restore();
ctx.strokeRect(30,30,300,300);
// MDN example: pretty graphic, inserted offset into
// previously created square
ctx.translate(125,125);
for (i=1;i<6;i++){
ctx.save();
ctx.fillStyle = 'rgb('+(51*i)+','+(255-51*i)+',255)';
for (j=0;j<i*6;j++){
ctx.rotate(Math.PI*2/(i*6));
ctx.beginPath();
ctx.arc(0,i*12.5,5,0,Math.PI*2,true);
ctx.fill();
}
ctx.restore();
}
// stream to PNG file
var out = fs.createWriteStream(__dirname + '/shadow.png');
var stream = canvas.createPNGStream();
stream.on('data', function(chunk){
out.write(chunk);
});
stream.on('end', function(){
console.log('saved png');
});Once you’ve run the Node application, access the shadow.png file from your favorite browser. Figure 12-3 shows the generated image.
You’re not going to use the Canvas object in a Node application as you would
a canvas element in a web page. One of
the examples included with node-canvas is a dynamic clock that requires
constant HTTP refreshes. If you want an active clock in the client, you
should use the canvas element in the
client.
Where canvas makes sense on the
server is as a way of providing a graphical representation of a server
activity, such as a database query, data in a Redis database, a logfile,
or other data that originates on the server. By generating the graphic on
the server, you not only can persist the graphic for multiple accesses,
but you can also limit how much data flows to the client by being able to
process a graphic on the server, rather than having to send the data to
the client and then create the graphic.
Using canvas in a Node
application also makes sense if you’re generating game components that may
need to adapt to user actions, particularly if the graphics need to be
persisted for later access.
In this chapter, we’re working in both the client and server environments, because both are necessary when it comes to WebSockets and Socket.IO.
WebSockets is a relatively new web technology that enables bidirectional, real-time communication directly from within a client to a server application, and back again. The communication occurs over TCP (Transmission Control Protocol), via sockets. The Socket.IO libraries provide the support necessary to implement this technology. Not only does Socket.IO provide a module to use in your Node application, but it also provides a client-side JavaScript library to enable the client end of the communication channel. For an added bonus, it also works as an Express middleware.
In this chapter I’ll introduce WebSockets more fully by demonstrating how Socket.IO works, both in the client and in the server.
Before jumping into using Socket.IO, I want to provide a quick overview of WebSockets. To do that, I also need to explain bidirectional full-duplex communication.
The term full duplex describes any form of data transmission that allows communication in both directions. The term bidirectional means that both endpoints of a transmission can communicate, as opposed to unidirectional communication, when one end of a data transmission is a sender and all other endpoints are receivers. WebSockets provides the capability for a web client, such as a browser, to open up bidirectional full-duplex communication with a server application. And it does so without having to use HTTP, which adds unnecessary overhead to the communication process.
WebSockets is standardized as part of a specification called the WebSockets API at the World Wide Web Consortium (W3C). The technology has had a bumpy start, because no sooner had some browsers begun implementing WebSockets in 2009 than serious security concerns led those same browsers to either pull their implementation, or enable WebSockets only as an option.
The WebSockets protocol was revamped to address the security concerns, and Firefox, Chrome, and Internet Explorer support the new protocol. At this time, Safari and Opera support only the older versions of the technology, but you must enable WebSockets in the configuration settings. In addition, most mobile browers have only limited support, or support only the older WebSockets specification.
Socket.IO addresses the issue of uneven support for WebSockets by using several different mechanisms to enable the bidirectional communication. It attempts to use the following, in order:
WebSockets
Adobe Flash Socket
Ajax long polling
Ajax multipart streaming
Forever iFrame for IE
JSONP Polling
The key point to take away from this list is that Socket.IO supports bidirectional communication in most, if not all, browsers in use today—desktop and mobile.
Before we jump into code that implements the WebSockets application, you’ll need to install Socket.IO on your server. Use npm to install the module and supporting JavaScript library:
npm install socket.io
A Socket.IO application requires two different components: a server and a client application. In the examples in this section, the server application is a Node application, and the client application is a JavaScript block in an HTML web page. Both are adaptions of example code provided at the Socket.IO website.
The client/server application demonstrated in this section sets up a communication between client and server, sending a text string back and forth that’s published to the web page. The client always echoes the recent string to the server, which modifies the string and sends it back to the client.
The client application creates a new WebSockets connection, using
the Socket.IO client-side library, and listens for any events labeled
news. When an event is received, the
application takes the text sent with the event and outputs it to the web
page. It also echoes the text back to the server via an echo event. Example 13-1 shows the complete
code for the client web page.
<!doctype html>
<html lang="en">
<head>
<meta charset="utf-8">
<title>bi-directional communication</title>
<script src="/socket.io/socket.io.js"></script>
<script>
var socket = io.connect('http://localhost:8124');
socket.on('news', function (data) {
var html = '<p>' + data.news + '</p>';
document.getElementById("output").innerHTML=html;
socket.emit('echo', { back: data.news });
});
</script>
</head>
<body>
<div id="output"></div>
</body>
</html>The server application uses HTTP to listen for incoming requests,
and serves up only one file: the client HTML file. When a new socket
connection is made, it emits a message to the client with the text of
Counting... to an event labeled
news.
When the server gets an echo
event, it takes the text sent with the event and appends a counter value to it. The counter is maintained
in the application and incremented every time the echo event is transmitted. When the counter
gets to 50, the server no longer transmits the data back to the client.
Example 13-2 contains all
the code for the server application.
var app = require('http').createServer(handler)
, io = require('socket.io').listen(app)
, fs = require('fs')
var counter;
app.listen(8124);
function handler (req, res) {
fs.readFile(__dirname + '/index.html',
function (err, data) {
if (err) {
res.writeHead(500);
return res.end('Error loading index.html');
}
counter = 1;
res.writeHead(200);
res.end(data);
});
}
io.sockets.on('connection', function (socket) {
socket.emit('news', { news: 'world' });
socket.on('echo', function (data) {
if (counter <= 50) {
counter++;
data.back+=counter;
socket.emit('news', {news: data.back});
}
});
});After the client application is loaded into the server, you can watch the counter update until it reaches the target end value. The web page doesn’t have to be reloaded, and the user doesn’t have to do anything special for the application to execute. The application exhibits the same behavior in all modern browsers, though the underlying technology that implements the effect differs by browser.
Both news and echo are custom events. The only socket events
Socket.IO supports out of the box are connection, passed during the initial
connection, and the following events on the server socket:
messageEmitted whenever a message sent using socket.send is received
disconnectEmitted when either the client or server disconnects
And the following events on the client socket:
connectEmitted when the socket connection is made
connectingEmitted when the socket connection is being attempted
disconnectEmitted when the socket is disconnected
connect_failedEmitted when the connection fails
errorEmitted when an error occurs
messageEmitted when message sent with socket.send is received
reconnect_failedEmitted when Socket.IO fails to reestablish the connection if it is dropped
reconnectEmitted when a connection is reestablished after being dropped
reconnectingEmitted when attempting a reconnection after the connection is dropped
If you want WebSockets behavior, rather than use the emit method, you can use the send method and listen for the message. For
instance, on the server, the application can use send to send the message to the client, and
then listen for a response via the message event:
io.sockets.on('connection', function (socket) {
socket.send("All the news that's fit to print");
socket.on('message', function(msg) {
console.log(msg);
});
});On the client, the application can also listen for the message event, and use send to communicate back:
socket.on('message', function (data) {
var html = '<p>' + data + '</p>';
document.getElementById("output").innerHTML=html;
socket.send('OK, got the data');
});This example uses send to
manually acknowledge receipt of the message. If we want an automatic
acknowledgment that the client received the event, we can pass a
callback function in as the last parameter of the emit method:
io.sockets.on('connection', function (socket) {
socket.emit('news', { news: "All the news that's fit to print" },
function(data) {
console.log(data);
});
});In the client, we can then pass a message back using this callback function:
socket.on('news', function (data, fn) {
var html = '<p>' + data.news + '</p>';
document.getElementById("output").innerHTML=html;
fn('Got it! Thanks!');
});The socket passed as a parameter to the connection event handler is the unique connection between the server and the client, and persists as long as the connection persists. If the connection terminates, Socket.IO attempts to reconnect.
The application works...to a point. Where it fails is in not taking into account Node’s asynchronous nature. In the application, the counter used is one that’s global to the application. If only one customer accesses the application at a time, it works fine. However, if two users access the application at the same time, you get odd results: one browser may end up with fewer numbers than the other, and neither is likely to get an expected result. Add in more concurrent users, and the results are worse.
What we need is a way of attaching data so it persists beyond events to the socket itself. Luckily, we have such a way—just by adding the data directly to the socket object that’s created with each new connection. Example 13-3 is a modification of the code from Example 13-2, where the counter is now attached to the socket object directly, rather than floating about as a global variable. The changed code is bolded in the text.
var app = require('http').createServer(handler)
, io = require('socket.io').listen(app)
, fs = require('fs')
app.listen(8124);
function handler (req, res) {
fs.readFile(__dirname + '/index.html',
function (err, data) {
if (err) {
res.writeHead(500);
return res.end('Error loading index.html');
}
res.writeHead(200);
res.end(data);
});
}
io.sockets.on('connection', function (socket) {
socket.counter = 1;
socket.emit('news', { news: 'Counting...' });
socket.on('echo', function (data) {
if (socket.counter <= 50) {
data.back+=socket.counter;
socket.counter++;
socket.emit('news', {news: data.back});
}
});
});Now you can have several concurrent users, and they each get the exact same communication. The socket object exists until the socket connection is closed and can’t be reestablished.
For Socket.IO to work, the client side of the application
must have access to the Socket.IO client-side JavaScript library. This
library is included in the page with the following script element:
<script src="/socket.io/socket.io.js"></script>
You may be wondering if you have to specifically place this code in the top level of your web server—you don’t.
In the server application, when the HTTP web server was created,
it was passed to the Socket.IO’s listen event:
var app = require('http').createServer(handler)
, io = require('socket.io').listen(app)What happens is that Socket.IO intercepts requests sent to the web server and listens for requests for:
/socket.io/socket.io.js
Socket.IO does a clever bit of behind-the-scenes finagling that determines what’s returned in the response. If the client supports WebSockets, the JavaScript file returned is one that uses WebSockets to implement the client connection. If the client doesn’t support WebSockets, but does support Forever iFrame (IE9), it returns that particular JavaScript client code, and so on.
Socket.IO comes with several default settings that we
usually won’t need to change. In the examples in the preceding section, I
didn’t alter any of the default settings. If I wanted to, though, I could
by using Socket.IO’s configure method, which
operates in a manner similar to what we’ve used with Express and Connect.
You can even specify different configurations based on which environment
the application is running.
Socket.IO contains a wiki page (at https://github.com/learnboost/socket.io/wiki/) that lists all of the options, and I don’t want to repeat the rather extensive list here. Instead, I want to demonstrate a couple that you may want to consider modifying as you’re learning to work with Socket.IO.
You can change the allowable transports by setting the transports option. By
default, the allowable transports, in order of priority, are:
websocket
htmlfile
xhr-polling
jsonp-polling
Another transport option is Flash Socket, which is not enabled by default. If we add the following to Example 13-3, then when we access the application with Opera and IE, the application uses Flash Socket (rather than Ajax long polling and Forever iFrame, respectively):
io.configure('development', function() {
io.set('transports', [
'websocket',
'flashsocket',
'htmlfile',
'xhr-polling',
'jsonp-polling']);
});You can also define different configurations for different
environments, such as production and development:
io.configure('production', function() {
io.set('transports', [
'websocket',
'jsonp-polling']);
});
io.configure('development', function() {
io.set('transports', [
'websocket',
'flashsocket',
'htmlfile',
'xhr-polling',
'jsonp-polling']);
});Another option controls the amount of detail output to the logger
(you’ll notice the logger output as debug statements to the console on the
server). If you want to turn off the logger output, you can set the
log level option to 1:
io.configure('development', function() {
io.set('log level', 1);
});Some of the options—such as store, which determines where client data is
persisted—have requirements other than just having an option in a
configuration method call. However, other than setting log level and transports, you should find the default settings
sufficient as you’re learning to work with Socket.IO.
Every technology has its own version of Hello, World—the first application people typically create when learning the technology—and the one for WebSockets and Socket.IO seems to be a chat client. The Socket.IO GitHub site provides a chat client (as well as an IRC, or Internet relay chat, client); searching on “Socket.IO and chat” lists several nice examples.
In this section, I’ll demonstrate the code for a very simple chat client. It has no bells and whistles, and uses only Socket.IO (and no other library on the client or server), but it demonstrates how nicely Socket.IO facilitates an application that would be quite difficult to implement otherwise.
The application makes use of a couple of new methods to handle
communication. In the earlier examples, the applications used either
send or emit to send a
communication between client and server. This type of communication is
restricted to the socket, and is visible only to the user receiving the
message, no matter how many other people are connected to the
server.
To broadcast to every person connected to the server, you can use
the emit method on the
Socket.IO framework object:
io.sockets.emit();
Now anyone who has a socket connection to the server gets the message.
You can also broadcast a message to everyone but a specific
individual by issuing a broadcast.emit on the
socket of the person you don’t want to see the message:
socket.broadcast.emit();
In the simple chat application, when a new client connects, the client application prompts for a name and then broadcasts to other connected clients that this person has now entered the chat room. The client application also provides a text field and button to send messages, and provides a place where new messages from all participants are printed. Example 13-4 shows the client application code.
<!doctype html>
<html lang="en">
<head>
<meta charset="utf-8">
<title>bi-directional communication</title>
<script src="/socket.io/socket.io.js"></script>
<script>
var socket = io.connect('http://localhost:8124');
socket.on('connect', function() {
socket.emit('addme', prompt('Who are you?'));
});
socket.on('chat',function(username, data) {
var p = document.createElement('p');
p.innerHTML = username + ': ' + data;
document.getElementById('output').appendChild(p);
});
window.addEventListener('load',function() {
document.getElementById('sendtext').addEventListener('click',
function() {
var text = document.getElementById('data').value;
socket.emit('sendchat', text);
}, false);
}, false);
</script>
</head>
<body>
<div id="output"></div>
<div id="send">
<input type="text" id="data" size="100" /><br />
<input type="button" id="sendtext" value="Send Text" />
</div>
</body>
</html>Other than the addition of basic JavaScript functionality to capture the click event on the button, and the prompt to get the person’s name, the functionality isn’t much different than earlier examples.
In the server, the new person’s username is attached as data to the socket. The server acknowledges the person directly, and then broadcasts the person’s name to other chat room participants. When the server receives any new chat message, it attaches the username to the message so everyone can see who sent it. Finally, when a client disconnects from the chat room, another message is broadcast to all connected users indicating that the person is no longer participating. Example 13-5 has the complete code for the server application.
var app = require('http').createServer(handler)
, io = require('socket.io').listen(app)
, fs = require('fs');
app.listen(8124);
function handler (req, res) {
fs.readFile(__dirname + '/chat.html',
function (err, data) {
if (err) {
res.writeHead(500);
return res.end('Error loading chat.html');
}
res.writeHead(200);
res.end(data);
});
}
io.sockets.on('connection', function (socket) {
socket.on('addme',function(username) {
socket.username = username;
socket.emit('chat', 'SERVER', 'You have connected');
socket.broadcast.emit('chat', 'SERVER', username + ' is on deck');
});
socket.on('sendchat', function(data) {
io.sockets.emit('chat', socket.username, data);
});
socket.on('disconnect', function() {
io.sockets.emit('chat', 'SERVER', socket.username + ' has left the building');
});
});Figure 13-1 shows the results of the application when I tested it from four different browsers (Chrome, Firefox, Opera, and IE).
An additional modification to the application might add a list of people currently connected so newcomers could see who is in the room when they enter. This could be a global array, since it, unlike the username, is accessible by all clients. I’ll leave this last bit of code to you as an off-book exercise.
The examples up to this point used Node’s HTTP as the web server. You can also easily incorporate Express into a Socket.IO application (or Socket.IO into an Express application). The key thing to remember is that Socket.IO must be able to listen for requests before they’re processed by Express.
Example 13-6 converts the server component of the chat application from the last section into using Express to handle all web service requests. The line in the code that’s essential to the integration of Socket.IO and Express is in bold. The actual communication components are not changed at all from the code in Example 13-5.
var express = require('express'),
sio = require('socket.io'),
http = require('http'),
app = express();
var server = http.createServer(app);
app.configure(function () {
app.use(express.static(__dirname + '/public'));
app.use(app.router);
});
app.get('/', function (req, res) {
res.send('hello');
});
var io = sio.listen(server);
server.listen(8124);
io.sockets.on('connection', function (socket) {
socket.on('addme',function(username) {
socket.username = username;
socket.emit('chat', 'SERVER', 'You have connected');
socket.broadcast.emit('chat', 'SERVER', username + ' is on deck');
});
socket.on('sendchat', function(data) {
io.sockets.emit('chat', socket.username, data);
});
socket.on('disconnect', function() {
io.sockets.emit('chat', 'SERVER', socket.username + ' has left the building');
});
});As the Express application is passed to the HTTP server, the HTTP server is in turn passed to Socket.IO. All three modules work together to ensure that all requests—whether web service or chat—are handled properly.
Though the chat client is a static page, it would be a simple matter to incorporate a template. The only issues are ensuring the integrity of the scripting block where the client application code resides, and remembering to include a link to the Socket.IO library.
In previous chapters, the only debugging aid used in the examples was printing information to the console. For smaller and less complex applications that are still in development, this is sufficient. However, as your application grows and gets more complicated, you’ll need to use other, more sophisticated tools for debugging.
You’re also going to want to incorporate more formal testing, including the use of test-creation tools that can be used by others to test your module or application in their environments.
Frankly, console.log will
always remain my debugger of choice, but its usefulness does degrade as
your application increases in size and complexity. Once you’ve moved
beyond a simple application, you’re going to want to consider using more
sophisticated debugging tools. We’ll go over some options in the sections
that follow.
The V8 engine comes with a built-in debugger we can use with our Node applications, and Node provides a client that makes it simple to use. We start by adding debugger statements into our code anywhere we want a breakpoint:
// create the proxy that listens for all requests
httpProxy.createServer(function(req,res,proxy) {
debugger;
if (req.url.match(/^\/node\//))
proxy.proxyRequest(req, res, {
host: 'localhost',
port: 8000
});
else
proxy.proxyRequest(req,res, {
host: 'localhost',
port: 8124
});
}).listen(9000);We then run the application in debug mode:
node debug debugger.js
In debug mode, the application stops at the beginning of the file.
To go to the first breakpoint, type cont, or its abbreviation, c. This causes the debugger to stop at the
first breakpoint; the application then sits, waiting for input from the
user (such as a web request):
< debugger listening on port 5858
connecting... ok
break in app2.js:1
1 var connect = require('connect'),
2 http = require('http'),
3 fs = require('fs'),
debug> cont (--> note it is just waiting at this point for a web request)
break in app2.js:11
9 httpProxy.createServer(function(req,res,proxy) {
10
11 debugger;
12 if (req.url.match(/^\/node\//))
13 proxy.proxyRequest(req, res, {
debug>You have several options at this point. You can step through the
code using the next (n) command, step into a function using
step (s), or step out of a function using out (o). In the following code, the debugger stops
at the breakpoint, and the next few lines are stepped over with
next until line 13,
which has a function call. I use step at this point to
step into the function. I can then traverse the function code using
next, and return to the
application using out:
debug> cont break in app2.js:11 9 httpProxy.createServer(function(req,res,proxy) { 10 11 debugger; 12 if (req.url.match(/^\/node\//)) 13 proxy.proxyRequest(req, res, { debug> next break in app2.js:12 10 11 debugger; 12 if (req.url.match(/^\/node\//)) 13 proxy.proxyRequest(req, res, { 14 host: 'localhost', debug> next break in app2.js:13 11 debugger; 12 if (req.url.match(/^\/node\//)) 13 proxy.proxyRequest(req, res, { 14 host: 'localhost', 15 port: 8000 debug> step break in /home/examples/public_html/node/node_modules/http-proxy/lib/ node-http-proxy/routing-proxy.js:144 142 // 143 RoutingProxy.prototype.proxyRequest = function (req, res, options) { 144 options = options || {}; 145 146 // debug> next break in /home/examples/public_html/node/node_modules/http-proxy/lib/ node-http-proxy/routing-proxy.js:152 150 // arguments are supplied to `proxyRequest`. 151 // 152 if (this.proxyTable && !options.host) { 153 location = this.proxyTable.getProxyLocation(req); 154 debug> out break in app2.js:22 20 port: 8124 21 }); 22 }).listen(9000); 23 24 // add route for request for dynamic resource
You can also set a new breakpoint, either on the current line
setBreakpoint (sb), or the first line in a named function or
script file:
break in app2.js:22
20 port: 8124
21 });
22 }).listen(9000);
23
24 // add route for request for dynamic resource
debug> sb()
17 else
18 proxy.proxyRequest(req,res, {
19 host: 'localhost',
20 port: 8124
21 });
*22 }).listen(9000);
23
24 // add route for request for dynamic resource
25 crossroads.addRoute('/node/{id}/', function(id) {
26 debugger;
27 });Clear a breakpoint with clearBreakpoint
(cb).
You can add an expression to a watch list and list out current watches, in addition to using REPL to examine variables:
break in app2.js:11
9 httpProxy.createServer(function(req,res,proxy) {
10
11 debugger;
12 if (req.url.match(/^\/node\//))
13 proxy.proxyRequest(req, res, {
debug> repl
Press Ctrl + C to leave debug repl
> req.url
'/node/174'
debug>The backtrace command is
helpful for printing a backtrace (a list of
currently active function calls) of the current execution frame:
debug> backtrace
#0 app2.js:22:1
#1 exports.createServer.handler node-http-proxy.js:174:39Anytime you want to see which commands are available to you, type
help:
debug> help Commands: run (r), cont (c), next (n), step (s), out (o), backtrace (bt), setBreakpoint (sb), clearBreakpoint (cb), watch, unwatch, watchers, repl, restart, kill, list, scripts, breakpoints, version
The built-in debugger is very helpful, but sometimes you want a
little bit more. You have other options, including accessing the V8
debugger directly by using the --debug command-line flag:
node --debug app.js
This starts up a TCP connection to the debugger, and you enter the V8 debug commands at the prompt. This is an interesting option, but does require a great deal of understanding of how the V8 debugger works (and what the commands are).
Another option is to use debugging via a WebKit browser—through an application such as Node Inspector, covered next.
Node Inspector requires a little more setup to begin debugging, but the extra effort is worth it.
First, install Node Inspector globally using npm:
npm install -g node-inspector
To use the functionality, you’ll first need to start the application using the V8 debugger flag:
node --debug app.js
Then you’ll need to start the Node Inspector, in either the background or foreground:
node-inspector
When you start the application, you’ll get the following message:
node-inspector info - socket.io started visit http://0.0.0.0:8080/debug?port=5858 to start debugging
Using a WebKit-based browser (Safari or Chrome), access the debugging page. My example is running on my server, so I use the following URL:
| http://examples.burningbird.net:8080/debug?port=5858 |
In the browser, the client-side debugger (part of the developer toolset) opens, and stops at the first breakpoint. Now you can use the tools you’re probably already familiar with from your client-side JavaScript development efforts, such as stepping over a couple of lines of code and examining an object’s properties, as shown in Figure 14-1.
Node Inspector is, by far, a superior approach to debugging the server application. Using the command line is OK, but being able to see all the code at once, and to use a toolset we’re familiar with, more than compensates for the little extra effort necessary to enable the Node Inspector setup.
Unit testing is a way of isolating specific components of an application for testing. Many of the tests that are provided in the tests subdirectory of Node modules are unit tests. The tests in the test subdirectory of the Node installation are all unit tests.
You can run a module’s test scripts using npm. In the module subdirectory, type:
npm test
This command runs a module test script if one is provided. When I ran the test script in the subdirectory for node-redis (covered in Chapter 9), the resulting output displayed successful test results, such as the portion displayed here:
Connected to 127.0.0.1:6379, Redis server version 2.4.11 Using reply parser hiredis - flushdb: 1 ms - multi_1: 3 ms - multi_2: 9 ms - multi_3: 2 ms - multi_4: 1 ms - multi_5: 0 ms - multi_6: 7 ms - eval_1:Skipping EVAL_1 because server version isn't new enough. 0 ms - watch_multi: 0 ms
Many of these unit tests are built using the Assert module, which we’ll go over next.
Assertion tests evaluate expressions,
the end result of which is a value of either true or false. If you’re testing the return from a
function call, you might first test that the return is an array (first
assertion). If the array contents should be a certain length, you
perform a conditional test on the length (second assertion), and so on.
There’s one Node built-in module that facilitates this form of assertion
testing: Assert.
You include the Assert module in an application with the following:
var assert = require('assert');To see how to use Assert, let’s look at how existing modules use it. The following test is in the test.js script found with the node-redis installation:
var name = "FLUSHDB";
client.select(test_db_num, require_string("OK", name));The test uses a function, require_string, which returns a function that
uses the Assert module methods assert.equal and
assert.stringEqual:
function require_string(str, label) {
return function (err, results) {
assert.strictEqual(null, err, "result sent back unexpected error: " + err);
assert.equal(str, results, label + " " + str + " does not match " + results);
return true;
};
}The first test, assert.stringEqual,
fails if the err object returned in
the Redis test isn’t null. The second
test using assert.equal fails if
results are not equal to the expected string. Only if both tests are
successful (i.e., neither test fails) does the code fall through to the
return true statement.
What is actually tested is whether the Redis select command succeeds. If an error occurs,
the error is output. If the result of the selection isn’t what’s
expected (a return value of OK), a
message is output to that effect, including the test label where the
test failed.
The Node application also makes use of the Assert module in its
module unit tests. For instance, there’s a test application called
test-util.js that tests the
Utilities module. The following code is the section that tests the
isArray method:
// isArray
assert.equal(true, util.isArray([]));
assert.equal(true, util.isArray(Array()));
assert.equal(true, util.isArray(new Array()));
assert.equal(true, util.isArray(new Array(5)));
assert.equal(true, util.isArray(new Array('with', 'some', 'entries')));
assert.equal(true, util.isArray(context('Array')()));
assert.equal(false, util.isArray({}));
assert.equal(false, util.isArray({ push: function() {} }));
assert.equal(false, util.isArray(/regexp/));
assert.equal(false, util.isArray(new Error));
assert.equal(false, util.isArray(Object.create(Array.prototype)));Both the assert.equal and the
assert.strictEqual
methods have two mandatory parameters: an expected response and an
expression that evaluates to a response. In the earlier Redis test, the
assert.strictEqual test
expects a result of null for the
err argument. If this expectation
fails, the test fails. In the assert.equal
isArray test in the Node source, if the expression evaluates
to true, and the expected response is
true, the assert.equal method succeeds and produces no
output—the result is silent.
If, however, the expression evaluates to a response other than
what’s expected, the assert.equal
method responds with an exception. If I take the first statement in the
isArray test in the Node source and
modify it to:
assert.equal(false, util.isArray([]));
then the result is:
node.js:201
throw e; // process.nextTick error, or 'error' event on first tick
^
AssertionError: false == true
at Object.<anonymous> (/home/examples/public_html/node/chap14/testassert.js:5:8)
at Module._compile (module.js:441:26)
at Object..js (module.js:459:10)
at Module.load (module.js:348:31)
at Function._load (module.js:308:12)
at Array.0 (module.js:479:10)
at EventEmitter._tickCallback (node.js:192:40)The assert.equal and assert.strictEqual
methods also have a third optional parameter, a message that’s displayed
rather than the default in case of a failure:
assert.equal(false, util.isArray([]), 'Test 1Ab failed');
This can be a useful way of identifying exactly which test failed if you’re running several in a test script. You can see the use of a message (a label) in the node-redis test code:
assert.equal(str, results, label + " " + str + " does not match " + results);
The message is what’s displayed when you catch the exception and print out the message.
The following Assert module methods all take the same three parameters, though how the test value and expression relate to each other varies, as the name of the test implies:
assert.equalFails if the expression results and given value are not equal
assert.strictEqualFails if the expression results and given value are not strictly equal
assert.notEqualFails if the expression results and given value are equal
assert.notStrictEqualFails if the expression results and given value are strictly equal
assert.deepEqualFails if the expression results and given value are not equal
assert.notDeepEqualFails if the expression results and given value are equal
The latter two methods, assert.deepEqual and
assert.notDeepEqual,
work with complex objects, such as arrays or objects. The following
succeeds with assert.deepEqual:
assert.deepEqual([1,2,3],[1,2,3]);
but would not succeed with assert.equal.
The remaining assert methods
take differing parameters. Calling assert as a method, passing in a value and a
message, is equivalent to calling assert.isEqual, passing
in true as the first parameter, an
expression, and a message. The following:
var val = 3; assert(val == 3, 'Equal');
is equivalent to:
assert.equal(true, val == 3, 'Equal');
Another variation of the exact same method is assert.ok:
assert.ok(val == 3, 'Equal');
The assert.fail method
throws an exception. It takes four parameters: a value, an expression, a
message, and an operator, which is used to separate the value and
expression in the message when an exception is thrown. In the following
code snippet:
try {
var val = 3;
assert.fail(3, 4, 'Fails Not Equal', '==');
} catch(e) {
console.log(e);
}the console message is:
{ name: 'AssertionError',
message: 'Fails Not Equal',
actual: 3,
expected: 4,
operator: '==' }The assert.ifError function
takes a value and throws an exception only if the value resolves to
anything but false. As the Node
documentation states, it’s a good test for the error object as the first
argument in a callback function:
assert.ifError(err); //throws only if true value
The last assert methods are
assert.throws and assert.doesNotThrow. The first expects an
exception to get thrown; the second doesn’t. Both methods take a code
block as the first required parameter, and an optional error and message
as the second and third parameters. The error object can be a
constructor, regular expression, or validation function. In the
following code snippet, the error message is printed out because the
error regular expression as the second parameter doesn’t match the error
message:
assert.throws(
function() {
throw new Error("Wrong value");
},
/something/
)
} catch(e) {
console.log(e.message);
}You can create sophisticated tests using the Assert module. The one major limitation with the module, though, is the fact that you have to do a lot of wrapping of the tests so that the entire testing script doesn’t fail if one test fails. That’s where using a higher-level unit testing framework, such as Nodeunit (discussed next), comes in handy.
Nodeunit provides a way to script several tests. Once scripted, each test is run serially, and the results are reported in a coordinated fashion. To use Nodeunit, you’re going to want to install it globally with npm:
npm install nodeunit -g
Nodeunit provides a way to easily run a series of tests without
having to wrap everything in try/catch blocks. It supports all of the
Assert module tests, and provides a couple of methods of its own in
order to control the tests. Tests are organized as test cases, each of
which is exported as an object method in the test script. Each test case
gets a control object, typically named test. The first method call in the test case
is to the test element’s expect method, to tell
Nodeunit how many tests to expect in the test case. The last method call
in the test case is to the test
element’s done method, to tell
Nodeunit the test case is finished. Everything in between composes the
actual test unit:
module.exports = {
'Test 1' : function(test) {
test.expect(3); // three tests
... // the tests
test.done();
},
'Test 2' : function (test) {
test.expect(1); // only one test
... // the test
test.done();
}
};To run the tests, type nodeunit, followed by the name of the test
script:
nodeunit thetest.jsExample 14-1 has a
small but complete testing script with six assertions (tests). It
consists of two test units, labeled Test
1 and Test 2. The first
test unit runs four separate tests, while the second test unit runs two.
The expect method call
reflects the number of tests being run in the unit.
var util = require('util');
module.exports = {
'Test 1' : function(test) {
test.expect(4);
test.equal(true, util.isArray([]));
test.equal(true, util.isArray(new Array(3)));
test.equal(true, util.isArray([1,2,3]));
test.notEqual(true, (1 > 2));
test.done();
},
'Test 2' : function(test) {
test.expect(2);
test.deepEqual([1,2,3], [1,2,3]);
test.ok('str' === 'str', 'equal');
test.done();
}
};The result of running the Example 14-1 test script with Nodeunit is:
example1.js ✔ Test 1 ✔ Test 2 OK: 6 assertions (3ms)
Symbols in front of the tests indicate success or failure: a check for success, and an x for failure. None of the tests in this script fails, so there’s no error script or stack trace output.
In addition to Nodeunit, covered in the preceding section, there are several other testing frameworks available for Node developers. Some of the tools are simpler to use than others, and each has its own advantages and disadvantages. Next, I’ll briefly cover three frameworks: Mocha, Jasmine, and Vows.
npm install mocha -g
Mocha is considered the successor to another popular testing framework, Espresso.
Mocha works in both browsers and Node applications. It allows
for asynchronous testing via the done function, though the function can be
omitted for synchronous testing. Mocha can be used with any assertion
library.
The following is an example of a Mocha test, which makes use of the should.js assertion library:
should = require('should')
describe('MyTest', function() {
describe('First', function() {
it('sample test', function() {
"Hello".should.equal("Hello");
});
});
});You need to install the should.js library before running the test:
npm install should
Then run the test with the following command line:
mocha testcase.js
✔ 1 test complete (2ms)
Jasmine is a behavior-driven development (BDD) framework that can be used with many different technologies, including Node with the node-jasmine module. The node-jasmine module can be installed with npm:
npm install jasmine-node -g
Note the module name: jasmine-node, rather than the format of
node-modulename (or the shortened form,
modulename) that you’ve seen so far in
the book.
The jasmine-node GitHub repository includes examples in the
specs subdirectory. As with most
other testing frameworks, the Jasmine Node module also accepts a
done function as a callback in order to
allow asynchronous testing.
There are some environmental requirements to using jasmine-node. First, the tests must be in a specs subdirectory. The jasmine-node module is a command-line application, and you’ll be able to specify the root directory, but it does expect the tests to be in specs.
Next, the tests must be named in a specific format. If the test is written in JavaScript, the test filename must end in .spec.js. If the test is written in CoffeeScript, the name of the file must end in .spec.coffee. You can use subdirectories in the specs directory. When you run jasmine-node, it runs all tests in all directories.
To demonstrate, I created a simple test script that uses Zombie (discussed later) to make a request against a web server and access the page contents. I named the file tst.spec.js and placed it in the specs directory in my development environment:
var zombie = require('zombie');
describe('jasmine-node', function(){
it("should respond with Hello, World!", function(done) {
zombie.visit("http://examples.burningbird.net:8124",
function(error, browser, status){
expect(browser.text()).toEqual("Hello, World!\n");
done();
});
});
});The web server is from Chapter 1, and all it does is return the “Hello, World!” message. Note the use of the newline character—the test will fail if you don’t include it.
I ran the test with the following command line:
jasmine-node --test-dir /home/examples/public_html/node
The result was the following output:
Finished in 0.133 seconds 1 test, 1 assertion, 0 failures
A successful test.
Jasmine uses path.existsSync, which is deprecated in
favor of js.existsSync in Node
0.8. Again, hopefully a fix will be in soon.
If the script had been in CoffeeScript, I would have added the
--coffee parameter:
jasmine-node --test-dir /home/examples/public_html/node --coffee
Vows is another BDD testing framework, and has one advantage over others: more comprehensive documentation. Testing is composed of testing suites, themselves made up of batches of sequentially executed tests. A batch consists of one or more contexts, executed in parallel, and each consisting of a topic, which is when we finally get to the executable code. The test within the code is known as a vow. Where Vows prides itself on being different from the other testing frameworks is by providing a clear separation between that which is being tested (topic) and the test (vow).
I know those are some strange uses of familiar words, so let’s look at a simple example to get a better idea of how a Vows test works. First, though, we have to install Vows:
npm install vows
To try out Vows, I’m using the simple circle module I created earlier in the book, now edited to set precision:
var PI = Math.PI;
exports.area = function (r) {
return (PI * r * r).toFixed(4);
};
exports.circumference = function (r) {
return (2 * PI * r).toFixed(4);
};I needed to change the precision on the result because I’m going to be doing an equality assertion test on the results in the Vows application.
In the Vows test application, the circle object is the topic, and the area and circumference methods are the vows. Both are encapsulated as a Vows context. The suite is the overall test application, and the batch is the test instance (circle and two methods). Example 14-2 shows the entire test.
var vows = require('vows'),
assert = require('assert');
var circle = require('./circle');
var suite = vows.describe('Test Circle');
suite.addBatch({
'An instance of Circle': {
topic: circle,
'should be able to calculate circumference': function (topic) {
assert.equal (topic.circumference(3.0), 18.8496);
},
'should be able to calculate area': function(topic) {
assert.equal (topic.area(3.0), 28.2743);
}
}
}).run();Running the application with Node runs the test because of the
addition of the run method at the
end of the addBatch method:
node example2.js
The results should be two successful tests:
·· ✓ OK » 2 honored (0.003s)
The topic is always an asynchronous function or a value. Instead
of using circle as the topic, I
could have directly referenced the object methods as topics—with a
little help from function closures:
var vows = require('vows'),
assert = require('assert');
var circle = require('./circle');
var suite = vows.describe('Test Circle');
suite.addBatch({
'Testing Circle Circumference': {
topic: function() { return circle.circumference;},
'should be able to calculate circumference': function (topic) {
assert.equal (topic(3.0), 18.8496);
},
},
'Testing Circle Area': {
topic: function() { return circle.area;},
'should be able to calculate area': function(topic) {
assert.equal (topic(3.0), 28.2743);
}
}
}).run();In this version of the example, each context is the object given
a title: Testing Circle
Circumference and Testing Circle
Area. Within each context, there’s one topic and one
vow.
You can incorporate multiple batches, each with multiple contexts, which can in turn have multiple topics and multiple vows.
Acceptance testing differs from unit testing in that the former’s primary purpose is to determine if the application meets user requirements. Unit tests ensure that the application is robust, while acceptance tests ensure that the application is useful.
Acceptance testing can be accomplished through the use of predefined scripts that users actually design and implement in a coordinated setting. Acceptance testing can also be automated—again through the use of scripts, but scripts that are implemented by tools rather than people. These tools don’t completely satisfy all aspects of acceptance testing because they can’t measure subjective perspectives (“This web page form is awkward to use”), nor can they pinpoint those difficult-to-find bugs that users always seem to drive out, but they can make sure program requirements are met.
If you want a higher level of sophistication in your testing, using actual browsers rather than emulators, and you’re willing to pay for a subscription to a testing service, then you might want to check out Selenium, Sauce Labs, and the Node module Soda.
Selenium emerged out of a desire to automate testing tools. It consists of a core library, a Selenium remote control (RC), and a Selenium integrated development environment (IDE). The Selenium IDE is a Firefox plug-in, while the RC is a Java .jar file. The first version of Selenium (Selenium 1) is based in JavaScript, which was also one of the problems with the tool suite: whatever limitations JavaScript had, Selenium shared. Another effort to provide an automated test suite is WebDriver, a project that came about because of an interest in working around Selenium’s limitations. Work is currently under way for Selenium 2 (Selenium WebDriver), which is a merge of Selenium 1 and WebDriver.
Sauce Labs provides a host for Selenium 1 testing. It offers a way of testing your application with various web browsers in various environments, such as Opera on Linux, or IE9 on Windows 7. It does have two major limitations: no Mac OS X support, and no mobile test environment. However, it is a way of testing an application with multiple versions of browsers, such as IE, which is difficult (if not impossible) if you have only one machine.
Sauce Labs provides various subscription plans, including a basic, free subscription plan for trying out the service. The basic plan allows for two concurrent users, and provides 200 OnDemand minutes a month and 45 Scout minutes a month—more than sufficient for a developer trying things out. The site is geared toward Ruby developers, but there is a Node module, Soda, that you can use.
Soda provides a Node wrapper for Selenium testing. An example of using Soda, included in the module documentation, is the following:
var soda = require('soda');
var browser = soda.createClient({
host: 'localhost'
, port: 4444
, url: 'http://www.google.com'
, browser: 'firefox'
});
browser.on('command', function(cmd, args){
console.log(' \x1b[33m%s\x1b[0m: %s', cmd, args.join(', '));
});
browser
.chain
.session()
.open('/')
.type('q', 'Hello World')
.end(function(err){
browser.testComplete(function() {
console.log('done');
if(err) throw err;
});
});The code is actually quite intuitive. First, you create a browser
object, specifying which browser to open, the name of the host and port,
and what website is being accessed. Start a new browser session, load a
web page ('/'), and type a phrase
into an input field with a given identifier of q. When finished, print done to the console.log, and throw any error that
occurs.
To run a Soda application, you’ll need to ensure that Java is installed. Then, copy the Selenium RC Java .jar file to your system and run it:
java -jar selenium.jar
The application expects Firefox to be installed, since this is the browser specified in the application. While I didn’t have it on my Linux box, I did on my Windows laptop and was able to easily get the application running. It’s rather fascinating but a little disconcerting to see windows pop up and suddenly disappear as the Selenium RC does its thing.
Another approach is to use Sauce Labs as a remote testing environment, specifying which browser to use for a given test. You’ll need to create an account first, and then find your account username and application programming interface (API) key. The username is displayed in the top toolbar, and you can find the API key under the Account tab, after clicking the “View my API Key” link. This is also where you can track your remaining OnDemand and Scout minutes (the testing applications we’re creating use OnDemand minutes).
To try the remote testing out, I created a simple test for a login
form that we’ll build in Chapter 15. The
login form has two text fields and two buttons. The text field values
are username and password, and one of the buttons has a value
of Submit. The test script is testing
failure, not success, so the testing script (scenario) would be:
Access web application (http://examples.burningbird.net:3000).
Open login (/login).
Type Sally into the
username field.
Type badpassword into
the password field.
The page should display “Invalid Password.”
These are the steps encoded into Example 14-3.
var soda = require('soda');
var browser = soda.createSauceClient({
'url': 'http://examples.burningbird.net:3000/'
, 'username': 'your username'
, 'access-key': 'your access key'
, 'os': 'Linux'
, 'browser': 'firefox'
, 'browser-version': '3.'
, 'max-duration': 300 // 5 minutes
});
// Log commands as they are fired
browser.on('command', function(cmd, args){
console.log(' \x1b[33m%s\x1b[0m: %s', cmd, args.join(', '));
});
browser
.chain
.session()
.setTimeout(8000)
.open('/login')
.waitForPageToLoad(5000)
.type('username', 'Sally')
.type('password', 'badpassword')
.clickAndWait('//input[@value="Submit"]')
.assertTextPresent('Invalid password')
.end(function(err){
browser.setContext('sauce:job-info={"passed": ' + (err === null) + '}', function(){
browser.testComplete(function(){
console.log(browser.jobUrl);
console.log(browser.videoUrl);
console.log(browser.logUrl);
if (err) throw err;
});
});
});In the test application, a browser object is created with a given
browser, browser version, and operating system—in this case, Firefox 3.x
on Linux. Note also the different browser client: soda.createSauceClient, not soda.createClient. In the browser object, I’m
restricting testing time to no more than five minutes; the site accessed
is http://examples.burningbird.net:3000; and we’ve
just covered where to get the username and API key.
As each command is issued, it’s logged. We want to have a log so we can check responses and look for failures and abnormalities:
// Log commands as they are fired
browser.on('command', function(cmd, args){
console.log(' \x1b[33m%s\x1b[0m: %s', cmd, args.join(', '));
});Last is the actual test. Typically, the tests would have to be
nested callbacks (since this is an asynchronous environment), but Soda
provides a chain
getter that greatly simplifies adding tasks. The
very first task is to start a new session, and then each separate item
in the testing script is encoded. In the end, the application prints out
the URLs for the job, log, and video of the test.
The output from running the application is:
setTimeout: 8000
open: /login
waitForPageToLoad: 5000
type: username, Sally
type: password, badpassword
clickAndWait: //input[@value="Submit"]
assertTextPresent: Invalid password
setContext: sauce:job-info={"passed": true}
testComplete:
https://saucelabs.com/jobs/d709199180674dc68ec6338f8b86f5d6
https://saucelabs.com/rest/shelleyjust/jobs/d709199180674dc68ec6338f8b86f5d6/
results/video.flv
https://saucelabs.com/rest/shelleyjust/jobs/d709199180674dc68ec6338f8b86f5d6/
results/selenium-server.logYou can access the results directly, or you can log into Sauce Labs and see the results of all your tests, as shown in Figure 14-2.
As mentioned earlier, Soda is a Selenium wrapper, so there’s little documentation of the Selenium commands in the module. You’ll need to find these at the Selenium website and extrapolate how they’d work with Soda.
Access the Selenium website at http://seleniumhq.org/.
Rather than using any specific browser, you can do acceptance testing with Node modules that emulate a browser. Both Tobi and Zombie provide this capability. The primary advantage to these modules is that you can run the applications in an environment that doesn’t have a browser installed. In this section, I’ll briefly demonstrate how you can use Zombie for acceptance testing.
First, install Zombie using npm:
npm install zombie
Zombie resembles Soda in that you create a browser and then run tests that emulate the actions of a user at a browser. It even supports chained methods to circumvent the issues with nested callbacks.
I converted the test case against the login form in Example 14-3 to Zombie, except this time the test uses the proper password and tests for success rather than failure (the user is redirected to the /admin page). Example 14-4 has the code for this acceptance test.
var Browser = require('zombie');
var assert = require('assert');
var browser = new Browser();
browser.visit('http://examples.burningbird.net:3000/login', function() {
browser.
fill('username', 'Sally').
fill('password', 'apple').
pressButton('Submit', function() {
assert.equal(browser.location.pathname, '/admin');
});
});The test is silent, since the assert at the end is successful—the browser
location is /admin, which is the page that
should open if the login works, signaling a successful test.
A robust application that meets all the user’s needs is going to have a short life if its performance is atrocious. We need the ability to performance test our Node applications, especially when we make tweaks as part of the process to improve performance. We can’t just tweak the application, put it out for production use, and let our users drive out performance issues.
Performance testing consists of benchmark testing and load testing. Benchmark testing, also known as comparison testing, is running multiple versions or variations of an application and then determining which is better. It’s an effective tool to use when you’re tweaking an application to improve its efficiency and scalability. You create a standardized test, run it against the variations, and then analyze the results.
Load testing, on the other hand, is basically stress testing your application. You’re trying to see at what point your application begins to fail or bog down because of too many demands on resources, or too many concurrent users. You basically want to drive the application until it fails. Failure is a success with load testing.
There are existing tools that handle both kinds of performance testing, and a popular one is ApacheBench. It’s popular because it’s available by default on any server where Apache is installed—and few servers don’t have Apache installed. It’s also an easy-to-use, powerful little testing tool. When I was trying to determine whether it’s better to create a static database connection for reuse or to create a connection and discard it with each use, I used ApacheBench to run tests.
ApacheBench works against web applications, which means you provide a URL rather than an application name. If we prefer a Node solution, or an application that can run applications (not just query websites), there’s another combination command-line tool/module: Nodeload. Nodeload can interact with a stats module, output graphics of results, and provide real-time monitoring. It also supports distributed load testing.
In the next couple of sections, the test applications are working with Redis, so if you haven’t read Chapter 9, you may want to do that now.
ApacheBench is commonly called ab, and I’ll use that name from this point forward. ab is a command-line tool that allows us to specify the number of times an application is run, and by how many concurrent users. If we want to emulate 20 concurrent users accessing a web application a total of 100 times, we’d use a command like the following:
ab -n 100 -c 20 http://somewebsite.com/It’s important to provide the final slash, as ab expects a full URL, including path.
ab provides a rather rich output of information. An example is the following output (excluding the tool identification) from one test:
Concurrency Level: 10 Time taken for tests: 20.769 seconds Complete requests: 15000 Failed requests: 0 Write errors: 0 Total transferred: 915000 bytes HTML transferred: 345000 bytes Requests per second: 722.22 [#/sec] (mean) Time per request: 13.846 [ms] (mean) Time per request: 1.385 [ms] (mean, across all concurrent requests) Transfer rate: 43.02 [Kbytes/sec] received Connection Times (ms) min mean[+/-sd] median max Connect: 0 0 0.1 0 4 Processing: 1 14 15.7 12 283 Waiting: 1 14 15.7 12 283 Total: 1 14 15.7 12 283 Percentage of the requests served within a certain time (ms) 50% 12 66% 14 75% 15 80% 16 90% 18 95% 20 98% 24 99% 40 100% 283 (longest request)
The test ran 15,000 times, with 10 concurrent users.
The lines we’re most interested in (in bold text) are those having to do with how long each test took, and the cumulative distribution at the end of the test (based on percentages). According to this output, the average time per request (the first value with this label) is 13.846 milliseconds. This is how long the average user could expect to wait for a response. The second line has to do with throughput, and is probably not as useful as the first.
The cumulative distribution provides a good look into the percentage of requests handled within a certain time frame. Again, this indicates what we can expect for an average user: response times between 12 and 283 milliseconds, with the vast majority of responses handled in 20 milliseconds or less.
The last value we’re looking at is the requests per second—in this case, 722.22. This value can somewhat predict how well the application will scale, because it gives us an idea of the maximum requests per second—that is, the upper boundaries of application access. However, you’ll need to run the test at different times, and under different ancillary loads, especially if you’re running the test on a system that serves other uses.
The application tested consists of a web server listening for requests. Each request triggers a query to a Redis data store. The application creates a persistent connection to the Redis data store that it maintains throughout the lifetime of the Node application. The test application is shown in Example 14-5.
var redis = require("redis"),
http = require('http');
// create Redis client
var client = redis.createClient();
client.on('error', function (err) {
console.log('Error ' + err);
});
// set database to 1
client.select(1);
var scoreServer = http.createServer();
// listen for incoming request
scoreServer.on('request', function (req, res) {
console.time('test');
req.addListener("end", function() {
var obj = {
member : 2366,
game : 'debiggame',
first_name : 'Sally',
last_name : 'Smith',
email : 'sally@smith.com',
score : 50000 };
// add or overwrite score
client.hset(obj.member, "game", obj.game, redis.print);
client.hset(obj.member, "first_name", obj.first_name, redis.print);
client.hset(obj.member, "last_name", obj.last_name, redis.print);
client.hset(obj.member, "email", obj.email, redis.print);
client.hset(obj.member, "score", obj.score, redis.print);
client.hvals(obj.member, function (err, replies) {
if (err) {
return console.error("error response - " + err);
}
console.log(replies.length + " replies:");
replies.forEach(function (reply, i) {
console.log(" " + i + ": " + reply);
});
});
res.end(obj.member + ' set score of ' + obj.score);
console.timeEnd('test');
});
});
scoreServer.listen(8124);
// HTTP server closes, close client connection
scoreServer.on('close', function() {
client.quit();
});
console.log('listening on 8124');I was curious about performance if I changed one parameter in the application: from maintaining a persistent connection to Redis to grabbing a connection when the web service was accessed, and releasing it as soon as the request was finished. That led to the second version of the application, shown in Example 14-6. The changes from the first are in bold text.
var redis = require("redis"),
http = require('http');
var scoreServer = http.createServer();
// listen for incoming request
scoreServer.on('request', function (req, res) {
console.time('test');
// create Redis client
var client = redis.createClient();
client.on('error', function (err) {
console.log('Error ' + err);
});
// set database to 1
client.select(1);
req.addListener("end", function() {
var obj = {
member : 2366,
game : 'debiggame',
first_name : 'Sally',
last_name : 'Smith',
email : 'sally@smith.com',
score : 50000 };
// add or overwrite score
client.hset(obj.member, "game", obj.game, redis.print);
client.hset(obj.member, "first_name", obj.first_name, redis.print);
client.hset(obj.member, "last_name", obj.last_name, redis.print);
client.hset(obj.member, "email", obj.email, redis.print);
client.hset(obj.member, "score", obj.score, redis.print);
client.hvals(obj.member, function (err, replies) {
if (err) {
return console.error("error response - " + err);
}
console.log(replies.length + " replies:");
replies.forEach(function (reply, i) {
console.log(" " + i + ": " + reply);
});
});
res.end(obj.member + ' set score of ' + obj.score);
client.quit();
console.timeEnd('test');
});
});
scoreServer.listen(8124);
console.log('listening on 8124');I ran the ab test against this second application, and the relevant test results are as follows:
Requests per second: 515.40 [#/sec] (mean) Time per request: 19.402 [ms] (mean) ... Percentage of the requests served within a certain time (ms) 50% 18 66% 20 75% 21 80% 22 90% 24 95% 27 98% 33 99% 40 100% 341 (longest request)
The tests give us a fairly good indication that maintaining a persistent connection enhances performance. This is further borne out, in rather dramatic fashion, with a second test.
When I ran the test 100,000 times, with 1,000 concurrent users, the Node application that maintained a persistent connection to Redis finished the test, while the other option actually failed; too many concurrent users backed up at Redis, and it started rejecting connections. Exactly 67,985 tests completed before the application went toes up.
Nodeload provides a command-line tool that performs the same type of testing as ab, but with the addition of some nice graphics of the results. It also provides a module you can use to develop your own performance testing applications.
Another application also goes by the name Nodeload, and is responsible for building and delivering Git repositories as .zip files. To ensure that you’re accessing the correct Nodeload, install it with the following:
npm install nodeload -g
When Nodeload is installed globally, you can access the command-line version (nl.js) of the module application anywhere. The command-line arguments it takes are similar to what we’ve used with ab:
nl.js -c 10 -n 10000 -i 2 http://examples.burningbird.net:8124
The application accesses the website 10,000 times,
emulating 10 concurrent users. The -i
flag alters how frequently the statistics are reported (every 2 seconds
rather than the default 10 seconds). Here is the complete set of
flags:
-n --numberNumber of requests to make
-c --concurrencyNumber of concurrent users
-t --time-limitTime limit for the test
-m --methodHTTP method to use
-d --dataData to send with PUT or
POST request
-r
--request-generatorPath to module for getRequest function (if a custom one is
provided)
-q --quietSuppress display of progress
-h --helpHelp
What’s fun about Nodeload is the live graphics that are displayed while the test is running. If you access port 8000 of the test server (http://localhost:8000 or via domain), you can see a graphic display of the results as they are happening. Figure 14-3 shows a snapshot of the display during one test.
The graphics file is also persisted for later access, as is a logfile of the test results. At the end of the test, summary results are given that are very close to ab in nature. An example of one output is the following:
Server: examples.burningbird.net:8124 HTTP Method: GET Document Path: / Concurrency Level: 100 Number of requests: 10000 Body bytes transferred: 969977 Elapsed time (s): 19.59 Requests per second: 510.41 Mean time per request (ms): 192.74 Time per request standard deviation: 47.75 Percentages of requests served within a certain time (ms) Min: 23 Avg: 192.7 50%: 191 95%: 261 99%: 372 Max: 452
If you want to provide your own custom test, you can use the Nodeload module to develop a testing application. The module provides live monitoring, graphics capability, statistics, as well as distributed testing capability.
Before leaving this chapter, I want to introduce one more module: Nodemon. Though not technically related to either testing or debugging, it is a handy development tool.
First, install it with npm:
npm install nodemon
Nodemon wraps your application. Instead of using Node to start the application, use Nodemon:
nodemon app.js
Nodemon sits quietly monitoring the directory (and any contained directories) where you ran the application, checking for file changes. If it finds a change, it restarts the application so that it picks up the recent changes.
You can pass parameters to the application:
nodemon app.js param1 param2
You can also use the module with CoffeeScript:
nodemon someapp.coffee
If you want Nodemon to monitor some directory other than the current
one, use the --watch flag:
nodemon --watch dir1 --watch libs app.js
There are other flags, documented with the module. The module can be found at https://github.com/remy/nodemon/.
Chapter 16 demonstrates how to use Nodemon with Forever, which restarts your application if it shuts down for some reason.
Security in web applications goes beyond ensuring that people don’t have access to the application server. Security can be complex, and even a little intimidating. Luckily, when it comes to Node applications, most of the components we need for security have already been created. We just need to plug them in, in the right place and at the right time.
In this chapter, I break down security into four major components: encryption, authentication and authorization, attack prevention, and sandboxing:
Ensures that data transmitted over the Internet is safe, even if it is intercepted midroute. The only receiver that can actually decrypt the data is the system that has the proper credentials (typically a key). Encryption is also used for data that must be stored confidentially.
Consist of the logins we get whenever we need to access protected areas of an application. Not only do these logins ensure that a person has access to a section of an application (authorization), they also ensure the person is who she says she is (authentication).
Ensures that someone who is submitting data via a form isn’t trying to tack on text that can attack the server or the database you’re using.
Barricades script so it doesn’t have access to the system resources—it operates only within a limited context.
We send a lot of data over the Internet. Most of it isn’t anything essential: Twitter updates, web page history, comments on a blog post. Much of the data, though, is private, including credit card data, confidential email messages, or login information to our servers. The only way to ensure that these types of data transmissions are kept private, and aren’t hacked in any way during transit, is to use encryption with the communication.
Secure, tamper-resistant communication between a client and a server occurs over SSL (Secure Sockets Layer), and its upgrade, TLS (Transport Layer Security). TSL/SSL provides the underlying encryption for HTTPS, which I cover in the next section. However, before we can develop for HTTPS, we have to do some environment setup.
A TSL/SSL connection requires a handshake between client and server. During the handshake, the client (typically a browser) lets the server know what kind of security functions it supports. The server picks a function and then sends through an SSL certificate, which includes a public key. The client confirms the certificate and generates a random number using the server’s key, sending it back to the server. The server then uses its private key to decrypt the number, which in turn is used to enable the secure communication.
For all this to work, you’ll need to generate both the public and private key, as well as the certificate. For a production system, the certificate would be signed by a trusted authority, such as our domain registrars, but for development purposes you can make use of a self-signed certificate. Doing so generates a rather significant warning in the browser, but since the development site isn’t being accessed by users, there won’t be an issue.
The tool used to generate the necessary files is OpenSSL. If you’re using Linux, it should already be installed. There’s a binary installation for Windows, and Apple is pursuing its own Crypto library. In this section, I’m just covering setting up a Linux environment.
To start, type the following at the command line:
openssl genrsa -des3 -out site.key 1024
The command generates the private key, encrypted with Triple-DES and stored in PEM (privacy-enhanced mail) format, making it ASCII readable.
You’ll be prompted for a password, and you’ll need it for the next task, creating a certificate-signing request (CSR).
When generating the CSR, you’ll be prompted for the password you
just created. You’ll also be asked a lot of questions, including the
country designation (such as US for United States), your state or
province, city name, company name and organization, and email address.
The question of most importance is the one asking for the Common Name.
This is asking for the hostname of the site—for example,
burningbird.net or
yourcompany.com. Provide the hostname where the
application is being served. In my example code, I created a certificate
for examples.burningbird.net.
openssl req -new -key site.key -out site.csr
The private key wants a passphrase. The problem is, every time you start up the server, you’ll have to provide this passphrase, which is an issue in a production system. In the next step, you’ll remove the passphrase from the key. First, rename the key:
mv site.key site.key.org
Then type:
openssl rsa -in site.key.org -out site.key
If you do remove the passphrase, make sure your server is secure by ensuring that the file is readable only by root.
The next task is to generate the self-signed certificate. The following command creates one that’s good only for 365 days:
openssl x509 -req -days 365 -in site.csr -signkey site.key -out final.crt
Now you have all the components you need in order to use TLS/SSL and HTTPS.
Web pages that ask for user login or credit card information had better be served as HTTPS, or we should give the site a pass. HTTPS is a variation of the HTTP protocol, except that it’s also combined with SSL to ensure that the website is who and what we think it is, that the data is encrypted during transit, and the data arrives intact and without any tampering.
Adding support for HTTPS is similar to adding support for HTTP,
with the addition of an options
object that provides the public encryption key, and the signed
certificate. The default port for an HTTPS server differs, too: HTTP is
served via port 80 by default, while HTTPS is served via port
443.
Example 15-1 demonstrates a very basic HTTPS server. It does little beyond sending a variation of our traditional Hello, World message to the browser.
var fs = require("fs"),
https = require("https");
var privateKey = fs.readFileSync('site.key').toString();
var certificate = fs.readFileSync('final.crt').toString();
var options = {
key: privateKey,
cert: certificate
};
https.createServer(options, function(req,res) {
res.writeHead(200);
res.end("Hello Secure World\n");
}).listen(443);The public key and certificate are opened, and their contents are
read synchronously. The data is
attached to the options object,
passed as the first parameter in the https.createServer method. The callback
function for the same method is the one we’re used to, with the server
request and response object passed as parameters.
Accessing the page demonstrates what happens when we use a self-signed certificate, as shown in Figure 15-1. It’s easy to see why a self-signed certificate should be used only during testing.
The browser address bar demonstrates another way that the browser signals that the site’s certificate can’t be trusted, as shown in Figure 15-2. Rather than displaying a lock indicating that the site is being accessed via HTTPS, it displays a lock with a red x showing that the certificate can’t be trusted. Clicking the icon opens an information window with more details about the certificate.
Encrypting communication isn’t the only time we use encryption in a web application. We also use it to store user passwords and other sensitive data.
Node provides a module used for encryption: Crypto. According to the module’s documentation:
The crypto module requires OpenSSL to be available on the underlying platform. It offers a way of encapsulating secure credentials to be used as part of a secure HTTPS net or http connection.
It also offers a set of wrappers for OpenSSL’s
hash,hmac,cipher,decipher,sign, andverifymethods.
The functionality we’re interested in is the module’s OpenSSL hash support.
One of the most common tasks a web application has to support is also one of the most vulnerable: storing a user’s login information, including password. It probably only took five minutes after the first username and password were stored in plain text in a web application database before someone came along, cracked the site, got the login information, and had his merry way with it.
You do not store passwords in plain text. Luckily, you don’t need to store passwords in plain text with Node’s Crypto module.
You can use the Crypto module’s createHash method to
encrypt the password. An example is the following, which creates the
hash using the sha1 algorithm, uses the hash to encode a password, and
then extracts the digest of the encrypted data to store in the
database:
var hashpassword = crypto.createHash('sha1')
.update(password)
.digest('hex');The digest encoding is set to hexadecimal. By default, encoding is binary, and base64 can also be used.
Many applications use a hash for this purpose. However, there’s a problem with storing plain hashed passwords in a database, a problem that goes by the innocuous name of rainbow table.
Put simply, a rainbow table is basically a table of precomputed hash values for every possible combination of characters. So, even if you have a password that you’re sure can’t be cracked—and let’s be honest, most of us rarely do—chances are, the sequence of characters has a place somewhere in a rainbow table, which makes it much simpler to determine what your password is.
The way around the rainbow table is with salt (no, not the crystalline variety), a unique generated value that is concatenated to the password before encryption. It can be a single value that is used with all the passwords and stored securely on the server. A better option, though, is to generate a unique salt for each user password, and then store it with the password. True, the salt can also be stolen at the same time as the password, but it would still require the person attempting to crack the password to generate a rainbow table specifically for the one and only password—adding immensely to the complexity of cracking any individual password.
Example 15-2 is a simple application that takes a username and a password passed as command-line arguments, encrypts the password, and then stores both as a new user in a MySQL database table. The table is created with the following SQL:
CREATE TABLE user (userid INT NOT NULL AUTO_INCREMENT, PRIMARY KEY(userid), username VARCHAR(400) NOT NULL, password VARCHAR(400) NOT NULL);
The salt consists of a date value multiplied by a random number and rounded. It’s concatenated to the password before the resulting string is encrypted. All the user data is then inserted into the MySQL user table.
var mysql = require('mysql'),
crypto = require('crypto');
var client = mysql.createClient({
user: 'username',
password: 'password'
});
client.query('USE databasenm');
var username = process.argv[2];
var password = process.argv[3];
var salt = Math.round((new Date().valueOf() * Math.random())) + '';
var hashpassword = crypto.createHash('sha512')
.update(salt + password)
.digest('hex');
// create user record
client.query('INSERT INTO user ' +
'SET username = ?, password = ?, salt = ?',
[username, hashpassword, salt], function(err, result) {
if (err) console.log(err);
client.end();
});The application to test a username and password, shown in Example 15-3, queries the database for the password and salt based on the username. It uses the salt to, again, encrypt the password. Once the password has been encrypted, it’s compared to the password stored in the database. If the two don’t match, the user isn’t validated. If they match, then the user’s in.
var mysql = require('mysql'),
crypto = require('crypto');
var client = mysql.createClient({
user: 'username',
password: 'password'
});
client.query('USE databasenm');
var username = process.argv[2];
var password = process.argv[3];
client.query('SELECT password, salt FROM user WHERE username = ?',
[username], function(err, result, fields) {
if (err) return console.log(err);
var newhash = crypto.createHash('sha512')
.update(result[0].salt + password)
.digest('hex');
if (result[0].password === newhash) {
console.log("OK, you're cool");
} else {
console.log("Your password is wrong. Try again.");
}
client.end();
});Trying out the applications, we first pass in a username of
Michael, with a password of applef*rk13*:
node password.js Michael apple*frk13*
We then check the same username and password:
node check.js Michael apple*frk13*
and get back the expected result:
OK, you're cool
Trying it again, but with a different password:
node check.js Michael badstuff
we get back the expected result again:
Your password is wrong. Try again
Of course, we don’t expect our users to log in via the command line. Neither do we always use a local password system to authenticate people. We’ll go over the authentication process next.
Are you the person you say you are? Do you have the authority to do this action? Can this action cause harm? Answering these questions is the work of two different technical components: authentication and authorization.
Authentication is concerned with ensuring that you are who you say you are. When Twitter attaches a verification flag to an account, it’s signaling that the person flagged is the genuine article. Authorization, on the other hand, is related to ensuring that you have access only to what you need to access. Of a dozen users at a Drupal site, half may have only the ability to post comments, five others can post articles and comments, but only one has control over everything. The site may not care who user Big Daddy is, only that he can post comments but not delete posts.
It’s not unusual for both authorization and authentication to be combined into the same function. Typically, when attempting to do some action, you’re challenged to provide some means of authenticating who you are. You’re probably going to be asked to provide a username and a password. Then, once you’ve proved who you are, your actions are further limited by the application: the person identified by your username can access only certain pages or perform only certain operations.
Sometimes the authentication is done through a third party. An example of third-party authentication is the use of OpenID. Rather than have your users create a username and password at your site, you authenticate them with OpenID and then give them application access.
Other times, both authentication and authorization occur at a third-party site. For instance, if an application wants to access a Twitter or Facebook account, either to post messages or to get information, the users have to authenticate with these sites, and then your application has to be authorized for the access. This authorization occurs via another strategy, OAuth.
The functionality for all of these scenarios can be met with the Passport module and one or more Passport strategies.
Passport isn’t the only module that provides authentication and authorization, but I found it to be the easiest to use.
Let’s take a closer look at our three different types of authorization/authentication strategies.
When you’re accessing the administrative section of a content management system (CMS) such as Drupal or an online site such as Amazon, you’re using basic credential verification. You’re supplying a username and a password, both of which are verified by the site before you’re given access. This is still the most widely implemented authorization/authentication strategy. And for the most part, it’s an effective one.
Earlier in the chapter, I demonstrated how user passwords can be protected in the database. Even if the user system is compromised, the data thieves won’t have access to your password in plain text. Of course, they could crack your password, but if you used a combination of letters, symbols, and numbers in a relatively meaningless way, it would take a lot of time and CPU power to crack the password.
OAuth is a way of accessing data, such as a person’s Twitter account data, without the person having to give direct access to the account password. It’s a way of authorizing data access without the person’s credentials having to be stored in various locations—which increases the likelihood of the person’s credentials eventually being compromised. It also gives the user greater control, because she can usually rescind the authorization from her primary account at any time.
OAuth is involved almost exclusively with authorization—of data access. OpenID is different in that its primary focus is on authentication, though authorization does come along for the ride.
OpenID is not as widely used as OAuth, and is used primarily in comment systems and in user registration at various media sites. One of the problems with comment systems is that individuals may say they’re a person, but there’s no way to verify they are who they say they are. With OpenID, a person can sign into a comment system or register as a user, and the OpenID system ensures that the person authenticates, at least within the OpenID system.
OpenID is also a way of registering at different locations without having to create a different username and password with each. You just provide your OpenID, it’s verified, the information the system needs is pulled from the OpenID provider, and you’re done.
None of these three strategies precludes the use of the other two. Many applications incorporate support for all three: local credential verification for administrative tasks, OAuth to share data or post to sites such as Facebook and Twitter, and OpenID to allow user registration and comments.
There are several modules that can provide all forms of authentication and authorization, but I’m going to focus on one: Passport. Passport is middleware that works with both Connect and Express to provide both authentication and authorization. You can install it with npm:
npm install passport
Passport utilizes strategies that are installed independently from the framework. All Passport strategies have the same basic requirements:
The strategy must be installed.
The strategy must be configured in the application.
As part of the configuration, the strategy incorporates a callback function, used to verify the user’s credentials.
All strategies require additional work depending on the authority vetting the credentials: Facebook and Twitter require an account and account key, while the local strategy requires a database with usernames and passwords.
All strategies require a local data store that maps the authority’s username with an application username.
Passport-provided functionality is used to persist the user login session.
In this chapter, we’re looking at two Passport strategies: local authentication/authorization, and authentication through Twitter using OAuth.
We can install the local Passport strategy module (passport-local) with npm:
npm install passport-local
Passport is middleware, and must be instantiated like middleware within the Express application. After including both the passport and passport-local modules, like so:
var express = require('express');
var passport = require('passport');
var localStrategy = require('passport-local').Strategy;initiate the Passport middleware as follows:
var app = express();
app.configure(function(){
...
app.use(passport.initialize());
app.use(passport.session());
...
});Then configure the local strategy. The format for configuring the
local strategy is the same as that for configuring all other strategies:
a new instance of the strategy is passed to Passport via the use method, similar to the approach utilized
by Express:
passport.use(new localStrategy( function (user, password, done) { ... }The passport-local module expects that the username and password
are passed to the web application via a posted form, and that the values
are contained in fields named username and password. If you want to use two other field
names, pass them as an option when creating the new strategy
instance:
var options =
{ usernameField : 'appuser',
passwordField : 'userpass'
};
passport.use(new localStrategy(options, function(user, password, done) { ... }The callback function passed to the strategy construction is called after the username and password have been extracted from the request body. The function performs the actual authentication, returning:
Whenever a user tries to access a protected site, Passport is
queried to see if he is authorized. In the following code, when the user
tries to access the restricted admin page, a function named ensureAuthenticated is called to determine
whether he is authorized:
app.get('/admin', ensureAuthenticated, function(req, res){
res.render('admin', { title: 'authenticate', user: req.user });
});The ensureAuthenticated
function checks the result of the req.isAuthenticated
method that Passport has added as an extension to the request object. If
the response is false, the user is
redirected to the login page:
function ensureAuthenticated(req, res, next) {
if (req.isAuthenticated()) { return next(); }
res.redirect('/login')
}To persist the login for the session, Passport provides two
methods, serializeUser and
deserializeUser. We
have to provide the functionality in the callback function that is
passed to these two methods. Basically, passport.serializeUser
serializes the user’s identifier, while passport.deserializeUser uses this identifier
to find the user in whatever data store we’re using, and return an
object with all the user information:
passport.serializeUser(function(user, done) {
done(null, user.id);
});
passport.deserializeUser(function(id, done) {
...
});Serialization to the session isn’t a requirement for Passport. If
you don’t want to serialize the user, don’t include the passport.session
middleware:
app.use(passport.session());
If you do decide to serialize the user to the session (and you should; otherwise, you’ll have a very annoyed user, as he’ll keep getting login requests), you must ensure that the Passport middleware is included after the Express session middleware:
app.use(express.cookieParser('keyboard cat'));
app.use(express.session());
app.use(passport.initialize());
app.use(passport.session());If you don’t maintain the proper order, the user never authenticates.
The last chunk of functionality is handling what happens when the person doesn’t validate. During the authentication, if a user’s username isn’t found in the data store, an error message is generated. If the username is found, but the password doesn’t match what’s stored, an error is generated. We need to communicate these error messages back to the user.
Passport uses the Express 2.x req.flash method to
queue error messages for display back to the user. I didn’t cover
req.flash in earlier
chapters because the functionality was deprecated in Express 3.x.
However, to ensure that Passport works with Express 2.x and 3.x, the
Passport developer created a new module, connect-flash, that adds this
functionality back in.
The connect-flash module can be installed with npm:
npm install connect-flash
used in the application:
var flash = require('connect-flash');and then integrated as middleware with Express:
app.use(flash());
Now, in the POST login route,
if the user doesn’t authenticate, he’s redirected to the login form and
given a notification that an error occurred:
app.post('/login',
passport.authenticate('local', { failureRedirect: '/login', failureFlash: true }),
function(req, res) {
res.redirect('/admin');
});The error message(s) generated via the authentication process can
be passed on to the views engine via req.flash when the
login form is rendered:
app.get('/login', function(req, res){
var username = req.user ? req.user.username : '';
res.render('login', { title: 'authenticate', username: username,
message: req.flash('error') });
});The views engine can then display the error message in addition to the login form elements, as this Jade template demonstrates:
extends layout block content h1 Login if message p= message form(method="POST" action="/login" enctype="application/x-www-form-urlencoded") p Username: input(type="text" name="username" id="username" size="25" value="#{username}" required) p Password: input(type="password" name="password" id="password" size="25" required) input(type="submit" name="submit" id="submit" value="Submit") input(type="reset" name="reset" id="reset" value="reset")
To demonstrate all of these pieces, I incorporated the command-line authentication application from Example 15-3 into an Express application, shown in Example 15-4, with authentication provided by Passport. The only routes the application supports are the login route for the login form display and authentication, and access to a restricted admin page and the top-level index page.
The MySQL code from Example 15-3 is incorporated directly into the authentication routine (though normally this would be split out in a more formal application). Additional MySQL access code is used to find the user information given an identifier, when the user is deserialized.
// modules
var express = require('express')
, flash = require('connect-flash')
, passport = require('passport')
, LocalStrategy = require('passport-local').Strategy
, http = require('http');
var mysql = require('mysql')
, crypto = require('crypto');
// check user authentication
function ensureAuthenticated(req, res, next) {
if (req.isAuthenticated()) { return next(); }
res.redirect('/login')
}
// serialize user to session
passport.serializeUser(function(user, done) {
done(null, user.id);
});
// find user in MySQL database
passport.deserializeUser(function(id, done) {
var client = mysql.createClient({
user : 'username',
password: 'password'
});
client.query('USE databasenm');
client.query('SELECT username, password FROM user WHERE userid = ?',
[id], function(err, result, fields) {
var user = {
id : id,
username : result[0].username,
password : result[0].password};
done(err, user);
client.end();
});
});
// configure local strategy
// authenticate user against MySQL user entry
passport.use(new LocalStrategy(
function(username, password, done) {
var client = mysql.createClient({
user : 'username',
password: 'password'
});
client.query('USE nodetest2');
client.query('SELECT userid, password, salt FROM user WHERE username = ?',
[username], function(err, result, fields) {
// database error
if (err) {
return done(err);
// username not found
} else if (result.length == 0) {
return done(null, false, {message: 'Unknown user ' + username});
// check password
} else {
var newhash = crypto.createHash('sha512')
.update(result[0].salt + password)
.digest('hex');
// if passwords match
if (result[0].password === newhash) {
var user = {id : result[0].userid,
username : username,
password : newhash };
return done(null, user);
// else if passwords don't match
} else {
return done(null, false, {message: 'Invalid password'});
}
}
client.end();
});
}));
var app = express();
app.configure(function(){
app.set('views', __dirname + '/views');
app.set('view engine', 'jade');
app.use(express.favicon());
app.use(express.logger('dev'));
app.use(express.bodyParser());
app.use(express.methodOverride());
app.use(express.cookieParser('keyboard cat'));
app.use(express.session());
app.use(passport.initialize());
app.use(passport.session());
app.use(flash());
app.use(app.router);
app.use(express.static(__dirname + '/public'));
});
app.get('/', function(req, res){
res.render('index', { title: 'authenticate', user: req.user });
});
app.get('/admin', ensureAuthenticated, function(req, res){
res.render('admin', { title: 'authenticate', user: req.user });
});
app.get('/login', function(req, res){
var username = req.user ? req.user.username : '';
res.render('login', { title: 'authenticate', username: username,
message: req.flash('error') });
});
app.post('/login',
passport.authenticate('local', { failureRedirect: '/login', failureFlash: true }),
function(req, res) {
res.redirect('/admin');
});
http.createServer(app).listen(3000);
console.log("Express server listening on port 3000");Example 15-4 is a longer example than I normally like to include in a book, but stubbing in the data source portions of the example wouldn’t give you a real feel for how the Passport component works with the password hashing component, discussed earlier.
Let’s take a closer look at the authentication method. Once the
application has queried for the user record given the username, it
invokes the callback function with the database error, if an error
occurs. If an error does not occur, but the username isn’t found, the
application invokes the callback function with the username set to
false to signal that the username
wasn’t found, and provides an appropriate message. If the user is found,
but the passwords don’t match, the same thing happens: a value of
false is returned for the user and a
message is generated.
Only when no database error occurred, the user exists in the user table, and the passwords match is a user object created and returned via the callback function:
// database error
if (err) {
return done(err);
// username not found
} else if (result.length == 0) {
return done(null, false, {message: 'Unknown user ' + username});
// check password
} else {
var newhash = crypto.createHash('sha512')
.update(result[0].salt + password)
.digest('hex');
// if passwords match
if (result[0].password === newhash) {
var user = {id : result[0].userid,
username : username,
password : newhash };
return done(null, user);
// else if passwords don't match
} else {
return done(null, false, {message: 'Invalid password'});
}
}This user object is then serialized to the session, and the user is given access to the admin page. He’ll continue to have access without challenge to the admin page as long as the session is alive.
Rather than store usernames and passwords locally and perform our own authentication, we can use another service, such as Twitter. This is also a way to integrate a site more closely with Twitter (or Facebook, Google+, or another third-party site).
Passport authentication using Twitter is supported through the passport-twitter module. It can be installed with npm:
npm install passport-twitter
To use OAuth to authenticate a user through Twitter, you need to set up a developer’s account at Twitter, and get a consumer key and a consumer secret. These are used in the application to form part of the OAuth request.
Once you have your consumer key and secret, use these, in addition to the callback URL, to create the Twitter strategy:
passport.use(new TwitterStrategy(
{ consumerKey: TWITTER_CONSUMER_KEY,
consumerSecret: TWITTER_CONSUMER_SECRET,
callbackURL: "http://examples.burningbird.net:3000/auth/twitter/callback"},
function(token, tokenSecret,profile,done) {
findUser(profile.id, function(err,user) {
console.log(user);
if (err) return done(err);
if (user) return done(null, user);
createUser(profile, token, tokenSecret, function(err, user) {
return done(err,user);
});
})
})
);Though Twitter provides authentication, you’re still most likely
going to need a way to store information about the user. In the Twitter
strategy code block, notice that the callback function passed lists
several parameters: token, tokenSecret, profile, and then the
last callback function. Twitter provides the token and tokenSecret parameters
when it responds to the request for authentication. The token and tokenSecret values can
then be used to interact with the individual’s Twitter account—for
example, to republish recent tweets, tweet to her account, or discover
information about her lists and followers. The Twitter API exposes all
the information the user herself sees when she interacts with Twitter
directly.
The profile object, though, is the object we’re interested in here. It contains a wealth of information about the person: her Twitter screen name, full name, description, location, avatar image, number of followers, number of people followed, number of tweets, and so on. It’s this data that we’re going to mine in order to store some relevant information about the user in our local database. We’re not storing a password; OAuth doesn’t expose the individual’s authentication information. Rather, we’re just storing information we may want to use in our web applications to personalize the individual’s experience at our sites.
When the person first authenticates, the application does a lookup
on her Twitter identifier in the local database. If the identifier is
found, an object is returned with the information stored about the
person locally. If it’s not found, a new database record is created for
the person. Two functions are created for this process: findUser and createUser. The findUser function is also used when Passport
deserializes the user from the session:
passport.deserializeUser(function(id, done) {
findUser(id, function(err, user) {
done(err,user);
});
});There is no longer a login page, because Twitter provides the login form. In the application, the only login provided is a link to authenticate via Twitter:
extends layout
block content
h1= title
p
a(href='/auth/twitter') Login with TwitterIf the person isn’t logged into Twitter, she’s presented a login page like the one shown in Figure 15-3.
Once the user is logged in, the web page is then redirected to the application, which then displays the administrative page for the user. Now, however, the page is personalized with data drawn directly from Twitter, including the person’s display name and avatar:
extends layout
block content
h1 #{title} Administration
p Welcome to #{user.name}
p
img(src='#{user.img}',alt='avatar')This data is some of what’s stored when the person first authenticates. If you look into your Twitter account settings page and then click through to the Apps, you’ll see the application among those listed, as shown in Figure 15-4.
Example 15-5 has the complete application code for authenticating the user via Twitter and storing her data in a MySQL database. You can, of course, also store the data in MongoDB, or even Redis, if you persist your Redis data. The Crypto module is no longer needed, because we’re no longer storing passwords—a distinct advantage to authenticating via a third-party service.
var express = require('express')
, flash = require('connect-flash')
, passport = require('passport')
, TwitterStrategy = require('passport-twitter').Strategy
, http = require('http');
var mysql = require('mysql');
var TWITTER_CONSUMER_KEY = "yourkey";
var TWITTER_CONSUMER_SECRET = "yoursecret";
var client = mysql.createClient({
user : 'username',
password : 'password'
});
client.query('USE nodetest2');
function findUser(id, callback) {
var user;
client.query('SELECT * FROM twitteruser WHERE id = ?',
[id], function(err, result, fields) {
if (err) return callback(err);
user = result[0];
console.log(user);
return callback(null,user);
});
};
function createUser(profile, token, tokenSecret, callback) {
var qryString = 'INSERT INTO twitteruser ' +
'(id, name, screenname, location, description,' +
'url, img, token, tokensecret)' +
' values (?,?,?,?,?,?,?,?,?)';
client.query(qryString, [
profile.id,
profile.displayName,
profile.username,
profile._json.location,
profile._json.description,
profile._json.url,
profile._json.profile_image_url,
token,
tokenSecret], function(err, result) {
if (err) return callback(err);
var user = {
id : profile.id,
name : profile.displayName,
screenname : profile.screen_name,
location : profile._json.location,
description: profile._json.description,
url : profile._json.url,
img : profile._json.profile_image_url,
token : token,
tokensecret : tokenSecret};
console.log(user);
return callback(null,user);
});
};
function ensureAuthenticated(req, res, next) {
if (req.isAuthenticated()) { return next(); }
res.redirect('/auth/twitter')
}
passport.serializeUser(function(user, done) {
done(null, user.id);
});
passport.deserializeUser(function(id, done) {
findUser(id, function(err, user) {
done(err,user);
});
});
passport.use(new TwitterStrategy(
{ consumerKey: TWITTER_CONSUMER_KEY,
consumerSecret: TWITTER_CONSUMER_SECRET,
callbackURL: "http://examples.burningbird.net:3000/auth/twitter/callback"},
function(token, tokenSecret,profile,done) {
findUser(profile.id, function(err,user) {
console.log(user);
if (err) return done(err);
if (user) return done(null, user);
createUser(profile, token, tokenSecret, function(err, user) {
return done(err,user);
});
})
})
);
var app = express();
app.configure(function(){
app.set('views', __dirname + '/views');
app.set('view engine', 'jade');
app.use(express.favicon());
app.use(express.logger('dev'));
app.use(express.bodyParser());
app.use(express.methodOverride());
app.use(express.cookieParser('keyboard cat'));
app.use(express.session());
app.use(passport.initialize());
app.use(passport.session());
app.use(flash());
app.use(app.router);
app.use(express.static(__dirname + '/public'));
});
app.get('/', function(req, res){
res.render('index', { title: 'authenticate', user: req.user });
});
app.get('/admin', ensureAuthenticated, function(req, res){
res.render('admin', { title: 'authenticate', user: req.user });
});
app.get('/auth', function(req,res) {
res.render('auth', { title: 'authenticate' });
});
app.get('/auth/twitter',
passport.authenticate('twitter'),
function(req, res){
});
app.get('/auth/twitter/callback',
passport.authenticate('twitter', { failureRedirect: '/login' }),
function(req, res) {
res.redirect('/admin');
});
http.createServer(app).listen(3000);
console.log("Express server listening on port 3000");You can use the same steps you took with the Twitter Passport strategy with other OAuth services. As an example, you can use the exact same code to authenticate the user with Facebook that you used with the Twitter application. The only difference is that you have to supply a Facebook key and secret, rather than the one Twitter provides. Because of the similarity in code and processing, many applications today let you authenticate with a variety of OAuth services.
Passport does its best to reformat the data returned by the different services so that the functionality to process the profile has to change very little. However, you’ll need to investigate the profile returned by each service in order to determine what’s consistently provided before deciding what you do, and don’t, want to store.
Then there’s the issue of the user revoking application access in the service. Of course, the only time this impacts the web application is if the person decides to authenticate with the same application using another service—in which case, her new information is stored, and the application continues on its merry way. The only negative consequence is a now-defunct database record containing the previous authentication information for the person, and it wouldn’t be that much extra work to modify the application to generate an application-specific identifier for her, and update the record if she changes authentication servers. I’ll leave this for an off-book exercise. Now it’s time to look at another aspect of application security: cleaning form data.
As a JavaScript developer, you quickly learned about the
hazards of accepting input from the user and passing it directly to an
eval statement call. As a
web developer, you also learned about the hazards of taking text from
users and appending it directly as a where clause in a SQL statement.
Node applications have all the vulnerability of client-side JavaScript applications, as well as the additional vulnerabilities associated with server-side applications that use database systems, especially relational database systems.
To ensure that your applications are safe, you need to provide good authorization and authentication systems, as described in the last section. But you also need to protect your application against injection attacks and other attempts to use openings in your system to gain access to your important, and confidential, data.
Earlier, the login form accepted text directly from the user and
pasted it into a SQL query. This isn’t the wisest thing to do, because the
person could attach text that can cause harm in a SQL database. For
instance, if the text is forming the data in a WHERE clause, and is appended directly to a
WHERE clause string:
var whereString = "WHERE name = " + name;
and the name string contains the following:
'johnsmith; drop table users'
You could have a problem.
The same occurs when processing text or JSON from the user or source
in a JavaScript eval statement—the
incoming string could be more harmful than helpful.
Both types of vulnerabilities demand that we scrub input before using it in circumstances that can cause harm. Both also require that we make use of tools and techniques to ensure the safest possible applications.
One simple rule can make a difference in your JavaScript
applications, regardless of whether they’re Node or not: don’t use
eval. The eval function is the least restrictive, most
permissive component of JavaScript, and we should view its use with fear
and trepidation.
In most cases, we don’t need to use eval. The one instance where we might be
tempted to use it is when we’re converting a JSON string into an object.
However, a simple approach to protect against a JavaScript injection
attack when converting a string into an object is to use JSON.parse, rather than
eval, to process incoming JSON. An
eval statement isn’t discriminatory
about what’s included in the text, while JSON.parse validates that the JSON is
only JSON:
var someObj = JSON.parse(jsonString);
Since Node is using the V8 engine, we know that we have access to the JSON object, so we don’t have to worry about cross-browser workarounds.
A second simple rule for developing web applications is to minimize the opportunities for writing free text in a web form. Provide drop-down selections and checkboxes or radio buttons rather than open text fields. You’ll not only ensure safer data, but you’ll most likely ensure more consistent and reliable data, too.
Years ago, I was cleaning up a database table where all the data came from a form that the client (aeronautical engineers) used. All the inputs in the form were open text. One field required part identifiers, if this data was applicable. The “if applicable” part was the application’s downfall.
The engineers decided to use the field for “notes and whatever,” because the form didn’t have such a field designated. I ended up finding data ranging from part identifiers to a reminder from one engineer about a lunch reservation with a vendor. It was entertaining reading, but not particularly helpful to the company. And it was extremely difficult to clean, because part numbers from different vendors weren’t similar enough that we could use regular expressions to clean up the data.
This is an example of unintentional harm. An example of intentional harm was described in the last section, where a SQL statement to drop a database table was attached to the user’s login name.
If you must require free text from a user for fields, such as his username when he’s logging into a system, then you’re going to want to scrub the data before using it in a data update or query.
If you must support text input fields, scrub the data
before you use it. The node-mysql module provides a method, client.escape, that escapes the incoming text
and protects against potential SQL injection attacks. You can also
disable potentially destructive functionality. In Chapter 10’s discussion on
MongoDB, I mentioned how you can flag that a JavaScript function should
be serialized when stored.
You can also use a validation tool that not only ensures that incoming data is safe, but also that it’s consistent. One such validation tool that stands out is node-validator.
Install node-validator using npm:
npm install node-validator
The module exports two objects, check and sanitize:
var check = require('validator').check,
sanitize = require('validator').sanitize;You can check that the incoming data is of a format consistent with its use, such as checking to ensure that incoming text is an email:
try {
check(email).isEmail();
} catch (err) {
console.log(err.message); // Invalid email
}The node-validator application throws an error whenever the data
doesn’t check out. If you want a better error message, you can provide
it as an optional second parameter in the check method:
try {
check(email, "Please enter a proper email").isEmail();
} catch (err) {
console.log(err.message); // Please enter a proper email
}The sanitize filter ensures
that the string is sanitized according to whatever method you
use:
var newstr = sanitize(str).xss(); // prevent XSS attack
Example 15-6 uses both objects to check and sanitize three different strings.
var check = require('validator').check,
sanitize = require('validator').sanitize;
var email = 'shelleyp@burningbird.net';
var email2 = 'this is a test';
var str = '<SCRIPT SRC=http://ha.ckers.org/xss.js></SCRIPT>';
try {
check(email).isEmail();
check(email2).isEmail();
} catch (err) {
console.log(err.message);
}
var newstr = sanitize(str).xss();
console.log(newstr);The result of running this application is:
Invalid email [removed][removed]
There’s also Express middleware support for node-validator: express-validator. When you include this in your Express application:
var expressValidator = require('express-validator');
...
app.use(expressValidator);You can access the check, sanitize, and other
provided methods directly on the request object:
app.get('/somepage', function (req, rest) {
...
req.check('zip', 'Please enter zip code').isInt(6);
req.sanitize('newdata').xss();
...
});The vm Node module provides a way to safely sandbox JavaScript. It provides access to a new V8 virtual machine in which you can run JavaScript passed as a parameter.
There are a couple of approaches to using vm. The first is using
vm.createScript with the script passed
as a parameter to the method. The vm module compiles it and returns a
script object representing the script:
var vm = require('vm');
var script_obj = vm.createScript(js_text);You can then run the script in a separate context, passing in any data it might need as an optional object:
script_obj.runInNewContext(sandbox);
Example 15-7 has a small but complete example of using vm to compile a JavaScript statement, utilizing two sandbox object properties, and creating a third.
var vm = require('vm');
var util = require('util');
var obj = { name: 'Shelley', domain: 'burningbird.net'};
// compile script
var script_obj = vm.createScript("var str = 'My name is ' + name + ' at ' + domain",
'test.vm');
// run in new context
script_obj.runInNewContext(obj);
// inspect sandbox object
console.log(util.inspect(obj));Running the application returns the following output:
{ name: 'Shelley',
domain: 'burningbird.net',
str: 'My name is Shelley at burningbird.net' }The object passed to the new context is the point of connection
between the calling application and the sandboxed script. The script has
no other access to the parent context. If you tried to use a global
object, such as console, in your
sandboxed JavaScript, you’d get an error.
To demonstrate, Example 15-8 modifies the Example 15-7 to load a script in
from a file and run it. The script being loaded is nothing but a slight
variation of what we had in the preceding example, with the addition of a
console.log request:
var str = 'My name is ' + name + ' from ' + domain; console.log(str):
The vm.createScript can’t read in
the file directly. The second (optional) parameter isn’t an actual file,
but a name used as a label in a stack trace—it’s for debugging purposes
only. We’ll need to use the filesystem’s readFile to read in the
script file contents.
var vm = require('vm');
var util = require('util');
var fs = require('fs');
fs.readFile('suspicious.js', 'utf8', function(err, data) {
if (err) return console.log(err);
try {
console.log(data);
var obj = { name: 'Shelley', domain: 'burningbird.net'};
// compile script
var script_obj = vm.createScript(data, 'test.vm');
// run in new context
script_obj.runInNewContext(obj);
// inspect sandbox object
console.log(util.inspect(obj));
} catch(e) {
console.log(e);
}
});Running the application returns the following:
[SyntaxError: Unexpected token :]
The error occurs—and rightly so—because there is no console object within the virtual machine; it’s a V8 virtual machine, not a Node virtual machine. We’ve seen how we can implement any process with child processes in a Node application. We certainly don’t want to expose that kind of power to sandboxed code.
We can run the script within a V8 context, which means it has access
to the global object. Example 15-9 re-creates the
application from Example 15-8, except this time
the runInContext method is
used, with a context object passed to the method. The context object is
seeded with the object that has the parameters the script is expecting.
Printing out the inspection results on the object after the script
execution, though, shows that the newly defined property, str, is no longer present. We need to inspect
the context to see the object as it exists both in the current context and
the sandbox context.
var vm = require('vm');
var util = require('util');
var fs = require('fs');
fs.readFile('suspicious.js', 'utf8', function(err, data) {
if (err) return console.log(err);
try {
var obj = { name: 'Shelley', domain: 'burningbird.net' };
// compile script
var script_obj = vm.createScript(data, 'test.vm');
// create context
var ctx = vm.createContext(obj);
// run in new context
script_obj.runInContext(ctx);
// inspect object
console.log(util.inspect(obj));
// inspect context
console.log(util.inspect(ctx));
} catch(e) {
console.log(e);
}
});The examples used a precompiled script block, which is handy if you’re going to
run the script multiple times. If you want to run it just once, though,
you can access both the runInContext and
runInThisContext methods
directly off the virtual machine. The difference is that you have to pass
in the script as the first parameter:
var obj = { name: 'Shelley', domain: 'burningbird.net' };
// create context
var ctx = vm.createContext(obj);
// run in new context
vm.runInContext(data,ctx,'test.vm');
// inspect context
console.log(util.inspect(ctx));Again, within a supplied context, the sandbox script does have
access to a global object defined via createContext, seeded with any data the
sandboxed code needs. And any resulting data can be pulled from this
context after the script is run.
At some point in time, you’re going to want to take your Node application from development and testing to production. Depending on what your application does and what services it provides (or needs), the process can be simple, or it can be very complex.
I’m going to briefly touch on the possible combinations and issues related to production deployment of a Node application. Some require only minimal effort on your part, such as installing Forever to ensure that your Node application runs, well, forever. Others, though, such as deploying your application to a cloud server, can take considerable time and advance planning.
Taking your application from development to production isn’t overly complicated, but you do need to prepare for the move, and make sure that your application is staged in such a way as to maximize its performance and minimize any potential downtimes.
Deploying a Node application has several prerequisites:
Your application must be well tested by users as well as developers.
You need to be able to deploy your application safely, and ensure well-coordinated changes and fixes.
Your application must be secure.
You need to ensure that your application restarts if some event causes a failure.
You may need to integrate your Node applications with other servers, such as Apache.
You must monitor your application’s performance, and be ready to adjust application parameters if the performance begins to degrade.
You need to take the fullest advantage of your server’s resources.
Chapter 14 covered unit, acceptance, and performance testing, and Chapter 15 covered security. Here, we’ll look at implementing the other necessary components of deploying a Node application to production on your own server.
Each Node module has a package.json file that contains information about the module, as well as code dependencies the module might have. I briefly touched on the package.json file with the discussion of modules in Chapter 4. Now I want to take a closer look at this file, especially as you can use it to deploy your application.
As its name implies, package.json must be proper JSON. You can
jump-start the package.json process
by running npm init and answering the
questions. When I ran npm init in
Chapter 4, I didn’t provide any
dependencies, but most Node applications will have them.
As a case in point, the widget application we built over several chapters in the book is an example of an application, albeit a small one, that we might consider deploying. What would its package.json look like?
I’m not covering all the possible data values in package.json, only those meaningful for a Node application.
To start, we need to provide the application’s basic information, including its name, version, and primary author:
{
"name": "WidgetFactory",
"preferGlobal": "false",
"version": "1.0.0",
"author": "Shelley Powers <shelley.just@gmail.com> (http://burningbird.net)",
"description": "World's best Widget Factory",Note that the name property
value cannot have any whitespace.
The author values could also be split out, as follows:
"author": { "name": "Shelley Powers",
"email": "shelley.just@gmail.com",
"url": "http://burningbird.net"},though it is simpler to use the single value format.
If there are other contributors to the application, you can list
them out in an array with the contributors keyword, with each person
identified in the same manner as the author.
If the Widget Factory had a binary application, you could list it
with the bin property. An example of
the use of bin is in the Nodeload
(covered in Chapter 14)
package.json:
"bin": {
"nodeload.js": "./nodeload.js",
"nl.js": "./nl.js"
},What this setting tells me is that when the module is installed
globally, I can run the Nodeload application just by typing nl.js.
The widget application doesn’t have a command-line tool. It also
doesn’t have any scripts. The scripts
keyword identifies any scripts that are run during the package life
cycle. There are several events that can happen during the life cycle,
including preinstall, install, publish, start, test, update, and so on, and
scripts can be run with each.
If you issue the following npm command in a Node application or module directory:
npm test
the script test.js is run:
"scripts": {
"test": "node ./test.js"
},You should include any unit test script for the widget application
in scripts, in addition to any other
script necessary for installation (such as scripts to set up the
environment for the application). Though the Widget Factory doesn’t have
a start script yet, your application should, especially if it is going
to be hosted in a cloud service (discussed later in the chapter).
If you don’t provide a script for some values, npm provides defaults. For the start script, the default is to run the application with Node:
node server.js
if the application has a server.js file in the root of the package.
The repository property
provides information about the tool used to manage the source code
control for the application, and the url property provides the location of the
source, if it is published online:
"repository": {
"type": "git",
"url": "https://github.com/yourname/yourapp.git"
},The repository property isn’t
essential unless you’re publishing your application source (though you
can restrict source access to a specific group of people). One of the
advantages of providing this information is that users can access your
documentation with npm docs:
npm docs packagenameOn my Ubuntu system, I first set the browser configuration option to Lynx:
npm config set browser lynx
Then I opened the docs for Passport, the authentication module covered in Chapter 15:
npm docs passport
The repository setting helps
npm find the documentation.
One of the more important designations in the package.json file is what version of Node
your application can run in. You specify this with the engine property. In the case of the Widget
Factory, it’s been tested in stable release 0.6.x and 0.8.2, which means
it should work with future versions of 0.8, too. Being ever hopeful, I
set the engine option to:
"engines": {
"node": ">= 0.6.0 < 0.9.0"
},The widget application has several different dependencies, for
both production and development environments. These are listed
individually—the former in devDependencies, the latter in dependencies. Each module dependency is listed
as the property, and the version needed as the value:
"dependencies": {
"express": "3.0",
"jade": "*",
"stylus": "*",
"redis": "*",
"mongoose": "*"
},
"devDependencies": {
"nodeunit": "*"
}If there are any operating system or CPU dependencies, we can also list these:
"cpu" : ["x64", "ia32"], "os": ["darwin","linux"]
There are some publishing values, including private, to ensure that the application isn’t
accidentally published:
"private": true,
And publishConfig is used for
setting npm configuration values.
By the time we’re done, the Widget Factory package.json file looks like Example 16-1.
{
"name": "WidgetFactory",
"version": "1.0.0",
"author": "Shelley Powers <shelley.just@gmail.com> (http://burningbird.net)",
"description": "World's best Widget Factory",
"engines": {
"node": ">= 0.6.0"
},
"dependencies": {
"express": "3.0",
"jade": "*",
"stylus": "*",
"redis": "*",
"mongoose": "*"
},
"devDependencies": {
"nodeunit": "*"
},
"private": true
}We can test the package.json
file by copying the Widget Factory’s code to a new location and then
typing npm install -d to see if all the dependencies are
installed and the application
runs.
You do the best you can with your application. You test it thoroughly, and you add error handling so that errors are managed gracefully. Still, there can be gotchas that come along—things you didn’t plan for that can take your application down. If this happens, you need to have a way to ensure that your application can start again, even if you’re not around to restart it.
Forever is just such a tool—it ensures that your application restarts if it crashes. It’s also a way of starting your application as a daemon that persists beyond the current terminal session. Forever can be used from the command line or incorporated as part of the application. If you use it from the command line, you’ll want to install it globally:
npm install forever -g
Rather than start an application with Node directly, start it with Forever:
forever start -a -l forever.log -o out.log -e err.log httpserver.js
The preceding command starts a script, httpserver.js, and specifies the names for the Forever log, the output log, and the error log. It also instructs the application to append the log entries if the logfiles already exist.
If something happens to the script to cause it to crash, Forever restarts it. Forever also ensures that a Node application continues running, even if you terminate the terminal window used to start the application.
Forever has both options and actions. The start value in the command line just shown is
an example of an action. All available actions are:
startStarts a script
stopStops a script
stopallStops all scripts
restartRestarts the script
restartallRestarts all running Forever scripts
cleanlogsDeletes all log entries
logsLists all logfiles for all Forever processes
listLists all running scripts
configLists user configurations
set
<key>
<val>Sets configuration key value
clear
<key>Clears configuration key value
logs
<script|index>Tails the logs for <script|index>
columns add
<col>Adds a column to the Forever list output
columns rm
<col>Removes a column from the Forever list output
columns set
<cols>Sets all columns for the Forever list output
An example of the list output
is the following, after httpserver.js is started as a Forever
daemon:
info: Forever processes running data: uid command script forever pid logfile uptime data: [0] ZRYB node httpserver.js 2854 2855 /home/examples/.forever/forever.log 0:0:9:38.72
There are also a significant number of options, including the
logfile settings just demonstrated, as well as running the script
(-s or --silent), turning on Forever’s verbosity (-v or --verbose), setting the script’s source
directory (--sourceDir), and others,
all of which you can find just by typing:
forever --help
You can incorporate the use of Forever directly in your code, as demonstrated in the documentation for the application:
var forever = require('forever');
var child = new (forever.Monitor)('your-filename.js', {
max: 3,
silent: true,
options: []
});
child.on('exit', this.callback);
child.start();Additionally, you can use Forever with Nodemon (introduced in
Chapter 14), not only to
restart the application if it unexpectedly fails, but also to ensure
that the application is refreshed if the source is updated. You simply
wrap Nodemon within Forever and specify the --exitcrash option to
ensure that if the application crashes, Nodemon exits cleanly, passing
control to Forever:
forever nodemon --exitcrash httpserver.js
If the application does crash, Forever starts Nodemon, which in turn starts the Node script, ensuring that not only is the running script refreshed if the source is changed, but also that an unexpected failure doesn’t take your application permanently offline.
If you want your application to start when your system is
rebooted, you need to set it up as a daemon. Among the examples provided
for Forever is one labeled initd-example. This example is the basis of a
script that starts your application with Forever when the system is
rebooted. You’ll need to modify the script to suit your environment and
also move it to /etc/init.d, but
once you’ve done so, even if the system is restarted, your application
restarts without your intervention.
All the examples in this book start as a port other than 80, the default web service port. Some start at port 3000, others at port 8124. In my system, I have to use another port because Apache processes web requests on port 80. People are not going to want to have to specify a port, though, when they access a website. What we need is a way for Node applications to coexist with another web service, be it Apache, Nginx, or another web server.
If the system is running Apache, and you aren’t able to change the Apache port, you can use an .htaccess file to rewrite the web requests for Node, redirecting the applications to the proper port without the user being aware of the redirection:
<IfModule mod_rewrite.c>
RewriteEngine on
# Redirect a whole subdirectory:
RewriteRule ^node/(.+) http://examples.burningbird.net:8124/$1 [P]
</IfModule>If you have the proper permissions, you can also create a subdomain specifically for your Node application and have Apache proxy all requests to the Node application. This is an approach used in other environments of this type, such as running Apache and Tomcat together:
<VirtualHost someipaddress:80>
ServerAdmin admin@server.com
ServerName examples.burningbird.net
ServerAlias www.examples.burningbird.net
ProxyRequests off
<Proxy *>
Order deny,allow
Allow from all
</Proxy>
<Location />
ProxyPass http://localhost:8124/
ProxyPassReverse http://localhost:8124/
</Location>
</VirtualHost>These will work, and the performance should be more than acceptable if you don’t expect your Node application to be accessed frequently. The problem with both approaches, though, is that all requests are channeled through Apache, which spins off a process to handle each. The whole point of Node is to avoid this costly overhead. If you expect your Node application to get heavy use, another approach—but one that’s dependent on your having root control of your system—is to modify the Apache ports.conf file and change which port Apache listens to, from:
Listen 80
to whatever your preferred port is, such as 78:
Listen 78
Then use a Node proxy, like http-proxy, to listen for and proxy requests to the appropriate port. As an example, if Apache is to handle all requests to subdirectory public, and Node handles all requests to node, you could create a standalone proxy server that takes incoming requests and routes them accordingly:
var httpProxy = require('http-proxy');
var options = {
router: {
'burningbird.net/public_html' : '127.0.0.1:78',
'burningbird.net/node' : '127.0.0.1:3000'
}
};
var proxyServer = httpProxy.createServer(options);
proxyServer.listen(80);The user never sees any of the port magic that is happening behind the scenes. The http-proxy module also works with WebSocket requests, as well as HTTPS.
Why continue to use Apache? Because applications such as Drupal and others use .htaccess files to control access to their contents. In addition, several subdomains at my site use .htpasswd to password-protect the contents. These are all examples of Apache constructs that have no equivalence in Node server applications.
We have a long-established history with Apache. Tossing it aside in favor of Node applications is more complicated than just creating a static server using Express.
There are additional steps you can take to boost the performance of your Node application, depending on your system’s resources. Most are not trivial, and all are beyond the scope of this book.
If your system is multicore, and you’re willing to use experimental technology, you can use Node clustering. The Node.js documentation contains an example of clustering, whereby each process is spawned on a different CPU, though all are listening for incoming requests on the same port.
In some future version of Node, we’ll be able to automatically
take advantage of a multicore environment just by passing a parameter of
--balance when starting
the application.
You can also take advantage of a distributed computing architecture, utilizing a module such as hook.io.
There are tricks and techniques to improve your Node application’s performance. Most will take a considerable amount of work. Instead, you can host your application on a cloud service and take advantage of whatever performance improvements the host provides. We’ll go over that option next.
An increasingly popular choice for running an application is deploying the application to a cloud service rather than hosting it on your own servers. The reasons for doing so are many and include:
Enhanced security (it’s like having your own personal security team)
24-hour monitoring (so you can go to bed)
Immediate scalability (if your application suddenly peaks in popularity, your server doesn’t crash)
Cost (it frequently can be cheaper to host in a cloud service rather than your own server)
Deployment tools (clouds provide tools that can simplify Node app deployment)
Being cool (the only reason on this list not to deploy your Node application to a cloud service)
Of course, there are disadvantages, too. One is the necessary limitations on what you can do with your application. For instance, if your application wants to use a tool like ImageMagick, most clouds won’t have this installed or allow you to install it. In addition, if your application is based in Node 6.x (or 8.x, or whatever), the cloud service may only be set up for another version (such as 4.x).
It can also be cumbersome to set up your application on a cloud. Some cloud services provide tools so that deployment basically consists of typing in a location and pushing a button. Others, though, can require a great deal of preparation—preparation, I should add, that may or may not be well documented.
In this last section, I’m going to briefly introduce some of the more commonly used cloud services that provide hosting for Node applications, and touch on any aspect that makes one unique from the others.
If your environment is Windows-based, and you’ve used Windows functionality previously (such as developing applications with .NET), then you’re definitely going to want to explore hosting a Node application in Windows Azure. To make it simpler to post Node applications to Azure, you can use the Cloud9 IDE (integrated development environment) in order to post a project.
Cloud9 is a web-based IDE that can, among other things, interface with your GitHub account. When you open the application, you’re presented with the project management interface, as shown in Figure 16-1.
From the project management page, clicking on a project opens it into a separate page, where you can select any of the project files for editing, as shown in Figure 16-2. You can clone an existing project in GitHub directly from the IDE.
You can add and edit files, and then run the application directly in the IDE. Cloud9 also supports debugging.
The Cloud9 IDE is free to start working with an application, but you’ll need to sign up for premium service if you want to deploy. It supports a variety of languages, though it’s primarily focused on HTML and Node applications. It also supports multiple repositories, including GitHub, Bitbucket, Mercurial repositories, Git repositories, and FTP servers.
The Cloud9 IDE interface simplifies moving an application to Azure (and other services—more on this a little later). If you have an Azure account, moving a Node application to Azure is as simple as clicking the Deploy button and providing information in the dialogs that open. Be forewarned: you should be familiar with Azure first. There is a 90-day free trial to try out the service before committing.
How much Azure costs is dependent on the number of compute instances, the size of the SQL Server database instance, the blob storage amount, and bandwidth. The service also provides a decent set of documents to get you started, including a nice tutorial on creating an Express application on Azure.
I mentioned a few paragraphs back that Cloud9 IDE can deploy to multiple clouds. It supports three at this time:
Windows Azure
Heroku
Joyent
I’ll introduce you to the Joyent Development SmartMachine and Heroku next.
Joyent SmartMachines are virtual machines, running either Linux or Windows, that come prebuilt and optimized for running a Node application. The folks at Joyent also provide a Node.js Development SmartMachine that lets Node developers host an application in a cloud service without any charge. If you’re ready to go to production, then you can upgrade to the production environment.
Joyent provides a detailed how-to on getting started with a Node.js Development SmartMachine. It includes the following steps:
Create a Joyent cloud account.
Create an SSH (secure shell) key if you don’t already have one.
Update the ~/.ssh/config file to reflect the unique port number for your machine.
Deploy the application to the SmartMachine with Git.
Ensure that the application has a package.json file, and identify a start script.
Again, the Node.js Development SmartMachine is for development purposes only.
So, what does the Joyent Development SmartMachine provide? Well, for a start, no upfront cost. This is actually a smart move—it gives developers a chance to try cloud hosting without significant cost.
Joyent also provides for simplified Git deployment to multiple machines at the same time, as well as npm support to manage application dependencies.
I like cloud services where you don’t have to pay anything in order to try them out, and a Heroku account is both free and instant. If you decide to use the service for your production system, it’s configurable, just like Azure. The cloud server also has very good documentation, and tools you can install in your development environment to simplify deploying the application to Heroku (if you’re not using Cloud9 IDE).
The cloud service comes with prepackaged add-ons you can add to your account, including support for one of my favorite data stores, Redis. The concept of the add-on in Heroku is very well managed, and many of the add-ons are also free while you’re trying them out.
The Heroku documentation, as mentioned, is some of the best among
the cloud servers, and the development tools really simplify deployment.
You create the application, write the package.json file listing out dependencies,
declare a process type via a simple Procfile (which usually has
something like web: node app.js), and
then start the application with one of the tools supplied as part of the
Heroku toolkit.
To deploy, commit the application to Git, and then deploy the application using Git. Simple.
Amazon Elastic Compute Cloud, or EC2, has some history behind it now, which makes it an attractive option. It also doesn’t impose a lot of requirements on the Node developer looking to host an application in this cloud service.
Setting up on Amazon EC2 is little different than setting up on a more traditional VPN (virtual private network). You specify your preferred operating system, update it with the necessary software to run Node, deploy the application using Git, and then use a tool like Forever to ensure that the application persists.
The Amazon EC2 service has a website that can make it simple to set up the instance. It doesn’t provide a free service like Joyent does, but the charges are reasonable—about 0.02 an hour while you’re trying out the service.
If your application is using MongoDB, the MongoDB website provides very detailed Amazon EC2 setup instructions.
Nodejitsu is currently in beta, and is offering beta accounts. Like many of the other excellent cloud services, it lets you try out the service for free.
Like Heroku, Nodejitsu provides a tool, jitsu, to simplify the deployment process. You install it using npm. Log into Nodejitsu with jitsu, and deploy simply by typing:
jitsu deploy
The tool gets what it needs from the package.json file and asks a couple of minor questions, and then you’re good to go.
Nodejitsu also provides its own web-based IDE, though I haven’t had a chance to try it out. It does seem to be much simpler than Cloud9 IDE.
Git is a version control system, similar to CVS (Concurrent Versioning System) or Subversion. Where Git differs from the other, more conventional version control systems is how it maintains the source as you make modifications. A version control system like CVS stores version changes as differences from a base file. Git, on the other hand, stores snapshots of the code at a specific point in time. If a file isn’t changed, Git just links to the previous snapshot.
To begin using Git, you first need to install it on your system. There are binaries for Windows and Mac OS X, as well as source code for various flavors of Unix. Installing it on my Linux (Ubuntu 10.04) server required only one command:
sudo apt-get install git
All dependencies are automatically downloaded and installed.
The commands from this point on assume you’re using a Unix-based terminal to enter them. There is a graphical interface for Git on Windows. You’ll need to follow the documentation that comes with the interface to set up your system, but the general procedures are the same in all environments.
Once Git is installed, it needs to be configured. You’ll need to provide a Git username (typically, your first and last name) and an email address. These form the two components of the commit author, used to mark your edits:
git config --global user.name "your name" git config --global user.email "your email"
Since you’re going to be working with GitHub, the hosting service that houses most (if not all) Node modules, you’re also going to need to set up a GitHub account. You can use whatever GitHub username you want—it doesn’t have to match the username you just specified. You’ll also need to generate an SSH (secure shell) key to provide GitHub, following the documentation outlined in the GitHub help documentation.
Most Git tutorials start you out by creating a simple repository (or repo to use common terminology) of your own work. Since we’re interested mainly in Git with Node, we’ll start out by cloning an existing repository rather than creating our own. Before you can clone the source, though, you must first fork (obtain a working snapshot) the repository at the GitHub website by clicking the Fork button located on the upper-right side of the repository’s main GitHub web page, as shown in Figure A-1.
Then you can access the forked repository in your profile. You’ll also
access the Git URL in the newly forked
repository web page. For instance, when I forked the node-canvas module (covered in Chapter 12), the URL was
git@github.com:shelleyp/node-canvas.git. The command to clone
the forked repository is git clone
URL:
git clone git@github.com:shelleyp/node-canvas.git
You can also clone over HTTP, though the GitHub folks don’t recommend it. However, it is a good approach to use if you want a read-only copy of the repository source because you want examples and other material that may not be included when you install the module with npm (or if you want to access a copy of the module in work that hasn’t yet been pushed out to npm).
Access the HTTP read-only URL from each repository’s web page, such as the following for node-canvas:
git clone https://github.com/username/node-whatever.git
You can also install a module by specifying a Git URL:
npm install git://github.com/username/node-whatever.git
Now you have a copy of the node-canvas repository (or whatever
repository you want to access). You can make changes in any of the source
files if you wish. You add new or changed files by issuing the command
git add, and then commit those changes by
issuing git commit (using the –m flag to provide a brief comment about the
change made):
git addsomefile.js git commit -m 'note about what this change is'
If you want to see if the file is staged and ready to commit, you can
type the git status command:
git status
If you want to submit the changes to be included back as part of the original repository, you’ll issue a pull request. To do so, open the forked repository on which you want to issue the request in your browser, and look for the button labeled Pull Request, as shown in Figure A-2.
Clicking the Pull Request link opens up a Pull Request preview pane, where you can enter your name and a description of the change, as well as preview exactly what’s going to be committed. You can change the commit range and destination repository at this time.
Once satisfied, send the request. This puts the item in the Pull Request queue for the repository owner to merge. The repository owner can review the change; have a discussion about the change; and, if he decides to merge the request, do a fetch and merge of the change, a patch and apply, or an automerge.
GitHub has documentation on how to merge in changes, as well as other aspects of using Git with the hosting site.
If you create your own Node module and want to share it with others, you’ll want to create a repository. You can do this through GitHub, too, by clicking the New Repository button from your main GitHub web page and providing information about the module, including whether it is private or public.
Initialize an empty repository using the git
init command:
mkdir ~/mybeautiful-module cd ~/mybeautiful-module git init
Provide a README for the repository, using your favorite text editor. This is the file that is displayed when a user clicks Read More in a module page at GitHub. Once the file is created, add it and commit it:
git add README git commit -m 'readme commit'
To connect your repository to GitHub, you’ll need to establish a remote repository for the module and push the commits to it:
git remote add origin git@github.com:username/MyBeautiful-Module.git
git push -u origin masterOnce you’ve pushed your new module to GitHub, you can begin the fun of promoting it by ensuring that it gets listed in the Node module listings as well as the npm registry.
This is a quick run-through of the documentation that you can find at the GitHub website, under the Help link.
A link in an index entry is displayed as the section title in which that entry appears. Because some sections have multiple index markers, it is not unusual for an entry to have several links to the same section. Clicking on any link will take you directly to the place in the text in which the marker appears.
Shelley Powers has been working with, and writing about, web technologies--from the first release of JavaScript to the latest graphics and design tools--for more than 12 years. Her recent O'Reilly books have covered the semantic web, Ajax, JavaScript, and web graphics. She's an avid amateur photographer and web development aficionado, who enjoys applying her latest experiments on her many web sites.
The animal on the cover of Learning Node is a hamster rat (Beamys). There are two species of hamster rats: the greater hamster rat (Beamys major) and the lesser hamster rat (Beamys hindei).
The hamster rat inhabits the African forests from Kenya to Tanzania. This large rodent prefers to make its home in moist environments: along riverbanks and in thickly-forested areas. It thrives in coastal or mountainous regions, although deforestation threatens its natural habitat. Hamster rats live in multichambered burrows and are excellent climbers.
This rodent has a very distinct appearance: it can be 7 to 12 inches long and weigh up to a third of a pound. It has a short head and gray fur overall, with a white belly and a mottled black and white tail. The hamster rat, like other rodents, has a variable diet; it possesses cheek pouches for food storage.
The cover image is from Shaw’s Zoology. The cover font is Adobe ITC Garamond. The text font is Linotype Birka; the heading font is Adobe Myriad Condensed; and the code font is LucasFont’s TheSansMonoCondensed.
| Revision History | |
| 2012-08-24 | First release |
Copyright © 2012 Shelley Powers
O’Reilly books may be purchased for educational, business, or sales promotional use. Online editions are also available for most titles (http://my.safaribooksonline.com). For more information, contact our corporate/institutional sales department: 800-998-9938 or corporate@oreilly.com.
Nutshell Handbook, the Nutshell Handbook logo, and the O’Reilly logo are registered trademarks of O’Reilly Media, Inc. Learning Node, the image of a hamster rat, and related trade dress are trademarks of O’Reilly Media, Inc.
Many of the designations used by manufacturers and sellers to distinguish their products are claimed as trademarks. Where those designations appear in this book, and O’Reilly Media, Inc., was aware of a trademark claim, the designations have been printed in caps or initial caps.
1005 Gravenstein Highway North
Sebastopol, CA 95472