Table of Contents for
Apache Cookbook, 2nd Edition
 Apache Cookbook, 2nd Edition
Published by
O'Reilly Media, Inc., 2007
Apache Cookbook, 2nd Edition
Published by
O'Reilly Media, Inc., 2007
- Cover
- Apache Cookbook
- Apache Cookbook
- Preface
- 1. Installation
- 2. Adding Common Modules
- 3. Logging
- 4. Virtual Hosts
- 5. Aliases, Redirecting, and Rewriting
- 6. Security
- 7. SSL
- 8. Dynamic Content
- 9. Error Handling
- 10. Proxies
- 11. Performance
- 12. Directory Listings
- 13. Miscellaneous Topics
- A. Using Regular Expressions in Apache
- B. Troubleshooting
- Index
- About the Authors
- Colophon
- Copyright
Chapter 8. Dynamic Content
Very few Web sites can survive without some mechanism for providing dynamic content—content that is generated in response to the needs of the user. The recipes in this chapter guide you through enabling various mechanisms to produce this dynamic content and help you troubleshoot possible problems that may occur.
CGI programs are one of the simplest ways to provide dynamic content for your Web site. They tend to be easy to write because you can write them in any language. Thus, you don’t have to learn a new language to write CGI programs. Examples in this chapter will be given in a variety of languages, but it’s not necessary that you know these languages in order to see how to configure Apache for their execution.
Although CGI is no longer the preferred mechanism for generating dynamic content, it is the simplest, and understanding how CGI works is a great help in understanding how the more complex dynamic content providers work.
Other dynamic content providers, such as PHP and mod_perl, also enjoy a great deal of popularity, because they provide many of the same functions as CGI programs but typically execute faster.
8.1. Enabling a CGI Directory
Problem
You want to designate a directory that contains only CGI scripts.
Discussion
A CGI directory will usually be designated and enabled in your default configuration file when you install Apache. However, if you want to add additional directories where CGI programs are located, the ScriptAlias directive does this for you. You may have as many ScriptAlias’ed directories as you want.
The one line previously introduced is equivalent to these directive lines:
Alias /cgi-bin/ /www/cgi-bin/

<Location /cgi-bin/>
    Options ExecCGI
    SetHandler cgi-script
</Location>
Warning
Note that URLs that map to the directory in question via some
other mechanism or URL path, such as another Alias or a RewriteRule, will not benefit from the
ScriptAlias setting, as this
mapping is by URL (<Location>), not by directory. As a
result, accessing the scripts in this directory through some other
URL path may result in their code being displayed rather than the
script being executed.
You also may need to add a <Directory> block to permit access to the directory in question, as a cgi-bin directory is usually outside of the document directory tree. It is also recommended that you deny the use of .htaccess files in cgi-bin directories:
<Directory /www/cgi-bin>
    Order allow,deny
    Allow from all
    AllowOverride None
</Directory>
Tip
See also Recipe 8.4 for a discussion of using Windows file extensions to launch CGI programs.
Problem
You want to put a CGI program in a directory that contains non-CGI documents.
Solution
Use AddHandler to map the CGI handler to the particular files that you want executed:
<Directory "/foo">
    Options +ExecCGI
    AddHandler cgi-script .cgi .py .pl
</Directory>
Discussion
Enabling CGI execution via the ScriptAlias directive is preferred for a number of reasons over permitting CGI execution in arbitrary document directories. The primary reason is security auditing. It is much easier to audit your CGI programs if you know where they are, and storing them in a single directory ensures that.
However, there are cases in which it is desirable to have access to CGI functionality in other locations. For example, you may want to keep several files together in one directory—some of them static documents, and some of them scripts—because they are part of a single application.
Using the AddHandler directive maps certain file extensions to the cgi-script handler so they can be executed as CGI programs. In the case of the aforementioned example, programs with a .cgi, .py, or .pl file extension will be treated as CGI programs, whereas all other documents in the directory will be served up with their usual MIME type.
Note that the +ExecCGI
argument is provided to the Options
directive, rather than the ExecCGI
argument—that is, with the + sign
rather than without. Using the +
sign adds this option to any others already in place, whereas using
the option without the + sign will
replace the existing list of options. You should use the argument
without the + sign if you intend to
have only CGI programs in the directory, and with the + sign if you intend to also serve non-CGI
documents out of the same directory.
See Also
Problem
You want to allow a default file to be served when a CGI directory is requested.
Solution
Rather than using ScriptAlias to enable a CGI directory, use the following:
Alias /cgi-bin /www/cgi-bin
<Directory /www/cgi-bin>
    Options ExecCGI
    SetHandler cgi-script
    DirectoryIndex index.pl

    Order allow,deny
    Allow from all
    AllowOverride none
</Directory>
Discussion
Using ScriptAlias explicitly
forbids the use of DirectoryIndex
to provide a default document for a directory. Because of this, if you
attempt to get a default document from a ScriptAlias’ed directory, you’ll see the
following error message in your error log file: "attempt to invoke directory as
script“.
And, in their browsers, users will see the message: Forbidden. You don't have permission to access
/cgi-bin/ on this server.
So, in order to get a default document, you must avoid ScriptAlias and use the alternate method of creating a CGI-enabled directory, as discussed in Recipe 8.2.
Once you have created a CGI directory without using ScriptAlias, you may use a DirectoryIndex directive to display a default document when the directory is requested.
An alternate method is possible if you wish, for some reason, to use ScriptAlias rather than this technique. You may use either a RedirectMatch directive, or a RewriteRule directive, to redirect the request for the CGI directory to the filename desired:
ScriptAlias /cgi-bin /www/cgi-bin
RedirectMatch "^/cgi-bin/?$" "http://server.example.com/cgi-bin/index.pl"
Or:
ScriptAlias /cgi-bin /www/cgi-bin
RewriteEngine On
RewriteRule "^/cgi-bin/?$" "/cgi-bin/index.pl" [PT]
The two examples above should go in your main server configuration file. Ordinarily, .htaccess files are not enabled in ScriptAlias directories. However, if you do have .htaccess files enabled in your ScriptAlias directory, and wish to use the RewriteRule technique in one, remember that the directory path is stripped from the requested URI before the RewriteRule is applied, so your rule set should look more like:
RewriteEngine On
RewriteBase /cgi-bin/
RewriteRule "^$" "index.pl" [R]
See Also
Problem
You want to have CGI programs on Windows executed by the program
associated with the file extension. For example, you want .pl scripts to be executed by perl.exe without having to change the
scripts’ #!
line to point at the right location of perl.exe.
Discussion
Because Apache has its roots in the Unixish world, there are a number of things that are done the Unixish way, even on Microsoft Windows. CGI execution is one of these things, but the ScriptInterpreterSource directive allows you to have Apache behave more in the way to which Windows users are accustomed.
Usually, on Windows, a file type is indicated by the file extension. For example, a file named example.pl is associated with the Perl executable; when a user clicks on this file in the file explorer, Perl is invoked to execute this script. This association is created when you install a particular program, such as Perl or MS Word, and the association is stored in the Windows registry.
On Unixish systems, by contrast, most scripts contain the
location of their interpreter in the first line of the file, which
starts with the characters #!. This
line is often called the shebang line (short for
sharp bang, which are the shorthand names for the two
characters).
For example, a Perl program might start with the line:
#!/usr/bin/perl
The shell running the script looks in this first line and uses
the program at the indicated path to interpret and execute the script.
In this way, files with arbitrary file extensions (or no extension at
all) may be invoked with any interpreter desired. In the case of Perl,
for example, one might have several versions of Perl installed, and
the particular version desired may be invoked by using the appropriate
#! line.
However, you may be accustomed to Windows’ usual way of executing a program based on the file extension, and this Unixism can be somewhat nonintuitive. Thus, in the early days of Apache on Windows, the ScriptInterpreterSource directive was added to make Apache behave the way that Windows users expected.
ScriptInterpreterSource may have one of three values. When set to the default value, script, Apache will look in the script itself for the location of the interpreter that it is to use.
When it is set to registry, it will look in the Windows registry for the mapping that is associated with the file’s extension and use this to execute the script.
Setting the value to registry-strict will have the same effect as
registry except that only the
subkey Shell\ExecCGI\Command will
be searched. This requires that the setting be manually configured,
and prevents unintentional command execution.
This feature can be very useful for users who are running multiple servers, some on Unixish operating systems and others on Windows, but who want the same CGI programs to run both places. Because Perl, for example, is unlikely to be located at /usr/bin/perl on your Windows machine, using the ScriptInterpreterSource directive allows you to run the script unedited on Windows, simply by virtue of it having a .pl file extension.
Problem
You want Apache to know that all files with a particular extension should be treated as CGI scripts.
Solution
Add the following to your httpd.conf file in a scope covering the areas where it should apply, or in an .htaccess file for the appropriate directory:
AddHandler cgi-script .cgiDiscussion
The AddHandler directive shown in this solution tells Apache that any files that have a .cgi extension should be treated as CGI scripts, and it should try to execute them rather than treat them as content to be sent.
The directive only affects files with that extension in the same scope as the directive itself. You may replace the common .cgi extension with another, or even with a list of space-separated extensions.
Note the use of the term extension rather than suffix; a file named foo.cgi.en is treated as a CGI script unless a handler with the .en extension overrides it.
An alternate way of accomplishing this will cause files with a particular extension to be execute as CGI programs regardless of where they appear in the file system:
<FilesMatch \.cgi(\.|$)>
    Options +ExecCGI
    SetHandler cgi-script
</FilesMatch>
The FilesMatch directive
allows directives to be applied to any file that matches a particular
pattern. In this case, a file with a file extension of .cgi. As mentioned above, a file may have
several file extensions. Thus, rather than using a pattern of
\.cgi$, which would require that
the filename ended with .cgi, we
use \.cgi(\.|$). The
(\.|$) regular expression syntax requires
that .cgi be followed either by
another ., or the end of the
string.
See Also
Problem
You want to test that you have CGI enabled correctly. Alternatively, you are receiving an error message when you try to run your CGI script and you want to ensure the problem doesn’t lie in the Web server before you try to find a problem in the script.
Solution
#! /usr/bin/perl
print "Content-type: text/plain\n\n";
print "It's working.\n";
And then, if things are still not working, look in the error log.
Discussion
Because Perl is likely to be installed on any Unixish system, this CGI program should be a pretty safe way to test that CGI is configured correctly. In the event that you do not have Perl installed, an equivalent shell program may be substituted:
#! /bin/sh
echo Content-type: text/plain
echo
echo It\'s working.
And if you are running Apache on Windows, so that neither of the above options works for you, you could also try this with a batch file:
echo off
echo Content-type: text/plain
echo.
echo It's working.
Make sure that you copy the program code exactly, with all the right punctuation, slashes, and so on, so that you don’t introduce additional complexity by having to troubleshoot the program itself.
In either case, once the program is working, you should see something like the screen capture shown in Figure 8-1.
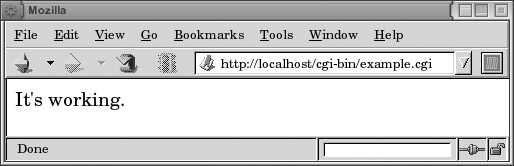
The idea here is to start with the simplest possible CGI program to ensure that problems are not caused by other complexities in your code. We want to ensure that CGI is configured properly, not to verify the correctness of a particular CGI program.
There are a variety of reasons why a particular CGI program might not work. In very general terms, it can be in one of three categories: misconfiguration of the Web server; an error in the program itself; or incorrect permissions on the files and directories in question.
Fortunately, when something goes wrong with one of your CGI programs, an entry is made in your error log. Knowing where your error log is located is a prerequisite to solving any problem you have with your Apache server. The error messages that go to the browser, while vaguely useful, tend to be catch-all messages and usually don’t contain any information specific to your actual problem.
Ideally, if you have followed the recipes earlier in this chapter, you will not be having configuration problems with your CGI program, which leaves the other two categories of problems.
If your problem is one of permissions, you will see an entry in your logfile that looks something like the following:
[Sun Dec  1 20:31:16 2002] [error] (13)Permission denied: exec of /usr/local/apache/
     cgi-bin/example1.cgi failed
The solution to this problem is to make sure that the script itself is executable:
# chmod a+x /usr/local/apache/cgi-bin/example1.cgiIf the problem is an error in the program itself, then there are an infinite number of possible solutions, as there are an infinite number of ways to make any given program fail. If the example program above works correctly, you can be fairly assured that the problem is with your program, rather than with some other environmental condition.
The error message Premature end of
script headers, which you will see frequently in your
career, means very little by itself. You should always look for other
error messages that augment this message. Any error in a CGI program
will tend to cause the program to emit warnings and error message
prior to the correctly formed HTTP headers, which will result in the
server perceiving malformed headers, resulting in this message. The
suexec wrapper also can confuse
matters if it’s being used.
One particularly common error message, which can be rather hard to track down if you don’t know what you’re looking for, is the following:
[Sat Jul 19 21:39:47 2003] [error] (2)No such file or directory:
     exec of /usr/local/apache/cgi-bin/example.cgi failed
This error message almost always means one of two things: an incorrect path or a corrupted file.
In many cases, particularly if you have acquired the script from
someone else, the #! line of the
script may point to the wrong location (such as #!/usr/local/bin/perl, when perl is instead
located at /usr/bin/perl). This
can be confirmed by using the which
command and comparing its output to the #! line. For example, to find the correct
location for Perl, you would type:
% which perlThe other scenario is that the file has been corrupted somehow
so that the #! line is illegible.
The most common cause of this second condition is when a script file
is transferred from a Windows machine to a Unixish machine, via FTP,
in binary mode rather than ASCII mode. This results in a file with the
wrong type of end-of-line characters, so that Apache is
unable to correctly read the location of the script
interpreter.
To fix this, you should run the following one-liner from the command line:
% perl -pi.bak -le 's/\r$//;' example.cgiThis will remove all of the Windows-style end-of-line characters, and your file will be executable. It also creates a backup copy of the file, with a .bak file extension, in case, for some reason, the changes that you make to the file cause any problems.
Problem
You want your CGI program to read values from Web forms for use in your program.
Solution
First, look at an example in Perl, which uses the popular CGI.pm module:
#!/usr/bin/perl
use CGI;
use strict;
use warnings;

my $form = CGI->new;

# Load the various form parameters
my $name = $form->param('name') || '-';

# Multi-value select lists will return a list
my @foods = $form->param('favorite_foods');

# Output useful stuff
print "Content-type: text/html\n\n";
print 'Name: ' . $name . "<br />\n";
print "Favorite foods: <ul>\n";
foreach my $food (@foods) {
    print " <li>$food</li>\n";
}
print "</ul>\n";
Next, look at a program in C, which does pretty much the same thing, and uses the cgic C library:
#include "cgic.h"
/* Boutell.com's cgic library */

int cgiMain() {
    char name[100];

    /* Send content type */
    cgiHeaderContentType("text/html");

    /* Load a particular variable */
    cgiFormStringNoNewlines("name", name, 100);
    fprintf(cgiOut, "Name: ");
    cgiHtmlEscape(name);
    fprintf(cgiOut, "\n");

    return 0;
}
For this example, you also will need a Makefile, which looks something like this:
CFLAGS=-g -Wall
CC=gcc
AR=ar
LIBS=-L./ -lcgic

libcgic.a: cgic.o cgic.h
TABrm -f libcgic.a
TAB$(AR) rc libcgic.a cgic.o

example.cgi: example.o libcgic.a
TABgcc example.o -o example.cgi $(LIBS)
Discussion
The exact solution to this will vary from one programming language to another, and so examples are given here in two languages. Note that each of these examples uses an external library to do the actual parsing of the form content. This is important, because it is easy to parse forms incorrectly. By using one of these libraries, you ensure that all of the form-encoded characters are correctly converted to usable values, and then there’s the simple matter of code readability and simplicity. It’s almost always better to utilize an existing library than to reimplement functionality yourself.
The Perl example uses Lincoln Stein’s CGI.pm module, which is a standard part of the Perl distribution and will be installed if you have Perl installed. The library is loaded using the use keyword and is used via the object-oriented (OO) interface.
The param method returns the
value of a given form field. When called with no arguments, params() returns a list of the form field
names. When called with the name of a multivalue select form field, it
will return a list of the selected values. This is illustrated in the
example for a field named favorite_foods.
The example in C uses the cgic C library, which is available from http://boutell.com. You will need to acquire this library and install it in order to compile the aforementioned code. The Makefile provided is to assist in building the source code into a binary file that you can run. Type make example.cgi to start the compile. Note that if you are doing this on Windows, you will probably want to replace .cgi with .exe in the example Makefile.
In either case, an HTML form pointed at this CGI program,
containing a form field named name,
will result in the value typed in that field being displayed in the
browser. The necessary HTML to test these programs is as
follows:
<html>
 <head>
   <title>Example CGI</title>
 </head>
 <body>

   <h3>Form:</h3>

   <form action="/cgi-bin/example.cgi" method="post">
   Name: <input name="name">
   <br />
   <input type="submit">
   </form>

 </body>
</html>
The examples given in this recipe each use CGI libraries, or modules, for the actual functionality of parsing the HTML form contents. Although many CGI tutorials on the Web show you how to do the form parsing yourself, we don’t recommend it. One of the great virtues of a programmer is laziness, and using modules, rather than reinventing the wheel, is one of the most important manifestations of laziness. And it makes good sense, too, because these modules tend to get it right. It’s very easy to parse form contents incorrectly, winding up with data that have been translated from the form encoding incompletely or just plain wrongly. These modules have been developed over a number of years, extensively tested, and are much more likely to correctly handle the various cases that you have not thought about.
Additionally, modules handle file uploads, multiple select lists, reading and setting cookies, returning correctly formatted error messages to the browser, and a variety of other functions that you might overlook if you were to attempt to do this yourself. Furthermore, in the spirit of good programming technique, reusing existing code saves you time and tends to prevent errors.
Problem
You want to invoke a CGI program to act as a sort of content filter for certain document types. For example, a photographer may wish to create a custom handler to add a watermark to photographs served from his Web site.
Solution
Use the Action directive to create a custom handler, which will be implemented by a CGI program. Then use the AddHandler directive to associate a particular file extension with this handler:
Action watermark /cgi-bin/watermark.cgi
AddHandler watermark .gif .jpg
Or if you really want to the server to select your handler based on the type of data rather than the name of the file, you can use:
Action image/gif /cgi-bin/watermark.cgi
Action image/jpeg /cgi-bin/watermark.cgi
Discussion
This recipe creates a watermark handler that is called whenever a .gif or .jpg file is requested.
A CGI program, watermark.cgi, takes the image file as
input and attaches the watermark image on top of the photograph. The
path to the image file that was originally requested in the URL is
available in the PATH_TRANSLATED
environment variable, and the program needs to
load that file, make the necessary modifications, and send the
resulting content to the client, along with the appropriate HTTP
headers.
Note that there is no way to circumvent this measure, as the CGI program will be called for any .gif or .jpg file that is requested from within the scope to which these directives apply.
This same technique may be used to attach a header or footer to HTML pages in an automatic way, without having to add any kind of SSI directive to the files. This can be extremely inefficient, as it requires that a CGI program be launched, which can be a very slow process. It is, however, connstructive to see how it is done. What follows is a very simple implementation of such a footer script:
#! /usr/bin/perl

print "Content-type: text/html\n\n";

my $file = $ENV{PATH_TRANSLATED};

open FILE, "$file";
print while <FILE>;
close FILE;
print qq~

<p>
FOOTER GOES HERE
</p>
~;
An equivalent PHP script might look something like this:
#! /usr/bin/php
$fh = fopen($_SERVER['PATH_TRANSLATED'], 'r');
fpassthru($fh);
print "\n\n<p>\n"
    . "FOOTER GOES HERE\n"
    . "</p>\n";
return;
The requested file, located at PATH_TRANSLATED, is
read in and printed out, unmodified. Then, at the end of it, a few
additional lines of footer are output. A similar technique might be
used to filter the contents of the page itself. With Apache 2.0, this
may be better accomplished with mod_ext_filter.
This script is intended to illustrate the technique, not to be used to add footer text to Web pages! It doesn’t do any of the checking that would be necessary for such a task (“Is this an HTML file?,” “Is it safe to add HTML after all of the content?,” and so on).
See Also
Problem
You want to enable Server-Side Includes (SSIs) to make your HTML documents more dynamic.
Solution
There are at least two different ways of doing this.
Specify which files are to be parsed by using a filename extension such as .shtml. For Apache 1.3, add the following directives to your httpd.conf in the appropriate scope:
<Directory /www/html/example>
    Options +Includes
    AddHandler server-parsed .shtml
    AddType "text/html; charset=ISO-8859-1" .shtml
</Directory>
Or, for Apache 2.0 and later:
<Directory /www/html/example>
    Options +Includes
    AddType text/html .shtml
    AddFilter INCLUDES .shtml
</Directory>
The second method is to add the XBitHack directive to the appropriate scope in your httpd.conf file and allow the file permissions to indicate which files are to be parsed for SSI directives:
XBitHack On
Discussion
SSIs provide a way to add dynamic content to an HTML page via a variety of simple tags. This functionality is implemented by the mod_include module, which is documented at http://httpd.apache.org/docs/mod/mod_include.html. There is also a how-to-style document available at http://httpd.apache.org/docs/howto/ssi.html.
The first solution provided here tells Apache to parse all .shtml files for SSI directives. So, to test that the solution has been effective, create a file called something.shtml, and put the following line in it:
File last modified at '<!--#echo var="LAST_MODIFIED" -->'.
Tip
Note the space between the last argument and the closing
"-->“. This space is
surprisingly important; many SSI failures can be traced to its
omission.
Accessing this document via your server should result in the page displaying the date and time when you modified (or created) the file.
If you wish to enable SSIs, but do not wish to permit execution of CGI scripts, or other commands using the #exec or the #include virtual SSI directives, substitute IncludesNoExec for Includes in the Options directive in the solution.
Some Webmasters like to enable SSI parsing for all HTML content on their sites by specifying .html instead of .shtml in the AddType, AddHandler, and AddFilter directives.
If for some reason you do not wish to rename documents to .shtml files, merely because you want to add dynamic content to those files, XBitHack gives you a way around this. Of course, you could enable SSI parsing for all .html files, but this would probably result in a lot of files being parsed for no reason, which can cause a performance hit.
The XBitHack directive tells Apache to parse files for SSI directives if they have the execute bit set on them. So, when you have this directive set to On for a particular directory or virtual host, you merely need to set the execute bit on those files that contain SSI directives. This way, you can add SSI directives to existing documents without changing their names, which could potentially break links from other pages, sites, or search engines.
The simplest way of setting (or clearing) the execute permission bit of a file is:
#chmod a+x foo.html# turns it on #chmod a-x foo.html# turns it off
The XBitHack method only works on those platforms that support the concept of execute access to files; this includes Unixish systems but does not include Windows.
See Also
Problem
You want your Web page to indicate when it was last modified but not have to change the date every time.
Solution
Use SSI processing by putting a line in the HTML file for which you want the information displayed:
<!--#config timefmt="%B %e, %Y" -->
This document was last modified on <!--#echo var="LAST_MODIFIED" -->
Discussion
The config SSI directive
allows you to configure a few settings governing SSI output formats.
In this case, we’re using it to configure the format in which
date/time information is displayed. The default format for date output
is 04-Dec-2037 19:58:15 EST, which
is not the most user-friendly style. The recipe provided changes this
to the slightly more readable format December
4, 2002. If you want another output format, the timefmt attribute can take any argument
accepted by the C strftime(3)
function.
See Also
The strftime(3) documentation
8.11. Including a Standard Header
Solution
Use SSI by inserting a line in all your parsed files:
<!--#include virtual="/include/headers.html" -->
Discussion
By using the SSI include directive, you can have a single header file that can be used throughout your Web site. When your header needs to be modified, you can make this change in one place and have it go into effect immediately across your whole site.
The argument to the virtual attribute is a local URI and subject to all normal Alias, ScriptAlias, RewriteRule, and other commands, which means that:
<!--#include virtual="/index.html" -->
will include the file from your DocumentRoot, and:
<!--#include virtual="/cgi-bin/foo" -->
will include the output from the foo script in your server’s ScriptAlias directory.
If the argument doesn’t begin with a / character, it’s treated as being relative
to the location of the document using the #include directive.
Tip
Be aware that URIs passed to #include virtual may not begin with ../, nor may they refer to full URLs such as http://example.com/foo.html. Documents included using relative syntax (i.e., those not beginning with /) may only be in the same location as the including file, or in some sublocation underneath it. Server processing of the URI may result in the actual included document being located somewhere else, but the restrictions on the #include virtual SSI command syntax permit only same-location or descendent-location URIs.
See Also
Problem
You want to have the output of a CGI program appear within the body of an existing HTML document.
Solution
Use server-side includes by adding a line such as the following to the document (which must be enabled for SSI parsing):
<!--#include virtual="/cgi-bin/content.cgi" -->
Discussion
The SSI #include directive, in addition to being able to include a plain file, can also include other dynamic content, such as CGI programs, other SSI documents, or content generated by any other method.
The #exec SSI directive may also be used to produce this effect, but for a variety of historical and security-related reasons, its use is deprecated. The #include directive is the preferred way to produce this effect.
See Also
Problem
You want to have CGI programs executed by some user other than
nobody (or whatever user the Apache
server runs as). For example, you may have a database that is not
accessible to anyone except a particular user, so the server needs to
temporarily assume that user’s identity to access it.
Solution
When building Apache, enable suexec by passing the --enable-suexec argument to configure.
Then, in a virtual host section, specify which user and group you’d like to use to run CGI programs:
User rbowen
Group users
Also, suexec will be invoked for any CGI programs run out of username-type URLs for the affected virtual host.
Discussion
The suexec wrapper is a
suid (runs as the user ID of the user that owns the file) program that
allows you to run CGI programs as any user you specify, rather than as
the nobody user that Apache runs
as. suexec is a standard part of
Apache but is not enabled by default.
Tip
The suexec concept does not fit well into the Windows environment, and so suexec is not available under Windows.
When suexec is installed, there are two different ways that it can be invoked, as shown in the Solution.
A User and Group directive may be specified in a VirtualHost container, and all CGI programs executed within the context of that virtual host are executed as that user and group. Note that this only applies to CGI programs. Normal documents and other types of dynamic content are still accessed as the user and group specified in the User and Group directives in the main server configuration, not those in the virtual host, and need to be readable by that user and group.
Second, any CGI program run out of a UserDir directory is run with the
permissions of the owner of that directory. That is, if a CGI program
is accessed via the URL http://example.com/~rbowen/cgi-bin/test.cgi, then that
program will be executed, via suexec, with a userid of
rbowen, and a groupid of
rbowen’s primary group.
Note
If UserDir points to a
nonstandard location, you must tell suexec about this when you build it. In a
default configuration, suexec
is invoked when CGI programs are invoked in a directory such as
/home/username/public_html/ for some
username. If, however, you move the
UserDir directory somewhere
else, such as, for example, /home/username/www/, then you could configure suexec to be invoked in that directory
instead, using the following argument when you build Apache
1.3:
--suexec-userdir=wwwAnd, for Apache 2.0, you would specify the following:
--with-suexec-userdir=wwwRunning CGI programs via suexec eliminates some of the security concerns surrounding CGI programs. By default, CGI programs run with the permissions of the user and group specified in the User and Group directives, meaning that they have rather limited ability to do any damage. However, it also means that CGI programs on one part of your Web server run with all the same permissions as those on another part of your server, and any files that are created or modified by one will be modifiable by another.
By running a CGI program under suexec, you allow each user to exercise a little more control over her own file permissions, and in the event that a malicious CGI program is written, it can only damage the files owned by the user in question, rather than having free rein over the entire Web server.
PHP scripts that are run as CGI programs, rather than under the mod_php handler, may be run as suexec processes in the same way as any other CGI program.
If suexec encounters a problem, it reacts in as paranoid a way as possible—which means it won’t serve the document. The end user will see an error page, but the only explanation of what really went wrong will be found in the server’s error log. The messages are pretty self-explanatory. Almost all suexec problems are caused by files having the wrong permission or ownership; the entry in suexec’s log should make clear which.
See Also
User directive at http://httpd.apache.org/docs/mod/core.html#user or http://httpd.apache.org/docs-2.0/mod/mpm_common.html#user
Group directive at http://httpd.apache.org/docs/mod/core.html#group or http://httpd.apache.org/docs-2.0/mod/mpm_common.html#group
The suexec documentation at http://httpd.apache.org/docs/programs/suexec.html or http://httpd.apache.org/docs-2.0/programs/suexec.html
Problem
You want to install one of the many mod_perl handler modules available on CPAN. For example, you want to install the Apache::Perldoc module, which generates HTML documentation for any Perl module that you happen to have installed.
Solution
Assuming you already have mod_perl installed, you’ll just need to install the module from CPAN, and then add a few lines to your Apache configuration file.
To install the module, run the following command from the shell as root:
# perl -MCPAN -e 'install Apache::Perldoc'Then, in your Apache configuration file, add:
<Location /perldoc>
    SetHandler perl-script
    PerlHandler Apache::Perldoc
</Location>
After restarting Apache, you can access the handler by going to a URL such as http://example.com/perldoc/Apache/Perldoc.
Discussion
The CPAN shell, which is installed when Perl is installed, gives you an easy way to install Perl modules from CPAN. CPAN, if you’re not familiar with it, is the Comprehensive Perl Archive Network, at http://cpan.org, a comprehensive archive of Perl stuff, including Perl modules for every purpose you can imagine and several you can’t. This includes a substantial number of mod_perl handlers.
The module specified in this recipe is a very simple one that gives you HTML documentation for any Perl module you have installed, accessible via your Apache server. Other ones provide photo albums, weblog handlers, and DNS zone management, among other things.
The first time you run the CPAN shell, you will need to answer a series of questions about your configuration, what CPAN server you want to get modules from, where it should find your FTP clients, and so on. This only happens once, and for every use after that it just works.
The specific way that you need to configure Apache to use your newly-installed module will vary from one module to another, but many of them will look like the example given. The SetHandler perl-script directive tells Apache that the content will be handled by mod_perl, whereas the PerlHandler directive specifies what Perl module contains the actual handler code.
Problem
You want to write your own mod_perl handler.
Solution
Here’s a simple handler:
package Apache::Cookbook::Example;

sub handler {
    my $r = shift;
    $r->send_http_header('text/plain');
    $r->print('Hello, World.');
}

1;
Place this code in a file called Example.pm, in a directory Apache/Cookbook/, somewhere that Perl knows to look for it.
Discussion
The example handler given is fairly trivial and does not do anything useful. More useful examples may be obtained from the mod_perl Web site (http://perl.apache.org) and from Geoffrey Young’s (et al.) excellent book) mod_perl Developer’s Cookbook (Sams). Also, although it is somewhat dated, the “Eagle book” (Writing Apache Modules with Perl and C) by Lincoln Stein and Doug MacEachern (O’Reilly) is an excellent introduction to mod_perl and the Apache API.
The real question here, however, is how and where you should install the file that you’ve created. There are two answers to this question, and which one you choose will be largely personal preference.
When Perl looks for a module, it looks through the list called @INC for directories where that module might be. You can either put your module in one of those directories, or you can add a directory to the list.
To find out where Perl is looking, you can examine the values stored in @INC with the following:
perl -le 'print join "\n", @INC;'
This will give you a listing that will look something like:
/usr/local/lib/perl5/5.8.0/i686-linux
/usr/local/lib/perl5/5.8.0
/usr/local/lib/perl5/site_perl/5.8.0/i686-linux
/usr/local/lib/perl5/site_perl/5.8.0
/usr/local/lib/perl5/site_perl
.
This will of course vary from one system to another, from one version of Perl to another, but will bear some resemblance to that listing.
To install a module called Apache::Cookbook::Example, you might put the file Example.pm at this location: /usr/local/lib/perl5/site_perl/5.8.0/Apache/Cookbook/Example.pm.
Alternately, you can tell Perl to look in some other directory by adding a value to the @INC list. The best way to do this is to add the following to your startup.pl file:
use lib '/home/rbowen/perl_libs/';
startup.pl should then be loaded by Apache at startup, using the following directive in the Apache server configuration file:
PerlRequire /path/to/startup.plThis tells Perl to also look in that directory for Perl modules. This time, if your module is called Apache::Cookbook::Example, you would now place it at the location /home/rbowen/perl_libs/Apache/Cookbook/Example.pm.
See Also
mod_perl Developer’s Cookbook by Geoffrey Young et al., which can be accessed at http://modperlcookbook.org
Solution
If you have mod_php installed, use AddHandler to map .php and .phtml files to the PHP handler:
AddHandler application/x-httpd-php .phtml .php
Discussion
This recipe maps all files with .phtml or .php to the PHP handler. You must ensure that the mod_php module is installed and loaded.
Tip
You may find some disagreement as to whether one should use AddHandler or AddType to enable the module, but the AddHandler directive is the correct one.
See Also
Installation instructions on the mod_php Web site at http://www.php.net/manual/en/install.apache.php for Apache 1.3, or go to http://www.php.net/manual/en/install.apache2.php for Apache 2.0.
Problem
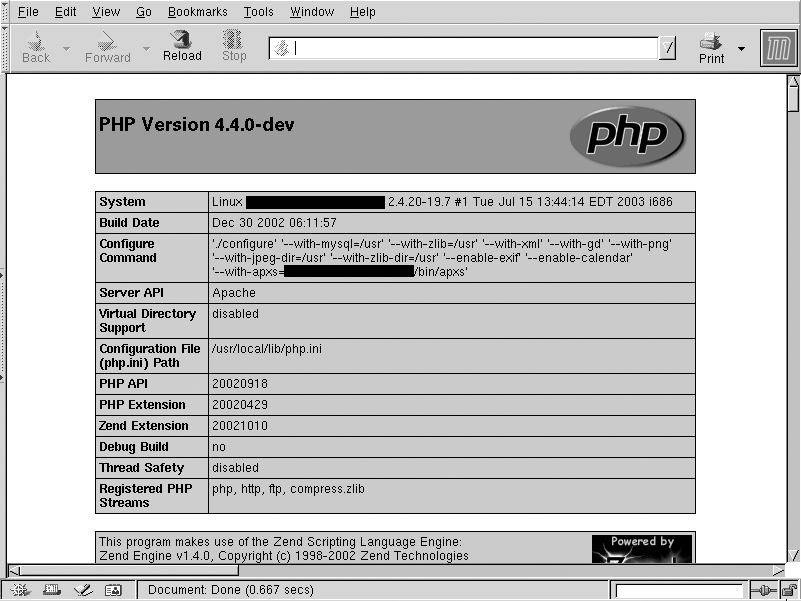
You want to verify that you have PHP correctly installed and configured.
Discussion
Place that text in a file called something.php in a directory where you believe you have enabled PHP script execution. Accessing that file should give you a list of all configured PHP system variables. The first screen of the output should look something like Figure 8-2.
See Also
Problem
You want to include SSI directives in the output from a CGI script and have them processed correctly.
Solution
Put the following into a scope that includes the CGI scripts for
which you want the output parsed. Change the .cgi suffix to whatever your scripts
use:
Options +Includes
AddOutputFilter INCLUDES .cgi
Discussion
Place this text in the server-wide configuration files or in a .htaccess file in the same directory as the scripts. This will cause the server to collect the output from the scripts and examine it for SSI directives before sending it to the client.
See Also
Problem
You want to include SSI directives in the output from one or more of the scripts in your ScriptAlias directory and have them processed correctly.
Solution
Note
This is fully supported only in Apache httpd version 2.0 and later.
Put the following into the <Directory> container for your ScriptAlias directory:
Options +Includes
SetOutputFilter INCLUDES
Discussion
The above directive will instruct the server to filter all output from scripts in the ScriptAlias directory for SSI directives before sending it to the client.
See Also
Solution
Place this line near the top of your httpd.conf file, after the module declaration and activation sections:
PerlModule Apache::Registry
Place this code in the section of your httpd.conf file which includes the scope where you want this behavior to occur (such as within a <Directory> container:
<FilesMatch \.pl$>
    SetHandler perl-script
    PerlHandler Apache::Registry
</FilesMatch>
Be sure that you have the Apache module mod_perl installed and activated.
Discussion
The PerlModule directive
ensures that the necessary bits from mod_perl are available. The <FilesMatch>
applies to every file ending in .pl
and instructs the server to treat it as a script to be handled as CGI
scripts by the Apache::Registry
package.
More information can be found at the mod_perl Web site (http://perl.apache.org).
These directives will result in all .pl
files being treated as CGI scripts, whether they are or not. If the
server tries to execute a non-CGI script using this method, the
end-user will get an error page and an entry will be made in the
server’s error log. The most common error logged refers to “Premature end of script headers,” which is a
pretty sure indicator of either a broken CGI script or a completely
non-CGI script being treated like one.
See Also
The mod_perl Web site at http://perl.apache.org
mod_perl Developer’s Cookbook, by Geoffrey Young et al., which can be accessed at http://modperlcookbook.org/
Problem
You want to enable Python scripts on your server.
Solution
If you have mod_python installed, use the following directives to instruct the server to call it when a Python script is referenced:
AddHandler mod_python .py
PythonHandler mod_python.publisher
PythonDebug On
Discussion
This recipe maps all files with .py to the Python script handler. Whenever a request resolves to a file with a .py suffix in the scope of those directives, the server will treat it as a Python script and execute it. You must ensure that the mod_python module is installed.
See Also
Installation instructions on the mod_python Web site at http://modpython.org/doc_html