Table of Contents for
Linux Basics for Hackers
 Linux Basics for Hackers
Published by
No Starch Press, 2018
Linux Basics for Hackers
Published by
No Starch Press, 2018
- Cover Page
- Title Page
- Copyright Page
- Dedication
- About the Author
- About the Technical Reviewer
- BRIEF CONTENTS
- CONTENTS IN DETAIL
- ACKNOWLEDGMENTS
- INTRODUCTION
- 1 GETTING STARTED WITH THE BASICS
- 2 TEXT MANIPULATION
- 3 ANALYZING AND MANAGING NETWORKS
- 4 ADDING AND REMOVING SOFTWARE
- 5 CONTROLLING FILE AND DIRECTORY PERMISSIONS
- 6 PROCESS MANAGEMENT
- 7 MANAGING USER ENVIRONMENT VARIABLES
- 8 BASH SCRIPTING
- 9 COMPRESSING AND ARCHIVING
- 10 FILESYSTEM AND STORAGE DEVICE MANAGEMENT
- 11 THE LOGGING SYSTEM
- 12 USING AND ABUSING SERVICES
- 13 BECOMING SECURE AND ANONYMOUS
- 14 UNDERSTANDING AND INSPECTING WIRELESS NETWORKS
- 15 MANAGING THE LINUX KERNEL AND LOADABLE KERNEL MODULES
- 16 AUTOMATING TASKS WITH JOB SCHEDULING
- 17 PYTHON SCRIPTING BASICS FOR HACKERS
- INDEX
- Linux Basics for Hackers: Getting Started with Networking, Scripting, and Security in Kali
12
USING AND ABUSING SERVICES

In Linux terminology, a service is an application that runs in the background waiting for you to use it. Your Linux system has dozens of services preinstalled. Of these, the most well known is the ubiquitous Apache Web Server, which is used for creating, managing, and deploying web servers, but there are so many more. For the purposes of this chapter on services, I have selected just four that are of particular importance to the hacker: Apache Web Server, OpenSSH, MySQL, and PostgreSQL.
In this chapter, you’ll learn how to set up a web server with Apache, physically spy with OpenSSH, access data with MySQL, and store your hacking information with PostgreSQL
Starting, Stopping, and Restarting Services
Before we begin to work with these four crucial services, let’s start by examining how to start, stop, and restart services in Linux.
Some services can be stopped and started via the GUI in Kali Linux, much as you would on an operating system like Windows or Mac. However, some services require use of the command line, which we’ll look at here. Here is the basic syntax for managing services:
service servicename start|stop|restart
To start the apache2 service (web server or HTTP service), you would enter the following:
kali >service apache2 start
To stop the Apache web server, enter:
kali >service apache2 stop
Usually, when you make a configuration change to an application or service by altering its plaintext configuration file, you need to restart the service to capture the new configuration. Thus, you would enter the following:
kali >service apache2 restart
Now that you understand how to start, stop, and restart services from the command line, let’s move on to the four most critical Linux services to hackers.
Creating an HTTP Web Server with the Apache Web Server
The Apache Web Server is probably the most commonly used service on Linux systems. Apache is found on over 60 percent of the world’s web servers, so any self-respecting Linux admin should be familiar with it. As a hacker aspiring to hack websites, it’s critical to understand the inner workings of Apache, websites, and the backend databases of these sites. You can also use Apache to set up your own web server, from which you could serve up malware via cross-site scripting (XSS) to anyone who visits your site, or you could clone a website and redirect traffic to your site via abuse of the Domain Name System (DNS). In either of these cases, a basic knowledge of Apache is required.
Starting with Apache
If you have Kali running on your system, Apache is already installed. Many other Linux distros have it installed by default as well. If you don’t have Apache installed, you can download and install it from the repositories by entering the following:
kali >apt-get install apache2
The Apache Web Server is often associated with the MySQL database (which we will look at in the next section) and these two services are very often paired with a scripting language such as Perl or PHP to develop web applications. This combination of Linux, Apache, MySQL, and PHP or Perl forms a powerful and robust platform for the development and deployment of web-based applications, known collectively as LAMP. These are the most widely used tools for developing websites in the Linux world—and they’re very popular in the Microsoft world too, where they’re generally referred to as WAMP, with the W standing for Windows.
The first step, of course, is to start our Apache daemon. In Kali, go to Applications ▸ Services ▸ HTTPD and click Apache start. You can accomplish the same from the command line by entering the following:
kali >services apache2 start
Now that Apache is running, it should be able to serve up its default web page. Enter http://localhost/ in your favorite web browser to bring up the web page, which should look something like Figure 12-1.
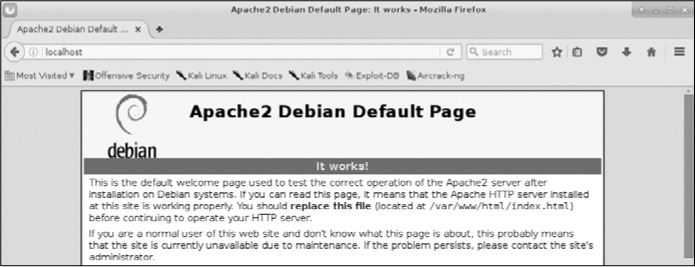
Figure 12-1: The Apache2 Web Server default page
As you can see, Apache displays “It works” as its default web page. Now that you know your Apache Web Server is working, let’s customize it!
Editing the index.html File
Apache’s default web page is at /var/www/html/index.html. You can edit the index.html file to serve up whatever information you want, so let’s create our own. For this, you can use any text editor you please; I’ll be using Leafpad. Open up /var/www/html/index.html and you should see something like Listing 12-1.
<!DOCTYPE html PUBLIC "-//W3C//DTD XHTML 1.0 Transitional//EN"
"http://www.w3.org/TR/xhtm11/DTD/xhtm11-transiti
<html xmlns="http://www.w3.org/1999/xhtml>
<head>
<meta http-equiv="Content-Type" content="text/html; charset=UTF-8" I>
➊ <title>Apache2 Debian Default Page: It works</title>
<style type="text/css" media="screen">
* {
margin: Opx Opx Opx Opx;
padding: Opx Opx Opx Opx;
}
body, html {
padding: 3px 3px 3px 3px;
background-color: #D8DBE2;
font-family: Verdana, sans-serif;
font-size: 11pt;
text-align: center;
}
div.main_page {
position: relative;
display: table;
Listing 12-1: The Apache Web Server index.html file
Note here that the default web page has exactly the text that was displayed when we opened our browser to localhost, but in HTML format ➊. All we need to do is edit or replace this file to have our web server display the information we want.
Adding Some HTML
Now that we have the web server up and running and the index.html file open, we can add whatever text we’d like the web server to serve up. We will create some simple HTML blocks.
Let’s create this page. In a new file in your text editor, enter the code shown in Listing 12-2.
<html>
<body>
<h1>Hackers-Arise Is the Best! </h1>
<p> If you want to learn hacking, Hackers-Arise.com </p>
<p> is the best place to learn hacking!</p>
</body>
</html>
Listing 12-2: Some simple HTML to add to the index.html file
Once you have entered the text exactly as it appears in Listing 12-2, save this file as /var/www/html/index.html and close your text editor. Your text editor will then prompt you that the file already exists. That’s okay. Just overwrite the existing /var/www/html/index.html file.
Seeing What Happens
Having saved our /var/www/html/index.html file, we can check to see what Apache will serve up. Navigate your browser once again to http://localhost, and you should see something like Figure 12-2.
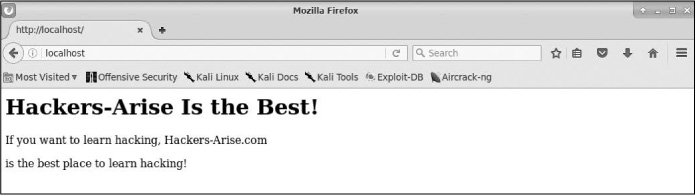
Figure 12-2: New Hackers-Arise website
Apache has served up our web page just as we created it!
OpenSSH and the Raspberry Spy Pi
SSH is an acronym for Secure Shell and is basically what enables us to connect securely to a terminal on a remote system—a replacement for the insecure telnet that was so common years ago. When we’re building a web server, SSH enables us to create an access list (a list of users who can use this service), authenticate users with encrypted passwords, and encrypt all communication. This reduces the chance of unwanted users using the remote terminal (due to the added authentication process) or intercepting our communication (due to encryption). Probably the most widely used Linux SSH service is OpenSSH, which is installed on nearly every Linux distribution, including Kali.
System administrators often use SSH to manage remote systems, and hackers often use SSH to connect to compromised remote systems, so we’ll do the same here. In this example, we use SSH to set up a remote Raspberry Pi system for spying, something I call the “Raspberry Spy Pi.” For this, you’ll need a Raspberry Pi and the attendant Raspberry Pi camera module.
Before we do that, though, start OpenSSH on your Kali system with the now familiar command:
kali >service ssh start
We’ll be using SSH to build and control a remote spying Raspberry Pi. If you’re not already familiar with it, the Raspberry Pi is a tiny but powerful, credit card–sized computer that works great as a remote spying tool. We will employ a Raspberry Pi with a camera module to use as a remote spying device. You can purchase a Raspberry Pi at nearly any electronics retailer, including Amazon, for less than $50, and you can get the camera module for about $15.
Here, we’ll use the Raspberry Spy Pi on the same network as our Kali system, which allows us to use private, internal IP addresses. Of course, when hacking in the real world, you’d probably want to set it up on another remote network, but that would be a touch more difficult and beyond the scope of this book.
Setting Up the Raspberry Pi
Make certain that your Raspberry Pi is running the Raspbian operating system; this is simply another Linux distribution specifically ported for the Raspberry Pi CPU. You can find download and installation instructions for Raspbian at https://www.raspberrypi.org/downloads/raspbian/. Nearly everything you’ve learned in this book applies to the Raspbian OS on the Raspberry Pi as well as Kali, Ubuntu, and other Linux distributions.
Once you have your Raspbian OS downloaded and installed, you’ll need to connect your Raspberry Pi to a monitor, mouse, and keyboard and then connect it to the internet. If this is all new to you, check out the instructions at https://www.raspberrypi.org/learning/hardware-guide/. With everything set up, log in with the username pi and the password raspberry.
Building the Raspberry Spy Pi
The first step is to make certain that SSH is running and enabled on the Raspberry Spy Pi. SSH is usually off by default, so to enable it, go to the Preferences menu and launch Raspberry Pi Configuration. Then go to the Interfaces tab and, next to SSH, click Enabled (if it is not already checked) and click OK.
When SSH is enabled, you can start it on your Raspberry Spy Pi by opening a terminal and entering the following:
kali >service ssh start
Next you need to attach your camera module. If you’re using a Raspberry Pi version 3 board, there’s only one place to connect it. Switch the Pi off, attach the module to the camera port, and then switch it on again. Note that the camera is very fragile and must never come into contact with the general-purpose input/output (GPIO) pins; otherwise, it might short and die.
Now, with the SSH service up and running, place the Raspberry Spy Pi somewhere within your home, school, or some other location you want to spy on. It must, of course, be connected to the local area network, either by Ethernet cable or, ideally, via Wi-Fi. (The new Raspberry Pi 3 and Raspberry Pi Zero both have built-in Wi-Fi.)
Now, you need to obtain the IP address of your Raspberry Pi. As you learned in Chapter 3, you can get a Linux device’s IP address by using ifconfig:
pi >ifconfig
The IP address of my Pi is 192.168.1.101, but make certain you are using the IP address of your Raspberry Spy Pi wherever my address appears in this chapter. Now, from your Kali system, you should be able to connect directly to and control your Raspberry Spy Pi and use it as a remote spying system. In this simple example, your system will need to be on the same network as the Pi.
To connect to the remote Raspberry Spy Pi via SSH from your Kali system, enter the following, remembering to use your own Pi’s IP address:
kali >ssh pi@192.168.1.101
pi@192.168.1.101's password:
The programs included with the Debian GNU/Linux system are free software;
the exact distribution terms for each program are described in the
individual files in /usr/share/doc/*/copyright.
Debian GNU/Linux comes with ABSOLUTELY NO WARRANTY, the extent
permitted by applicable law
last login: Tues Jan. 1 12:01:01 2018
pi@raspberyypi:: $
The Spy Pi will then prompt you for a password. In this case, the default password is raspberry, unless you’ve changed it.
Configuring the Camera
Next, we need to configure the camera. To do so, start the Raspberry Pi configuration tool by entering the following command:
pi >sudo raspi-config
This should start a graphical menu like the one shown in Figure 12-3.

Figure 12-3: The Raspberry Pi configuration tool
Scroll down to 6 Enable Camera and press ENTER. Now, scroll to the bottom of this menu and select Finish and press ENTER, as shown in Figure 12-4.

Figure 12-4: Finishing the configuration
When the configuration tool asks if you want to reboot, as shown in Figure 12-5, select Yes and press ENTER again.

Figure 12-5: Reboot the Pi to enable the changes.
Now your Raspberry Spy Pi camera should be enabled and ready for spying!
Starting to Spy
Once your Raspberry Spy Pi has rebooted and you have logged in to it via SSH from your Kali terminal, you are ready to start using it to spy by taking still pictures.
The Raspbian operating system has an application named raspistill that we will be using to take pictures from our little Raspberry Spy Pi. Enter raspistill into the terminal to see the tool’s help screen and all of its options:
pi@raspberrypi: raspistill
raspistill Camera App v1.3.8
Runs camera for specific time, and takes JPG capture at end if requested
usage: raspistill [options]
Image parameter commands
--snip--
Let’s now use the Raspberry Spy Pi to take some remote spying pictures! The raspistill command has numerous options you should explore, but here we’ll simply use the defaults. To take a picture and save it as a JPEG, enter the following:
pi@raspberrypi: raspistill -v -o firstpicture.jpg
raspistill Camera App v1.3.8
width 2592, Height 1944, quality 85, filename firstpicture.jpg
Time delay 5000, Raw no
--snip--
We use the –v option to give us verbose output and the –o option to tell raspistill we’re about to give it a filename to use; then we give the filename. When we do a long listing on the Raspberry Spy Pi, we can see the file firstpicture.jpg, as shown here:
pi@raspberrypi: ls -l
total 2452
drwxr-xr-x 2 pi pi 4096 Mar 18 2019 Desktop
drwxr-xr-x 2 pi pi 4096 Mar 18 2019 Documents
drwxr-xr-x 2 pi pi 4096 Mar 18 2019 Downloads
-rw-r--r-- 1 pi pi 2472219 Mar 18 2019 firstpicture.jpg
drwxr-xr-x 2 pi pi 4096 Mar 18 2019 Music
drwxr-xr-x 2 pi pi 4096 Mar 18 2019 Pictures
--snip--
We've taken our very first spy picture on our remote Raspberry Spy Pi using SSH! Feel free to explore this versatile weapon further.
Extracting Information from MySQL
MySQL is the most widely used database behind database-driven web applications. In our modern era of Web 2.0 technologies, where nearly every website is database driven, this means MySQL holds the data for most of the web.
Databases are the “golden fleece” for hackers. They contain critical information about users as well as confidential information such as credit card numbers. For this reason, hackers are most often targeting databases.
Like Linux, MySQL is open source and general public licensed (GPL), and you’ll find it preinstalled on nearly every Linux distribution.
Being free, open source, and powerful, MySQL has become the database of choice for many web applications, including popular websites such as WordPress, Facebook, LinkedIn, Twitter, Kayak, Walmart.com, Wikipedia, and YouTube.
Other popular content management systems (CMSs) such as Joomla, Drupal, and Ruby on Rails all use MySQL, too. You get the idea. If you want to develop or attack the backend databases of web applications, you should know MySQL. Let’s get started.
Starting MySQL
Fortunately, Kali has MySQL already installed (if you’re using another distribution, you can download and install MySQL from the software repository or directly from https://www.mysql.com/downloads/).
To start your MySQL service, enter the following into the terminal:
kali >service mysql start
Next, you need to authenticate yourself by logging in. Enter the following and, when prompted for a password, just press ENTER:
kali >mysql -u root -p
Enter password:
Welcome to MySQL monitor. Commands end with ; or \g.
Your MySQL connection id is 4
Server version: 5.6.30-1 (Debian)
Copyright (c) 2000, 2016, Oracle and/or its affiliates. All rights reserved
Oracle is a registered trademark of Oracle Corporation and/or its
affiliates. Other names may be trademarks of their respective
owners
Type 'help;' or '\h' for help. Type '\c' to clear the current input statement
mysql >
In the default configuration of MySQL, the root user’s password is empty. Obviously, this is a major security vulnerability, and you should remedy this by adding a password after your first login. Note that usernames and passwords for your operating system and MySQL are separate and distinct. Let’s change the password for the MySQL root user now in order to be safe.
Interacting with MySQL
SQL is an interpreted programming language for interfacing with a database. The database is often a relational database, meaning data is stored in multiple tables that interact and each table has values in one or more columns and rows.
There are several implementations of SQL, each with its own commands and syntax, but here are a few common commands:
select Used to retrieve data
union Used to combine the results of two or more select operations
insert Used to add new data
update Used to modify existing data
delete Used to delete data
You can supply conditions to each command in order to be more specific about what you want to do. For example, the line
select user, password from customers where user='admin';
will return the values for the user and password fields for any user whose user value is equal to “admin” in the customers table.
Setting a MySQL Password
Let’s see what users are already in our MySQL system by entering the following. (Note that commands in MySQL are terminated with a semicolon.)
mysql >select user, host, password from mysql.user;
+----------------------------------------------------------------------------
| user | host | password
+----------------------------------------------------------------------------
|root |localhost |
|root |aphrodite.kali.org |
|root |127.0.0.1 |
--snip--
This shows that the root users have no password set. Let’s assign a password to root. To do so we’ll first select a database to work with. MySQL on your system will come with some databases already set up. Use the show databases; command to see all the available databases:
mysql >show databases;
+-------------------------------+
| Database |
+-------------------------------+
| information_schema |
| mysql |
| performance_schema |
+-------------------------------+
3 rows in set (0.23 sec)
MySQL comes with three databases by default, two of which (information_schema and performance_schema) are administrative databases that we won’t use here. We’ll use the non-administrative database, mysql, which is included for your own purposes. To begin using the mysql database, enter:
mysql >use mysql;
Reading table information for completion of table and column names
You can turn off this feature to get a quicker startup with -A
Database changed
This command connects us to mysql. Now, we can set the password for the root user to hackers-arise with the following command:
mysql >update user set password = PASSWORD("hackers-arise") where user = 'root';
This command will update the user by setting the user’s root password to hackers-arise.
Accessing a Remote Database
To access a MySQL database on the localhost, we use the following syntax:
kali >mysql -u <username> -p
This command defaults to using the MySQL instance on the localhost if it isn’t given a hostname or IP address. To access a remote database, then, we need to provide the hostname or IP address of the system that is hosting the MySQL database. Here’s an example:
kali >mysql -u root -p 192.168.1.101
This will connect us to the MySQL instance at 192.168.1.101 and prompt us for a password. For demonstration purposes, I am connecting to a MySQL instance on my local area network (LAN). If you have a system on your network with MySQL installed, use its IP address here. I will assume you’ve managed to bypass the password and have logged in to system as root (you already know that by default, the mysql database has no password).
This opens up the MySQL command line interface, which provides us with the mysql > prompt. As well as this command line interface, MySQL has GUI interfaces—both native (MySQL Workbench) and third party (Navicat and TOAD for MySQL). For you as a hacker, the command line interface may be the best opportunity for exploiting the MySQL database, so we’ll focus on that here. It’s unlikely that as an unauthorized entrant to the database, you will be presented with an easy-to-use GUI.
NOTE
This screen reminds us that all commands must end in a semicolon or \g (unlike Microsoft’s SQL Server) and that we can get help by entering help; or \h.
Now that we’re logged in as the system admin, we can navigate unimpeded through the database. If we had logged in as a regular user, our navigation would be limited by the permissions provided by the system administrator for that user.
Connecting to a Database
With access to the system, we want to snoop around. Our next step is to find out whether there are any databases worth accessing. Here is the command to find which databases are on the accessed system:
mysql >show databases;
+-------------------------------+
| Database |
+-------------------------------+
| information schema |
| mysql |
| creditcardnumbers |
| performance_schema |
+-------------------------------+
4 rows in set (0.26 sec)
Aha! We’ve found a database worth exploring named creditcardnumbers. Let’s connect to it.
In MySQL, as in other database management systems (DBMS), we can connect to the database we are interested in by entering use databasename;.
mysql >use creditcardnumbers;
Database changed
The Database changed response indicates that we are now connected to the creditcardnumbers database.
Of course, it should go without saying that it’s unlikely a database admin would be so accommodating as to name a database something as easily recognizable as creditcardnumbers, so you may need to do a bit of exploring to find a database of interest.
Database Tables
We are now connected to the creditcardnumbers database and can do a bit of exploring to see what information it might hold. Data in a database is organized into tables, and each table might hold a different set of related data. We can find out what tables are in this database by entering the following command:
mysql >show tables;
+-----------------------------------+
| Tables_in_creditcardnumbers |
+-----------------------------------+
| cardnumbers |
+-----------------------------------+
1 row in set (0.14 sec)
Here, we can see that this database has just one table in it, called cardnumbers. Generally, databases will have numerous tables in them, so it’s likely you’ll have to do a bit more snooping. In this sample database, we are fortunate to be able to focus our attention on this single table to extract the hacker’s golden fleece!
Now that we have a table we want to examine, we need to understand the structure of that table. Once we know how the table is laid out, we can extract the relevant information.
You can see the structure of the table using the describe statement, like so:
mysql >describe cardnumbers;
+---------------+--------------+---------+-----------+---------+---------+
| Field | Type | Null | Key | Default | Extra |
+---------------+--------------+---------+-----------+---------+---------+
| customers | varchar(15) | YES | | NULL | |
| address | varchar(15) | YES | | NULL | |
| city | varchar(15) | YES | | NULL | |
| state | varchar(15) | YES | | NULL | |
| cc | int(12) | NO | | 0 | |
+---------------+--------------+---------+-----------+---------+---------+
MySQL responds with the critical information on the structure of our table of interest. We can see the name of each field as well as the data type it holds (often the text type varchar or integer type int). We can also see whether it will accept NULL values; the key, if any exists (the key links tables); any default values a field might have; and any extra information at the end, such as notes.
Examining the Data
To actually see the data in the table, we use the SELECT command. The SELECT command requires you to know the following information:
- The table that holds the data you want to view
- The columns within that table that hold the data you want to view
We lay this out in the following format:
SELECT columns FROM table
As a handy shortcut to look at data from all the columns, we can use an asterisk as a wildcard instead of typing out every column name we want to look at. So, to see a dump of all the data from the cardnumbers table, we enter the following:
mysql >SELECT * FROM cardnumbers;
+-----------+---------------+-------------+---------+--------------+
| customers | address | city | state | cc |
+-----------+---------------+-------------+---------+--------------+
| Jones | 1 Wall St | NY | NY | 12345678 |
| Sawyer | 12 Piccadilly | London | UK | 234567890 |
| Doe | 25 Front St | Los Angeles | CA | 4567898877 |
+-----------+---------------+-------------+---------+--------------+
As you can see, MySQL has displayed all the information from the cardnumbers table to our screen. We have found the hacker’s golden fleece!
PostgreSQL with Metasploit
PostgreSQL, or just Postgres, is another open source relational database often used in very large, internet-facing applications due to its ability to scale easily and handle heavy workloads. It was first released in July 1996 and is maintained by a substantial group of developers known as the PostgreSQL Global Development Group.
PostgreSQL is also installed by default in Kali, but if you are using another Linux distribution, it will likely be in your repository and you can install it by entering the following command:
kali >apt-get postgres install
As a hacker, you will find PostgreSQL particularly important because it is the default database of the most widely used penetration testing and hacking framework, Metasploit. Metasploit uses PostgreSQL to store its modules, as well as the results of scans and exploits, for ease of use in a penetration test or hack. For that reason, we will be using PostgreSQL here in the context of Metasploit.
As with nearly all the services in Linux, we can start PostgreSQL by entering service application start, like so:
kali >service postgresql start
With PostgreSQL up and running, let’s start Metasploit:
kali >msfconsole
Note that when Metasploit has completed starting up, you will see an msf > prompt.
Teaching you how to use Metasploit for hacking and exploitation purposes is beyond the scope of this book, but here we’ll set up the database that Metasploit will store its information in.
With Metasploit running, we can set up PostgreSQL with the following command so that it stores data from any Metasploit activity on your system:
msf >msfdb init
[*] exec :msfdb init
Creating database use 'msf'
Enter password for new role
Enter it again:
Creating databases 'msf' and 'msf_test'
Creating configuration file /usr/share/metasploit-framework/config/database.yml
Creating initial database schema
Next, we need to log in to Postgres as root. Here, we precede the command with su, the “switch user” command, to obtain root privileges:
msf >su postgres
[*] su postgres
postgres@kali:/root$
When you log in to Postgres, you will see that the prompt has changed to postgres@kali:/root$, representing the application, the hostname, and the user.
In the next step, we need to create a user and password, like so:
postgres@kali:/root$ createuser msf_user -P
Enter Password for new role:
Enter it again:
We create the username msf_user using the –P option with the createuser command. Then enter your desired password twice. Next, you need to create the database and grant permissions for msf_user. Name the database hackers_arise_db, as shown here:
postgres@kali:/root$ createdb --owner=msf_user hackers_arise_db
postgres@kali:/root$ exit
When you exit from Postgres with the exit command, the terminal will fall back into the msf > prompt.
Next, we have to connect our Metasploit console, msfconsole, to our PostgreSQL database by defining the following:
- The user
- The password
- The host
- The database name
In our case, we can connect msfconsole to our database with the following command:
msf >db_connect msf_user:password@127.0.0.1/hackers_arise_db
You will, of course, need to provide the password you used earlier. The IP address is that of your local system (localhost), so you can use 127.0.0.1 unless you built this database on a remote system.
Lastly, we can check the status of the PostgreSQL database to make sure it’s connected:
msf >db_status
[*] postgresql connected to msf
As you can see, Metasploit responds that the PostgreSQL database is connected and ready to use. Now when we do a system scan or run exploits with Metasploit, the results will be stored in our PostgreSQL database. In addition, Metasploit now stores its modules in our Postgres database, making searches for the right module much easier and faster!
Summary
Linux has numerous services that run in the background until the user needs them. The Apache Web Server is the most widely used, but a hacker should be familiar with MySQL, SSH, and PostgreSQL for various tasks, too. In this chapter, we covered the absolute basics of getting started with these services. Once you’re comfortable with your Linux system, I urge you to go out and explore each of these services further.